1. Sill Garden with Lace-Leaf Ferns
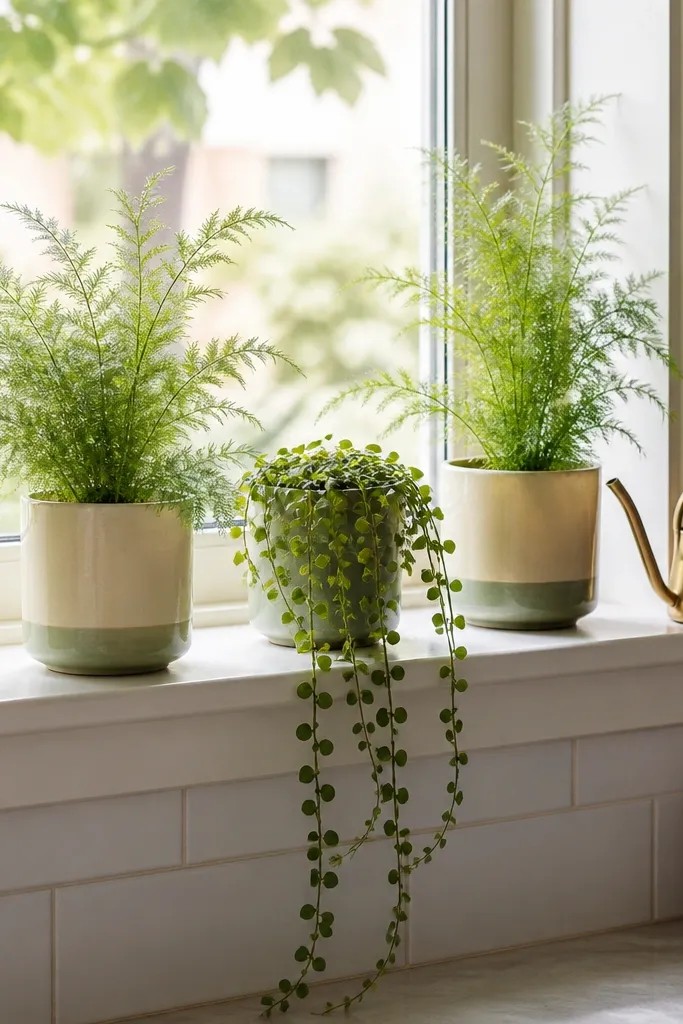
This setup makes the window feel like part of the room instead of an empty rectangle. Fern textures give you that Stardew-style “cool, damp forest corner” look, while the trailing vine ties the greenery to the architecture. Keep the pot colors in a tight range — cream, sage, and pale terracotta — so it reads retro instead of chaotic. The brass watering can adds a warm glint that looks right next to matte ceramics.
Use three planters that are the same height or within 1 inch of each other so the line looks clean. Place the feathery plants at the left and right, then let the trailing vine spill from the center pot. I like using a thin white or oatmeal curtain behind the sill so the plants pop without looking harsh.
Rotate the pots every two weeks so the vines don’t lean hard toward the window.
Avoid high-gloss cachepots — they look too modern next to wood and linen.
2. Dining Table Herb Row in Terracotta Pots
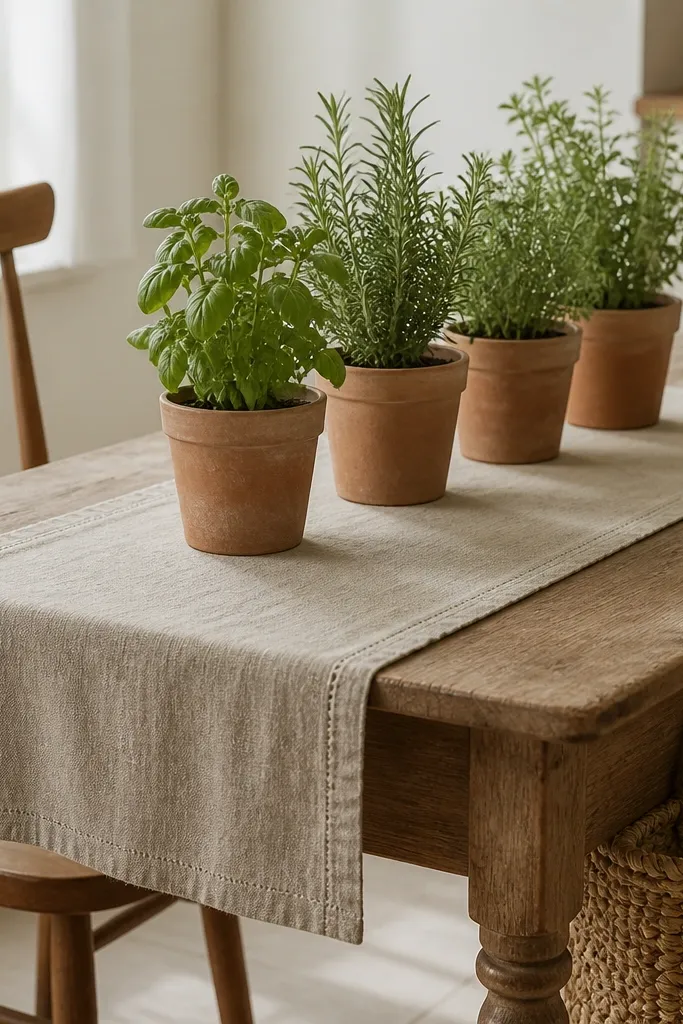
Herbs look like decor when they’re grouped and kept neat. The upright growth pattern creates a tidy retro line that matches the farmhouse dining vibe. Terracotta brings that slightly sun-baked color you see in Stardew interiors. When the herbs are healthy, the greens look richer and more believable than most artificial plants.
Choose four pots with similar diameters (about 4 to 5 inches). Space them 2 to 3 inches apart so air moves between leaves. Use a light linen runner in oatmeal or warm cream, then add a small wooden tray under the pots if your table top is sensitive.
Pro tipTrim the herbs back once a week so they stay bushy instead of tall and leggy.
Watch outDon’t mix random pot sizes — the row looks messy fast.
3. Corner Ladder Shelf with Hanging Vines
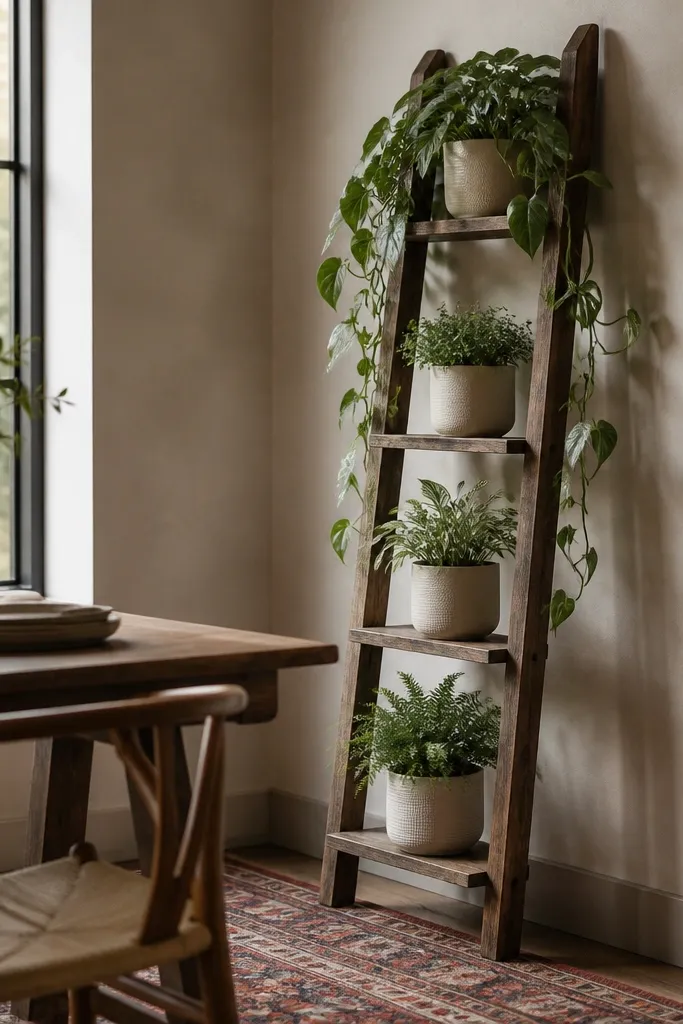
A ladder shelf gives you vertical rhythm, which is what most Stardew interiors need because corners are usually bare. Hanging vines soften the straight lines and add movement. Use small planters on the lower steps so the vine becomes the focal point. The muted rug ties the whole corner together and makes the plants feel like part of a lived-in room.
Place the ladder shelf 6 to 10 inches from the wall so the hanging plant has breathing space. Keep pot colors consistent across tiers — I like cream with one terracotta accent pot on the middle shelf. If you’re using real plants, pick a vine that tolerates indoor humidity and keep the top rung near a bright window.
Pro tipUse a clear suction hook or a small plant clip near the top for the vine — it keeps growth from smearing across the wall.
Watch outSkip plastic-looking planters — they cheapen the ladder look immediately.
4. Kitchen Counter Canisters with Tiny Grow Pots
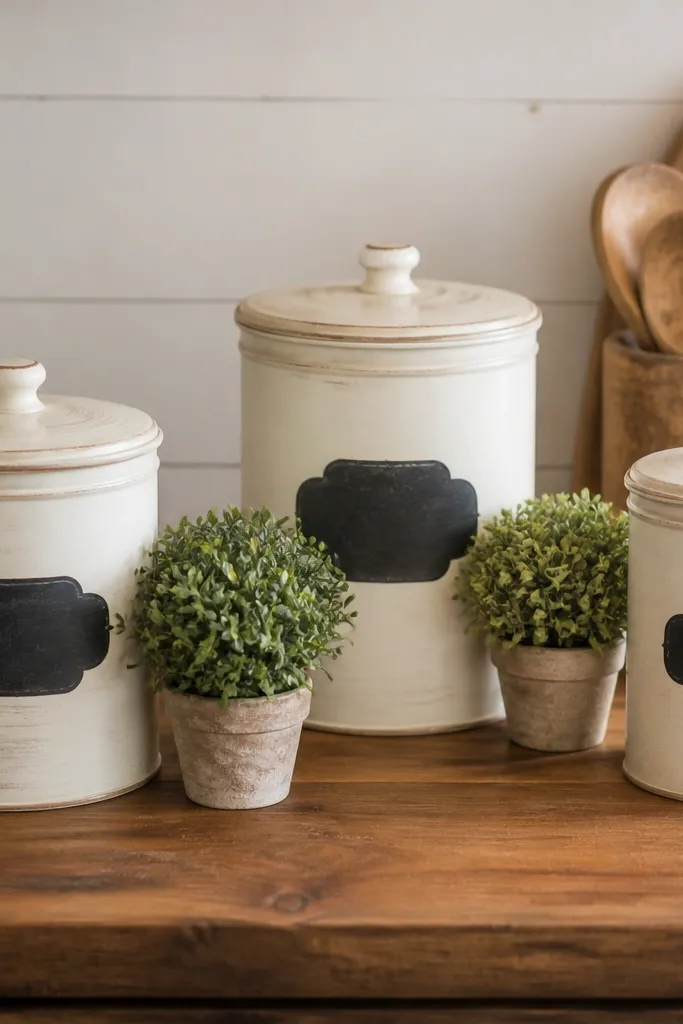
This is the “retro clutter done right” method. Canisters give you that old-time kitchen feel, and the tiny plants fill the space with color without taking over. Dense, compact plants (like small pilea-style leaves or compact pothos cuttings) look best at counter height. The result feels like someone actually lives there and keeps plants close for daily care.
Pick two or three canisters with the same finish (matte ceramic or metal) and keep the labels in off-white paper. Place the plants in pots no bigger than 3 to 4 inches wide so the counter doesn’t look crowded. Add a narrow tray or small saucers so water never touches the wood.
Mist the leaves lightly in dry weather, then wipe the canister tops with a dry cloth so you don’t leave water spots.
Don’t put wet soil directly on the counter — always use saucers.
5. Over-Sink Window Box with Trailing Pothos
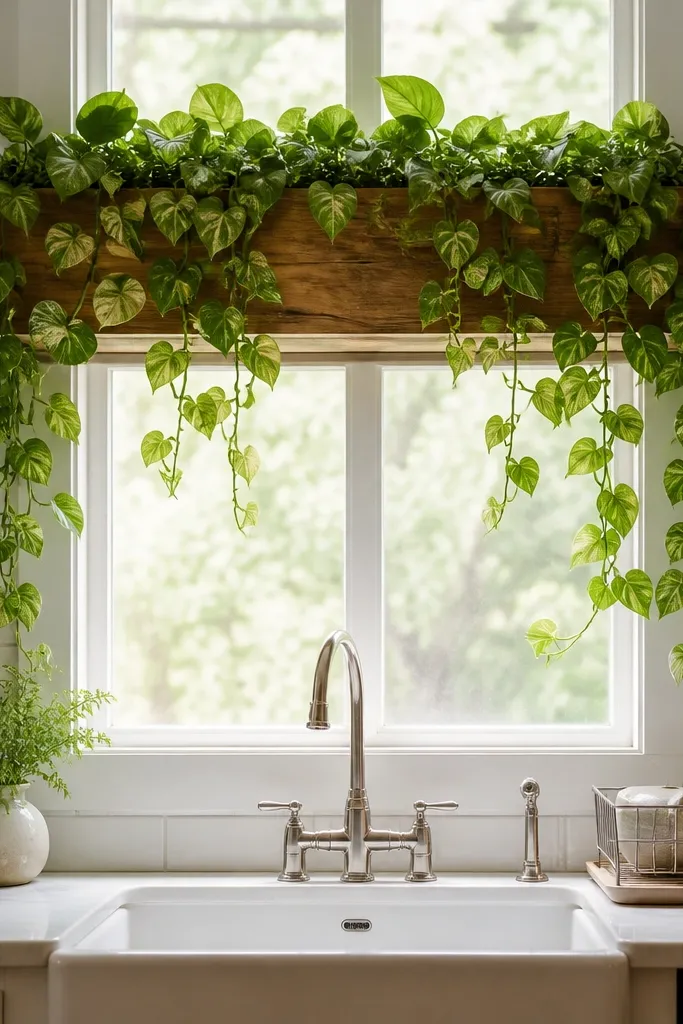
This placement is the most Stardew-looking because it frames the daily routine. A window box creates a built-in feel, and pothos trailing over the edge makes the greenery look intentional. The white sink and light grout keep everything bright, while the green adds contrast. You get a “farm kitchen” moment every time you wash dishes.
Use a window box that’s about the same width as your window opening. Plant one pothos in the center and tuck a second plant behind it for fuller coverage. Line the box with a plastic insert if it’s wood so water doesn’t ruin it. Keep the vine on the inside of the window frame so it doesn’t tangle around hardware.
Pin the vine with small garden clips to train it to spill evenly.
Avoid very thin, wiry faux vines — they read like cheap craft store decor.
6. Bookcase Back Wall with Plant Shelf Sconces
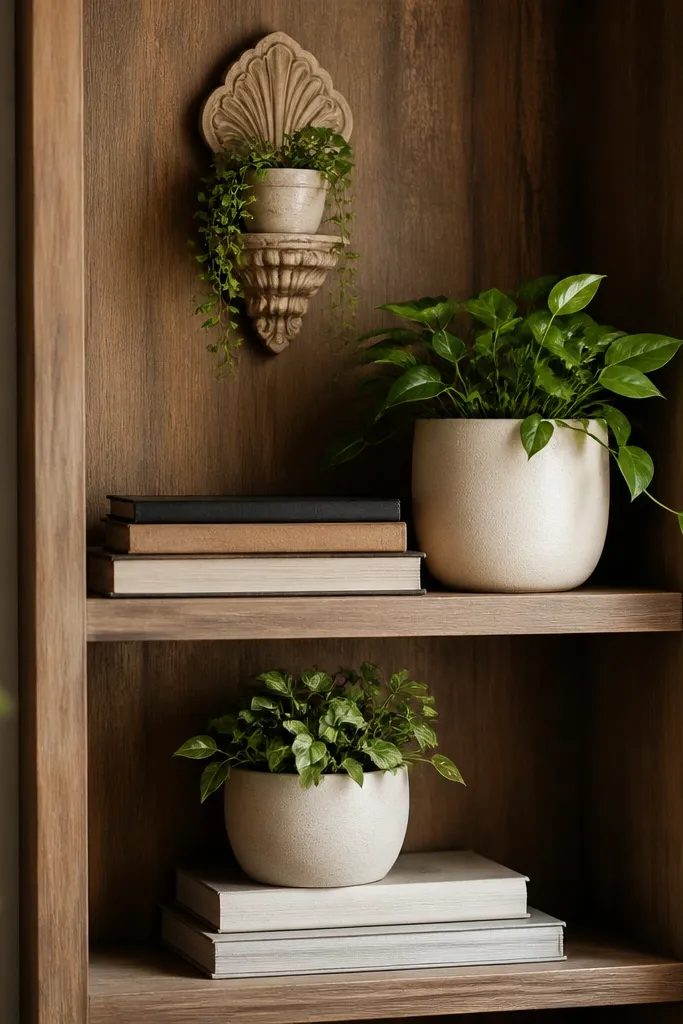
Plants look best on shelves when they’re paired with something structured, like books or framed prints. This style gives you the Stardew “study nook” vibe without adding more clutter. The books create height variety, and the plants soften the edges. Use one plant with broad leaves and one with fine leaves so the shelf doesn’t look flat.
Make the planters sit forward on the shelf by 1 to 2 inches so they’re visible from the room entrance. Keep book spines in warm tones — tan, brown, dusty blue — and avoid neon covers. For the sconce-like holder, use a ceramic or matte metal container so it matches the retro hardware.
Pro tipDust shelves first, then water plants last — wet leaves attract dust fast.
Watch outDon’t cram plants directly behind tall books — you lose the leaf shapes.
7. Vintage Wall Hooks with Small Pot Holders
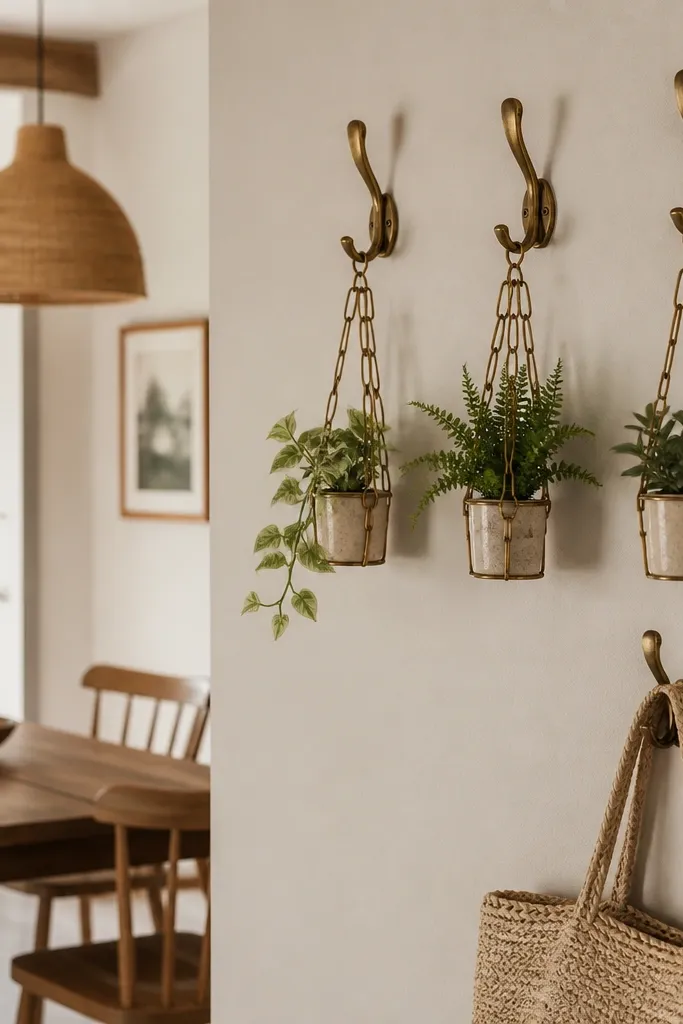
Wall hooks are a sneaky way to add plants without eating floor space. The aged brass gives you that retro hardware feel you see in Stardew interiors. Small pots keep the look light and airy, and the different leaf textures add variety. This also makes watering easier because you can lift each pot off the hook.
Space hooks 10 to 12 inches apart so leaves don’t tangle. Use holders with a drainage tray or a removable insert so you can empty water. Keep the plants small and manageable — think compact trailing plants or small rosette plants.
Hang one pot slightly higher than the others so the group forms a diagonal, not a straight line.
Avoid flimsy string macrame — it looks modern and messy next to wood.
8. Sideboard Centerpiece with a Terracotta Planter Bowl
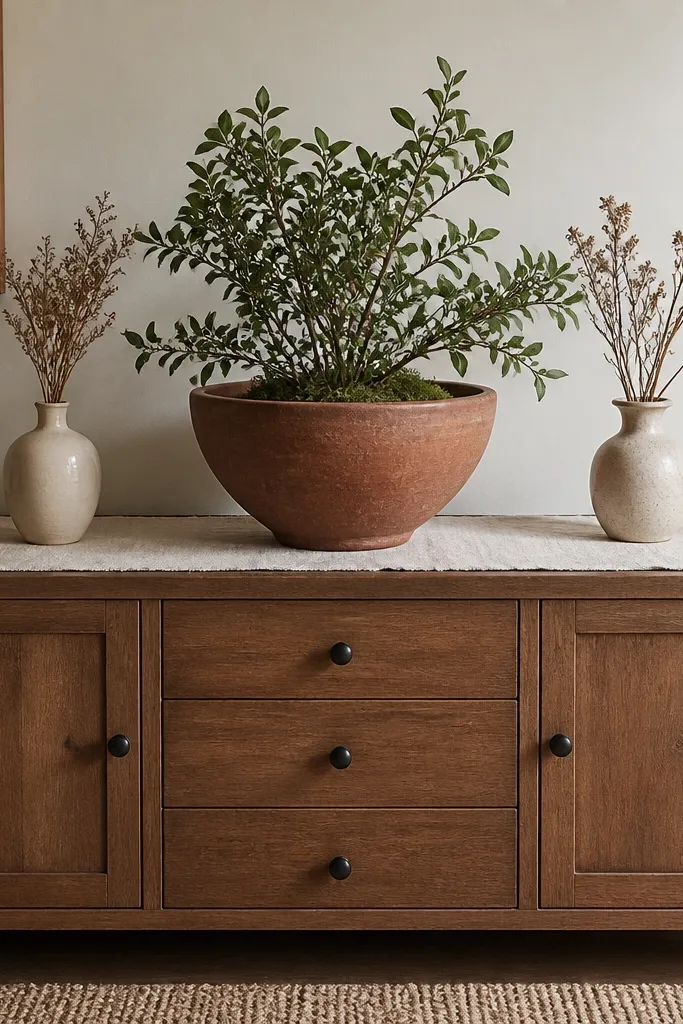
A planter bowl on a sideboard makes the plant feel like furniture, not decor. Terracotta anchors the green and gives you that warm, sun-baked color. Dried stems next to it add retro texture and make the arrangement look good even when you’re between plant growth spurts. This is a strong choice if your dining wall feels empty.
Choose a bowl that’s wide enough to read from across the room — roughly 10 to 14 inches across. Use one main plant only, then add small supporting elements at the edges. Keep the runner in cream or pale oatmeal so the terracotta stays warm instead of orange.
Rotate the main plant weekly so it grows evenly and keeps its shape centered in the bowl.
Skip multi-plant clumps in a bowl — it looks overgrown and messy quickly.
9. Ceiling Rail Planters with Trailing Growth
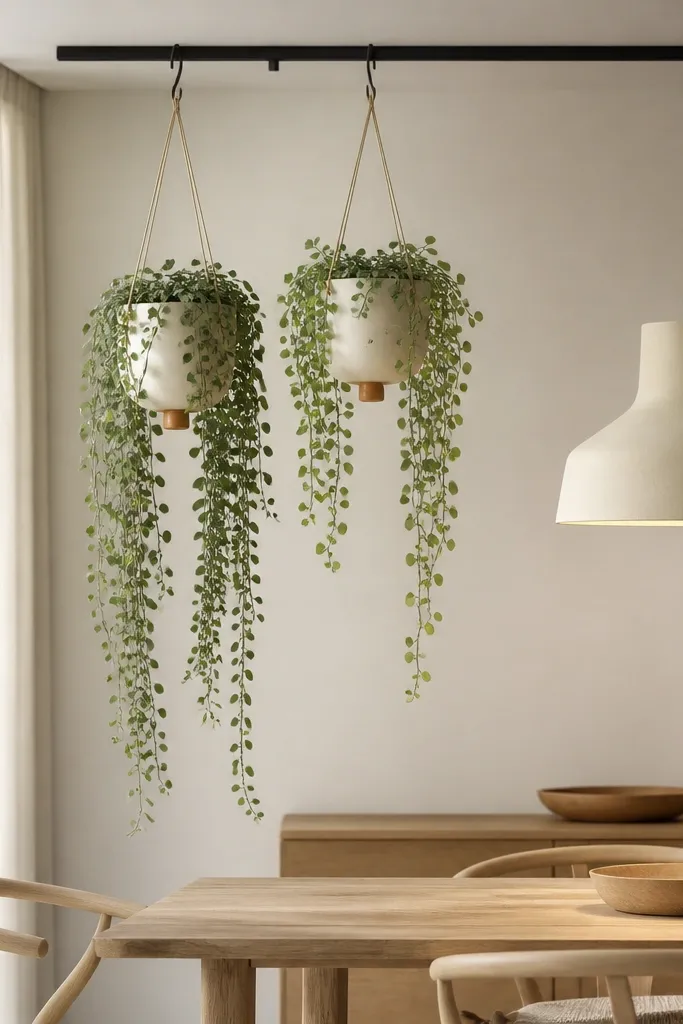
Hanging planters add height, and height makes small rooms feel bigger. A ceiling rail looks intentional and keeps hanging lines straight, which matches the structured Stardew interior vibe. Trailing growth creates softness around lamps and light fixtures. Use matte pots so the hanging plants don’t look like plastic toys.
Hang planters so the trailing leaves stop about 8 to 12 inches above the table or counter. Keep both planters the same pot style for a cohesive look. If you’re using real plants, make sure the rail is near a bright window or you’ll get leggy growth.
Tuck a small piece of moss on top of the soil to reduce visible dry patches between waterings.
Avoid long chains — they make the whole setup feel industrial.
10. Wall Framed Herb Prints with Matching Plant Pots
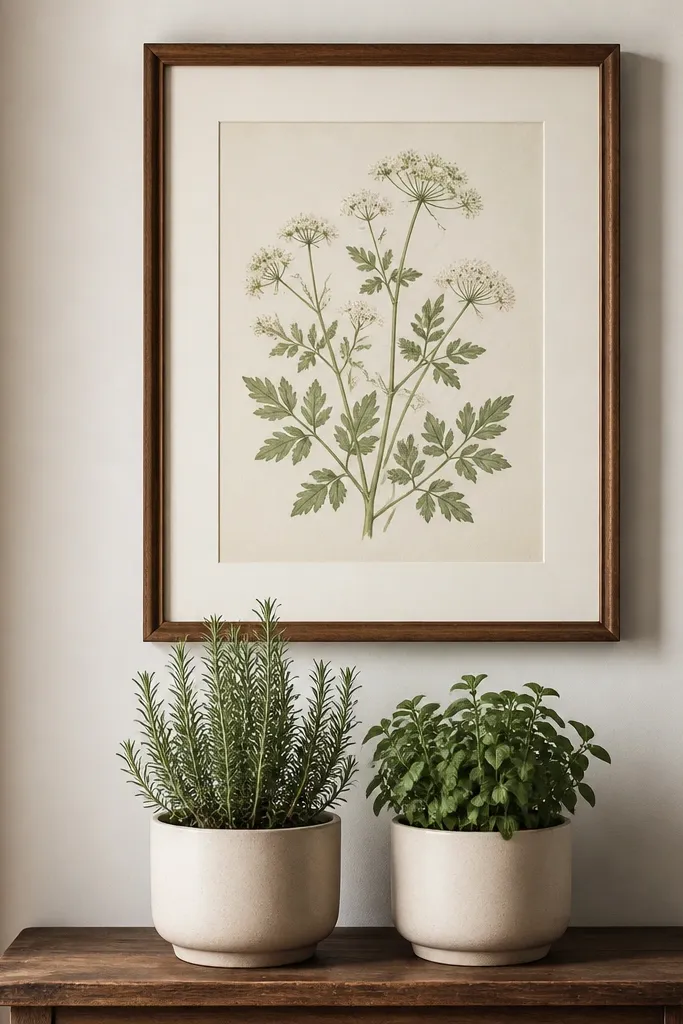
This is the “plants plus story” trick. When your art includes herbs, the real herbs feel like part of the same world. Matching pot colors to the frame mat makes the whole corner look designed instead of random. Keep the plant scale small so it doesn’t fight the artwork. The result reads like an old cottage kitchen where someone collected seeds and pressed leaves.
Hang the frame so the bottom edge sits about 10 to 12 inches above the table surface. Use two planters that match in color and finish, even if the plants are different. Choose herbs with tidy leaves so they look good in photos and in daily life.
Pro tipUse a small tray under the pots that matches the frame mat color for a clean base.
Watch outDon’t pick bright modern poster prints — muted botanical art is the point.
11. Matte Black Pot + Warm Wood Stool Plant Cluster
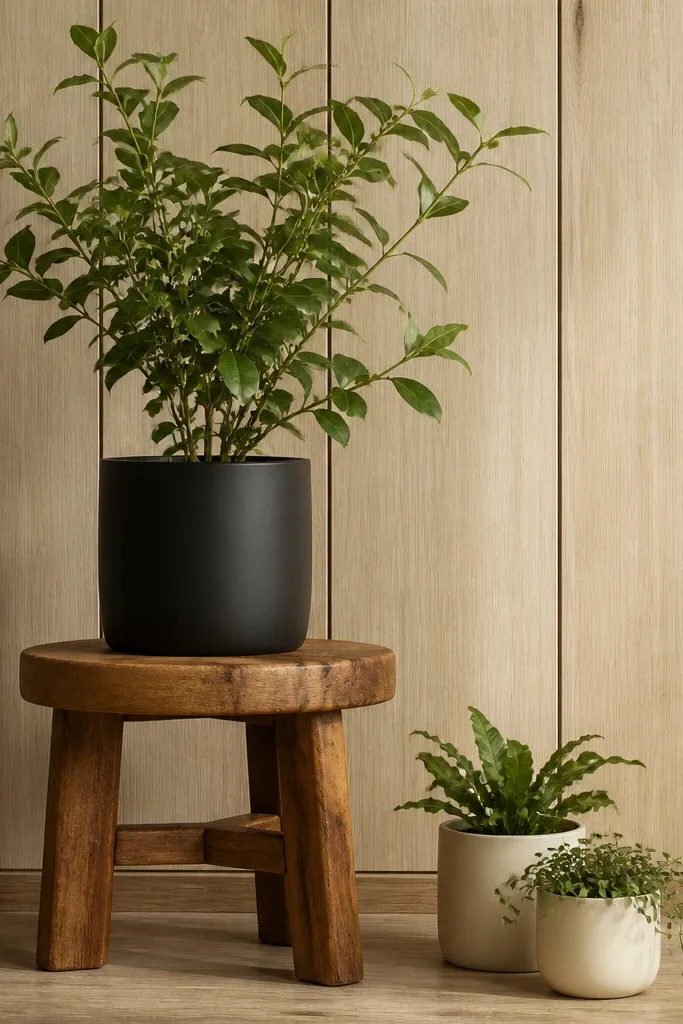
Even in a retro Stardew room, a single dark pot makes the greenery look richer. The warm wood stool adds that handmade, rustic feel, and it gives your plants a stair-step height. This setup is great when your room has lots of light wood and you need one grounding element. The matte black stays calm and doesn’t look glossy or harsh.
Place the tall plant on the stool so it reaches about eye level from where you usually stand in the kitchen. Put two smaller pots on the floor slightly forward, not behind the stool. Use one plant type with broad leaves for the main pot and a smaller trailing or fine-leaf plant for the supporting pots.
Dust leaves with a soft microfiber cloth once a week — matte pots show dust less than shiny ones, but leaves still collect it.
Avoid shiny black planters — they look like kitchen appliances.
12. Window Seat Storage Bench with Hidden Plant Trays
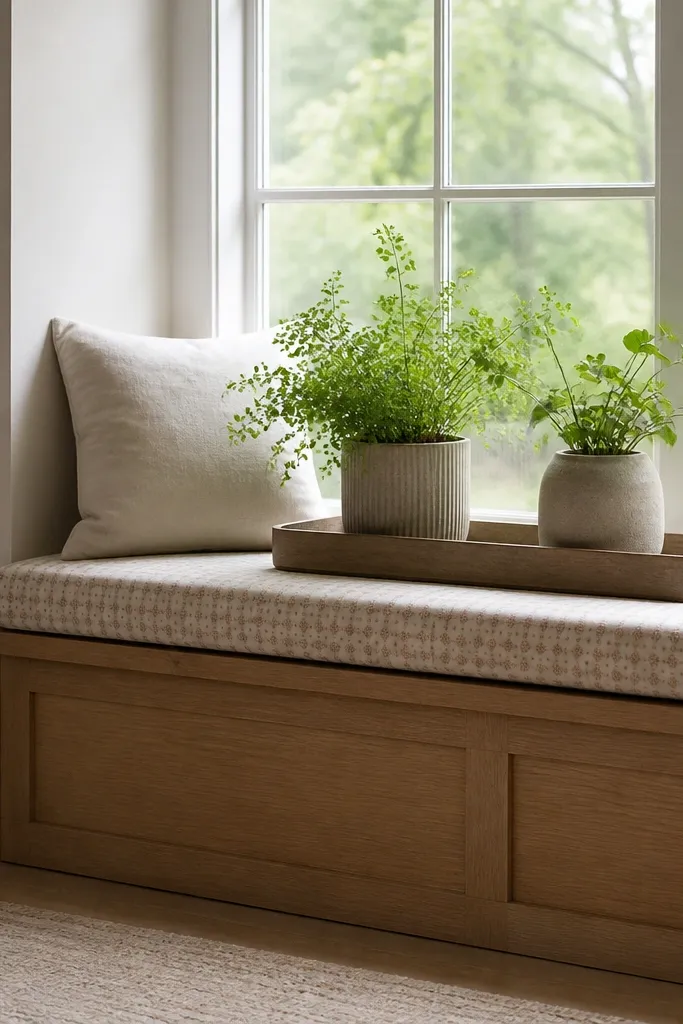
This setup is practical and pretty. A window seat gives you a natural plant zone, and a tray keeps water contained so the cushion stays safe. The check or subtle floral cushion pattern reads retro, and it matches the soft, lived-in Stardew vibe. Plants sit at a comfortable height, so you’ll actually notice them and care for them.
Use a shallow tray with handles or a rim so you can lift it out for watering. Place two medium planters side by side, leaving 3 to 4 inches between them. Choose cushion fabric in warm cream with muted red or sage accents so the green looks intentional.
Pro tipUse a fabric liner under the tray if your bench top is bare wood to prevent scratches.
Watch outDon’t water directly on the window seat — condensation and drips ruin cushions.