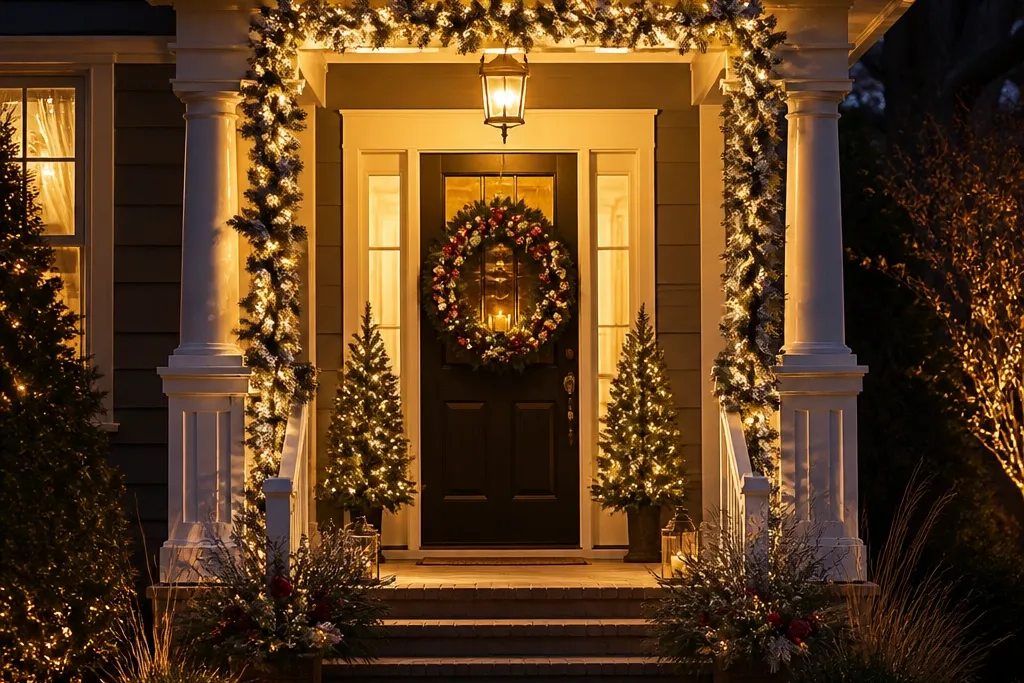
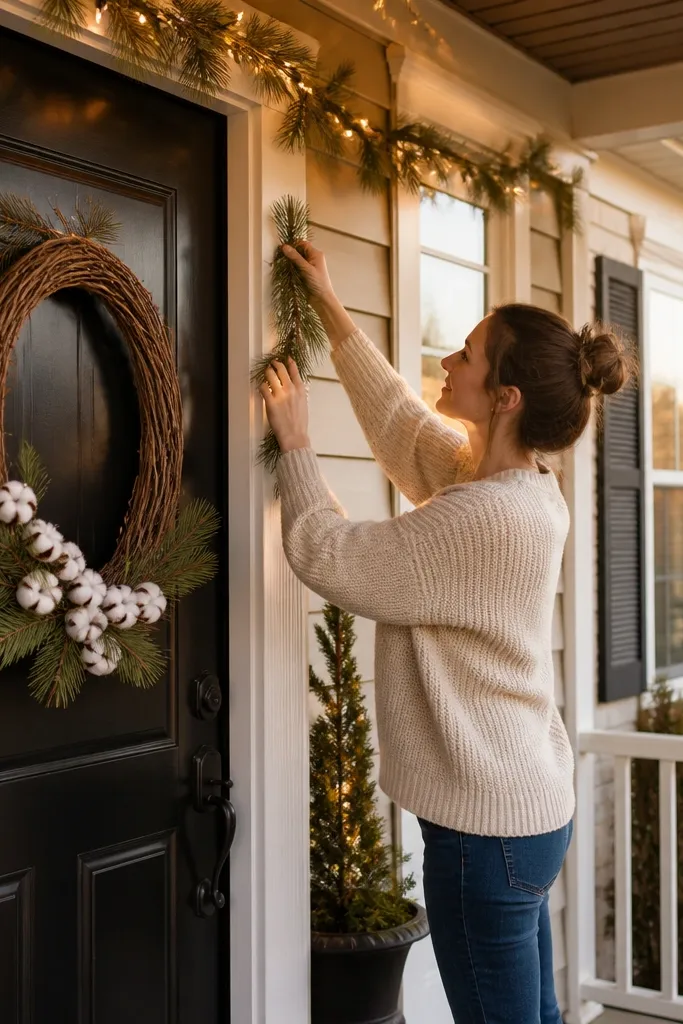
1. Warm White Porch Column Wrap with Faux Evergreen Bands
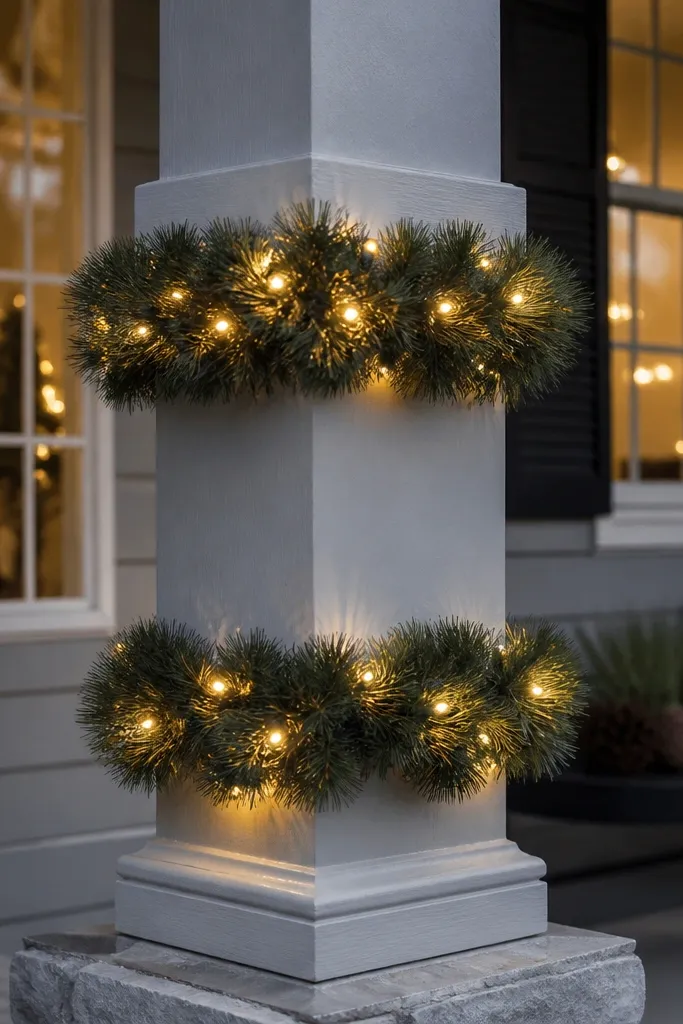
This look makes your entry feel framed, not scattered. Wrap faux evergreen bands around porch columns first, then weave warm white mini lights into the greenery so the glow looks embedded, not pasted-on. Choose a band thickness that covers the column all the way around — about 4-6 inches wide — so the light doesn’t look patchy from the street. Add small red berries or red ribbon loops at the same height on both columns for symmetry. It’s beginner-friendly because you can build it in sections and adjust the lights while you’re wrapping.
Step 1: Measure each column’s height and estimate a 4-6 inch wrap width, then secure faux evergreen bands with zip ties or outdoor twist ties. Step 2: Plug in warm white mini lights and start at the bottom, wrapping upward in a loose spiral; keep spacing consistent so you don’t get bright stripes. Step 3: Finish by tying two or three small ribbon loops or berry picks at eye level on each column, then test the lighting before you trim any excess ties.
Pro tipKeep the light color consistent across the whole entry. If you use warm white on the columns, don’t switch to cool white on the steps.
Watch outAvoid wrapping lights too tight — it creates hot spots and makes the greenery look flattened.
2. Oversized Door Wreath with Pinecones and Warm LED Candle Lights
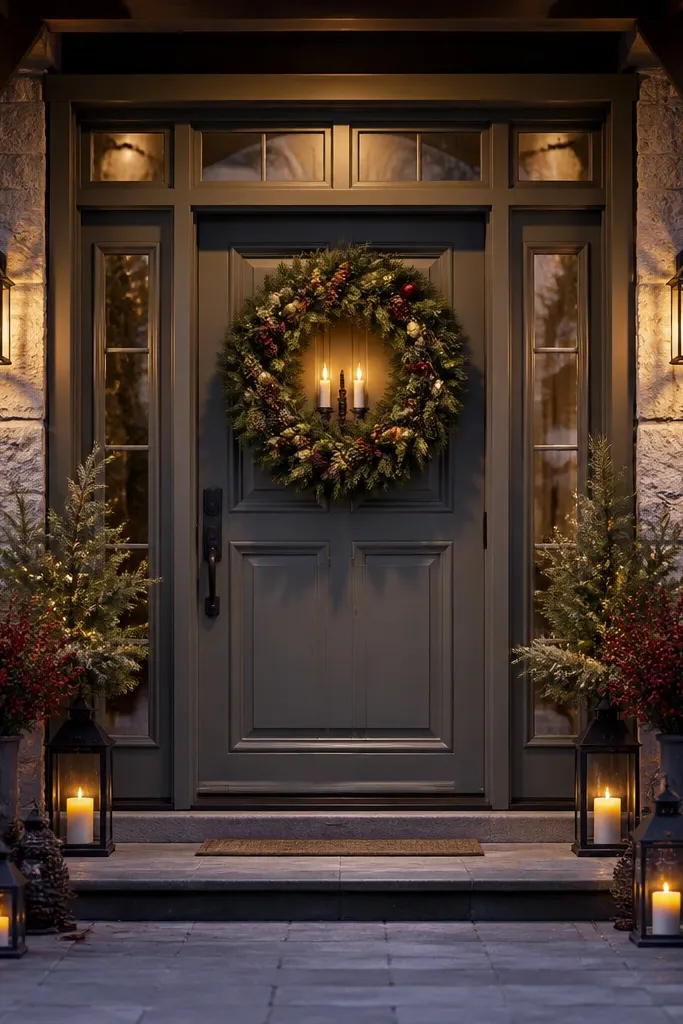
A big wreath is the easiest “anchor” because it reads instantly from across the street. Choose an oversized wreath (around 24-30 inches) with faux pine tips, pinecones, and a few matte ornaments in your chosen color family. Then add two warm LED candle lights inside the wreath, placed so they face outward — it gives a cozy glow that looks real in photos. This works especially well if your door has sidelights or a porch overhang, since the light will bounce off glass and wood. It also solves the common beginner problem of decorations that look bright up close but disappear from the curb.
Step 1: Hang the wreath at the door’s center height, then use two hooks or one sturdy wreath hanger so it doesn’t tilt. Step 2: Place LED candles inside the wreath using small zip ties or hidden clips; keep a gap between the candles and any ribbon so nothing droops into the light. Step 3: Add pinecone clusters at three points around the wreath (top-left, top-right, bottom) so the design looks intentional rather than random.
Use matte pinecones and matte ornaments. Glossy pieces can reflect harsh LED glare and look washed out.
Skip tiny wreaths — small wreaths look like accessories and won’t anchor the whole display.
3. Railing Garland with Red-Check Bow Repeat
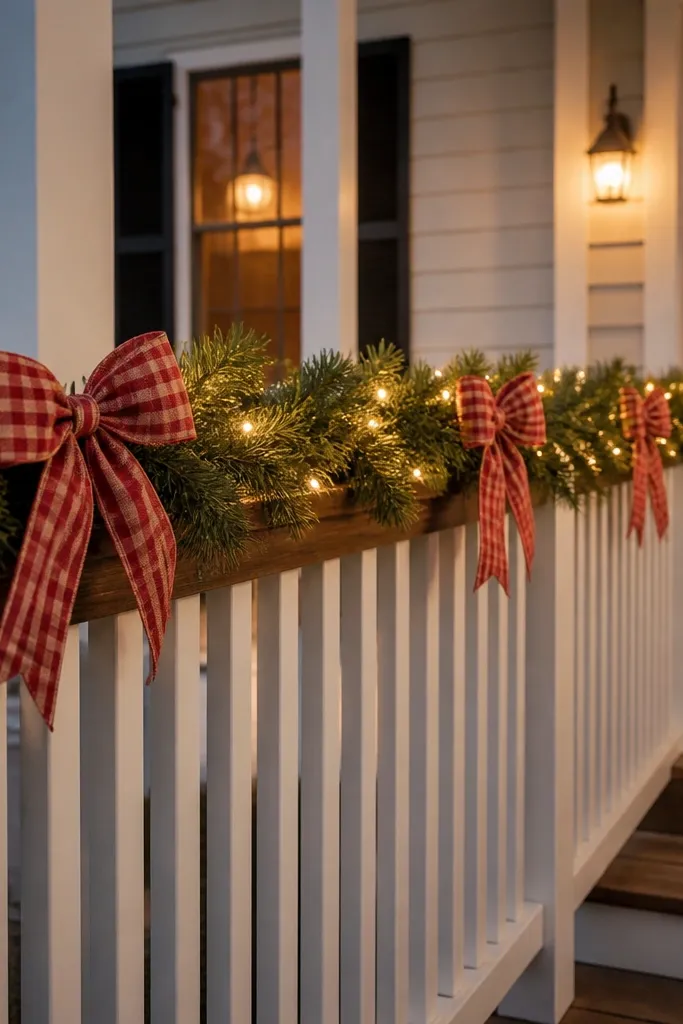
If your porch has a railing, garland is the quickest way to make it look dressed. Use faux evergreen garland along the top of the railing, then add warm white lights woven underneath so the glow hits the bow fabric instead of the wood. Pick one bow style and repeat it at even spacing — red-check ribbon is great because it reads clearly in daylight and at night. Aim for about 12-18 inches between bow placements on longer rails. This look is beginner-friendly because it hides uneven spacing — the greenery fills gaps and the repeating bows create order.
Step 1: Lay garland across the railing and secure with zip ties or hook-and-loop outdoor fasteners every 12-18 inches. Step 2: Weave warm white string lights into the garland before you attach the final length; plug in and adjust so the lights sit under the bow line. Step 3: Add red-check bows with wire stems, placing them in a straight rhythm from left to right, then tie off any loose ribbon tails.
Pro tipKeep ribbon tails similar in length. Uneven tails look messy fast from the street.
Watch outDon’t mix ribbon patterns. Two prints can make the railing look busy instead of festive.
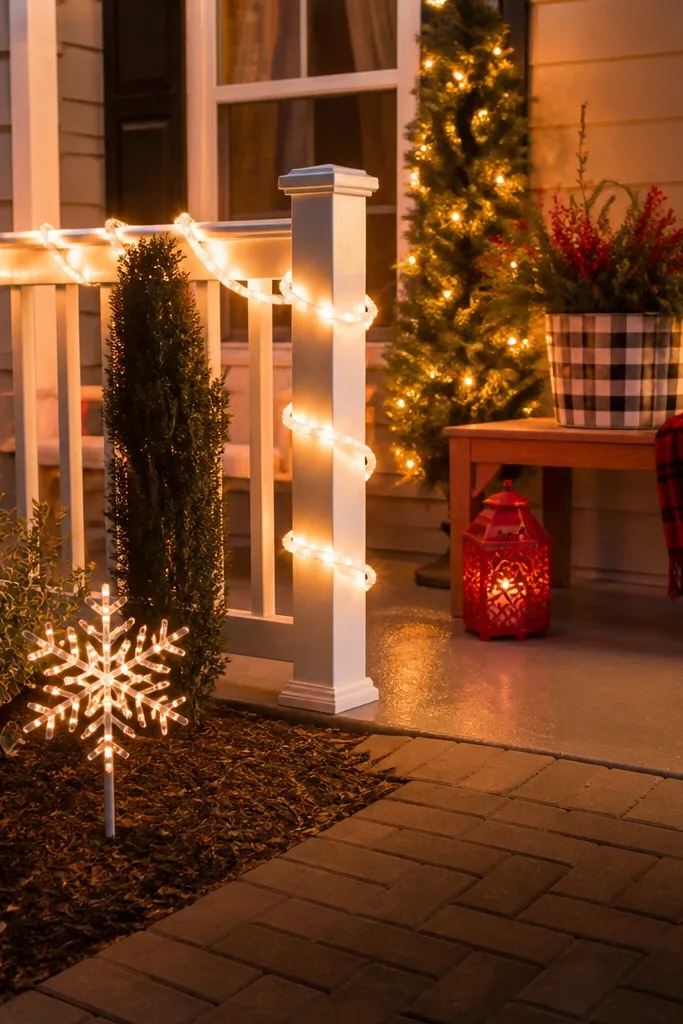
4. Pathway Light Stakes with Frosted Snowball Accents
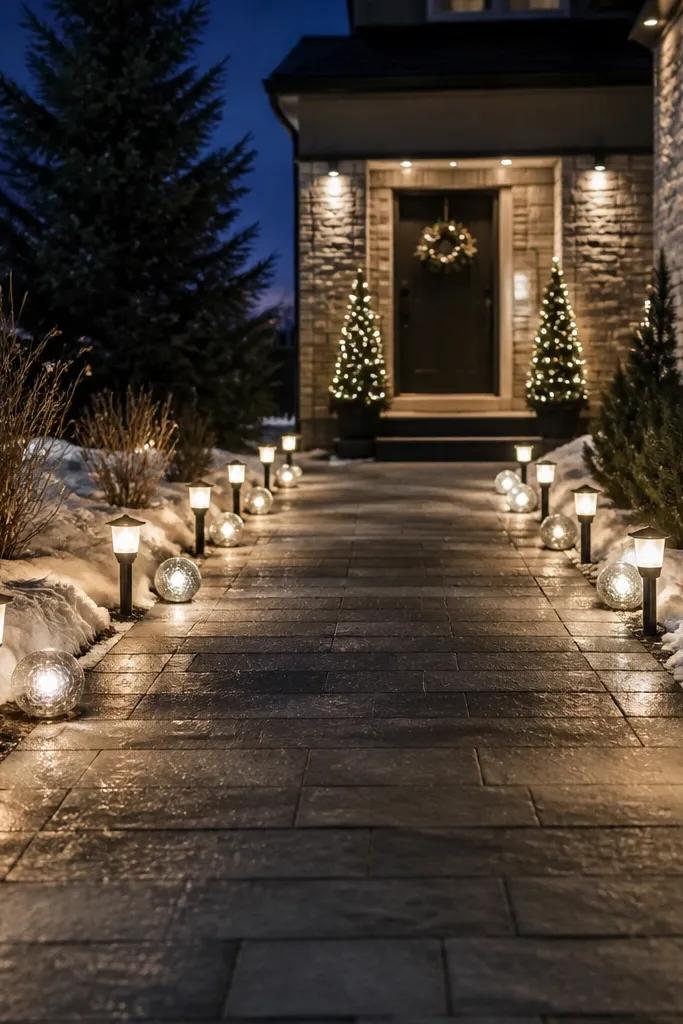
A path setup makes the whole yard feel “invited,” and it’s also the most forgiving for beginners. Use light stakes with warm white LEDs spaced so the ground looks gently lit, not blasted. Then add frosted snowball accents (clear or frosted spheres) at intervals near the edges of the path for a winter feel. The frosted surfaces catch light softly, which makes the display look magical rather than harsh. This works best for walkways, driveway edges, and side paths where you want clear direction without needing a full yard installation.
Step 1: Start at the porch step or front gate and mark stake spacing with your foot — aim for about 4-6 feet between stakes depending on how bright the LEDs are. Step 2: Insert stakes firmly into the ground and angle snowball accents slightly inward toward the path so they glow at the camera line. Step 3: Plug in and do a quick walk-through from the street — adjust stake spacing until the path looks evenly lit.
Choose stakes that have a wide angle beam. Narrow beams create pinpoints that look uneven in fog or light rain.
Avoid placing stakes too close together. It creates a dotted line effect instead of a smooth glow.
5. Window Silhouette Lighting with Warm White Accent Wreaths
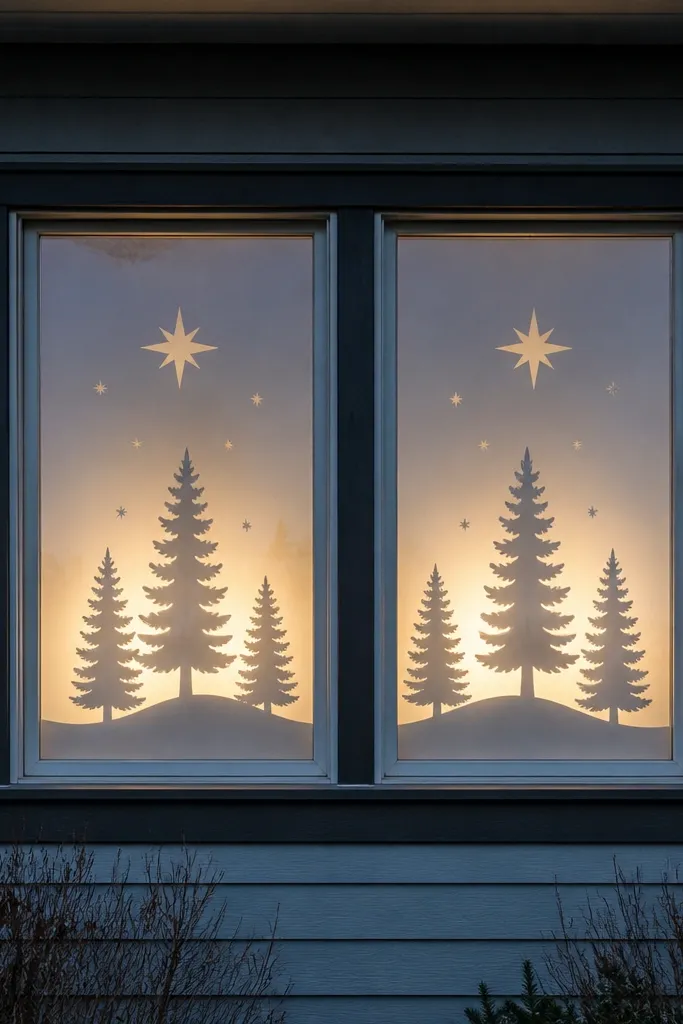
Window silhouettes give you that “storybook” look without complicated assembly. Choose a silhouette set that projects or illuminates a single winter scene style across multiple windows — think simple star or evergreen shapes rather than lots of tiny moving pieces. Add small accent wreaths (10-14 inches) on either side of the window or on the window ledge with warm white micro-lights. The silhouette supplies the big wow, and the small wreaths make the display feel connected to your home’s details. It’s great if your house has multiple windows and you want a consistent look across them.
Step 1: Decide which windows are most visible from the street, then mount silhouette lights at the base or inside the window frame using outdoor-safe placement instructions. Step 2: Add small wreaths directly next to the window so the light aligns with the window shape; keep wreath sizes consistent on each side. Step 3: Turn everything on at night and check for glare — reposition if the lights are reflecting directly into the street.
Pro tipMatch the silhouette color temperature to your wreath lights. Warm white silhouettes look best with warm wreath LEDs.
Watch outSkip mixing multiple silhouette styles in the same row of windows. It looks like random downloads instead of a coordinated scene.
6. Projector Light with Foam Snowflake Border on the Steps
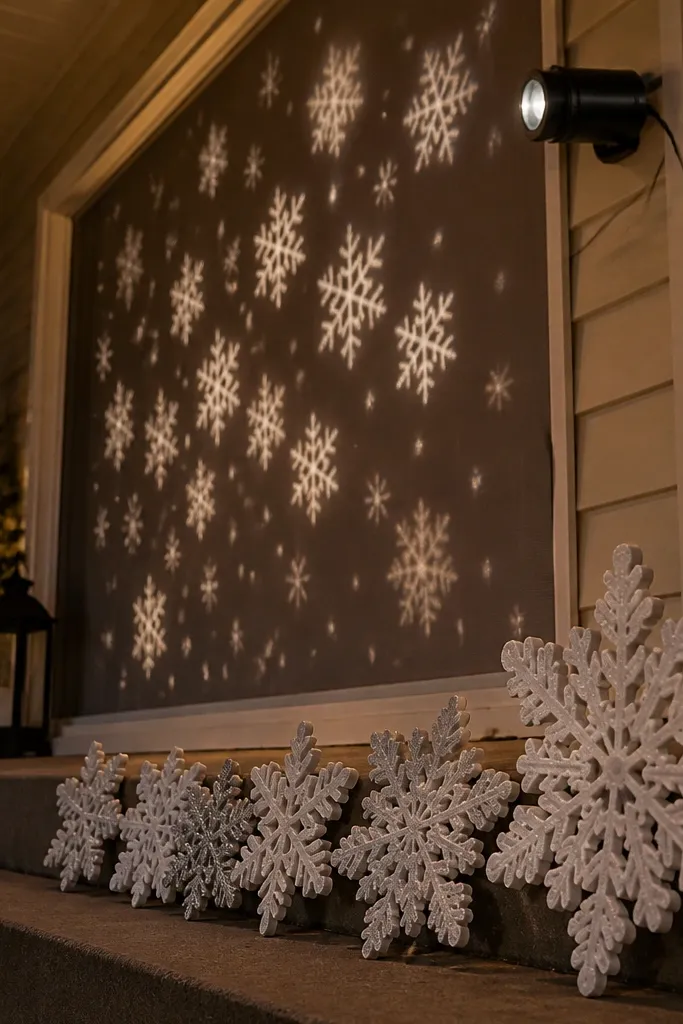
A projector is the beginner cheat code for a full display with minimal labor. Mount it so it throws onto a wall, porch screen, or flat facade area, then add foam snowflake accents on the steps to give the foreground texture. Use foam snowflakes in white or pale silver, spaced so they form a subtle border on the top step and the step below. This gives depth: the projector handles the sky, while the snowflakes handle the ground. It’s ideal when you want a magical look but don’t have time for dozens of individual decorations.
Step 1: Place the projector at a stable spot about 3-6 feet from the target surface, aiming slightly upward so the light fills the visible wall area. Step 2: Lay foam snowflakes on the step risers or treads using outdoor-safe adhesive or zip ties through pre-made holes (if your snowflakes have them). Step 3: Turn on the projector and adjust its angle so the snowflakes aren’t competing with the brightest light in the same spot.
Pro tipUse a flat target surface if possible. Projecting onto textured brick can blur the shapes.
Watch outDon’t aim the projector too low — it makes the scene look like it’s stuck at your feet.
7. Evergreen Corner Trio with Matching Red Lanterns
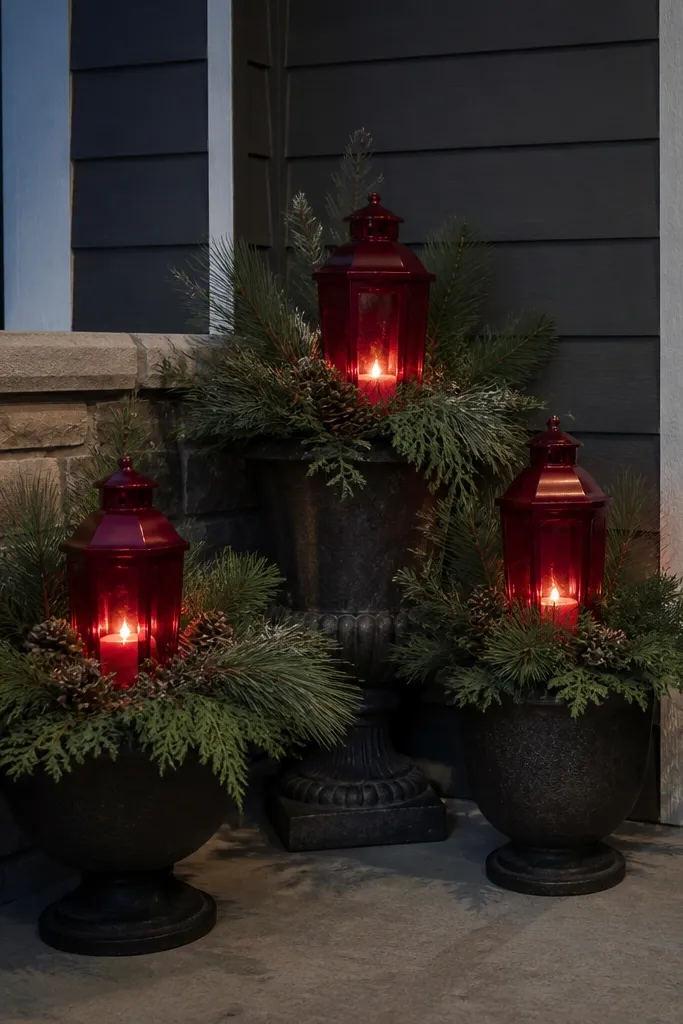
Corner decor makes a yard look designed because corners frame the space. Set three outdoor planters or large urns in a corner cluster (front left, front right, or porch corners), then place faux evergreen bundles inside. Add matching red lanterns — either real lantern props or LED lanterns — so the warm glow sits at different heights. Use two lanterns at mid-height and one at the top height in the center urn for a stepped look. This works beautifully for porches, entry landings, and patios where you want a symmetrical, holiday-ready frame without building a full border.
Step 1: Choose three planters with similar shapes, then fill with faux evergreen stems and secure with zip ties or floral wire so nothing shifts. Step 2: Place lanterns inside or against the evergreen so they don’t tip; keep lantern bases at least 2 inches away from dense foliage for stability. Step 3: Add one small red accent per planter — a ribbon tie or a cluster of berries — so the color repeats across all three.
Pro tipPick lanterns with warm LED bulbs. The red looks richer and less “toy-like” at night.
Watch outAvoid mixing lantern sizes randomly. One oversized lantern can throw off the whole corner balance.
8. Icy Blue Hedge Light Clips with Clear Globe Ornaments
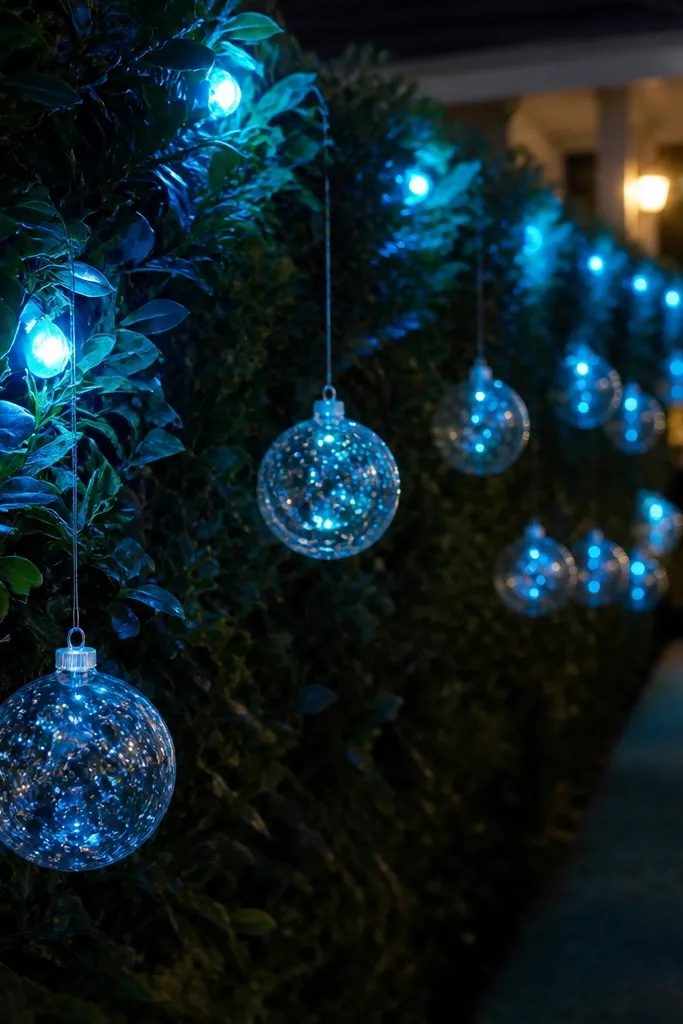
Hedges are a gift for beginner outdoor decor because they hide wiring and create a natural canvas. Clip icy blue LED light strands along the hedge line, then hang a few clear globe ornaments (or clear acrylic baubles) at staggered heights. The clear ornaments catch the blue light and scatter it into tiny highlights, which reads “winter” even if you don’t have snow. Keep the ornaments spaced so you can still see the hedge texture behind them. This look is photogenic because it shows depth — light on leaves plus sparkle in the foreground.
Step 1: Use light clips made for outdoor cords and attach the strand along the hedge at about 10-12 inch intervals. Step 2: Hang 6-10 clear globe ornaments per hedge section, spacing them roughly every 2-3 feet and alternating heights (waist and head height). Step 3: Plug in and check from the street; if the hedge looks spotty, add one extra mini strand in the blank areas.
Pro tipChoose blue LEDs that are labeled for outdoor use and have a steady glow, not rapid flashing.
Watch outDon’t overload the hedge with too many ornaments. If everything is sparkling, nothing stands out.
9. Porch Step Light Rope with Mini Wreaths at Each Post
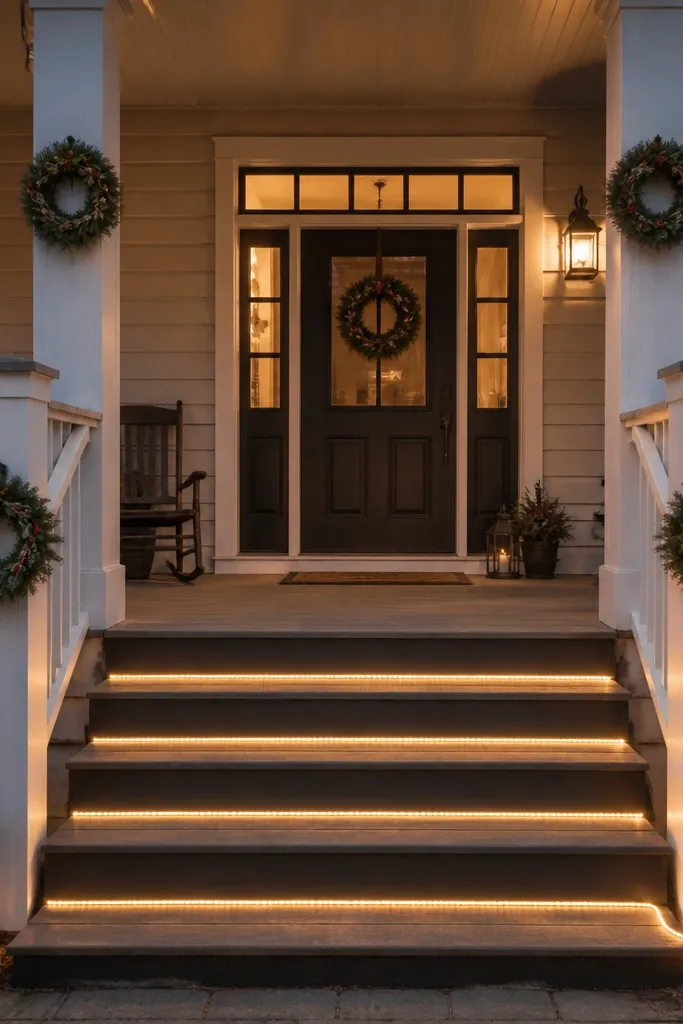
This is the “clean and cozy” look that reads expensive even when it’s simple. Use a weatherproof light rope along the edge of the porch steps or along the base of the railing, then place mini wreaths at each post or column. The rope creates a continuous line of light, which makes the entry feel structured. Mini wreaths add a holiday focal point without needing a full garland install. It’s great for small porches where full-size decorations would crowd the space.
Step 1: Route the light rope along the step edges in one continuous line, using outdoor clips so it stays straight. Step 2: Add mini wreaths (8-12 inches) at each post, securing with hooks or zip ties so they don’t slide when you open the door. Step 3: Turn everything on and adjust any wreath angles so the bows face outward toward the street.
Pro tipKeep the rope’s color temperature warm white to match most exterior paint colors.
Watch outSkip placing wreaths at random heights. Align them to one eye-level line for a more finished look.
10. Snowy Balloon Garland for Front Yard (Weighted Base)
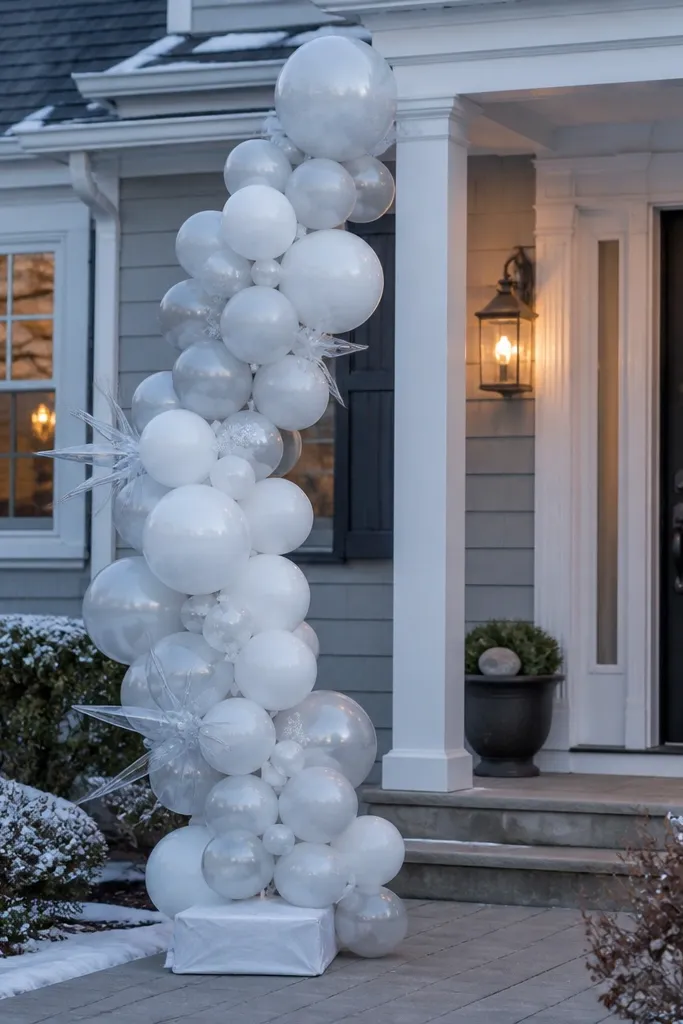
Balloon garlands sound basic until you place them right: near the entry where they frame the doorway and catch light. Choose snow-themed balloon sets with frosted whites and pale silver, plus a few clear or star-shaped accents. Use a weighted base stand so the garland stays upright in wind, then position it where it won’t block the walkway. This works for beginners because it’s fast, and it creates a strong vertical element that balances horizontal porch decor. It’s also photogenic from the sidewalk because the balloons create a “ceiling” of winter sparkle.
Step 1: Inflate balloons and assemble the garland using the manufacturer’s connector method, then attach to a weighted base stand. Step 2: Place the stand in the yard so the garland is visible from the street and not behind shrubs; keep it at least 3 feet from the path. Step 3: Add one small light source nearby, like a warm path stake, so the frosted balloons glow instead of looking flat.
Stick to two main tones (frosted white + pale silver). More colors makes balloons look like a party instead of holiday decor.
Avoid placing them too close to doorways where people brush them as they come and go.
11. Outdoor Christmas Tree on a Stand with Color-Blocked Lights
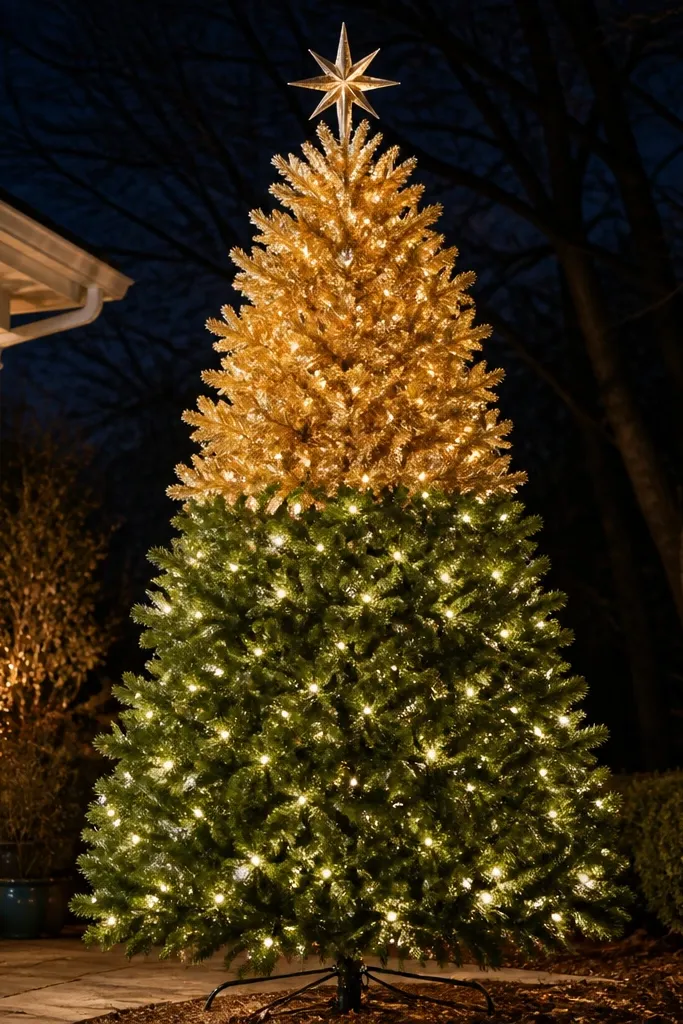
An outdoor tree can look stunning without going full-yard if you choose the right size and lighting pattern. Use a pre-lit outdoor tree on a stand, then add a color-block plan: warm white lights for the lower half and a single accent color (like gold or red) for the upper section. Finish with a gold star topper and a few larger ornaments in the same accent color. This creates a clean, readable look that doesn’t feel chaotic. It’s beginner-friendly because the structure is already built; you’re mainly arranging lights and ornaments.
Step 1: Place the tree in a visible corner or near the porch, then angle it so it faces the street. Step 2: If the tree is not pre-lit, wrap warm white lights first, then add the accent color in a deliberate band from mid-height to the top. Step 3: Add 6-10 larger ornaments spaced evenly and keep the star centered; plug in and check visibility from the sidewalk.
Pro tipUse fewer ornaments but larger sizes. Big ornaments read from farther away and look less cluttered.
Watch outDon’t use three light colors at once. It turns the tree into a multicolor blur.
12. Rope Light Frame Around the Entry Door
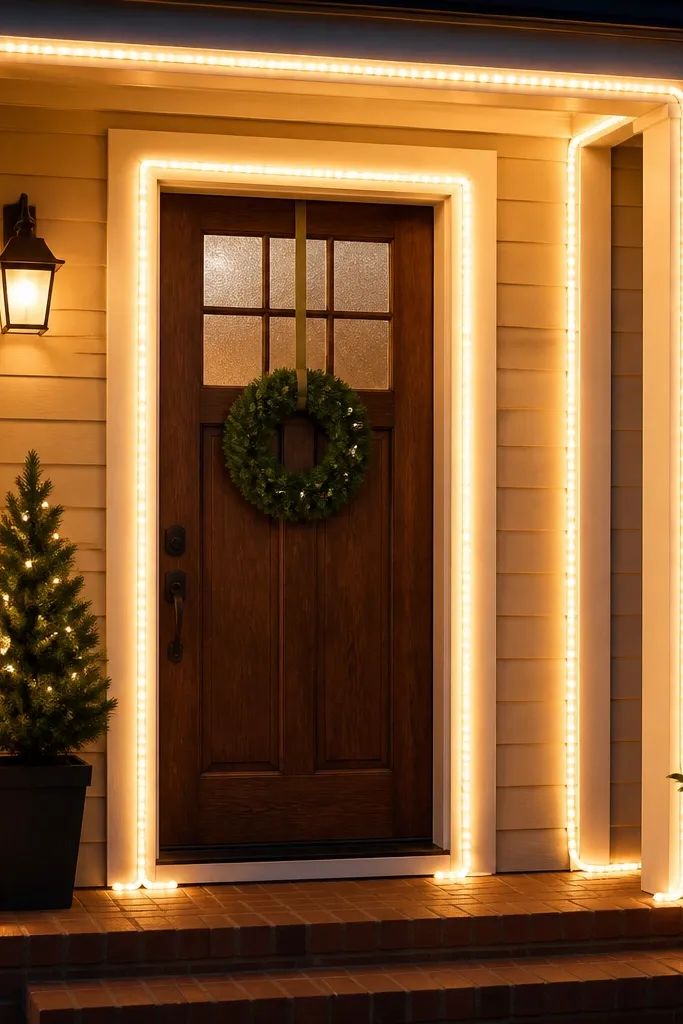
A rope light frame makes your entry look like it has architectural lighting, not just holiday decor. Outline the door opening and the adjacent panel edges (or the porch trim) with warm white rope lights so you get a clean border. Add one small wreath to break up the frame — either centered on the door or hung on the left side if the door layout makes centering awkward. This look is perfect for modern homes, brick entries, and any facade where you want crisp lines. It’s also one of the easiest installs: you’re laying a single continuous line.
Step 1: Measure the door frame edges and buy enough rope light to complete a full outline with a little slack at corners. Step 2: Attach rope lights with outdoor-rated adhesive clips or mounting channels, keeping the cable tight to the trim. Step 3: Add a centered wreath and test at night; adjust the rope light angle if it reflects too strongly into a nearby window.
Use rope light on a trim surface, not directly on textured walls. Smooth trim gives you cleaner lines.
Avoid running rope light across uneven surfaces without clips — it will sag and look sloppy fast.
13. Hanging Porch Swing or Chair with Sweater-Look Stockings

This look turns a porch seat into a focal point without building anything new. Hang sweater-look outdoor stockings on the back of a chair, porch swing, or railing near seating, then add warm string lights around the chair frame. Choose stockings in a single color family (cream with red stitching, or charcoal with white snowflake patterns). The knitted texture reads cozy in daylight and the warm lights make the fabric glow. It’s beginner-friendly because it’s a one-and-done placement and it works even on small porches.
Step 1: Hang three stockings — left, center, right — using hooks designed for outdoor use or sturdy zip ties around the frame. Step 2: Wrap warm white string lights around the chair back and seat supports, then secure with small clips so the wire doesn’t slip. Step 3: Place the chair so it’s visible from the door or sidewalk and plug in to check that the center stocking faces outward.
Pro tipChoose stockings with a flat back or built-in hanger. Bulky backs twist and look uneven.
Watch outSkip flimsy clip-on lights that slide off chair frames. They create gaps and uneven glow.
14. Yard Sign Trio with Snowy Silhouettes and Warm Spotlights
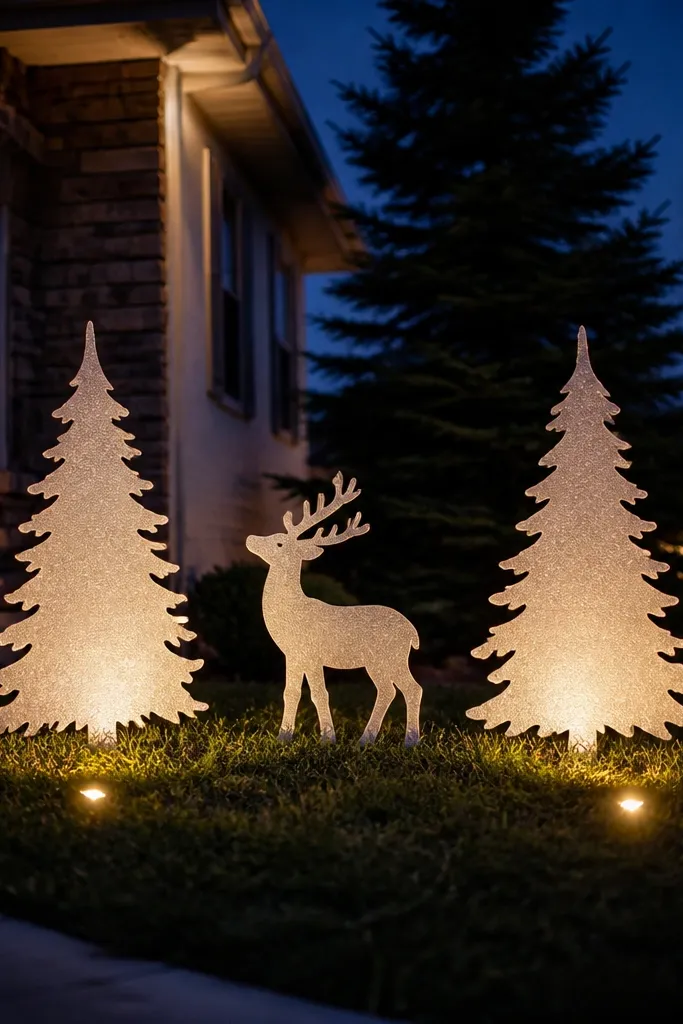
A yard sign trio is a clean way to get height and story without a complicated border. Choose two snowy silhouette signs (like evergreen or reindeer shapes) and one smaller sign for a center focal point, all in a consistent style. Then add two warm spotlights aimed from the ground to cast light upward through the scene. This makes the silhouettes look crisp at night and prevents the “flat printed sign” look. It’s beginner-friendly because you’re placing three stable items and two lights — not building an entire yard system.
Step 1: Place the signs at staggered distances, with the largest silhouette in the center and the smaller ones left and right; keep them about 3-6 feet apart depending on your yard width. Step 2: Position two spotlights on the ground facing upward, angled so the light hits the silhouettes evenly. Step 3: Turn on the lights and adjust aim by inches until the edges look sharp instead of washed out.
Use warm spotlights for silhouettes. Cool lights can make the signs look gray and flat on many exterior surfaces.
Avoid aiming spotlights directly at windows or reflective siding. It creates glare and looks messy in photos.
15. Frosted Garland on Fence with Clear LED Bubble Lights
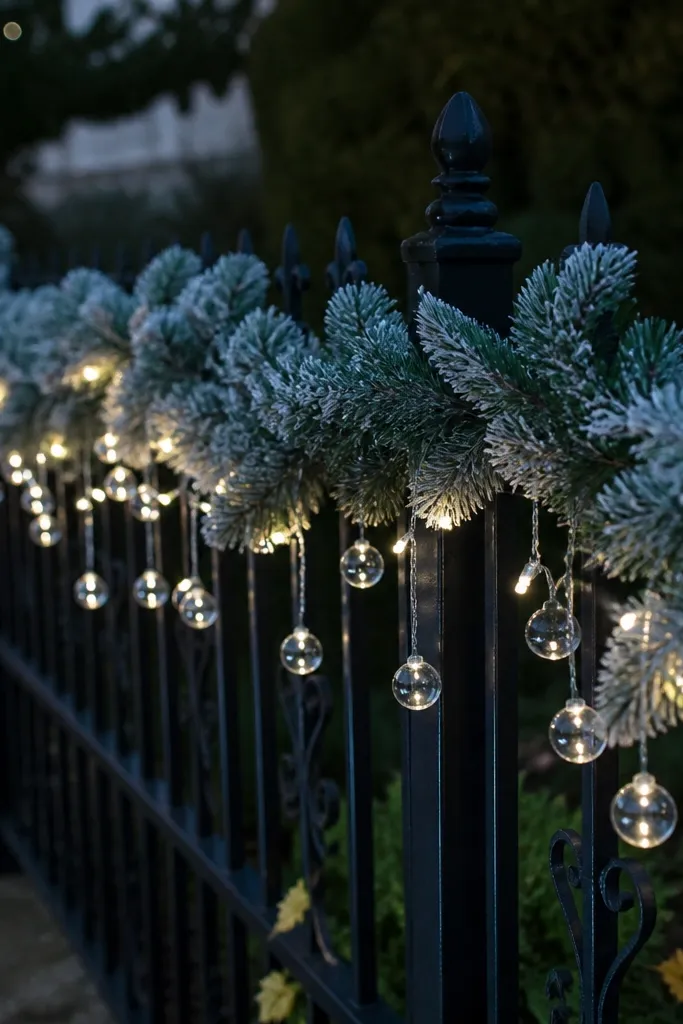
Fences can look plain in winter, and garland solves that fast. Use frosted garland along the top of the fence or along a gate, then add clear LED bubble lights spaced like a gentle snowfall. Clear bubbles catch light at different angles, so the fence looks alive as you move. This look is especially photogenic when the fence is visible from the street and you can see the top rail line. It’s also forgiving for beginners because fence rows hide minor spacing issues and the garland covers gaps.
Step 1: Secure the frosted garland at regular intervals with outdoor zip ties or twist ties, keeping it taut but not stretched. Step 2: Attach clear LED bubble lights along the garland, starting near the center and working outward so the spacing stays consistent. Step 3: Plug in and walk the perimeter; adjust any bulb clusters that look too bright compared to the rest.
Pro tipChoose bubble lights with a steady glow. Flashing makes fence lines look chaotic.
Watch outAvoid using green garland under clear lights. It can turn the whole setup muddy instead of frosty.