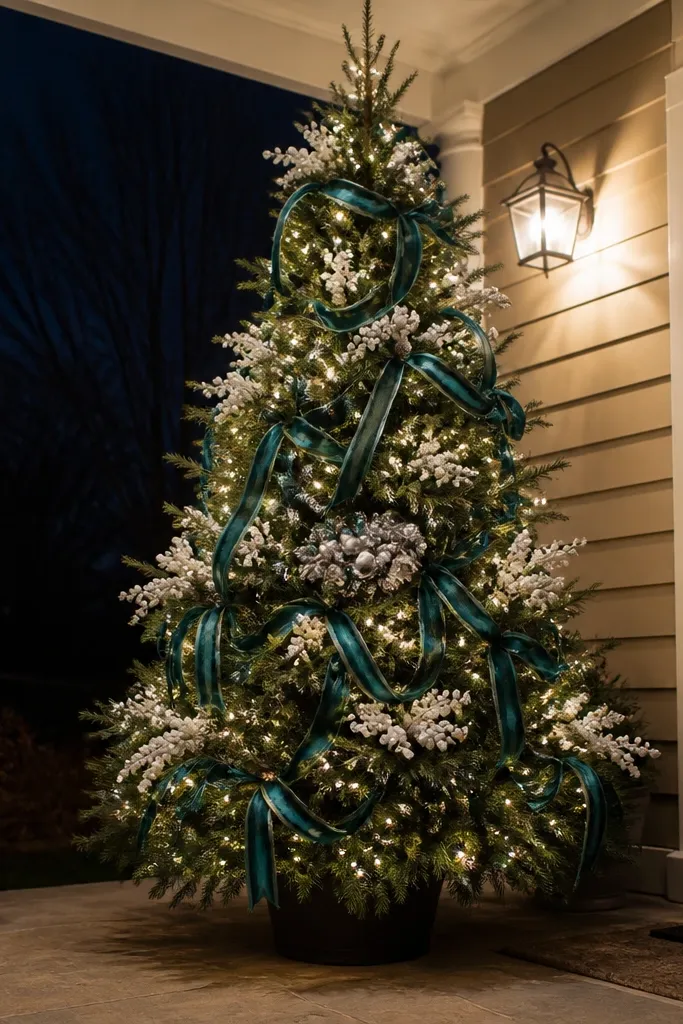
1. Frosted white berry clusters on a dark-green tree
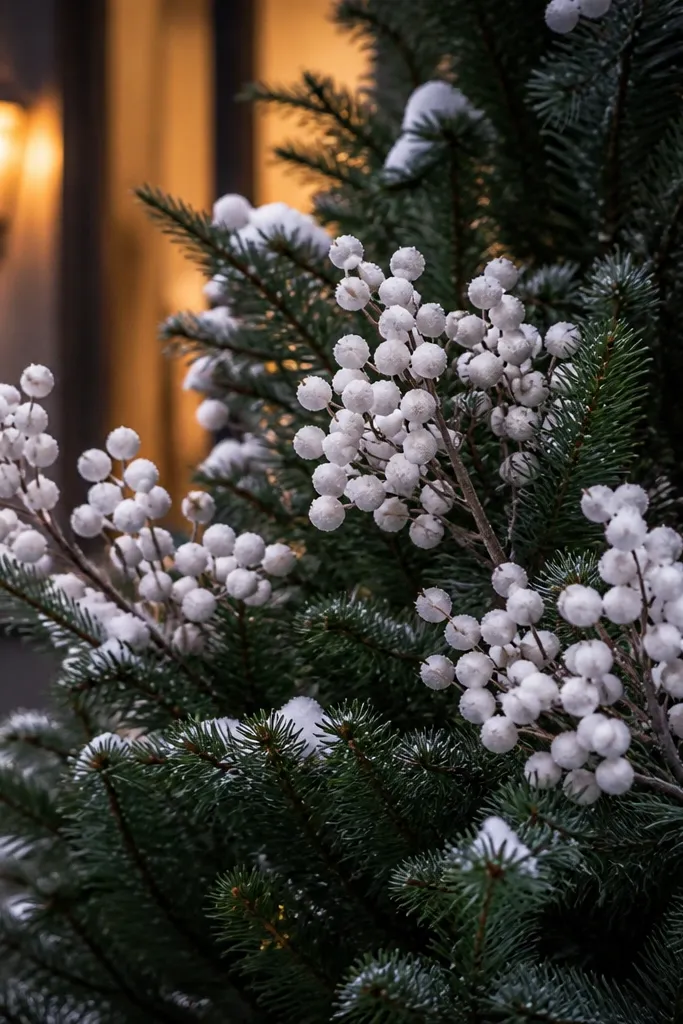
This look uses frosted white berry clusters to make the tree look like it already has winter on it. White berries pop against evergreen needles and keep the tree looking bright even when the lights are off. Choose berry picks with a slightly matte finish so they don’t glare in headlights. Keep the clusters concentrated in the lower third and mid-level, then let a few drift upward so the tree feels full rather than stuffed. It’s a beginner-friendly way to add texture without dealing with fragile ornaments.
Step 1: Place 6-10 berry clusters evenly around the tree, spacing them about 8-12 inches apart. Step 2: For each cluster, wrap the pick base with floral wire or a zip tie to a branch so it can’t rotate. Step 3: Add 2-3 extra clusters higher up, aiming toward the front so they catch street-level light.
Pro tipIf your tree looks sparse, add berries in “arcs” around the trunk instead of scattering them randomly.
Watch outDon’t use glossy red berries — they fight the frosted white palette and look off in outdoor daylight.
2. Warm white micro-dot lights with an inner ring
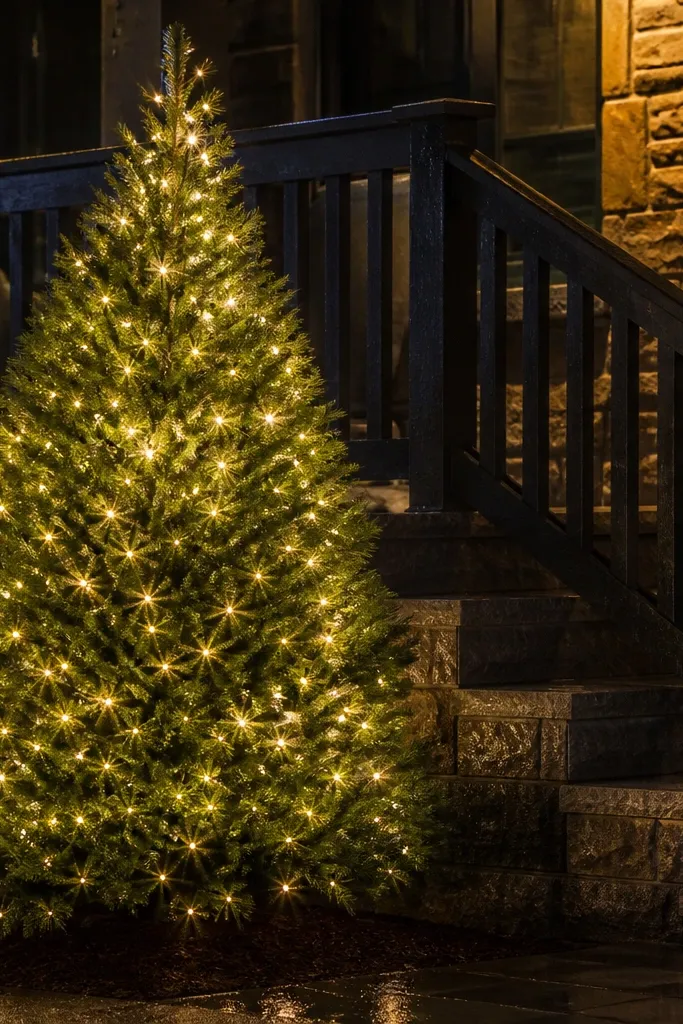
Micro-dot lights are small enough to fill gaps, so a beginner doesn’t end up with big bright patches and dark holes. A warm white color reads soft and cozy against outdoor greenery, and it photographs well at night because the dots blend into a glow. Build an inner ring first, then let the lights fill outward. This method makes the tree look “lit from within” even if the outer branches are thin. It’s also easier to manage than stringing lights randomly across every branch.
Step 1: Start by wrapping the light string around the trunk area in a loose circle, about 6-10 inches from the inner branches, then secure with zip ties every 12-18 inches. Step 2: Expand outward in a spiral, keeping the spacing tight so you don’t see bare needles. Step 3: Step back at eye level and adjust — if one side is dim, add one extra spiral pass on that side.
Use a timer plug and aim the first inner ring slightly toward the street to balance the glow where people look.
Avoid stretching lights too tight — it pulls branches inward and makes the tree look lopsided.
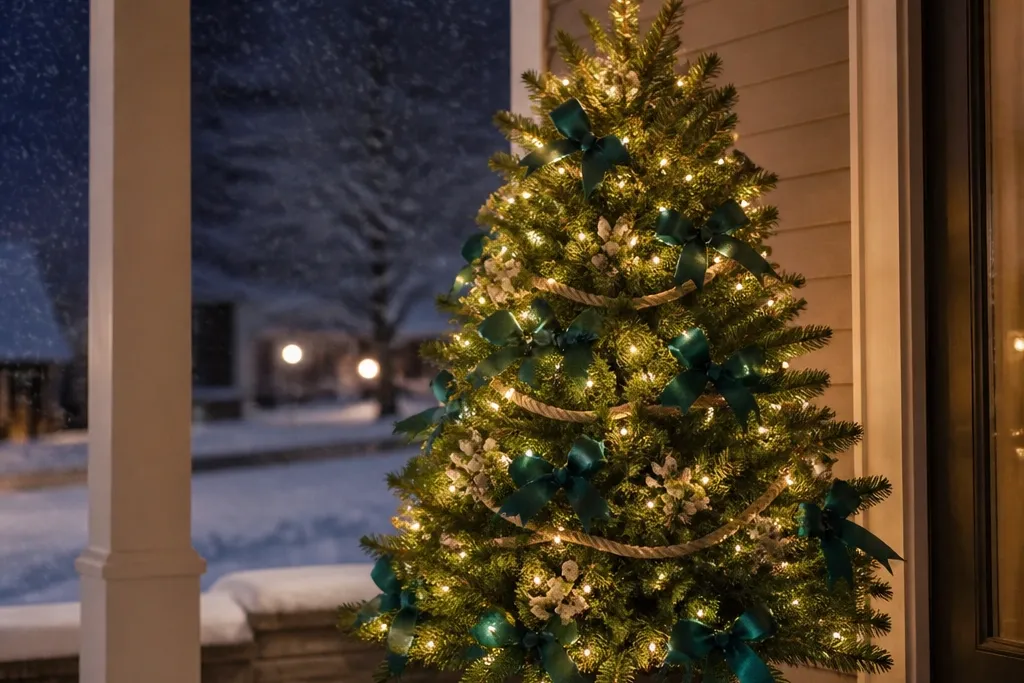
3. Teal satin ribbon loops in two sizes
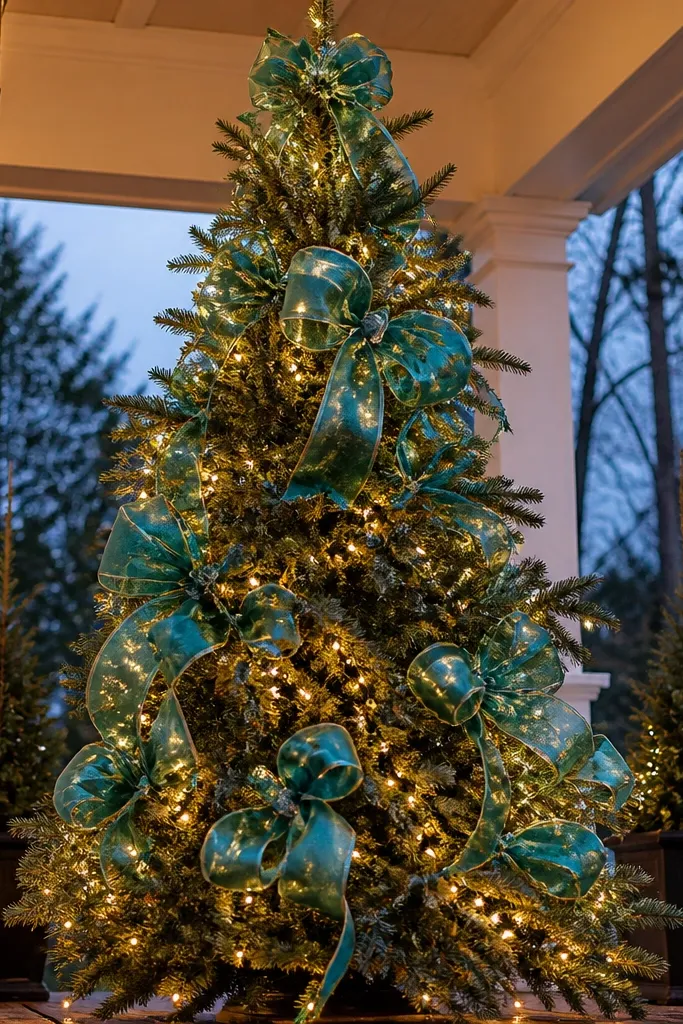
Two-size ribbon loops create a styled look without complicated bows. Teal satin reads modern against evergreen and makes the tree feel designed rather than “store-bought generic.” Use loops that are slightly translucent in daylight so they catch light when the sun hits. The key is repetition: you want the teal showing in every section of the tree. For beginners, ribbon is forgiving because you can adjust placement by simply moving loops.
Step 1: Cut or pre-measure ribbon lengths. Use 12-18 inch loops for the top half and 18-24 inch loops for the lower half. Step 2: Attach each loop by tying the center to a branch with wire or zip-tie-friendly clips, letting the ribbon drape naturally. Step 3: Place loops in a vertical pattern — one loop per 6-8 inches of height on the front half of the tree, then mirror slightly on the sides.
Pro tipUse a thin wired ribbon edge if you want the loops to hold shape in wind.
Watch outDon’t mix teal with bright magenta ornaments — the color clash looks chaotic in outdoor daylight.
4. Cedar-tone rope garland around the tree trunk
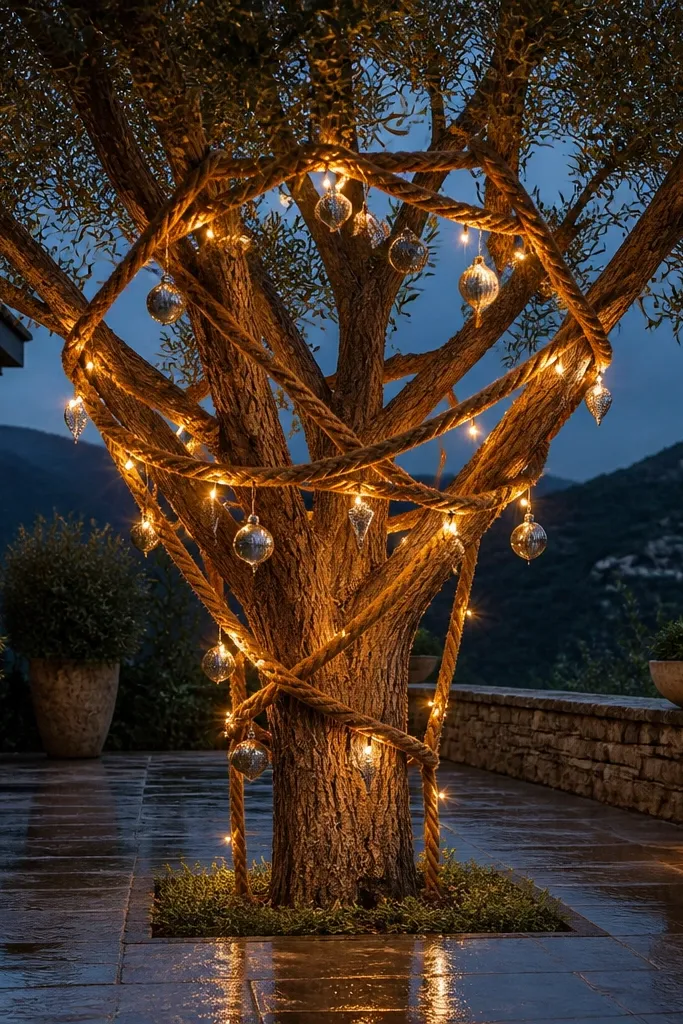
Rope garland gives you instant structure and a natural texture that looks expensive without being fussy. A cedar-tone (warm brown with a slight red undertone) pairs with warm white lights and any silver or natural ornament finishes. Wrap it around the trunk and lower branches so the tree has a strong “frame” even if you use fewer decorations. Rope also hides minor gaps because it fills space between branches. It’s a great choice for beginners who want a styled look without lots of small pieces.
Step 1: Start the garland low, wrapping clockwise around the trunk at about 2-4 inches above the ground, then secure every 10-12 inches with zip ties. Step 2: Spiral upward, keeping the rope spaced so you can still see needles between wraps. Step 3: Leave 2-3 sections slightly open on the front so lights and ornaments show through instead of getting buried.
If your tree sits in wind, add one extra tie point on the front side where movement is most visible.
Skip slippery synthetic rope — it slides and the wrap loosens fast outdoors.
5. Large matte champagne ornaments in a front-facing cluster
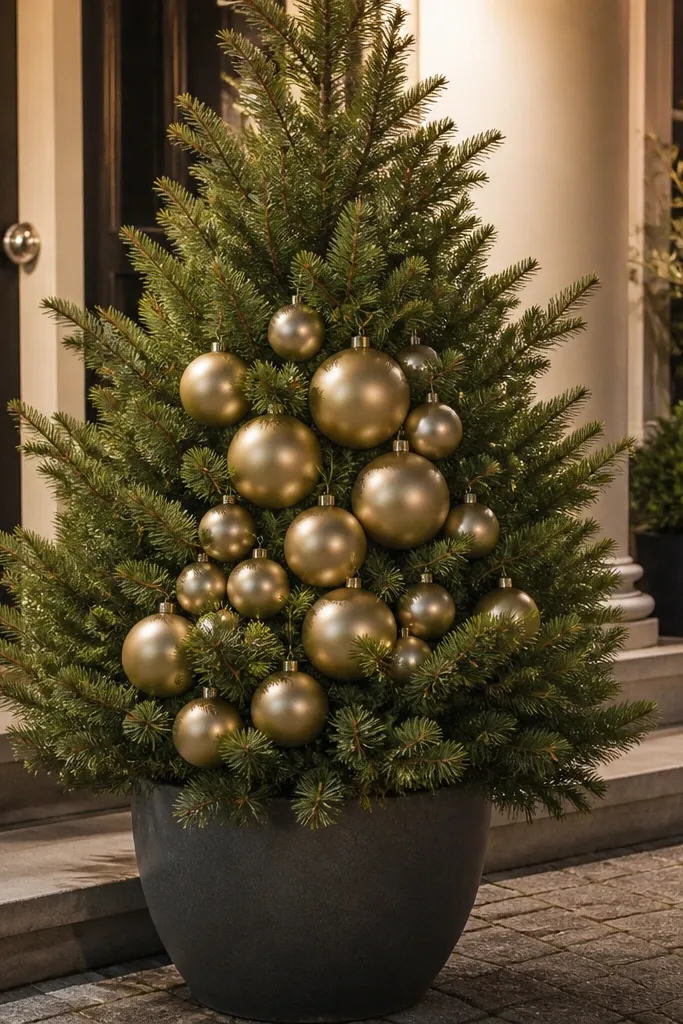
Big matte champagne ornaments look clean and upscale because they don’t reflect harsh porch lighting. Instead of spreading dozens of ornaments everywhere, make a front-facing cluster — it reads clearly from the street and looks intentional. Matte finishes also hide smudges and water spots better than shiny glass in real outdoor conditions. Place the largest ornaments at mid-height and smaller ones above and below them. This method gives you impact without the constant rebalancing that comes with scattering many tiny pieces.
Step 1: Choose 9-15 ornaments total. Use 4-6 large ornaments (3-4 inch) for the front center and the rest smaller (2-3 inch). Step 2: Hang by tying ornament hooks to branches with thin wire so they can’t swing. Step 3: Arrange in a triangle: 1 large at center, 2 slightly lower on either side, then fill gaps with the smaller set.
If ornaments keep turning sideways, add a second tie so they hang straight.
Don’t use ultra-shiny gold ornaments — they can look harsh and washed out in daylight.
6. Snow-dusted clear icicle strands with a staggered drop
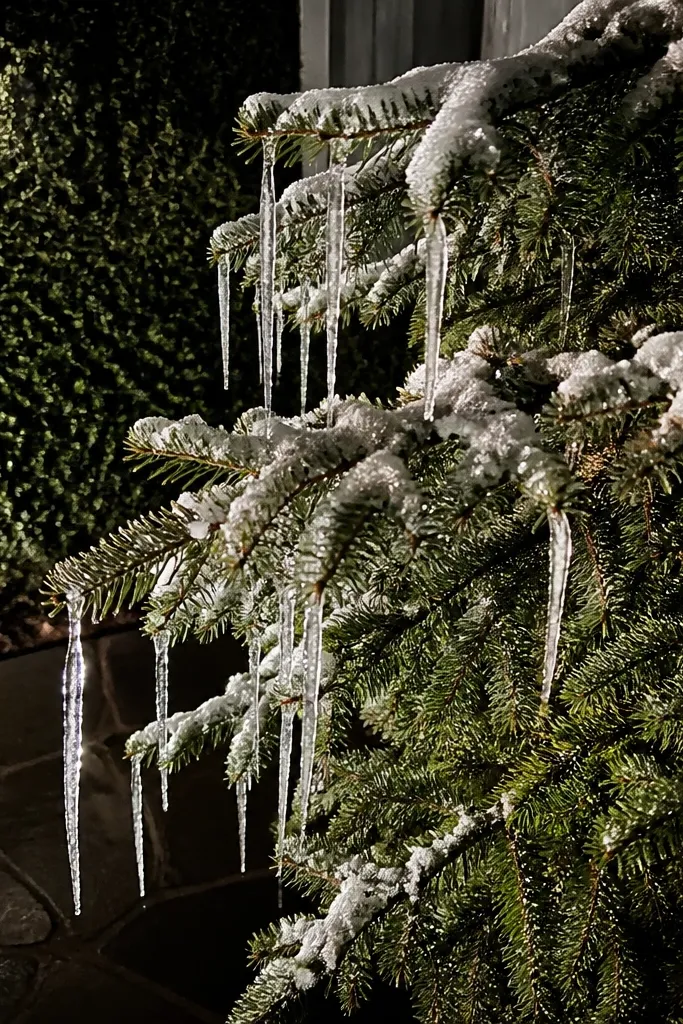
Icicle strands create that “just-right” winter effect and they photograph beautifully because they catch light in multiple directions. Choose snow-dusted icicle strands so the color reads white and soft, not transparent and empty. The staggered drop matters: if every icicle starts at the same height, it looks like a curtain. Staggering makes it look natural, like the tree is forming icicles as it freezes. It’s a strong option for beginners because you’re placing strands, not building complex designs.
Step 1: Pick 2-4 strands long enough to reach from mid-height to the lower third. Step 2: Attach using the built-in clips or tie points, staggering start points by 6-10 inches around the tree. Step 3: Step back and adjust so you see a few drops in the front without covering the entire tree.
Aim the longest drops toward the porch side so the effect shows from where people stand.
Avoid placing icicles too low — they can get buried under branches and look like random strings.
7. Mini lantern lights on branch hooks
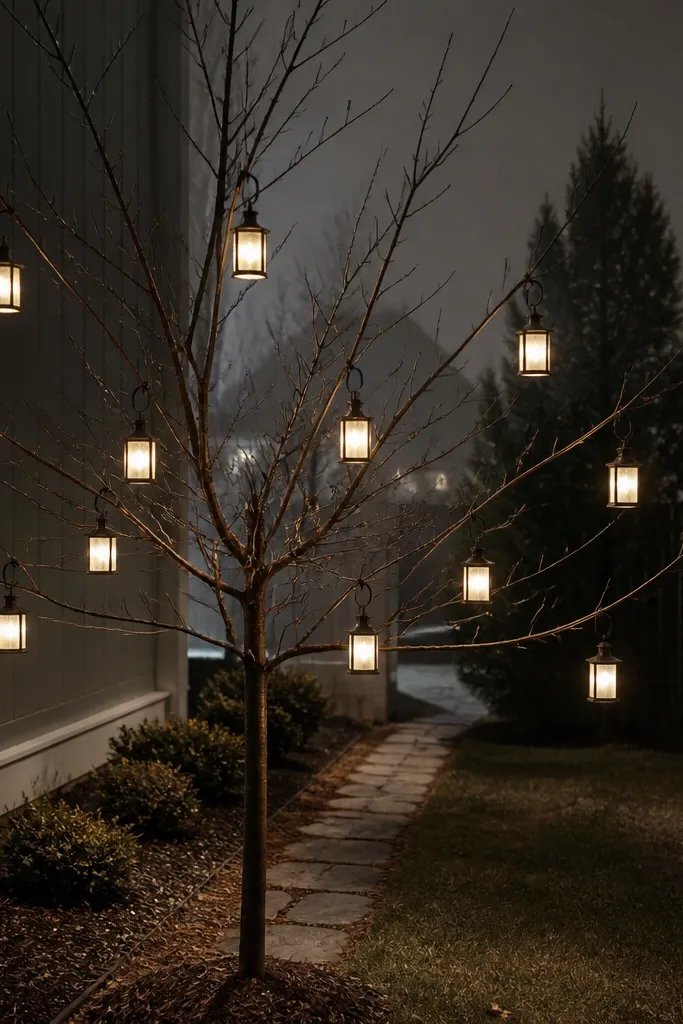
Mini lantern lights give you a cozy, cottage style that looks great on smaller outdoor trees and narrow yards. The light source is contained, so it doesn’t scatter everywhere like regular string lights. Choose lanterns with a warm white glow and opaque housings so the bulbs don’t look exposed. Put them at even height intervals — it creates a rhythm. This decoration is beginner-friendly because the lanterns act like “anchors” that organize the rest of your tree.
Step 1: Test battery or plug placement first so you don’t end up with cords crossing the front. Step 2: Clip or tie 8-14 lanterns onto branches at about chest height and above, spacing 6-10 inches apart. Step 3: Add one lantern at the top third centered to guide the eye upward.
Use lanterns in a single row on the front half if your tree is small — it stays readable.
Don’t mix lantern warm white with cool blue lights — the tree looks like two different displays.
8. Outdoor faux pine wreath rings as "halo" accents
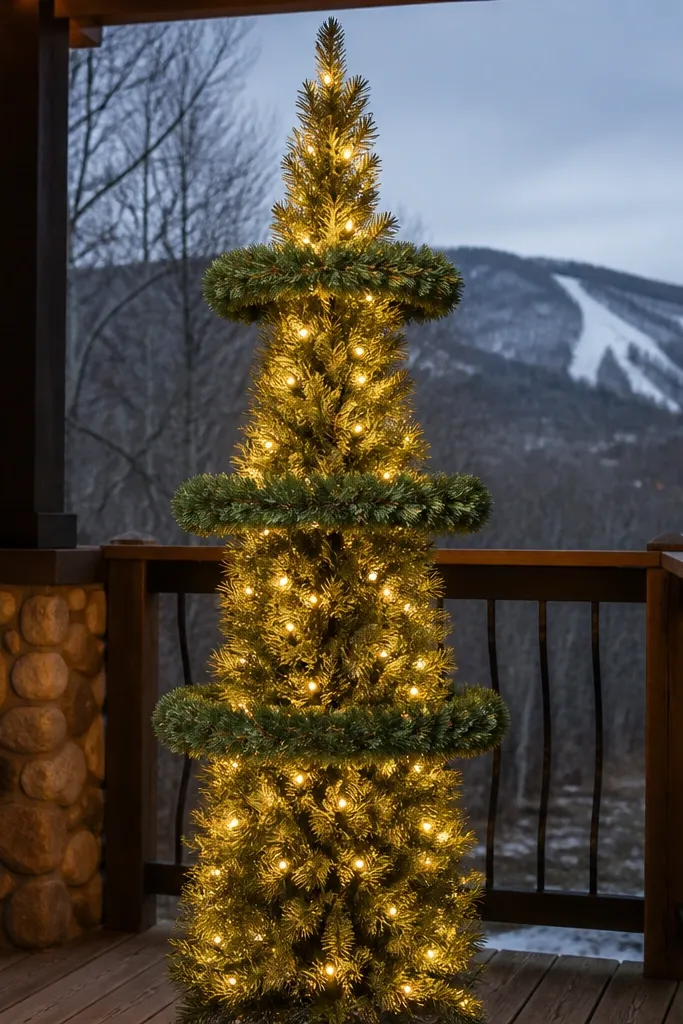
Wreath rings look like mini halos and they add shape even when your tree is narrow. They also create a strong photo focal point because the circular form reads clearly from a distance. Choose rings made for outdoor use with UV-resistant faux pine and weatherproof wire. Keep the rings bigger than you think — 10-14 inch diameter for most yard trees — so the circles show. This is a smart beginner option when you don’t want to fuss with delicate ornament placement.
Step 1: Hang 3-5 wreath rings: one near the top third, one at mid-height, and one or two toward the lower third. Step 2: Tie each ring with two points to prevent twisting — one on each side of the ring’s wire. Step 3: Add small spacing so the rings don’t overlap; aim for 4-8 inches of separation.
If you have a slanted tree, angle the rings to follow the slope so they look intentional, not crooked.
Avoid using indoor paper wreath rings — they collapse outdoors and look flat in photos.
9. Black and white buffalo plaid ribbon tails
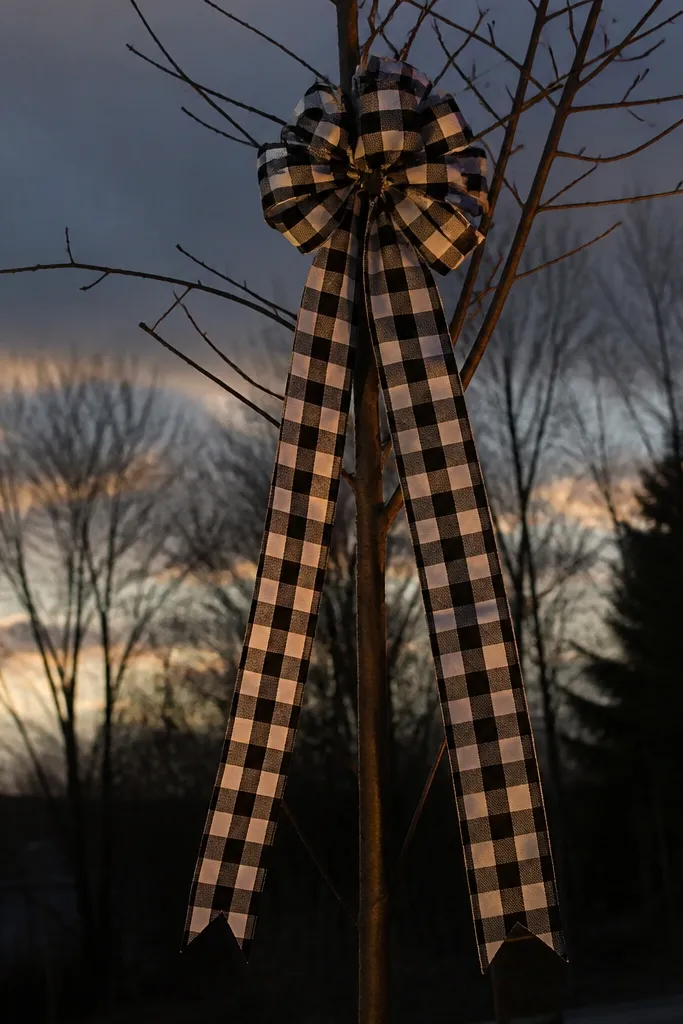
Buffalo plaid tails bring instant holiday character and they photograph well because the pattern stands out even when the tree is dark. Black and white also works with almost any lighting color. The trick is tailoring the tails: keep them longer in the lower third and shorter at the top so the tree doesn’t look like it’s drowning in fabric. Use outdoor-safe plaid ribbon with a wired edge for control. Beginners love this because tails are easy to place and correct — you can lift and re-tie in seconds.
Step 1: Cut ribbon into tail lengths of 18-24 inches for the bottom and 12-16 inches for the top. Step 2: Attach by tying the center to branches, then spread the two ends so they hang outward slightly. Step 3: Place 10-14 tails around the front half, then mirror fewer tails on the sides for balance.
Fold ribbon ends into a slight angle cut so the ends look deliberate, not frayed.
Skip thin craft ribbon — it collapses in wind and the plaid looks wrinkled.
10. Glowing star topper with a simple garland frame
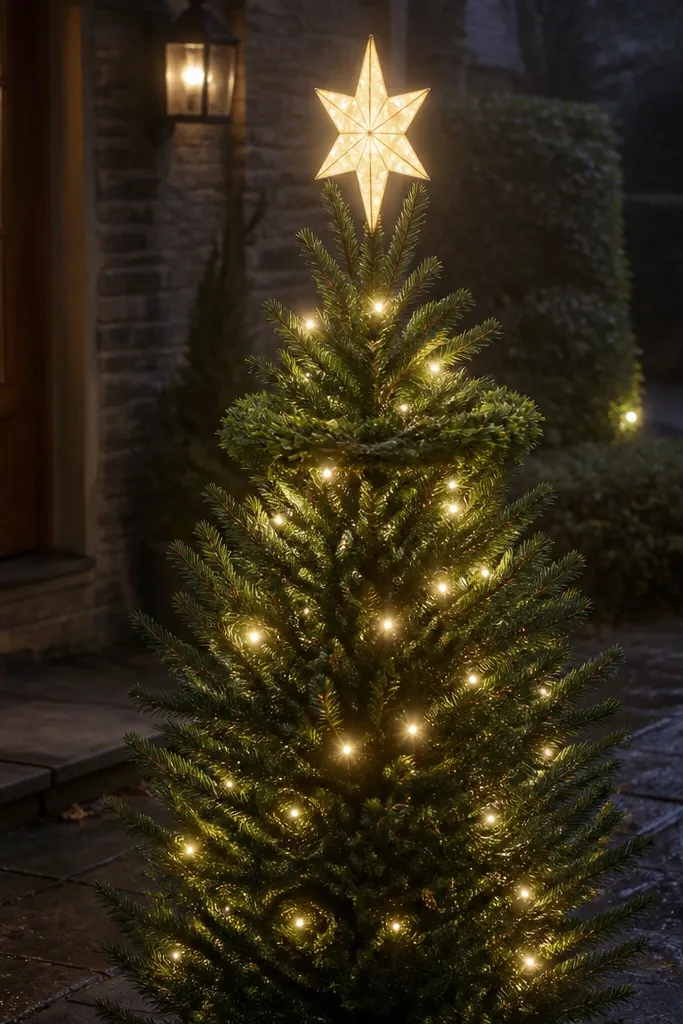
A star topper is the fastest way to make your tree look finished, and beginners can keep it clean with a garland frame. Pick a star with a warm white glow and a stable base so it doesn’t wobble. Add a short garland ring below the star — about 10-14 inches wide — so the top feels anchored. This prevents the common problem where the topper looks stuck on top of a tree that still reads unfinished. The garland frame also helps hide any light wiring at the top.
Step 1: Mount the topper first by wrapping its base wire around the top branches or using the included stake. Step 2: Create a small ring of garland or ribbon below it using zip ties, then attach 4-6 small picks to fill gaps. Step 3: Finally, tuck a few light strands into the top ring so the glow concentrates near the star.
Pro tipIf your tree is tall, make the topper slightly lower than you think — the star reads better from street level.
Watch outAvoid lightweight toppers that spin — they look messy on camera when wind kicks in.
11. Red velvet bow clusters on the lower third
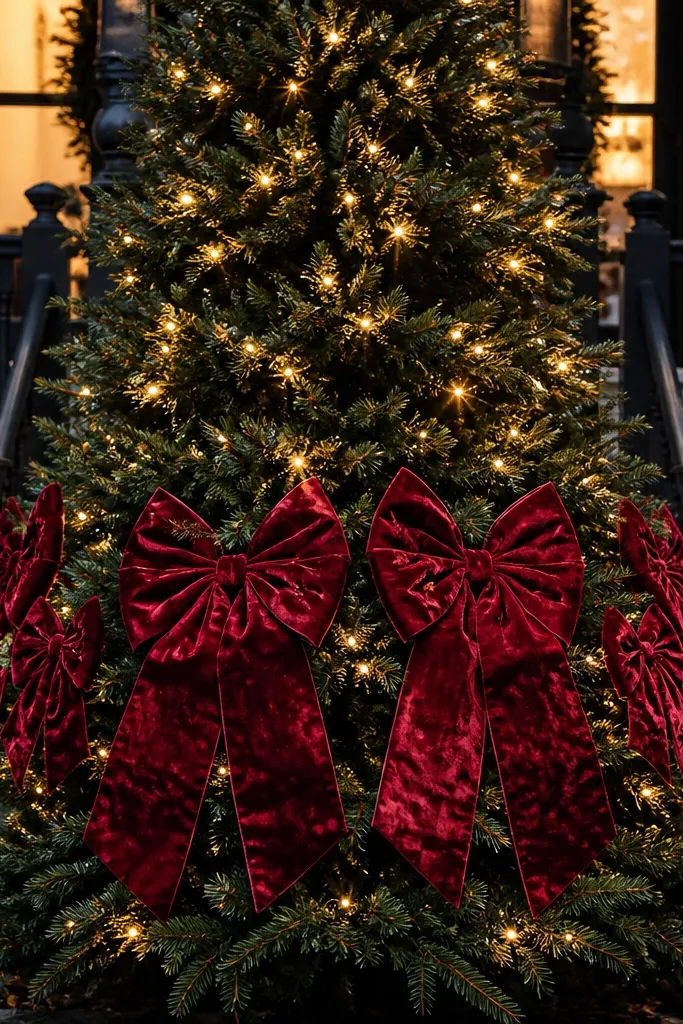
Velvet bows add depth and color in a way shiny decorations don’t. Put them in clusters on the lower third so the tree looks grounded and full, not top-heavy. Red velvet also pairs perfectly with warm white lights and looks great against dark porch railings. Use two bow sizes: larger bows at the front center and smaller bows on the sides. This is a beginner-friendly approach because bows hide branch irregularities and make sparse areas look styled.
Step 1: Choose 6-10 bows total, with 3-4 large bows (8-10 inch) and the rest smaller (5-7 inch). Step 2: Attach using the wire loop on each bow, then add a second tie point with floral wire so the bow doesn’t twist. Step 3: Arrange in a fan shape: 1 large bow center, 2 slightly lower on either side, then fill around them with smaller bows.
Pro tipPress the bow folds with your fingers so the velvet holds shape after you attach it.
Watch outDon’t place velvet bows too high — they flatten and disappear into upper branches in wind.
12. Silver pine cone picks with a light dusting effect
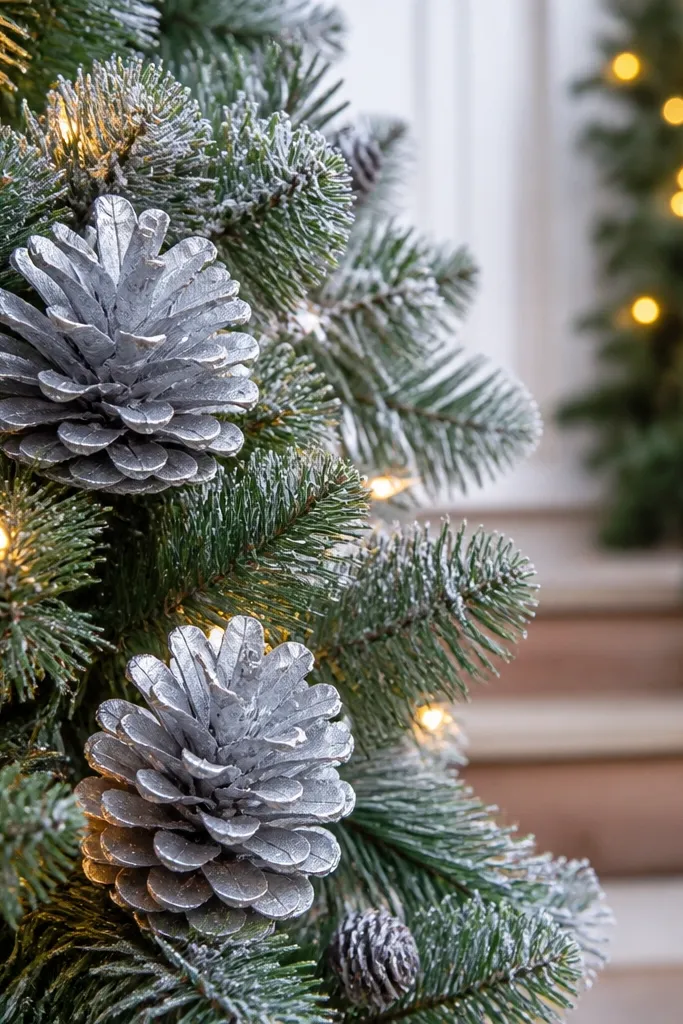
Silver pine cone picks give you natural texture plus a wintery sparkle without needing delicate glass ornaments. The matte silvery finish reads clean in daylight and catches light at night without looking glittery and messy. Use them to fill in the “in-between” spaces where lights and ribbon don’t cover. This is especially helpful if your tree is artificial and the branch density varies. Beginners can treat pine cones like a pattern: place in groups, step back, then add where the tree looks thin.
Step 1: Start with 12-18 pine cone picks depending on tree size, then group them in sets of 3-4. Step 2: Push the pick stems into the branches and secure the base with floral wire if they loosen. Step 3: Focus density on the mid-height and lower third, leaving the top slightly lighter so the star or topper stands out.
Pro tipMix pine cone picks with one other texture like berries or icicles so the tree doesn’t look monochrome.
Watch outAvoid using bright chrome cones — they look harsh outdoors and show water spots fast.
13. Projector-style star glow with minimal ornamenting
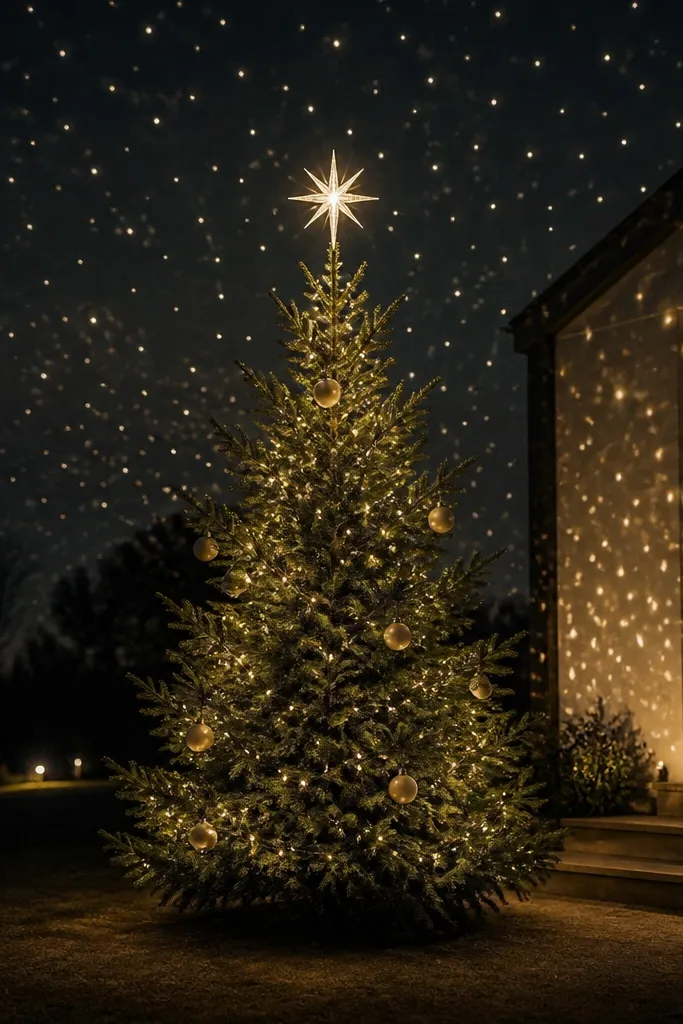
If you want the tree to look magical without hanging lots of decorations, a star projector is the easiest visual trick. It creates a sky of light dots behind the tree, making even a simple ornament plan look styled. Use warm white or soft amber projection so it matches typical holiday lighting and doesn’t look like a cold nightclub. Then keep ornamenting minimal: 6-10 ornaments that repeat in color and finish. This solves the beginner problem where too many decorations make the tree look busy rather than beautiful.
Step 1: Place the projector 6-10 feet from the tree, aimed slightly upward so the dots land behind branches. Step 2: Add 6-10 repeat ornaments in one finish (champagne matte or silver matte) and hang them at mid-height. Step 3: Run the projector and lights on the same timer so the display feels coordinated.
Pro tipUse a single color family for ornaments when using projection — it keeps the tree from looking crowded.
Watch outDon’t point the projector directly at the camera line — it washes out the ornaments and makes the display look flat.
14. Pastel ombre light string with front sweep wiring
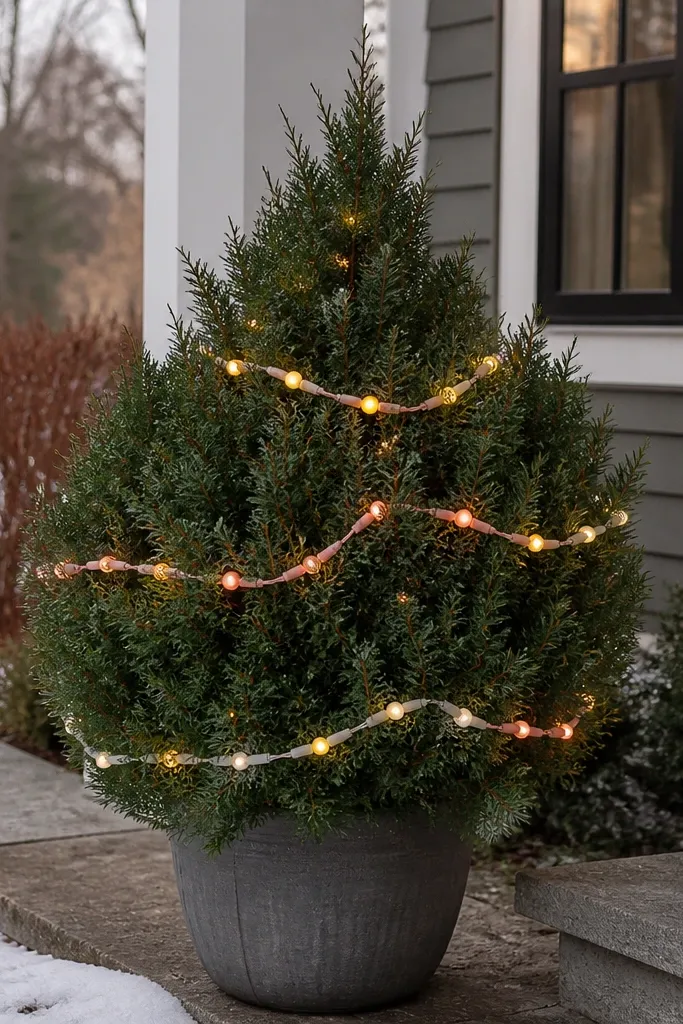
Pastel ombre lights are a beginner-friendly way to add color without fighting multiple ornament shades. The fade effect gives movement, and it looks especially good on smaller trees because the front sweep becomes the focal point. Choose a warm pastel blend (soft pink, peach, and light cream) rather than neon colors. The look is photogenic because the color shift is visible even when the tree is partially lit. You’ll still need structure though — keep ribbon or garland minimal so the lights stay the star.
Step 1: Start at the trunk and do a front sweep: wire the first pass across the front from left to right, then secure every 12 inches. Step 2: Add a second sweep slightly higher, overlapping just enough to avoid gaps. Step 3: Add 1-2 small ribbon loops in a matching cream tone to tie the colors together.
Pro tipIf your tree has uneven branches, adjust the sweep paths so the brighter end lands on the densest side.
Watch outAvoid pairing pastel lights with bold red ornaments — it makes the palette feel split.
15. Evergreen garland swag with oversized white bows
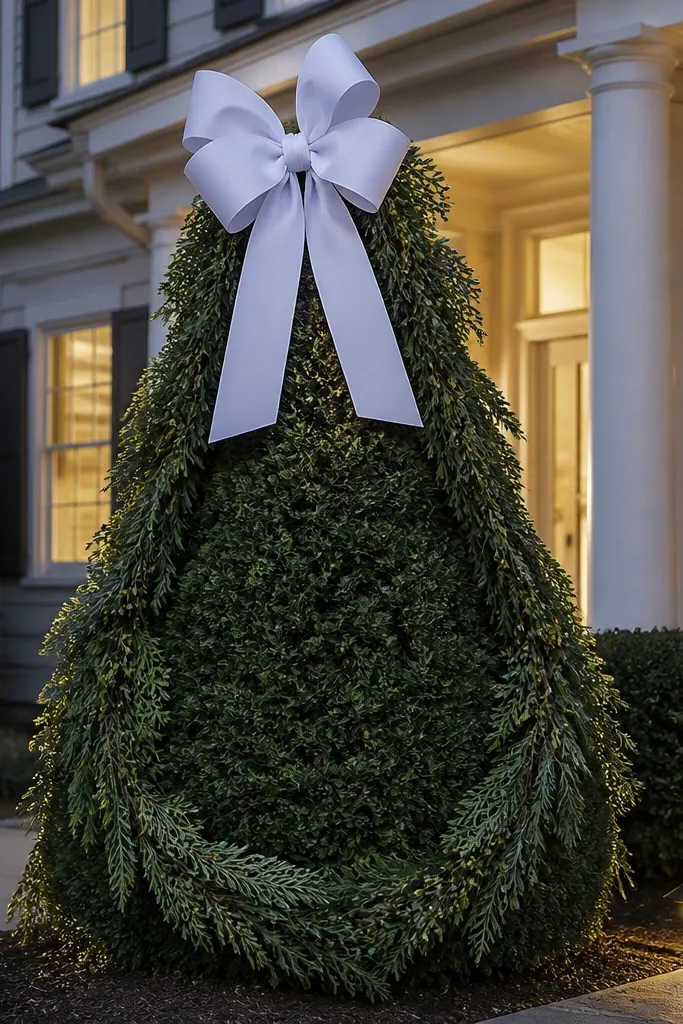
Garland swags make the tree look full fast. Oversized white bows on top of evergreen garland create a high-contrast holiday look that reads clearly from a distance. This is a great option when your tree has thin outer branches because the garland fills the silhouette. Choose outdoor garland with a realistic needle texture and a flexible base so it wraps without gaps. Then attach 3-4 oversized bows (10-14 inch) spaced evenly — front center, upper front, and lower front.
Step 1: Wrap garland around the tree in two horizontal swags: one at mid-height and one near the lower third, securing with zip ties. Step 2: Attach bows by tying the center to the garland, not the branch, so they don’t droop. Step 3: Add 8-10 warm white micro lights only where the garland is visible so the garland edges glow.
Pro tipUse a slightly off-white bow (not pure gray-white) so it looks warm under porch lighting.
Watch outDon’t use stiff ribbon bows on garland — they flare awkwardly and look cheap in wind.