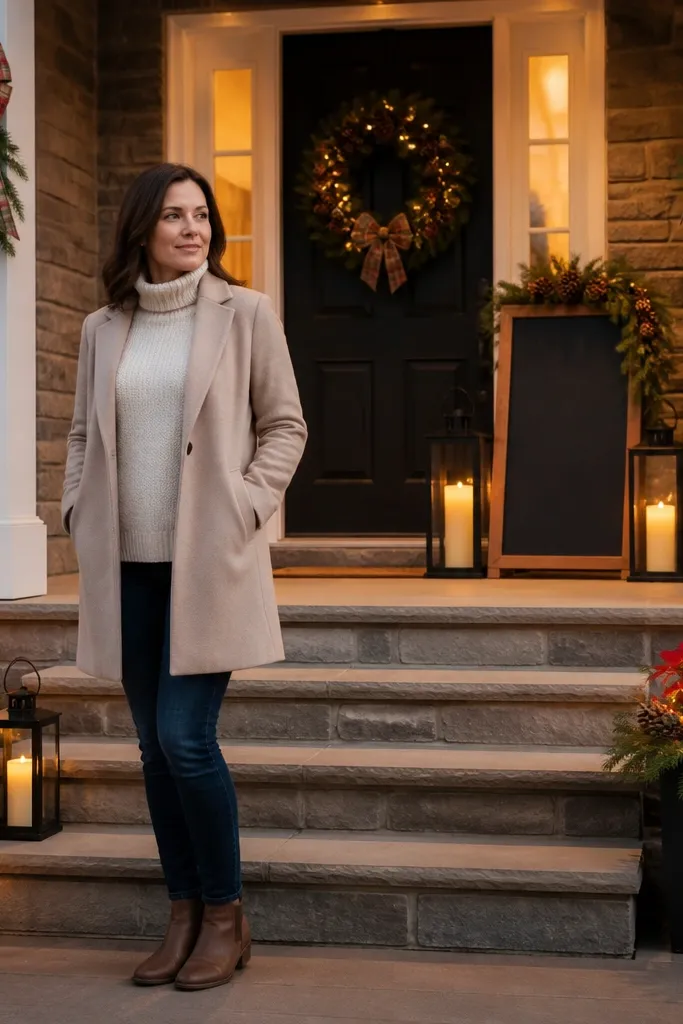
1. Birch-log lantern row with warm white glow
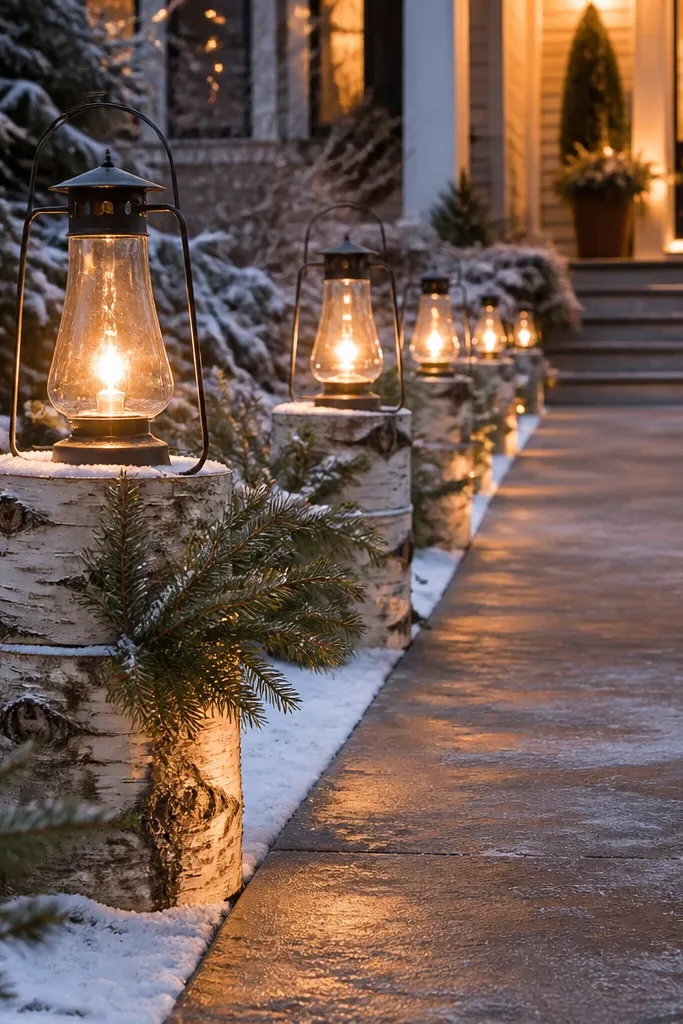
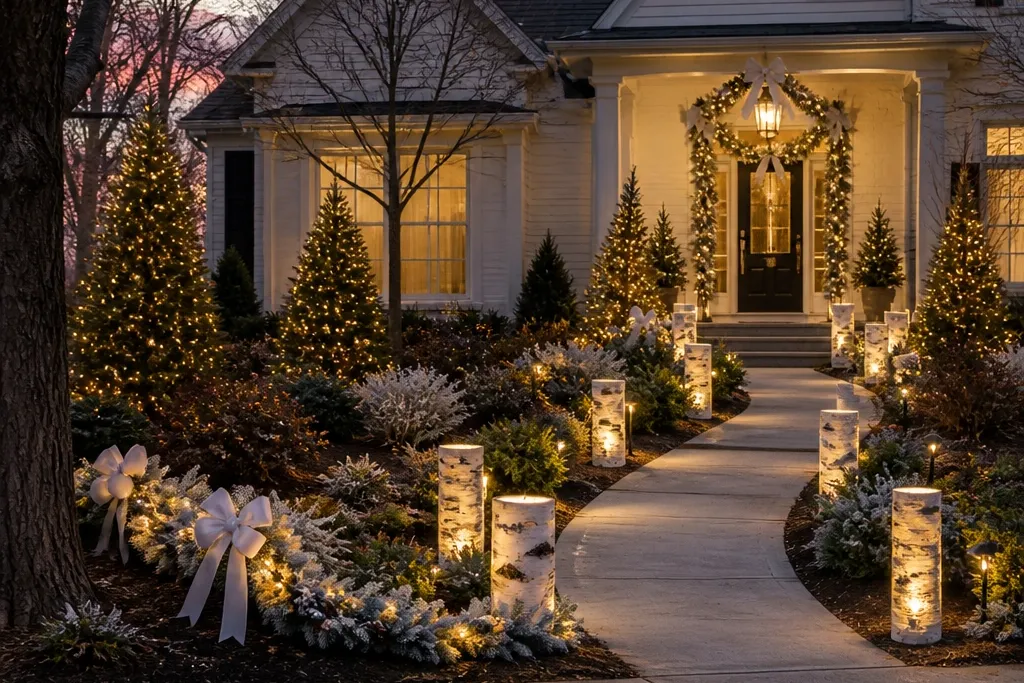
This look is cozy, photo-friendly, and hard to mess up because it’s built on repeated shapes. Birch-log style bases give you natural texture, then the warm white lantern glow adds a “real winter night” feel. Put the row where your eye travels — usually the walkway edge or the step landing — so the lights lead the viewer toward the door. Choose lanterns with glass sides (or frosted acrylic) so the light spreads softly instead of creating harsh points. It solves the common problem of yard decorations looking bright up close but dull from the street.
Start by setting three to five lantern/log bases in a straight line parallel to the walkway, spacing about 24-30 in apart. Then anchor them with outdoor-safe faux birch logs or a birch-pattern planter cover so the bases look intentional even when lights are off. Finally, plug them into a timer and aim the lanterns so the light throws forward, not straight down; warm white LED gives the most flattering glow on snow-like accents.
Pro tipIf your walkway is uneven, use a thin layer of gravel under each base so the tops line up — photos read “clean” when the lantern heights match.
Watch outDon’t mix cool white and warm white in the same row; it makes the scene look unfinished.
2. Snow-drift entry with white flocked garland and oversized bows
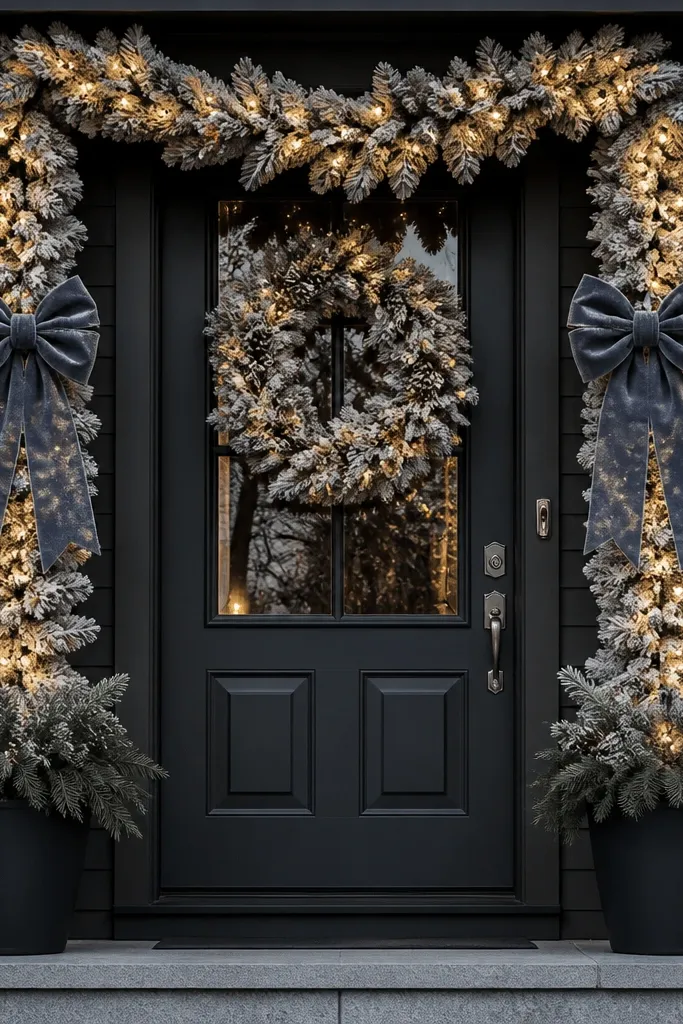
This is the front-door look that always photographs well because it frames the entry like a picture mat. White flocked garland creates depth and soft contrast against siding, while oversized bows give you a clear focal shape at eye level. Add small warm white lights inside the garland so the glow sits behind the texture, not on top of it. This setup is great if your porch is already busy with furniture or planters — the garland and bow bring order without needing more clutter. It also fixes the common “door looks empty” problem.
Start by measuring the porch width and plan one continuous garland run across the front railing or posts, plus one bow centered over the door area. Use outdoor-rated flocked garland (wire core helps you shape it) and hang it with zip ties or heavy-duty hooks so it doesn’t sag. Then add a light strand tucked into the garland every 6-8 in, and place two bow picks at roughly 1/3 and 2/3 of the garland length on the top line.
Choose bows with wired loops so you can angle the tails outward; flat bows look cheap in yard photos.
Avoid thin, flimsy garland that collapses — it reads flat and loses the snow-drift effect.
3. Giant candy-cane pillars flanking the door
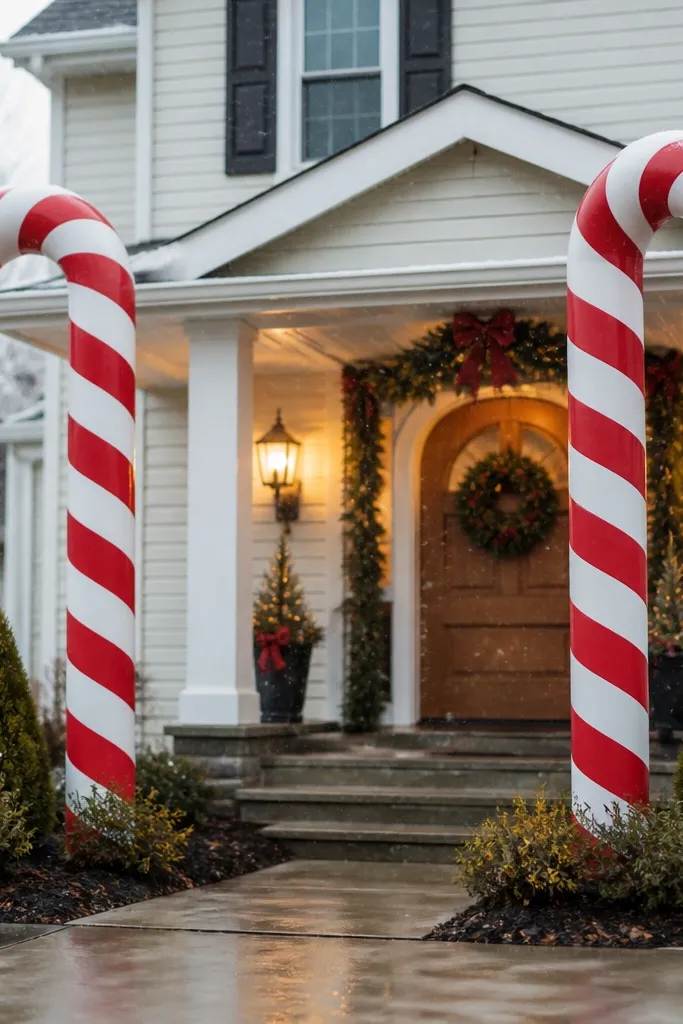
Candy canes look playful, but the reason this works is scale. Oversized striped poles create vertical stripes that pull the eye up, and they frame the door instantly. The look is photogenic from the street because stripes create strong contrast against siding and landscaping. Choose poles with a matte finish so the red and white don’t look like glossy plastic. This solves the issue where small candy cane stakes get swallowed by shrubs and end up looking random.
Start by placing one pole on each side of the door or porch steps, keeping the distance from the door about 18-30 in so they don’t block the entry path. Then secure bases with landscape spikes or weighted planters so they don’t tip in wind. Finally, wrap or integrate warm white mini LED lights so the glow follows the stripe line, not a single bulb cluster at the top.
Pro tipIf your door is dark, go heavier on the white — a brighter white stripe makes the red pop in photos.
Watch outDon’t place candy canes too close to shrubs; the stripes get visually interrupted and the framing effect disappears.
4. Evergreen wreath wall with acrylic icicle fringe
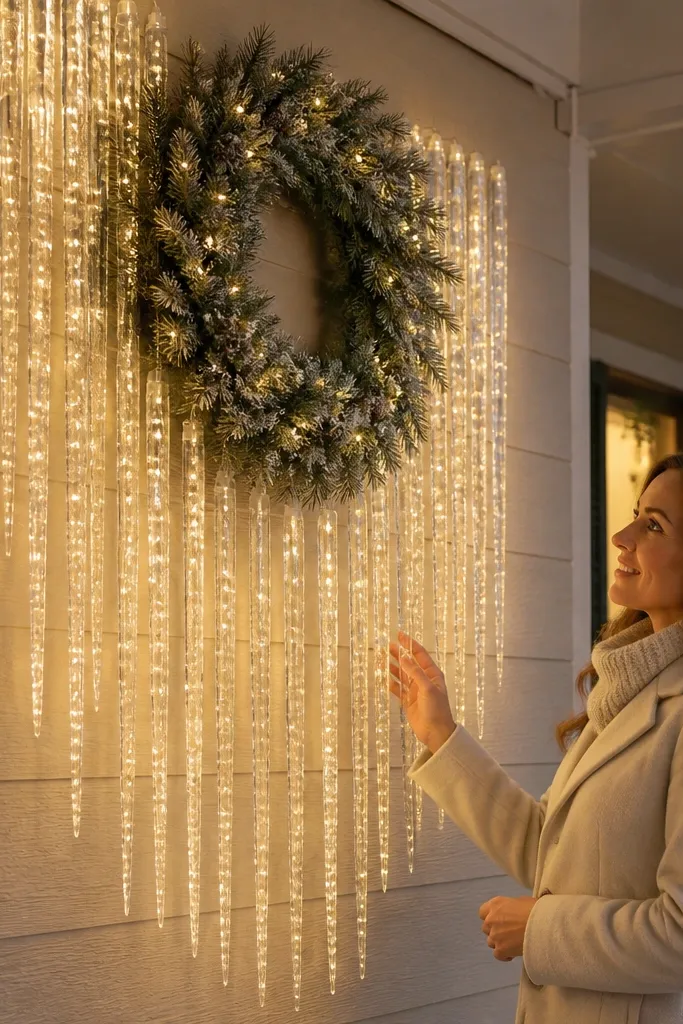
This setup turns a boring wall section into a winter scene without taking over the whole yard. Evergreen wreaths give you a classic circular anchor, and acrylic icicle fringe adds a clean, photogenic sparkle when lights hit it. The trick is to keep the icicles vertical and consistent so they look like one curtain, not scattered pieces. It’s best for homes with a window bay, side window, or a blank wall beside the door. This solves the problem of “I hung one wreath and it looks small.”
Start by choosing two wreath sizes that match the space: for most porches, aim for 24-30 in wide wreaths. Hang them at about 6-8 ft height so they sit above snow piles and don’t get blocked by railing clutter. Then add icicle fringe strips behind or under the wreaths, trimming them so they hang 10-18 in below the wreath edge, and connect to an outdoor light strand using clips.
Pro tipUse clear icicles with warm white lighting; clear acrylic looks most believable when the light isn’t icy blue.
Watch outAvoid mixing multiple icicle styles; different lengths make the wall look messy.
5. Chalkboard-style welcome sign with glowing lanterns and greenery
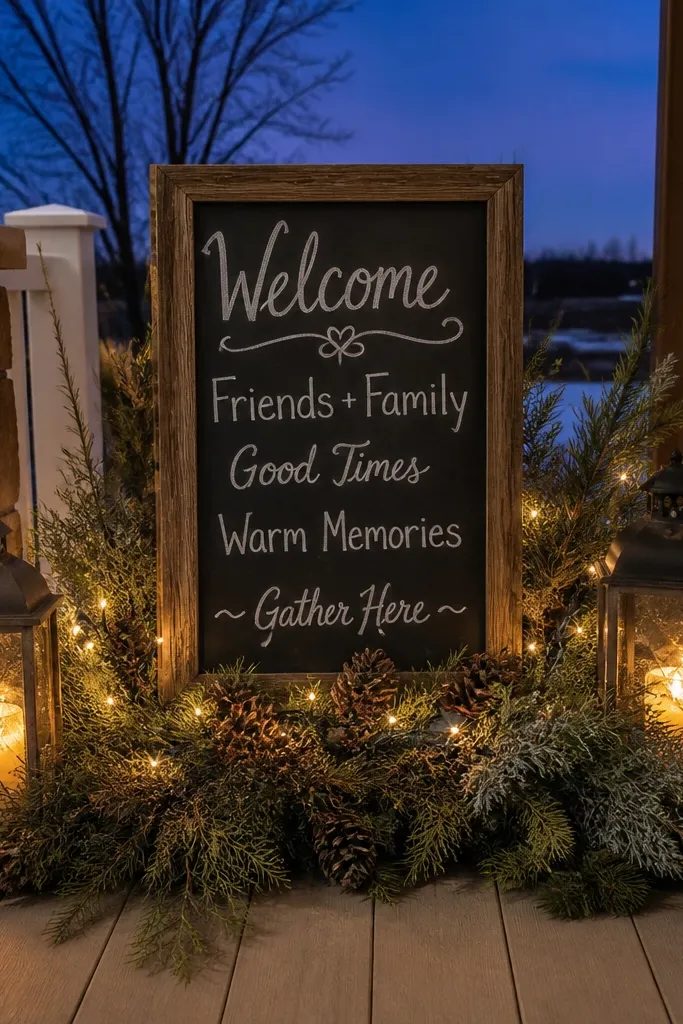
A dark welcome sign gives you instant contrast and reads clearly from the street, especially at dusk. Pair it with warm lanterns and evergreen greenery so it feels grounded, not like a floating sign. This look is great for homes with a porch step landing where you can stage a small “scene” in one spot. The greenery adds texture, and the lantern glow gives depth around the sign edges. It solves the common problem of bright signs looking washed out in low light.
Start by placing the sign on a stable step or low bench, then flank it with two lanterns spaced 12-18 in from the sign sides. Use real-feel evergreen picks (pine or cedar) and weave them into a small base ring or garland so the sign area looks full. Finally, tuck warm white micro LEDs into the greenery and set the sign lights to the same warm temperature for a consistent look.
Mount the welcome sign slightly higher than eye level for you; photos from the street look better when the sign sits in the upper third of the frame.
Skip multi-color lights on the sign area; one color family looks cleaner.
6. Giant plaid bow swag on porch columns
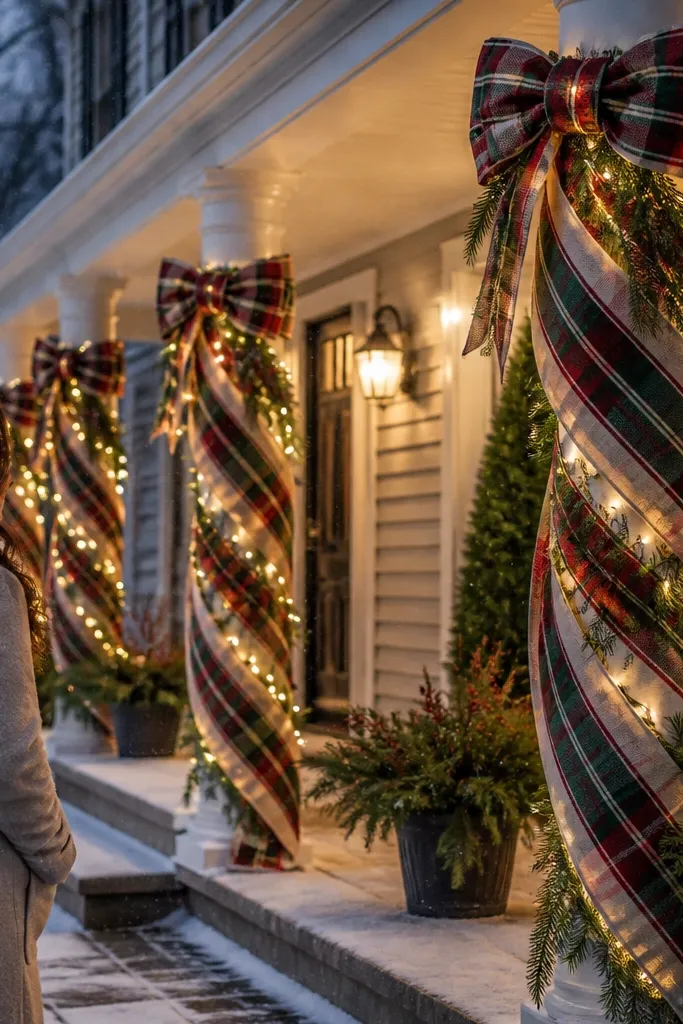
Plaid bows look great because they add pattern without needing lots of separate ornaments. When you swag them over porch columns, you create a strong diagonal drape that reads well from street distance. Pair plaid with simple white lights and evergreen stems so the pattern becomes the hero. This is the move for homes with tall columns or a porch roofline where you want height but don’t want a full inflatable setup. It solves the “porch feels tall but empty” problem.
Start by choosing two plaid bow swag sets or making one long swag with wired ribbon; aim for 24-30 in wide bows. Attach the swag to the top of each column with zip ties or outdoor-rated hooks, then let the tails fall to about the height of the porch rail. Finally, add a single warm or cool white light strand along the evergreen stems you tuck into the swag, and keep ornament count low.
Pro tipUse wired ribbon so you can angle the loops; straight ribbon looks limp from far away.
Watch outDon’t hang plaid bows too low; they get blocked by planters and stop reading as a column feature.
7. Black lanterns with frosted LED candles and pine garland
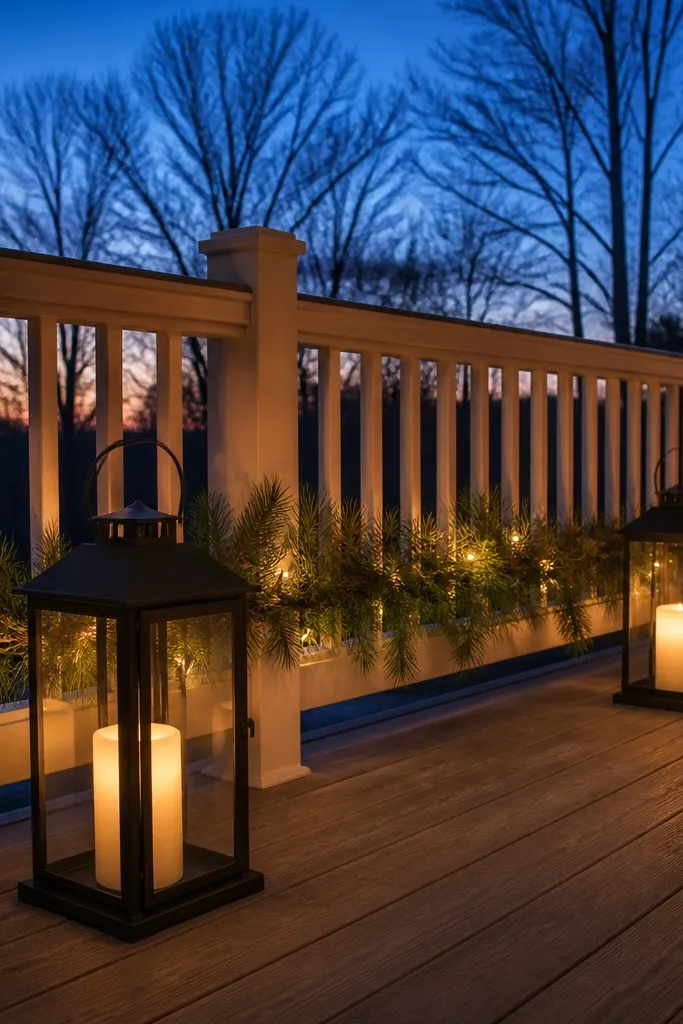
If you want a modern, photo-clean look, black lanterns with frosted LED candles are the best anchor. The black hardware frames the scene, and the frosted candle tops look soft instead of pointy. Add a thin pine garland along the railing so the lanterns don’t feel dropped into empty space. This works especially well on gray, tan, or white siding where you want contrast without loud colors. It solves the issue of traditional red-green decor looking too busy on minimalist houses.
Start by placing two black lanterns at the corners of the porch railing or on either side of the door, keeping about 24 in between them. Then run a narrow garland strip between them and tuck pine picks behind the lantern bases so the light source looks integrated. Finally, use a warm white LED candle set (frosted) and a timer; keep the garland lights to one strand so brightness stays controlled.
Pro tipChoose lanterns with doors or vents that diffuse light; sharp LED beams make the scene look harsh in photos.
Watch outAvoid mixing matte black lanterns with shiny chrome decor in the same area.
8. Outdoor light tunnel on the front archway
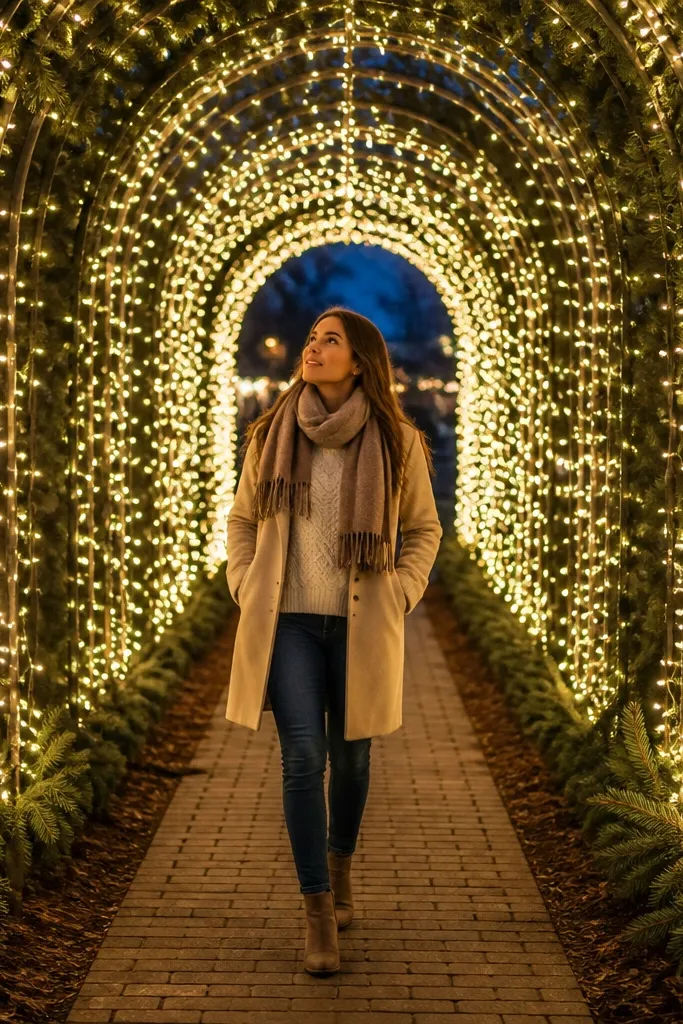
A light tunnel turns your entry into a destination. Even if your yard is small, the archway creates depth and makes the front look bigger in pictures. Wrap the arch with warm white micro lights and add low evergreen garland along the base so the tunnel doesn’t float. This is the best pick for narrow walkways where you can’t spread decorations across a lawn. It solves the “everything is flat” look caused by light strings that only hang vertically.
Start by wrapping the arch frame in warm white micro lights, keeping spacing tight enough that you don’t see gaps (about 2-4 in between light segments). Then add a garland or pine stems under the arch at railing height so the tunnel has a bottom edge. Finally, plug into a controller with a steady or slow fade mode and check the pattern from the street before securing the last ties.
Pro tipUse clear hooks or zip tie points at the arch edges so the lights stay symmetrical — asymmetry reads messy in photos.
Watch outDon’t use big bulb holiday strings for the tunnel; they look chunky and create uneven brightness.
9. Snowy reindeer duo with red lantern accents
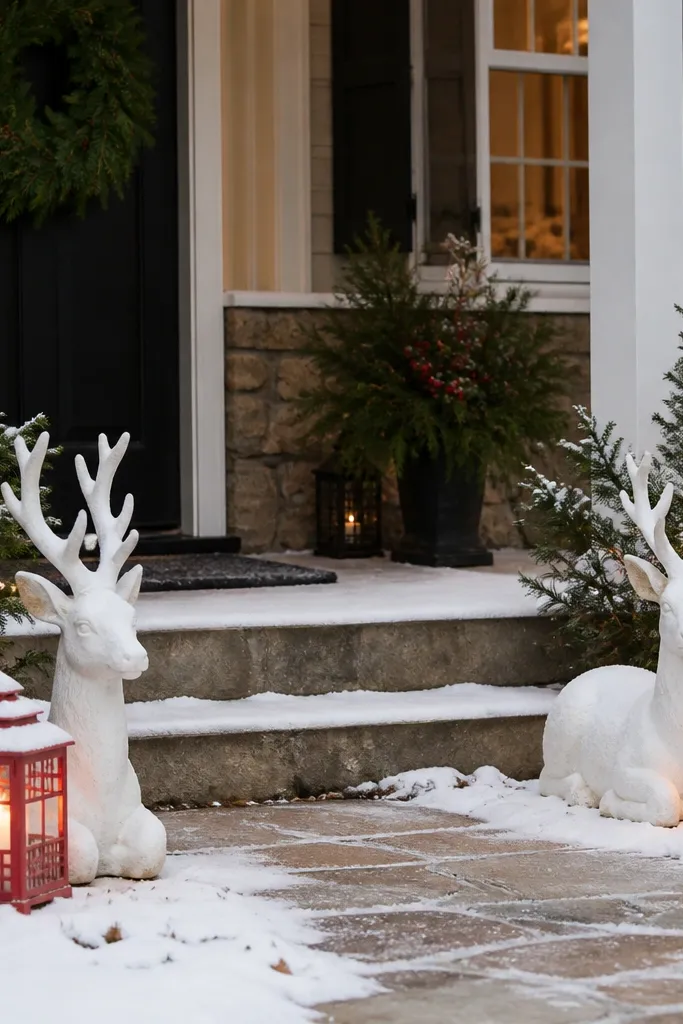
Reindeer are a yard classic, but the photogenic version is the snowy, white finish with controlled red accents. White reindeer figures read clean against greenery and siding, and the red lanterns bring warmth without turning the scene into a carnival. Place them where they’re seen side-by-side — steps, porch corners, or a lawn center line. This setup is great when you want a recognizable theme but still want the front garden to look tidy. It solves the “theme characters look random” problem by anchoring them with lantern color spots.
Start by placing two reindeer figures about 4-6 ft apart, with the heads angled slightly toward the door. Add two red lanterns at the outside edges of the reindeer group, roughly 18-24 in from each outer figure. Finally, keep the rest of the yard lighting warm and steady; add small pine picks around the base so the figures look planted, not dropped.
Pro tipAngle the reindeer so the antlers frame the porch door line; it makes the scene feel composed.
Watch outAvoid adding lots of extra animal figures; two is enough for a clean photo.
10. Giant LED poinsettia planters at the front corners
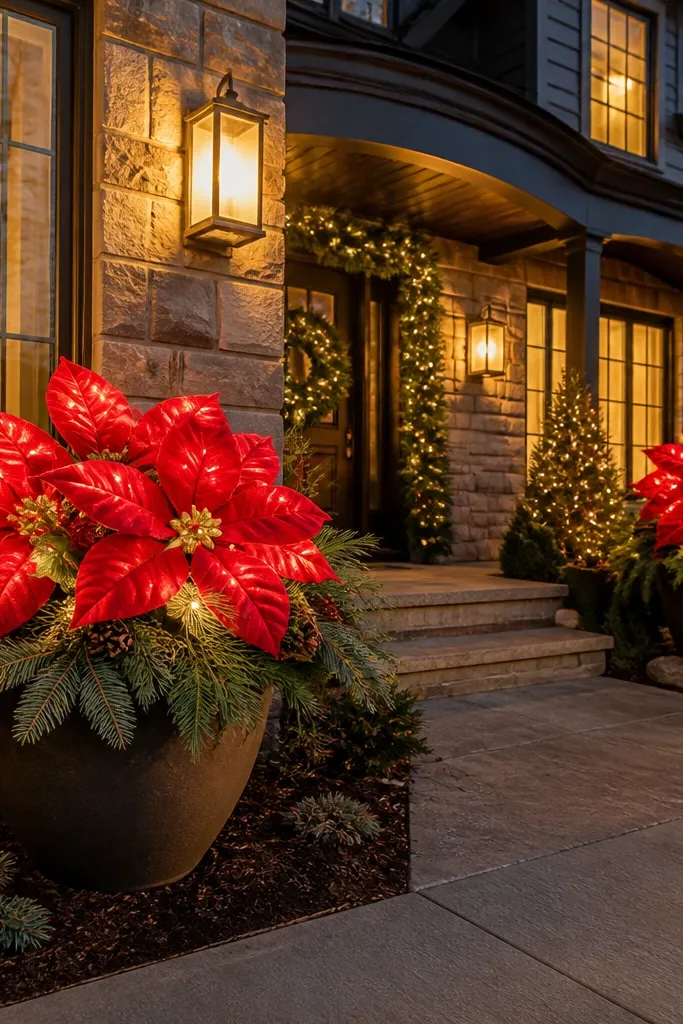
This is a “high impact, low clutter” move. Oversized poinsettia planters create big color blocks that read from the street, and LED bulbs inside the leaves add a soft glow rather than harsh points. Put them on the front corners to frame the house face and guide the eye toward the door. If your yard has lots of shrubs, planters give you a clean shape that doesn’t blend into leaves. It solves the problem of decorations getting swallowed by landscaping.
Start by choosing two planters that match each other in size and finish, then place them symmetrically at the front corners within 2-4 ft of the porch or walkway edge. Then fill planters with faux evergreen or pine base so the LED poinsettia looks rooted. Finally, connect the LED poinsettia lights to an outdoor timer and keep the lighting temperature warm white for the best color on red leaves.
Pro tipTurn the planters slightly inward toward the doorway; it makes the framing feel intentional in photos.
Watch outDon’t place poinsettias directly on dark mulch without a base layer — the glow looks dim.
11. Icicle curtain on the porch roofline with cable discipline
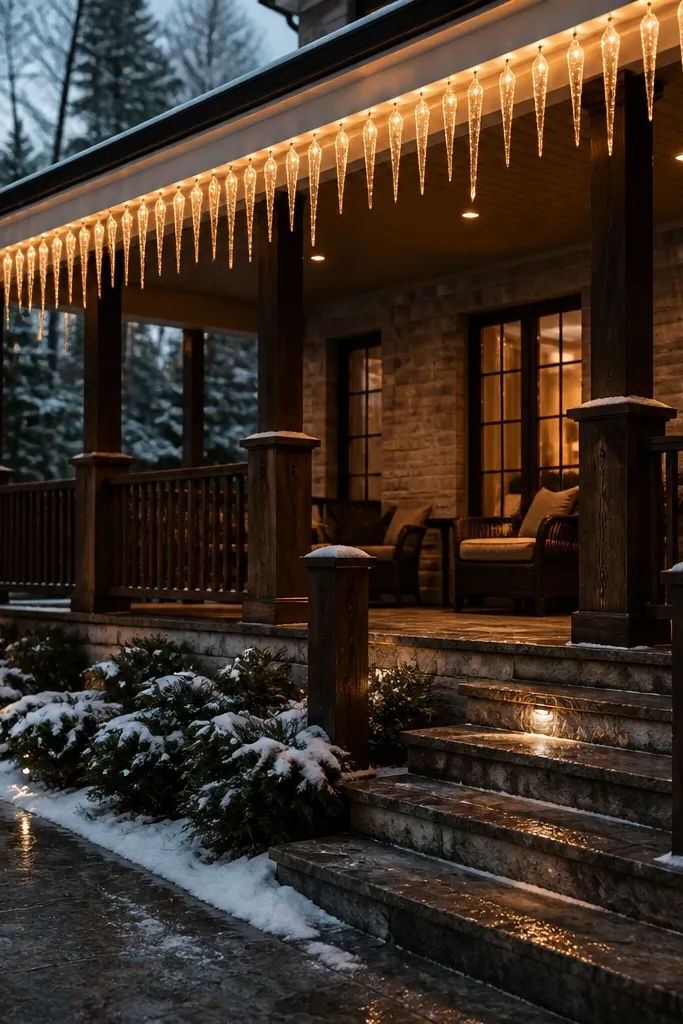
Icicle curtains look like real winter when the drop lengths are consistent and the cable routing is neat. This setup is all about the roofline: it creates movement and sparkle even when you’re not looking directly at the figures. Use a curtain-style icicle set so the strands hang evenly; the result is photogenic because it catches light and creates a clean vertical texture. This is perfect for porches with a covered roof where you can hang lights without drilling into siding. It solves the “my roofline looks sparse” problem.
Start by measuring the porch roof edge length and buying an icicle curtain kit that matches that width or covers in panels. Then hang the top cable along the roof edge with clips, keeping the drops straight; trim any excess length only after testing placement. Finally, plug into an outdoor controller and set to steady warm white so the icicles look smooth rather than flickery.
Keep the icicles slightly staggered in height by a few inches across the curtain — flat uniform drops look artificial.
Don’t let the power cable droop across the roof edge; it ruins the clean line in photos.
12. Evergreen garland ladder on the front fence
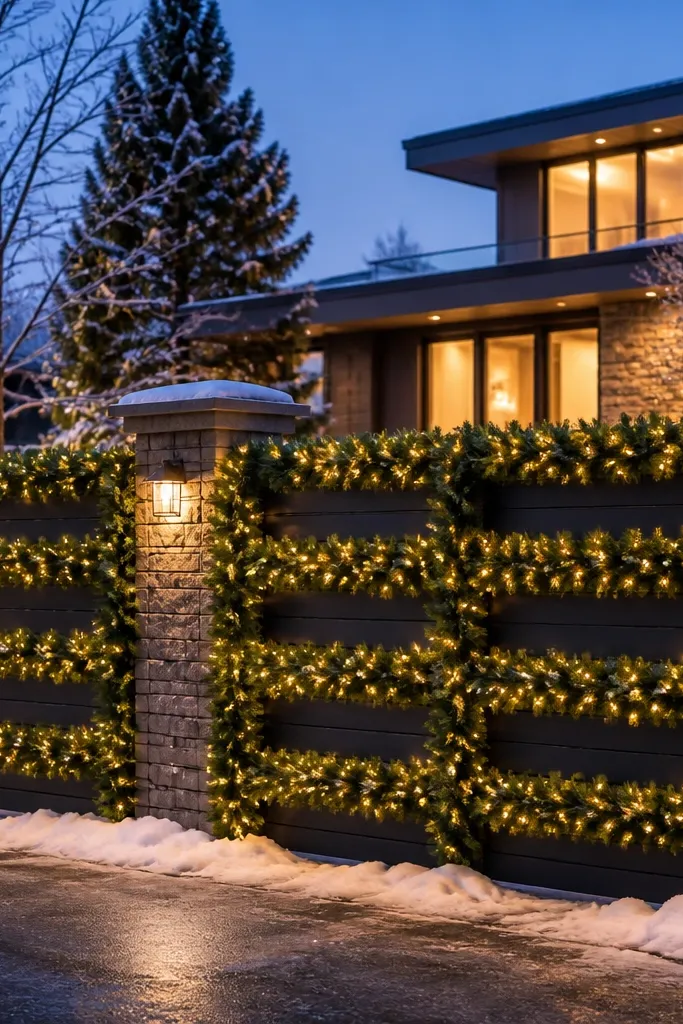
A fence is a huge surface people ignore, and garland arranged in a ladder pattern makes it look designed. Instead of random swags, you create repeating “steps” that lead toward the door. Warm white micro lights inside the garland give a soft glow, and evergreen texture keeps it from looking thin. This works when you have a long fence line and want the yard to look cohesive from the street. It solves the common problem of fence decor looking like leftover strands.
Start by choosing a garland with a wire frame so you can bend it into consistent ladder sections. Then attach the garland to fence posts in a stepped pattern: one horizontal run about 12-18 in long per section, repeating every 24-30 in. Finally, weave warm white micro lights through each rung and connect to a timer; keep the light density even so each “step” looks similar in brightness.
Pro tipUse the same garland thickness on every rung. If one section is thinner, it stands out in photos immediately.
Watch outAvoid mixing ornaments on the fence; let the repeating structure do the work.
13. Mason-jar snow globe lanterns on a stepping-stone path
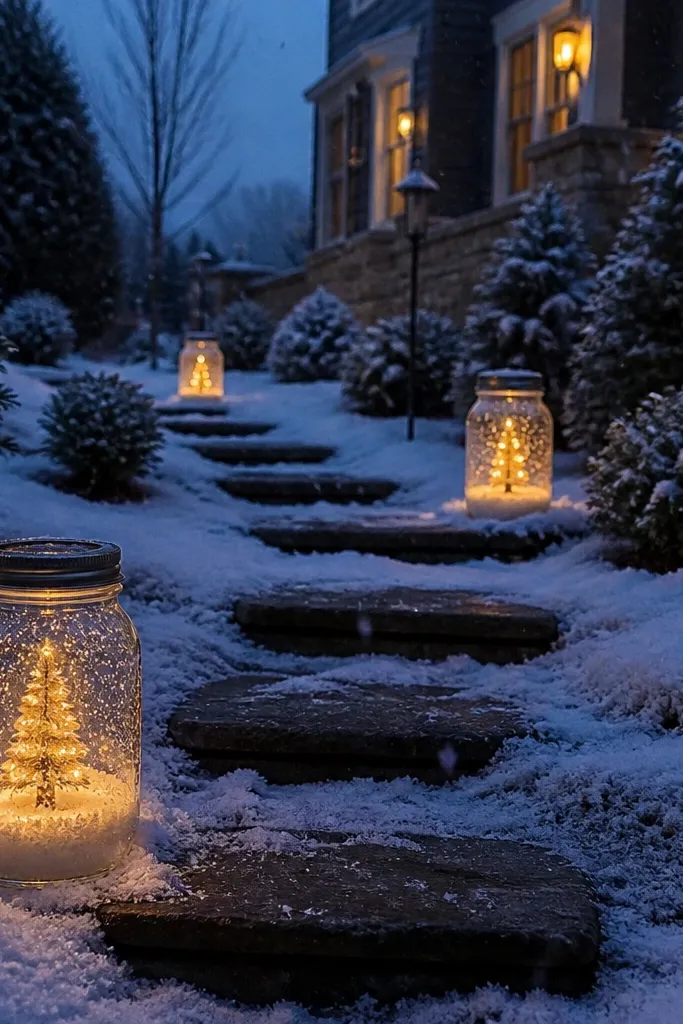
Mason-jar snow globe lanterns create that “tiny winter scene” feeling without needing a big yard. The jar shape gives a strong silhouette, and the globe effect looks magical in motion when the lights are on. Place them along stepping-stones or walkway borders so they’re seen at a natural walking height. This setup is great if you want something photogenic but not oversized. It solves the problem of small decorations looking boring because these jars read as individual objects.
Start by placing five to seven lantern jars along the stepping-stone line, centered between stones so they look evenly spaced. Then secure each lantern’s base with stakes or weighted planters so they don’t wobble. Finally, use warm white bulbs inside the jar and set the globe effect mode to the slowest motion so it looks smooth in video and photos.
Pro tipTurn off nearby multi-colored lights; keep this scene warm so the jar glow looks cohesive.
Watch outDon’t stack the lanterns too close; jars need spacing to look like a planned path.
14. 3D wreath topiary with lighted stems
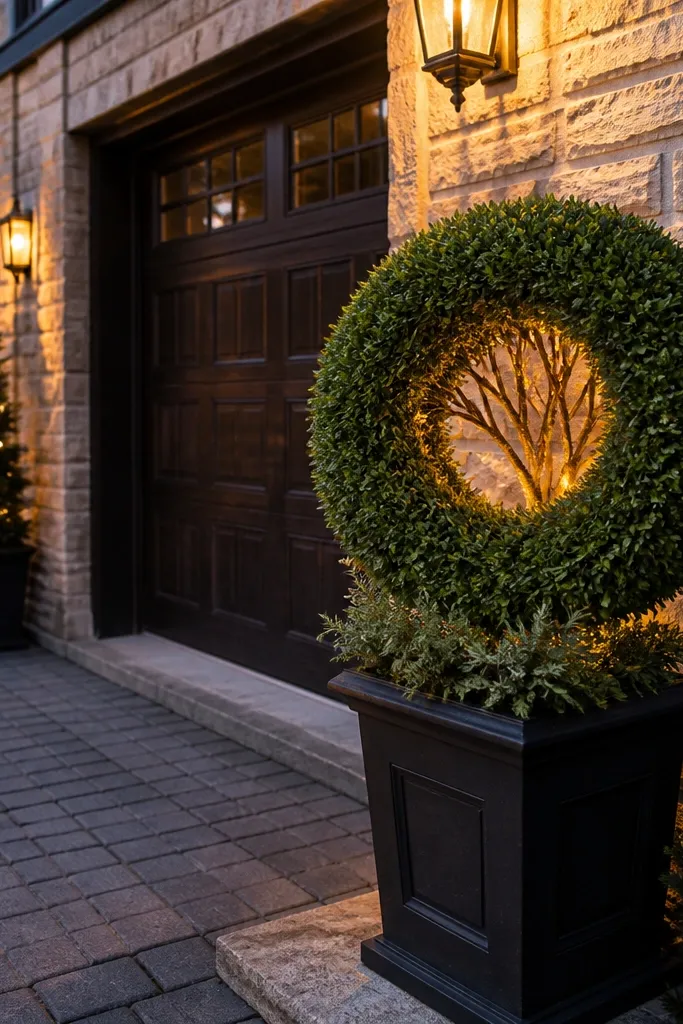
If you have shrubs, this is the way to make them look like a designed holiday sculpture. A 3D wreath topiary form gives you a clear silhouette, and lighted stems make the inside glow so the shrub doesn’t look like it’s just been “decorated.” This setup is ideal for front corners, beside garage doors, or on either side of a window bay. It solves the issue of traditional string lights getting lost in branches. The result is a clean shape that stays readable even when the wind moves the greenery.
Start by choosing one topiary form per shrub area, sized so it sits 6-10 in above the surrounding railing or shrub top. Then tuck faux evergreen around the form using zip ties or plant ties, spreading the greenery so the inner frame is hidden. Finally, weave warm white lights through the stems and keep the wire route tight so it doesn’t show outside the silhouette.
Pro tipUse warm white, not multicolor. Multicolor inside a shrub silhouette looks messy from the street.
Watch outAvoid overloading the shrub with ornaments; the glowing shape is the point.
15. Giant illuminated snowflake stakes in a straight line
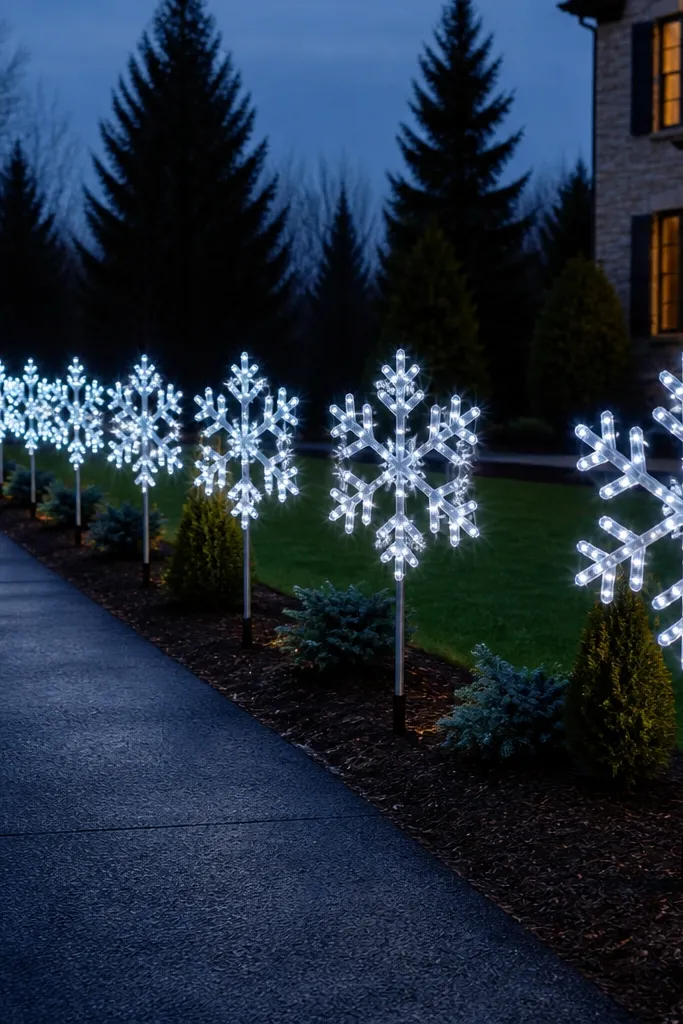
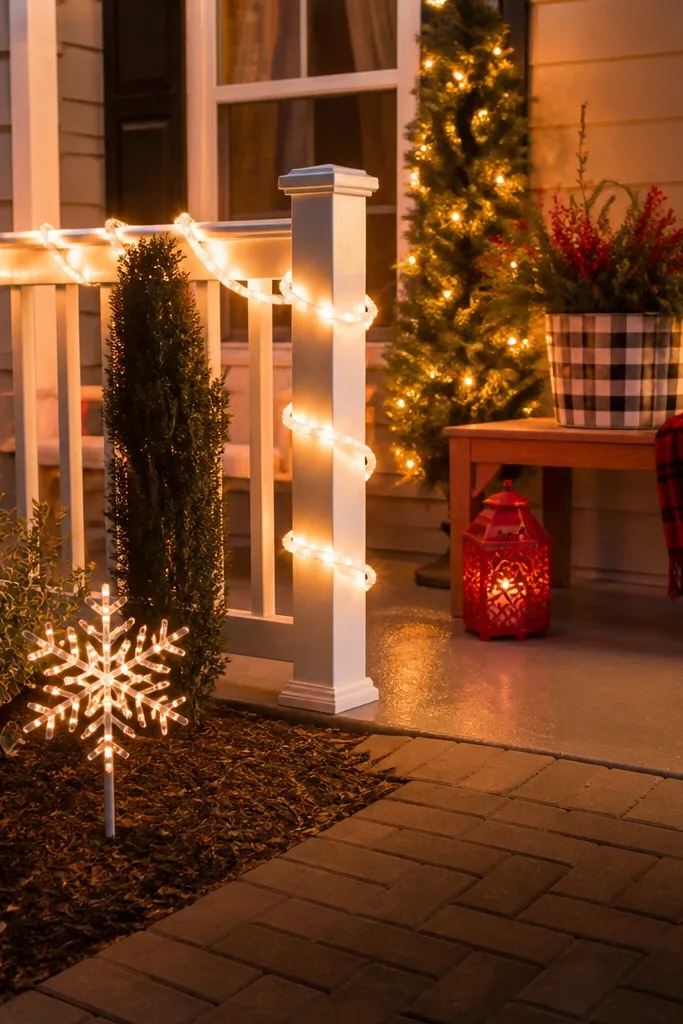
Snowflake stakes look best when they’re treated like a border, not random sparkle. When you line them up in a straight row, you get a graphic, winter pattern that’s easy to read from the street. Choose stakes with a consistent size so the glow forms a repeating rhythm. This works on lawns, along driveway edges, and in front of low hedges where you can see the stakes clearly. It solves the problem of scattered stakes that look like you “ran out of space” halfway through.
Start by marking a straight line along the yard edge and placing three stakes spaced about 4-6 ft apart, depending on your viewing distance. Then anchor each stake deeply into soil with the included ground spikes, checking the height so all snowflakes sit at the same level. Finally, use a timer and keep the lighting mode steady; set the angle so the snowflake faces toward the house for the best glow capture.
If your home face is wide, use five stakes instead of three so the row feels intentional across the façade.
Don’t mix different snowflake sizes in one row; it breaks the clean graphic look.