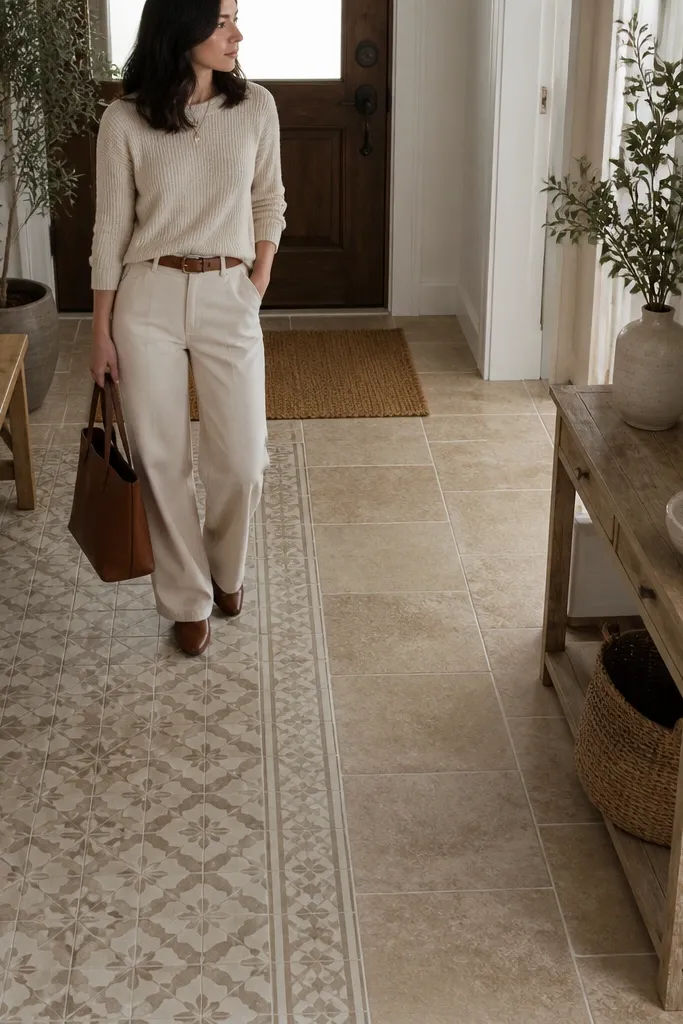
1. Travertine-look 12x24 with warm greige grout
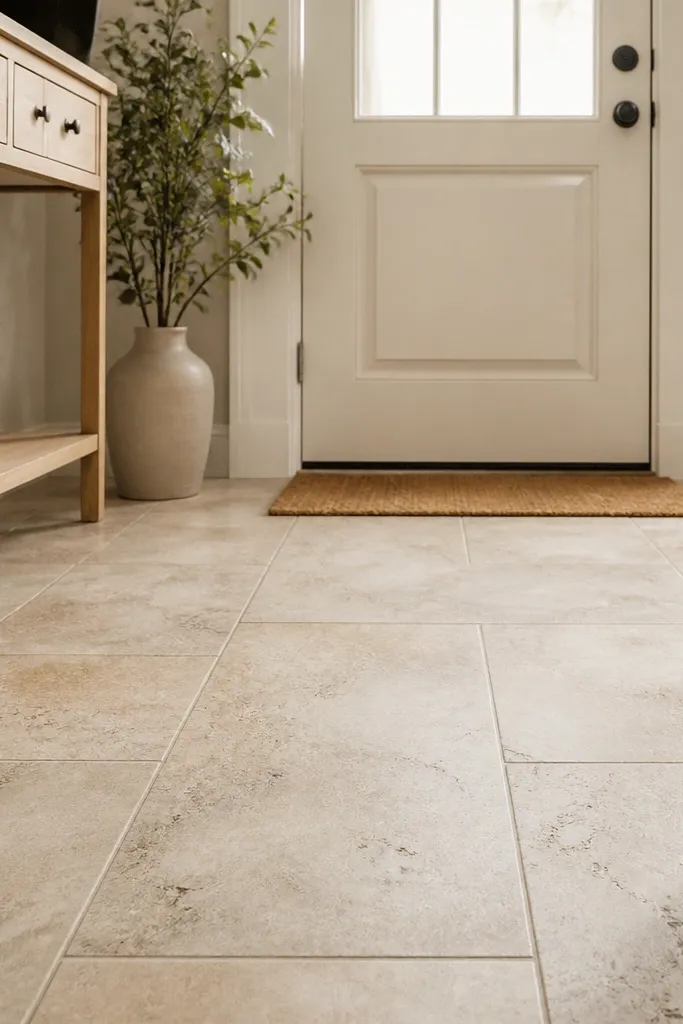
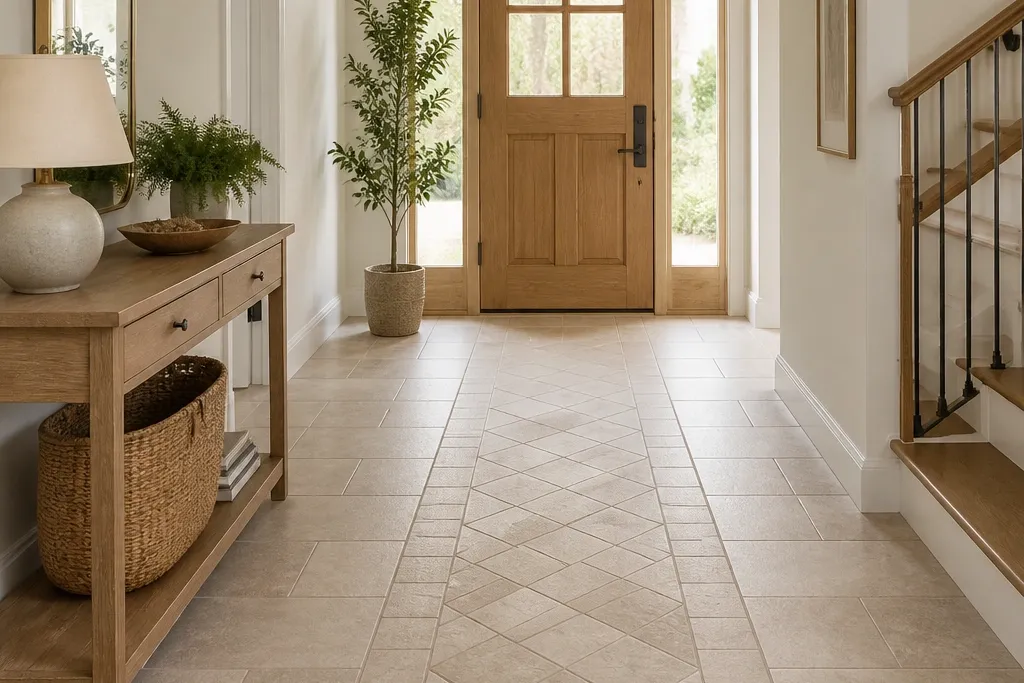
This is the cozy foyer tile ideas entryway combo when you want “expensive” without chasing natural stone maintenance. A 12x24 travertine-look tile reads warm because of its creamy base and subtle variation, and the large plank size keeps grout lines from making the entryway look busy. Choose a matte or low-sheen finish so the floor doesn’t glare from the front door light. Pair it with warm greige grout so scuffs and shoe dust don’t pop like they would with bright white grout. It works especially well in entries with wood accents or beige walls because the tones stay in the same temperature family.
Measure your foyer width and aim to keep tile cuts on the sides, not in the center path from the door. Lay out a dry grid using 12x24 tiles and spacers, then mark the centerline; adjust until you get roughly 1/2-tile or larger cuts at the edges. Set the tiles in a straight grid with a 1/8 in. Grout line, then use a warm greige grout (sanded grout for wider lines) and wipe clean right after troweling. For adhesion, use a polymer-modified thinset rated for porcelain or ceramic; it matters for entryway traffic. Plan on about 2-3 days total for tile set and grout cure, plus drying time for foot traffic.
Put the darker grout in the exact same direction as the main light source from the door — it makes the veining look more intentional.
Avoid glossy travertine-look finishes in wet-entry homes; water spots and scuffs show up fast.
2. Limestone-look 24x24 with charcoal grout
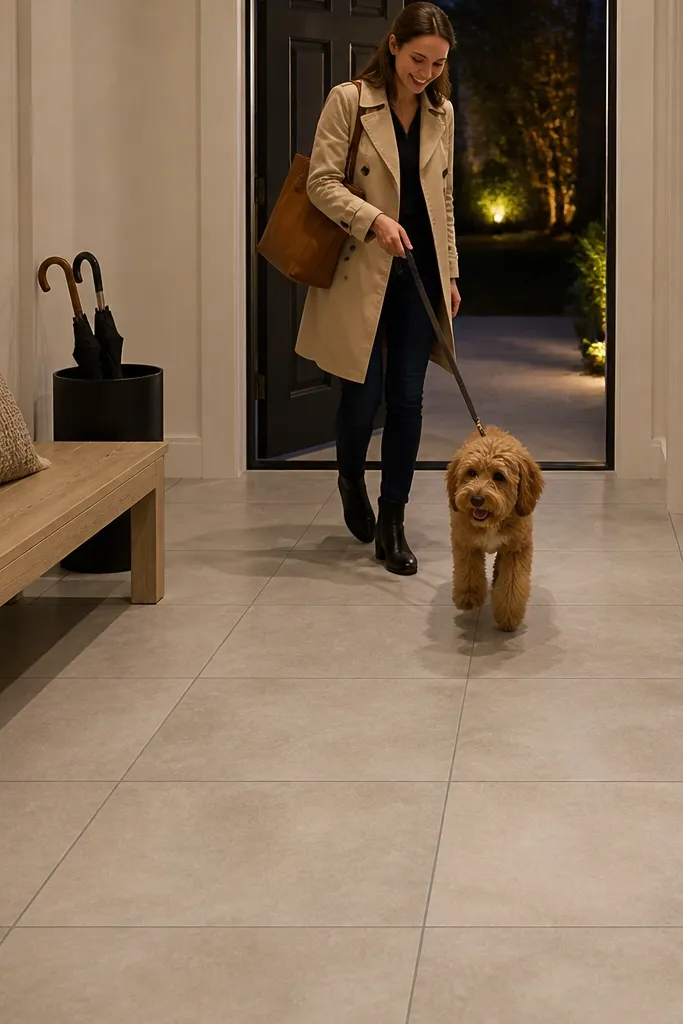
If your entryway feels a little too light or empty, charcoal grout gives you warmth and structure at the same time. The 24x24 format creates a calm, modern field, and the limestone-look surface keeps it cozy through soft gray-beige tones. Charcoal grout lines add depth so the floor looks grounded, not washed out. Go for a matte finish so the tile doesn’t reflect every scuff. This pairing is ideal for foyers with black hardware, dark wood benches, or a gray wall paint where you want the floor to anchor the room.
Dry-lay 24x24 tiles with spacers and confirm your layout so the grout lines align with the doorway threshold line. Use a medium bed thinset and keep your substrate flat — large squares telegraph dips more than smaller tiles. Apply sanded grout in charcoal, and mix to a peanut-butter consistency so it packs cleanly into the joints. After grouting, do a first wipe with a damp sponge, then buff lightly with a dry microfiber once it starts to haze. Seal the grout if the manufacturer recommends it for your specific grout type and climate.
Pro tipChoose grout that’s one shade darker than you think. Charcoal that’s too black can make the whole entryway feel harsh.
Watch outSkip white grout with light stone looks in a high-use entry; it turns into a maintenance job.
3. Warm wood-toned tile 6x24 in a staggered layout
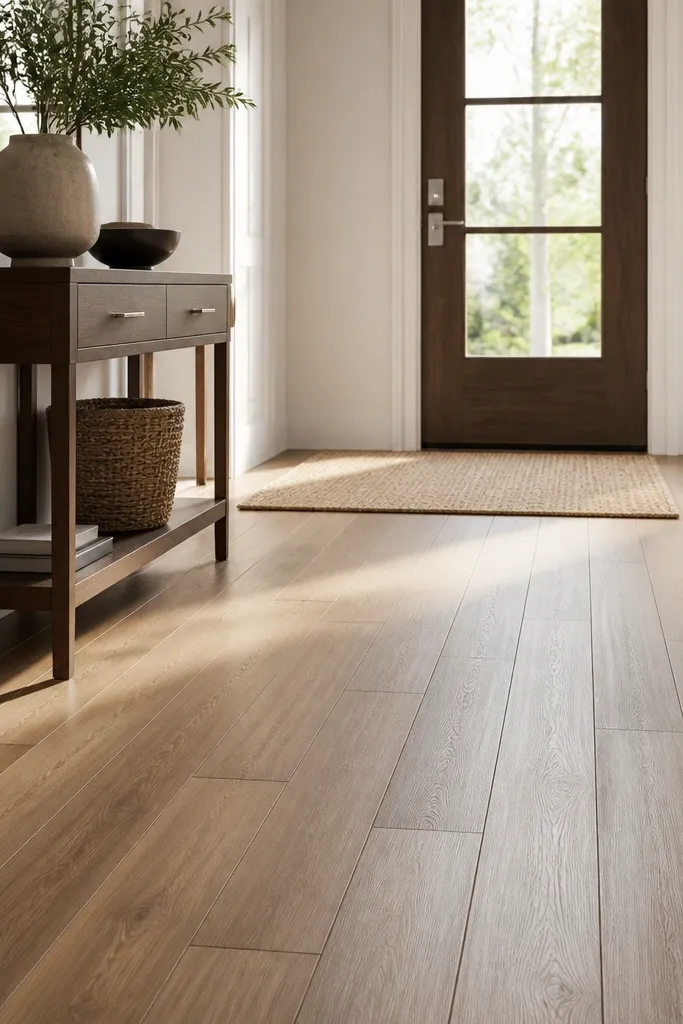
Wood-look tile is cozy because your brain reads wood warmth, but you get tile durability where shoes land. A 6x24 plank size looks like real flooring at a foyer scale, and a staggered layout hides the seam rhythm so it feels more natural. Use a tile with subtle grain and a matte finish so it doesn’t look like printed vinyl. Keep grout in a light warm gray that matches the wood’s “base,” not the darkest streaks. This works great when your entryway has wood stairs, a console table, or a bench in oak tones and you want the floor to blend instead of compete.
Pick a plank tile with directional grain and plan your layout so the grain runs lengthwise from the door toward the interior. Start your first row from the most visible wall, then offset each new plank by about 1/3 to 1/2 plank length for a staggered pattern. Use leveling spacers if your tiles vary slightly in thickness so the floor stays smooth underfoot. Set with a thinset appropriate for plank-format tiles and use spacers to keep grout lines consistent. Finish with a warm light gray grout and wipe after each section so it doesn’t stain the matte surface.
Aim for grout lines that are narrow — 1/16 to 1/8 in. Makes the wood illusion feel more believable.
Don’t mix wood-tone tiles with cool gray walls without adjusting grout warmth; the contrast will feel off.
4. 3x12 terracotta-look tiles with hand-trowel grout
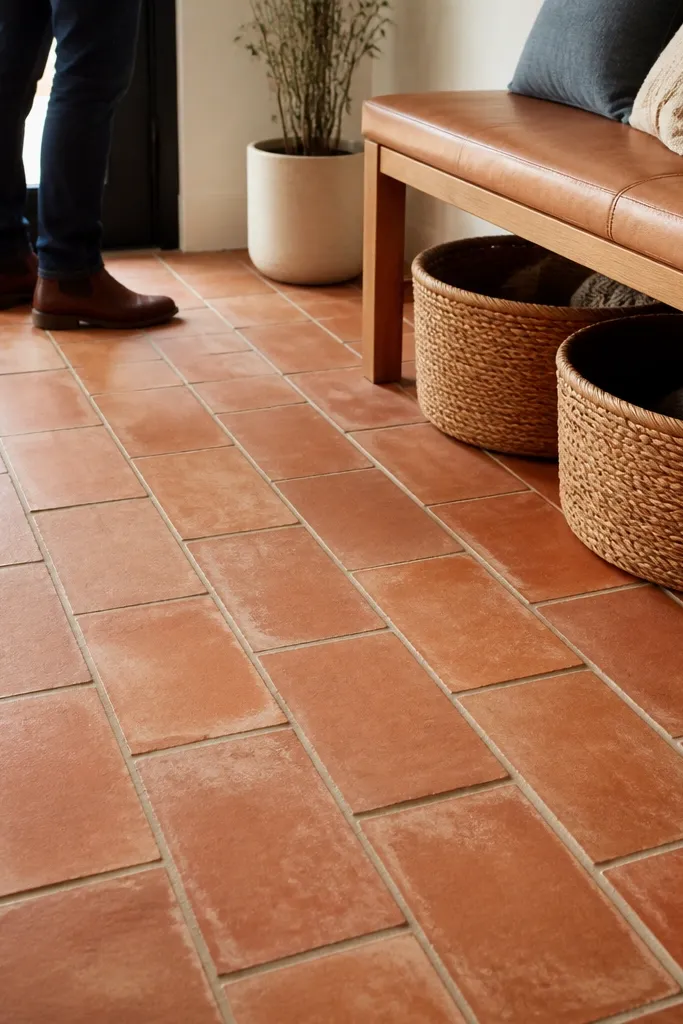
Terracotta-look tile makes an entryway feel instantly warmer because the color reads like fired clay, not painted beige. The 3x12 rectangle gives you movement without needing a complex pattern, especially if you lay it in a simple offset (like a brick). Choose a tile that has a slightly textured matte surface so it catches light softly instead of shining. Grout in a warm sand or light clay-beige keeps the floor cozy and helps hide scuffs. This is a strong choice if your entry has rattan, cream walls, or brass accents because the warm pigments play nicely with natural materials.
Dry-lay a few rows first and decide on your offset — keep it consistent, usually around 1/3 plank offset. Use a 1/8 in. Grout line and plan cuts so the most visible edge next to the door lands on a full tile when possible. Set tiles with a notched trowel sized for your tile thickness, then back-butter if the tile manufacturer calls for it to prevent hollow spots. Mix grout carefully, then apply in sections and use a grout float that presses into joints. After curing, seal if your grout system recommends it for stain resistance in entryways.
Use a slightly darker grout than the tile base; it makes the terracotta tones read deeper.
Skip glossy terracotta-look tile. It can look cold and slippery in an entry.
5. Beige microcement-look tiles with warm gray grout
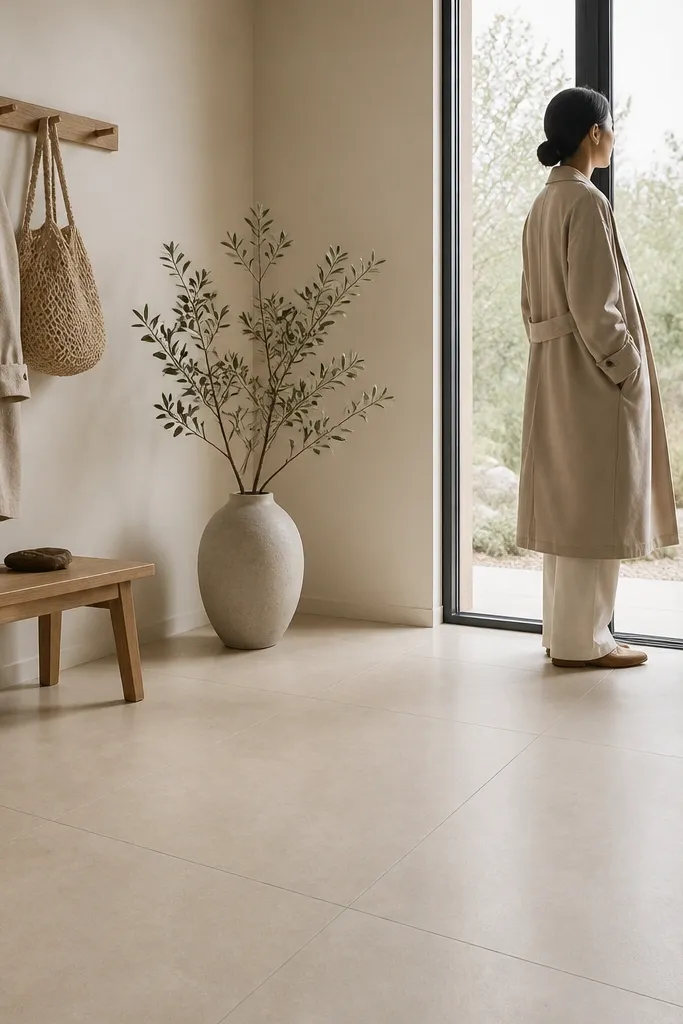
Microcement-look tile gives you that modern, soft-plaster vibe without the fragility of real cement. In a foyer, it feels cozy because it has a muted, matte surface and a gentle speckled texture that hides everyday marks. Go with a medium warm beige and pair it with warm gray grout so the floor looks continuous. This is a smart pick for entryways with minimal decor — think white walls, a slim console, and a simple mirror — because the floor texture adds interest without a loud pattern. It also works when you want to carry a “concrete” look but keep it warm.
Choose a tile format like 24x24 or 12x24 so the floor reads smooth rather than busy. Dry-fit a straight grid and mark a level starting line from the doorway threshold — microcement-look tiles can exaggerate uneven floors. Use a fine-grout joint (about 1/8 in.) for a modern plaster effect, then mix warm gray sanded grout. Apply grout in manageable sections and clean off haze with a damp sponge without over-scrubbing the texture. Seal the tile if the product calls for it, especially if you get frequent wet shoes.
Pick the grout shade from a sample under your foyer lighting. Warm gray can look beige or taupe depending on the bulb.
Don’t use bright white grout with microcement-look tile; it breaks the plaster effect immediately.
6. Herringbone 3x12 in oatmeal with ivory grout
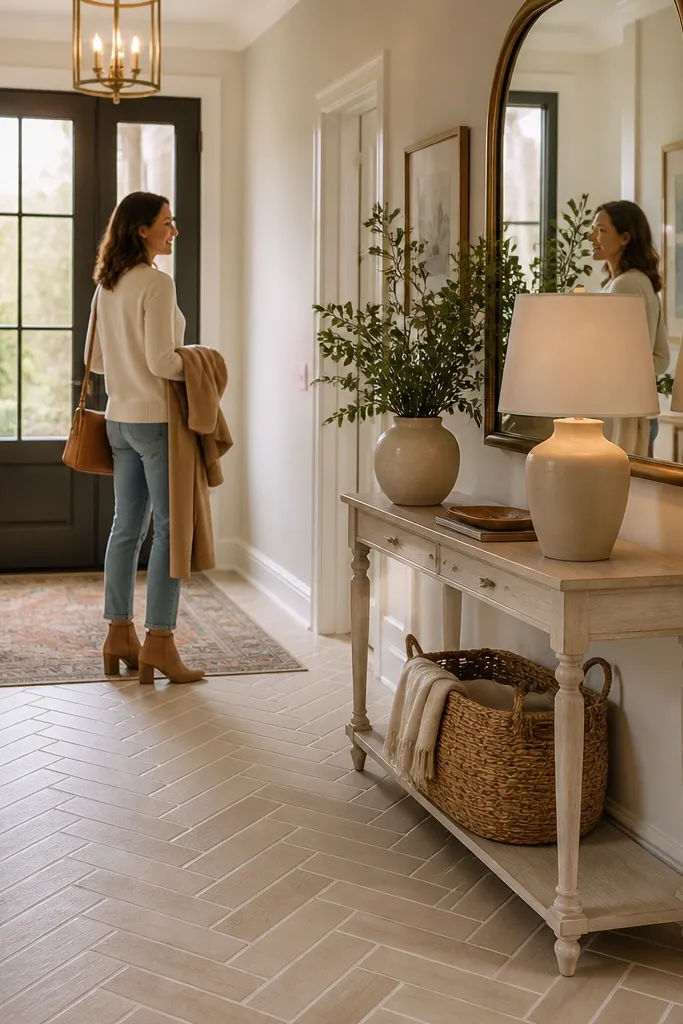
Herringbone makes a foyer look designed, not generic, and the key is choosing a warm neutral and keeping the grout light enough to feel airy. A 3x12 herringbone pattern gives you that tailored look while staying cozy because the oatmeal base reads soft and inviting. Ivory grout keeps the lines crisp, which is what makes herringbone look intentional instead of random. Use a matte finish so the pattern doesn’t glare, especially near the front door where light hits at an angle. This works best in entryways that are narrow or with lots of open space, since the pattern adds interest without adding clutter like small mosaic tiles.
Order extra tiles — herringbone has waste, and foyers with door thresholds need careful cutting. Start from the centerline under the door and build outward so the “V” shape stays symmetrical; use a herringbone layout guide or mark each row on a chalk line. Use spacers that match the tile’s recommended joint size, then set the tiles with a thinset using a small notched trowel for better alignment. Grout once the floor cures fully, and use a grout float that fills joints without smearing too much on the matte face. Clean haze in two passes: first with damp sponge, then buff lightly when it dries.
Pro tipChoose ivory grout that leans warm (creamy) instead of cool (blue-white) so it stays cozy.
Watch outAvoid oversized 12x12 herringbone in small foyers; it can feel too busy.
7. Classic black-and-cream checker 8x8 with warm white grout
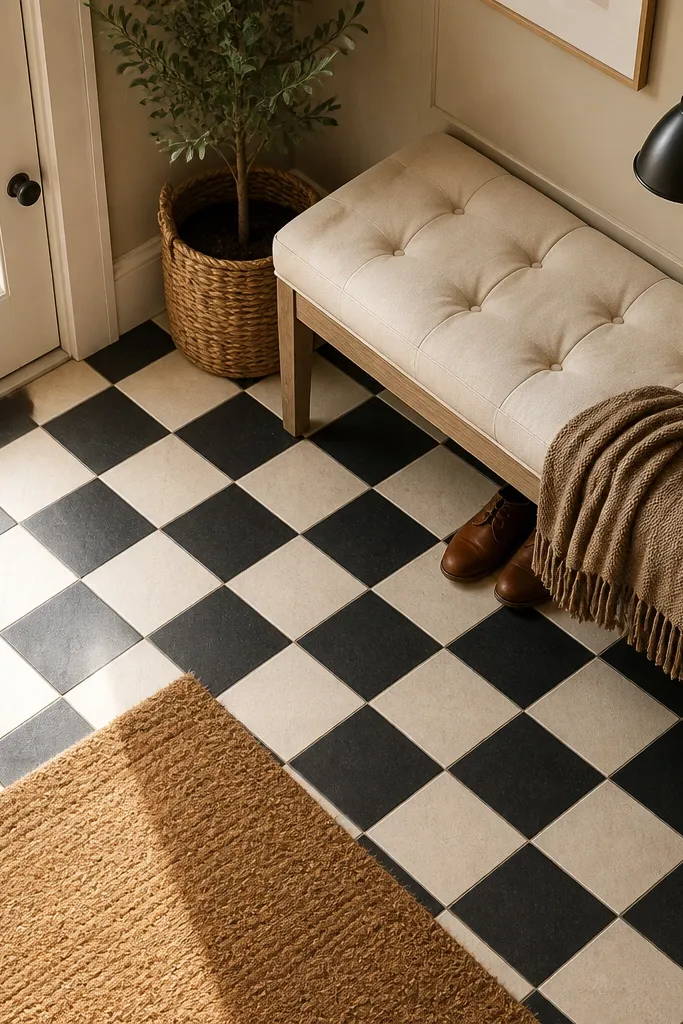
A checkerboard foyer floor is one of the fastest ways to make the entry feel styled, and it still looks cozy if you soften the contrast. Use black-and-cream 8x8 tiles with a warm white grout so the look feels inviting instead of stark. This pattern works beautifully under entry mats because the eye reads the grid even when the mat covers part of it. Matte tiles keep the surface forgiving, and the small size helps hide minor scuffs. If your entry has a light rug, cream walls, or a black console, this floor ties everything together without needing extra decor.
Measure the entryway and pick a checker size that fits cleanly — start with a centerline and ensure you end with the same half-tile type on both sides. Dry-lay a few rows to confirm the pattern doesn’t end up with a skinny cut at the main doorway. Use a 1/8 in. Grout line for a crisp checker look, and keep the grout warm white rather than cool white. Set tiles in a grid using spacers and keep the pattern square with a framing square. Grout after the thinset cures, then clean haze carefully so the matte face doesn’t stain.
Use a slightly textured matte tile face. Smooth black can show dust and smears more.
Don’t go glossy on black — footprints and water spots will look messy fast.
8. White oak-look 10x20 porcelain with taupe grout
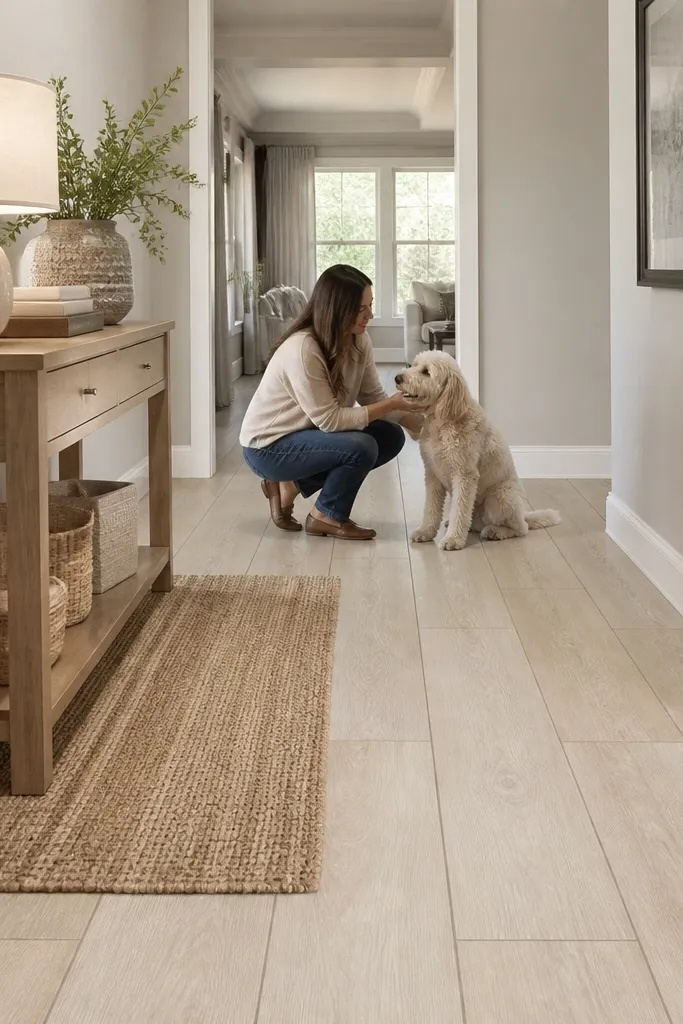
If your home style is brighter and you still want cozy, go for a light wood-look that isn’t yellow. A 10x20 porcelain tile with a white oak tone gives warmth without looking dated, and the longer rectangle makes the entry feel longer. Taupe grout ties the floor to warm neutrals and hides dirt better than bright white. Choose a matte finish with subtle grain texture so the tile doesn’t look like a printed surface. This works well in entryways with off-white walls, light gray trim, or a white/cream console, where a darker floor might feel heavy.
Select a tile with a consistent “direction” so the grain runs the same way across the entry. Dry-fit a test row to see how the grout line width looks in your light — target 1/8 in. Joints. Start from the doorway edge and work outward, keeping the tile ends aligned with your threshold line. Use a polymer-modified thinset and spacers, then use a grout that matches the medium tone in the wood rather than the lightest highlight. Seal grout if your system recommends it for stain resistance in entry areas.
Pro tipKeep your bench or rug colors in the same warm neutral family (cream, oat, taupe) so the floor reads intentional.
Watch outAvoid very cool gray grout with warm wood-look tiles; it makes the floor look dirty.
9. Arched pattern medallion insert on a warm neutral base
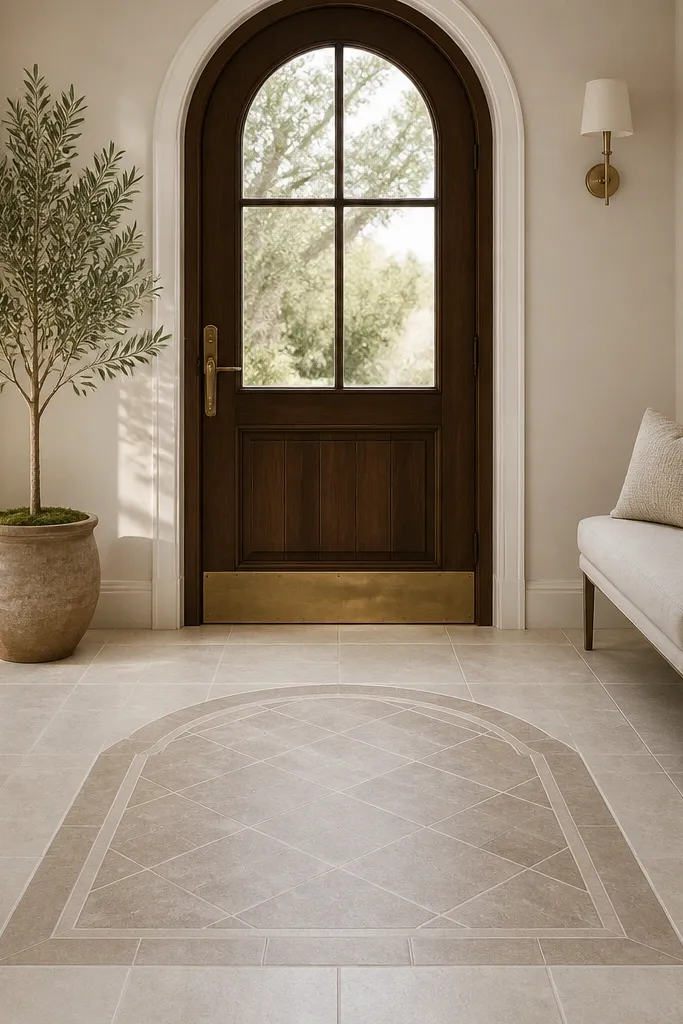
A medallion insert gives you the “wow” of a statement floor without covering the whole entry in a busy design. Start with a warm neutral base — like light limestone-look in 12x24 — then add a centered arched medallion in a slightly darker tone. The arch motif reads cozy because it echoes door shapes and frames the landing area where shoes pile up. Matte finishes keep it soft and photogenic. This is perfect for entryways with a defined focal point: a front door that lands directly on the floor, a centered runner, or a small rug area you want to anchor.
Pick your medallion size based on your entry width — a common approach is keeping the insert roughly 24-30 in. Wide so it doesn’t overpower the space. Dry-lay the base tiles first, then locate the medallion center under the door handle line. Use a tile saw for the base cuts around the medallion and set the insert with thinset after the base is partially cured so lines stay clean. Grout the whole floor in the same warm gray or greige so the insert looks like it belongs. Seal if recommended, especially around the entry where water gets tracked in.
Pro tipChoose the medallion color that’s one step darker than the base, not black. It keeps the entry warm.
Watch outDon’t center a medallion if your entryway has an off-center door swing and you can’t keep symmetry.
10. Small mosaic on the perimeter, large field in the middle
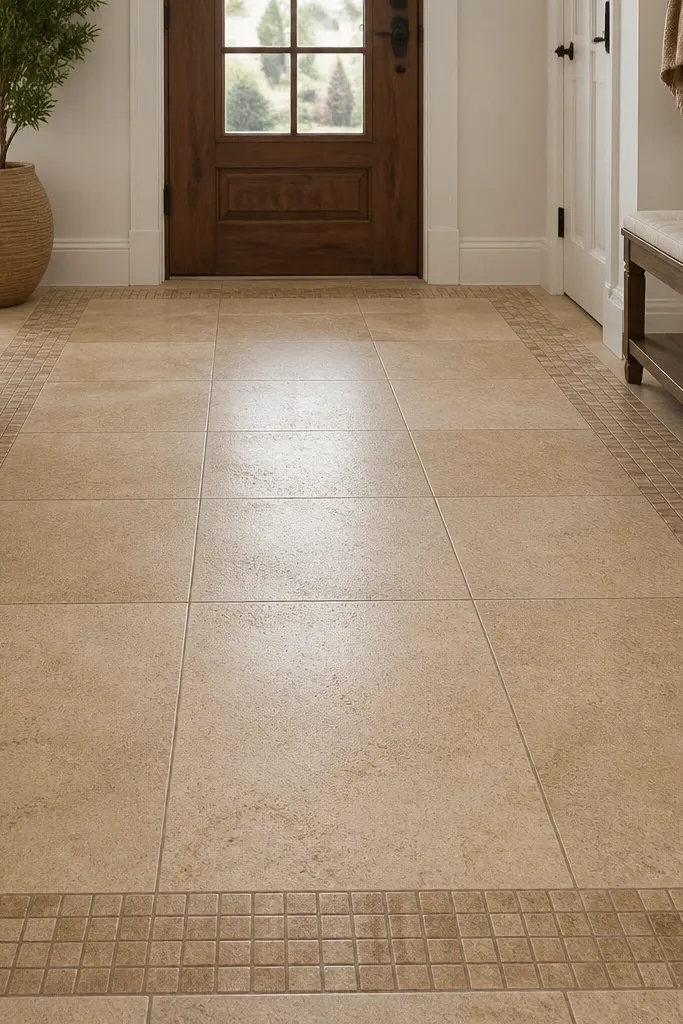
This is how you get interest without turning the whole floor into a dirt trap. Use large-format warm stone-look tiles in the main area, then add a thin mosaic border along the perimeter or around the doorway landing. The mosaic should be a tight, small-scale pattern in warm tones — like beige and taupe — so it reads cohesive instead of decorative clutter. Matte finishes keep it comfortable and less slippery. It’s great for entryways where you want a framed look, especially if there’s a bench or console near the walls and you want the floor to feel custom.
Measure your foyer and decide the mosaic border width — 4-6 in. Looks intentional without shrinking the main walking area. Install the large field tiles first, then leave a clean edge line where the border will land. Set the mosaic strip along the perimeter using the same grout joint size as the field, then grout the entire floor in a consistent warm gray. Use a straightedge to keep the border line level; mosaic sheets can drift if you don’t check. Seal the mosaic if your tile system recommends it, since grout lines in small pieces collect more dirt.
Pro tipKeep the mosaic pattern simple — two tones max. Complex mosaics look messy in real life.
Watch outAvoid a full mosaic floor in an entryway unless you like scrubbing grout.
11. Dark slate-look 12x24 with warm almond grout
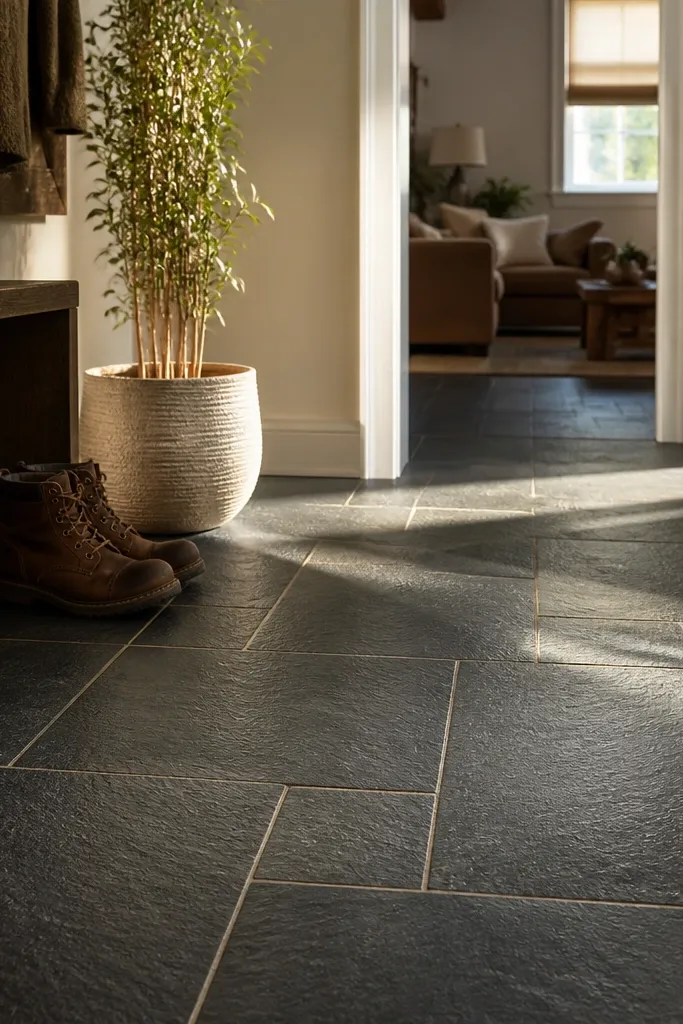
Dark slate-look tile makes a foyer feel more grounded and cozy when paired with warm grout. The 12x24 format gives you a sleek, modern look, and the slate texture hides small scuffs and shoe dust better than smooth tiles. Choose a warm almond or greige grout so the dark base doesn’t feel cold. Matte finish is key here — it prevents glare and reduces the “wet look” that shiny dark tiles can have near the door. This is a strong pick for foyers with warm wood, brass, or a lot of natural light where a darker floor can still feel inviting.
Dry-lay a few tiles to see how the slate variation reads in your entry lighting. Keep grout joints around 1/8 in. For a cohesive slate look, then choose a warm almond grout shade that isn’t too light. Use a polymer-modified thinset and press tiles firmly to avoid lippage, since slate-look surfaces can show uneven edges. Start from the threshold line and work outward, checking level frequently because entry floors can be slightly uneven. After grouting, wipe haze using a damp microfiber so the matte finish stays soft.
Pro tipUse a doormat with a rubber backing and wipe shoes before they hit the tile. Dark floors show grit even when they hide scuffs.
Watch outDon’t pair dark slate with cool gray grout; it makes the entry feel icy.
12. Soft blush terrazzo-look 12x12 with greige grout
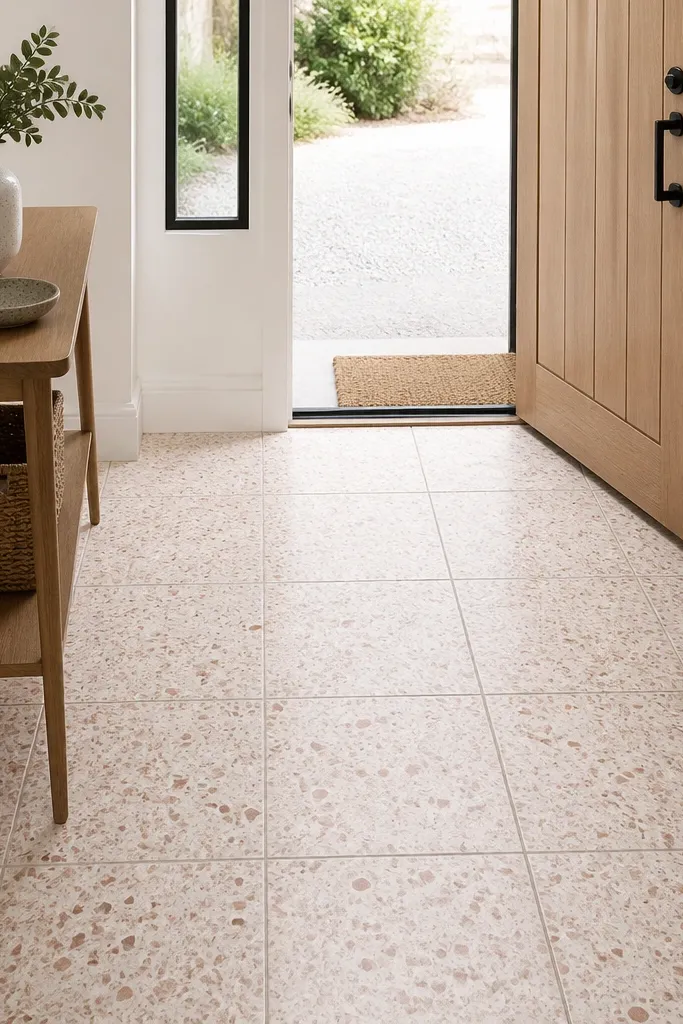
Terrazzo-look tile is cozy because it has movement and warmth in the surface — your eye sees speckles instead of dirt streaks. A blush and cream terrazzo palette feels gentle and welcoming, and 12x12 squares make it easy to fit foyers without lots of tricky long cuts. Greige grout keeps the look grounded and prevents the speckle from feeling too busy. Choose a matte finish so the terrazzo texture reads soft rather than glossy and slippery. This works well in entryways with blush, warm white, or light wood, and it looks especially good if you have a small bench where the floor is visible from above.
Pick the terrazzo tile with speckles that include warm neutrals, not just gray — you want the warmth to read. Dry-lay with spacers and confirm you can keep a balanced pattern across the entry centerline. Use sanded grout in greige for the 1/8 in. Joint width, and apply in small sections so it doesn’t stain the speckled face. Scrape off excess grout carefully and clean with two passes: first damp sponge, then a light buff with microfiber after haze. Seal the tile if the manufacturer recommends it, since entryways get frequent wet and tracked-in grit.
Pro tipMatch the grout temperature to your wall paint undertone. Greige that’s too cool can make the blush read pink instead of warm.
Watch outAvoid tiny 1x1 terrazzo in a small foyer if you hate grout maintenance.
13. Monochrome cream marble-look 16x32 with thin grout
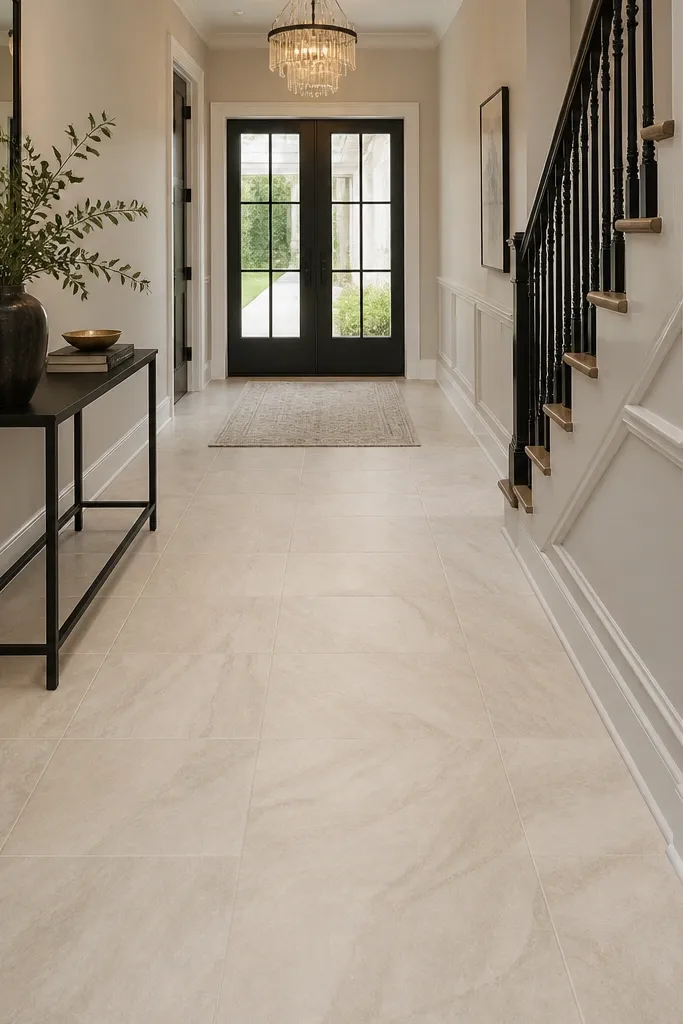
Marble-look tile can be cozy when you keep it monochrome and matte. A 16x32 cream marble-look tile gives you elegant movement without the cold feel that comes from stark white or high-gloss surfaces. Thin grout lines make the floor look more continuous, which reads cozy because it feels less broken up. Use a warm light gray grout, not pure white, so it doesn’t look like grout contrast tape. This is ideal for foyers that need a lift — small spaces, narrow hallways, and entryways with lots of shadow from a covered porch.
Choose a marble-look tile with subtle veining so the pattern doesn’t look random when repeated. Dry-lay to see where the veining lands across the entry path; adjust placement so the most visible area has a calm flow. Use a 1/16 to 1/8 in. Grout joint and a thinset that supports large-format tiles. Set tiles carefully with leveling clips if needed to keep edges flush. Grout after cure, then wipe haze quickly; marble-look surfaces can hold haze if you wait too long.
Pro tipPlan your tile direction so the longest veining runs toward the interior. It visually warms and lengthens the entry.
Watch outDon’t use bright white grout with cream marble-look tile; it makes the floor look harsh.
14. Terracotta-and-cream basketweave runner effect
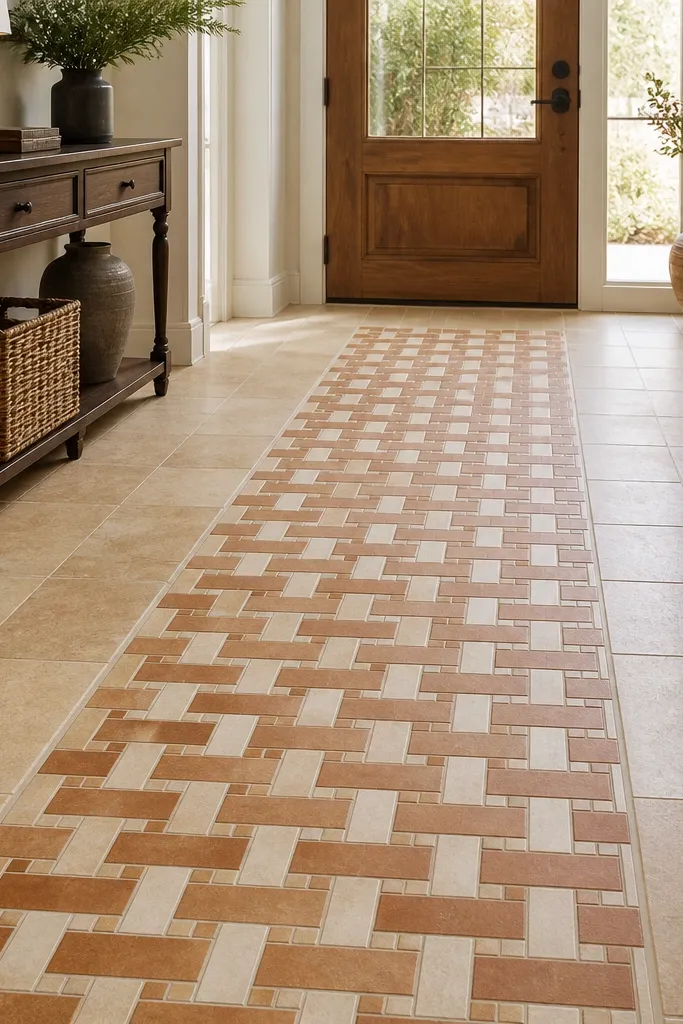
A basketweave-style tile strip gives you a runner look without installing a rug that traps dirt. Use a terracotta and cream basketweave pattern in the center path, then border it with a warm solid tile like limestone-look in 12x24. This makes the entry feel cozy because the center strip adds texture and warmth, while the solid border keeps cleaning simple. Choose matte tiles and warm grout so the terracotta reads like clay, not orange paint. It’s great when you want visual warmth but you don’t want the maintenance of a full pattern floor.
Measure your entry and decide the strip width — around 24-30 in. Works well for a walking path that still leaves room for mats. Dry-lay the solid border first, then place the basketweave strip centered under the door. Use spacers that match the basketweave tile’s design so the pattern stays even, and cut only at the strip edges to keep it neat. Set with thinset and keep the strip level with the border tiles; check alignment with a straightedge as you go. Grout in warm sand or light clay-beige, then seal if recommended for stain resistance in entry zones.
Keep the basketweave tiles slightly darker than the border tile. It makes the strip feel intentional, not accidental.
Avoid a basketweave strip that’s too narrow; it looks like a patch instead of a planned runner.