1. Porch Column Wreath Towers with Faux Pine Strips

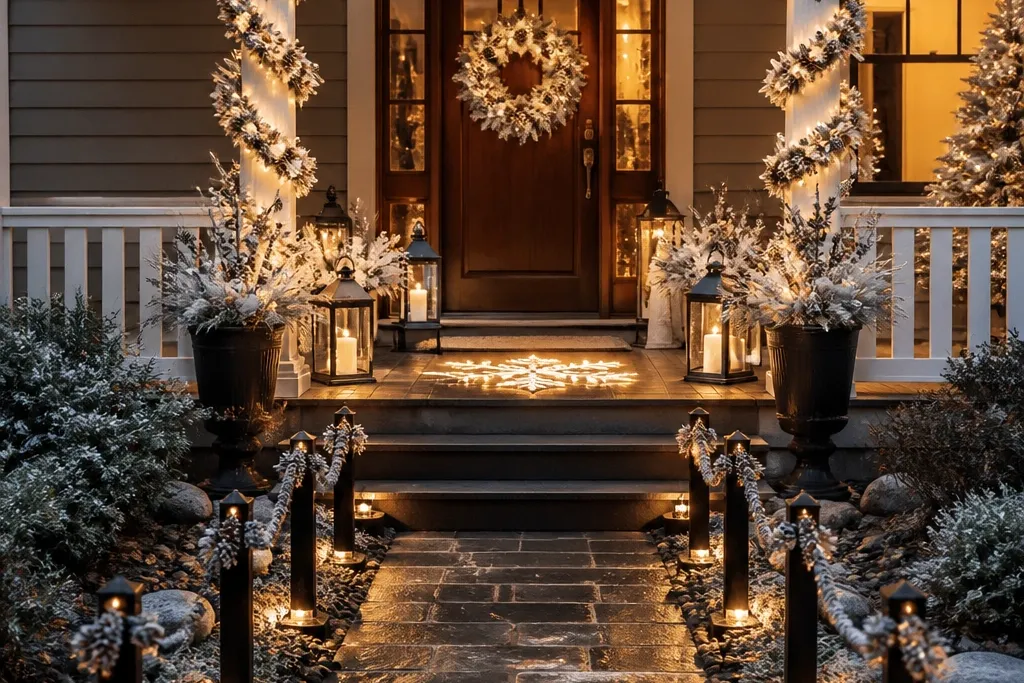
This is one of the easiest ways to make your front porch look styled instead of decorated. Wrap each column in faux pine strips so you get a full silhouette, then add a wreath ring at eye level to create a clear focal point. Use white ribbon or white faux berries for contrast against dark porch posts, and add warm white mini LEDs tucked into the greenery for that cozy glow. The look works best on porches with columns, railings, or posts where you can control height and spacing. It also solves the common problem of wreaths that look small up close and disappear from the sidewalk.
Step 1: Measure your column circumference and cut faux pine strips to wrap in overlapping layers. Secure with zip ties or outdoor zip-tie hooks every 6-8 inches so the wrap stays tight when it rains. Step 2: Attach a 14-16 inch wreath ring at about 60 inches from the ground using thin wire or a hot glue gun with an outdoor-safe adhesive. Step 3: Tuck warm white mini LEDs into the pine, then hide the battery pack under a porch base or behind a column wrap panel. Expect to spend about $35-80 depending on wreath size and how many LED strands you use.
Pro tipKeep ribbon ends the same length on both columns so the symmetry reads clean in pictures.
Watch outDon’t use thin, sparse garland — it turns into a “string of green” when the wind hits.
2. Corrugated Plastic Candy Cane Yard Stakes
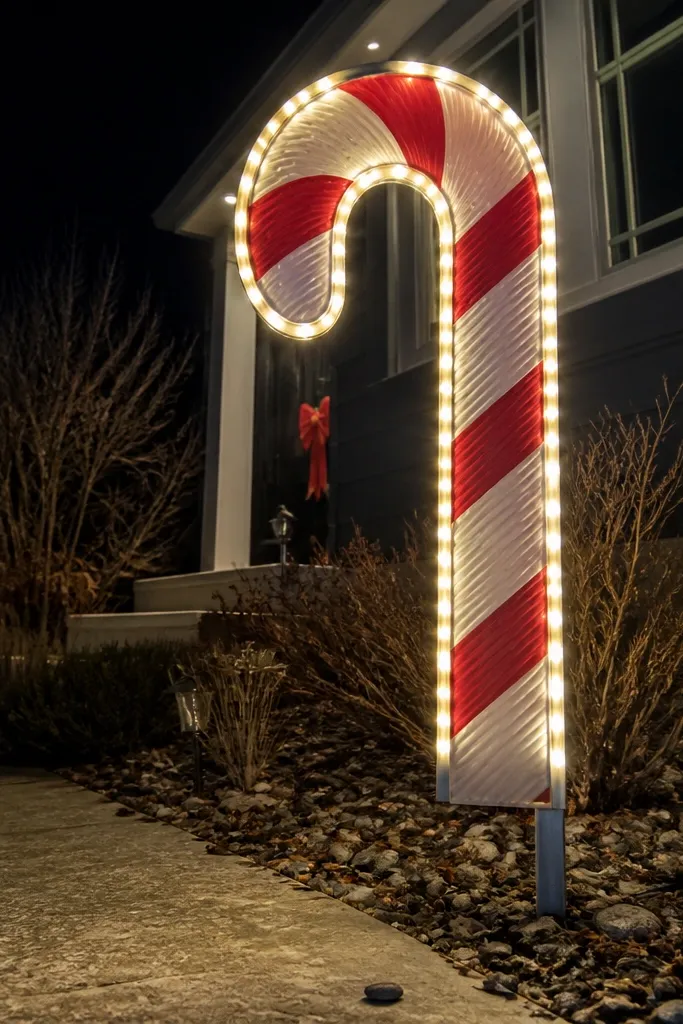
Candy canes are simple shapes, and corrugated plastic makes them outdoor-ready without the cost of store-bought yard art. The key is making them tall enough to matter — aim for 3-4 feet — and giving them a bold red-and-white pattern that reads from the street. Add warm white LED rope lights along the curve so the stakes glow like classic holiday candy. This works perfectly for narrow garden beds, walkway edges, or the sides of a driveway where you want a repeating pattern. It solves the problem of small candy cane figures that get lost behind shrubs.
Step 1: Cut corrugated plastic sheets into cane segments and glue or screw them to form a single 3-4 ft tall cane shape with a flat back. Paint the base with exterior white acrylic, then mask stripes for clean red bands using painter’s tape. Step 2: Drill two holes near the bottom and attach to a rebar stake or an L-bracket base for stability. Step 3: Wrap a thin LED rope or mini LED string along the cane curve and secure with zip ties or clear outdoor adhesive clips. Plan for $20-50 total for a set of 3-5 stakes depending on sheet size and LED type.
Pro tipUse painter’s tape to mask stripes — freehand red bands look messy fast on curved shapes.
Watch outDon’t skip a rigid back or base — wind will twist a lightweight cutout and ruin the candy cane silhouette.
3. Giant Felt Snowflake Door Mat Backing
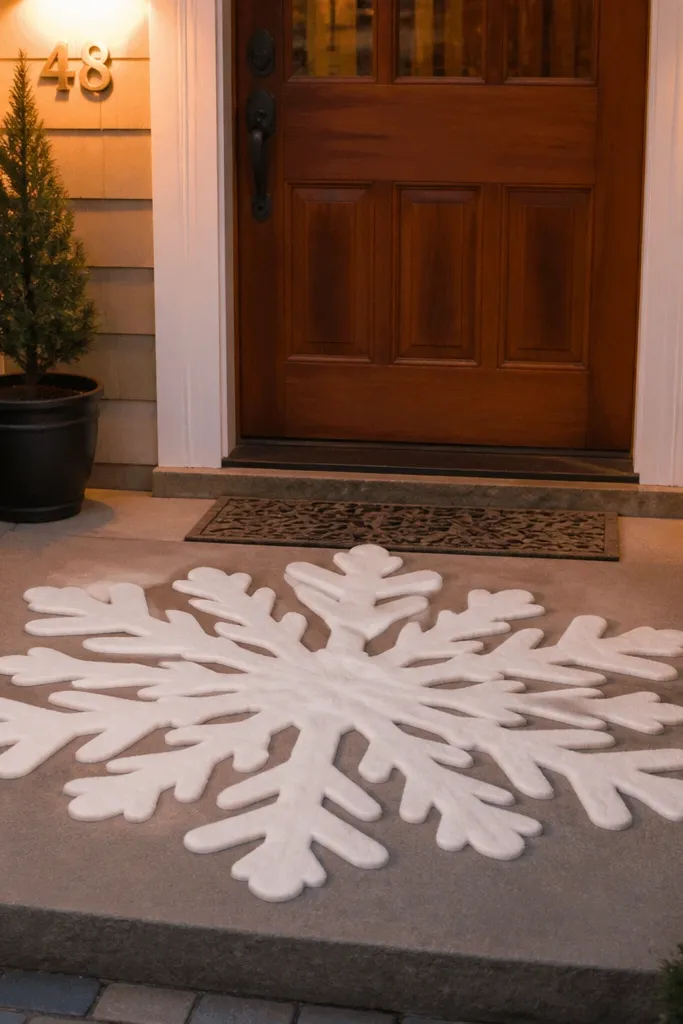
A huge snowflake looks like real yard decor, not craft leftovers, when you give it scale and a clean mounting plan. Use outdoor-friendly felt or thick fleece in white/ivory, then back it with a rigid board so it stays flat and photogenic. The best look is a single snowflake near the door at about 4 feet tall, paired with warm lights in the porch plants. This is ideal if your yard has limited space or you want one strong statement instead of a full yard layout. It solves the “everything is small” issue that makes DIY decor feel underwhelming.
Step 1: Cut a 4 ft snowflake template from cardboard first, then trace it onto thick felt. Cut 2 layers so you can sandwich a layer of foam board or corrugated plastic for stiffness. Step 2: Mount it to a piece of exterior plywood or a flat garden stake frame using zip ties through drilled holes around the edges. Step 3: Add warm white fairy lights behind the top arms of the snowflake so the glow shows through the fabric. Cost is typically $25-60 depending on felt thickness and whether you buy a LED light set.
Choose ivory felt instead of bright pure white if your porch has warm wood tones — it looks more intentional.
Don’t use thin craft felt — it buckles and makes the snowflake look wrinkled in photos.
4. Wood Pallet Santa Sleigh Planter
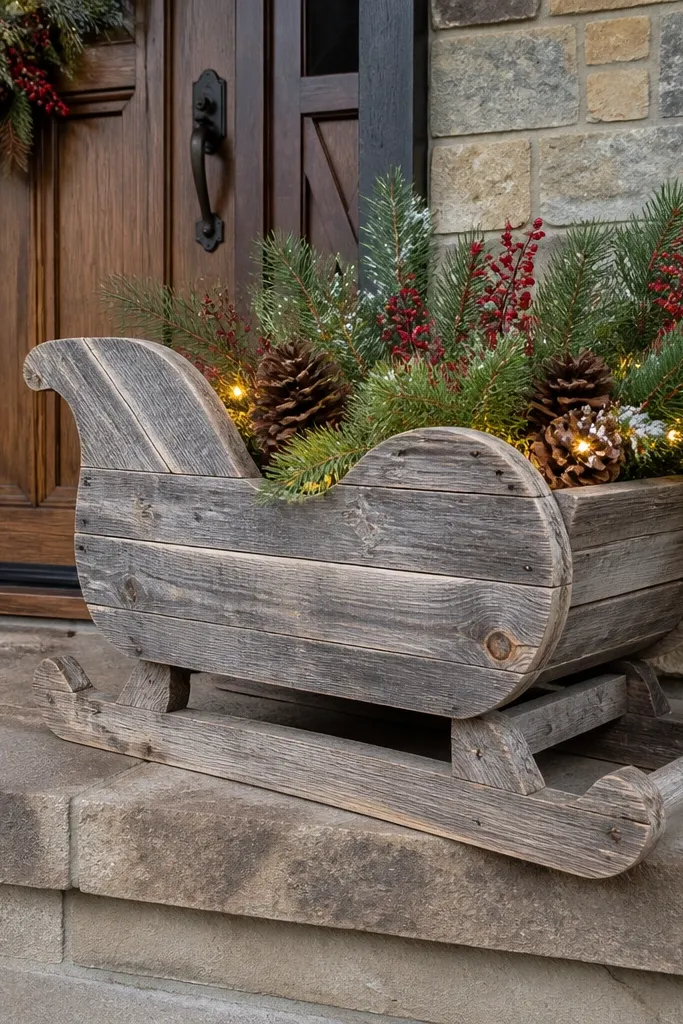
This one reads like a prop, and that’s the goal. Build a sleigh-shaped planter from pallet wood boards, then fill it with evergreen clippings, pinecones, and red berry picks. Santa motifs look best outdoors when they’re grounded in greenery — the sleigh shape gives you structure, and the plants keep it from feeling like cheap holiday plastic. Place it at the porch step or beside the entry so you get a clear silhouette. It solves the problem of planters that look bare in winter and makes your entry look “designed” instead of random.
Step 1: Build a shallow sleigh base using pallet boards, with a front curved lip and a flat bottom about 30-36 inches long. Sand rough edges, then seal with exterior wood sealer so it handles wet weather. Step 2: Screw in a liner using landscape fabric or a plastic trough so soil doesn’t rot the wood. Step 3: Plant a mix of evergreen cuttings or hardy winter greens, then add red accents like faux berries or durable red ornaments that won’t shatter. Plan on $40-120 depending on how much wood you need and whether you add a few pre-made evergreen bunches.
Add a black or dark stain to the pallet wood before you plant — it makes red accents pop hard.
Don’t fill the whole planter with loose potting soil — it spills and makes the sleigh look messy fast.
5. PVC Frame Star with Twinkle LED Netting
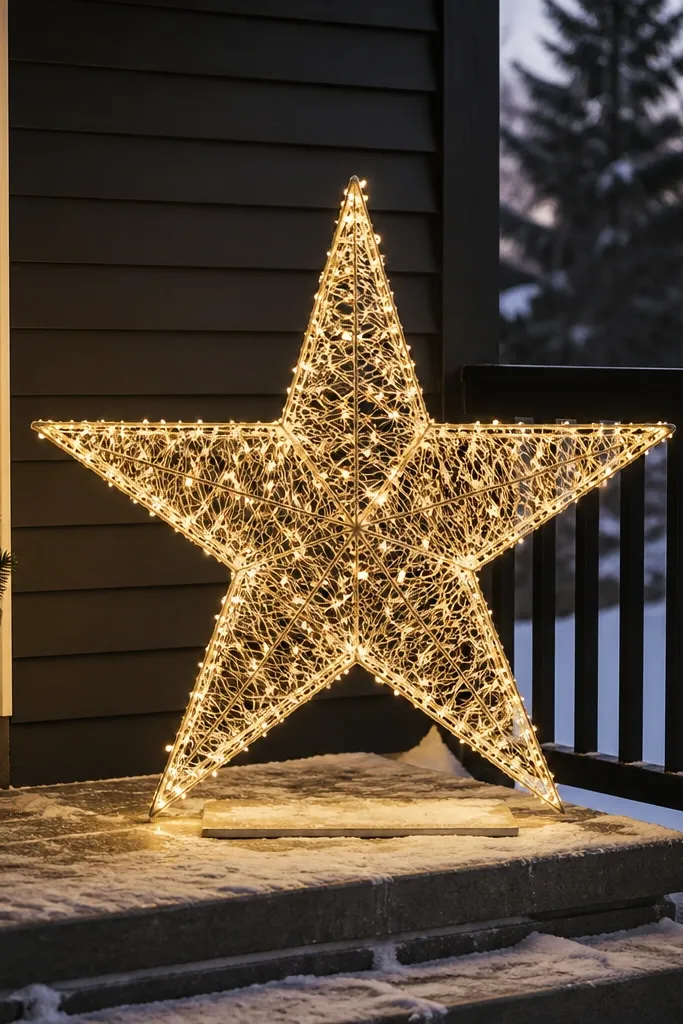
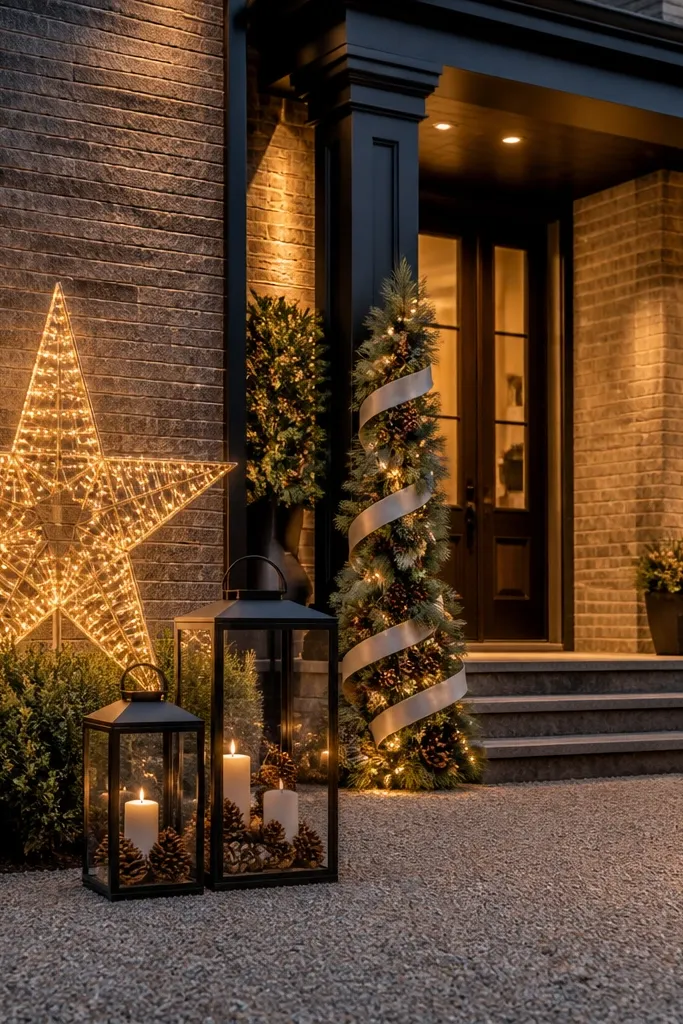
A star is a classic holiday shape, and a frame turns it into real yard art. Build a five-point star from PVC pipe, then cover it with LED netting or a tightly wrapped string pattern so it glows evenly. Pick warm white LEDs for a cozy look and avoid cool blue tones if your house trim is warm. This works great for front lawns, driveways, or anywhere you want a single hero piece that looks good from across the street. It solves the “star ornaments are too small” problem because it scales to 4-6 feet.
Step 1: Cut PVC and connect into a star using PVC elbows and T-connectors, then set the finished star on the ground where you want it. Measure the point-to-point distance and aim for 4-6 ft overall so it reads from the sidewalk. Step 2: Twist LED netting over the star frame, then secure with zip ties at each point and along each arm. Step 3: Anchor the base with rebar stakes or a weighted planter base so it doesn’t tip in wind. Cost is usually $60-140 depending on star size and LED net price.
Pro tipKeep the star slightly above eye level — mount or anchor so the bottom point sits about 18-24 inches off the ground.
Watch outDon’t use bare string lights — hotspots and gaps make it look uneven.
6. Hanging Icicle Light Curtain from Porch Beam
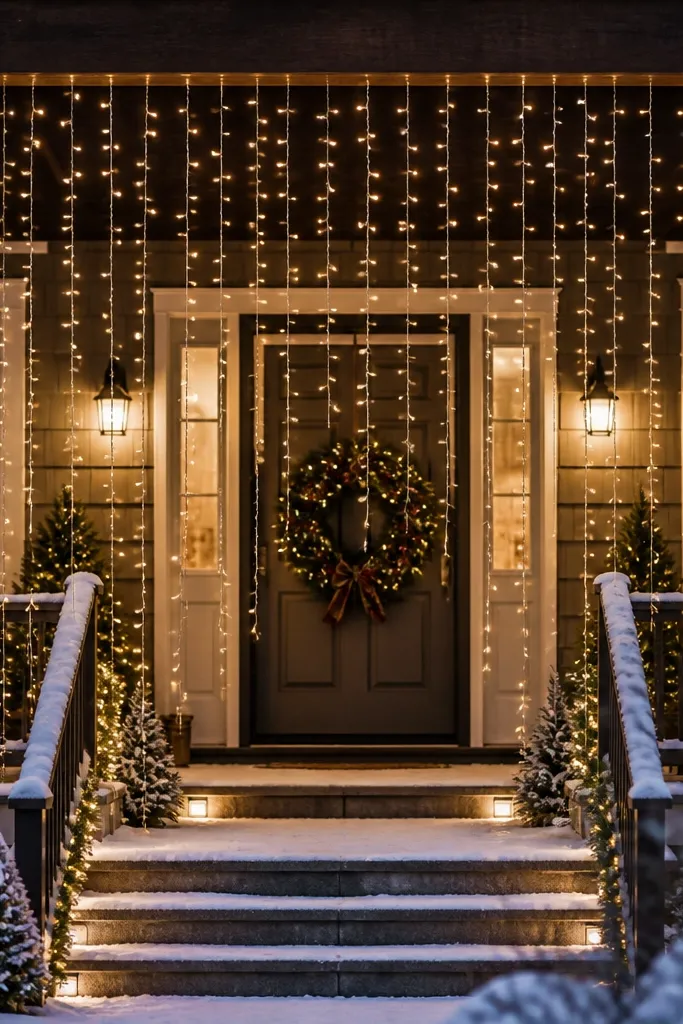
A curtain of icicle lights looks expensive because it creates motion and depth, not just sparkle. Hang it from a porch beam or roof edge so the strands fall straight down and frame your entry. Use warm white or soft white, and choose icicle strands with consistent spacing so you don’t see patchy sections. This is ideal for houses where you can’t set up big yard sculptures or where you want the decor to stay in one tight area. It solves the “door looks bare” issue by adding vertical drama.
Step 1: Measure the span under your porch roof edge and buy icicle strands with enough coverage for that width. Attach a thin outdoor wire or zip-tie guide line across the beam using hooks. Step 2: Clip or zip tie the icicle strands so each row hangs at the same length, aiming for 18-36 inches depending on ceiling height. Step 3: Plug into a weatherproof outdoor outlet or use a covered power box under the porch. Budget $25-70 depending on the length and number of strands.
Pro tipTuck the first row of lights behind a porch trim board so the top attachment hides from view.
Watch outDon’t let strands bunch up — uneven lengths make the curtain look sloppy.
7. Pinecone and Burlap Wreath Frame with Outdoor Spray Finish

This wreath looks hand-built and full, but it’s still easy: you’re building texture. Start with a simple wreath frame, then add burlap strips for a soft base and pack pinecones for shape. Finish with warm white mini LEDs tucked between pinecones so the wreath glows like a winter fire. The look is best on front doors with a bit of contrast — black, dark green, or natural wood doors make the burlap and pinecones pop. It solves the problem of store wreaths that look flat because the pinecones never reach the edges.
Step 1: Wrap a 16-20 inch wreath frame with burlap strips overlapping like petals, then secure with hot glue or outdoor adhesive. Step 2: Glue pinecones in rows from the outer edge inward, using a mix of sizes for a layered look. Step 3: Add warm mini LEDs by weaving the string between pinecone bases, then spray a clear exterior sealant lightly to help with moisture. Cost is usually $30-90 depending on pinecone supply and whether you buy a wreath frame.
Pro tipUse pinecones with different open/closed shapes — the variety gives sparkle without extra ornaments.
Watch outDon’t skip exterior sealant if you live where nights get wet — pinecones can discolor quickly.
8. Snowman Planter Trio with Stacked Pots and LED Face
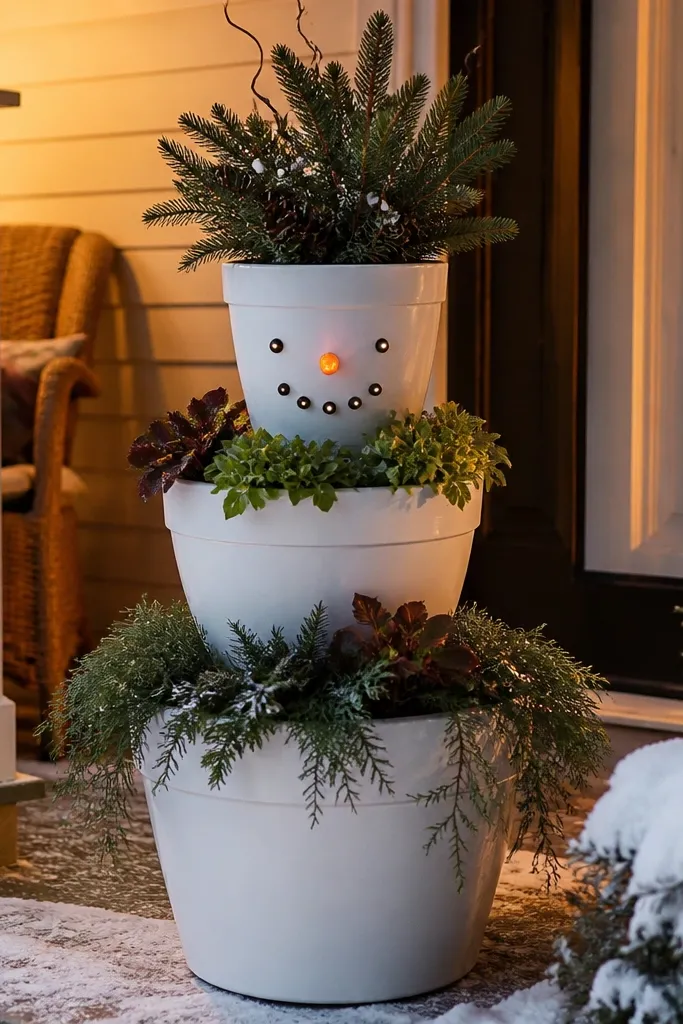
A snowman planter trio is photogenic because it’s sculptural and grounded in real winter plants. Stack three terra-cotta or plastic pots from small to large, then create a face with LED tea lights or a battery LED light strip. Use black for eyes and a small orange paper or foam nose, sealed for outdoor use. This works on patios, porch corners, or along a walkway where you want a character piece without building a full life-size figure. It solves the “snowman decor blows away” issue because pots weigh down the shape.
Step 1: Choose pot diameters like 6-8 inches, 10-12 inches, and 14-16 inches for a compact trio. Drill drainage holes if needed, then stack with outdoor construction adhesive or pot-to-pot foam spacers. Step 2: Create a face plate from thin corrugated plastic or craft foam, then attach it to the middle pot. Step 3: Add evergreen or winter greens into the top pot and tuck warm LEDs inside the foliage so the face glows. Expect $35-100 depending on pot material and plant choices.
Pro tipMake the face slightly higher than center on the middle pot so it looks natural from standing height.
Watch outDon’t use paper decorations for the nose and mouth — they soften and curl after one wet spell.
9. Patio Rope Garland with Red Ornaments and Pine Sprigs
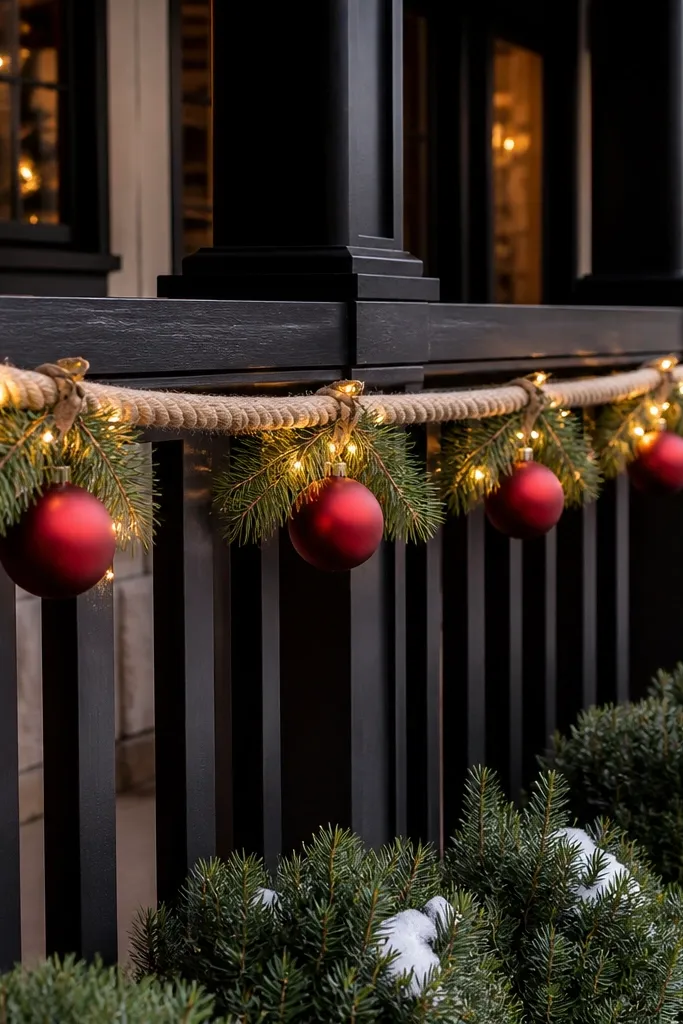
Rope garlands look clean and modern, especially when you keep the palette tight. Drape a thick jute or cotton rope along a railing or across a porch beam, then attach red shatterproof ornaments and pine sprigs at regular intervals. The rope gives you structure and keeps the garland from collapsing, while the ornaments add bold color pops. This works on small front porches where you want impact without building yard sculptures. It solves the “decor ends up on the floor” problem because rope garlands hang in a controlled curve.
Step 1: Measure the railing length and cut rope sections or use one long rope to span the area. Secure rope to hooks or eye screws every 12-18 inches so it holds a gentle arc. Step 2: Tie on pine sprigs with floral wire, then add red ornaments using zip ties through their loops for extra security. Step 3: Add a short strand of warm white LEDs behind the rope so the lights glow through the sprigs, not through empty rope space. Budget $25-75 depending on ornament count and rope length.
Hang ornaments in groups of two or three, not evenly spaced — it looks more natural and reads better in photos.
Don’t use shiny plastic ornaments only — mix matte and textured pieces so the garland doesn’t look flat.
10. Outdoor Snow Drift Board Walkway with LED Glow Edges

Snow drift boards make your yard look like a winter scene instead of a bunch of separate decorations. Build shallow, curved “drifts” from plywood or exterior foam board, then paint with a snow-texture finish and add warm LED edge lighting. The effect is a glowing path that frames your walkway and door, which looks great in night photos. This is ideal for driveways or steps where you want a guide line leading to the entry. It solves the problem of scattered decor that doesn’t connect into one cohesive story.
Step 1: Create drift shapes by cutting exterior foam board or thin plywood into curved panels, with drift height around 6-12 inches. Secure panels into place using stakes or a small base frame so they don’t shift. Step 2: Paint with exterior acrylic white and then add snow texture by mixing paint with fine sand or using a snow-texture product, keeping the surface uneven. Step 3: Glue or clip warm LED strip lights along the inner edge of the drift, then hide wiring along the back. Cost is usually $35-120 depending on panel size and how many meters of LED strip you use.
Pro tipMake the drift edges slightly irregular — perfectly smooth “snow” looks fake under harsh porch lights.
Watch outDon’t place the drift too narrow — under 12 inches wide reads as a thin strip instead of a snow bank.
11. Tarp-Molded Mini Wreath Planters for Window Boxes
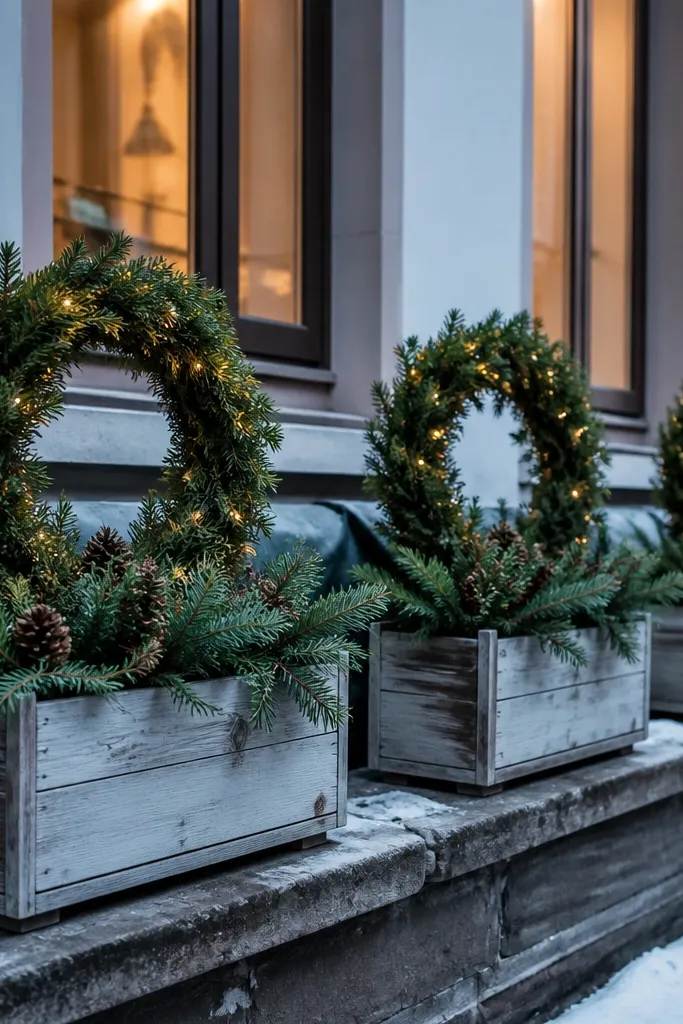
Mini wreath planters are a clever way to repeat your holiday look without adding bulky yard pieces. Make wreath-shaped frames from wire mesh or cheap plastic lattice, then fill them with evergreen sprigs so they look like living wreaths. Place them on window ledges, porch steps, or along the front wall so the decorations stay at eye level. This is best for homes where the yard is small, but the facade is wide. It solves the “I only have space for door decor” limitation.
Step 1: Bend wire mesh into wreath rings about 10-14 inches across, then wrap the mesh with landscaping fabric to hold plants. Step 2: Fill the center with potting mix or foam discs cut to fit, then anchor evergreen sprigs with floral wire. Step 3: Add battery warm LEDs tucked behind sprigs so each mini wreath glows. Plan about $20-60 for a set of 3-5, depending on how many you place.
Use two sizes — one 10-12 inches and one 14 inches — for visual rhythm across the front.
Don’t overstuff with random plants — keep it mostly evergreen so the wreath shape stays readable.
12. Black Metal Lanterns with DIY Pinecone Fill and Timer Lights
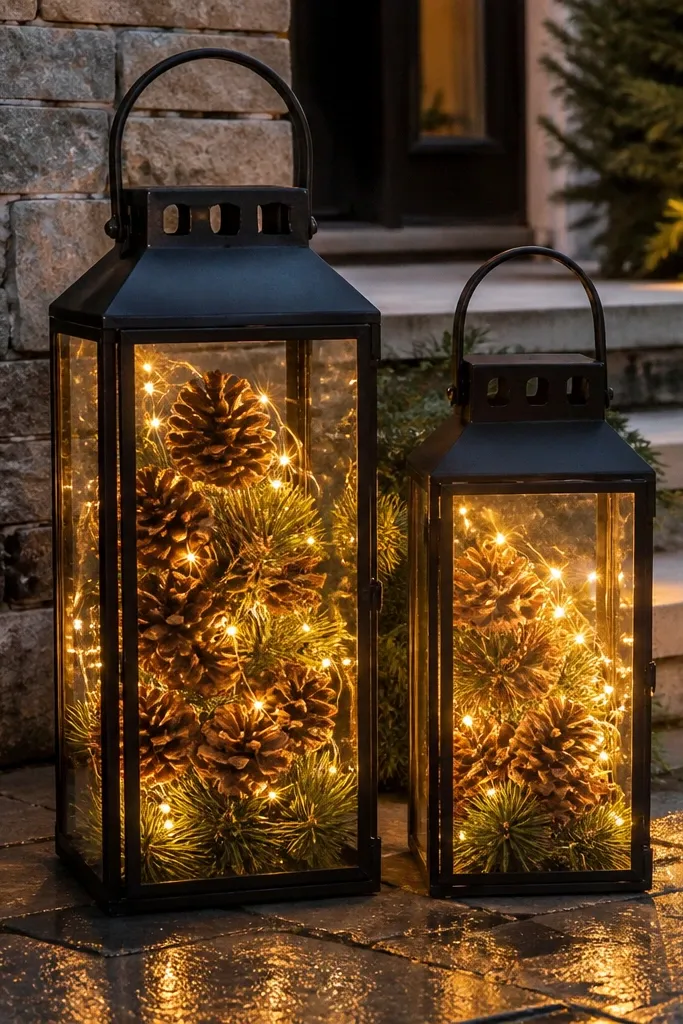
Lanterns look good because they create a controlled glow. Use black metal lanterns (or paint them black) and fill them with pinecones, faux evergreen clippings, and a small string of warm LEDs. The DIY part is the inside — you build a tight “winter cluster” so the light reflects off pinecone edges instead of showing empty space. This works on steps, porch corners, and beside the front door where people naturally stop. It solves the issue of bare entryways that need light but can’t take large sculptures.
Step 1: Choose lanterns with a flat base so they don’t tip, then clean and dry them. Step 2: Fill the base with pinecones and evergreen, then tuck the LED string so the light sits behind the densest pinecone layer. Step 3: Use a plug-in timer for the lights so the glow starts at the same time each evening. Cost is usually $40-120 depending on lantern size and whether you buy timers.
Pro tipAim the brightest part of the light toward the front glass side so the lantern reads clearly from the walkway.
Watch outDon’t use cold white LEDs — the pinecones will look gray and flat.
13. Faux Snow Bottle Brush Tree Row in Outdoor Planter Trench
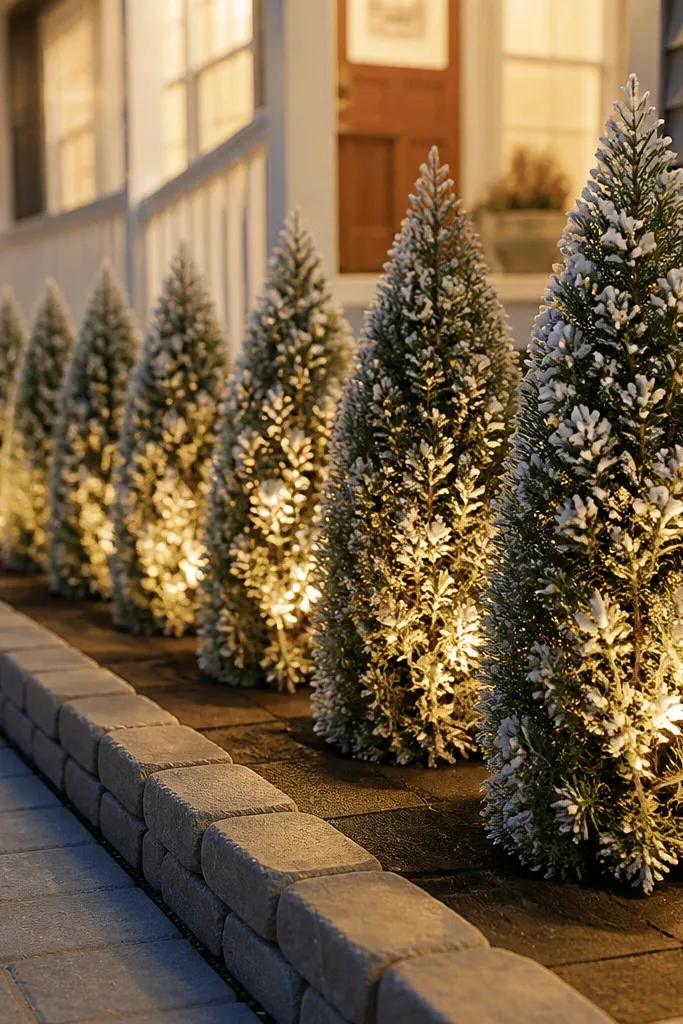
A row of small trees looks polished when you build a trench planter base and keep the heights consistent. Use bottle brush trees or small cone-shaped evergreens, then add faux snow over the tips so they look frosty under lights. The trick is uniform spacing — about 8-12 inches between trees — and a base that looks like a continuous snow bank. This works on the edge of a porch, along a front walk border, or in a long planter box. It solves the problem of “random mini trees” that look cluttered instead of designed.
Step 1: Create a shallow trench using exterior mulch edging or a low wooden border, about 6-10 inches deep. Step 2: Place trees evenly and lock them in with potting mix or foam wedges so they don’t shift when you add snow. Step 3: Sprinkle faux snow or snow-texture paint on the tips only, then tuck a warm LED string behind the row for a soft glow. Expect $25-70 depending on how many trees you buy.
Keep tree colors consistent — all white-frosted or all green with faux snow tips — for a clean photo look.
Don’t stack trees too close — crowded spacing makes the row look like a pile.