1. Warm White Lantern Trio on Black Metal Hooks
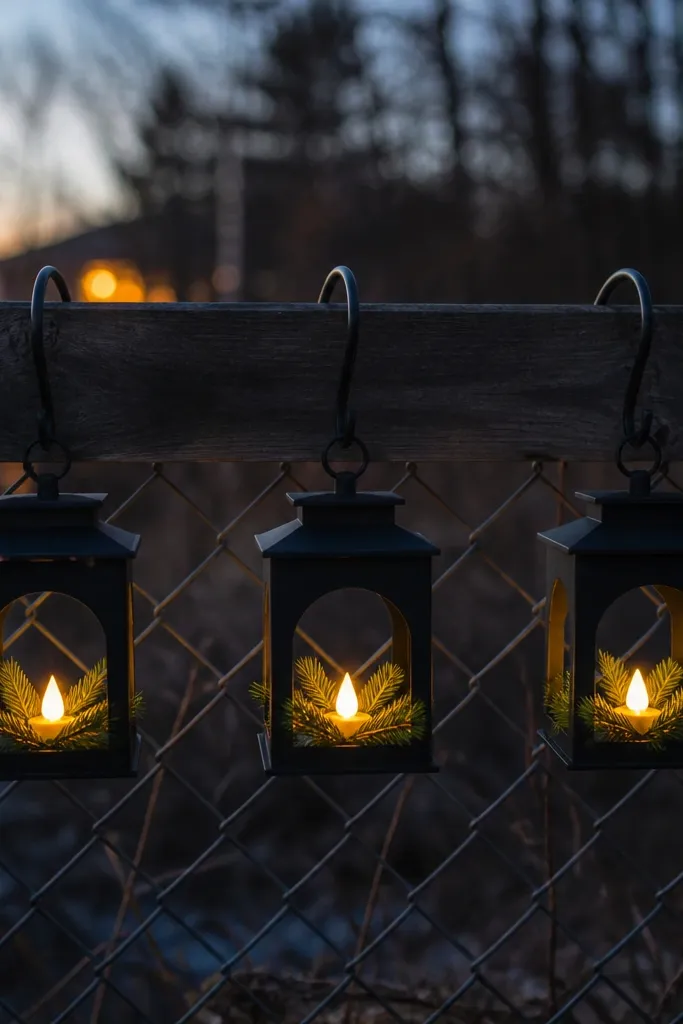
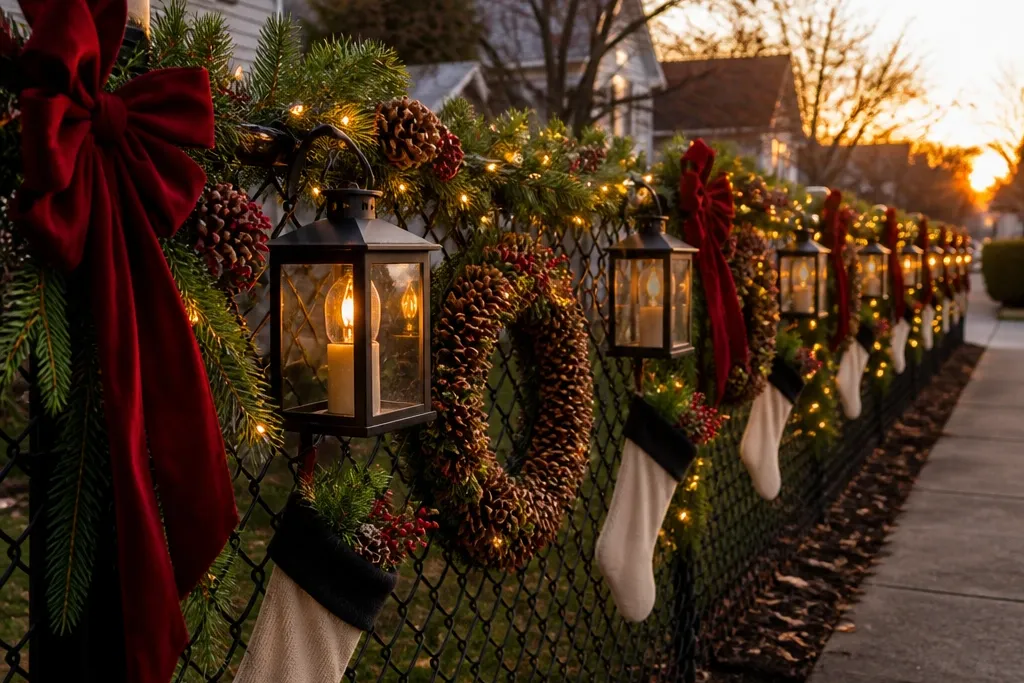
This look makes a fence feel styled because lanterns create vertical structure. Use matte black or dark bronze lantern frames so the metal doesn’t glare in daylight, and fill them with warm white LED tea-light strings or battery candles that mimic flame. Add short evergreen sprigs at the base of each lantern so the light looks grounded, not floating. It’s cheerful without being busy, and it works especially well on fences that already have a repeating pattern like wrought iron or pickets where the lanterns can line up.
Step 1: Install three hook points per fence section you’re dressing. Space the lantern centers about 18-24 inches apart, and keep the bottom of the lantern roughly 36 inches above ground for a clean sightline. Step 2: Attach lanterns using heavy-duty outdoor hooks or S-hooks with zip ties for extra security; for windy yards, use a second zip tie at the handle. Step 3: Add 6-10 inches of faux evergreen at the lantern base and tuck in a warm white micro LED strand so it follows the lantern’s inner edge. Plan for about 3 lanterns total per 6-8 feet of fence.
Keep the lantern glass matte or lightly frosted. Glossy plastic looks cheap when it catches direct sun.
Skip bright blue or multicolor LEDs — they turn the lantern glow into a toy effect.
2. Pinecone Wreaths in a Vertical Line
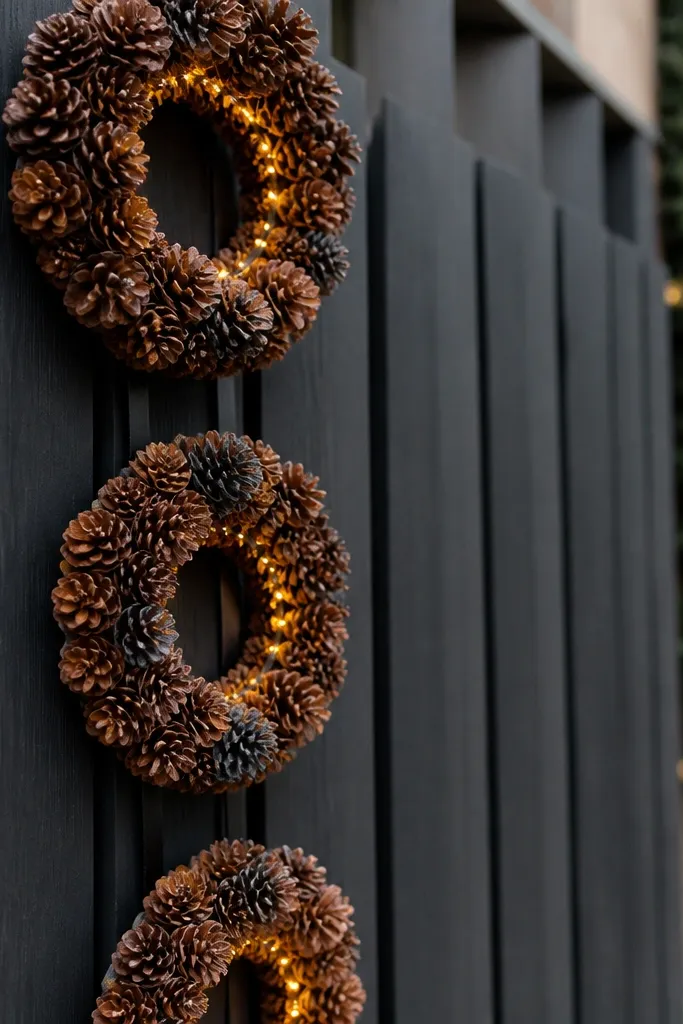
Step 1: Pick one fence post or corner and mount wreaths at three heights: 24 inches, 42 inches, and 60 inches. Use UV-rated wreath hangers or zip ties with a small loop of ribbon so you don’t crush the wreath form. Step 2: Wire the LED ring so the battery pack hides behind the post; run the wire along the back edge of the fence. Step 3: Keep the wreath diameter consistent, around 10-14 inches each, and stagger none of them if you want the “designed” look. Use one wreath per 4-5 feet of fence for a clean, premium spacing.
Small wreaths look high-end when they repeat and stay aligned. Choose wreaths that are pinecone-forward with minimal glitter, ideally in a natural brown or charcoal pinecone palette. Add a thin warm white LED ring inside each wreath so the pinecones read as textured, not flat. Place them in a vertical line along one fence post or between two posts so your eye has a clear path. This is a great choice for narrow fences or when you want holiday charm without covering every inch.
Watch outDon’t mix pinecones with heavy snow spray. It creates patchy shine that looks messy outdoors.
Pro tipUse a thin ribbon in cream or black to connect wreath placement to your palette.
3. Evergreen Garland Swags with Red Berry Picks
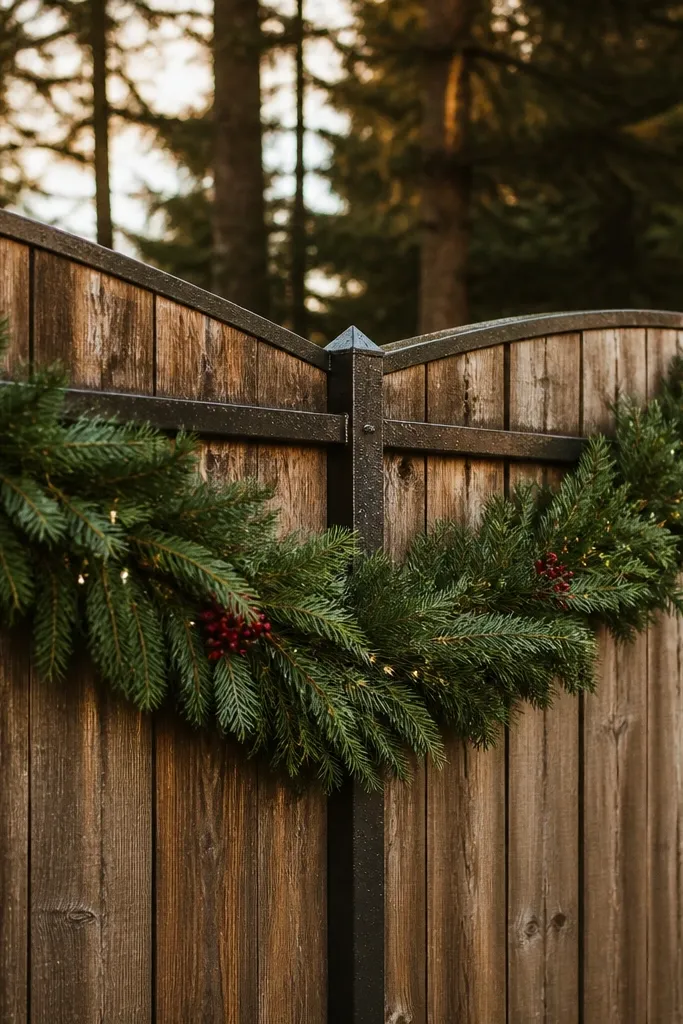
Step 1: Measure the fence span and decide your swag points. For a 6-foot section, hang two swags: one centered at 18-24 inches from the top rail and one slightly lower, or mirror left-right if your fence is uniform. Step 2: Attach garland using outdoor zip ties every 12-18 inches along the back rail, then hide ties with berry clusters. Step 3: Add 3-5 red berry picks per swag and weave the micro LED strand through the garland spine before you zip it down. Plan for 1 garland per 4-6 feet of fence depending on how full you want it.
Swags look expensive because they create motion and depth. Choose a thick outdoor garland with flat backing so it sits against the fence, then add berry picks in a controlled way — not everywhere. The berries should be deep red or burgundy matte, and the greenery should be mostly dark green to keep it grounded. Add a warm white micro LED strand threaded through the garland so it glows from within. This is a strong pick for wooden fences and privacy fences where garlands can drape across horizontal rails.
Watch outSkip thin, wispy garlands. They show fence gaps and make the whole setup look unfinished.
Pro tipLet the garland “kiss” the fence by leaving 1-2 inches of slack between zip points. Perfect straight lines look less premium.
4. Black-and-Cream Stocking Holders Along the Bottom Rail
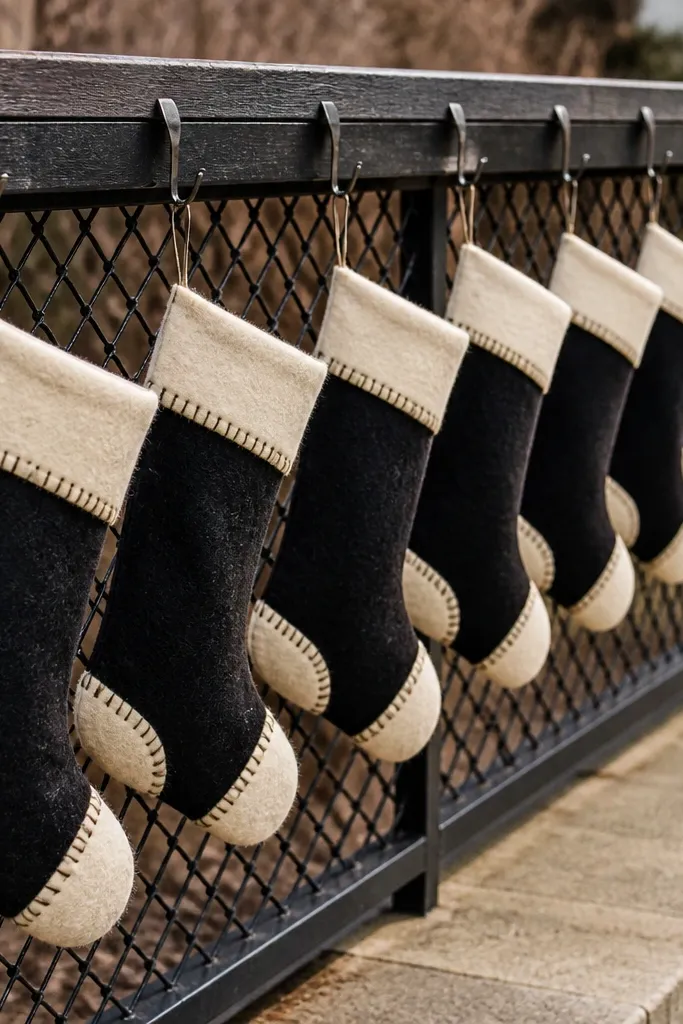
Mini stockings add charm without covering the entire fence, and they read clearly in photos because they create a repeating shape. Use outdoor stockings in black-and-cream felt or wool blend so they look textured rather than glossy. Hang them from the bottom rail or mid-rail using small hooks or clothespins so they sway slightly in wind. Add a warm white string of mini lights behind the stockings so the glow frames the fabric. This look suits yards where you want holiday decor but also need the fence to stay visually light.
Step 1: Choose stocking size that matches your rail spacing. If your pickets or mesh are close together, use 8-10 inch mini stockings; if rails are wider, use 12-14 inch. Step 2: Install a line of small S-hooks or spring clips along the rail, spacing them every 20-24 inches. Step 3: Attach stockings by looping a ribbon tie over the hook, then tuck the light wire behind the rail so it’s hidden. Add a small pine sprig inside each stocking opening for a cohesive, natural look.
Keep the stockings facing forward. If they twist, the whole design looks accidental.
Don’t hang full-size stockings on narrow fences. They hit the ground and look bulky in daylight.
5. Oversized Red Bow Clusters at Fence Corners
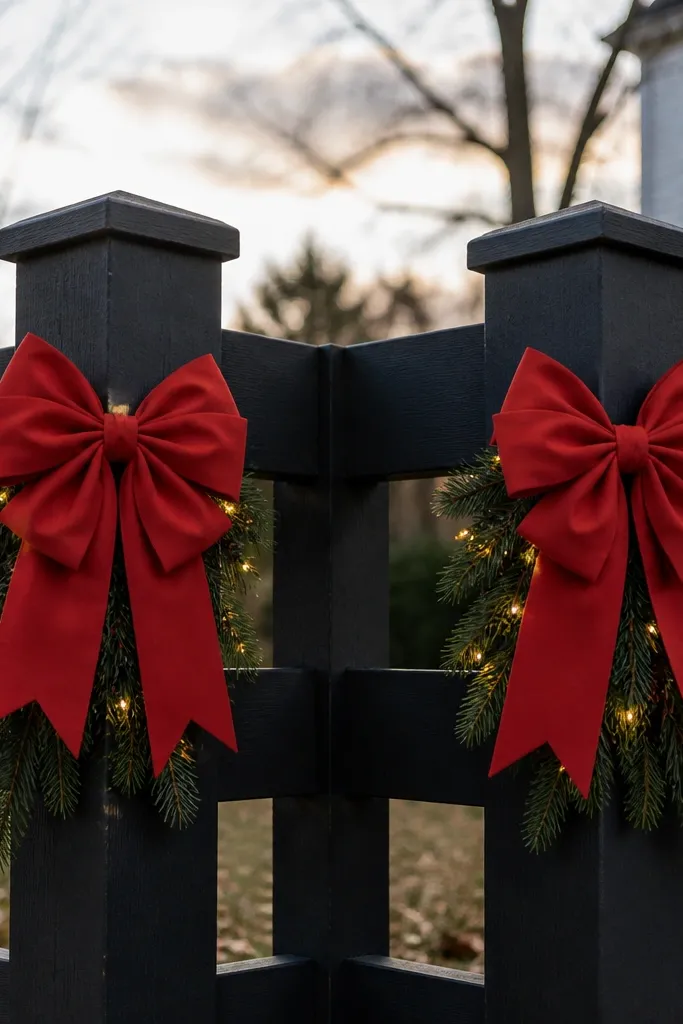
Step 1: Use 2 corner clusters per property segment — one at the left corner and one at the right, about 6-12 feet apart depending on your fence length. Step 2: Tie each bow to the fence using zip ties hidden behind ribbon loops; anchor with a second tie so the bow doesn’t rotate. Step 3: Add 6-8 inches of evergreen tuft under the bow and weave a 10-20 light warm LED mini strand through the tuft. Keep bow width around 10-14 inches for a bold look that still fits most fences.
Corners are where a fence starts to look like a design, not a collection. Oversized bows create an instant focal point, and fabric bows in matte red look more high-end than shiny ribbon. Pair each corner bow cluster with a short evergreen tuft so the bow doesn’t float above empty space. Add a few warm white LED points inside the evergreen, not in the ribbon itself. This is ideal for driveways and entry paths where people see the corners first.
Watch outSkip thin satin ribbon outdoors. It collapses fast and looks wrinkled.
Pro tipChoose ribbon with a wired edge or stiff backing. It holds a crisp fold in wind.
6. Chain-Link Star Wreaths with Windproof Ties
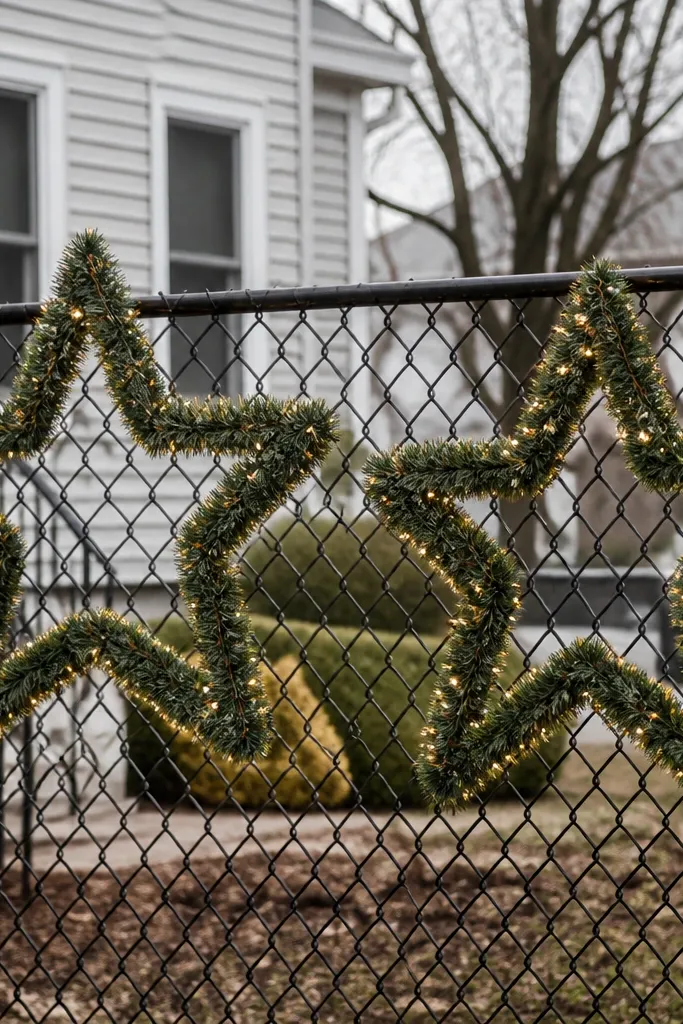
Step 1: For each star, plan for a 12-16 inch star width and tie it to the chain-link at two vertical points using UV-rated zip ties or twist ties. Space stars about 3-4 fence panels apart so the design repeats. Step 2: Secure the evergreen wrap with floral wire at the back so it doesn’t loosen. Step 3: Install warm white LED string lights inside the star frame and route the battery pack behind the fence where it’s less exposed to rain. Use 1 star per 4-6 feet of fence for a high-end feel.
Chain-link fences are tricky because everything looks like it’s hanging off the wire. Star wreaths solve that by giving you a clear shape that reads even when the fence moves in wind. Use wire-formed star wreaths wrapped in dark green faux evergreen, then add warm white LEDs inside the star so it glows as a single unit. Tie them at two points — top and bottom — so they don’t spin. This look feels cheerful because stars are instantly holiday-coded, and it stays neat because each piece is a defined silhouette.
Watch outDon’t hang loose garland on chain-link without tension. It sags and looks messy by day three.
Pro tipIf your chain-link is dark, keep the star evergreen dark too. The contrast looks intentional instead of patchy.
7. Wood Picket Mini Topiaries with Warm White Bulbs
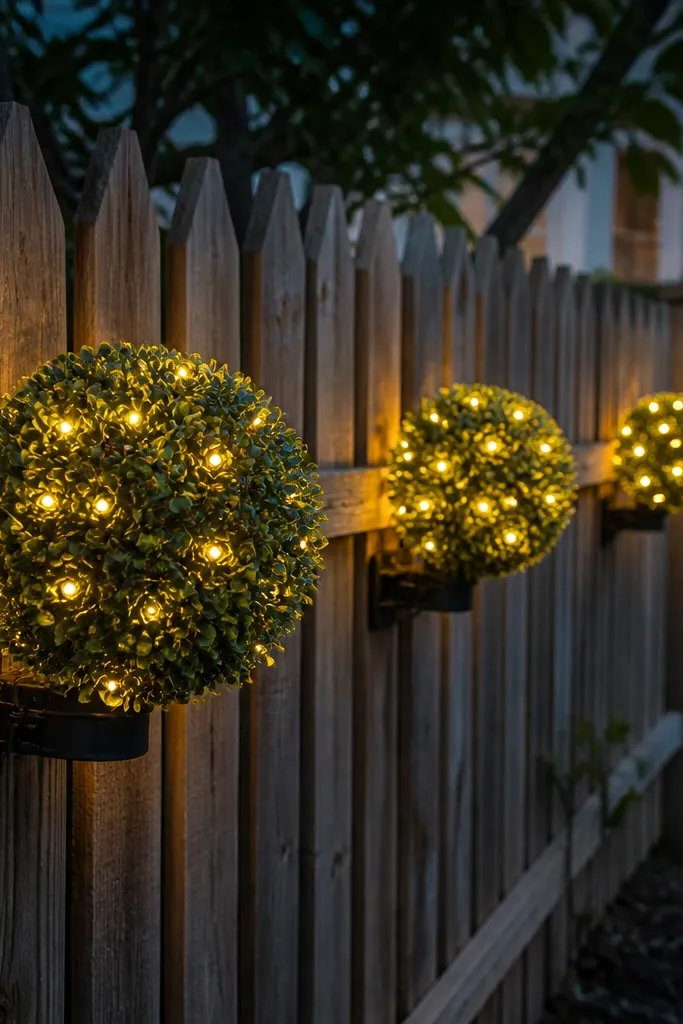
Topiary balls look high-end because they read as sculptural, not decorative clutter. Use faux evergreen ball topiaries designed for outdoor use, then mount them at consistent heights on a picket fence using brackets or sturdy clips. Choose a warm white LED bulb string inside each ball so it glows evenly through the greenery. Add a thin layer of berry stems only on the front half so the back doesn’t look bare. This works best on wood pickets or fences with visible vertical lines that can frame the balls.
Step 1: Pick 3 mounting heights that match your fence rhythm: 28-32 inches, 44-48 inches, and 58-62 inches. Space the balls 24-30 inches apart so they don’t overlap visually. Step 2: Attach using outdoor-rated fence brackets or heavy clips that grip the picket — avoid soft plastic hangers that crack in cold. Step 3: Thread warm white micro LEDs through the topiary and tuck the battery pack behind a picket overlap. For a 6-foot run, start with three balls total.
Angle the berry stems slightly inward toward the yard so photos show a fuller face.
Skip shiny metallic ornaments on each ball. Too many reflective bits flatten the sculpted look.
8. Cream Wreaths with Black Ribbon on Every Third Post
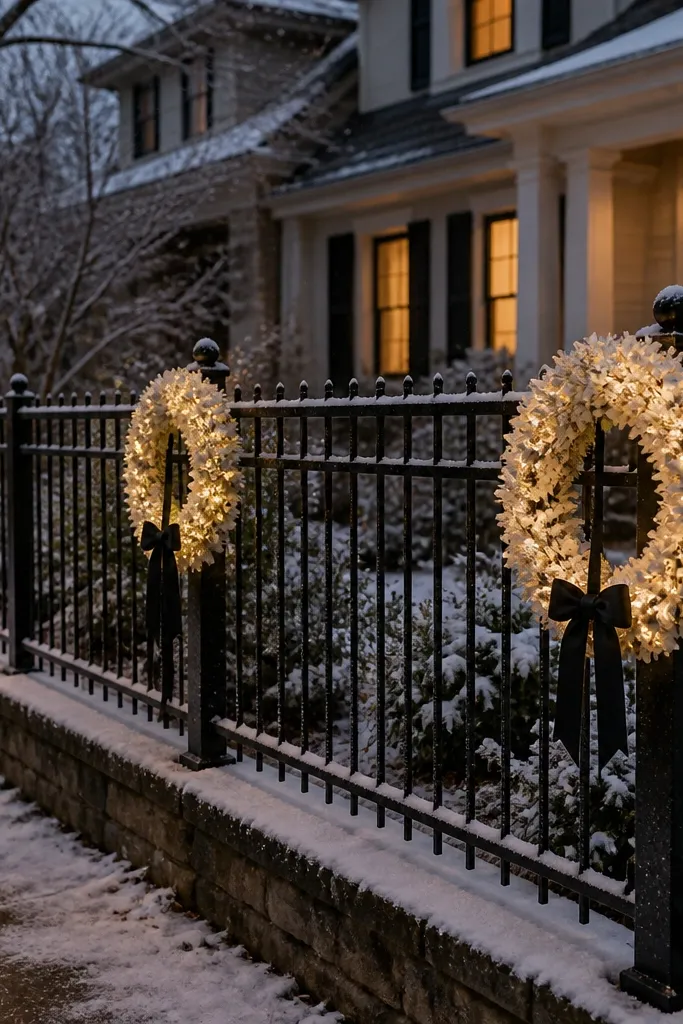
Step 1: Measure post-to-post spacing and mount wreath centers at 54-60 inches for a consistent eye level. Place wreaths on every third post to avoid crowding; for a 24-foot fence, that’s about 8 wreaths. Step 2: Tie with black ribbon loops over outdoor hooks, then secure the back with a hidden zip tie. Step 3: Add a warm white LED mini strand inside each wreath before mounting so you’re not fighting wires in place. Keep wreath diameter around 14-18 inches for a premium scale.
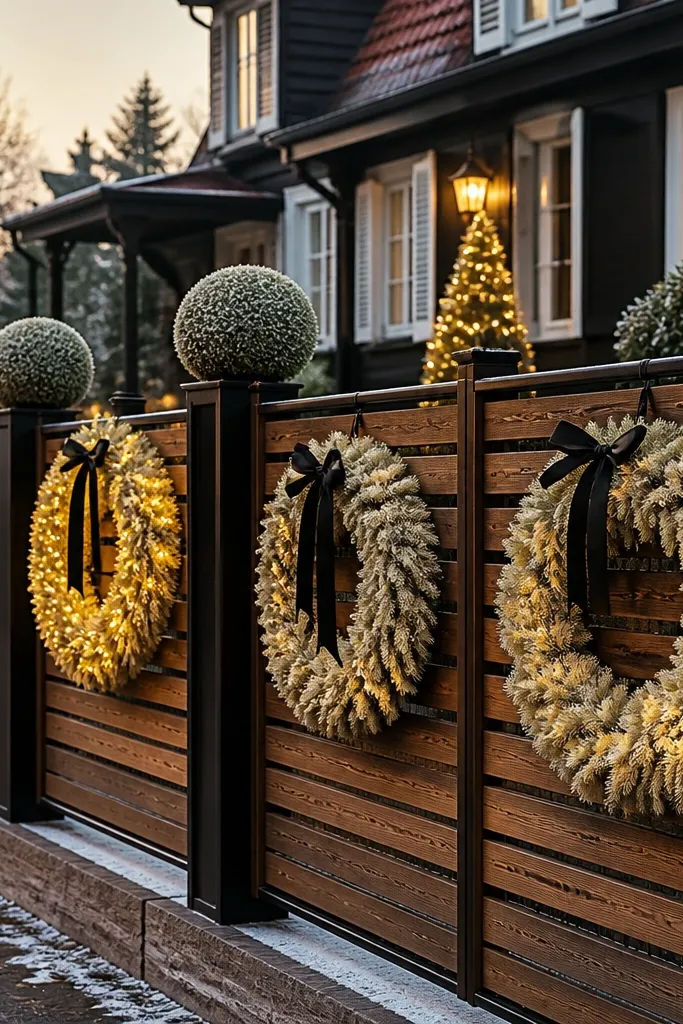
This is the clean, high-end “editorial” look: uniform wreaths and a strict spacing rule. Choose cream wreaths made of outdoor-safe material like foam or wire wrapped in matte faux greenery in pale tones. Add black ribbon bows that are small and crisp, not oversized. Put warm white lights inside the wreath ring so the cream reads as soft, not washed out. The key is consistency: same wreath size, same ribbon placement, same height. It looks cheerful because cream + warm light feels cozy even in daylight.
Watch outDon’t mix wreath sizes. Variation without a plan looks random fast.
Pro tipUse satin black ribbon with a wired edge so the bow keeps shape all season.
9. Giant Felt Stocking and Plaid Trim on a Single Section
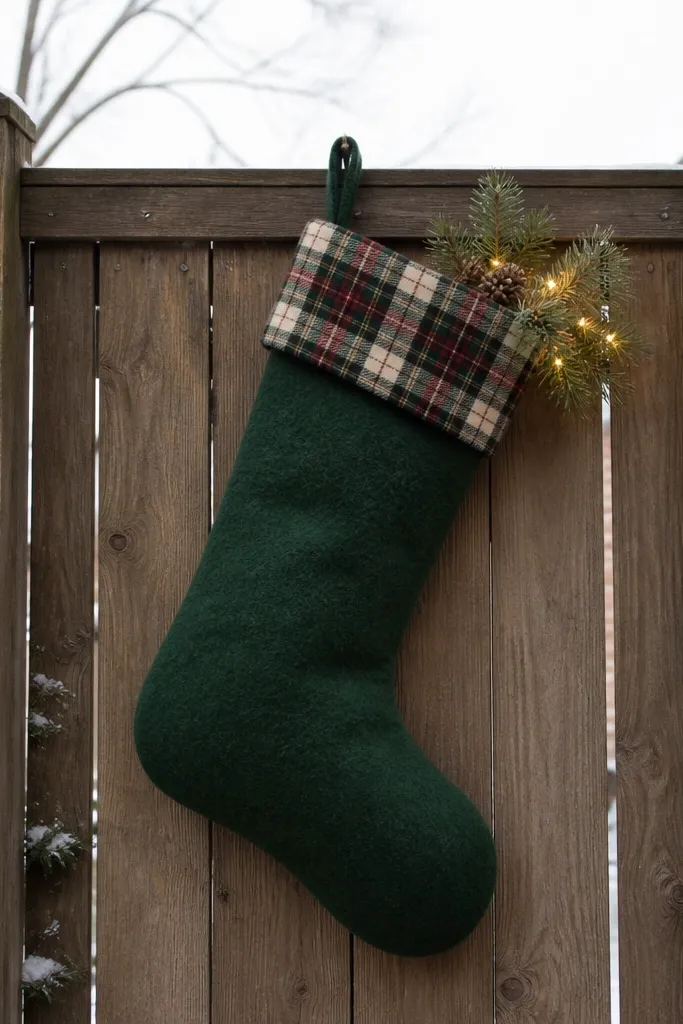
Step 1: Choose one fence panel to own. Center the stocking so its top is about 12 inches below the fence top rail; bottom should land around 8-12 inches above the ground. Step 2: Mount using two heavy-duty clips at the top corners plus one at the midline so it doesn’t sag. Step 3: Tuck a warm white mini LED strand inside the stocking and hide the battery pack behind the fence panel. Effort is low because it’s one piece — plan on 1 stocking per 8-10 feet of fence.
One oversized stocking looks more expensive than lots of small ones because it gives the fence a single hero moment. Pick a giant felt stocking in deep red or forest green with plaid trim at the cuff. Keep the ornamentation minimal: maybe one small sprig and a simple warm white light string tucked inside. Mount it on a single fence section so it reads from the driveway, then repeat smaller accents nearby if you want, but don’t crowd the hero. This suits fences with a clear viewing angle where a focal point will get noticed.
Watch outSkip shiny ornaments on the stocking. Felt + plaid already reads cozy and textured.
Pro tipAdd a small plaid ribbon loop at the top of the stocking to connect it visually to your other red accents.
10. Natural Wood Garland Clips with Pine Sprigs and Twinkle Lights
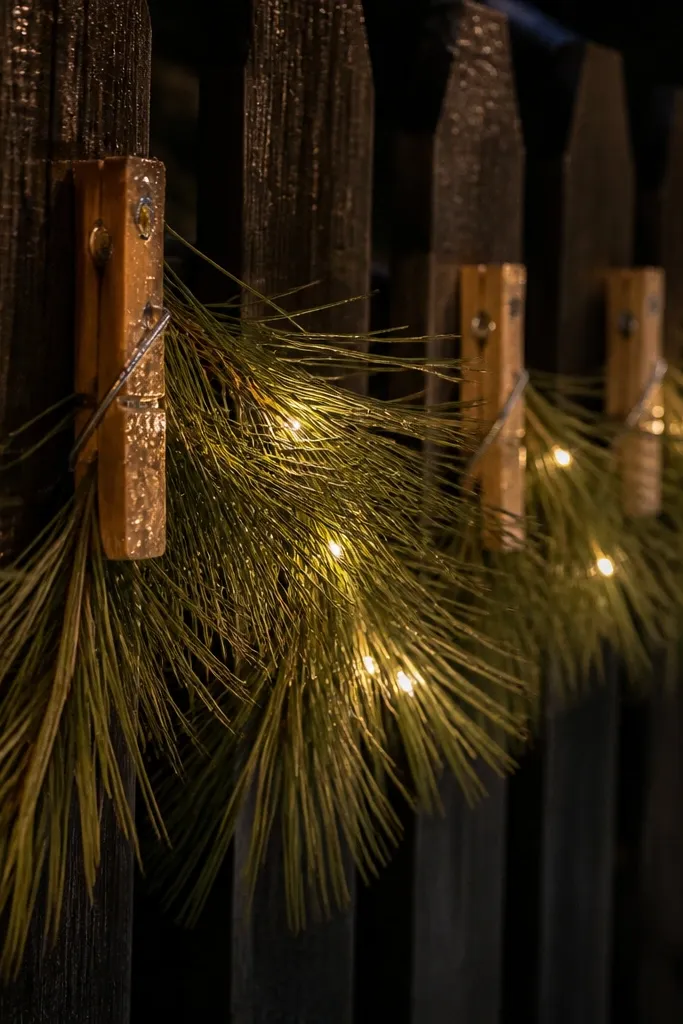
This look is subtle but looks high-end because it’s structured. Instead of full garlands, use short pine sprigs clipped in a repeating pattern with natural wood clips or dark metal clips. Add a warm white twinkle light strand that runs behind the sprigs, so the glow appears to come from the greenery. The result is neat, airy, and photogenic because you can see the fence lines through the decor. It works well when you have a busy fence material and you don’t want to cover it completely.
Step 1: Cut your sprigs into consistent lengths, about 10-14 inches, and plan a clip every 18-24 inches. Step 2: Use garland clips or wooden clothespins attached to the fence rail, then wedge the sprig base under the clip so it sits flat. Step 3: Run a warm white mini LED strand behind the sprigs along the same rail line, then test the battery pack position before you clip everything. For a 10-foot section, start with 6-8 sprigs.
Keep sprigs mostly facing the street. If they point inward, the lights look dim in photos.
Don’t use cool white LEDs. The whole look shifts from cozy to sterile.
11. Red Velvet Ribbon Banners with Mini Wreath Tabs
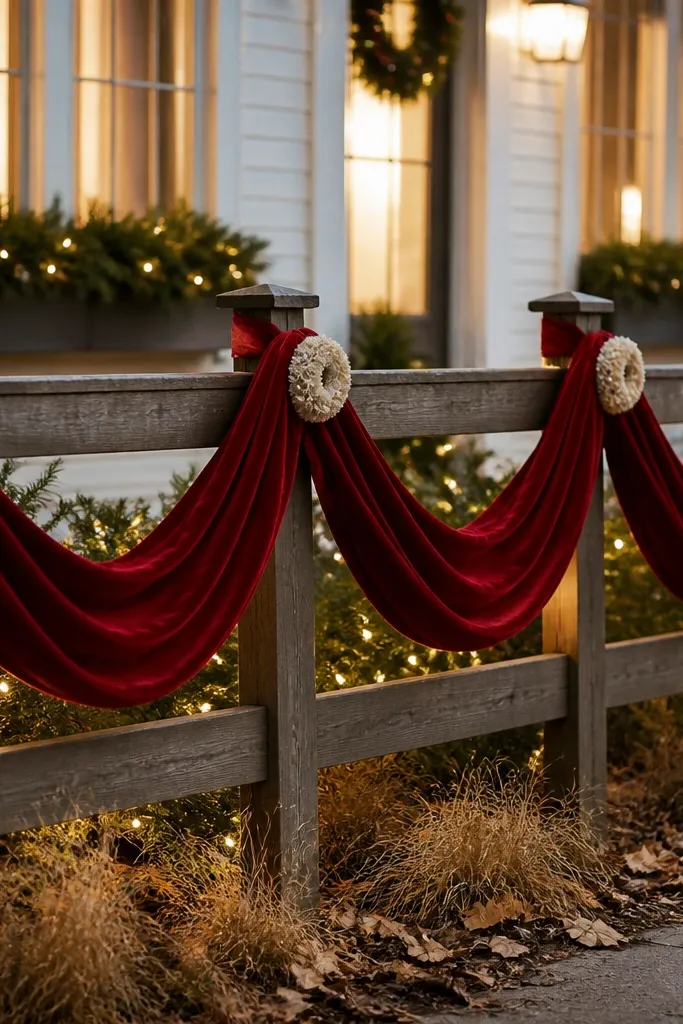
Ribbon banners look luxe when they’re fabric and when they repeat small accents. Use red velvet ribbon (or a heavy matte faux velvet) and drape it across fence sections in gentle arcs. Add mini wreath tabs every 2-3 feet: small wreaths or rosettes that sit where ribbon overlaps. Warm white LEDs hidden behind the ribbon create a glow line that looks intentional. This works best on fences with horizontal rails or spaces where ribbon can catch light without sagging.
Step 1: Cut ribbon lengths to fit each fence section and plan overlap points. For a 6-foot section, use about 2.5-3 feet of ribbon per banner run, anchored at both ends and one middle point. Step 2: Attach ribbon with UV-rated zip ties behind the rail so the tie line disappears. Step 3: Add mini wreath tabs at 24-36 inch intervals by tying them to the ribbon and clipping the back to the fence. Place battery packs behind the middle rail for easy access and stable mounting.
Steam or press the ribbon lightly before hanging so the folds stay crisp.
Skip thin organza ribbon. It flutters and makes the design look temporary.
12. Two-Tone Ornament Panels with Shatterproof Baubles
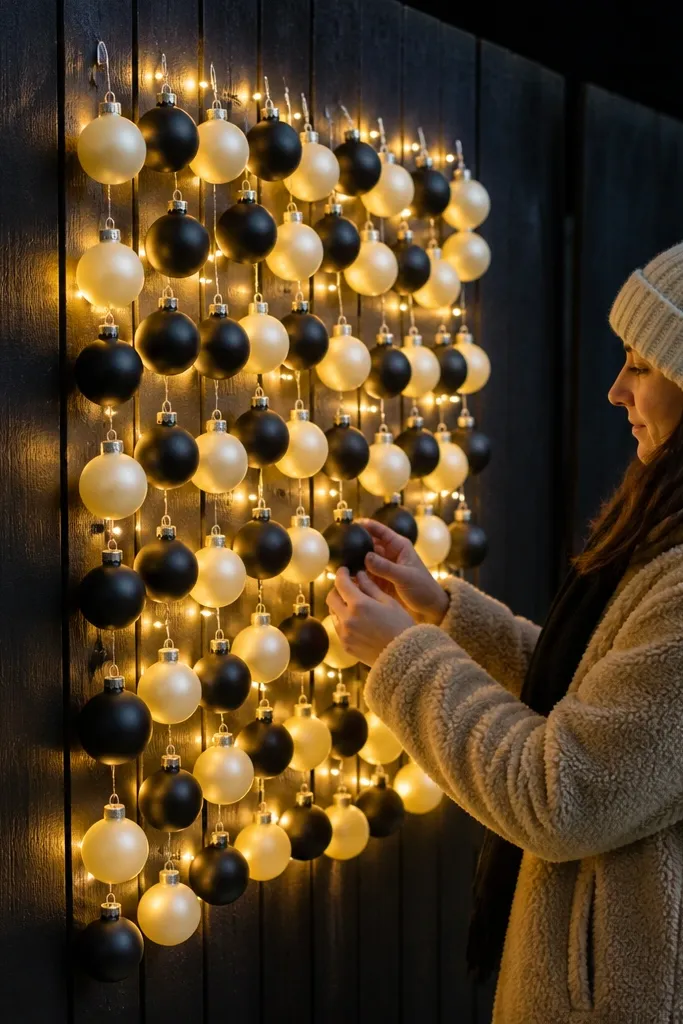
Ornament panels look high-end when you limit colors and keep the ornaments uniform. Use shatterproof baubles in two tones — like matte black and warm cream, or dark green and burgundy — then hang them from transparent outdoor fishing line or clear ornament hooks. Add warm white lights behind the ornament cluster so the baubles glow as a group instead of individually. This creates a dense, festive look that still feels clean because the color palette is tight. It’s perfect for fences with open space where a cluster can fill the view without covering everything.
Step 1: Pick a 3-4 foot fence section for your panel. Arrange 10-16 baubles in a loose grid, then mark attachment points on the fence rail or hooks. Step 2: Hang baubles using clear fishing line tied to small eye hooks; pull each line taut so ornaments hang at the same height. Step 3: Thread a warm white LED strand behind the cluster along the back side so it lights the baubles from behind, not from the front. Use 8-10 mm baubles for a noticeable scale.
Mix finishes intentionally: matte with one satin tone. Avoid mixing too many glitter textures.
Don’t use fragile glass ornaments outdoors. Wind and fence bumps will ruin the look fast.