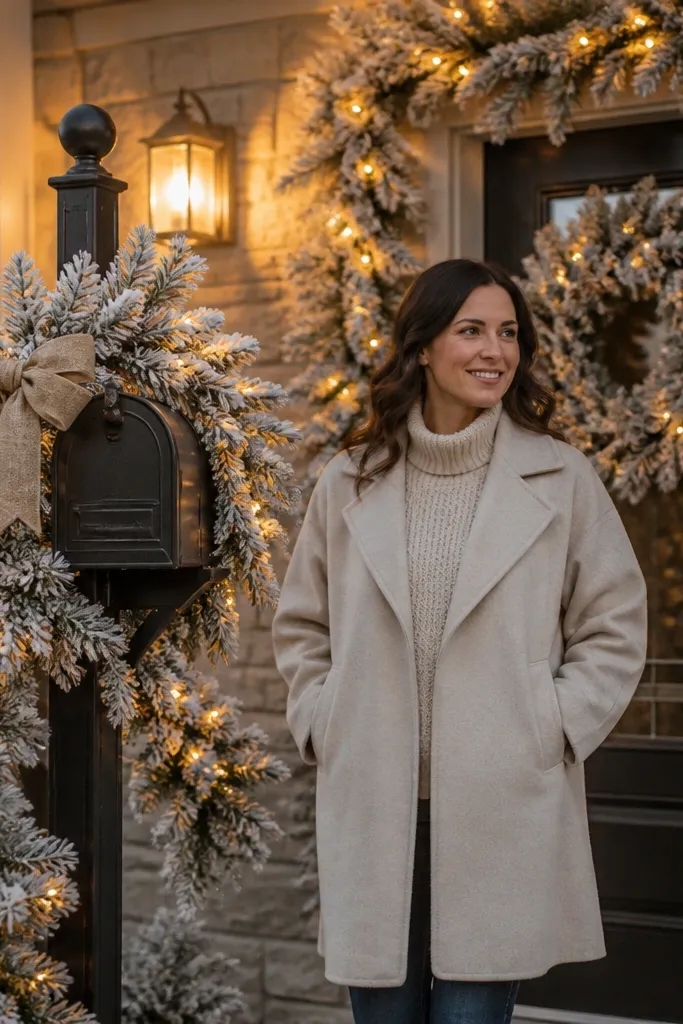
1. Front Door Frosted Wreath with Matching Bow
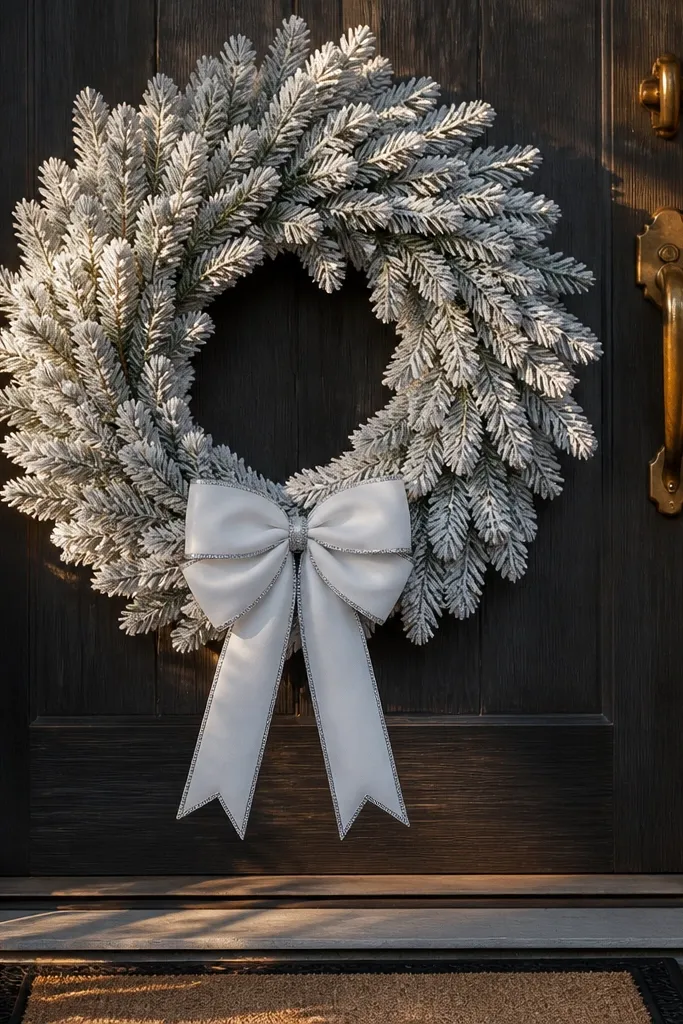
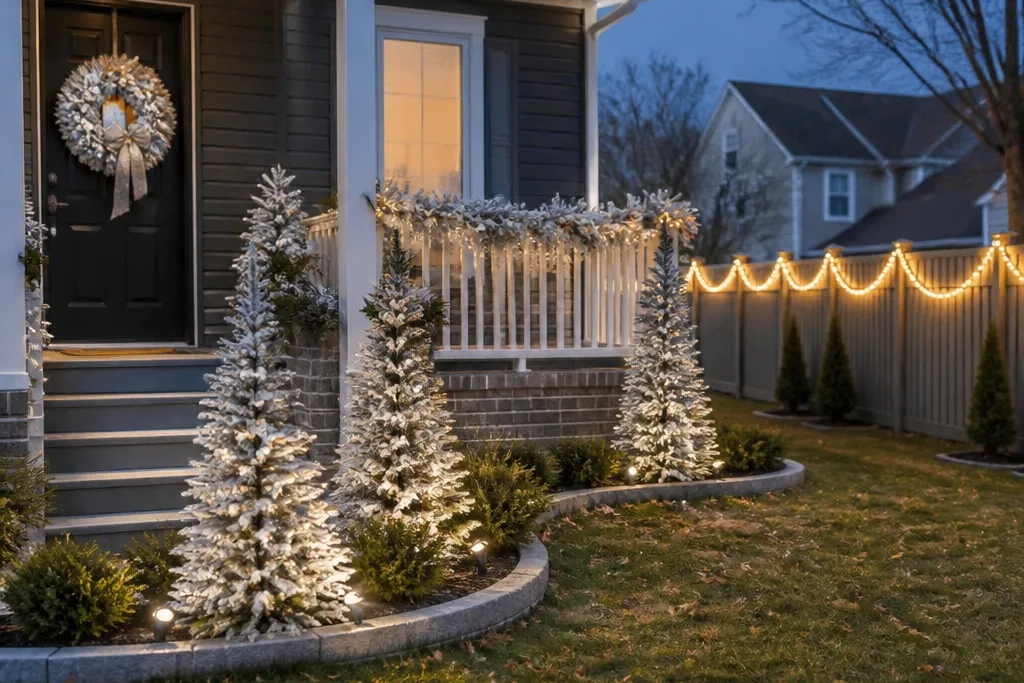
A frosted wreath on the front door is the easiest way to make the whole yard feel decorated because it’s the first thing people see when they pull up. Choose a wreath with PE branches or a dense foam core so it keeps its shape and doesn’t shed. Go for a white-and-green look with a wired bow in crisp white or icy silver so the colors pop against a dark door. Add a simple accent like 6-8 matte pinecones or frosted berries in the same tone — not mixed metals. This setup stays low maintenance because you’re not rebuilding it every day; you’re styling one focal point that holds up to wind.
Hang the wreath at eye level with a heavy-duty wreath hook rated for outdoor use. Fluff the branches once, then attach the bow with zip ties or the wreath’s built-in loops so it sits centered. If your door is windy, add two small clear command-style outdoor hooks on the door frame and use thin fishing line to lightly stabilize the wreath at the sides. Budget effort is low: plan for 15-25 minutes total and a single wreath purchase.
Pick one bow size and repeat it elsewhere — a smaller bow on a lantern or mailbox makes the yard look intentional.
Avoid glittery ornaments that flake in cold weather and end up on your mat.
2. Mailbox Snowy Garland Line with Warm White Clips
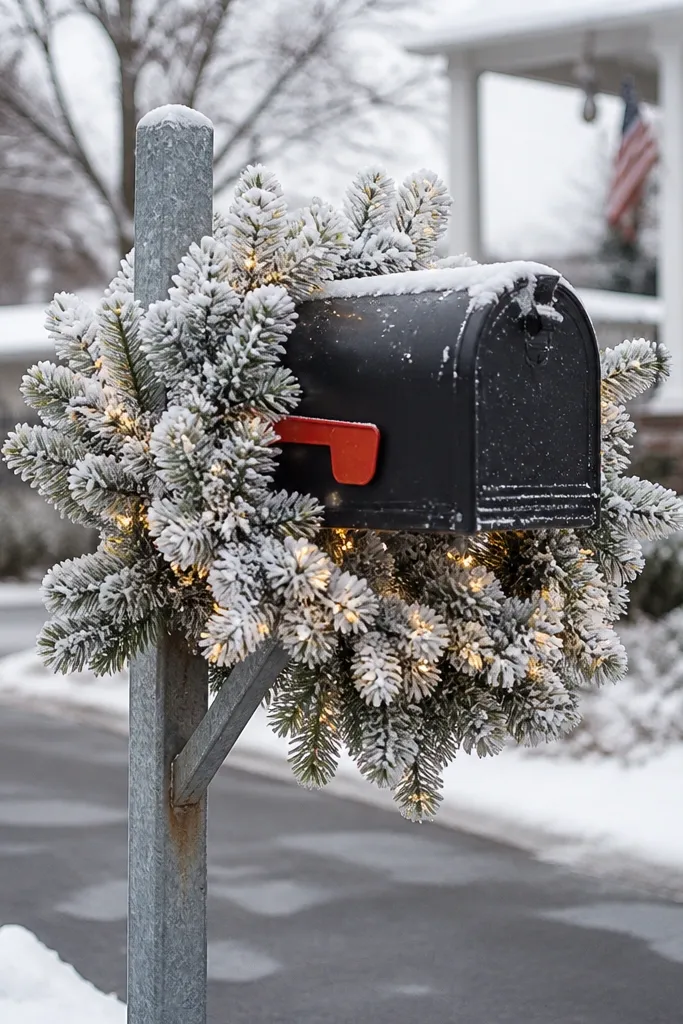
Wrap the garland around the mailbox post so the thickest part faces the street, then secure with zip ties hidden under the branches. Add 2-3 light clips or small cable ties so the lights follow the garland’s contour instead of hanging loose. Plug in the light set using the same outdoor extension route you already use for holiday lights so you’re not running cords across walkways. Plan for about 20 minutes and $25-60 depending on garland and light length.
Mailboxes are often the empty gap between street and porch. A short snowy garland wrapped around the mailbox post, plus warm white lights clipped in place, makes that gap look finished. Use a garland that’s thick enough to read from 30-50 feet away, ideally PE or faux pine with a light dusting effect. Keep the lights warm white (2700K) so the glow looks cozy, not blue. This solves the “looks festive from the door but not from the road” problem because the mailbox is visible in most drive-by angles.
Watch outDon’t wrap lights tightly around the metal post; it can pull them out of position when you adjust the garland.
Pro tipUse clear outdoor clips rather than tape — your garland stays removable and the lights don’t shift.
3. Porch Rail Garland with 3 Matching Bow Points
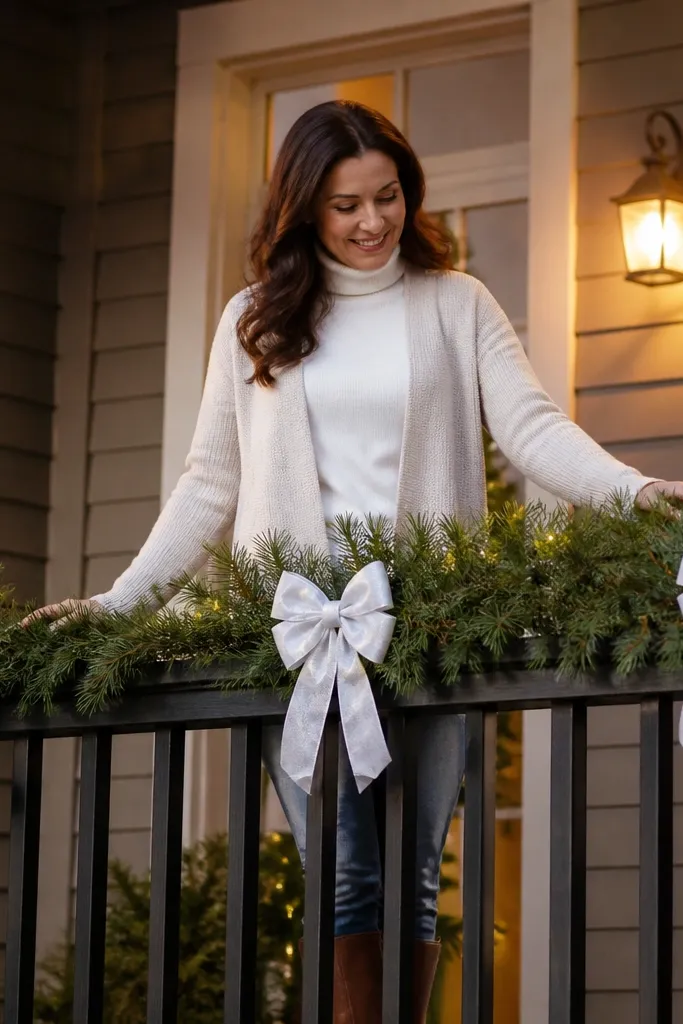
Measure your rail length and cut the garland so it spans with a small gap at each end (about 2-3 inches) for a tidy look. Zip-tie the garland to the underside of the rail every 12-18 inches, then attach bows using wire or zip ties at the three planned points. Finally, tuck in 6-8 battery LED mini lights along the garland’s inner edge so the glow sits under the bows, not on top. Total time is usually 30-45 minutes for an average porch.
Porch rails are perfect for a low-effort, high-impact look because you can create a long horizontal line that photographs cleanly. Choose a garland with a flat backing or thick PE needles so it sits flush to the rail instead of floating away. Style three bow points — one centered, two near the corners — using wired ribbon in the same color family (white with silver edges or red with black plaid accents). Add tiny evergreen clusters only at the bow points so it doesn’t look overloaded. This works for curb appeal because it frames your entry and gives the eye a clear path across the porch.
Watch outSkip thin, shedding garland that looks wispy in daylight and turns patchy once the wind hits.
Pro tipSpace bow points so the center bow lines up with your door knob or wreath — alignment reads expensive in photos.
4. Icicle Light Curtain Over the Front Steps
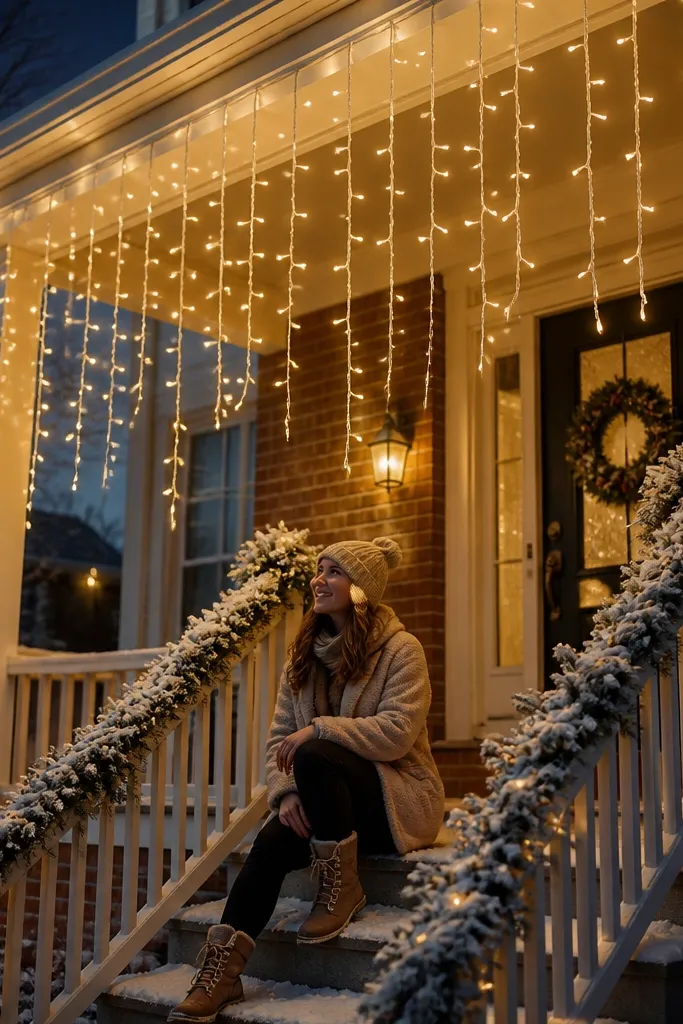
Icicle lights create a “snow fall” effect without the mess of real snow, and they photograph beautifully because the strings hang downward in a clear pattern. Use plug-in outdoor icicle lights with pre-set drop lengths so you don’t spend time untangling. Warm white (2700K) looks best on most home exteriors, especially brick and wood. Mount them across a front steps soffit, porch ceiling edge, or along a railing line where the drops are visible from the sidewalk. This is low maintenance because once you clip them in place, the look stays consistent all season.
Drape the icicle strands across your mounting points and keep the top wire taut so the drops hang evenly. Clip or tie the top line every 6-10 inches using outdoor clips, not tape. Plug in and check symmetry from the street — adjust before you secure the last few clips so the curtain looks intentional. Choose a length that covers the steps width plus 6-12 inches on each side for full coverage.
Run the light cable along a corner edge, then hide the first plug behind a step riser so the setup looks clean.
Don’t mix different icicle lengths; uneven drops look sloppy fast in close views.
5. LED Lantern Pair on Planter Lids
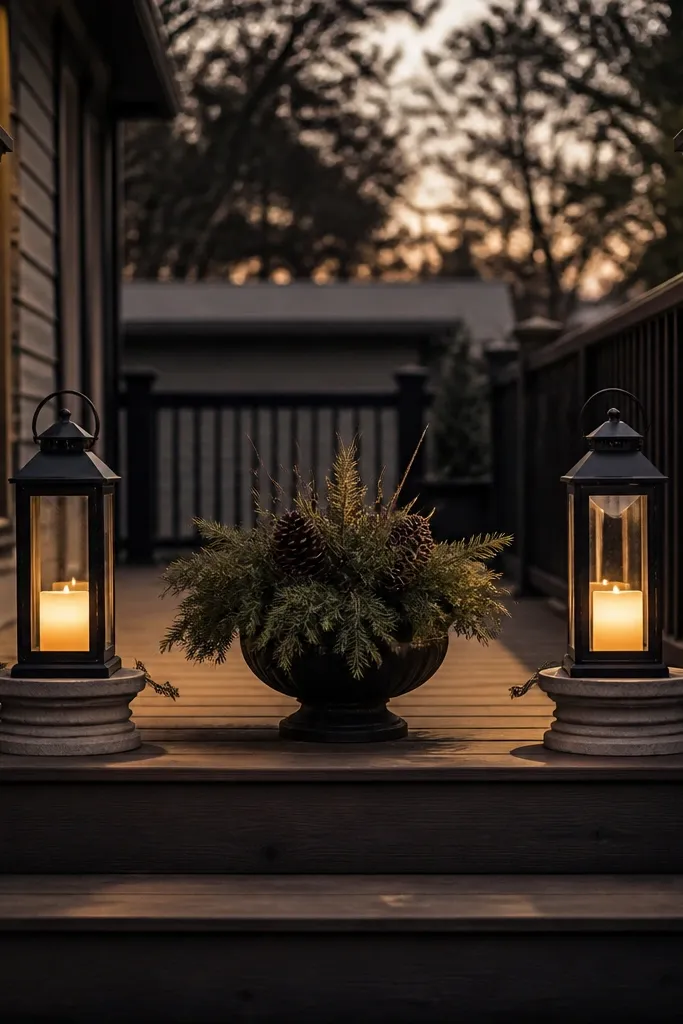
Choose two lanterns and set them 24-36 inches apart so they frame the entry without crowding. Put them on a stable surface (flat planter top, step, or outdoor tray) and route the power cable behind the planter so it’s not visible. If your planters sit on uneven ground, add a thin outdoor shimming pad under one lantern base for level alignment. Budget is straightforward: lanterns plus one extension cord run for the season.
Lanterns are a clean way to add height and holiday mood without bulky decorations that tip over. A matched pair gives you instant symmetry, which reads upscale from the street. Pick lanterns with a flicker-free warm LED or a subtle flicker panel so it looks like candlelight. Place them on planter lids, porch steps, or a low bench so they stay stable. This works for low maintenance because lanterns don’t require fluffing, and the look doesn’t degrade as branches shed.
Watch outAvoid open flame candles outdoors — wind blows smoke and makes the lantern look grimy.
Pro tipAdd one small evergreen sprig or pinecone cluster inside each lantern opening for a 'styled' look even in daylight.
6. Snow-Dusted Mini Tree Trio in One Corner
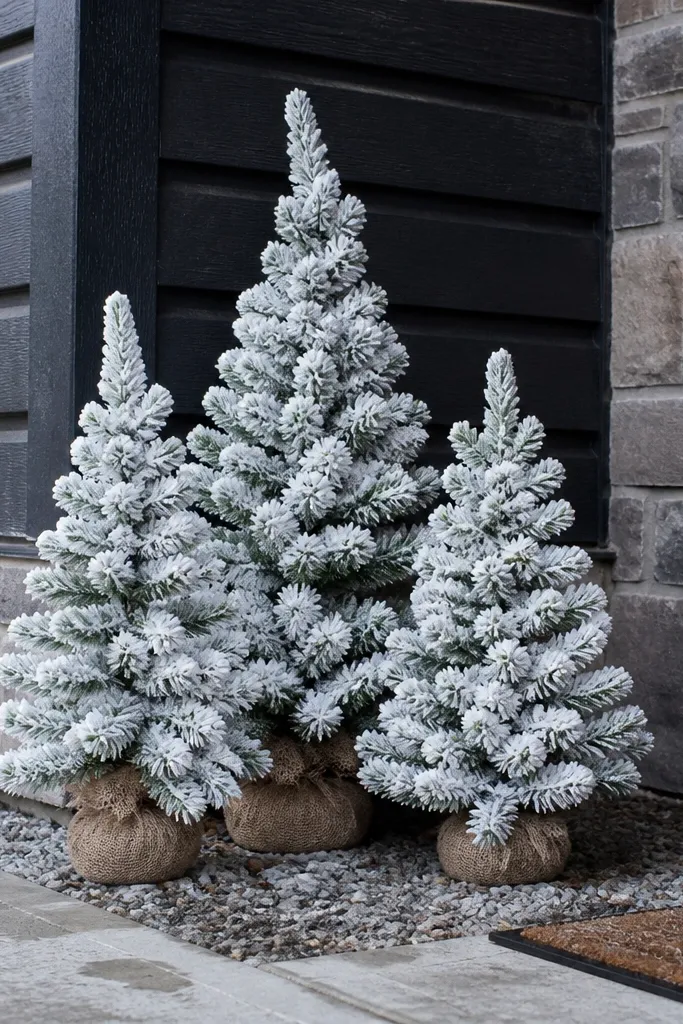
A trio of mini trees in one corner creates a layered winter scene without needing a full yard tree. Go for snow-dusted flocking or frosted plastic branches so you get the white texture in photos, especially against dark siding. Use three different heights (for example 2.5 ft, 3 ft, 3.5 ft) so the cluster looks natural instead of like identical props. Keep ornaments minimal: matte white baubles or small clear lights. This solves the problem of “my yard feels empty” because a corner cluster gives depth and a clear focal point from the driveway.
Pick the corner that’s visible from the street, then set the tallest tree slightly behind the others. Space them 10-14 inches apart so branches don’t tangle when you move them for storage. If they don’t come with weighted bases, use outdoor planters or add sandbags hidden under the base stand. Plug in one light string set and wrap the cord along the back edge of the cluster.
Match the ornaments across all three trees so the cluster reads cohesive instead of random.
Skip shiny ornaments in mixed colors — they look cheap under porch lighting.
7. Garden Stake Reindeer Silhouettes with Warm Glow
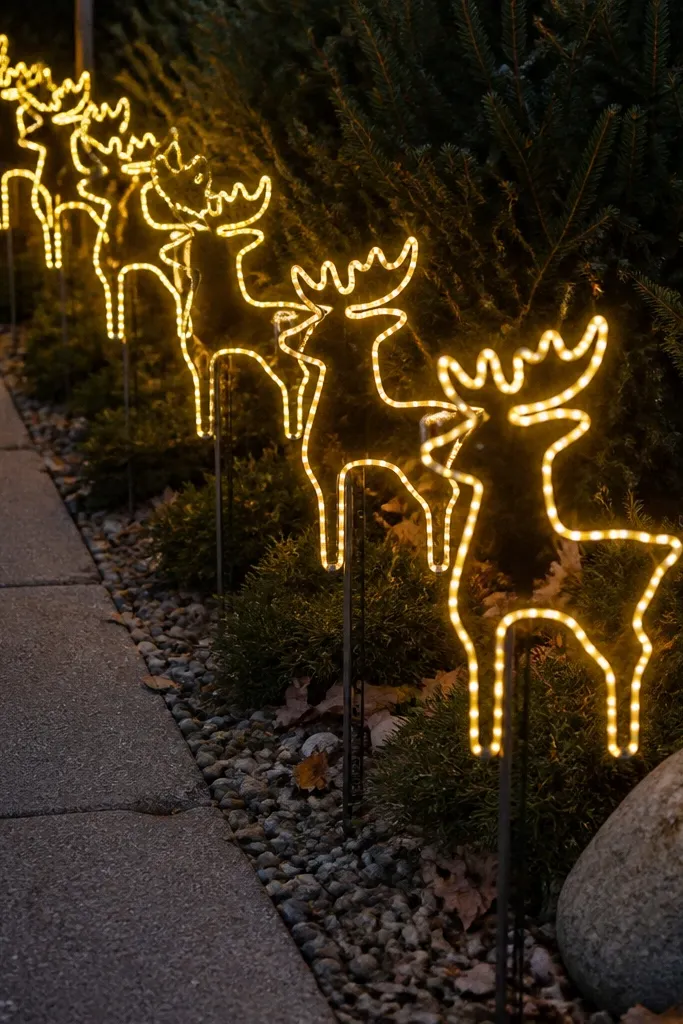
Mark a line where you want the reindeer, then space stakes 24-30 inches apart for a neat rhythm. Push stakes into the ground firmly, aiming for at least 8-10 inches depth; compact the soil around the base. Use the built-in cord management by plugging them into a single outdoor extension lead. Stand back from the street angle and adjust spacing before the first stake is fully seated.
Reindeer silhouettes are graphic and photogenic, and stakes are one of the lowest-maintenance ways to add holiday characters. Choose reindeer stakes with built-in warm white LEDs so you don’t need separate string lights. Line them along a walkway edge or in a shallow bed — the repeated shapes create a clear pattern. Keep them to one size family and one color (black metal with warm light, or white with warm light) for a clean look. This solves the “I want holiday decor but don’t want to fuss with fragile ornaments” issue.
Watch outDon’t place them too close to a path edge where snowplows or foot traffic can knock them over.
Pro tipAngle the reindeer slightly toward the house so the warm glow faces the main viewing direction.
8. Outdoor Wreaths on Porch Columns with One Color Accent

Hang wreaths using outdoor hooks or wreath hangers sized for your column material. Center each wreath so its bottom sits around the same height on both columns, then step back and check symmetry. Tie or tuck the accent ribbon so it sits flat against the wreath backing. If your columns are smooth, add a thin foam pad under the hook so it doesn’t slide.
If your porch has columns, wreaths there look intentional and frame the entry like picture frames. Use two matching outdoor wreaths, but keep the styling simple: one color accent ribbon and a small matching pick. For example, green wreaths with a red grosgrain bow and 5-6 red berries each. Column placement is great because it’s visible from multiple angles and doesn’t require decorating the whole porch floor. Low maintenance is the point: wreaths don’t shed daily, and once they hang straight, they stay photogenic.
Watch outSkip mixing multiple ribbon colors — columns make clutter obvious.
Pro tipUse the same ribbon width on both columns so the yard looks coordinated in photos.
9. LED Light-Up "Welcome" Yard Sign with Evergreen Base
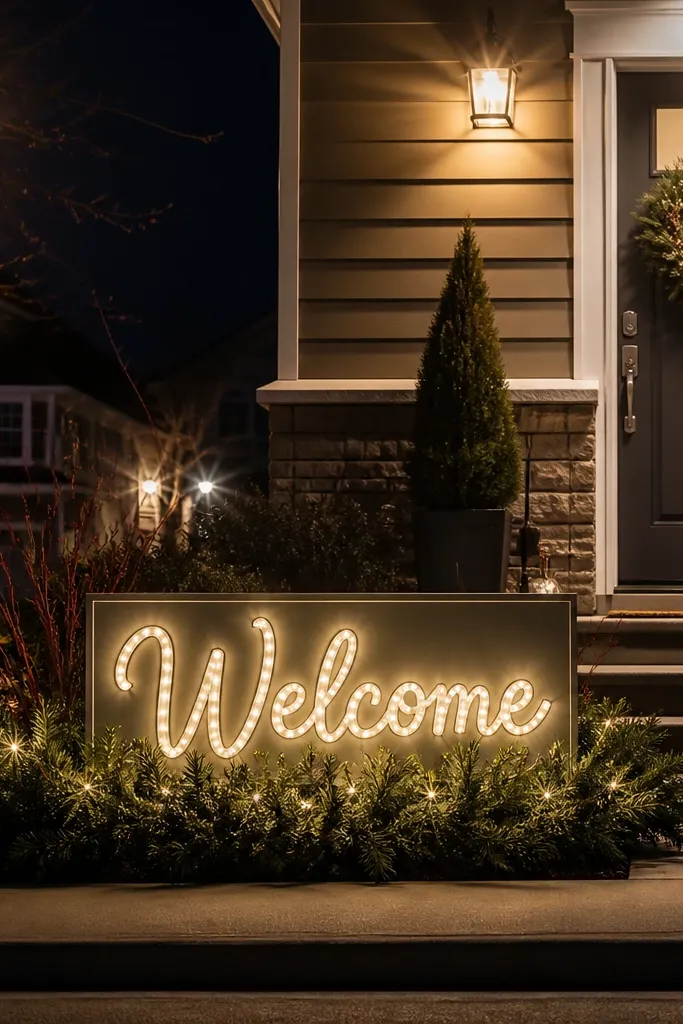
Set the sign near the path centerline, about 3-5 feet from the walkway so it doesn’t get blocked by people. Build the base with a simple evergreen garland loop or a compact planter of faux greenery, then anchor the sign stake into the ground. Plug the sign in using an outdoor-rated extension cord clipped along the ground edge. Keep the sign height consistent with the wreath on the door so the overall entry reads balanced.
A light-up welcome sign gives you a direct curb-appeal message and reads clearly at night. The key is pairing the glowing sign with an evergreen base so it looks grounded, not floating. Choose a sign with warm white LEDs and a neutral backing color that matches your door or siding. Add a low evergreen bed or a pre-made garland base around it in green tones only. This is low maintenance because you’re placing one sign and one base, not building a whole scene. It also helps when your walkway is narrow — the sign fills that vertical space cleanly.
Watch outAvoid multi-color LEDs on the sign — they look noisy in daylight.
Pro tipIf the sign has a removable face panel, wipe it once before install so the LED glow looks crisp.
10. Snowy Step-Treads with Pre-Lit Mini Wreaths
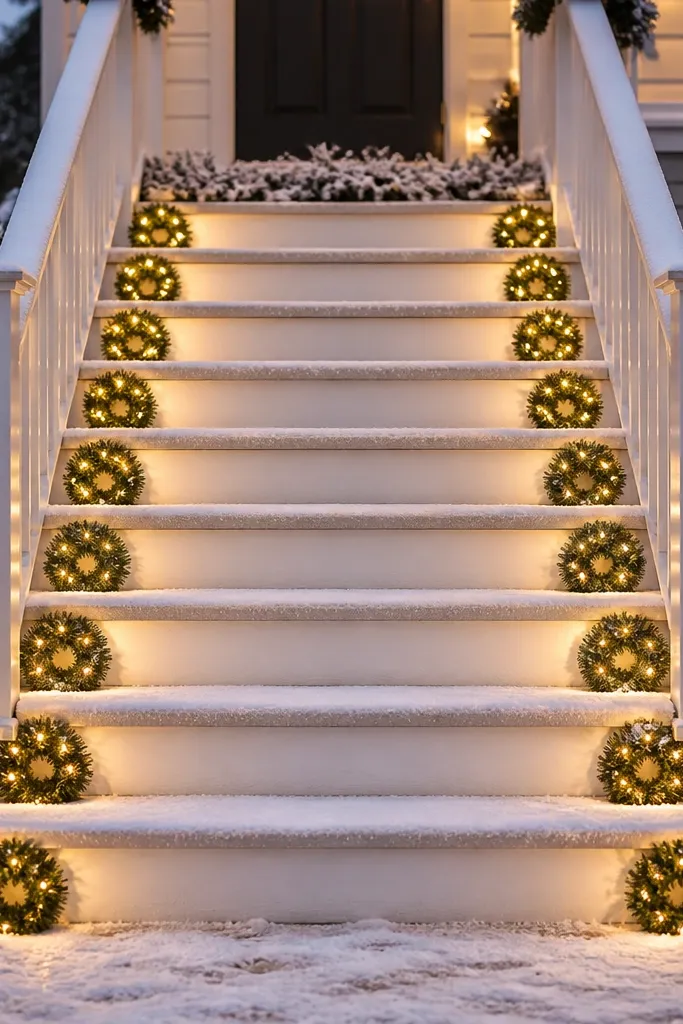
Count the risers and plan 1 mini wreath per riser side or per step landing, depending on your spacing. Secure wreaths with weather-resistant zip ties, clips, or small hook-and-loop straps on railings and risers. Plug in the pre-lit sets and route cords behind the step edge so you don’t trip. Finish by tucking 2-3 frosted picks into the lowest visible area so the stair looks complete in daylight.
Step risers are a cheat code for photogenic holiday curb appeal. You can make a staircase look fully decorated by placing small pre-lit mini wreaths at each riser or along the top edge of the steps. Choose mini wreaths with warm white LEDs and green that looks dense, not patchy. Add a snowy element like frosted picks or faux snow mats in front of the risers so the whole stair area reads winter-themed even from the sidewalk. This works for low maintenance because the pieces are small, stable, and pre-lit — no stringing lights across rails.
Watch outDon’t mount wreaths too high; they should be visible from street level, not hidden behind the next step.
Pro tipMatch the wreath diameter to the riser width so there’s a clear proportion instead of oversized clutter.
11. Berry and Pine Planter Sprays with One LED Clip Light
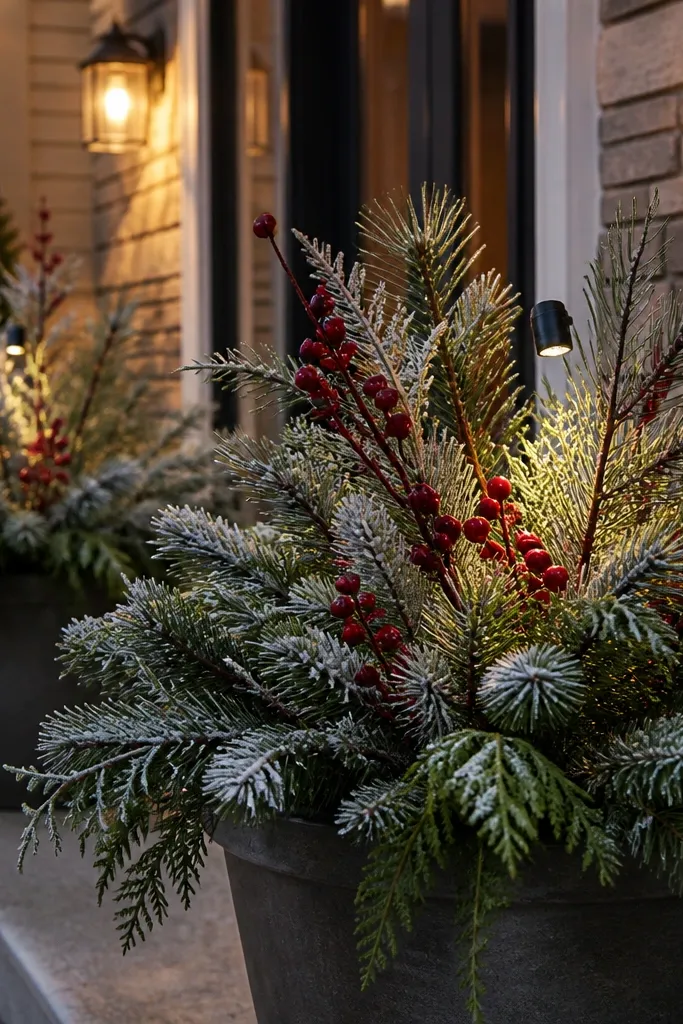
Start by placing 2-3 frosted pine sprays into the planter so they form a loose triangle shape. Add berry stems in the same direction so the berries face outward toward the street. Clip a single battery LED light under the top layer of branches, aiming it upward slightly. If you have wind, anchor stems with floral wire wrapped around an internal support pick or the planter rim.
Planters are where holiday decor turns from “decorated” to “finished.” Use frosted pine sprays mixed with a few berries in one consistent color — red or white — and keep the rest green. The look is photogenic because berries catch light and the frosted texture reads from across the yard. Add one small LED clip light per planter to highlight the berries at night. This is low maintenance because you’re not building a large installation; you’re styling two planters with a repeatable recipe.
Watch outSkip mixed berry colors — red and white together can look like leftover craft supplies at night.
Pro tipKeep berry color consistent with your door bow or wreath ribbon so the yard ties together visually.
12. Fenced Yard Rope Light Path Along the Perimeter
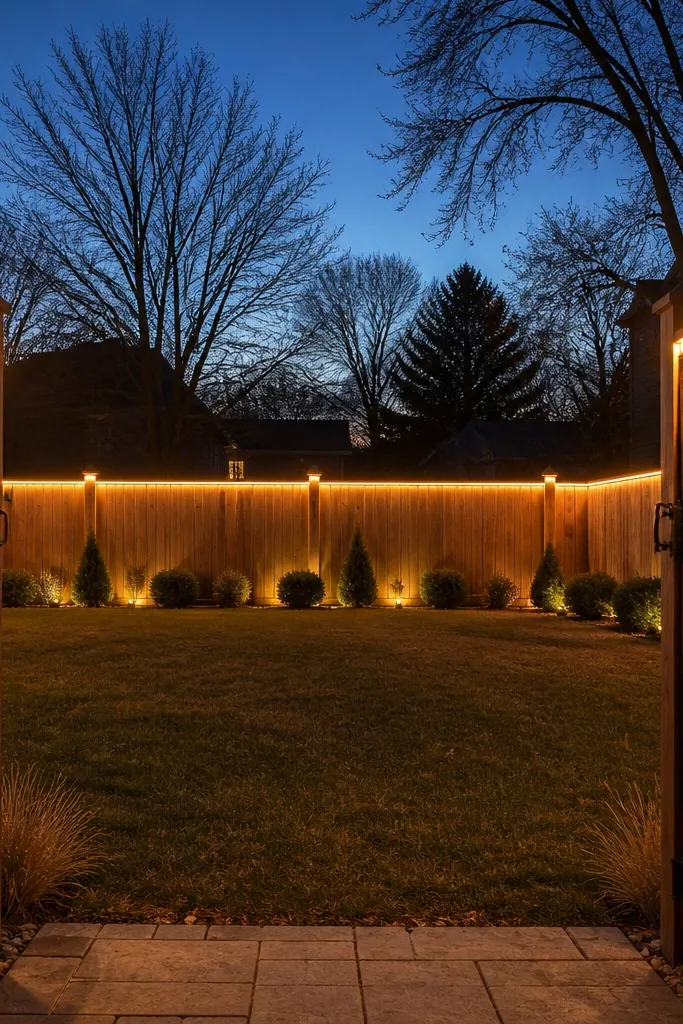
If your yard has a fence, rope lights along the perimeter look clean and intentional. They create a continuous line of glow that frames the whole space without placing dozens of separate figures. Use warm white rope lights with an outdoor rating and a plug-in power supply designed for outdoor use. The best look is a simple run: one line along the fence top rail and a second line around a gate edge if you have one. This is low maintenance because the rope light is one install — no daily adjustment, and it hides cord mess better than string lights.
Measure the fence line and buy rope light length with a little extra for corners and slack (add 10%). Attach using outdoor clips made for rope lights so the line stays even. Route the plug connection to the nearest outlet and keep it behind a planter or fence post so it’s not visible. Turn it on after install and check for sagging — adjust clips before the adhesive fully sets if you use any.
Use the same spacing of clips on the straight runs so the glow line looks uniform in photos.
Don’t run rope lights too close to bushes; leaves create uneven hotspots and make the line look messy.
13. Doorway Light-Up Garland in a Single Straight Line
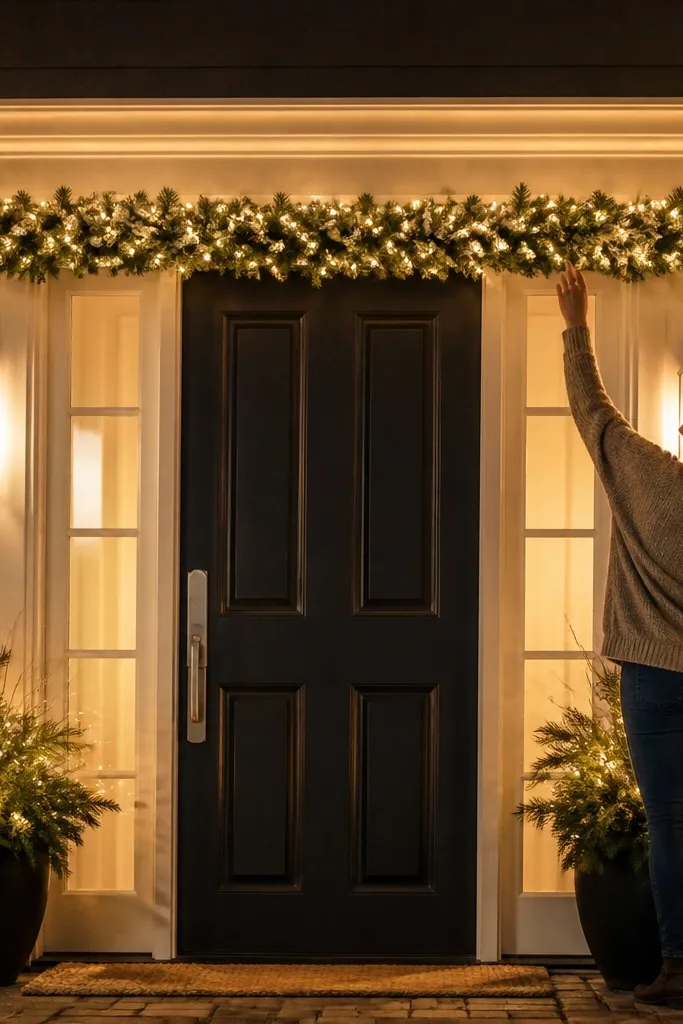
Measure doorway width and cut or choose a garland that covers it evenly. Attach the garland to the top trim or door frame using hooks, zip ties, or outdoor adhesive clips. Route the cord to the side where it’s least visible, then plug into an outdoor-rated extension. Check the symmetry by looking from the street — adjust the center point before you secure the last attachment.
For a front door that needs quick drama, a light-up garland stretched straight across the doorway gives you a neat, symmetrical look that reads clearly in daylight and at night. Choose a garland with pre-attached warm white LEDs and a dense backing so it doesn’t look see-through. Keep the garland length so it spans the doorway width with 6-10 inches of overhang on each side. This works well for low maintenance because the LEDs are integrated — you’re not weaving individual bulbs around branches.
Watch outSkip thin garlands that look good only when you’re standing right in front — curb appeal needs thickness.
Pro tipIf the garland has a flatter side, face it toward the street so the light density looks even.
14. Frosted Window Swag with Removable Hooks
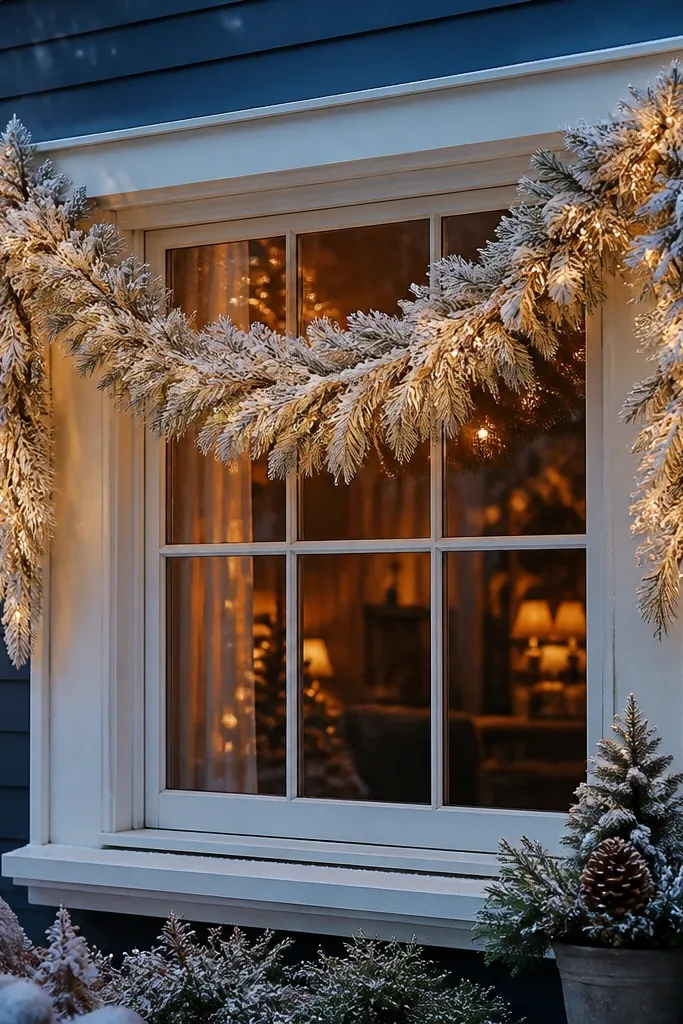
Window swags create a framed holiday look without covering the entire front of the house. Pick a frosted swag with a dense center and lighter outer ends so it drapes naturally from the top of the window trim. Warm white LED accents tucked inside the swag add sparkle, but keep it subtle — one small light cluster per side reads more high-end than a full blanket. Use removable hooks so you can take it down quickly after the season. This solves the “I don’t want to ladder for weeks” problem because you’re installing once and removing in one pass.
Install removable outdoor hooks along the window trim at the swag’s attachment points, keeping the spacing even left to right. Hang the swag and adjust the drape so the bottom center sits about 4-6 inches below the top of the window frame. Plug the LED module and route the cord behind the trim edge. When removing, store swag flat or loosely rolled so it keeps its shape next year.
Use the same warm white light tone across windows and porch so the whole facade matches at night.
Don’t use suction cups — they fail in cold weather and make you rehang everything.
15. Frosted Window Frame Swag with Hanging Mercury-Glass Orbs
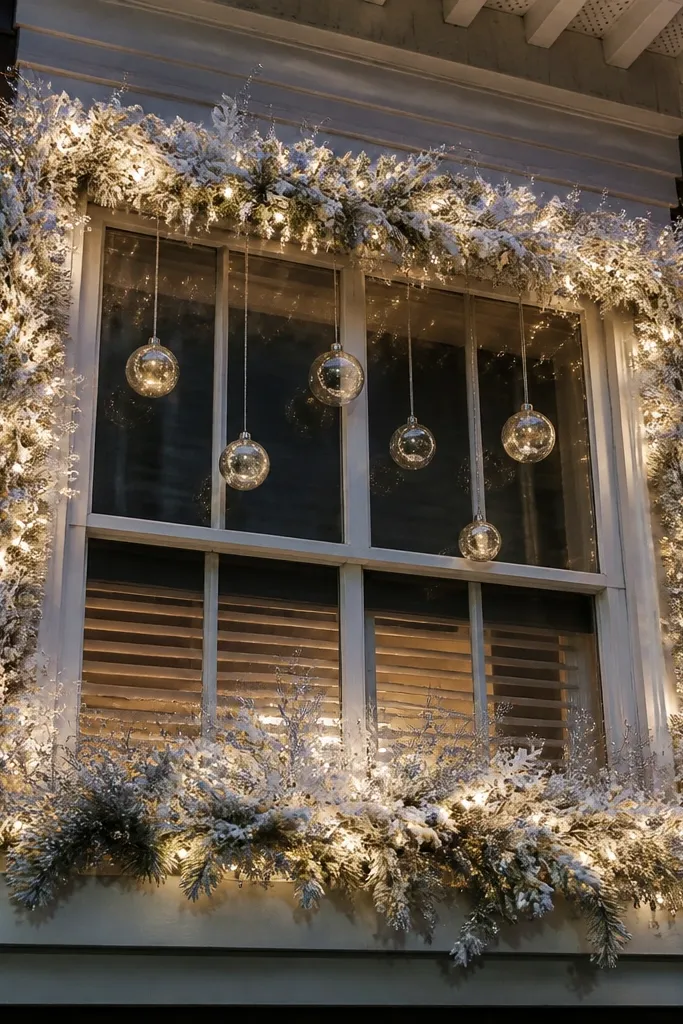
1) Measure the window width and cut a frosted garland strip so it wraps around the frame edges with a 6- to 10-inch drape on both sides. Use 18-gauge silver craft wire to secure the garland at the corners and then add small wire “staples” every 8 to 10 inches along the top run. 2) Thread clear fishing line through the cap loop of each orb and tie knots so the bottom of the lowest orb sits about 10 to 14 inches below the window trim; space the orbs evenly across the center. 3) Hang the orbs by tying the fishing line to the garland wire top or to small hooks you twist into the garland. Plan on spending about $40 to $90 depending on orb size and whether you buy a pre-lit garland; effort is about 60 to 90 minutes for one window.
This setup makes the window area look dressed even from the curb, without needing a full yard display. Use a frosted garland wrap in soft white with silver wire accents so it reads like real winter frost under streetlights. Add 5 to 7 hanging mercury-glass style orbs on clear fishing line so the movement catches light when the wind hits. It solves the common problem of “my yard looks empty but my house windows look bare” by focusing the eye on one high-visibility spot. It also stays low-maintenance because the garland is pre-formed and the ornaments hang in place — no constant rearranging of loose decor pieces.
Watch outAvoid using chunky red ornaments or thick ribbon here; the look should stay icy white and silver so it reads clean from the street.
Pro tipPick orbs in two sizes — for example, 3-inch and 2-inch — and keep the biggest ones slightly off-center so it looks designed, not symmetrical. Use warm white string lights tucked into the garland wire channel if your window gets direct evening shade — it keeps the glass looking “icy” instead of flat.