1. Lantern-style porch windows with faux garland and battery candles
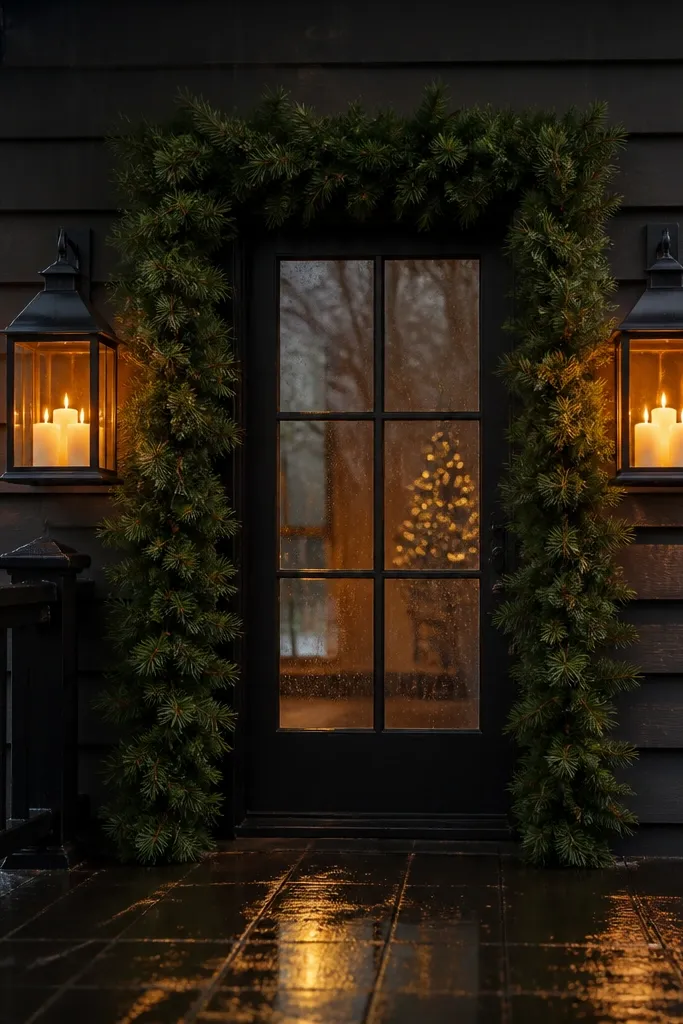
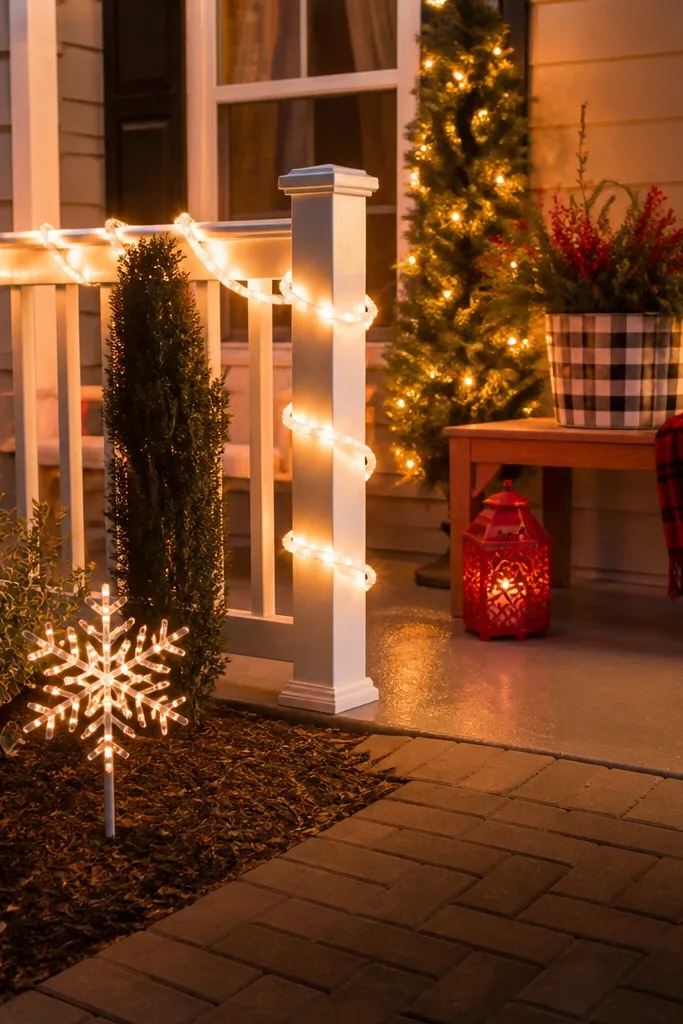
This setup makes a porch feel “designed” because lanterns create a clear frame around your entry. Use faux evergreen garland in deep green, not spiky loose branches — you want smooth coverage that looks full from the street. Add warm white battery candles inside the lanterns for a soft glow that doesn’t require outlets. The trick is scale: choose lanterns tall enough that the flame area sits around eye level, then keep the garland length proportional to the door width. It solves the common renter problem of wanting a cozy holiday look without tying lights to permanent wiring.
Step 1: Measure your door width and aim for garland lengths that cover about 80-90% of the window or lantern frame width, then trim faux greenery with wire cutters so it stays dense. Step 2: Place battery candles inside lanterns and test the glow from the sidewalk before securing anything. Step 3: Use zip ties or outdoor twist ties to attach garland to the lantern handles or a removable wreath hanger, then weigh the lantern base with a small bag of sand if it sits on a slippery surface. Plan on spending about $40-90 depending on lantern size and candle style.
Add one matte pinecone or a small velvet bow per lantern to keep the look from feeling generic.
Don’t use thin, wispy garland — it reads as patchy once it’s viewed from outside.
2. No-drill door wreath with a weighted ribbon tail
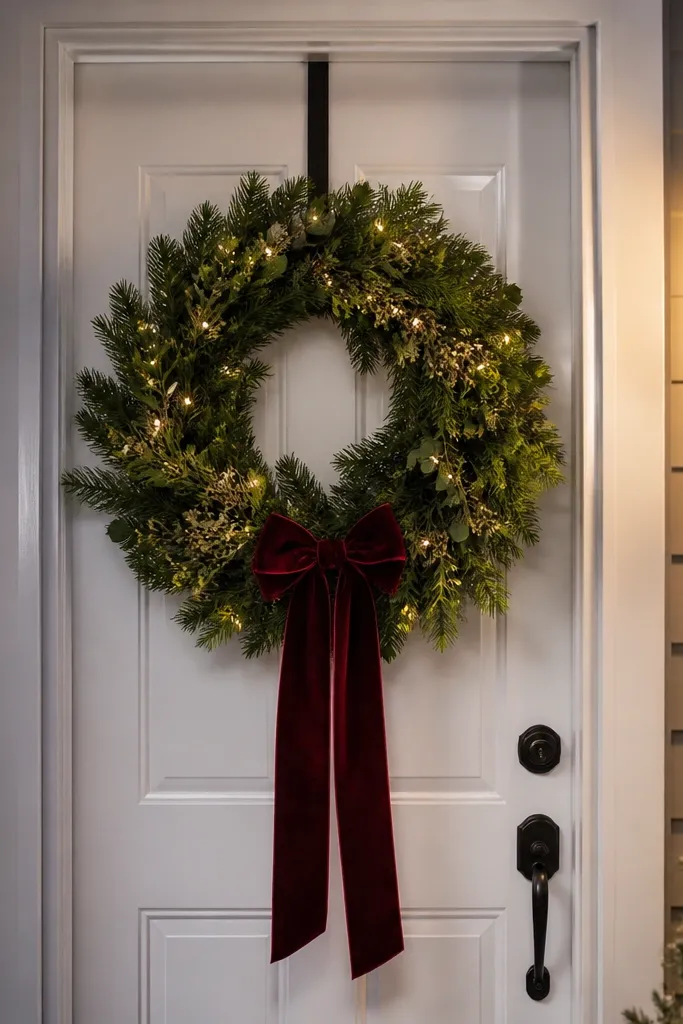
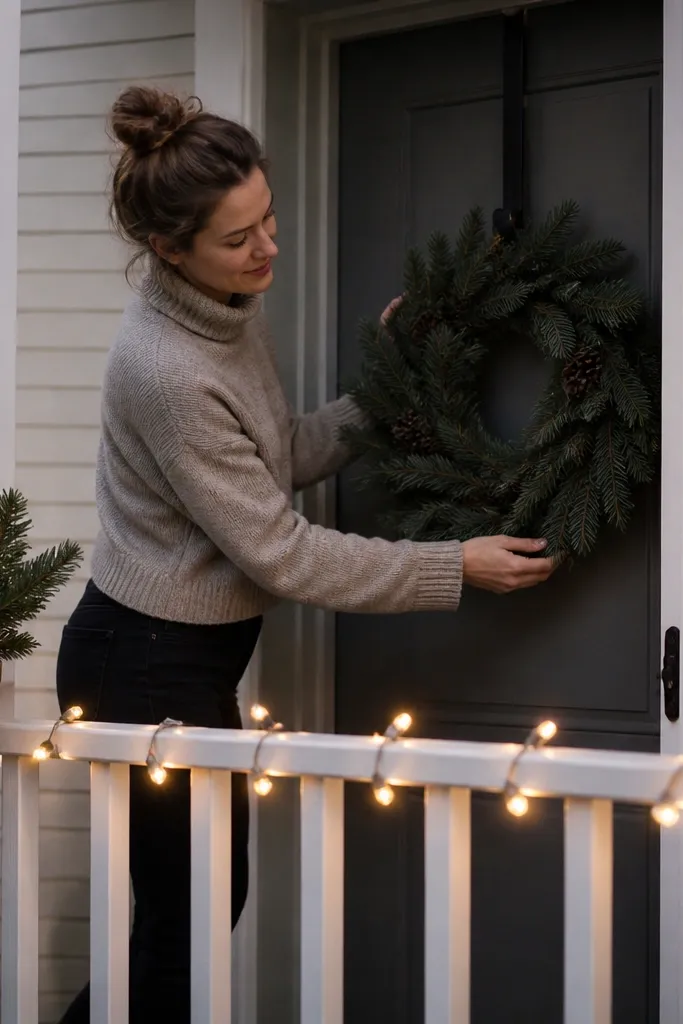
A wreath is the easiest way to look festive, but the “renter upgrade” is the weighted ribbon tail. It makes the wreath look styled instead of dropped on. Hang the wreath centered on the door using an over-the-door hook or a wreath hanger that clamps to the top trim, so you’re not poking holes. Choose an evergreen wreath base with a dense ring and add a few structured elements like pinecones and berry picks so the shape stays readable from the sidewalk. The ribbon tail adds movement and height, especially in photos where a flat wreath can look small.
Step 1: Pick a wreath size that matches your door — aim for about 18-24 inches wide for standard doors, then remove any flimsy tags and fluff the branches. Step 2: Attach ribbon to the bottom inside of the wreath with wired ribbon so you can shape it; leave a 24-36 inch tail. Step 3: Add a small weighted clip at the end of the ribbon tail (or tie the tail to a small decorative weight) so it hangs straight and doesn’t wrap around the door. Use outdoor ribbon at least 1.5 inches wide so it holds shape.
Pro tipUse wired ribbon in a single color (burgundy, hunter green, or black) so the wreath reads cohesive in winter daylight.
Watch outSkip glittery paper bows — they look flat and shed in wind.
3. Planter snowdrift with light-up faux "ice" and evergreen cuttings
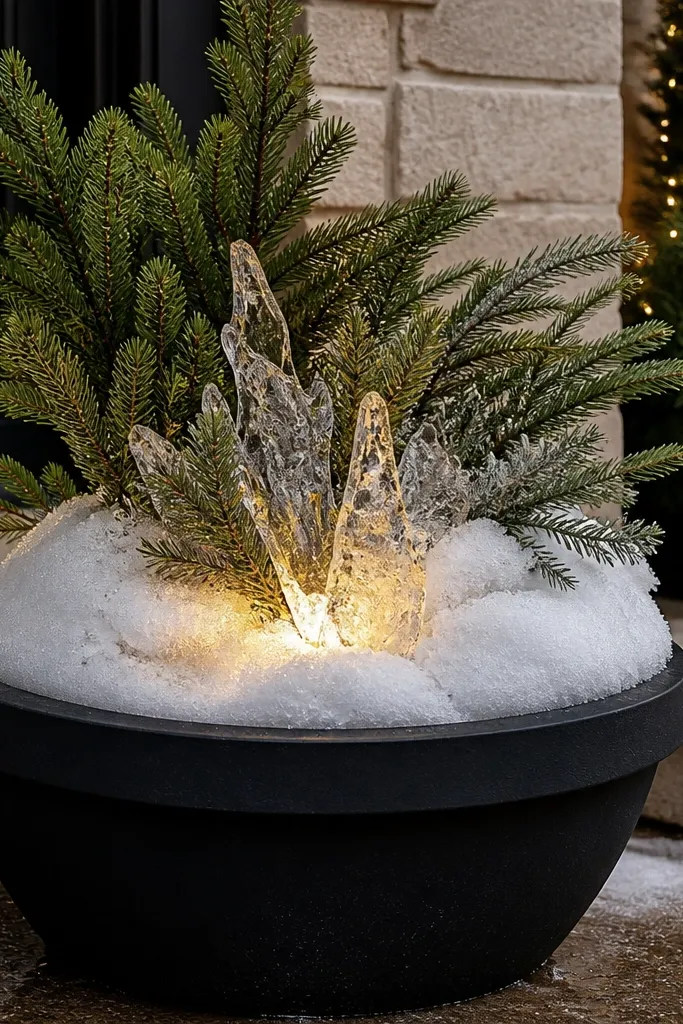
If your yard is mostly planters and walkways, a snowdrift centerpiece gives that winter “wow” without needing yard space. The look comes from layered textures: white faux snow for the base, a few taller evergreen sprigs rising from it, and a warm light source tucked low. Create the illusion of ice by using clear plastic cups or acrylic filler pieces lightly dusted with white translucent paint, then place mini LEDs behind them. It solves the common issue where planters look bare in winter because people only add one layer of greenery.
Step 1: Fill a wide planter with faux snow or polyester “snow filler” about 2-3 inches deep, then insert evergreen sprigs so the tallest pieces reach about 10-14 inches. Step 2: Tuck warm white mini LED fairy lights under the snow layer and secure the wire with floral tape so it doesn’t shift when it’s windy. Step 3: Add 2-4 clear “ice” pieces near the front, half-buried, so they glow. Keep all materials outdoors-rated or sealed.
Pro tipMake the front edge slightly higher than the back so it reads like a drift in photos.
Watch outDon’t cram everything at the same height — you’ll lose the snow mound shape.
4. Candy-cane pathway stakes made from foam pipe insulation
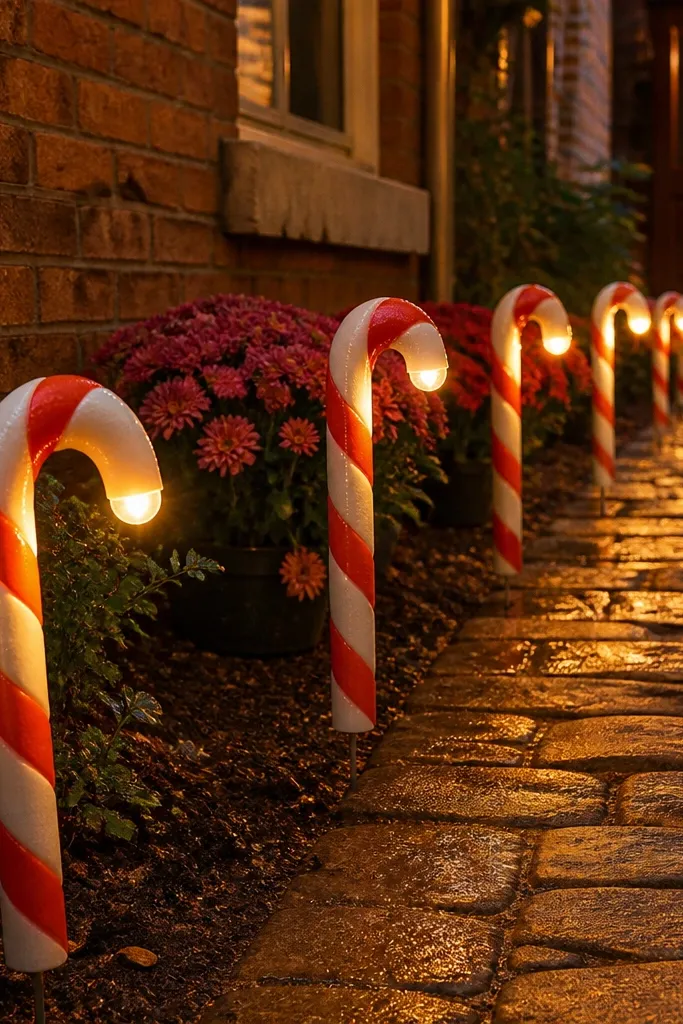
This is a renter-friendly way to create a clear holiday path without buying store-bought yard stakes. Foam pipe insulation is light, easy to cut, and weatherproof enough when you seal it — and it’s surprisingly photogenic because the stripes read from a distance. Add small warm LEDs at the top bend to create a “lit candy” effect. Place the stakes in pairs or a gentle stagger so the walkway looks guided instead of lined with random objects. The red and white also cuts through gray winter pavement.
Step 1: Cut 18-24 inch lengths of red and white foam pipe insulation, then bend by soaking briefly in hot water and shaping around a template (a bucket rim works). Step 2: Seal the stripes with outdoor matte clear spray so the foam resists moisture, then attach each shape to a short rebar or yard stake using zip ties through pre-cut holes. Step 3: Hot-glue or tie mini warm LEDs at the top and test the spacing by stepping back 15 feet. You can finish 10 stakes for roughly $25-60 depending on LED count.
Pro tipKeep the stripes thick and clean — thin striping looks messy once it’s windy.
Watch outDon’t skip sealing — unsealed foam absorbs damp and gets scuffed.
5. Rope-wrapped outdoor banister tree with mini ornaments
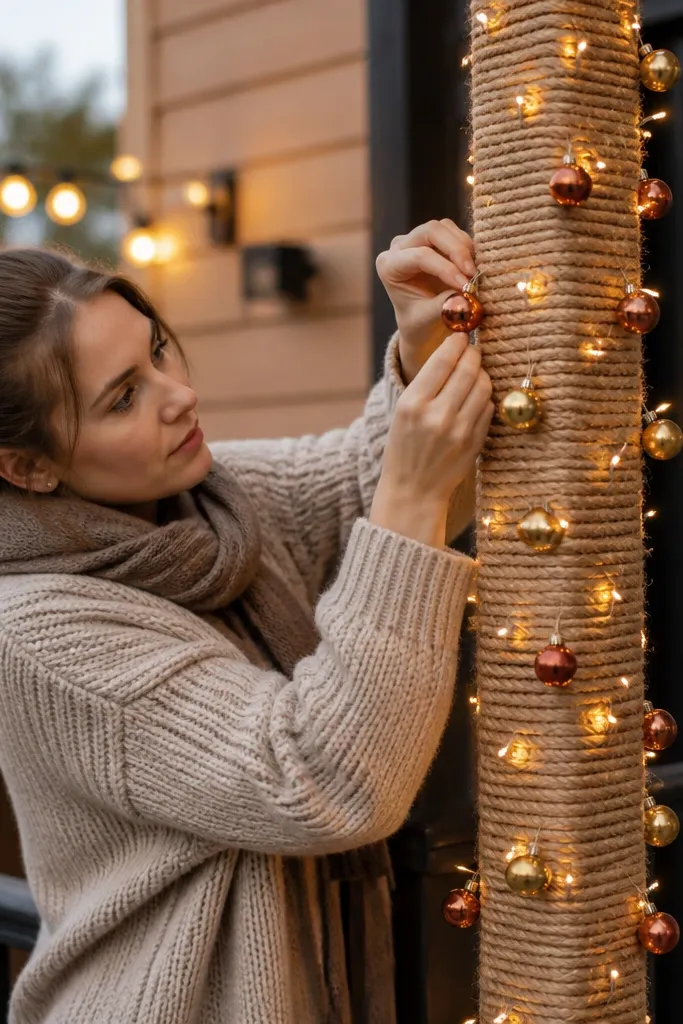
A banister tree works when you don’t have a lawn to decorate. Wrap a vertical rope or jute column around an existing railing post or a removable frame, then weave warm mini lights through the rope so the glow looks integrated. Add small, evenly spaced ornaments in one metal tone like brushed gold or copper — keep them light so they don’t pull the rope down. This looks beautiful in porch photos because the vertical line reads instantly. It solves the problem of renters who want “a tree look” without a full artificial tree or hauling it through a tight entryway.
Step 1: Choose a railing post or create a simple removable frame with two stakes and a top ring, then wrap jute rope tightly in spiral passes from bottom to top. Step 2: Tuck warm white mini lights into the rope gaps and secure with clear zip ties so the wire doesn’t sag. Step 3: Hang 8-12 small ornaments using thin hooks or twist ties, keeping them spaced 6-8 inches apart. Plan on $20-55 depending on ornament count and light set length.
Pro tipUse matte ornaments, not shiny plastic — matte hides tiny dents and looks better in low light.
Watch outDon’t overload with ornaments at the top — it makes the shape look lopsided.
6. Wood pallet snow sign with stenciled fir trees
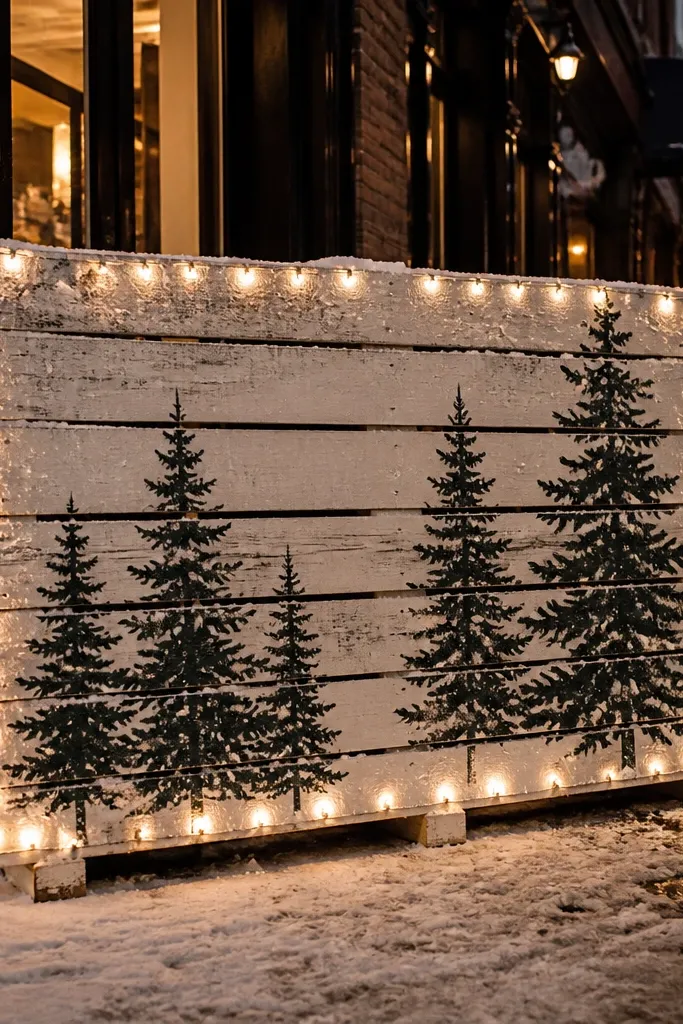
A pallet sign gives you a big, readable graphic that stands out from the sidewalk. The aesthetic trick is contrast: paint a winter “snow” base in soft white or chalky off-white, then stencil fir trees in dark green or black. Add a thin border of warm white LEDs so the sign feels alive at night. This setup is great for renters because you can place it on a stand, between planters, or tie it to a porch railing with removable cord. It solves the issue of DIY yard decor looking small and lost outdoors.
Step 1: Sand a pallet board smooth, then seal it with outdoor wood sealer so the paint doesn’t soak in unevenly. Step 2: Paint the base with two coats of exterior matte white, then use a fir tree stencil to add silhouettes in dark green. Step 3: Wrap a battery LED strip around the back edge or apply clip-on LED mini lights in a rectangle border on the front. Mount the sign on a removable A-frame stand or tie it securely to a planter. Budget $35-80 depending on lighting and paint.
Stencil with painter’s tape edges and press firmly so the tree lines stay crisp in photos.
Don’t use glossy paint — it reflects porch light and washes out the stencil.
7. Hula-hoop wreath garland wall for apartment balconies
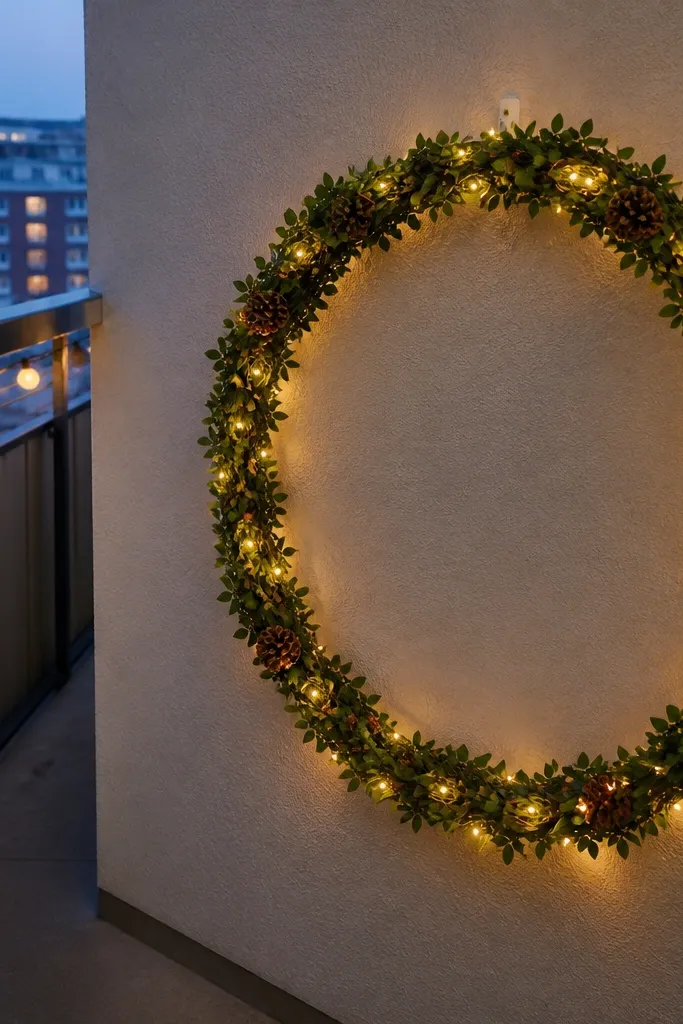
This one is made for balconies and narrow entry walls where you can’t hang a full wreath. A hula hoop gives you a perfect circle that reads cleanly in pictures, and it’s light enough to suspend with removable hooks. Wrap the hoop with outdoor faux greenery, then add warm white string lights that follow the ring. Finish with a few oversized ornaments so the circle doesn’t look like a pile of branches. It’s renter-friendly because the only contact points are removable hooks or suction clamps on non-textured glass.
Step 1: Remove the hoop’s padding if any, then wrap it tightly with faux greenery using wire ties until the hoop disappears. Step 2: Weave warm white string lights through the greenery, keeping the battery pack hidden behind the ring. Step 3: Hang the hoop using two removable hooks so it stays level, about 2-4 feet above the floor for best visibility. Add 3-5 ornaments spaced evenly and secure with twist ties. Cost is about $25-70 depending on greenery quality.
Pro tipUse one ornament size and repeat it — mismatched sizes make the circle look chaotic.
Watch outDon’t hang it too low — it becomes a wall decoration instead of a yard-view highlight.
8. Hanging snowflake wind spinner from embroidery hoops
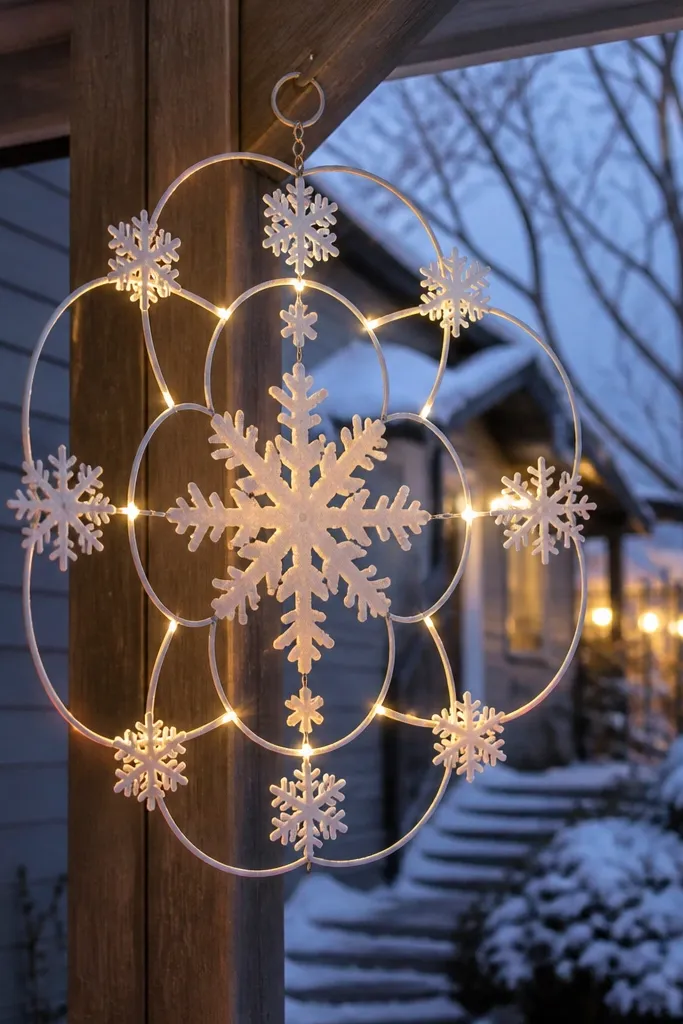
Wind spinners add motion, and motion reads as “holiday” even from a distance. For a photogenic look, use embroidery hoops to build a crisp snowflake frame, then add white fabric or thin foam snowflake pieces that catch light. Add warm LEDs at the intersections so the spinner glows while it moves. This is renter-friendly because it hangs from an existing balcony bracket or a porch beam using a removable hook. The beauty here is the graphic snowflake shape — not a vague ornament cluster.
Step 1: Create a snowflake layout by connecting two to three embroidery hoops at right angles with zip ties or wire, then shape spokes with thin metal craft wire. Step 2: Attach white accents (felt snowflake cutouts or foam sheets) on the spokes with hot glue and seal with a clear matte outdoor spray. Step 3: Hang from a removable hook and add 10-20 warm white micro LEDs at intersections using zip ties. Test movement by gently spinning it — it should rotate freely without bumping the door. Expect $20-55.
Pro tipChoose matte white materials; shiny foil reflects porch glare and looks messy in photos.
Watch outDon’t use heavy ornaments — the spinner will swing too slowly and look awkward.
9. Removable porch rail wreath swag with berry picks
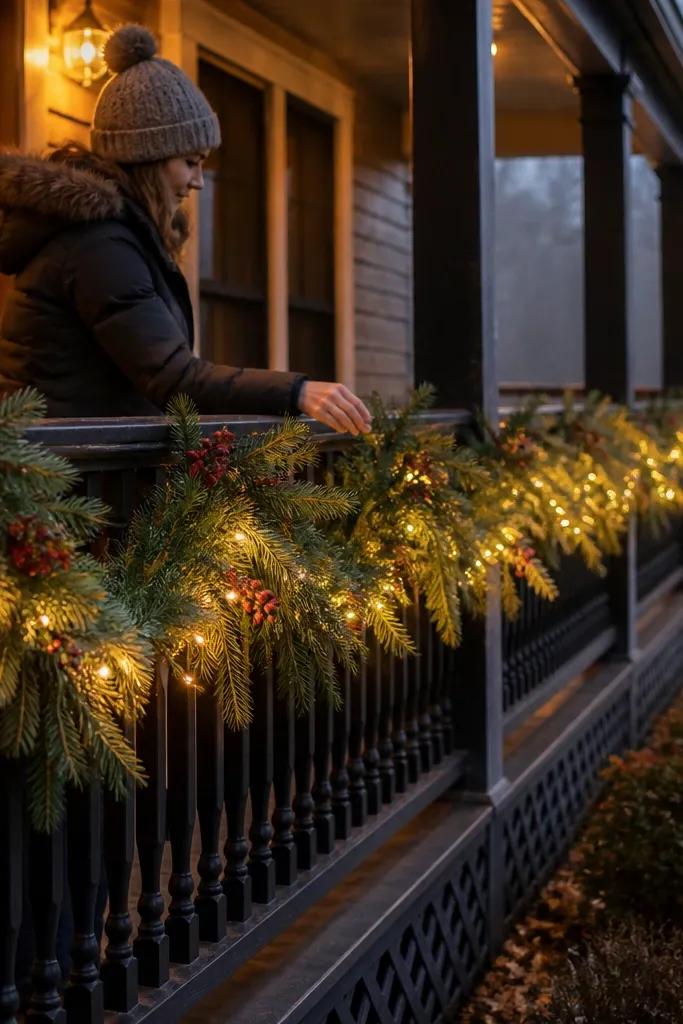
A rail swag gives you a long, horizontal holiday statement that makes a porch feel wrapped. Instead of one round wreath, you build a draped garland line using faux evergreen picks plus berry sprigs, then hang it over the rail. Add warm white mini lights along the underside so they show when you look toward the porch. This solves the problem of a single wreath looking lonely on wide railings. It also stays renter-friendly because you can use removable command hooks or over-rail hangers.
Step 1: Measure the railing span and cut your garland length so it covers about 85-90% of it, then fluff the greenery into a “U” drape shape. Step 2: Attach mini lights with zip ties at 6-8 inch intervals, keeping the battery pack tucked under the rail. Step 3: Add berry picks in groups of 2-3 spaced every 12-18 inches for a repeating pattern. Secure the swag using removable hooks so it lifts off cleanly. Budget $30-75.
Pro tipUse one berry color family (red or burgundy) and keep it consistent across the porch.
Watch outDon’t make the swag too tight to the rail — it should drape and show depth.
10. Glowing evergreen "tree" in a planter using PVC rings

This is a renter-friendly alternative to a full yard tree. You build a cone frame from PVC rings, then cover it with faux evergreen garland so it looks like a tabletop tree — but it’s tall enough to read from the walkway. Add warm white lights inside the frame for an even glow, not a single bright spot. Place it in a large planter or two stacked pots so it feels intentional and doesn’t tip. It solves the “my yard is too small for a tree” problem without drilling or heavy lifting.
Step 1: Build a cone frame by stacking 4-6 PVC rings from small at the top to larger at the bottom, then connect with zip ties and short PVC rods. Step 2: Insert the frame into a planter filled with foam or weighted gravel, then wrap faux evergreen garland around the frame in spirals. Step 3: Tuck warm white LED string lights between the garland layers and secure the wires with floral tape. Add a simple topper like a pinecone or star. Cost is about $45-95 depending on ring size and greenery.
Pro tipAim for a height that reaches about knee-to-waist level from the sidewalk for best readability.
Watch outDon’t skip weight at the bottom — light frames tip fast in wind.
11. Ice bucket light clusters made from galvanized pails
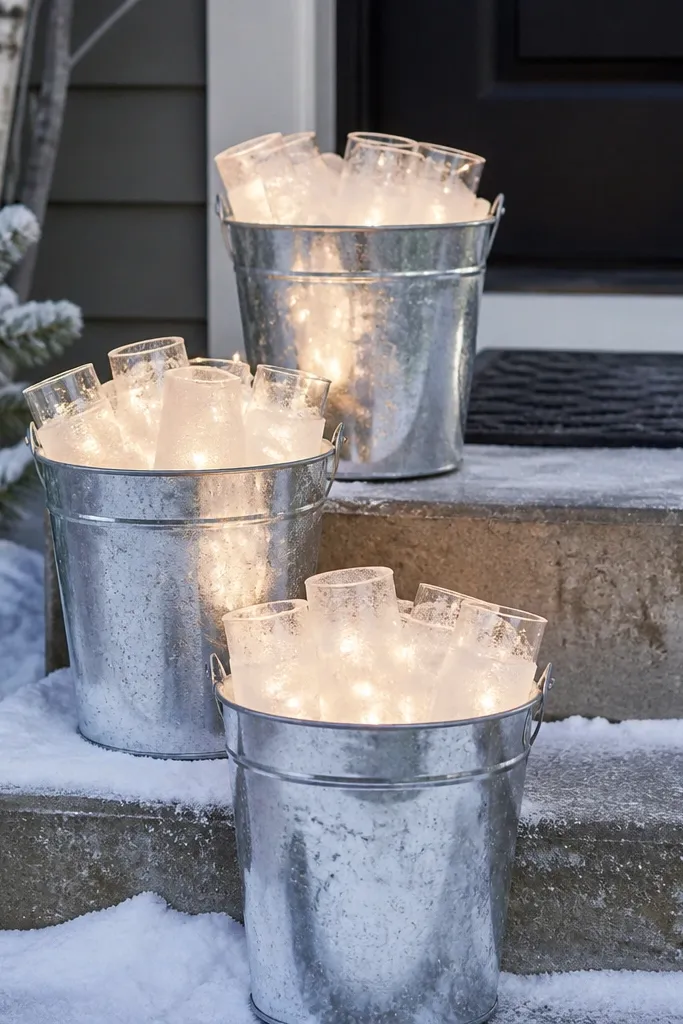
You get a clean, modern look by grouping matching containers. Galvanized pails read outdoorsy and hold shape in photos, while frosted plastic or clear cups create a “frozen” glow when lit. This design works on steps, by the garage, or along a walkway where you want a tight, repeated pattern. It’s renter-friendly because the pails sit on the ground or steps — no fasteners. The beauty is repetition: 3-5 identical pails looks styled even if the rest of your yard is simple.
Step 1: Choose 3-5 galvanized pails in the same size and place them in a loose triangle or a straight line along the steps. Step 2: Fill each pail with white filler (faux snow or crumpled plastic bags tucked under) and tuck warm LED lights inside. Step 3: Add clear cups or acrylic scraps at the front and dust them with translucent white spray for frosted effect. Keep wiring hidden under filler, then place pails where you can see the glow from the sidewalk. Budget $35-90.
Pro tipUse warm white LEDs, not cool white, so the “ice” looks inviting instead of hospital-like.
Watch outDon’t mix container sizes — the cluster stops reading as intentional.
12. Outdoor felt stocking row on a fence using zip ties

A stocking row gives you a playful, photo-ready line that’s easy to replicate and scale. Felt looks cozy and holds structure outdoors better than flimsy fabric, and it’s easy to make thicker by layering. The aesthetic comes from consistent spacing and one color palette: use cream or black stockings with matching trim, then add a few small red accents like pom-poms. Hang them on a fence using zip ties or removable clips so you don’t damage the wood. This solves the problem of fences looking blank in winter.
Step 1: Cut stocking shapes from outdoor felt and layer a second piece on the back, then stitch or glue the edges with exterior fabric glue. Step 2: Add trim and small accents, then attach a small loop at the top of each stocking for hanging. Step 3: Clip or zip tie stockings to fence rails at 10-12 inch spacing, and run warm white mini lights behind the row so the stockings glow slightly. Keep the bottom of each stocking about 2-3 inches above the ground to avoid dirt. Cost is about $20-60 depending on felt yardage.
Pro tipUse the same trim color on every stocking so the row looks like a set, not leftovers.
Watch outDon’t hang them too close together — the shapes blur when photographed.
13. Giant light-up snowflake made from shower curtain rings
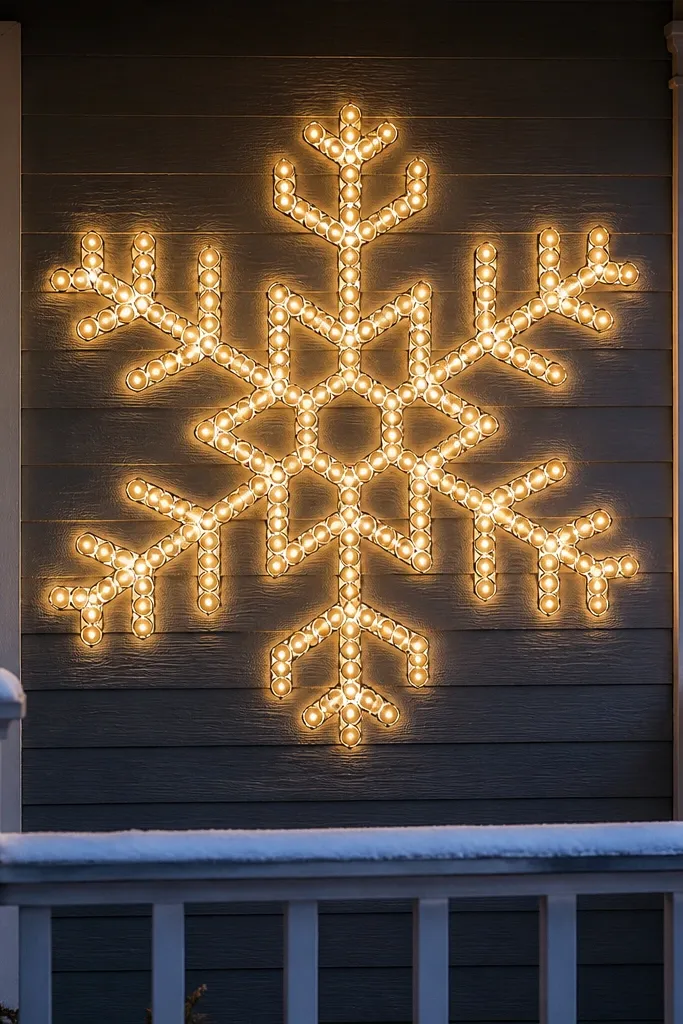
If you want one centerpiece that looks crisp in photos, a giant snowflake built from shower curtain rings is the move. The rings create a clean geometric structure that reads instantly, even in busy winter backgrounds. Add warm white LEDs at the ring intersections so the snowflake glows like stained glass. Hang it on a porch wall, above a walkway, or centered on a window using removable hooks. It’s renter-friendly because you’re mounting to surfaces without drilling, and the materials are cheap and easy to replace.
Step 1: Lay out a snowflake pattern using 3 arms or 6 arms and connect shower rings with zip ties, then reinforce joints with hot glue on the inside. Step 2: Add warm white LED string lights along each arm, tucking the wire between rings so it doesn’t show too much. Step 3: Hang using two picture hooks or a removable over-door hanger so it sits flat and centered. Keep the size big enough — aim for 24-30 inches across for porch visibility. Budget $15-45.
Use warm white LEDs and keep the wire tension even so the snowflake doesn’t sag.
Don’t use cool white lights — the snowflake looks harsh and less cozy.
14. Reindeer yard silhouettes from coroplast with weatherproof paint
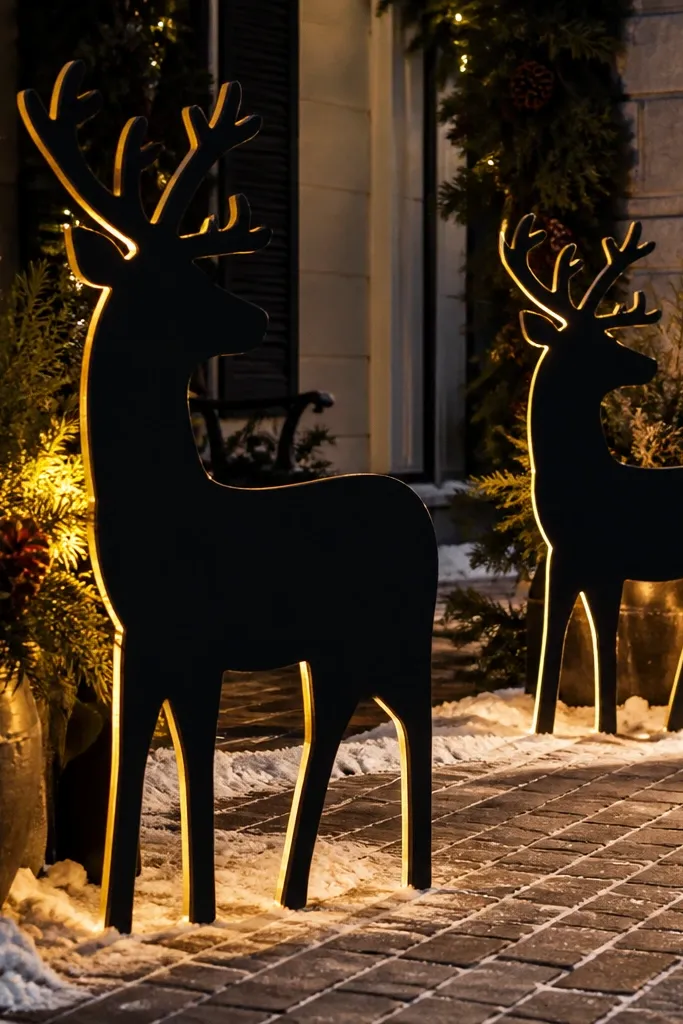
Coroplast silhouettes look sharp from a distance because they’re flat, bold, and easy to shape into reindeer or deer. Paint them matte black or deep espresso so they don’t glare, then add warm backlighting using battery LEDs behind cutouts. Place them near the walkway or at the edge of the yard so the silhouettes frame your entry. This is renter-friendly because you stake them with temporary yard stakes or set them in planters filled with gravel. The look is dramatic without being complicated — clean lines matter most.
Step 1: Sketch or print a reindeer silhouette template and trace onto coroplast sheets, then cut using a utility knife with a fresh blade. Step 2: Seal the coroplast with outdoor primer or clear sealer so paint sticks and resists moisture. Step 3: Paint matte black and add battery LED string lights behind the body using zip ties or painter’s tape, then stake or weight each piece so it stands upright. Plan on $25-70 for materials.
Pro tipAdd a thin strip of lighter “snow” paint at the bottom edge so the silhouette looks grounded in photos.
Watch outDon’t use glossy paint — it reflects sky light and washes out the silhouette.
15. Outdoor garland swag made from shower curtain rings and pine picks
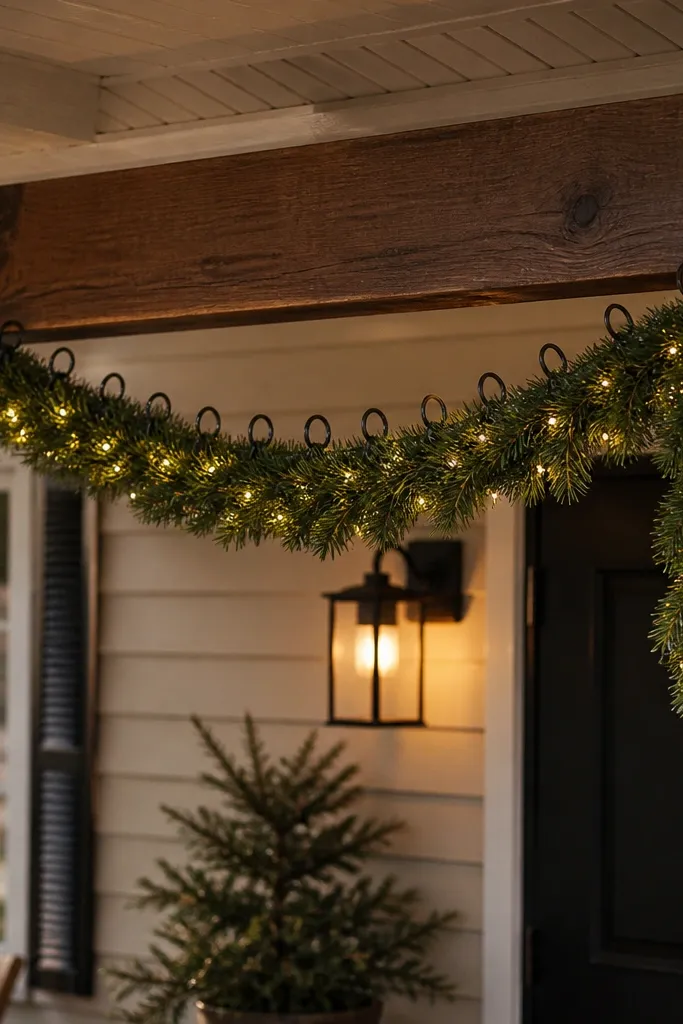
This garland style looks more expensive because it has consistent loops, not random drapes. Shower curtain rings act like uniform holders, so each loop sits the same distance from the beam. You thread faux pine picks and warm lights through the rings, then let a few longer ends fall at the ends for a styled look. It’s great for renters because you can hang it from a porch beam or rail with removable hooks. The payoff is symmetry: photos show a tidy holiday frame around the entrance.
Step 1: Measure the beam or railing span and decide loop count, then space rings about 10-12 inches apart across the length. Step 2: Attach faux pine picks to each ring with twist ties, keeping the green density even across all loops. Step 3: Weave warm white mini lights through the greenery at each ring and secure wire with clear zip ties. Finish by adding 2-3 small ornaments or pinecones per side. Expect $30-80 depending on pick quality and light length.
Keep the garland ends slightly longer than the middle so the center looks fuller in photos.
Don’t bunch all lights in one spot — distribute them so every loop has glow.