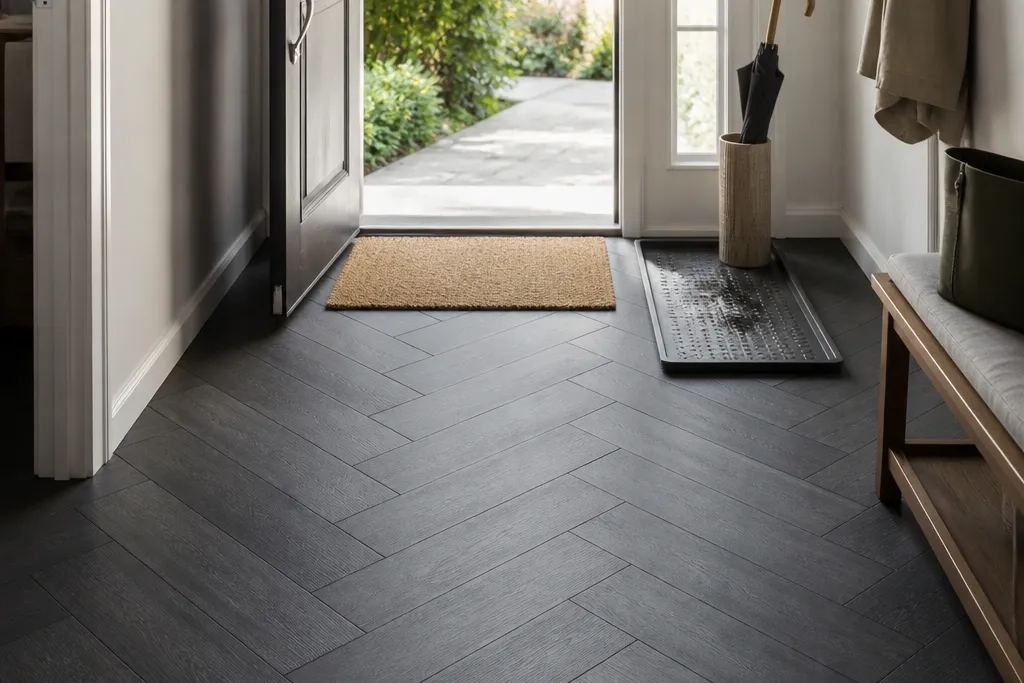
1. Graphite herringbone click-lock LVP with matte finish
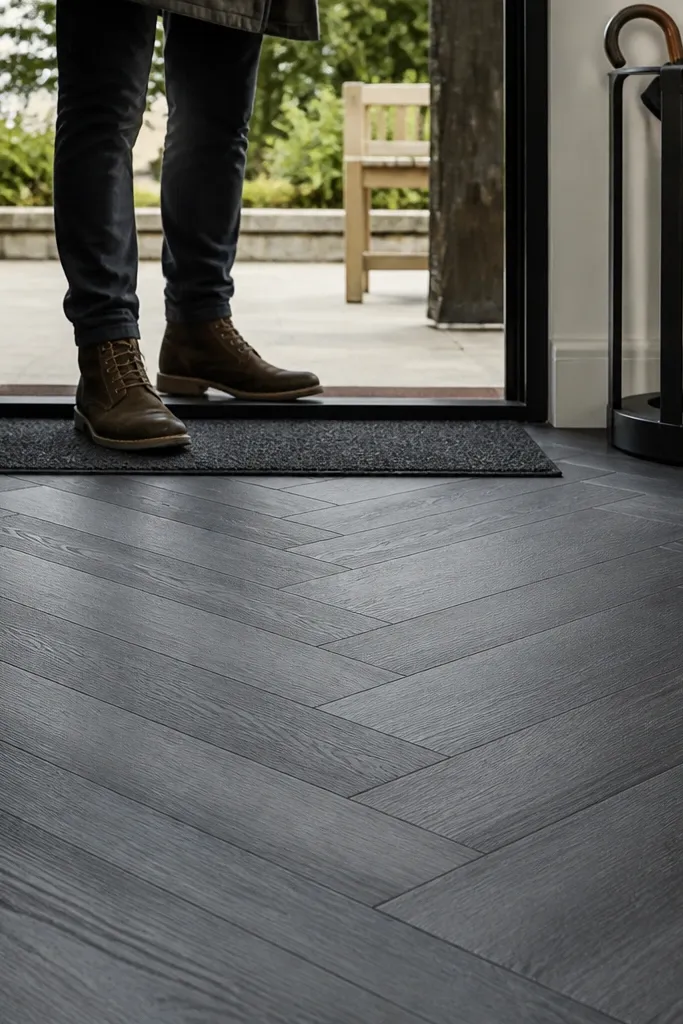
Step 1: Measure the entryway width and plan the herringbone starting line so the pattern centers under the doorway. Buy click-lock LVP with at least a 20 mil wear layer and a waterproof core; also get matching underlayment if the product calls for it. Step 2: Lay planks from left to right, using spacers for a 1/4-inch expansion gap at walls and door frames. Step 3: Cut around the threshold last, then add a transition strip at the doorway so removal stays clean later.
This is the “stylish but tough” option for a renter-friendly foyer flooring ideas entryway goal because it looks designer without needing grout. Graphite LVP with a matte finish hides scuffs from shoe soles better than glossy finishes, and herringbone makes the space feel intentional even if the entry is small. Go for a click-lock plank with a waterproof core so the inevitable damp shoe prints don’t cause swelling. Pair it with a light rug and warm wood console so the dark floor doesn’t swallow the room. It photographs well because the pattern creates movement across the whole entryway.
Watch outAvoid glossy “stone” LVP in the entry; glare makes every scuff look louder.
Pro tipUse a felt furniture pad on anything that will touch the floor, even a small bench — the graphite color shows deep scratches.
2. Warm oak wide-plank LVP with a low-sheen oil-rubbed look
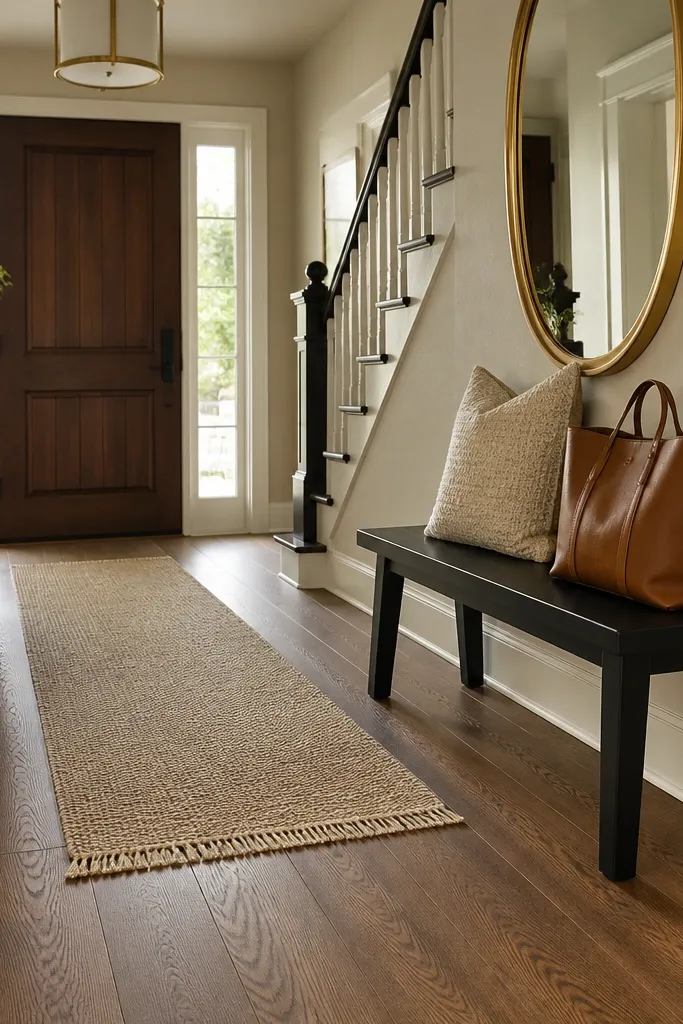
Step 1: Confirm your subfloor is flat within 1/8 inch over 6 feet; LVP shows dips at the seams. Step 2: Install a 6 mil plastic moisture barrier if your product instructions require it, then lay the click-lock planks with the grain running toward the doorway. Step 3: Stagger end joints by at least 8 inches and leave the 1/4-inch expansion gap around the perimeter.
If you want the entry to look expensive but still rental-friendly, warm oak wide-plank LVP is the cleanest path. Wide planks read more custom than narrow ones, and the low-sheen “oil-rubbed” style hides minor wear better than high-gloss laminates. Choose a plank with embossed-in-register texture so it feels like wood underfoot instead of plastic. Keep the color medium-warm so it doesn’t fight with white walls or a cream door. This option is great when you need a floor that works with nearly every entryway decor style — modern, transitional, farmhouse, you name it.
Watch outDon’t install over carpet or thick pad; it makes the click seams fail faster.
Pro tipPick a rug with a warm cream or camel base so the undertone matches the oak and the entry looks cohesive.
3. Whitewashed herringbone peel-and-stick vinyl tiles
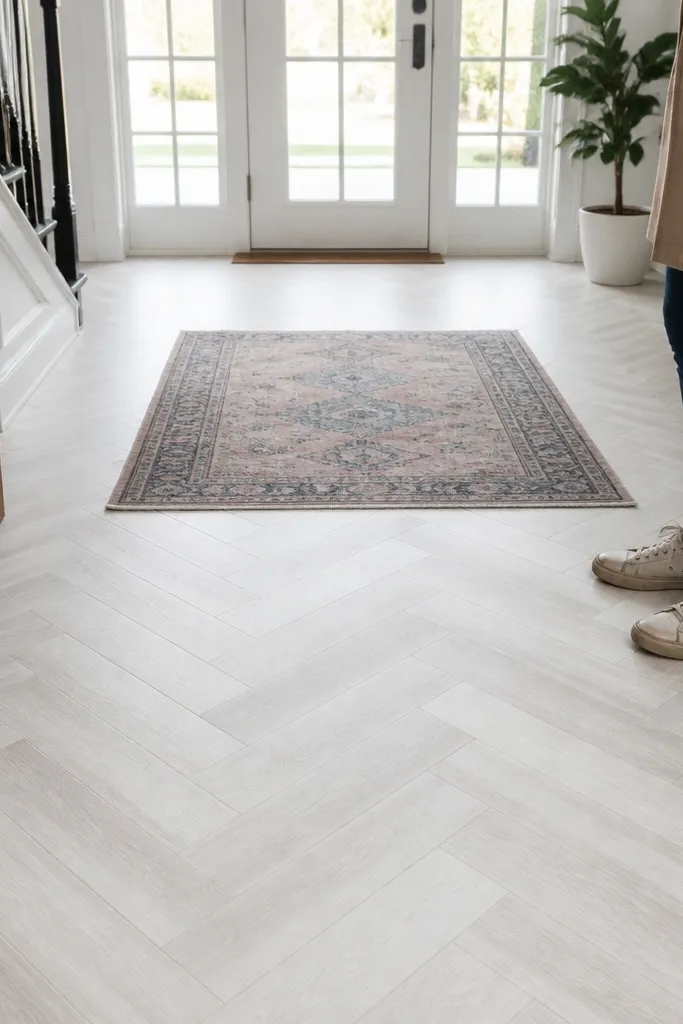
Peel-and-stick vinyl tiles are one of the most renter-friendly foyer flooring ideas entryway options because removal is usually cleaner than glued-down products. Whitewashed herringbone gives you the high-style pattern people pay for in real tile — and it brightens a narrow foyer instantly. Choose tiles with a waterproof surface and a matte topcoat so shoe scuffs don’t turn shiny. This works best in smaller entry zones where you can keep the layout tight and avoid complicated cuts near multiple doors. The lighter color also helps show fewer grit marks compared to very dark floors.
Step 1: Clean the subfloor until it squeaks — no dust, no wax, no leftover adhesive. Use a primer if the tile instructions specify it for your surface type. Step 2: Dry-lay a herringbone layout on paper first, then snap chalk lines to create a centered starting point; peel a few tiles at a time so you don’t misalign. Step 3: Press firmly with a rolling tool, then run a 1/8-inch gap at edges and cover with a baseboard or trim piece for a finished look.
Use a seam roller after 30 minutes; it helps edges stick down where shoes hit first.
Avoid installing on textured paint or uneven patchwork; tile edges lift and catch dirt.
4. Black-and-cream checkerboard peel-and-stick vinyl
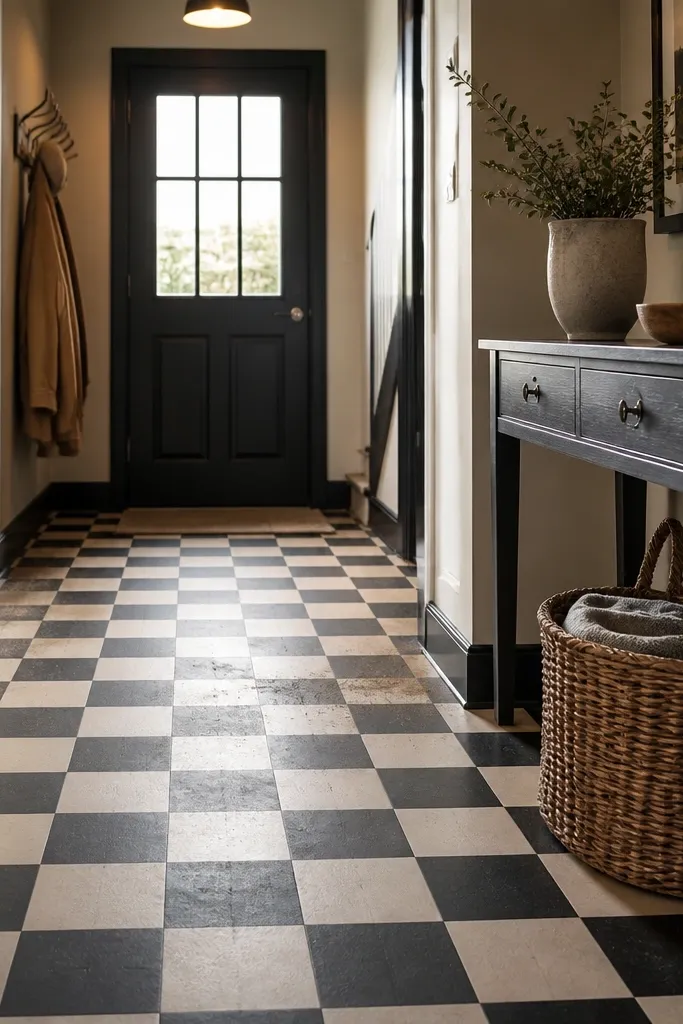
Step 1: Measure the entry area and choose a checker size that lets you avoid skinny half-tiles at both ends; adjust by choosing your starting center line. Step 2: Mark a straight baseline with chalk, then align the first row perfectly — everything else locks to it visually. Step 3: Peel, press, and use a hand roller across each tile; finish edges with a trim strip so you don’t have lifted corners later.
A checkerboard entry reads bold and intentional, and it hides dirt because the pattern breaks up scuffs. For renter-friendly foyers, peel-and-stick vinyl with a waterproof layer is the move: it gives you tile-like structure without grout maintenance or permanent installation. Go with a classic 2-inch or 4-inch square pattern depending on your foyer width — smaller squares work better in tight spaces. Black-and-cream also plays nicely with brass or black hardware, making the whole entry look styled rather than “just flooring.”
Watch outAvoid bright white — it shows scuffs more than warm cream in real entry traffic.
Pro tipPlace your entry rug so its border doesn’t cover the checker pattern; the best look is when the pattern frames the rug.
5. Smoky slate-look LVP with micro-bevel edges
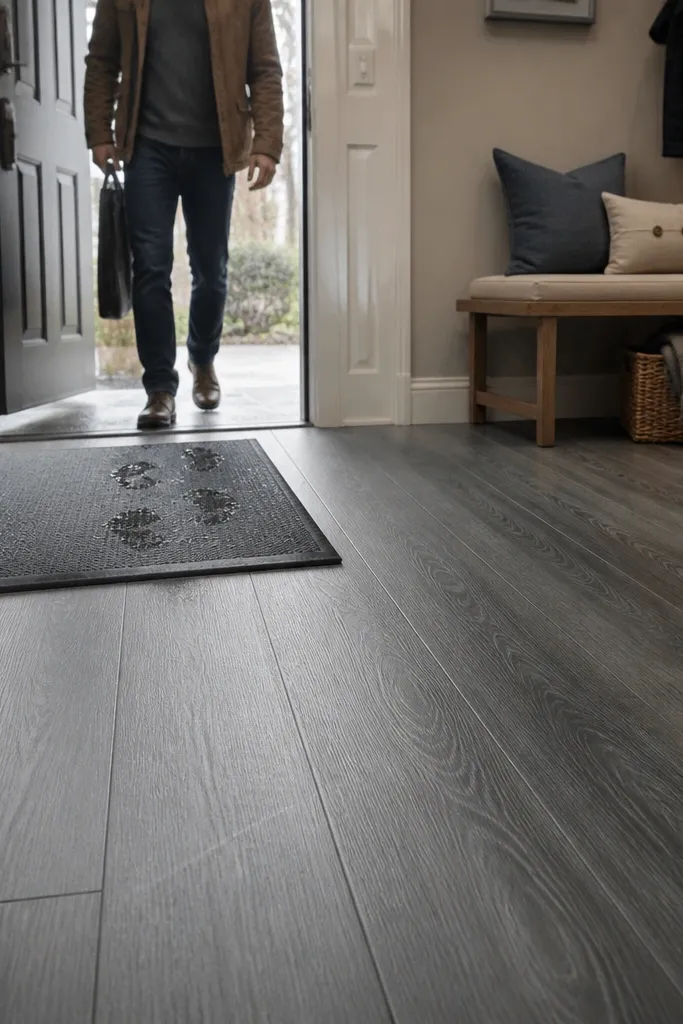
Slate-look LVP is a smart aesthetic choice for an entryway because it looks stone-cold and tough while staying warmer underfoot than real tile. The key is the color and edge profile: smoky gray with micro-bevel edges creates realistic shadow lines that help hide wear at seams. Choose a waterproof core and a thicker wear layer so dropped keys and daily scuffs don’t leave pale scratches. This style looks best with clean lines — a simple door, a metal-framed mirror, and a flatweave rug in charcoal or taupe. It’s a good pick when you want a darker floor without going full black.
Step 1: Pick a plank width that fits your entry; 7-inch planks look more proportionate in wider foyers, while 5-inch can work for narrower layouts. Step 2: Install with the long edge aligned to the longest wall and keep the pattern direction consistent — don’t randomly rotate boards. Step 3: Use a quarter-round or reducer transition at doorways so the micro-bevel doesn’t visually “float.”
Use a doormat with a rubber backing — it keeps moisture off the slate-look finish.
Avoid LVP that feels too smooth; a slightly textured top hides scuffs better.
6. Terracotta-look ceramic-style peel-and-stick squares
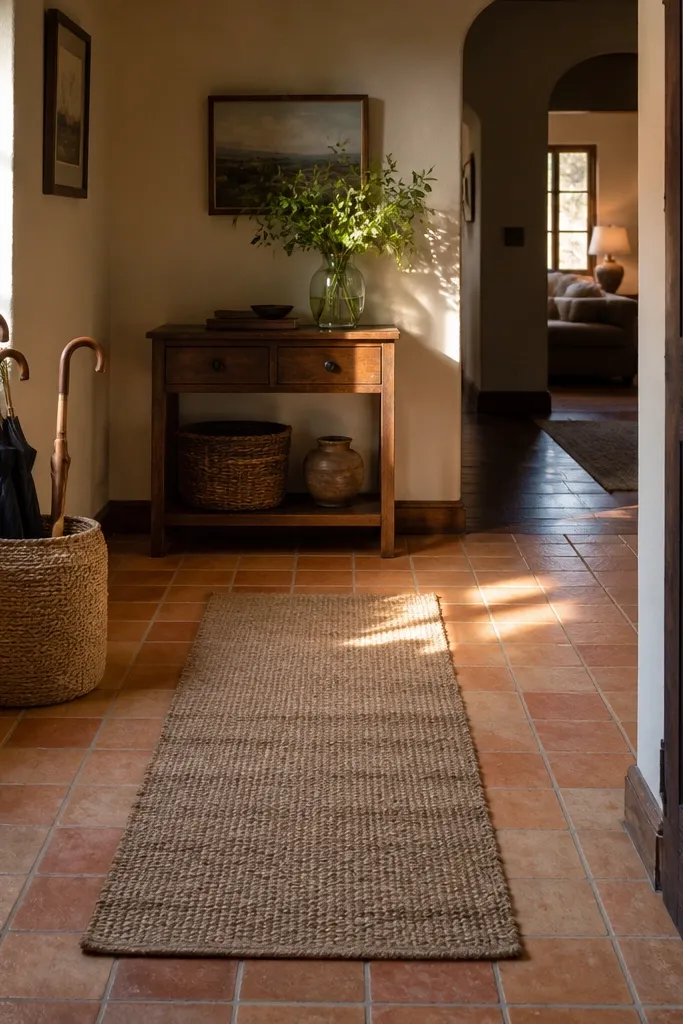
Step 1: Decide if you want a straight lay or a slight offset grid; offset makes the floor feel more “ceramic” and less like a sticker. Step 2: Clean the subfloor thoroughly and apply tile primer if required. Step 3: Press tiles in small sections, use a level or straightedge to keep grout-like lines even, then seal the edges with trim rather than trying to tuck vinyl under baseboards.
Terracotta-look peel-and-stick tile squares bring warmth and texture to a foyer, and they do it in a way that’s easy to undo when you move. The speckled pattern is the trick: it hides scuffs and small stains better than flat solid color vinyl. Look for a tile that mimics ceramic variation with small tonal shifts so the surface doesn’t look uniform. This is especially flattering in entries with white walls and natural wood accents. It also makes the space feel more welcoming than gray stone looks.
Watch outAvoid installing in a foyer that gets standing water; peel-and-stick needs a dry subfloor to stay flat.
Pro tipAdd a runner rug with cream or olive tones — it makes the terracotta feel intentional instead of seasonal.
7. Cork floating floor tiles with a clear matte topcoat
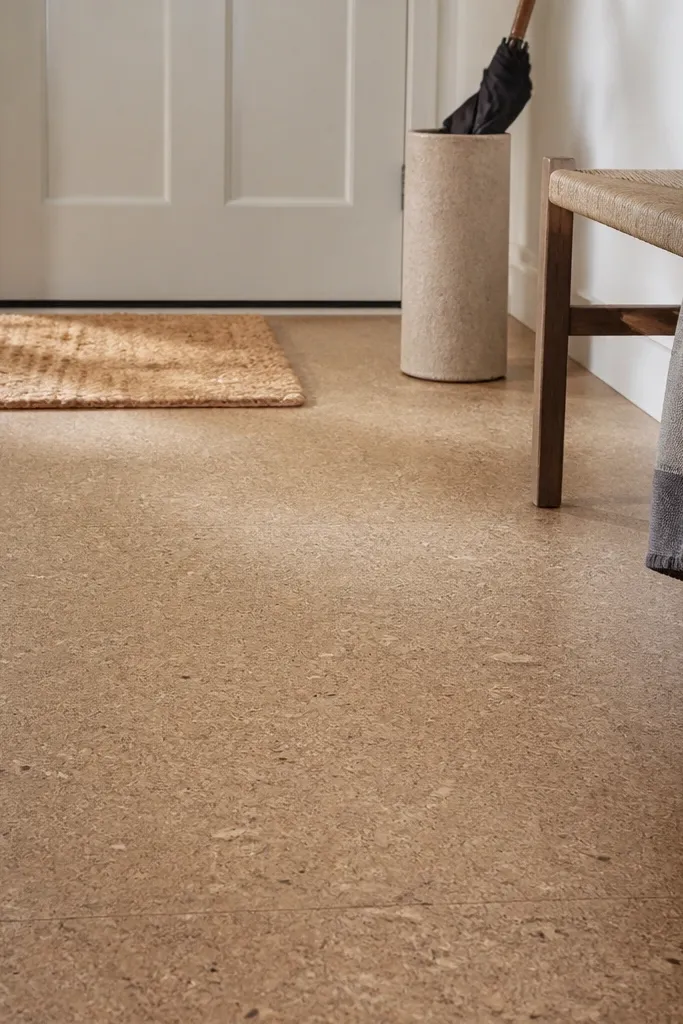
Cork is one of the better renter-friendly foyer flooring ideas entryway options when you care about comfort underfoot. It’s naturally springy, which helps with the “standing at the door” feeling and reduces the loud click of heels. For durability, you need a product that’s designed for floating installation and has a clear matte finish that resists scuffs and water spotting. Choose a light natural cork for a bright entry, or go honey for warmth. Cork also hides small imperfections because the texture is forgiving.
Step 1: Confirm your cork tiles are rated for floating floors and include an attached underlayment or specify a compatible one. Step 2: Install over a smooth, dry subfloor with a moisture barrier if the instructions require it; leave the expansion gap at walls. Step 3: Use a tapping block to keep seams tight, then add a threshold strip at the doorway to protect the edges.
Put a waterproof entry mat down for rainy days; cork hates long contact with wet grit.
Avoid high-gloss cork; it shows scuffs and looks plasticky in photos.
8. Vinyl sheet flooring look with peel-and-stick seam edges
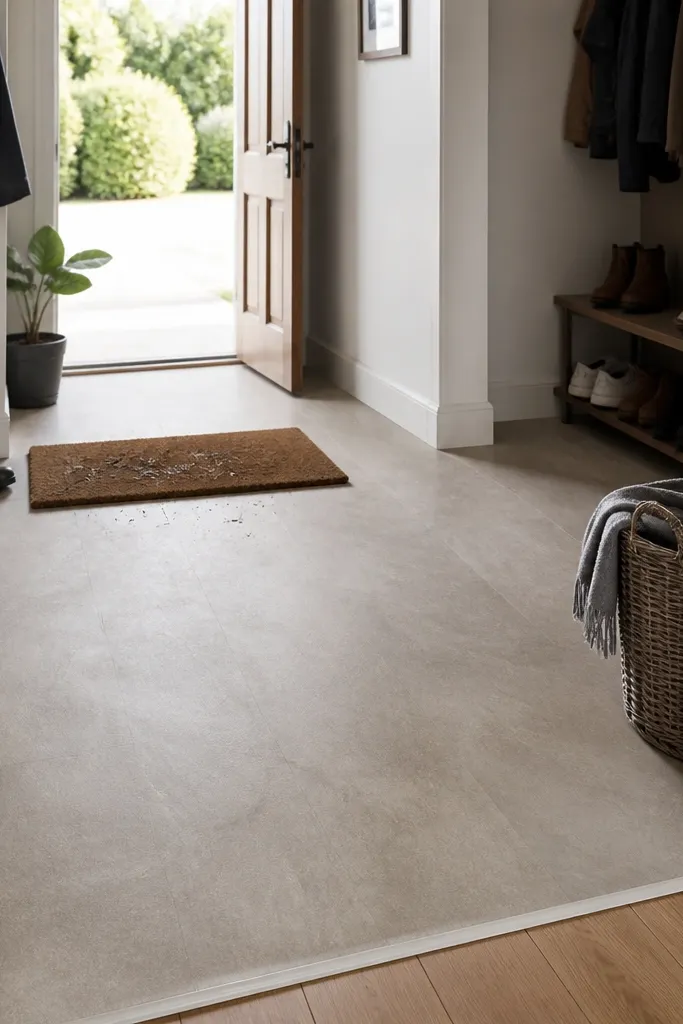
Step 1: Measure the entry carefully and plan where the seam will land; aim for it under a rug or in a less visible area. Step 2: Install the main sheet using the approved underlayment or adhesive method listed for that product, then seal seam edges with a peel-and-stick seam tape made for vinyl. Step 3: Finish with trim and a doorway reducer strip so the floor looks intentional and stays protected during daily traffic.
If your entry is shaped awkwardly, a sheet-style look can beat planks for a cleaner, higher-end photo. You get fewer seams, and fewer seams means fewer places for dirt to collect — a real win in foyers. Choose a vinyl product that looks like wood grain or stone and has a waterproof backing. Pair it with a transition strip at the doorway and keep the edges well finished so it doesn’t lift. This option is best when you can cover most of the entry in one main piece and control the seam placement.
Watch outAvoid tucking edges under mismatched trim; that’s how corners lift and start peeling.
Pro tipTrim the seam edges straight with a fresh utility blade; jagged seams catch dirt and ruin the look fast.
9. Honed travertine-look LVP with warm beige tones
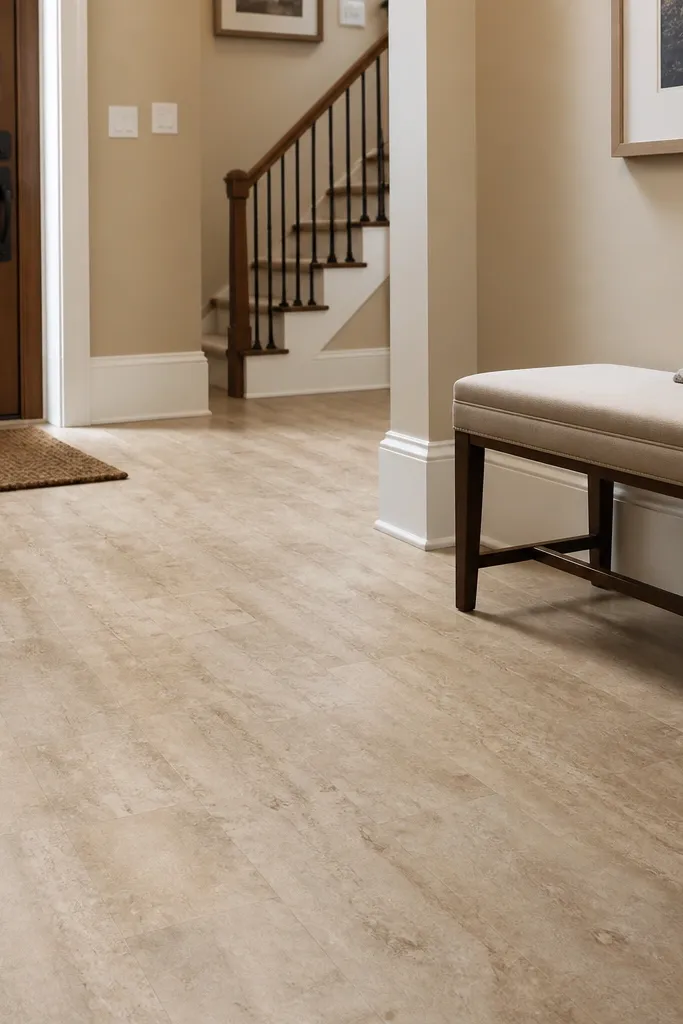
Step 1: Choose plank length that matches your entry proportions; 48-inch lengths look more “stone slab” in wider foyers. Step 2: Install in the direction of the longest wall so the stone look stretches the space visually. Step 3: Seal the transitions with a reducer strip and keep the expansion gap consistent around the perimeter.
Travertine-look flooring reads upscale, and honed (matte) finishes help it feel more realistic than shiny stone imitations. Warm beige tones keep the entry from feeling cold, and the mottled surface hides scuffs from shoes. Look for an LVP with a textured top layer — travertine should feel slightly grainy, not slick. This is a strong choice when your entry has a light wall color and you want the floor to add warmth. It also works well with brass lighting and creamy rugs.
Watch outAvoid cool gray travertine-look — it can make a small foyer feel dingy.
Pro tipUse a rug with a subtle pattern so it doesn’t compete with the travertine mottling.
10. Rug-inlay look: peel-and-stick "border tile" runner design
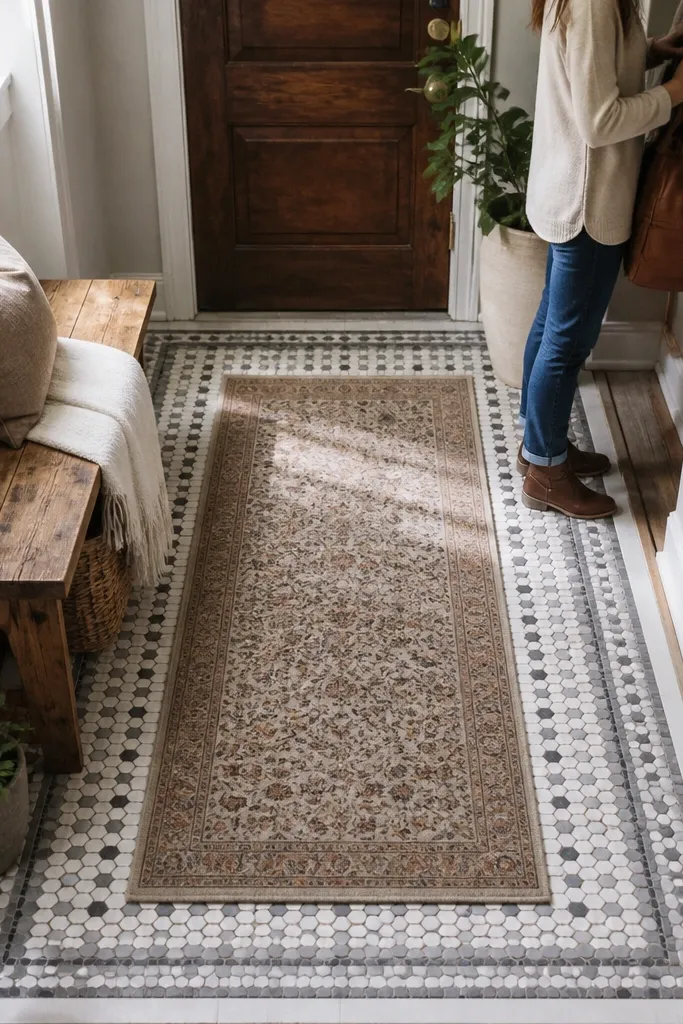
Step 1: Measure the footprint of your rug and plan the border width — 6 to 10 inches on each side is usually the sweet spot for small foyers. Step 2: Mark the rug’s outline on the floor, then install the border tiles first so they stay perfectly aligned. Step 3: Fill the center with the rug and add a low-profile threshold strip at the doorway if the tile border creates a slight height change.
This is for renters who want the look of custom tile without committing to a full-floor change. You lay a peel-and-stick tile border in a runner shape, then place a rug in the center. The border hides edge wear where shoes land and gives the entry a designed frame. Pick a tile style that looks like cement or micro-tiles for a crisp, architectural look. This option is also great when you already own an entry rug you love and don’t want to replace.
Watch outAvoid a border that’s too thick; oversized tile frames can make a foyer feel crowded.
Pro tipChoose a border color that matches your door hardware or console legs so the frame looks intentional.
11. Dark walnut tone LVP with wire-brushed texture
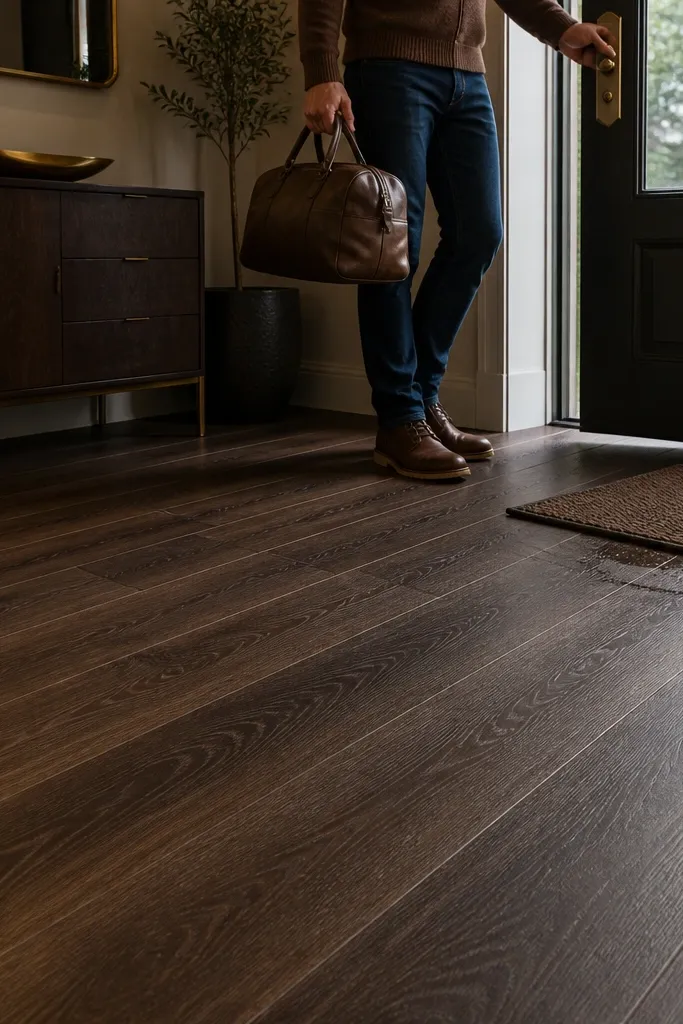
Step 1: Pick an LVP with an embossed texture and a wear layer rated for light-to-heavy commercial traffic. Step 2: Install with staggered joints and keep the plank length consistent across the entry so the grain reads as a single design. Step 3: Add a transition strip at the hallway and use caulk or trim around door frames to keep the edges clean for future moves.
Dark walnut tone LVP with wire-brushed texture gives you depth and hides grit better than smooth surfaces. The brushed texture breaks up the shine and makes everyday scuffs less obvious. Choose a matte finish and a waterproof core so you can handle damp shoes without worrying about swelling. This looks especially good with warm lighting and black metal accents, and it makes a white foyer wall feel more grounded. It’s a strong option if you want a dramatic look that still feels cozy.
Watch outAvoid “gray walnut” tones; they can look flat and dull in entry lighting.
Pro tipUse a door mat with a low pile height; high pile traps grit and makes dark floors look dirty faster.
12. Light gray cement-look LVP with random speckle
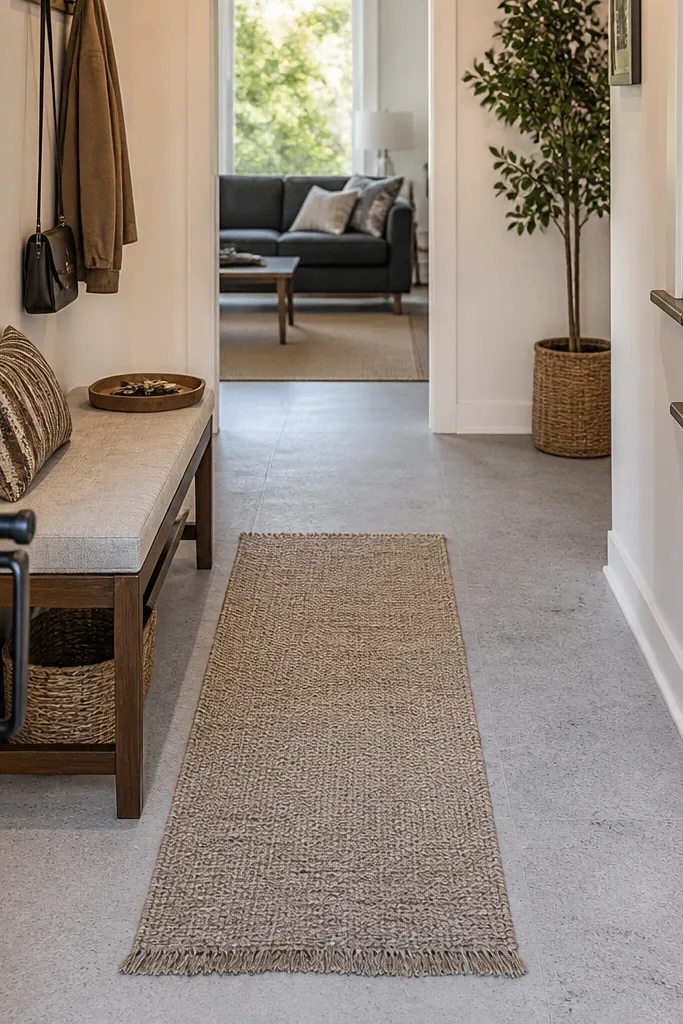
Step 1: Confirm the product is waterproof and has a matte wear layer; avoid semi-gloss cement looks that show shoe marks. Step 2: Lay planks with the printed pattern direction consistent, then use a minimum 6-inch stagger for seams. Step 3: Install a reducer transition at the hallway so the height change looks deliberate, not accidental.
Cement-look flooring is the sweet spot between clean and forgiving. Light gray with random speckle hides scuffs and dirt because the surface already has variation. It also makes the entry feel modern without looking like cold industrial tile. Choose a matte finish so it doesn’t glare under overhead lighting. This option is great for renters who want a neutral base that works with colorful rugs and seasonal decor. It also photographs well because cement textures tend to look richer under natural light.
Watch outAvoid large, uniform slabs of cement-look — they show dirt tracks more clearly.
Pro tipChoose a rug with a slightly darker border than the floor so the edges look crisp.
13. 3D embossed faux leather vinyl tiles in espresso
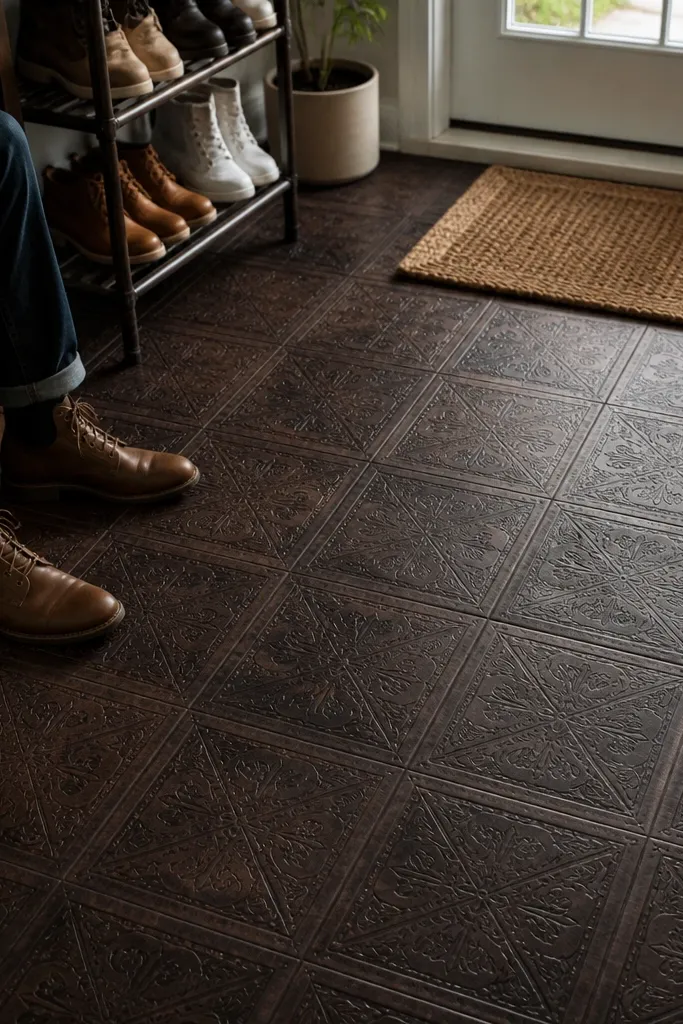
Step 1: Measure and install in a grid that keeps the emboss pattern aligned; misalignment makes the floor look cheap fast. Step 2: Clean subfloor thoroughly, then peel and press tiles in small sections, using a roller to lock down edges. Step 3: Add trim at transitions and around door thresholds to prevent edge lifting during daily traffic.
Leather-look flooring sounds odd until you see it in a foyer: it’s warm, directional, and forgiving visually. Espresso faux leather vinyl tiles with deep embossing hide scuffs because the texture breaks up the light. Choose a waterproof product with a matte topcoat so it doesn’t look like glossy vinyl. This is a great choice when your entry has dark wood furniture, warm brass, or a black front door. It also makes the entry feel cozy even when the walls are minimal.
Watch outAvoid glossy leather-look vinyl; it highlights every scuff line under entry lighting.
Pro tipPair with a low-pile wool rug; high pile can snag texture and make the floor look uneven.
14. Champagne marble-look peel-and-stick tiles with thin veins
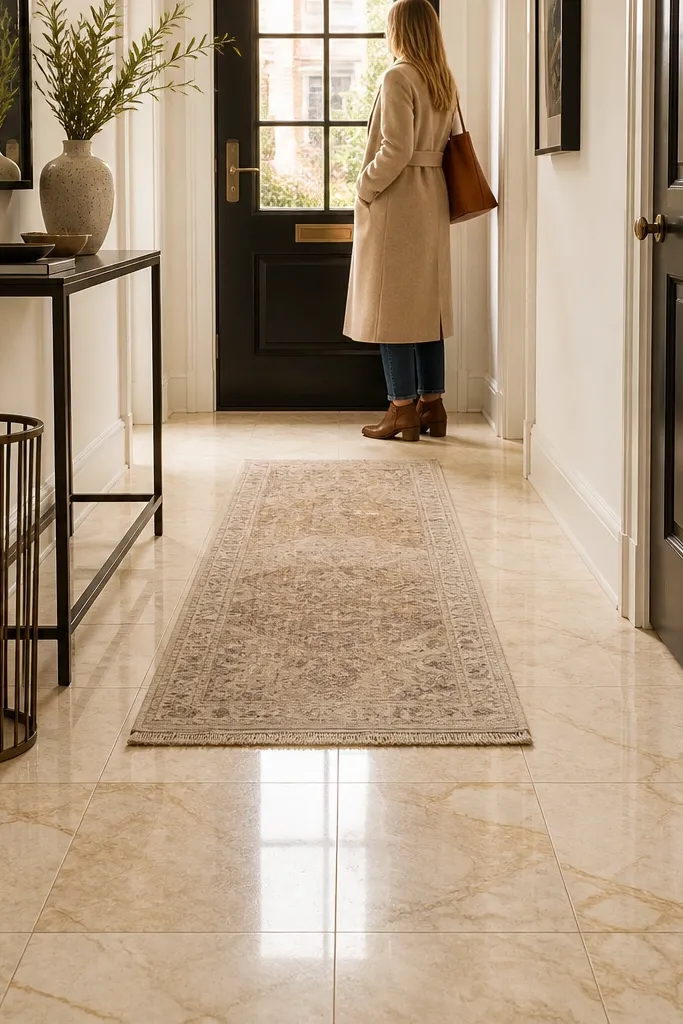
Step 1: Lay tiles dry first to find the vein direction that looks best under the light source. Step 2: Clean the floor, apply primer if required, then start from the centerline and work outward so the pattern stays balanced. Step 3: Press with a roller and install a thin metal or vinyl transition strip at doorways to keep edges protected.
Marble-look in a renter-friendly entry is possible if you keep the tone warm and the veining subtle. Champagne marble-look peel-and-stick tiles give you the bright, luxe effect without the grout problems or permanent installation. Thin veins make the surface look more realistic and less “print-like” than bold chunky patterns. A matte or satin topcoat helps hide scratches from keys and bag zippers. This works best in small foyers where you want a high-end look but you cannot commit to true stone tile.
Watch outAvoid high-contrast white marble on a small entry; it can look harsh and show wear marks.
Pro tipUse a lighter grout-like line style or consistent spacing so the marble pattern reads as one slab from a distance.
15. Smoky blue herringbone vinyl plank with warm undertone
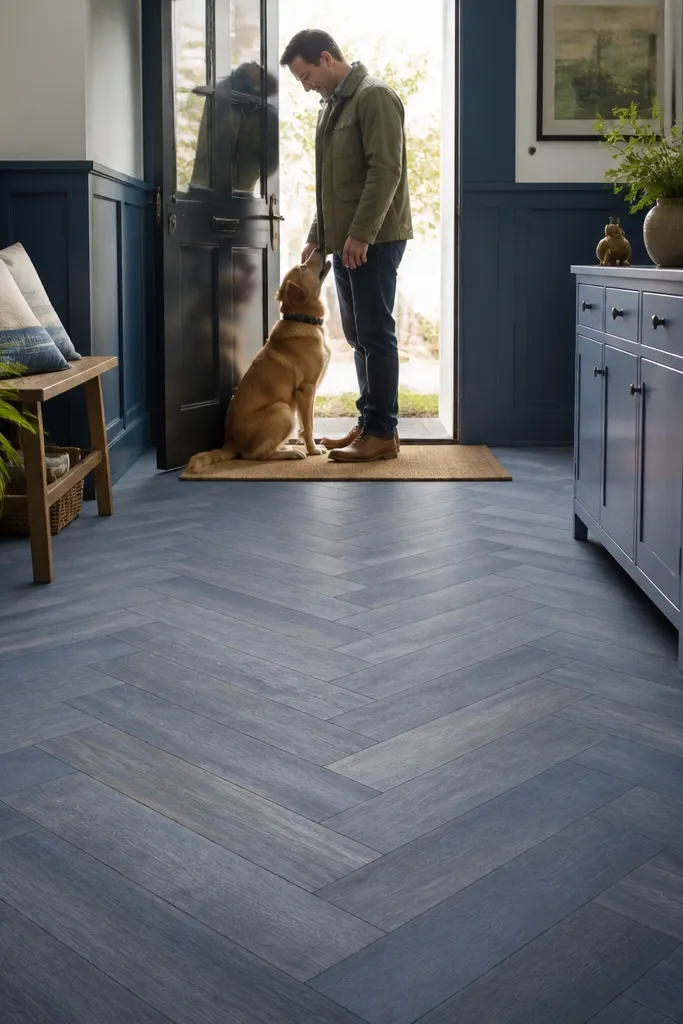
Step 1: Choose a plank width that matches your foyer — 6 to 7 inches looks balanced in most entryways. Step 2: Install with the pattern centered under the doorway and keep the expansion gap at 1/4 inch around the perimeter. Step 3: Use a proper underlayment if your product requires it, then add transitions that match the floor tone so seams stay clean.
If your entry decor has blue tones, smoky blue herringbone vinyl plank makes the whole space feel styled instead of generic. The warm undertone keeps it from looking like icy laminate, and the herringbone pattern adds movement that hides scuffs at seams. Choose a waterproof core and matte finish so wet shoe marks wipe away without dull spots. This is a strong pick for renters who want color without committing to paint — the floor does the heavy lifting. It also pairs well with white walls and brass fixtures.
Watch outAvoid overly saturated navy; it shows dust in bright foyer lighting.
Pro tipMatch the rug’s undertone to the blue floor by choosing a cream base with a hint of gray-blue.