1. Doorframe light wrap with a slim evergreen swag

Step 1: Turn off the porch lights and test a warm white LED set at the frame — aim for even spacing, then secure with clear outdoor clips or small zip ties on the inside edge. Step 2: Add a pre-made slim swag (about 10-14 inches deep) or wire together 5-7 stems of faux pine, then attach with two or three hidden zip ties behind the garland. Step 3: Tie a single ribbon loop in a solid color (burgundy, forest green, or cream) and keep it centered so the look stays clean.
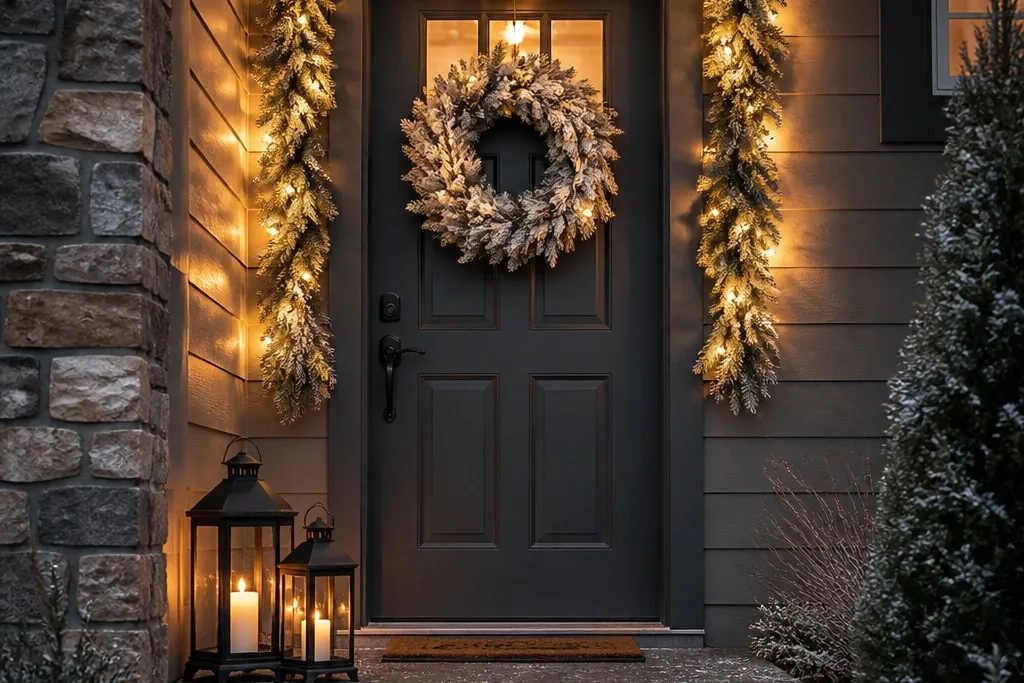
If your porch is narrow, the doorframe is the best real estate you have. Wrap warm white outdoor LED lights around the vertical sides of the frame first, then add a slim evergreen swag across the top so the whole thing reads like one continuous holiday unit. Choose dense faux pine or fir with a matte finish so it doesn’t look shiny and cheap in daylight. Keep the swag width to about the door width minus 6-10 inches each side, so it doesn’t hit your window trim or crowd your handle. This gives you a bright, photogenic focal point without adding bulky decor to the steps.
Watch outDon’t wrap lights randomly around the door hardware; it makes the frame look messy instead of styled.
Pro tipUse a frosted or opaque light cover if you can — it makes the glow look softer and more expensive in photos.
2. Tiered lantern trio on a front step landing
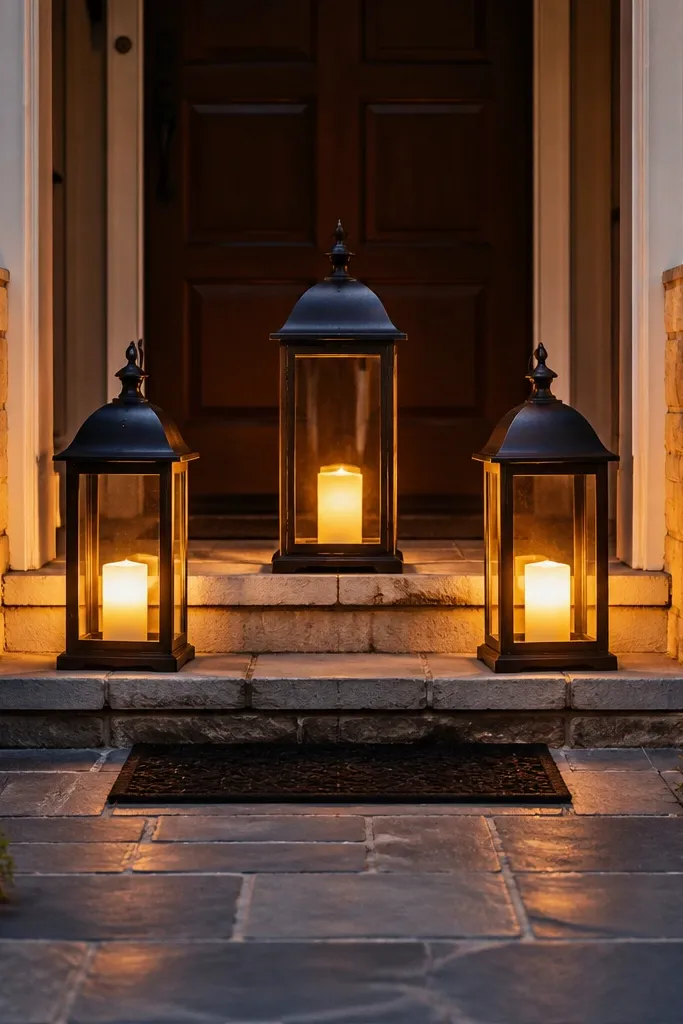
Step 1: Measure your landing and plan for about a 24-30 inch span for the whole trio, leaving at least 12 inches clear near the step edge. Step 2: Place the largest lantern in the center, then center the two smaller lanterns so their handles line up visually. Step 3: Add a 6-8 inch strip of faux garland around the middle lantern and tuck pine cones under the greenery with florist wire.
Lanterns work because they create a “light column” even on a tiny landing. A trio — one at the top center and two slightly lower at the sides — gives depth without needing a wide footprint. Choose metal lanterns in black or dark bronze with glass panels, then swap in warm LED candles so the light is consistent and safe outdoors. For the aesthetic, add a thin band of evergreen around the middle lantern and a few berries or pine cones tucked into the greenery. This setup photographs beautifully from the street because the glow sits at eye level and doesn’t require a lot of ground space.
Watch outDon’t use oversized lanterns that touch your railing or door threshold; it makes the area feel cramped.
Pro tipPick one candle color — warm white or soft amber — and match it across all lanterns so the glow looks intentional.
3. Railing vertical garland with micro-bulb string lights
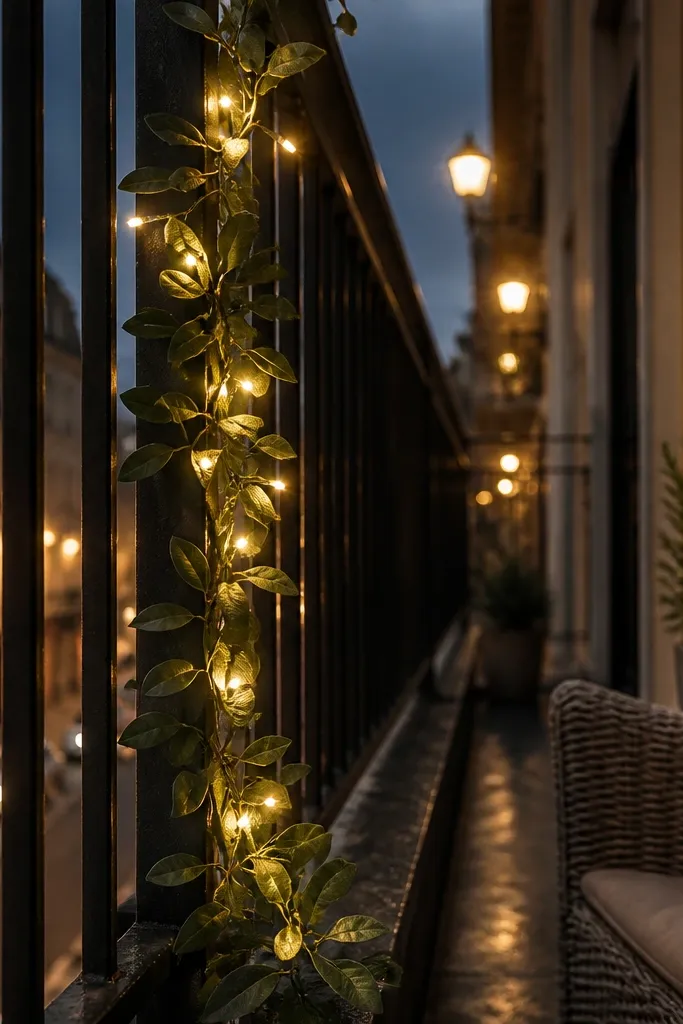
A railing is basically a built-in frame for holiday decor. Run a vertical garland down the outside posts and weave in a micro-bulb string so the lights look like they’re growing out of the greenery. Keep the garland narrow — about 4-6 inches thick — and use matte faux leaves so it reads real from a distance. The micro-bulb look is the point: it fills gaps without turning the railing into one big blob of light. This is ideal for apartments, townhomes, and narrow porches where you can’t place anything on the ground.
Step 1: Cut four equal lengths of outdoor-rated garland (or use a pre-lit vertical garland) to match the railing height, then anchor the top to the post with zip ties. Step 2: Drape micro-bulb lights in a gentle zig-zag through the garland so spacing stays even — then secure with clear plant clips every 8-10 inches. Step 3: Finish with one small ribbon bow per side, not five — tie it so it sits at about mid-rail height.
Use a dimmer plug if you have one; slightly lower brightness makes the garland look richer and less harsh in photos.
Skip thick, wide garlands on railings — they block sightlines and make small spaces feel boxed in.
4. Frosted wreath with a single ribbon tail

Step 1: Mount the wreath at eye level and center it on the door, then check clearance from the knob and any storm door. Step 2: Add mini lights first, tucking the wire hidden along the inner ring, and secure the battery pack with a zip tie to the back frame. Step 3: Attach one ribbon tail using two points (top center and one lower anchor) so it drapes neatly instead of twisting.
A wreath is the quickest way to make a small entrance look dressed. Go for a frosted or lightly snow-dusted wreath in a 16-20 inch size so it doesn’t overpower a compact door. Add warm white mini lights inside the wreath loops, then decorate with only one ribbon element — a long tail that hangs straight down. This creates a clean silhouette and gives the wreath movement when wind hits. The single-ribbon approach looks more expensive than a wreath with lots of ornaments fighting for attention, especially in tight spaces where everything is close together.
Watch outDon’t stack multiple ribbon styles (mesh + satin + plaid); it turns a small wreath into visual noise.
Pro tipChoose ribbon in cream or deep green with a matte finish; shiny satin can look plastic under outdoor lighting.
5. Mini tabletop Christmas tree on an outdoor stand

A mini tree gives you the holiday “centerpiece” look without needing a yard. Place it in a weatherproof pot or planter so it looks styled, not like a moved-in indoor decoration. Use a pre-lit tree with warm white lights, then keep ornaments tight: 6-10 ornaments total in two finishes (matte and one metallic). A short tree (2-3 feet) reads well on a porch corner or beside the door because it creates height and sparkle. If your space is tiny, the tree’s job is to anchor the whole entry and make the lighting feel purposeful.
Step 1: Choose a pot with a diameter about the tree’s widest branches plus 2-4 inches so it looks stable; drill no holes unless it’s designed for outdoor use. Step 2: Fluff branches outward in layers, then add ornaments starting with larger pieces at the lower midline. Step 3: Top with a simple pick or star and keep the tree at least 18 inches from the door so it doesn’t block opening clearance.
Use ornament hooks or small twist ties; hot glue can fail outdoors and makes ornaments shift in wind.
Avoid over-decorating — a mini tree looks better with fewer, bigger ornaments than lots of tiny ones.
6. Snowy garland across a narrow walkway planter edge
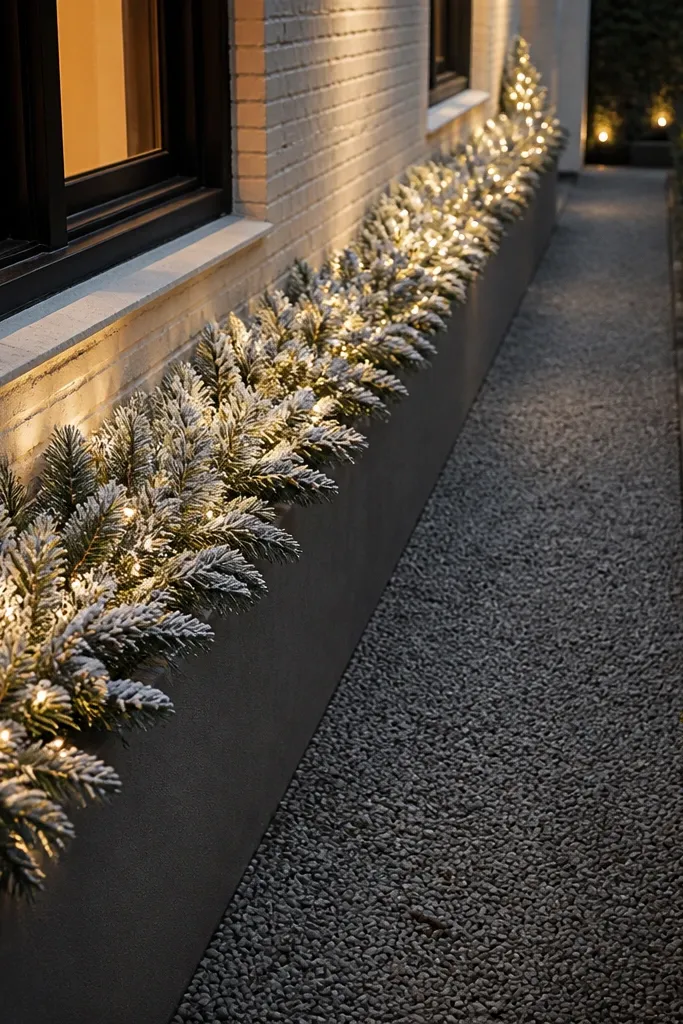
If you have a slim walkway edge, you can turn it into a photo-ready holiday line. Drape a frosted garland along the top of a low planter or directly along the edge where you already have landscaping. Add a thin string of warm white lights tucked into the garland so the glow follows the path line. The frosted texture matters: it softens the look in daylight and makes the lights look like they’re reflecting off snow. This approach is great for townhomes and side yards where you can’t hang lights overhead.
Step 1: Measure the edge length and buy garland with enough fullness to cover the top without hanging too low — aim for 6-10 inches of visible depth. Step 2: Secure the garland every 12-16 inches with outdoor zip ties or plant wire around the planter rim. Step 3: Weave lights into the garland, then run the cord to a nearby outlet using a weatherproof extension rated for outdoor use.
Keep the lights closer together at the corners; it makes the path look intentional from both directions.
Don’t let the garland sag onto the walkway; it creates a trip hazard and looks messy in motion.
7. Window box evergreen with berry picks and mini lights
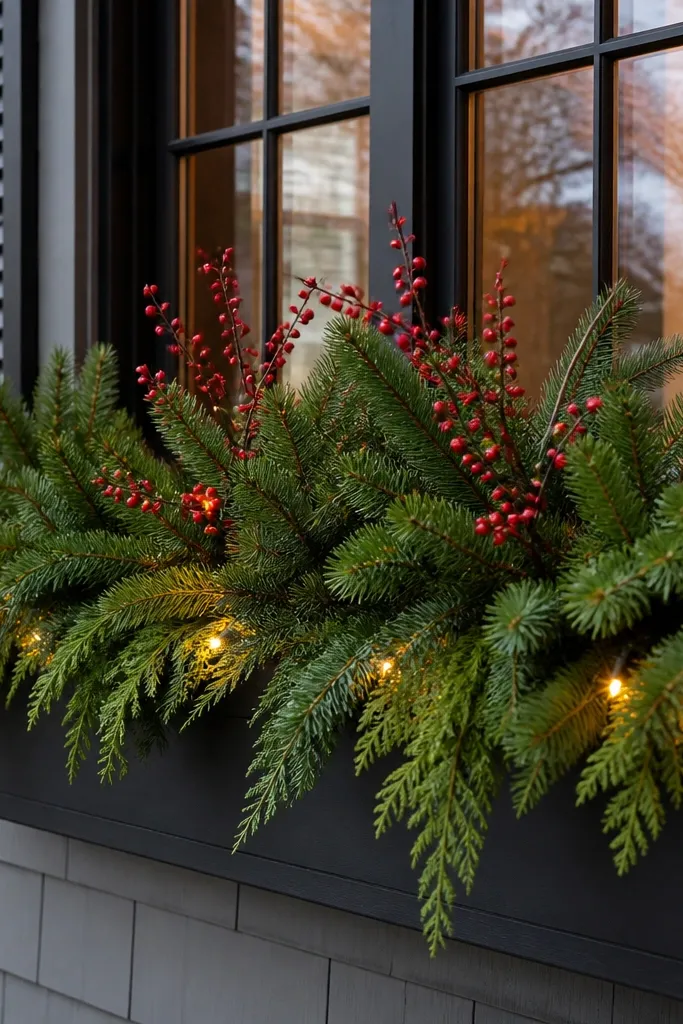
A window box is a small-space cheat code because it fills horizontal space without taking up walking room. Use a low, wide outdoor planter and build it with dense faux evergreen in a matte green, then add berry picks sparingly so the red pops without looking costume-y. Add warm white mini lights tucked near the front edge so they glow toward the street. Keep the overall height under 10-12 inches so it doesn’t block the window view. This setup looks great in photos because it frames the home face and gives a clean, symmetrical holiday look.
Step 1: Remove old plants and line the planter with a thin waterproof liner if it isn’t already weatherproof. Step 2: Insert evergreen stems first, anchoring with floral foam or a grid insert designed for outdoor planters, then place berry picks in three clusters (left, center, right). Step 3: Tuck mini lights into the lower third and secure the battery pack under the front lip.
Use one berry color family (either red or burgundy) so the box reads cohesive from across the street.
Don’t pack the box too high; tall planters look top-heavy on small facades.
8. Light net over a porch column or small shrub
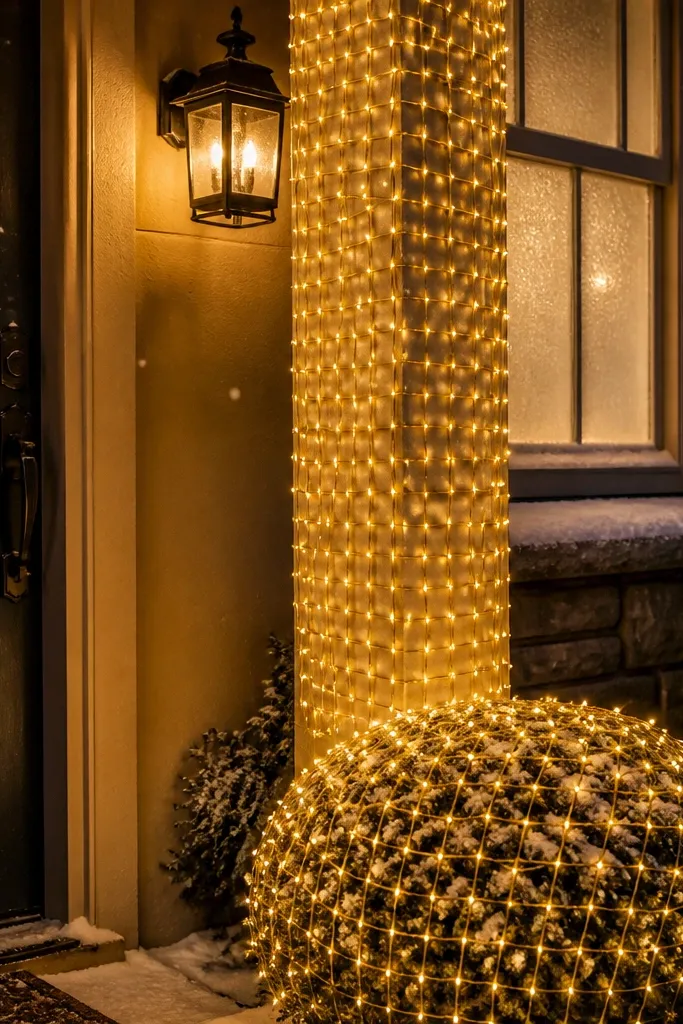
Step 1: Measure the height and width of the column/shrub and buy a net that covers that area with about 2-4 inches to spare on each side. Step 2: Drape the net over the structure and secure the top and bottom edges with zip ties or outdoor hooks. Step 3: Hide the cord near the base and use a timer plug so the lights stay consistent without daily fiddling.
A light net creates instant “wow” because it fills a surface evenly. Draping it over a column, a narrow shrub, or a small outdoor trellis makes the decoration look larger than it is. Choose warm white netting for a cozy look, and keep it tight — don’t let it hang in loose loops that look like laundry. This works in small spaces because you don’t need multiple pieces; the net is the visual. It also photographs well because the light reads as a solid shape.
Watch outSkip cool white for small entryways; it can feel harsh and make frosted greenery look gray.
Pro tipTuck the net seams toward the least visible side so the glow looks smooth from the street.
9. Corner cypress cone tree with string lights (no ornaments)
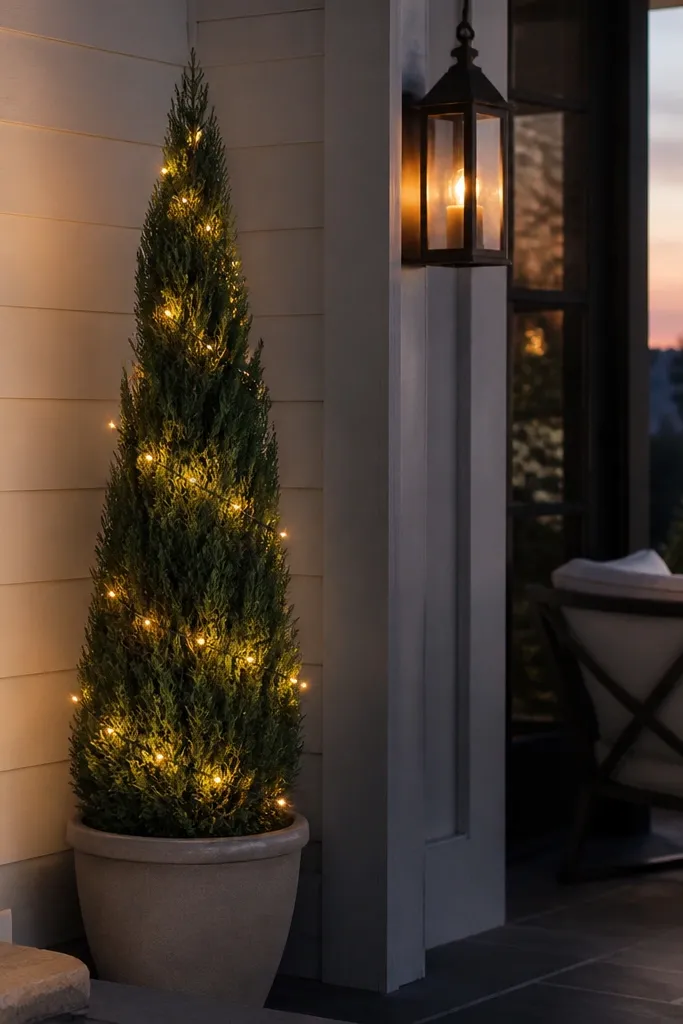
Cone-shaped trees are perfect for corners because they use height and don’t spread wide. Put a single cone tree in a planter near the porch corner, then wrap it with warm white string lights instead of ornaments. The clean silhouette is the aesthetic: you get a holiday shape that looks styled even in daylight when lights are off. Choose a faux cone tree with dense branches so the lights don’t show through gaps. This idea is great when you want a minimalist look but still want the home to feel festive from the street.
Step 1: Place the cone tree so it clears the walkway and sits about 10-18 inches away from walls or railing for airflow. Step 2: Wrap lights spiraling upward, using small clips or twist ties to keep spacing even; keep the wire visible only at the base. Step 3: Add a simple topper like a fabric bow or a small star and leave it ornament-free so the shape stays crisp.
Use a single light size (mini or C7-style) across the whole setup to keep the glow consistent.
Don’t overstuff the cone with ornaments; it turns the silhouette into a fuzzy ball.
10. Pair of matching mini wreaths on narrow side panels
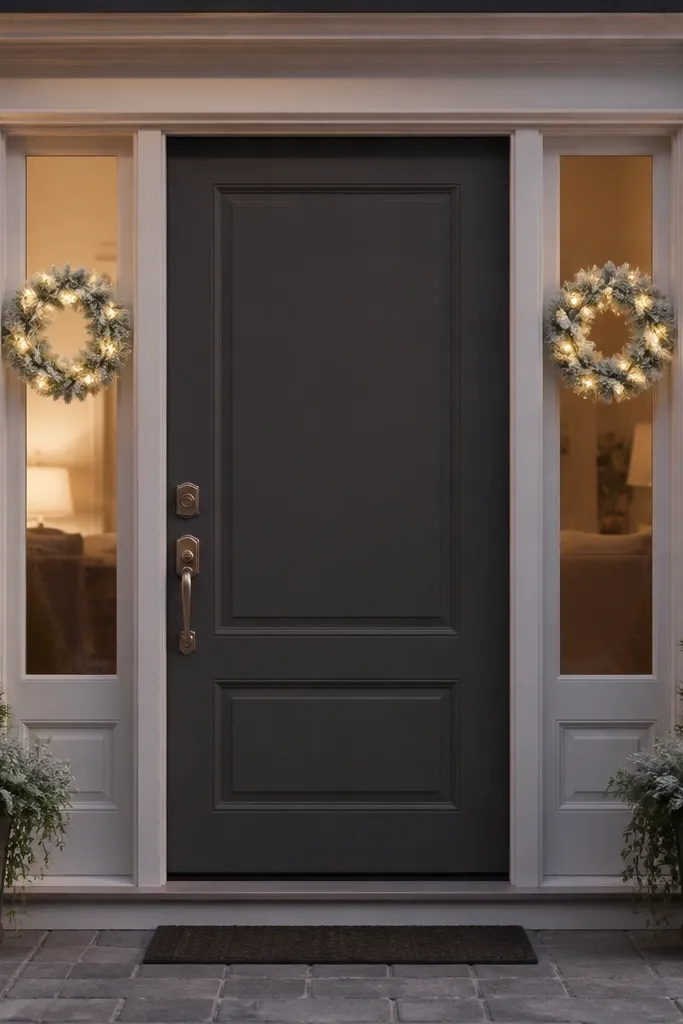
Step 1: Measure the side panel width and pick wreaths that leave at least 2 inches of clearance from trim. Step 2: Hang wreaths using outdoor hooks or a wreath hanger that won’t scratch paint, then check that the lights don’t interfere with any door movement. Step 3: Add a single accent — pine cone clusters or berry picks — and keep it centered to maintain symmetry.
If your front door is small or your porch has awkward side walls, use the side panels. Two matching mini wreaths — one on each side — make the entry feel framed, even if there’s no room for a large wreath. Choose 12-14 inch wreaths in the same color family and add warm white mini lights inside each. Decorate them with only pine cones or only berries so they read cohesive. This setup is photogenic because it creates symmetry and a clear holiday “frame” for the door area behind it.
Watch outDon’t mix wreath styles (one frosted, one shiny, one with ornaments); the mismatch shows up fast in small spaces.
Pro tipIf the side panels face different directions, angle the wreaths slightly so the lights face outward toward the street.
11. Stacked planter bases with faux garland rings
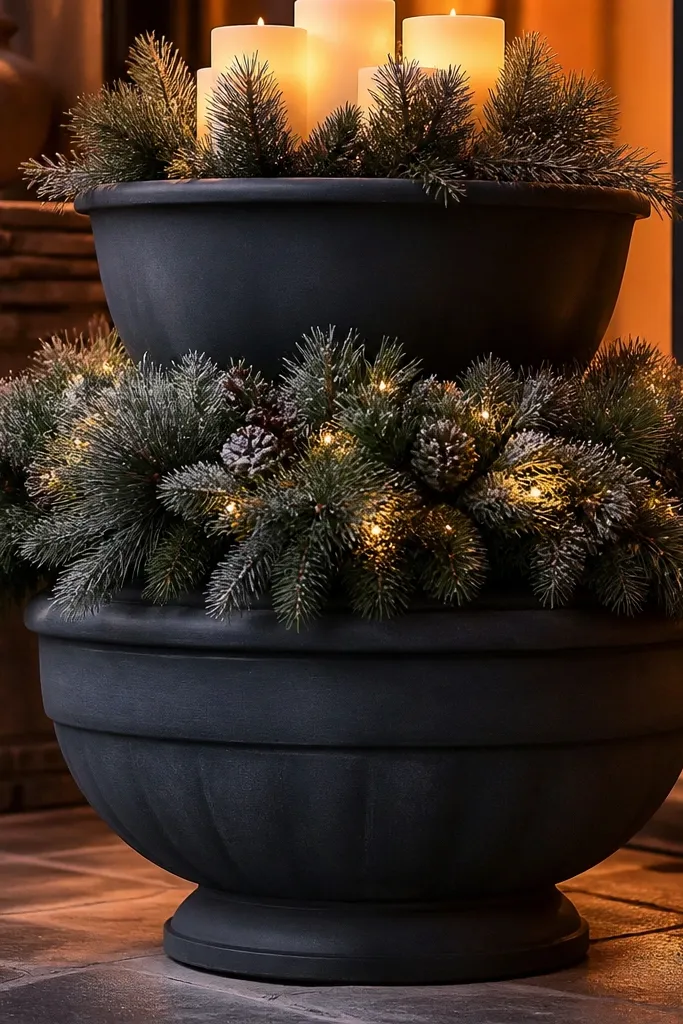
Stacked planters give you a tiered look without buying a large stand. Use two sizes of outdoor planters or planter risers and place a faux garland ring around the middle level, like a wreath but vertical. Add warm LED candles inside the top planter so the glow comes from above the greenery line. This is a great option if you already have planters but they look bare in winter. The garland ring keeps the decoration tight to the structure, so it doesn’t spread into your walkway.
Step 1: Choose a bottom planter wide enough to anchor the stack and a top planter that matches the garland ring diameter (about 14-18 inches). Step 2: Insert a pre-formed garland ring or wire together a ring using faux pine stems, then place it around the middle level and secure with discreet zip ties. Step 3: Put a warm LED candle set in the top planter and set it so the light is visible above the greenery.
Add two small pine cone clusters at opposite sides of the ring to break up the flat look.
Don’t stack planters too high; a tall stack can tip in wind and looks top-heavy.
12. Outdoor curtain lights on a small balcony railing
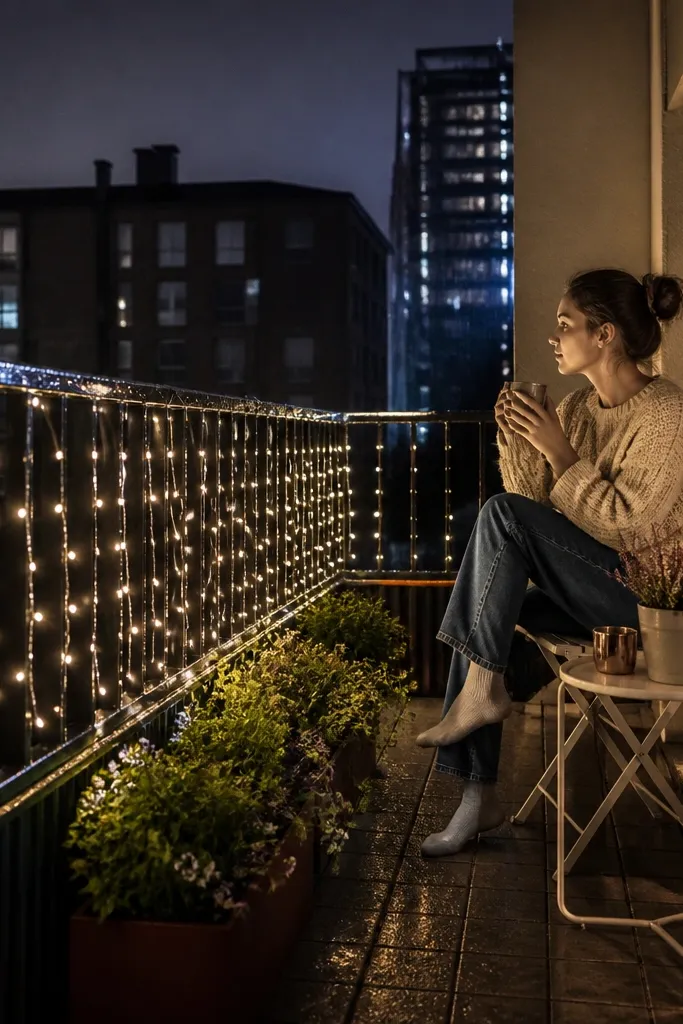
Step 1: Measure the railing span and the drop length you want (about 24-36 inches works well for small balconies). Step 2: Attach the curtain top with outdoor hooks or clips along the beam, then smooth strands so they hang straight. Step 3: Route the cord to a weatherproof outlet and use a timer so it turns on at the same time each evening.
Curtain lights are made for small balconies because they create a full backdrop without taking up floor space. Hang the curtain from the railing or a balcony beam so the strands fall in even lengths, creating a clean curtain of warm light. Choose warm white and keep the width close to the railing span; too wide and it tangles, too narrow and it looks incomplete. Add one grounded element — a small potted evergreen or a slim garland — so the light has something to “sit on.” This makes the whole balcony look like a set, even if it’s only 3-5 feet deep.
Watch outAvoid mixing curtain lights with other string lights on the same railing; it becomes a knotty mess fast.
Pro tipFold the curtain strands at the top so the densest part sits at center; it looks better than an even but thin spread.
13. Snow-dusted wreath garland for a small porch column
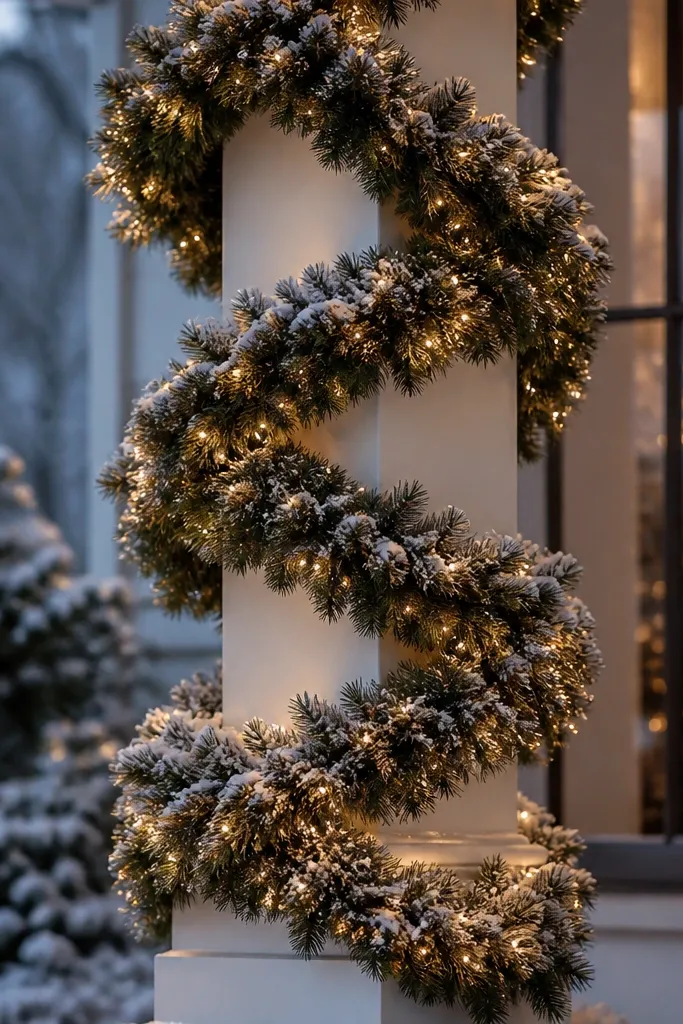
Step 1: Buy or build a wreath garland strip that wraps around your column circumference; you want overlap of about 2-3 inches. Step 2: Secure the garland at the top and bottom with zip ties, then add a few ties in between so it doesn’t rotate. Step 3: Insert warm mini lights into the overlap area and tape the wire ends down so they don’t drift.
A porch column is narrow but tall, so it’s begging for a vertical wreath look. Wrap a snow-dusted garland around the column in overlapping loops, then tuck warm mini lights into the front-facing sections only. The overlapping loops create a layered texture that looks full in daylight and glowy at night. Keep the overall width tight so it doesn’t scrape or snag your entry flow. This idea is especially good if you want the holiday look to feel built-in, not like temporary decorations.
Watch outDon’t wrap garland too tightly — crushed faux stems look flat and cheap.
Pro tipUse lights only on the front half of the column; the back can be unlit and still looks great from the street.
14. Small nativity-style lantern scene at the base of a door
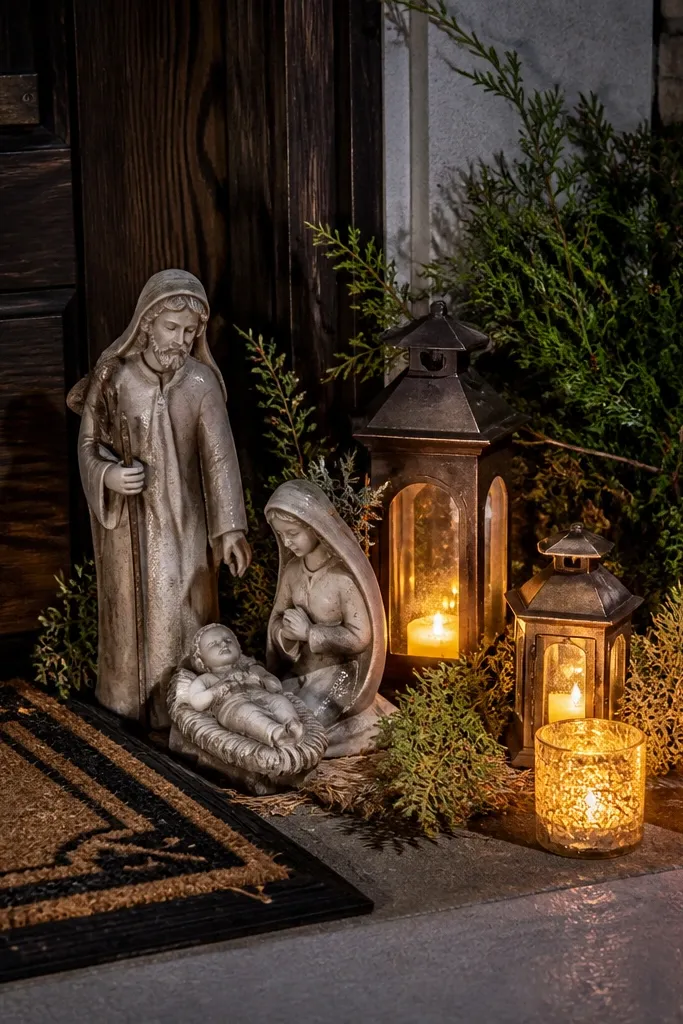
If you want something that looks like a real holiday display but fits a tiny porch, build a mini “scene” with lanterns and small figures. Place a few compact lanterns and battery candle holders in a cluster at the base of the door or beside the doormat, then add a couple of small greenery accents to tie it together. Keep the color palette to cream, pine green, and black metal so it reads clean. The key aesthetic is the grounded glow — warm light at the bottom makes the whole scene feel intentional, even when the porch is small and close to the ground.
Step 1: Choose a cluster width of 18-24 inches so it doesn’t block traffic and stays centered on the door zone. Step 2: Arrange lanterns in a staggered pattern (one back, two front) and add small evergreen sprigs behind them so you get height. Step 3: Add figures or a nativity-style piece only if it’s weather-safe and scaled for outdoor use, then secure everything with removable putty or hidden zip ties so it doesn’t shift.
Use a matte black or dark metal lantern set; it frames the glow better than shiny silver in outdoor light.
Avoid tall figures that stick above your door threshold; they look crowded and can get knocked.
15. Porch step runner of battery icicle lights with a pine-spray border
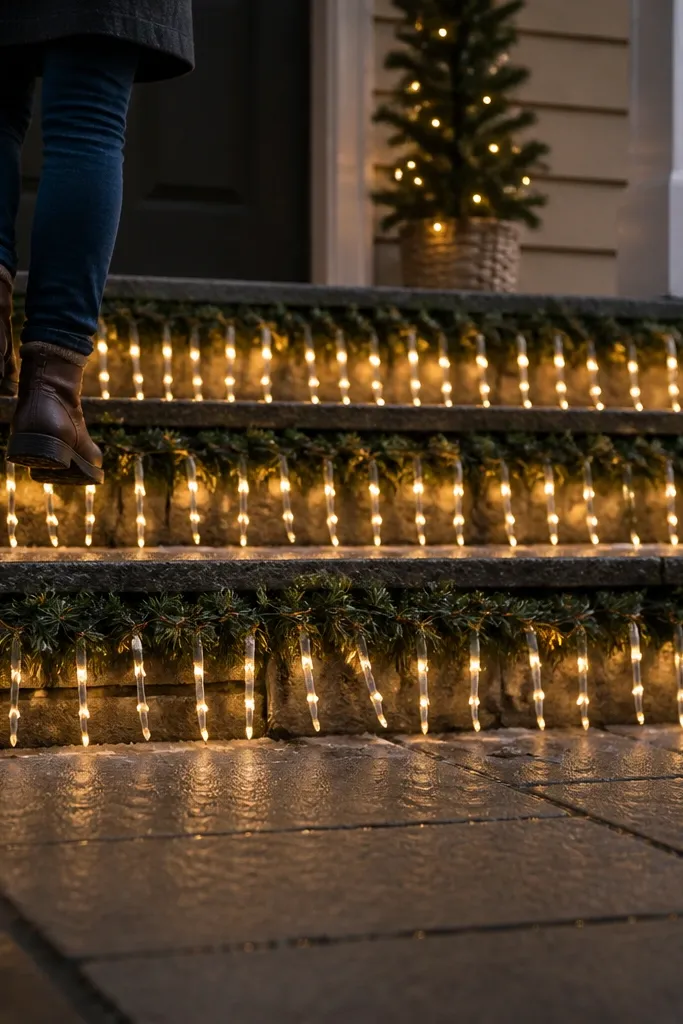
This is the fastest way to make small outdoor steps look dressed up without adding big bulky decor. The icicle strands create vertical sparkle that reads clearly from the sidewalk, even on a narrow entry. Use a low, fake pine-spray border along the step risers so the lights look like they belong there, not like loose strings. Pick warm white lights and pair them with matte green foliage and a few frosted accents so it feels wintry, not plastic. It brightens the exact problem most small porches have — a dark, flat entry where nothing has height or contrast.
1) Measure your porch steps and cut a pine-spray garland or bundle of faux pine stems into 2 to 3 lengths that match each riser. Use 7 to 10 cm (3 to 4 in) high riser coverage so the border is visible but doesn’t crowd your foot traffic. 2) Lay battery icicle light strands along the top edge of each step riser, spacing drops about 10 to 12 cm (4 to 5 in) apart. Secure with clear zip ties or small green plant clips, then tuck the cable ends behind the pine so you don’t see coils. 3) Add a thin layer of faux snow spray or flocking to the pine tips if you want a frosted look, then wrap any visible battery pack with a small piece of faux burlap or hide it behind a step skirt. Expect about 30 to 60 minutes and roughly $25 to $60 depending on strand length and whether you go with frosted icicles.
Aim the icicle drops so they land visually over the step edge, not straight down into the tread. That keeps the sparkle framed and makes the whole entry look taller.
Avoid using cool white icicle lights — warm white makes the pine look natural and reads better in evening light.