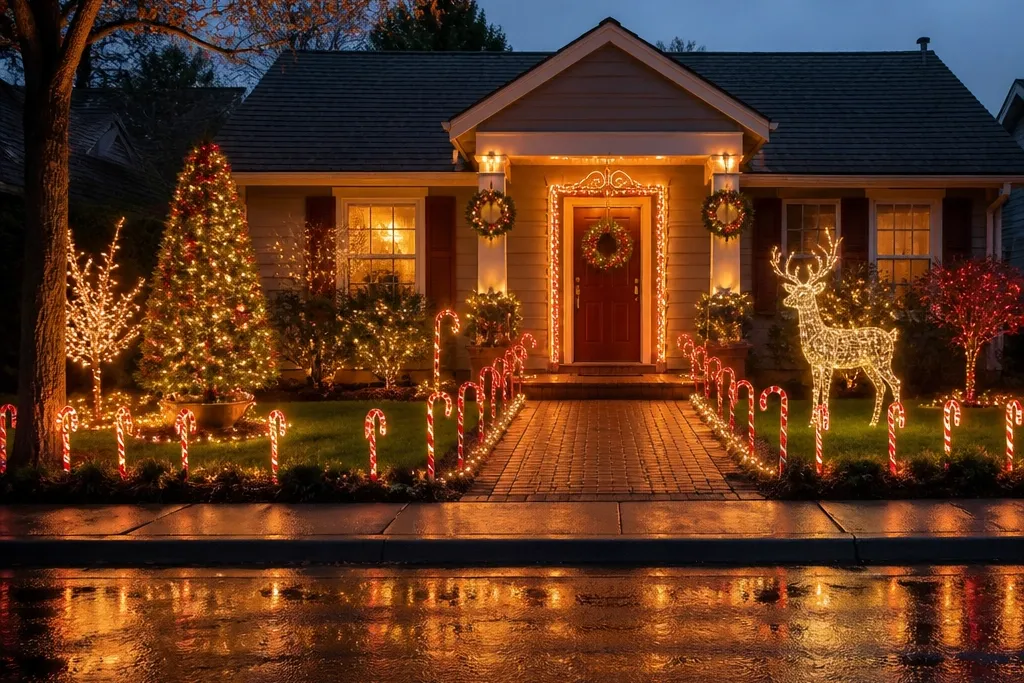
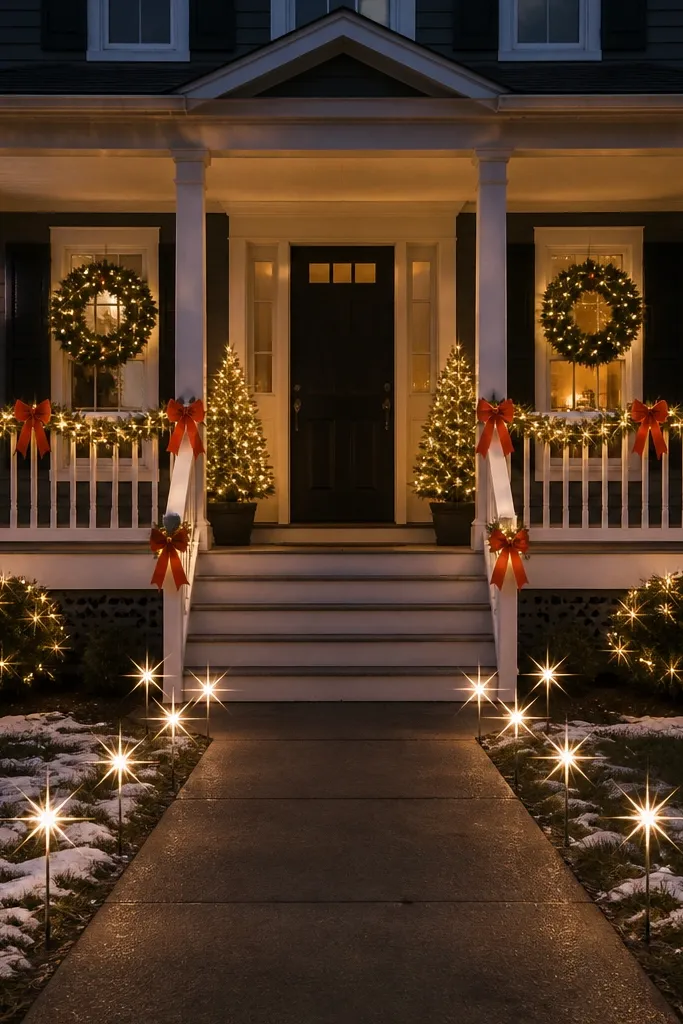
1. Gingerbread house facade with a lit doorframe
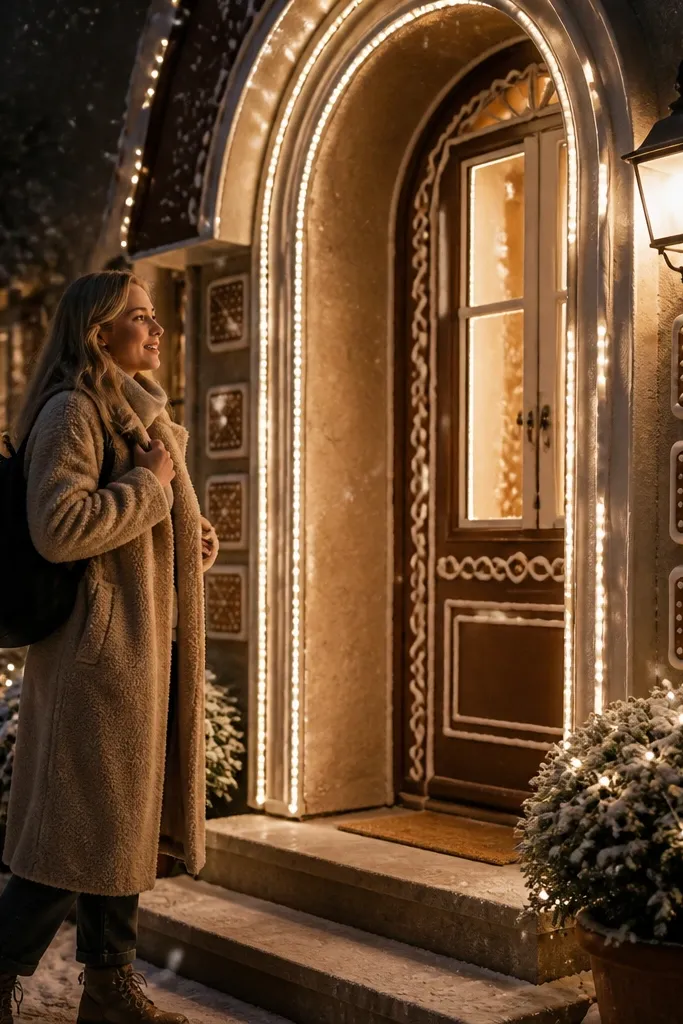
This theme works because it turns your entry into a sweet, recognizable shape instead of a pile of ornaments. Use white mini LEDs to outline the door frame like “frosting,” then add brown-and-cream trim details around the entry so the lighting has a story. Keep the “gingerbread” color palette grounded with warm taupe, cocoa brown, and off-white — it photographs cleanly and doesn’t clash with most siding. Add a small lit swag above the door to connect the door outline to the rest of the facade. It’s ideal for homes with a clear front door view from the street.
Step 1: Outline the door frame with warm white mini LEDs using clear cable clips. Start at the top corners and work down, aiming for even spacing of about 4-6 inches between light points so the “frost” looks smooth. Step 2: Build the gingerbread look with a narrow brown trim ribbon (or brown burlap tape) laid flat around the door edges, leaving the lights as the bright line. Step 3: Add one lit swag above the door using a pre-lit garland and tuck it so it overlaps the top outline by at least 3-4 inches. Plan about 100-200 feet of lights depending on door width and how far you extend the outline.
Use a matte ribbon or burlap texture for the brown parts. Glossy ribbon reflects stray streetlight and makes the theme look cheaper.
Don’t add multicolor bulbs on the door outline — it breaks the “frosting” effect.
2. Snowy window grid with cascading icicle lights
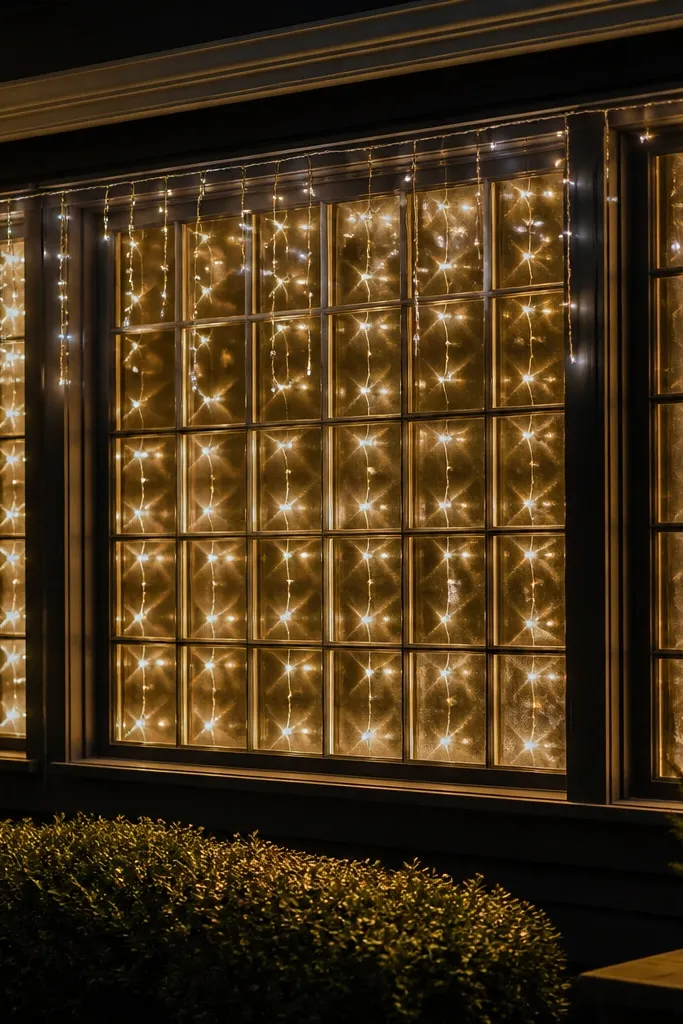
If your windows look dark at night, this setup makes them the star. The trick is a grid pattern that mimics frosted panes, then icicle strands that give vertical motion. Choose warm white LEDs for the grid and slightly cooler white for the icicles if you want extra sparkle, but keep it subtle. Use thin black or clear wiring so the grid looks like light frosting. This theme is perfect for homes with multiple windows in a row or a wide picture window where you can see the full pattern from the sidewalk.
Pro tipAdd a thin piece of white netting behind the grid if your window glass is reflective. It helps the light read as a soft “frost” instead of scattered dots.
Step 1: Measure each window width and decide your spacing. For a clean grid, run horizontal and vertical light lines about 10-12 inches apart, using clear outdoor zip ties to attach to the window trim or a sheer backing net. Step 2: Hang icicle strands from the top edge of the window trim so they reach down about 12-18 inches. Keep strand spacing around 6-8 inches so it looks even, not sparse. Step 3: Test the pattern at dusk, then adjust any strands that look lopsided before you clip them permanently.
Watch outSkip thick extension cords visible in front of windows; they draw attention away from the design.
3. Nutcracker soldier entry with tall topiary frames
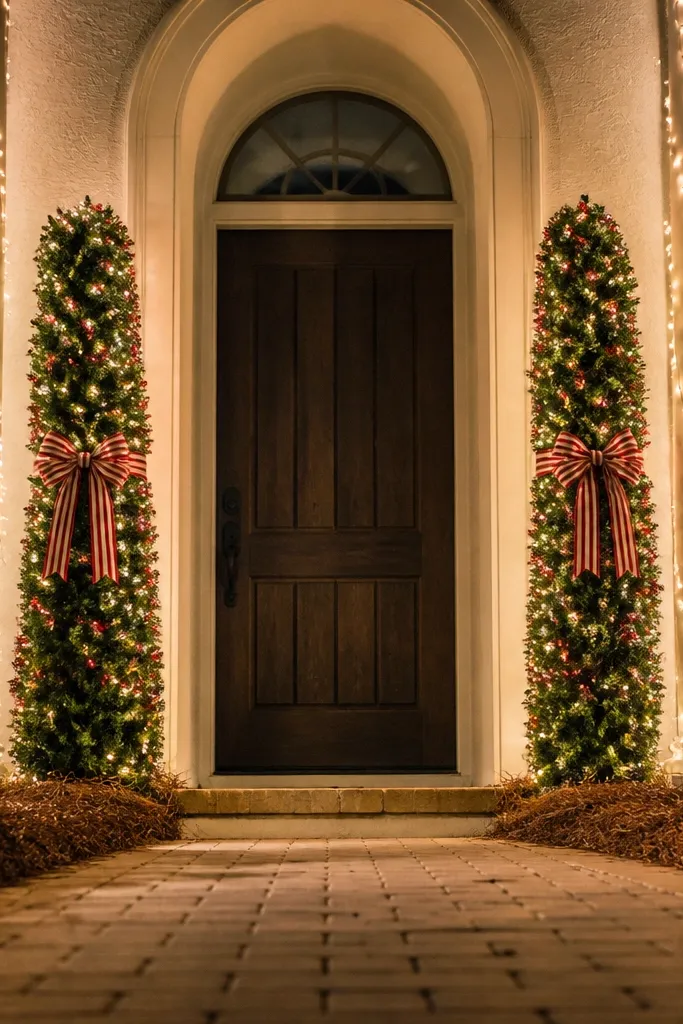
This is the most “story” you can get without painting anything. Build a Nutcracker vibe using tall, column-like frames wrapped in warm white lights, then add red accents like striped ribbon or small battery LEDs in red. The tall shape gives you vertical structure, which makes facades look taller and more dramatic in photos. Place one column on each side of the entry if you have the space; if not, do one center column and a lit wreath on the door. It works best for homes with wide front steps, a porch, or a symmetrical entry.
Step 1: Create two column shapes with pre-made outdoor lighted topiary forms or DIY wire frames wrapped with lights. For DIY, use lightweight metal stakes bent into a tall arch-less column and wrap with warm white mini LEDs, spacing about 4-6 inches between light points. Step 2: Tie red-and-white striped ribbon around the columns in two bands — one around the upper third and one around the lower third — so it looks like uniform details. Step 3: Add a wreath on the door in a matching palette: white lights plus a red bow. Aim for the columns to be about 4-6 feet tall to read clearly from the street.
Use red accents sparingly. One strong red ribbon band per column looks intentional; five different reds looks chaotic.
Don’t cover the entire column with heavy decorations. Keep the lights as the main structure.
4. Candy cane path border with angled ground lighting
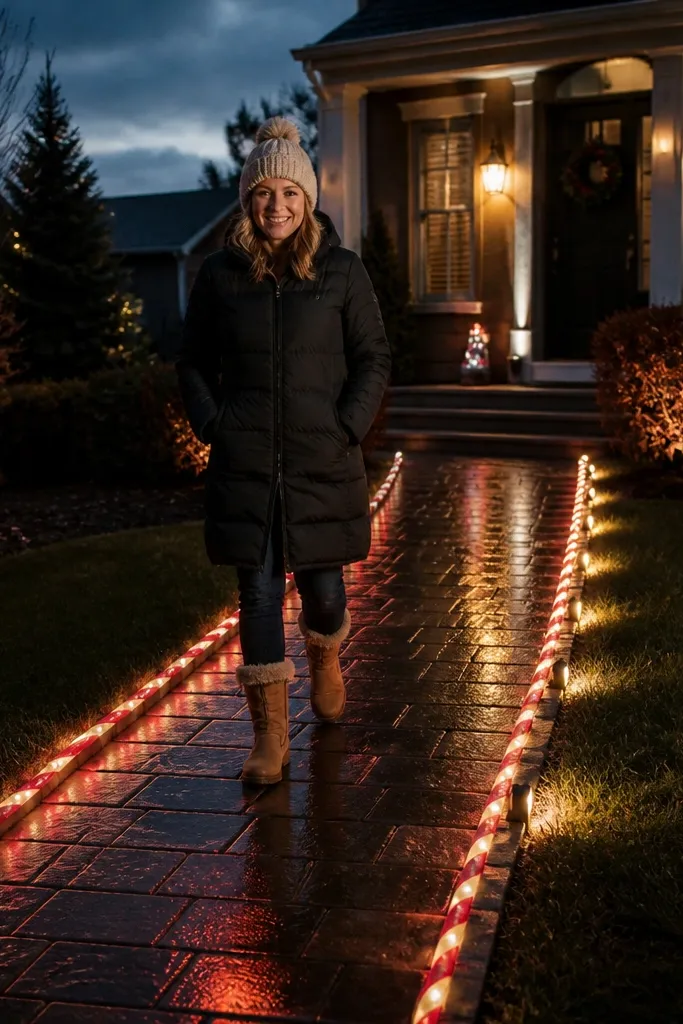
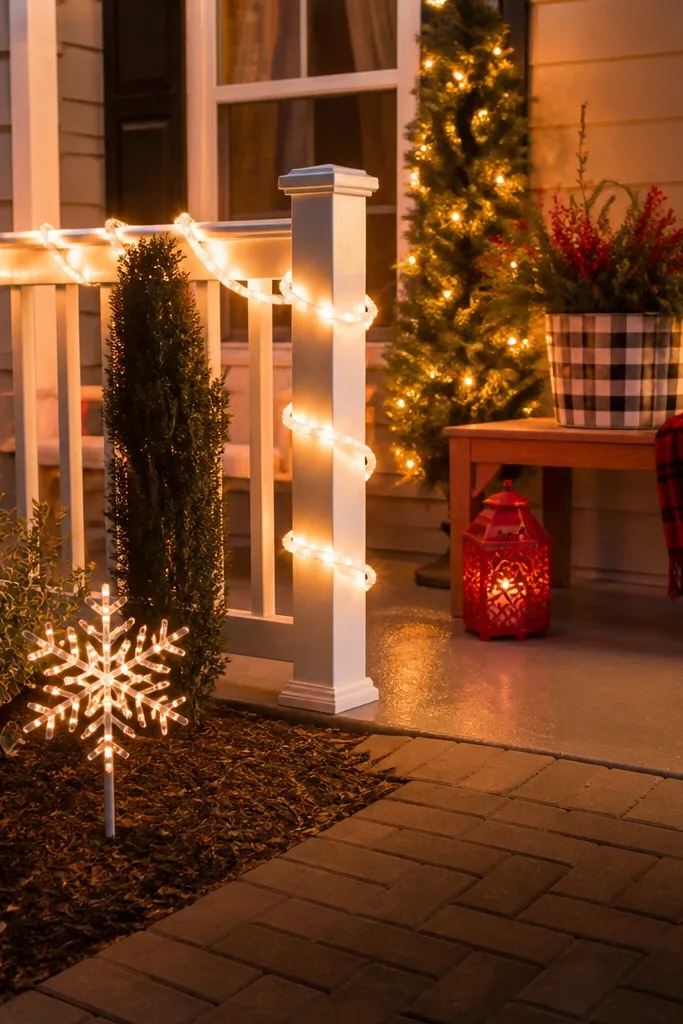
Path lighting is where themes turn into a “walk-in” experience. The candy cane look works because you can repeat a simple stripe pattern along the ground — it reads from above and from the street. Use alternating red and warm white LED rope lights or light stakes arranged in a clean border line. Angle the lights slightly inward toward the walkway so the glow pools on the path, not the grass. This setup is best for houses with a defined walkway edge, stepping stones, or a narrow front path where you can keep the line straight.
Step 1: Mark your border line with spray chalk or a thin rope so the stripes stay straight. Place red-and-white rope lights or stake lights alternating every 12-18 inches, forming a continuous edge. Step 2: Angle the lights 10-20 degrees toward the center of the walkway and secure with landscape stakes or clips. Step 3: Add one lit candy cane prop near the start of the path at eye level — about 4-5 feet tall — so the theme has a focal point. Budget roughly 50-100 feet of rope lights depending on walkway length.
Keep your stripe lengths equal. If one “white” section is much longer, the pattern looks accidental.
Don’t put the border too far from the walkway. If it’s over a foot into the lawn, the glow misses the path.
5. Reindeer silhouette with warm white rope outline
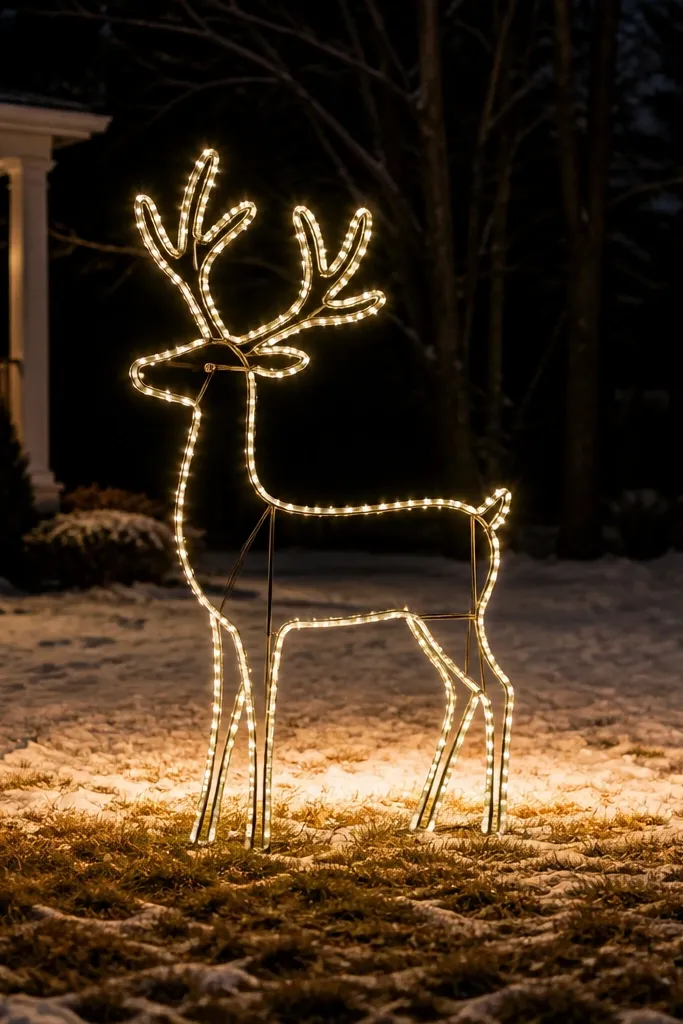
Silhouette decor looks great from a distance because it turns the yard into a graphic. Use a reindeer outline frame (metal or plastic) and cover it with warm white rope lights or LED strip channels. The key is clean edges: keep the rope tension even so the body doesn’t wobble visually. Add a soft ground glow behind it with a small spotlight or LED uplight so the reindeer pops against grass. This theme is ideal for open front lawns or yards where you can place the silhouette at least 8-10 feet from the house.
Pro tipChoose rope lights with a diffuser cover if you can. It makes the outline glow smooth instead of looking like individual bulbs.
Step 1: Place the reindeer frame on a flat spot and stake the base so it can’t shift in wind. Step 2: Wrap warm white rope lights around the outline, following the frame’s contours and using zip ties every 6-8 inches to keep spacing consistent. Step 3: Position one uplight behind the silhouette at ground level, aimed upward to create a gentle halo. Use a timer plug so it turns on at the same time each night.
Watch outSkip multicolor fill inside the silhouette. One color makes the shape read instantly.
6. Light curtain behind the porch swing
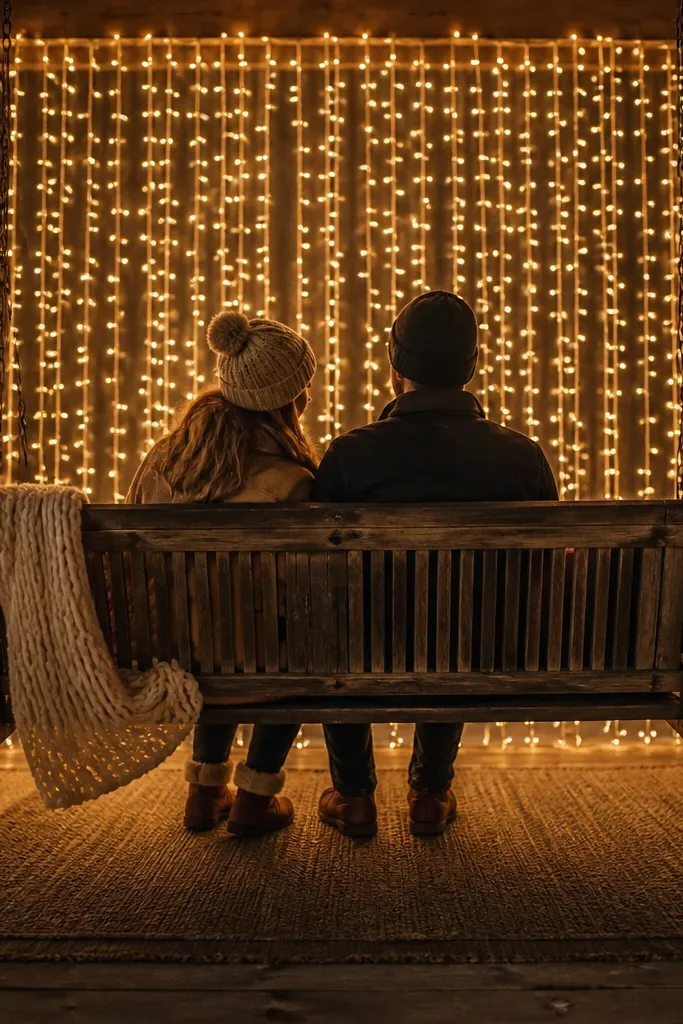
A light curtain gives you instant “wow” because it fills empty vertical space with a soft curtain of points. Put it behind a porch swing, bench, or outdoor seating so the lights look intentional rather than random. Choose warm white for a cozy winter glow and hang it so it starts just above seat height and falls to about knee level. The curtain also hides clutter behind it, which is a big aesthetic win if your porch has storage bins or a grill. This works especially well on porches with columns or a porch roof where you can anchor top and bottom.
Step 1: Measure the gap width and height behind your seating. Buy or DIY a light curtain with outdoor-rated LEDs and attach the top edge to porch beams using hooks or zip ties. Step 2: Secure the bottom with cable clips or a weighted base so it hangs straight. Step 3: Add two small uplights aimed at the columns or nearby greenery so the curtain doesn’t look like it’s floating in darkness. Aim for a curtain width that matches the seating area, not the entire porch.
Keep the curtain slightly wider than the seat. A tight curtain looks cramped in photos.
Don’t hang it too low. If it sits at ankle height, it turns into a cluttery light wall.
7. Blue winter wonder porch with icicle swag on roofline
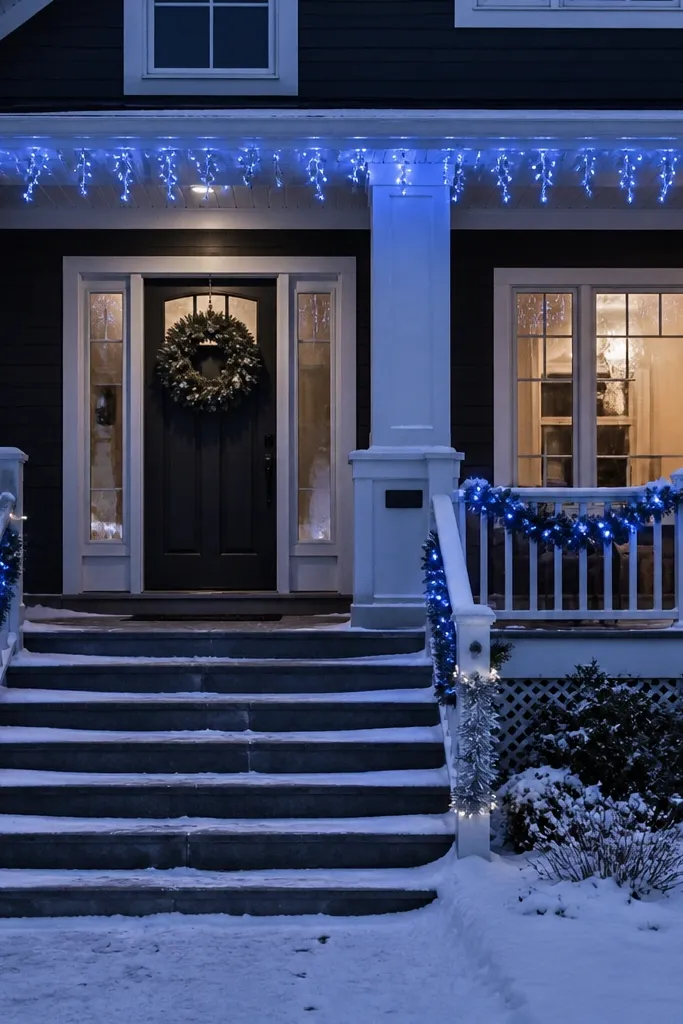
Cool blue lighting looks crisp against white trim and dark siding, and it instantly signals “winter” without getting childish. Use a roofline swag of icicle lights plus a matching garland along the porch rail or column. Keep the blue consistent and add only one accent color, like silver or white tinsel, so the theme stays clean. The icicles create depth because they hang in front of the roofline rather than sitting flat. This theme fits homes with a porch roof overhang where you can access the edge safely.
Pro tipUse cool white LEDs for any secondary lights like window outlines. It makes the blue feel sharper instead of muddy.
Step 1: Plan the icicle length first — aim for 12-24 inches from the roof edge. Attach icicle strands with clips to the gutter line or roof edge so they hang evenly across the entire front width you want to cover. Step 2: Add a garland below the icicles on the porch railing, spacing the lights about 4-6 inches apart along the garland. Step 3: Place two matching blue light accents at the base of the porch (or along the steps) so the glow connects down to the ground.
Watch outSkip red ornaments with blue icicles. The mix often reads like a generic holiday yard.
8. Evergreen wreath constellation across the front windows
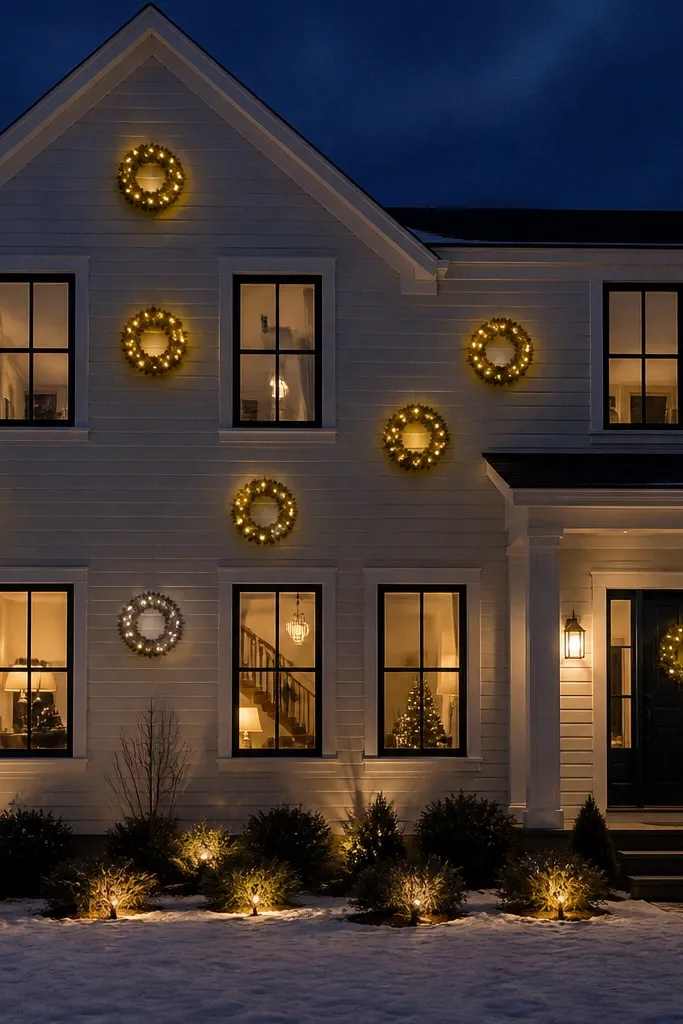
This is a theme for people who hate clutter but want something memorable. Instead of one wreath, you scatter smaller evergreen wreaths in a constellation pattern across multiple windows or a long front facade. Each wreath has warm white mini lights tucked into the branches so they glow like ornaments. The constellation arrangement creates rhythm — your eye moves window to window instead of getting stuck on one spot. It’s best for homes with at least two windows per side of the entry or a wide wall with repeating openings.
Pro tipIf your windows have blinds, tuck the wreath lights behind the inner edge of the frame so the glow reads through glass instead of getting blocked.
Step 1: Choose wreath sizes that step down — for example 18-inch wreaths near the center, 14-inch on the sides. Hang them so centers are about 12-18 inches apart, roughly matching the spacing of your window frames. Step 2: Plug each wreath into a single outdoor extension with a splitter or use an outlet timer. Step 3: Add a lighted garland strip only where the wreaths line up, so you don’t add extra competing lights. Use hooks rated for outdoor use so nothing droops in wind.
Watch outDon’t hang wreaths too close to each other. Overlap makes it look like one big blob.
9. Vintage frame mirror effect with a lighted faux window
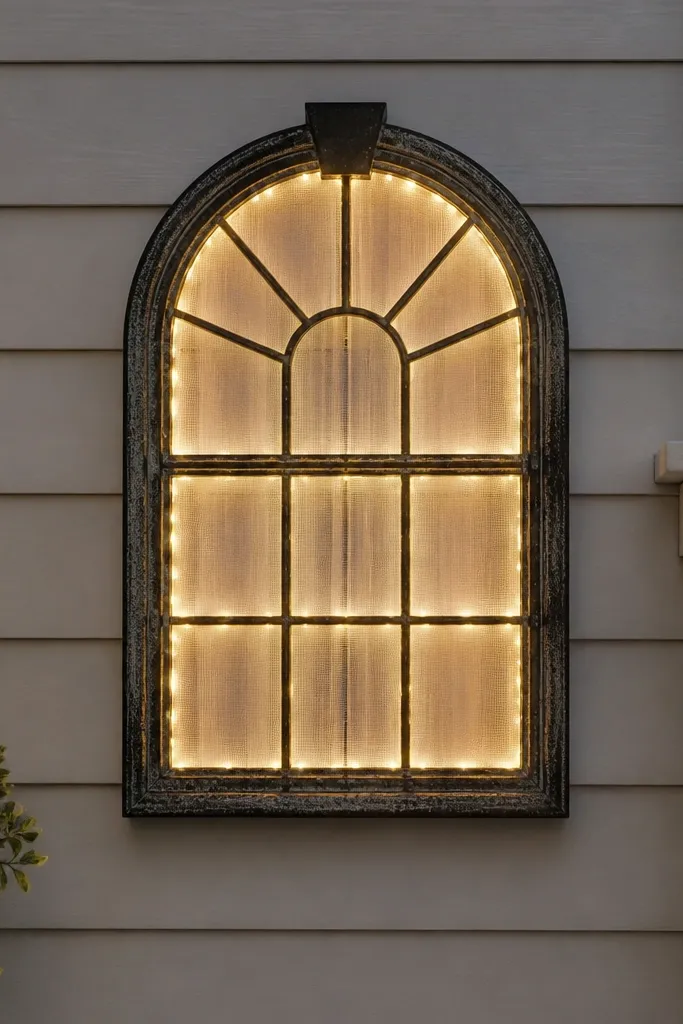
A faux “window” made of lights looks stunning even on plain siding because it adds architecture. Use a large outdoor frame (or build one with foam board covered in weather-safe fabric) and outline it with warm white mini LEDs like you’re drawing a window. Inside the frame, add a soft sheer fabric or thin white netting so the light diffuses instead of showing individual bulbs. Finish with a small bow or greenery at the bottom like a curtain tieback. This works great on blank wall sections beside the door or on a porch panel where you want a focal point.
Pro tipUse a diffusion layer. Without netting, the frame looks like a cheap outline instead of a glowing window.
Step 1: Make or mount a flat frame about 30-48 inches wide and 24-36 inches tall. Outline the border with warm white mini LEDs using clear clips every 3-5 inches. Step 2: Cover the interior with white netting or sheer fabric and secure it behind the frame so it stays smooth when it’s windy. Step 3: Add two small battery LED candle lights or a tiny string of warm white lights in the bottom corners for depth, then plug the main string into an outdoor timer.
Watch outDon’t use bright multicolor bulbs inside the frame. It turns the “window” into a toy.
10. Snowdrift base lights with a lit wreath topper
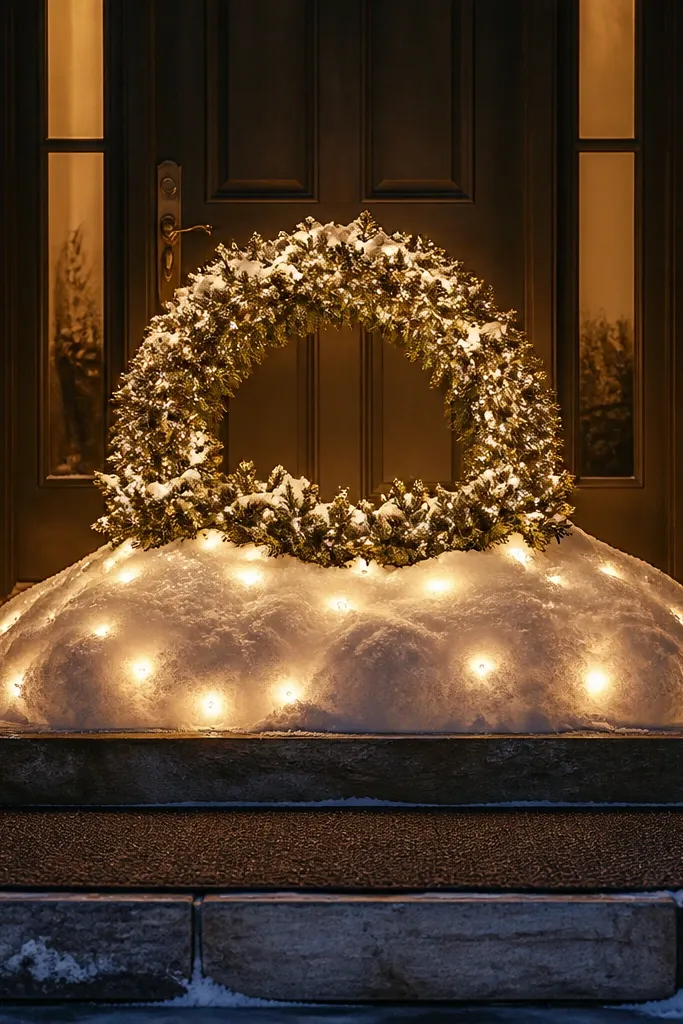
Snowdrift lighting makes the front entry feel grounded. Build a low mound effect using white LED ground lights or a lighted snowdrift mat, then place a wreath on top like a crown. The contrast between low, soft glow and the wreath’s brighter outline creates depth that looks great in street photos. Choose warm white for the snow and a slightly brighter warm white for the wreath lights so the wreath reads crisp. This theme is perfect for homes with a stoop, small entry porch, or a spot where you can place a single hero arrangement.
Pro tipAdd a thin layer of white outdoor fabric or artificial snow around the base so the light hits something textured and looks fuller.
Step 1: Place the snowdrift base about 6-12 inches from the steps or at the base of the door, centered to your facade. Step 2: Turn on the snowdrift first and adjust its position so the glow spreads toward the steps, not into the lawn. Step 3: Mount or stand a pre-lit wreath on top of the drift. If you DIY the wreath, wrap warm white mini LEDs around a foam wreath form and keep the light spacing consistent at about 4-6 inches.
Watch outDon’t put the drift too far forward. If it’s out at the lawn edge, the glow loses the entry focus.
11. Tree silhouette with warm white "trunk" lights and star topper
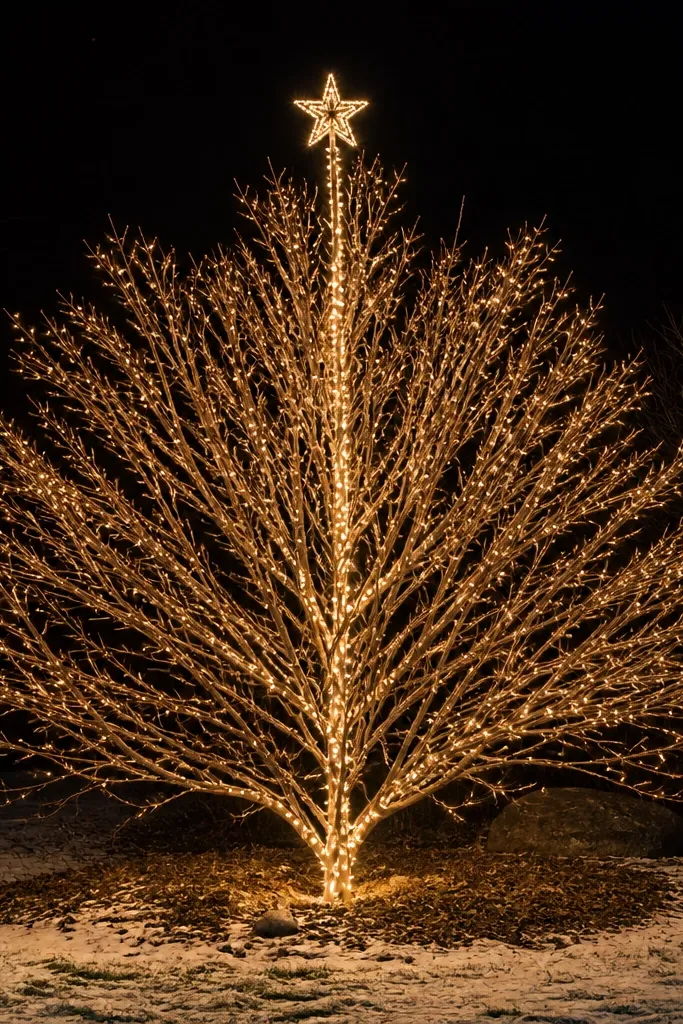
A tree silhouette is one of the cleanest ways to make your yard feel festive without covering every surface. Wrap a yard tree or large shrub with warm white micro lights, then add a defined “trunk” line using thicker rope lights or a second strand to create structure. Finish with a star topper at the upper third so it reads from the sidewalk. The star makes the whole setup feel like one object, not scattered lights. Use this theme for properties with a mature tree near the front — it’s the easiest way to get depth.
Pro tipIf your tree branches are sparse, tie in extra greenery or a sheer white net backing at the main trunk area so light has something to bounce off.
Step 1: Start at the trunk and wrap lights upward in vertical lines. Keep spacing about 3-5 inches between strands so it looks even, not spotty. Step 2: Add the star topper using a stable attachment point and secure wiring with outdoor clips so it doesn’t sag. Step 3: Plug in and check coverage — add a short extra strand only where you see gaps. For a medium tree, you’ll typically use 200-400 feet of micro lights depending on density.
Watch outDon’t wrap too tightly. Over-compression makes lights look like a single bright mass instead of a tree shape.
12. Red bow garland with warm white spotlighting
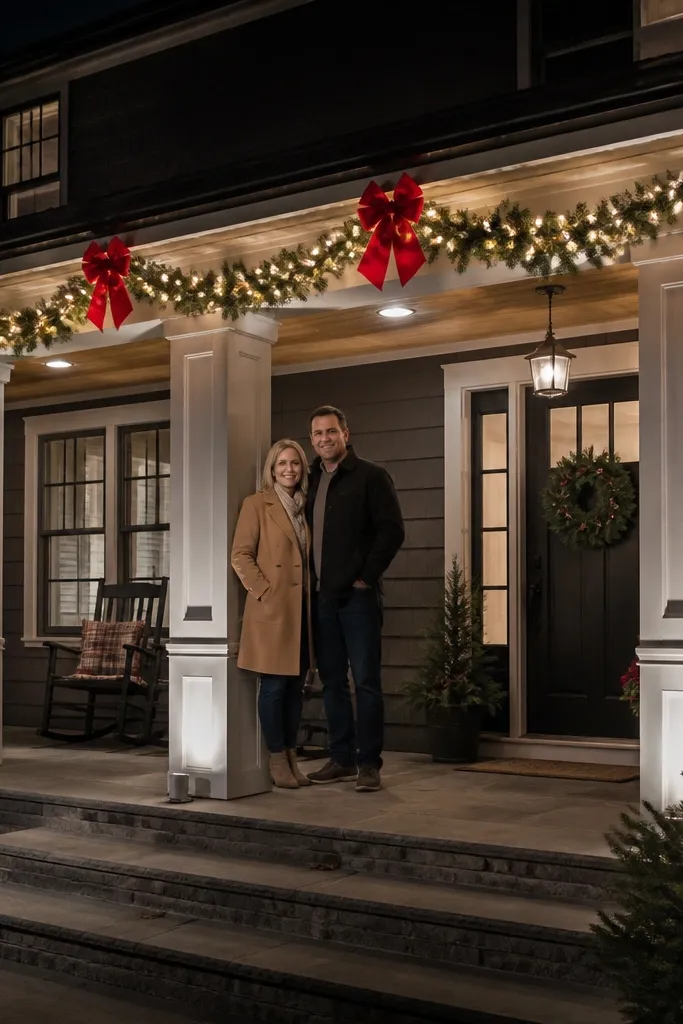
If your facade feels plain, garland plus spotlights creates instant dimension. Use warm white garland along the porch rail or along the top edge of the entry, then add large red bows at even intervals (every 3-4 feet). Add two small landscape spotlights aimed upward at the garland and columns so the lights look bright and intentional instead of flat. This theme reads well on porches with columns because the glow travels up the vertical lines. It’s a strong choice for traditional homes and anyone who wants a classic look without going heavy on props.
Pro tipChoose one bow style and one red shade. Burgundy plus bright red looks like you mixed sales finds.
Step 1: Lay the garland along the rail or entry edge and secure with outdoor zip ties. Keep light spacing consistent by using pre-lit garland and avoid extra random string lights. Step 2: Attach red bows by tying them to the garland so they sit at the same height on each section. Step 3: Place two uplights on the ground aimed at the garland and columns, adjusting the angle so the brightest spot hits the bows. Use outdoor-rated spotlights and plug through a timer.
Watch outSkip tiny bows. Small bows get swallowed by the light and look like decoration clutter.
13. Starry pathway with ground stakes and a doorway arch
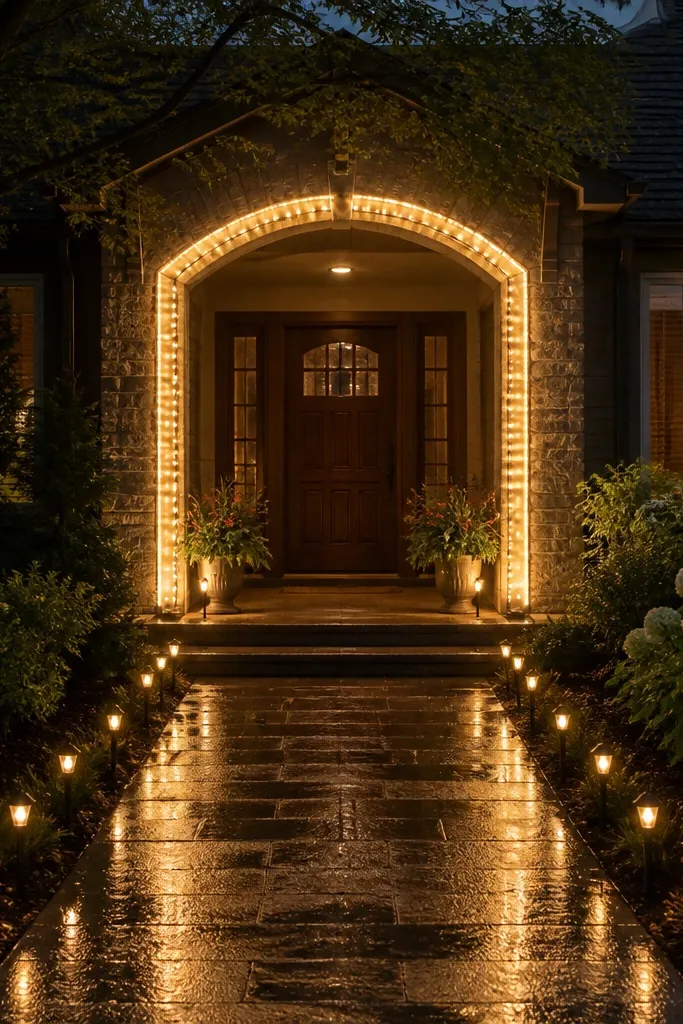
This theme is built for approach — it makes your home sparkle as someone walks up. Use dotted ground stake lights to create a “star” trail leading from the street to the door, then add an illuminated arch around the entry. The arch gives you a clear frame, and the path lights bring the eye forward. Keep the lighting warm white for a cozy glow and add only one shape language — dots on the ground and a continuous arch line. It’s perfect for driveways and walkways where you can see the path clearly from the street.
Pro tipUse slightly dimmer stakes than your arch. If the path is too bright, it competes with the door frame.
Step 1: Mark the centerline of your walkway and place ground stake lights about 24-30 inches apart, alternating slightly left-right to create a natural sparkle. Step 2: Build the arch using a pre-lit outdoor frame or a flexible rope light bent into a door-sized arch. Aim for the arch to be roughly 6-7 feet tall so it reads from a distance. Step 3: Tie the arch lights into the same timer so they turn on together with the path. For a medium walkway, expect 60-120 stakes or a similar equivalent in rope light length.
Watch outDon’t place path lights in a straight, perfect line if your walkway curves. Follow the curve so it looks like a planned trail.