1. Oversized Grinch Face Sign on a Black Fence Frame
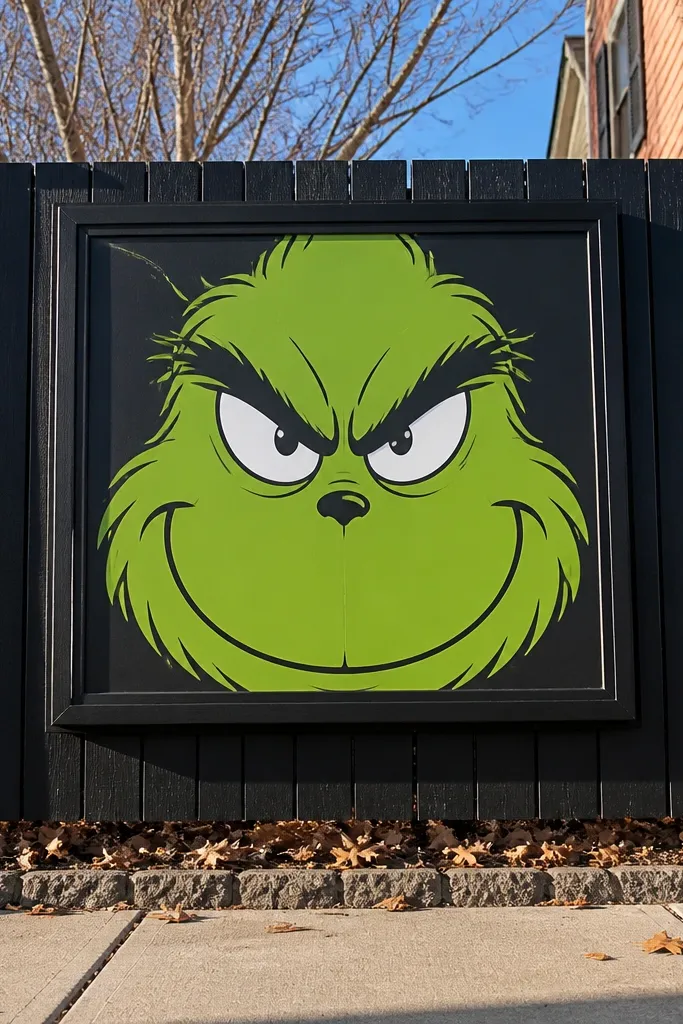
Step 1: Measure the fence bay width between two posts and size the sign so it’s about 70-80% of that bay. Step 2: Attach with four exterior-rated screws through mounting brackets, or use heavy-duty zip ties through drilled holes if you don’t want hardware on the fence boards. Step 3: Add a removable hat or scarf section with Velcro so you can change the holiday look without replacing the whole sign. Budget-wise, expect $25-70 depending on whether you buy a pre-made sign or build a board.
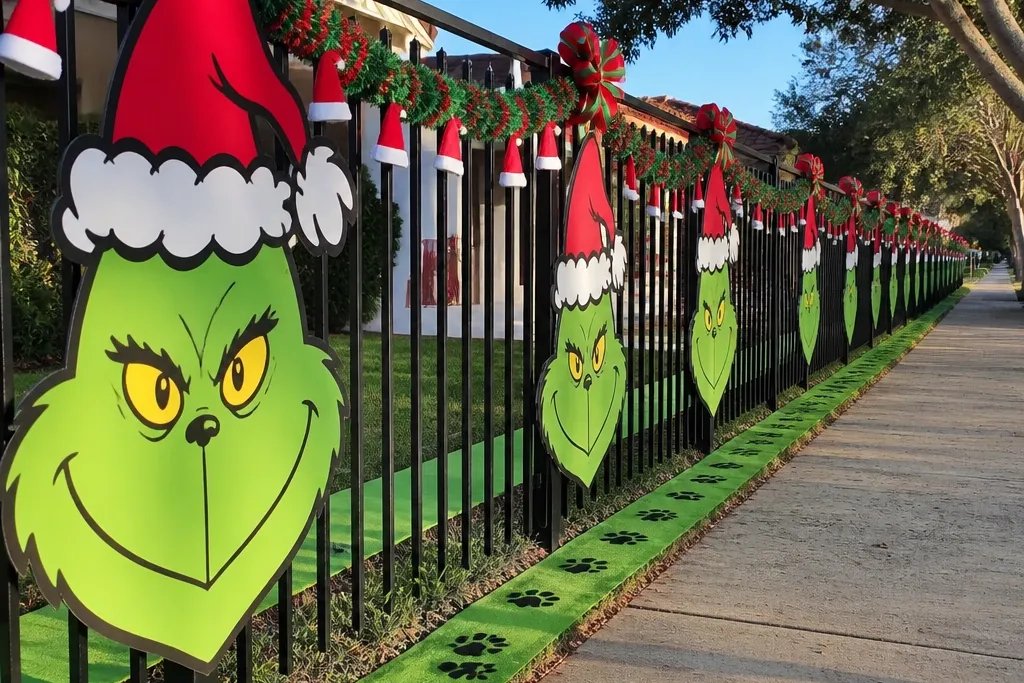
This is the cleanest fence look because it gives you one bold, readable face. Use a rigid sign board (foam board with a sealed outer layer, or UV-resistant plastic) painted or printed with a high-contrast Grinch face: bright Grinch green, white eye whites, and a thick black brow line. The black frame matters — it absorbs daylight glare and makes the green pop, especially on pale fences. Place it centered between two fence posts so the shape feels intentional, not tacked-on. For year-round outdoor Christmas fence decorations, you can keep the face up all year and swap only the accessories (like a Santa hat) later.
Watch outSkip thin, floppy fabric prints for the main face — they sag and lose the crisp Grinch edges.
Pro tipMount the sign so the eyes land around 56-60 inches from the ground — that’s the most flattering height for photos from the sidewalk.
2. Grinch Santa Hat + Faux Garland Clip Set
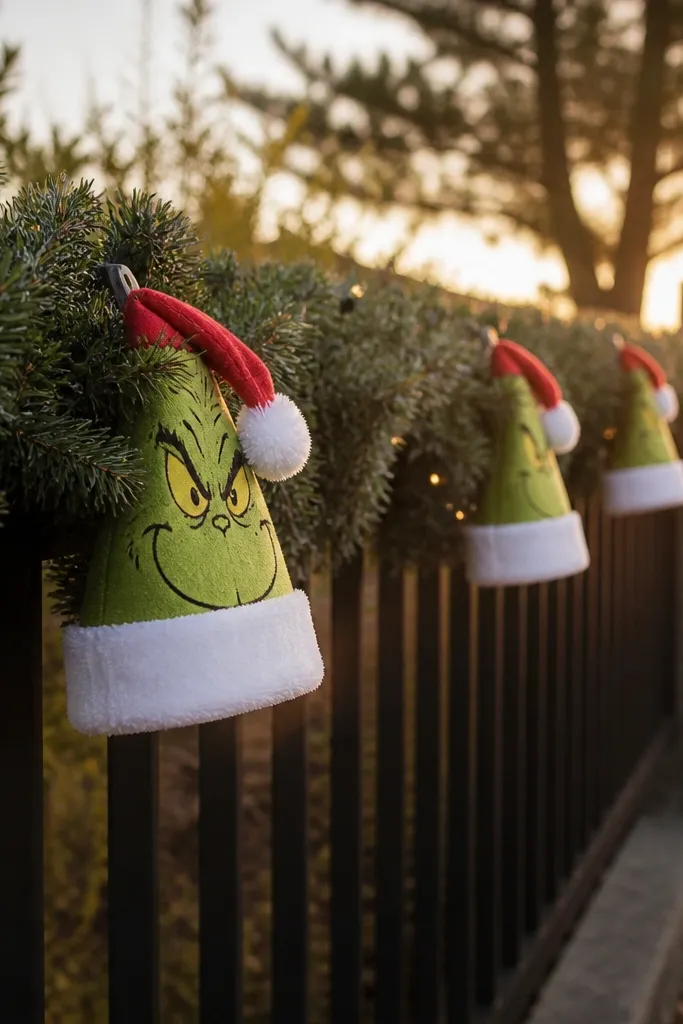
Step 1: Lay out the garland first along the top rail or wire line, then mark hat positions with painter’s tape at equal intervals (every 24-36 inches). Step 2: Clip hats using strong alligator clips or heavy-duty binder clips attached to the garland, then secure the garland to the fence with UV zip ties. Step 3: Add a small warm LED mini string hidden behind the garland so the hats glow at night. Plan for about 1.5-3 hours for a medium fence run.
This gives you a playful holiday layer without committing to a full character display. Pick a faux garland that’s dense enough to look full when viewed from 10 feet, then attach mini Grinch Santa hats every 2-3 feet. The hats should be felt or UV-printed fabric with stiff interfacing so they keep their shape. Color balance is the trick: use green hats against a mostly neutral garland base, then add red accents only where the hats sit. It looks like the Grinch is “visiting” your fence rather than taking over, which is great if your yard already has other holiday décor.
Watch outDon’t use a sparse garland — it will make the hats look like random ornaments instead of a planned fence line.
Pro tipChoose garland in dark green or black-green tones so the red only appears through the hats and lights.
3. Grinch and Max Paw Print Runner Down the Fence
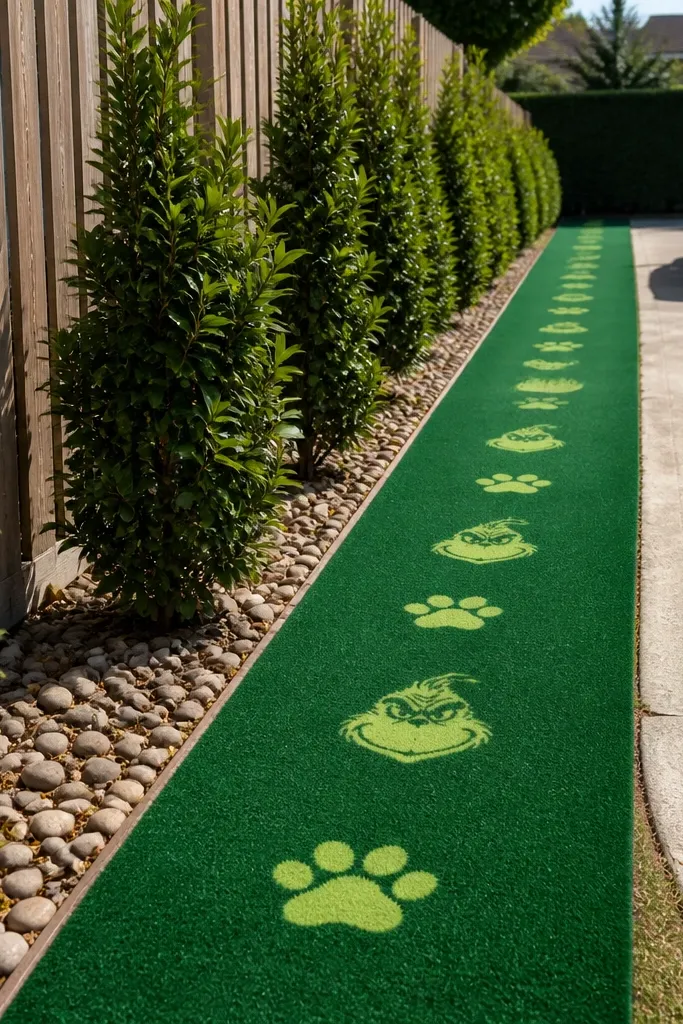
If you want year-round outdoor Christmas fence decorations that still feel seasonal, a paw-print theme is smart. Use a narrow “runner” strip of outdoor felt or vinyl decals that follows the fence line, spaced like a path: paw prints, then one small Grinch face every few feet. The visual effect is rhythm. It looks playful up close and reads as a pattern from afar. Choose a matte finish so daylight photos don’t wash out the greens. This works especially well on privacy fences with lots of vertical boards because the runner ties the whole section together.
Step 1: Decide your runner width — 6-8 inches looks right on most residential fences without blocking views. Step 2: Install small standoff clips or a thin tension line (like cording) so the strip stays straight; then attach felt with snaps or adhesive hook-and-loop placed behind the felt. Step 3: Add one low-profile warm LED strip along the bottom edge of the runner for night readability. Materials cost is usually $20-45 if you buy outdoor vinyl or pre-cut felt pieces.
Keep the paw prints evenly spaced; uneven spacing makes the whole line look accidental in photos.
Skip glossy vinyl if your fence faces direct sun — it reflects and turns the green into a glare blob.
4. Hanging Grinch Stocking Tags on Repurposed Fence Nails
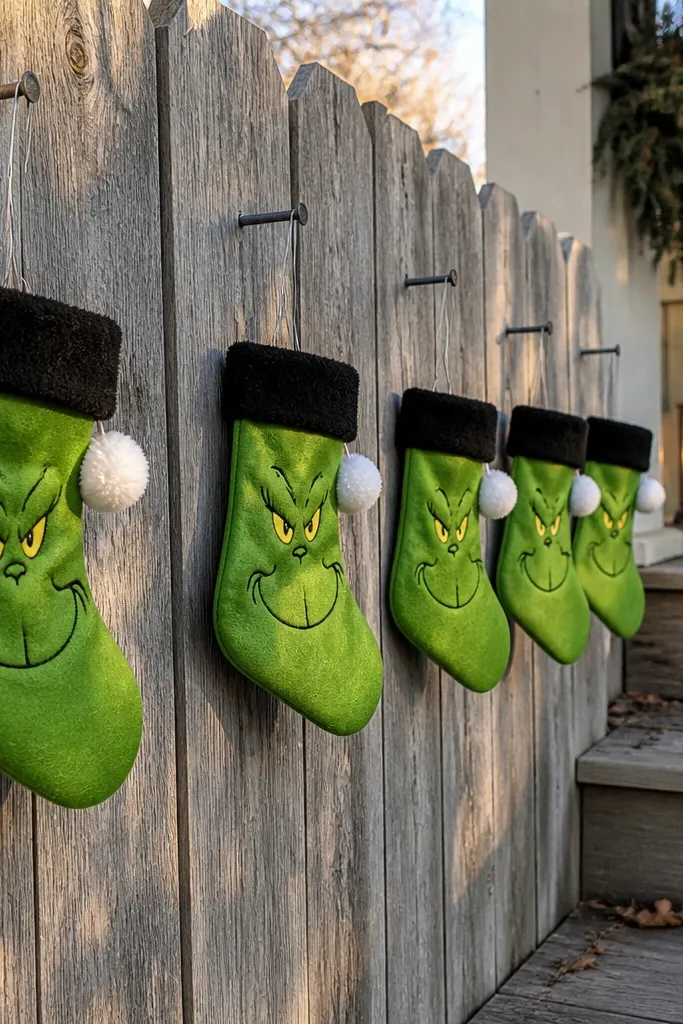
This is a fence-friendly way to add movement without building a huge display. Use small outdoor stockings or tag-shaped ornaments (about 10-12 inches tall) with Grinch motifs: green body, black cuff, and a white pom-pom. Tie them to a thin line or hang from fence nails with fishing line so they sway slightly in wind. The movement reads as playful, and the small size keeps it from overwhelming a narrow front yard. For year-round, you can keep the tags up but swap the holiday cuff color or remove the pom-poms seasonally.
Step 1: Hammer or screw in a row of small outdoor hooks along the fence top edge, spacing them 18-24 inches apart. Step 2: Hang each stocking tag with fishing line using a simple loop knot, then trim the length so stockings hang 2-4 inches above the fence rail. Step 3: Add one tiny warm LED light near the center to make the tags readable from the street. Expect $15-60 depending on whether you buy pre-made stockings or felt cutouts.
Use a mix of two stocking designs, not five — two repeating patterns look intentional from far away.
Don’t hang heavy ornaments on thin nails — they tilt and can tear in wind.
5. Grinch Wreath Panel for Every Fence Bay
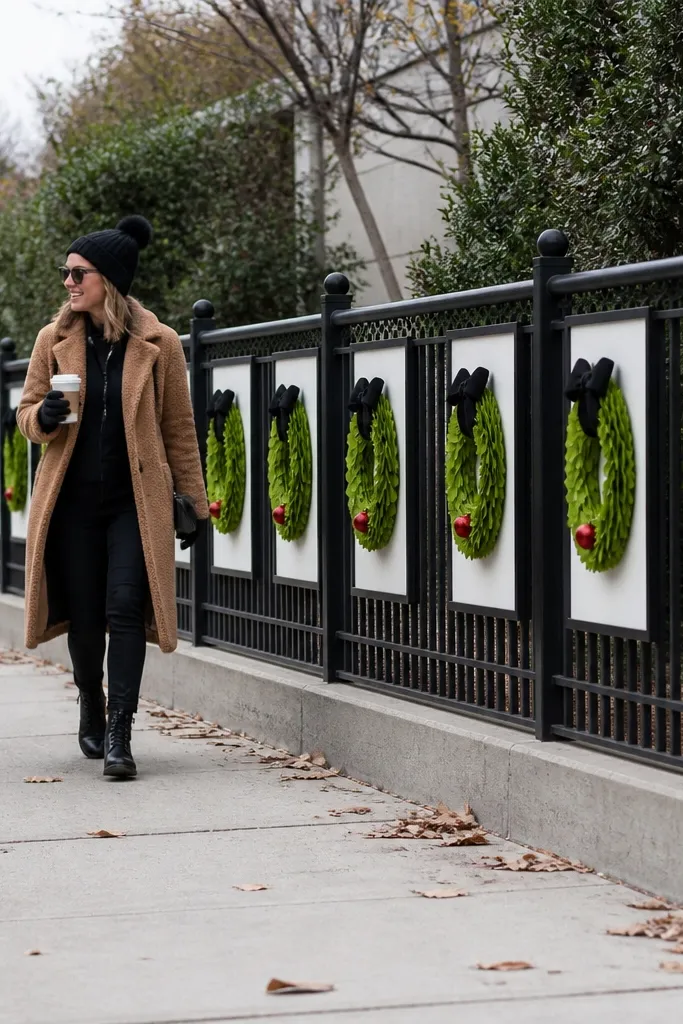
Step 1: Make or buy a backing panel and attach a wreath ring using outdoor hot glue or zip ties through pre-drilled holes. Step 2: Mount each panel with two bracket hooks per side so it sits flat and doesn’t twist. Step 3: Add a small warm LED puck light behind the panel at night. A kit per panel can run $20-50; doing multiple bays adds up, so choose 4-6 panels for a front section.
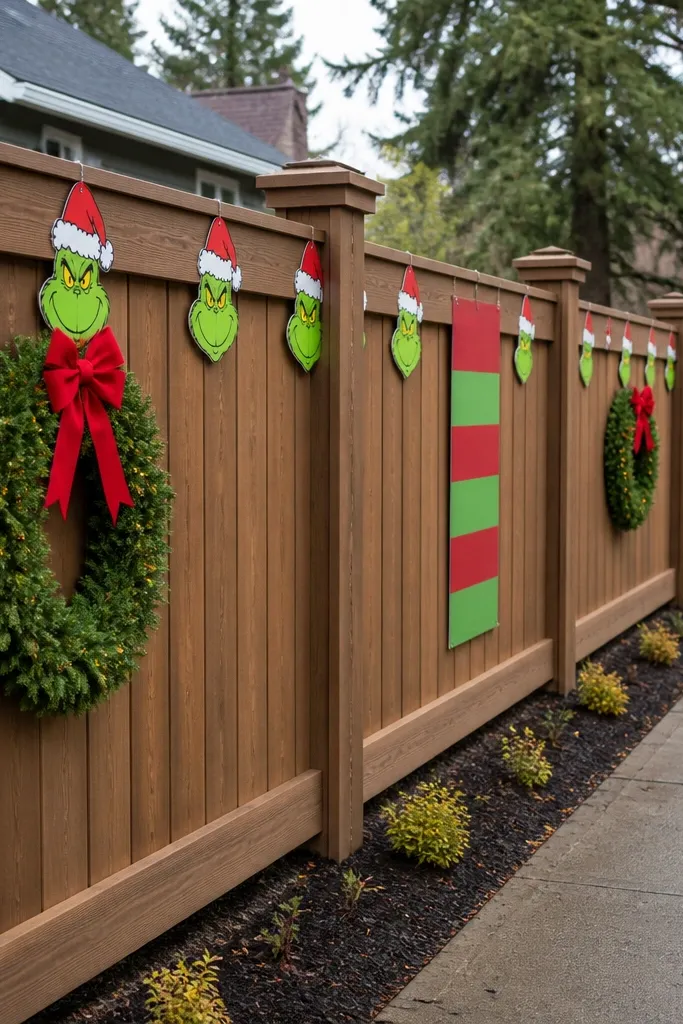
Wreath panels look polished because they’re shaped like a window. Build a rectangular backing panel (about 12x18 inches) with a mini Grinch wreath: green felt leaves, a black bow, and one red accent ball or ribbon. Mount one panel per fence bay so the display repeats like a gallery wall. The result looks designed, not random. This works best on chain-link fences or fences with wider bays where you want structure. Keep the wreath pieces UV-safe and matte so the green doesn’t look wet in sun.
Watch outSkip shiny ornaments — they catch glare and flatten the Grinch colors.
Pro tipUse the same bow size on every panel — matching bow proportions make the whole fence look cohesive.
6. Grinch Face Top-Rail Silhouette with Reflective Eyes
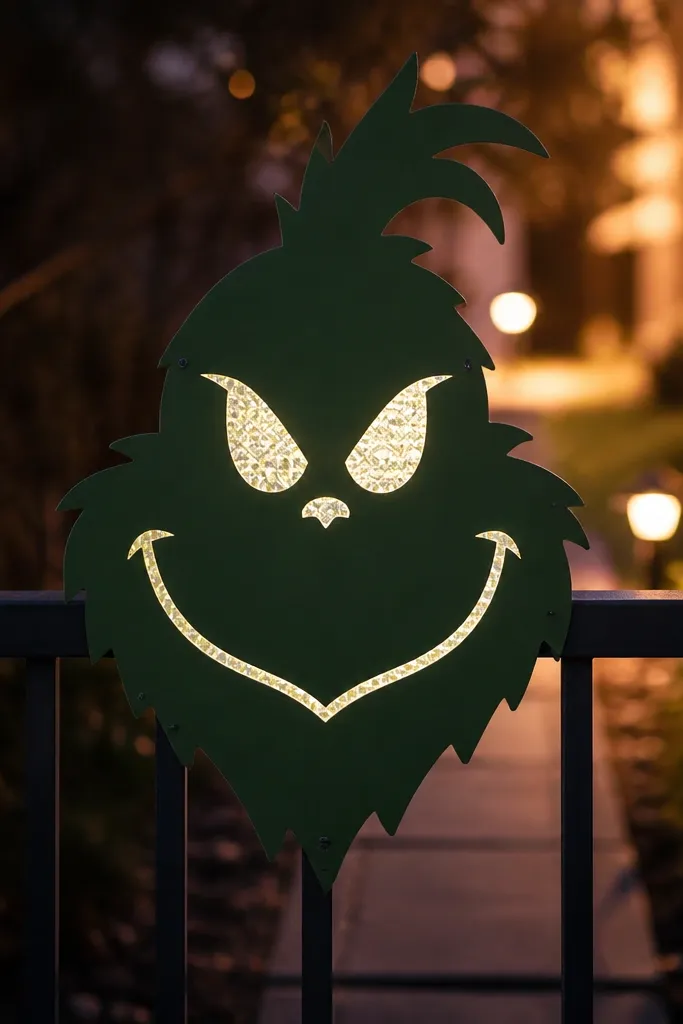
Step 1: Choose a top-rail mounting so the silhouette sits 2-4 inches below the rail line; aim for 10-14 inches wide per bay. Step 2: Attach using zip ties through drilled holes or adhesive-backed outdoor Velcro strips on the fence side. Step 3: Place a warm white string light behind the silhouette line so the reflective eyes glow. Cost is low if you cut your own: $10-25 per bay for materials.
Silhouettes are the most photogenic option when your fence is busy. Cut a Grinch face silhouette from outdoor felt or thin rigid plastic, paint or seal the edges, and add reflective tape for the eyes and smile line. In daylight it reads as graphic; at night the reflective eyes catch warm light and pop without needing big LEDs. This is one of the best year-round outdoor Christmas fence decorations because the silhouette works even when you remove the scarf or swap a small hat. It also hides small fence imperfections because the shape is bold and simple.
Watch outDon’t use glossy paint on the silhouette — it makes the face look washed out in sun.
Pro tipUse reflective tape sparingly — only eyes and the smile — or it looks like a safety sign.
7. Grinch Hand Holding a Candy Cane Yard Banner
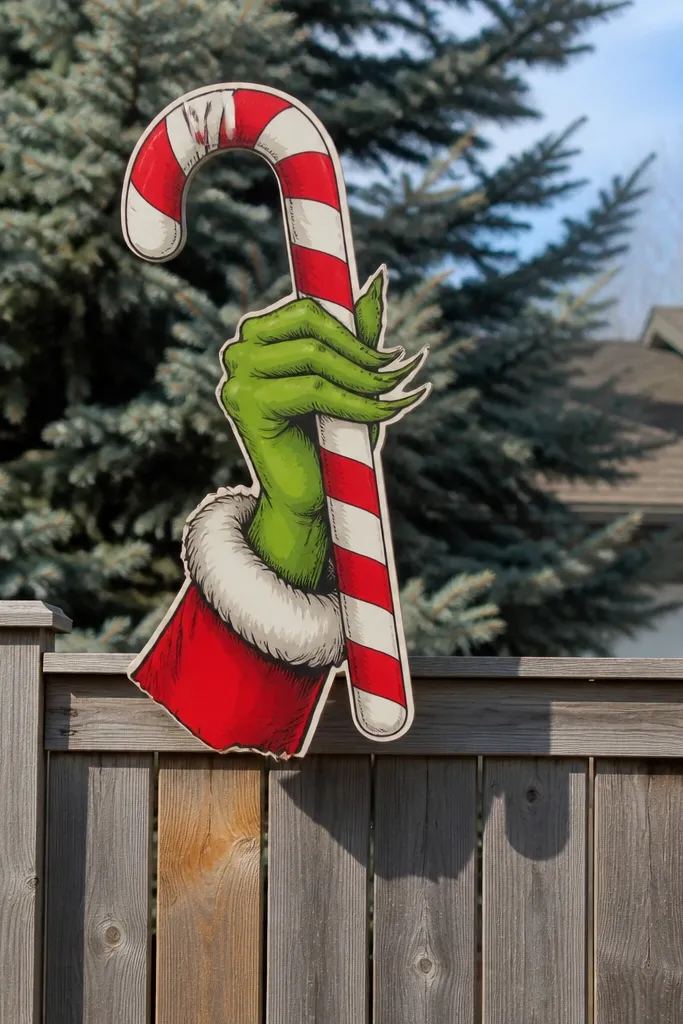
Step 1: Mount a rigid backing board or frame to the fence so the prop stays upright; use two mounting points per hand to prevent twisting. Step 2: Attach the candy cane with a snap or magnet so it’s removable without tools. Step 3: Add one warm LED bulb near the base of the hand, aimed upward, so the candy cane stripes glow. Expect $30-80 for a pre-made cutout, less if you DIY with sealed foam.
This one looks like a movie prop, which is exactly what you want on a fence. Get or create a cutout of a big Grinch green hand holding a candy cane, then mount it vertically so it extends above the fence line. The candy cane should be red-and-white with thick stripes so it reads at a distance. This decoration works best on fences that are low-to-average height where you can give the prop height. For year-round, keep the hand cutout up and store the candy cane piece; it flips between “Grinch all year” and “Christmas moment.”
Watch outSkip thin cardboard — wind will warp it and the stripes will look uneven.
Pro tipKeep the candy cane angled slightly (about 10-15 degrees) — straight-on looks flat in photos.
8. Mini Grinch Characters on a Wire Grid Fence Climber
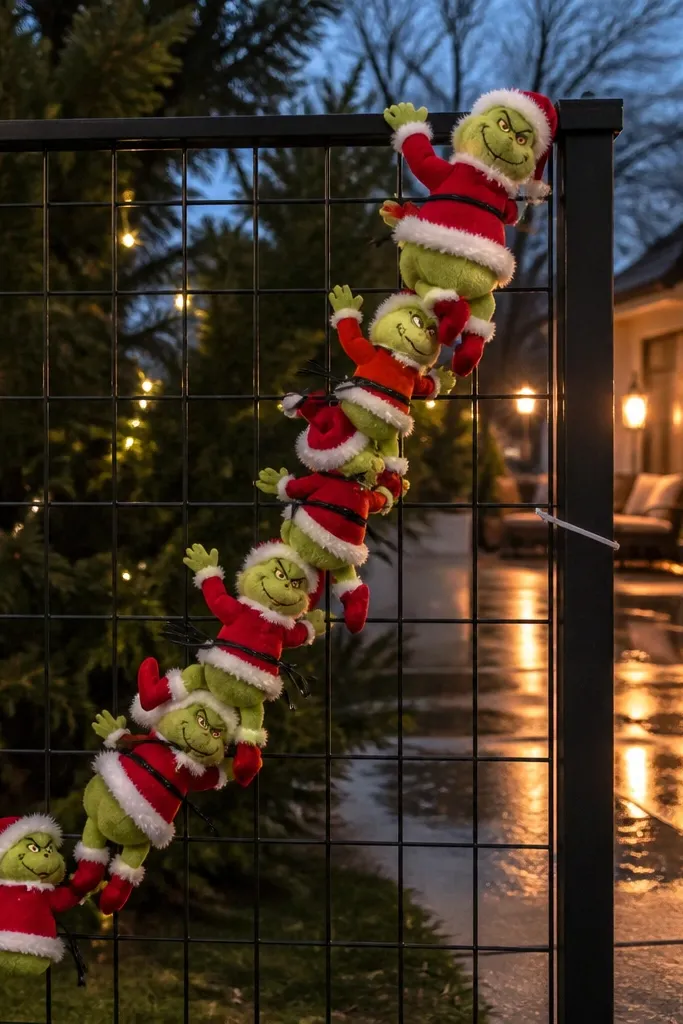
Step 1: Install a thin wire trellis or metal grid panel onto the fence using zip ties at the corners; keep it taut. Step 2: Attach characters at staggered heights — for example, 14 inches, 24 inches, and 36 inches from the ground — and keep spacing 8-12 inches apart. Step 3: Add a small battery LED tea light inside a hollow character accessory (like a candy jar) for night glow. Effort is moderate; materials are usually $25-70 depending on character size.
Wire grid fences love this because the grid gives you a natural mounting rhythm. Use small Grinch figures (6-10 inches tall) or felt character cutouts attached with zip ties to a lightweight vertical grid panel. Cluster them in a diagonal line so it looks like they’re “climbing” toward the top. The diagonal composition is what makes it feel playful rather than scattered. Choose one color palette only: green characters, black hats, and one red accent per character. This gives you year-round outdoor Christmas fence decorations that still look like a scene.
Watch outDon’t overcrowd the grid — too many characters makes the scene unreadable from the sidewalk.
Pro tipUse matte black for the characters' hats so they don’t shine and steal attention from the green faces.
9. Grinch Holiday Banner in Striped Red Green Panels
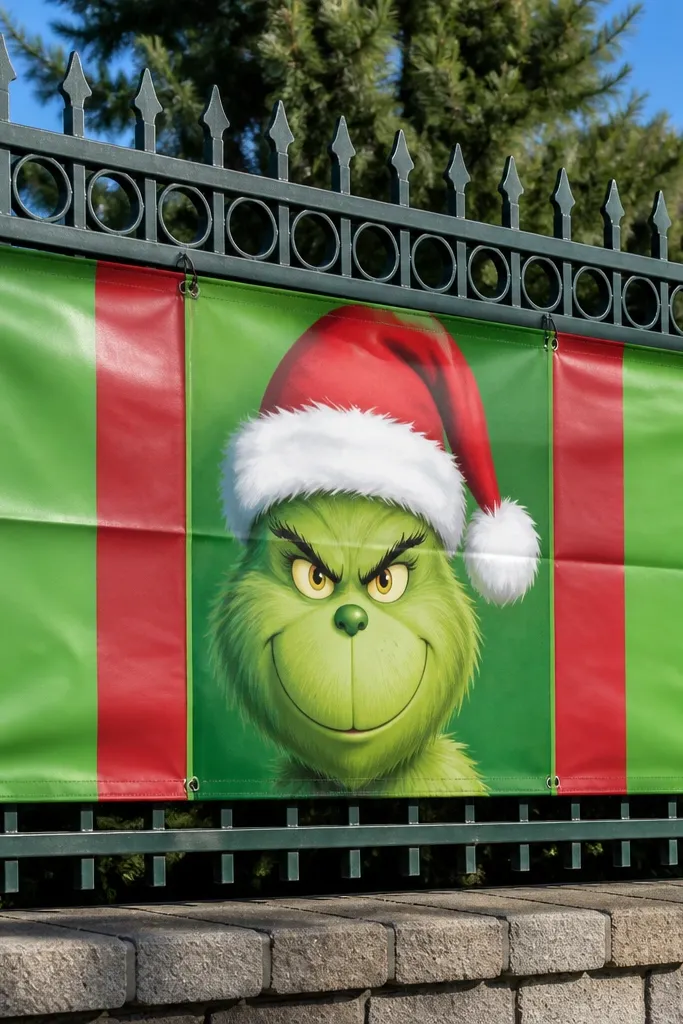
Step 1: Choose a banner width that spans one fence bay, usually 24-48 inches. Step 2: Attach with a top and bottom tension line (thin rope) so the banner stays taut and doesn’t flop; use zip ties at attachment points. Step 3: Add small warm LED clip lights along the bottom edge, 12-18 inches apart. DIY materials are typically $20-55 depending on panel size and printing.
A striped banner gives you a strong holiday look without needing lots of separate pieces. Make a banner from outdoor fabric or vinyl panels with bold red-and-green stripes, then add a single Grinch face panel in the center. The stripes create motion and structure; the center face keeps it from looking generic. This works best on fences with horizontal lines or on flat sections where you want a clear focal point. For year-round, keep the stripes up and switch the center face accessory (like a Santa hat) seasonally.
Watch outSkip stretchy fabric without stiff backing — it ripples and ruins the clean Grinch geometry.
Pro tipKeep stripe thickness consistent — uneven stripes make the banner look cheaply printed in daylight.
10. Grinch Fireplace Stocking Hook Row with Warm Lights
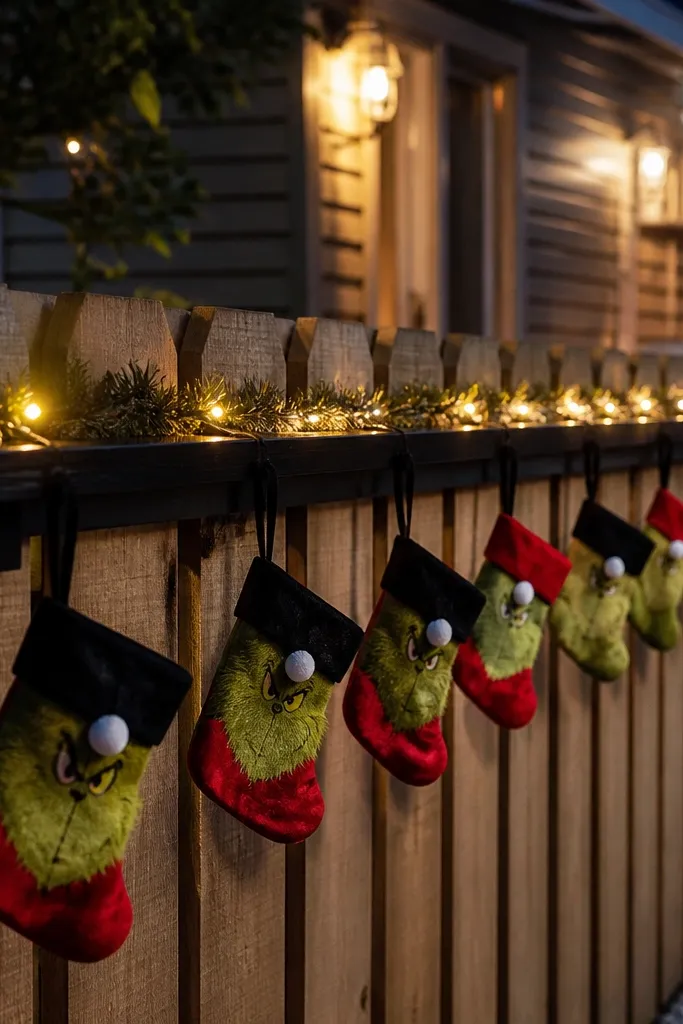
Step 1: Mark a baseline height and hang stockings so their tops align within 1 inch across the row; aim for 48-52 inches from the ground. Step 2: Install a thin shelf board or taut garland line, then attach stocking loops with S-hooks or binder clips. Step 3: Thread a warm LED string behind the shelf line so light bounces through the fence. Cost is $20-80 depending on stocking count and whether you buy LEDs as a set.
This idea is for fences that run long and need a repeatable pattern. Hang a row of small stockings along the fence at consistent heights, then add a simple faux “mantel” line using a narrow dark shelf board or a straight garland strip as the anchor. Each stocking gets a Grinch cuff detail: black trim and a white dot or pom-pom. At night, use warm LED mini lights tucked behind the stockings so the glow fills the gaps between fence slats. It reads like a whole scene without forcing you to build a massive character display.
Watch outDon’t mix cool white LEDs with red decorations — it makes the reds look dull and the green look sickly.
Pro tipUse two stocking designs alternating — one face cuff, one simple cuff — for a cleaner look in photos.
11. Grinch Ribbon Bow Clusters on Fence Posts
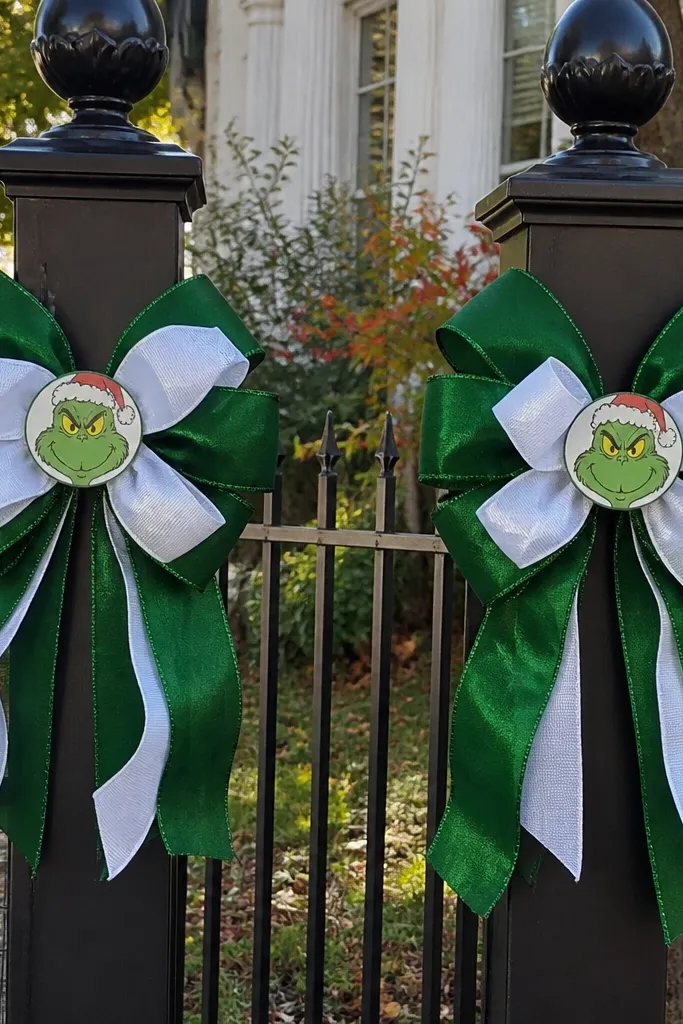
Not every fence needs a full character. Bow clusters are photogenic because they create height and crisp edges, and they photograph well even from far away. Tie oversized outdoor ribbon bows on each post (or every other post), then add a small Grinch tag at the center. Use wired ribbon so the loops hold their shape in wind. Keep ribbon colors tight: dark green, black, and one red accent. This works great for year-round outdoor Christmas fence decorations because you can swap the Grinch tag or change the ribbon color seasonally while leaving the bow hardware in place.
Step 1: Cut wired ribbon strips and tie bows using a consistent size — for posts, 10-14 inches wide looks right. Step 2: Attach each bow with zip ties through the ribbon tails, then add a small Grinch tag using a snap or Velcro dot. Step 3: Place two warm LED spotlights at the base aimed up so the bows cast soft light on the fence. Expect $25-60 for ribbon and tags, depending on how many posts you cover.
Fluff bows after installation — a quick push on the ribbon loops makes them look full instead of flat.
Skip thin non-wired ribbon — it collapses and looks sloppy after the first windy day.
12. Grinch Snowdrift Panel at the Bottom of the Fence
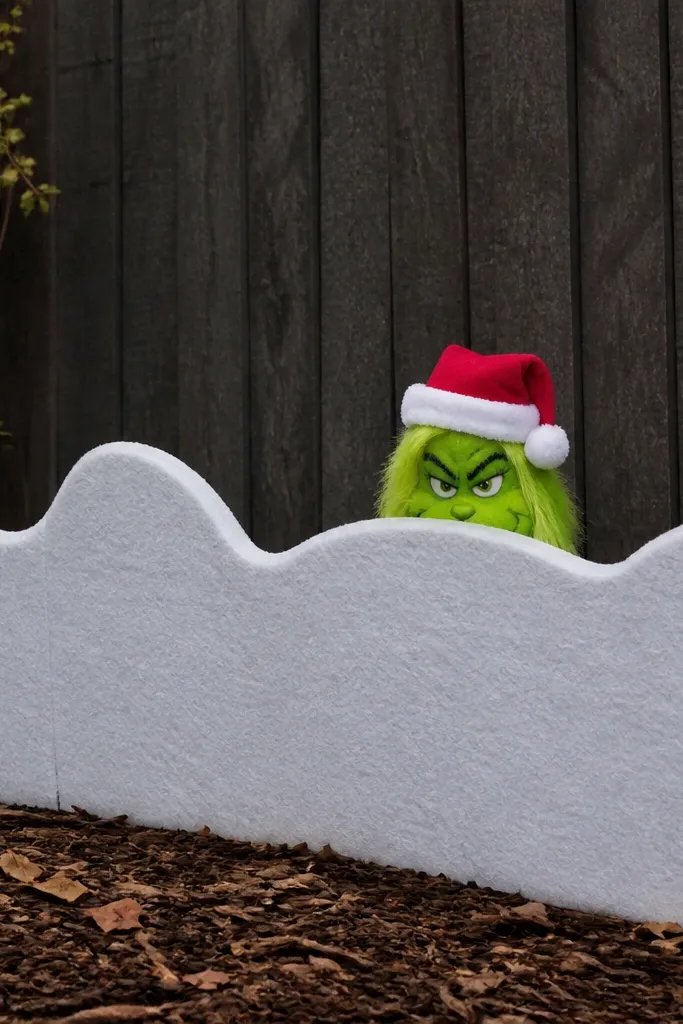
If your fence decor looks good in daylight but flat at night, add a bottom element. A snowdrift panel creates depth and a “grounding” layer. Use a white outdoor felt or foam panel shaped like a soft drift, then place a small Grinch peeking from the top edge. The contrast between bright white and green is exactly what reads in photos. This also helps hide the gap at the bottom of many fences where light and shadows make everything look messy. For year-round outdoor Christmas fence decorations, keep the snowdrift panel stored and swap in a neutral green or black panel when you want the scene off-season.
Step 1: Cut or buy a drift panel that’s 12-18 inches tall and spans one fence bay; mount it using low-profile standoffs or zip ties through hidden holes. Step 2: Attach the peeking Grinch element with Velcro so it’s removable or changeable. Step 3: Add a warm LED strip along the inside edge so the drift glows softly at night. DIY materials usually run $15-40 per bay.
Light from the inside edge, not directly from above — it avoids harsh shadows that make the drift look like a flat sticker.
Don’t place a snowdrift panel directly against wet ground without a standoff — it will soak and sag.
13. Grinch Character String Lights Around a Fence Corner
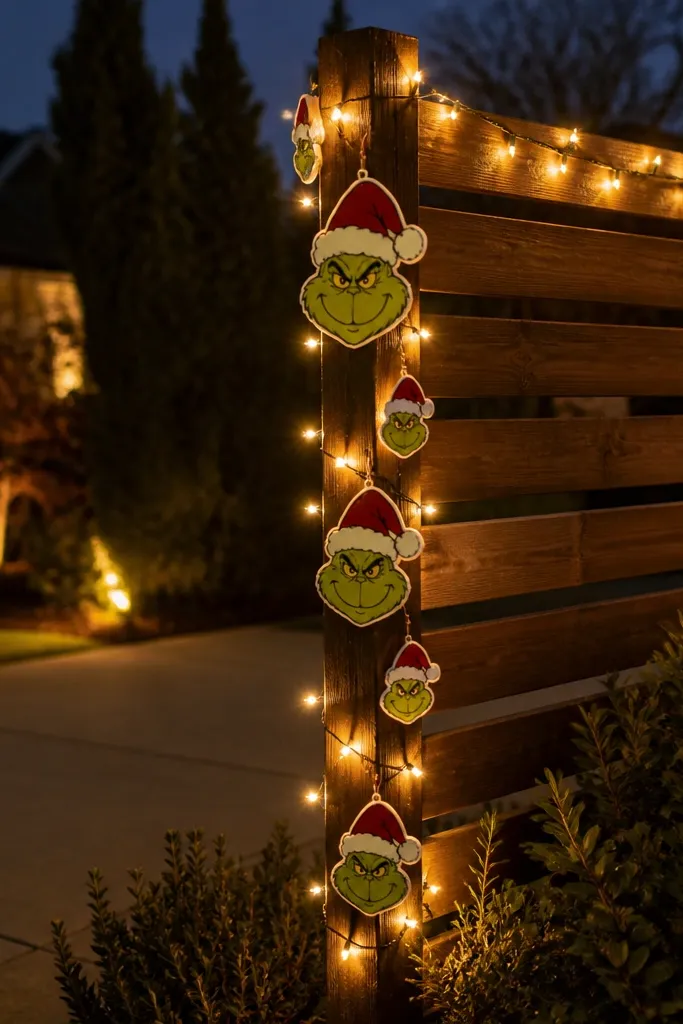
Corners are where your fence display should feel alive. Wrap warm string lights around a fence corner post, then hang small Grinch face ornaments at graduated heights so the corner becomes a focal point. Use ornaments made from rigid felt or sealed plastic so they don’t curl. The key is spacing: keep faces 10-14 inches apart so each one is readable. This is a great way to keep the look festive without blocking the whole fence — you’re building a light story. For year-round, you can leave the warm lights up and swap the Grinch faces in and out seasonally.
Step 1: Install the string lights first, securing with outdoor zip ties every 12-18 inches so the line stays straight. Step 2: Hang Grinch face ornaments using short loops of fishing line; start at about 40 inches height and go up to around 60-70 inches. Step 3: Add one larger ornament near the corner to anchor the composition. Cost is usually $25-90 depending on whether you buy pre-lit ornaments or DIY with lighted clips.
Use warm white (2700K) lights — it keeps skin tones and greens looking natural in photos.
Skip cool white — it makes the green look neon and cheap.
14. Grinch "Mischief" Fence Streamers with Clip-On Pom Poms
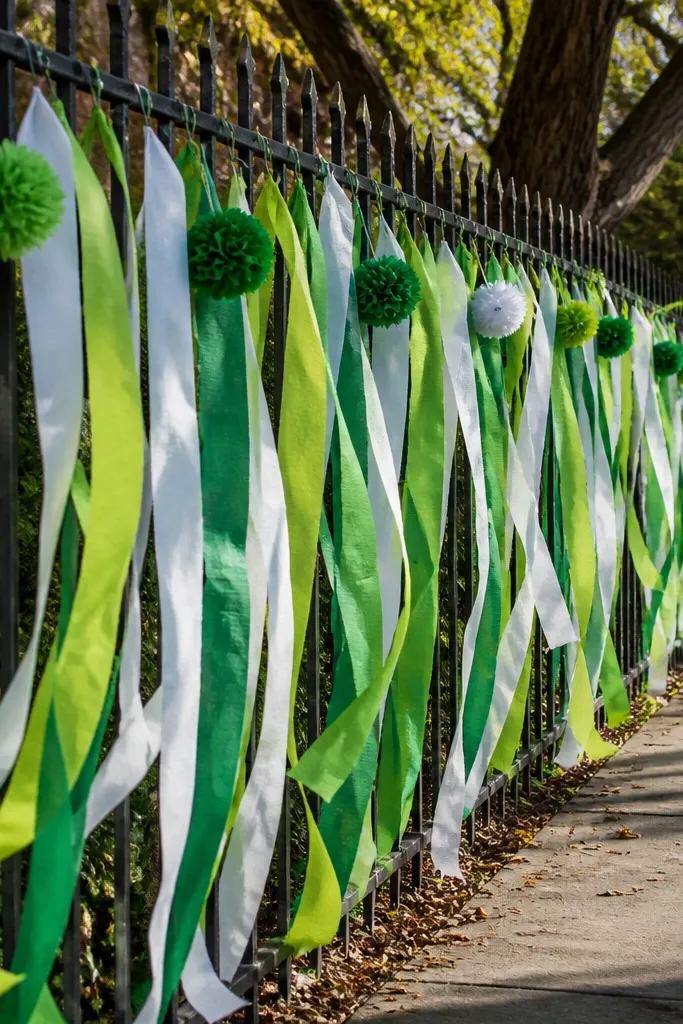
This one makes the fence feel alive fast, without covering the whole thing like a wall of signs. Use long green and white crepe paper streamers that hang in loose vertical falls, then add small clip-on pom poms at intervals so it reads playful from the street. The Grinch vibe comes from the color blocking — deep Grinch green paired with crisp white — plus a few small “mischief” character tags (Grinch face or Max-style paw shapes) tucked among the streamers. It works best for that middle fence zone where you want movement but you do not want to drill into every post. It also solves the problem of flat decorations that only look good straight-on; the streamers catch light and shift a little in wind, which makes photos look better.
1) Measure the fence bays and cut streamers to reach about 10-14 inches below the top rail (or about 1/3 of the fence height if it is shorter). Use 30-40 inch wide rolls of green and white crepe paper or streamer paper, then twist each strip lightly so it hangs with a fuller edge. 2) Lay out a pattern: one streamer every 8-10 inches across each bay, alternating green and white, and clip them to the fence with heavy-duty binder clips or mini spring clips. Add 6-10 pom poms per bay by clipping them onto the streamers at eye level (roughly 4-5 feet from the ground) so they show up in photos. 3) Finish with 2-3 small Grinch face or “mischief” tags per bay, tied to the streamers with thin green ribbon so they sit slightly above the pom pom line. Cost is usually low: crepe/streamer paper is cheap, pom poms come in packs, and clips are reusable; expect 1-2 hours for a 6-8 foot run depending on how many bays you have.
Make the streamers slightly uneven lengths within each bay (vary by 2-3 inches). That small messiness makes it look intentional and more Grinch than perfectly uniform.
Avoid tying everything at the same height — it reads like craft paper stuck to a fence instead of a designed display.