1. Aged Brass Herb Apothecary on the Corner Shelf
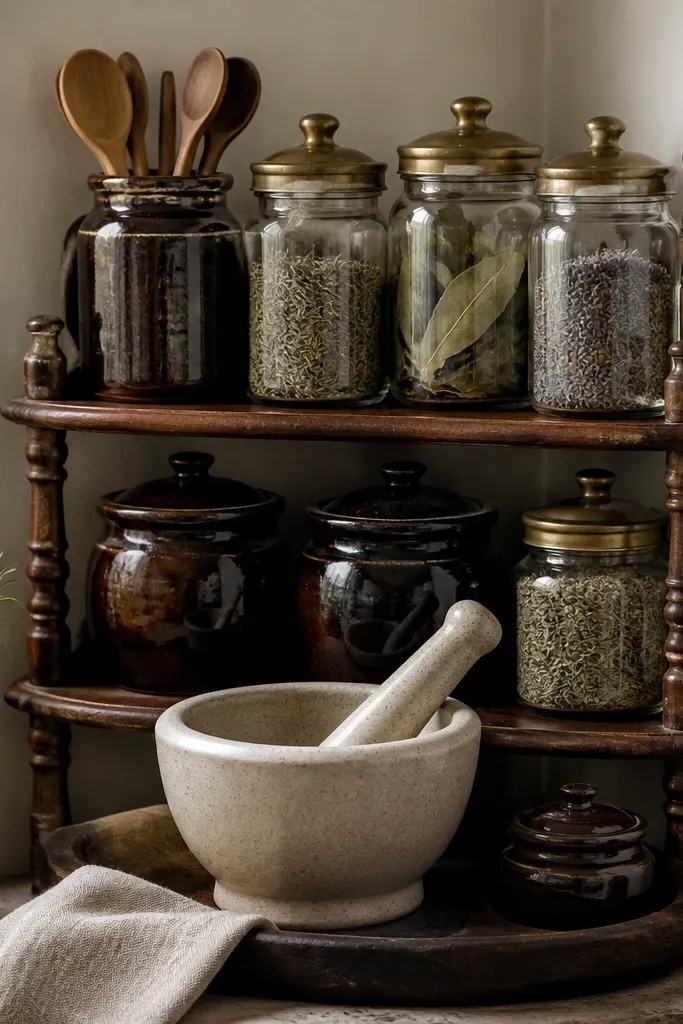
I love this setup because it looks like you’re constantly stocking your pantry with magical herbs. The palette is simple: aged brass, dark wood, and cream speckled ceramics. The dried botanicals make it feel alive and seasonal, and the clear glass lets you see texture and color without adding clutter. The brass ties everything together so it reads witchy instead of random kitchen props.
Use a corner shelf that’s at least 10 inches deep so the jars don’t hang off. Get jar lids in one finish only — aged brass or antique gold. For labels, write on cream paper with a black fine-tip pen, then seal the paper edges with a thin swipe of matte Mod Podge so it doesn’t curl. Place the tallest jars in the back, medium crocks in the middle, and the mortar on the front tray.
If you want it to look like a real apothecary, keep the jar contents consistent by color — use mostly green herbs, then add one batch of dried lavender or dried orange peel for contrast.
Avoid mixing shiny gold with black metal in the same shelf — it usually makes the whole corner look like thrift-store leftovers.
2. Deep Green Enamel Canister Set with Black Labels
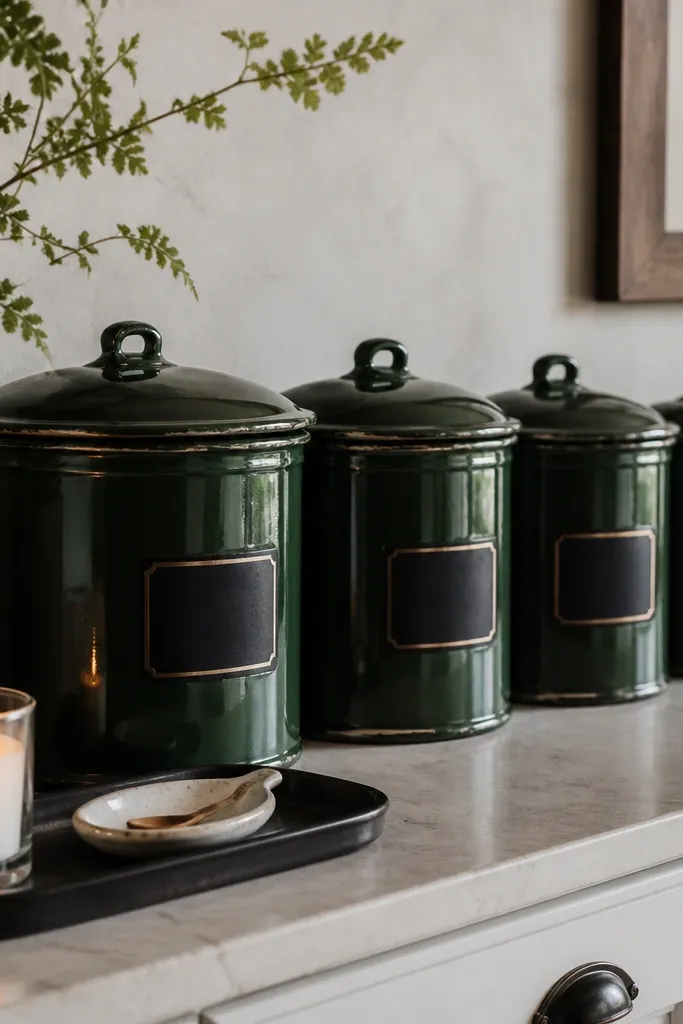
Deep green enamel gives you that witchy potion vibe without needing obvious “Halloween” decor. The black labels make it feel hand-made, and the enamel texture catches light in a soft way that looks cozy on camera and in real life. Pairing green with black and a touch of cream keeps it grounded, like a stardew farmhouse kitchen rather than a costume room. This one also works great when your kitchen is otherwise plain.
Pick canisters that are all the same shape, even if the sizes vary. Aim for three large plus two small so the line doesn’t look empty. Use matte black label tape or print-and-transfer labels, then write over with a fine pen for that slightly imperfect look. Put a black tray under the center canisters so the grouping has a base.
Add one “ingredient” jar that breaks the pattern — a clear jar with amber contents — so the eye has something warm to land on.
Skip glossy labels and bright white vinyl. They look modern and sharp, which fights the old-farm witch vibe.
3. Speckled Stoneware + Amber Glass Drinking Station
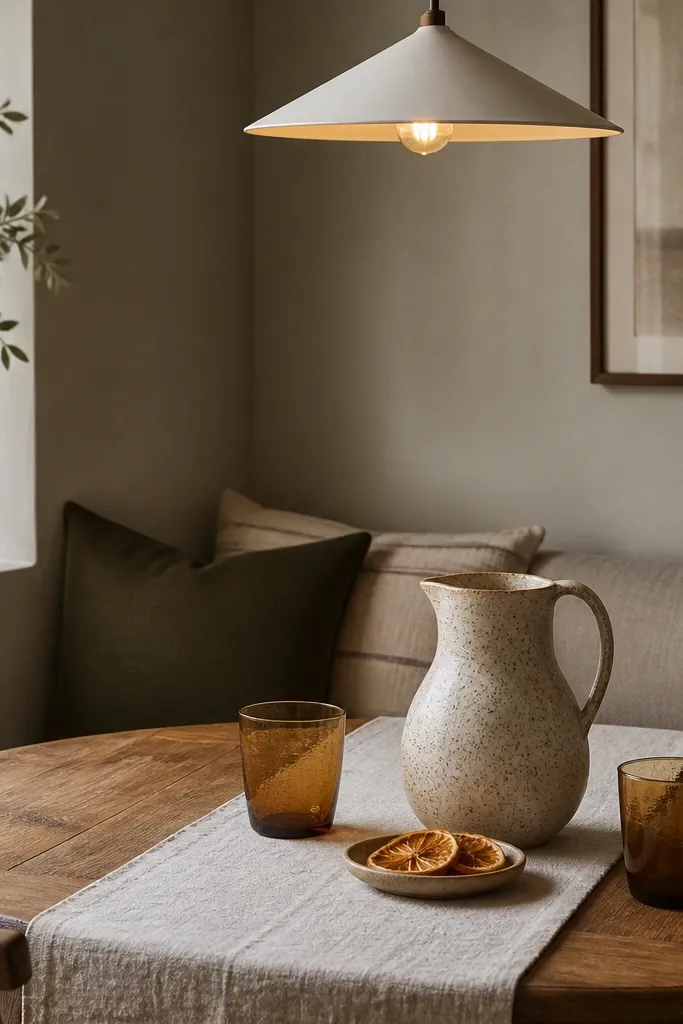
This is the easiest way to make a witchy stardew valley house interior feel lived-in. Amber glass gives you warmth like candlelight, and speckled stoneware looks old without being dusty. The linen runner softens everything so it doesn’t look like you’re staging a product photo. It also works for daily use: you’ll actually pour drinks here.
Use a runner that’s cream or oatmeal, not bright white. Put the pitcher slightly off-center so it feels casual. Choose amber tumblers with a similar tone — honey amber or burnt amber, not a mix of amber shades. Add dried citrus in a small shallow dish so it looks like pantry magic, not craft clutter.
Swap one tumbler for a clear one with a slightly different shape. That small mismatch makes the whole station look real and not too coordinated.
Don’t add six different glass types. Too many silhouettes makes it look like a collection instead of a scene.
4. Witchy Pendant Light with Smoke Glass Shade
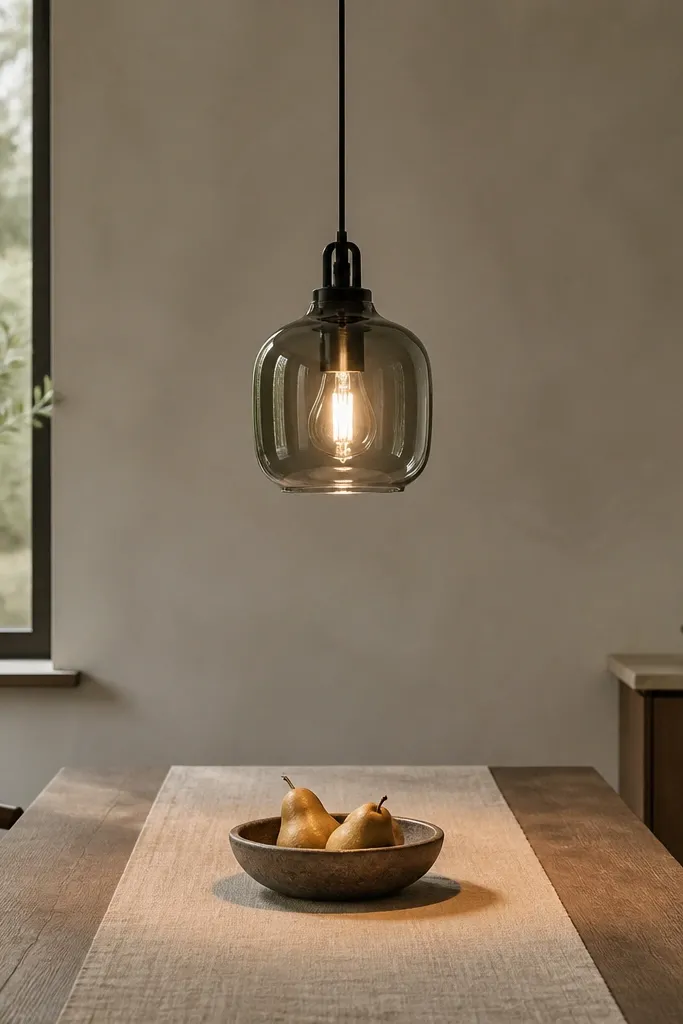
If you want the witchy effect to show up instantly, lighting is the fastest lever. Smoke glass makes the light feel older and moodier, and it pairs beautifully with brass, wood, and dark textiles. In a stardew valley house interior witchy setup, you want glow, not glare. This shade gives you that “lantern in a cottage” feeling.
Choose a pendant that hangs 30-32 inches above the table surface so it lights the center without blocking sightlines. Use a 60W equivalent LED bulb at 2700K with a warm dim setting if possible. Pair with nearby candle holders in brass or black so the metal repeats.
Take a quick photo at night before you commit. If the light creates harsh rings on your wall, swap to a bulb with a diffuser or lower brightness.
Avoid cool white bulbs (4000K). They make smoke glass look grey instead of cozy.
5. Blackened Steel Candle Lanterns on a Farm Shelf
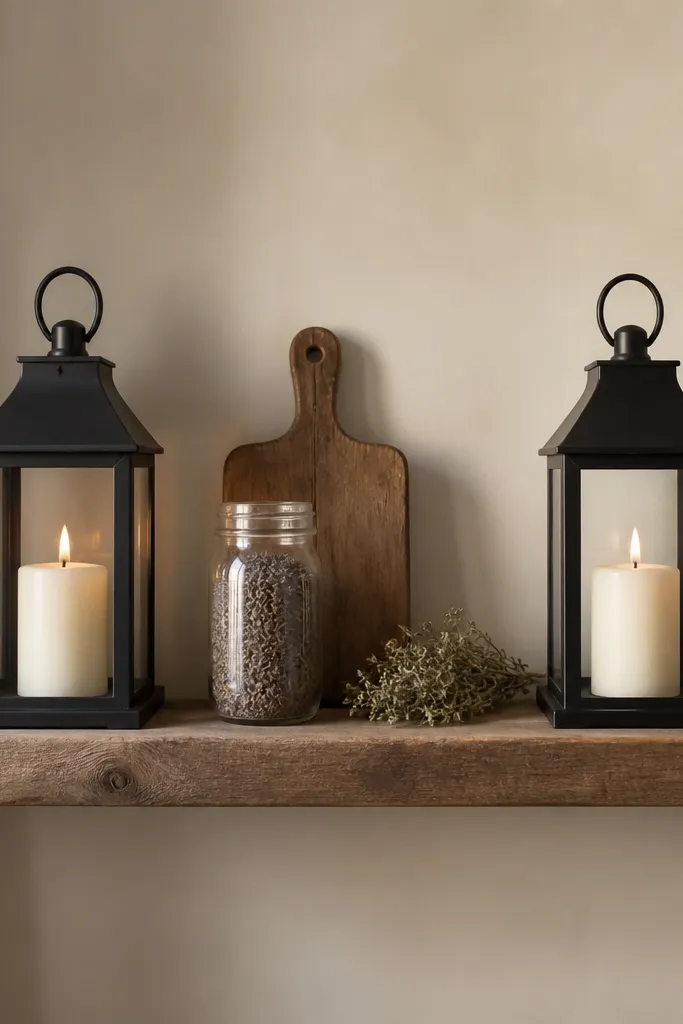
Lantern-style candles are witchy without looking like themed decor. Blackened steel keeps the vibe grounded, while the candle glow does the mood work. This arrangement works because lanterns are repeatable shapes, so even if you add more later, it still looks intentional. It also hides clutter: you can place a small jar behind a lantern and it looks like part of the composition.
Use two matching lanterns and keep them symmetrical by height. Make sure the lantern bases are stable on the shelf so they don’t wobble when you dust. Place a single jar of dried herbs between them at a slightly lower height so the lanterns stay the main focus. Keep the shelf styling to three items per level for a clean look.
Dust lantern tops weekly. The black finish shows dust fast, and clean glass makes the glow look expensive.
Skip tiny tea lights inside large lanterns. The scale mismatch looks cheap.
6. Mortar, Pestle, and Spell Station Tray
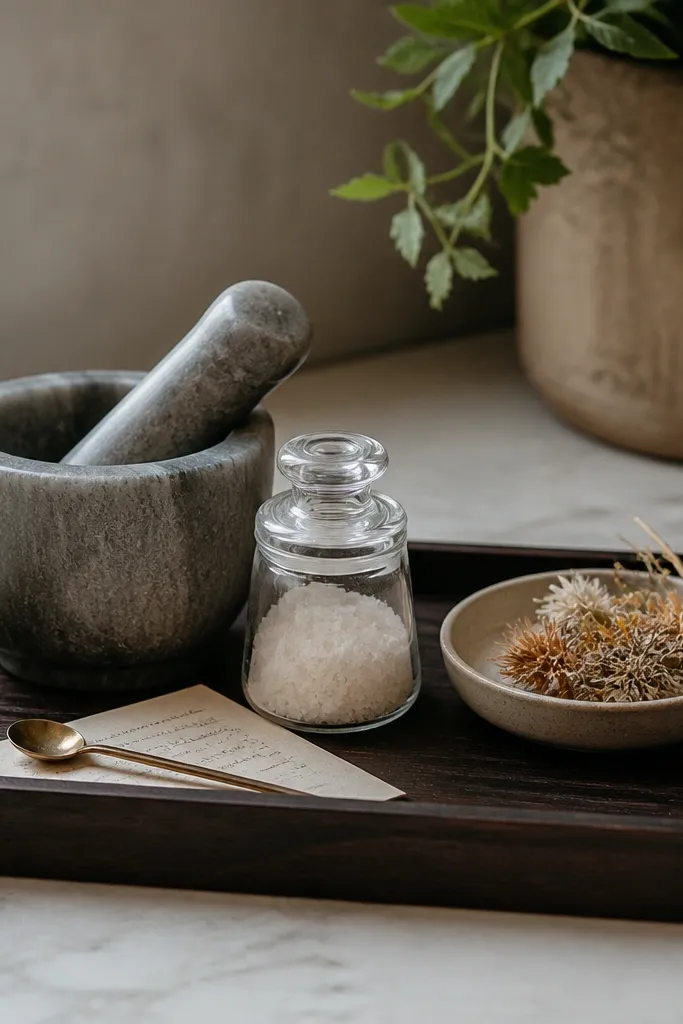
This is the witchy stardew valley house interior witchy trick that actually gets used. A mortar and pestle makes sense in a kitchen, and it instantly reads “herb magic” even when you’re just grinding garlic. The tray keeps it from spreading across your counter, and the small jar of salt or sugar makes the whole thing practical. It’s witchy in a way that matches cooking.
Choose a mortar that’s heavy and wide — around 6 to 8 inches across. Put it slightly back on the tray so the front stays clear for jars. Add one small labeled jar (salt, cinnamon, or dried chamomile) and one shallow dish for dried petals. Write labels on kraft paper, then seal them with clear matte spray so they survive kitchen humidity.
Use a tray with raised edges so jars don’t slide when you bump the counter with your hip.
Avoid “everything at once.” If the tray is crowded, it stops looking like a station and starts looking like clutter.
7. Woven Burlap Runner with Burnt Orange Candle Cups
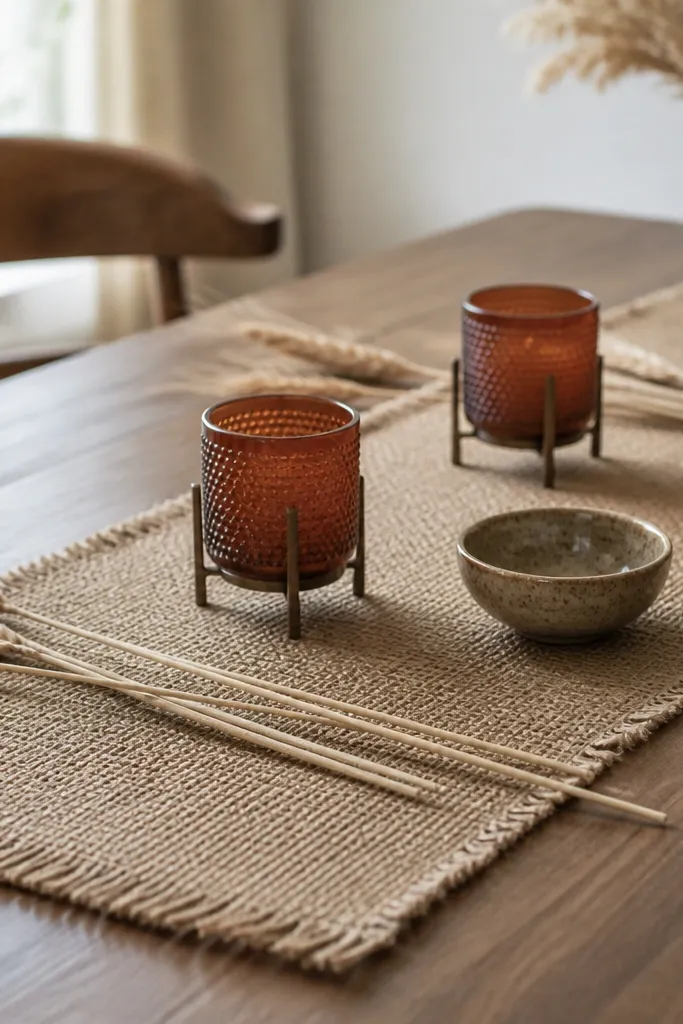
Burlap has that farm texture that makes witchy decor feel rooted. Burnt orange candle cups add warmth like late afternoon light in a cottage kitchen. The dried wheat brings in that stardew harvest feeling without needing bright colors. Put them together and you get cozy magic that doesn’t scream “party.”
Use burlap that’s tight-weave, not super frayed. If it sheds, wash it once and let it dry flat so it behaves. Place candle cups near the center, not the ends, and keep dried stems in a small bundle so they don’t look messy. Add a ceramic bowl for small seasonal items like acorns or cinnamon sticks.
Pro tipMist the dried wheat lightly with hairspray so it stays crisp and doesn’t shed everywhere during dinner.
Watch outSkip shiny satin runners. They kill the farm texture.
8. Wall-Mounted Spice Rack with Handwritten Apothecary Tags
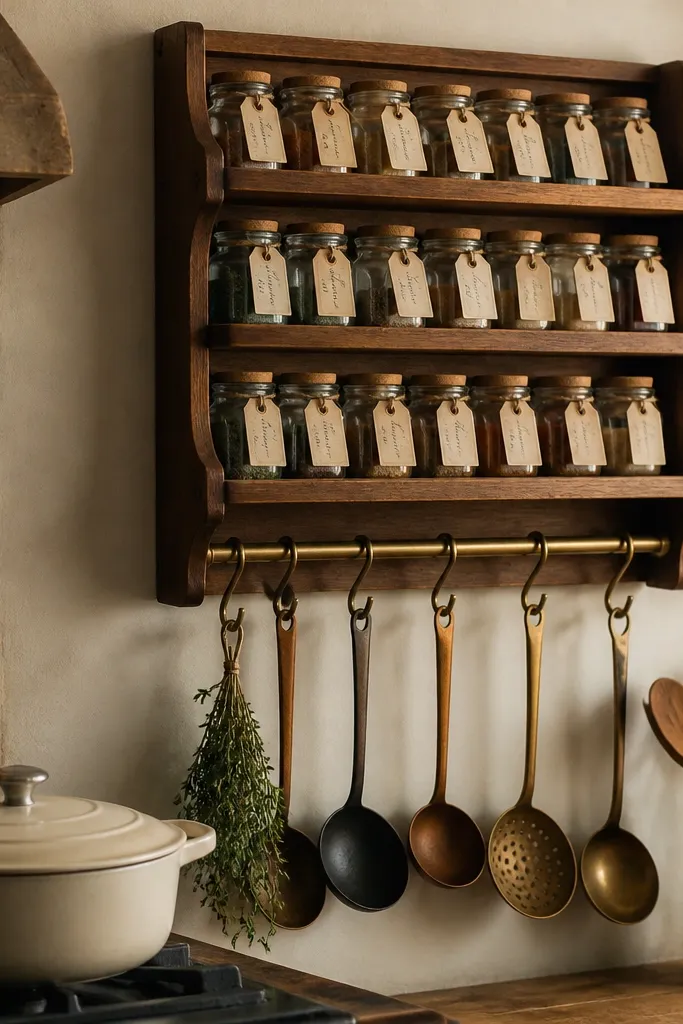
This is witchy because it looks like you’re labeling spells, not just spices. The wood rack keeps it grounded, and the handwritten tags add the farm-cottage charm. Tie the tags with twine so they look old-school. When it’s near the stove, the witchy theme blends into real cooking.
Use jars with uniform lids so the rack looks tidy. Make tags about 2.5 x 4 inches, then punch a hole and tie with 6 to 8 inches of twine. Keep font simple and consistent — one hand-written style across all jars. Hang the rack at about 60 inches from the floor so you can read and grab easily.
Pro tipWrite the ingredient names with a tiny “recipe” line underneath, like “for toast” or “for soups.” It makes the labels feel personal.
Watch outDon’t use neon marker on bright white sticker sheets. It reads modern and cheap.
9. Vintage-Style Hanging Herbs in a Black Iron Frame
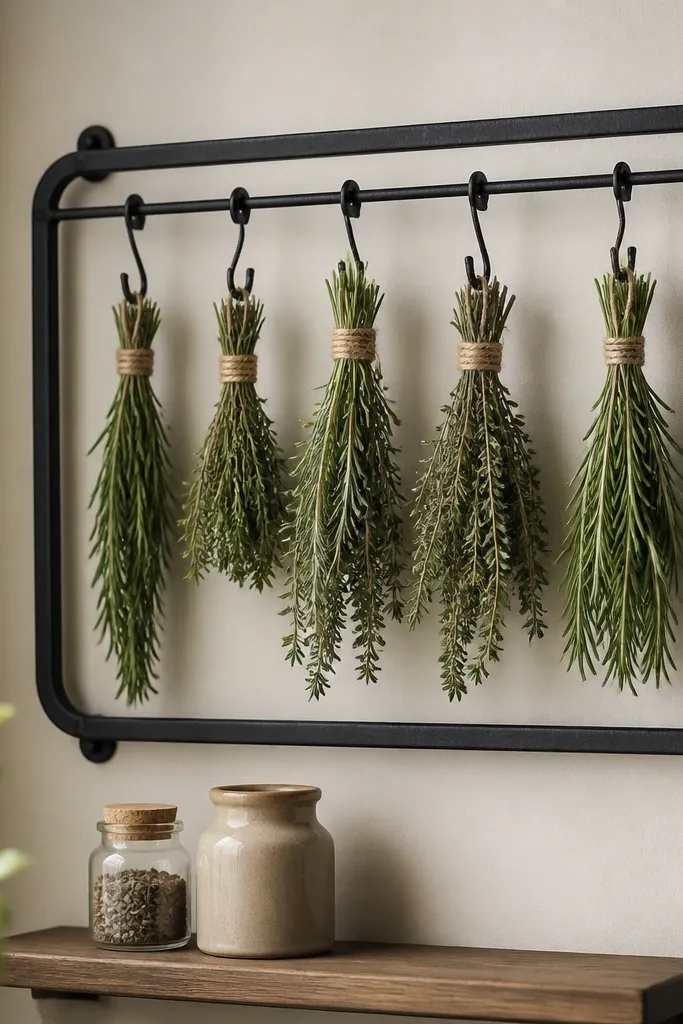
Hanging herbs make your kitchen look like a working cottage apothecary. The black iron frame gives you that witchy contrast, and dried herbs add color without needing extra decor. This setup is great for stardew valley house interior witchy because it feels like the house is alive with preparation. It also frees up counter space.
Bundle herbs with natural twine and cut the stems so they hang evenly. Use a frame with small hooks so bundles don’t slide. Mount it near a doorway or above a shelf, not directly over the stove where heat dries everything out fast. Place two jars on the shelf under it for “fresh” ingredients — clear jars look best.
Rotate the herb bundles every month. Even if they fade, you keep the display looking intentional.
Skip plastic herb bundles. They look flat and won’t match the real texture.
10. Charcoal + Cream Table Setting with a "Potion" Centerpiece
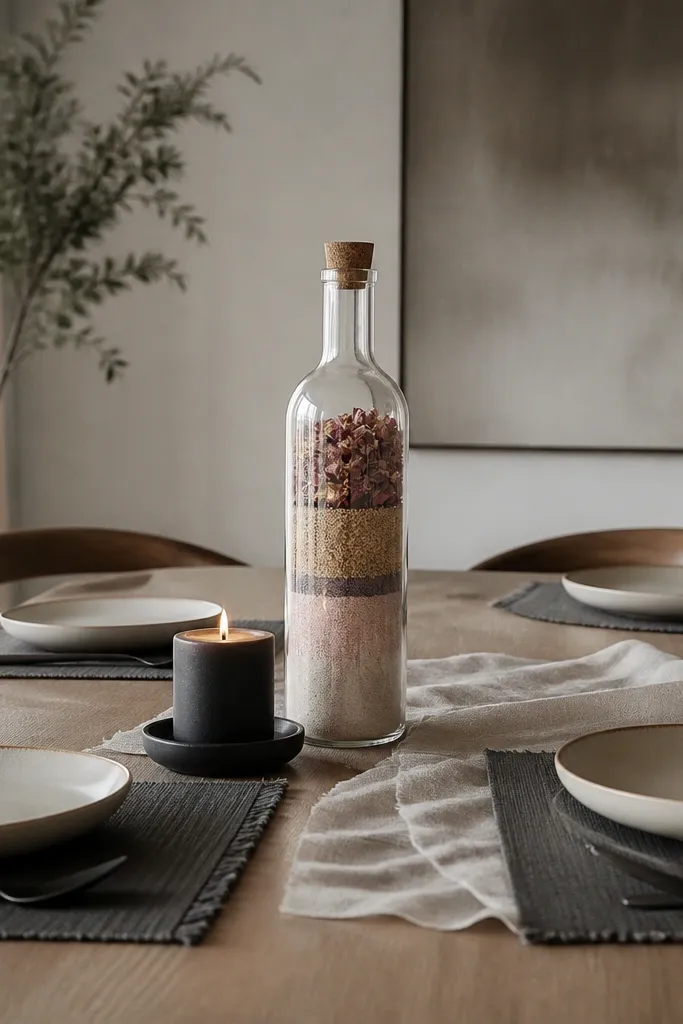
Charcoal and cream gives you that moody stardew vibe without going full goth. The potion centerpiece is the star because it has layers — you can see different colors inside the bottle. When you keep the rest of the table simple, the witchy element reads clean and intentional. It’s great for hosting because it looks styled but still cozy.
Use placemats in charcoal linen or textured cotton. Keep napkins cream and simple. For the potion bottle, use a clear tall bottle and layer dried flowers or colored sugar substitutes — keep it dry so it doesn’t clump. Put the bottle on a small black tray so it doesn’t slide and so the centerpiece looks framed.
Pro tipMatch the candle holder metal to your bottle cap or label color. One metal finish across the centerpiece makes it look designed.
Watch outDon’t add glitter or wet-looking “potions.” They look fake fast.
11. Mirrored Cabinet Door with Frosted Witchy Etching
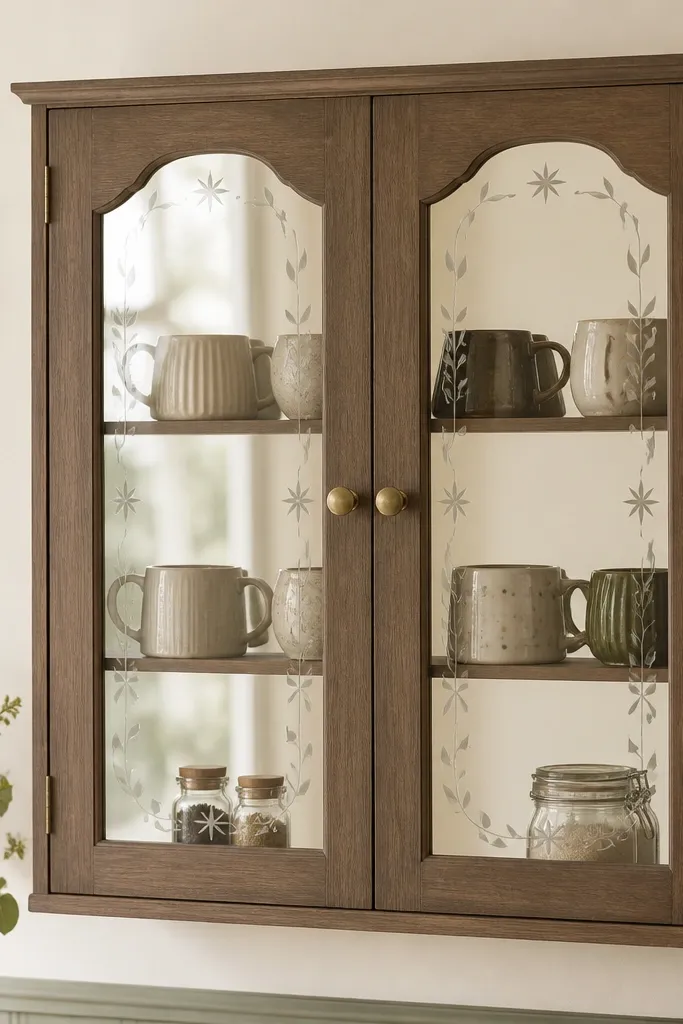
A mirrored cabinet door makes your kitchen feel bigger and adds that magical depth. Frosted etching keeps it from looking like a typical mirror upgrade — it reads witchy when you only use a few symbols like stars and leaves. The inside organization matters here, because the mirror reflects everything. When it’s neat, the whole kitchen looks curated and still lived-in.
Use frosted vinyl film or etching-style decals in small sections so it doesn’t cover the entire door. Arrange mugs by color tone, not by random mix. Keep the cabinet’s interior lighting off unless you have it; rely on room lighting and the mirror’s reflection. Place a tray on the bottom shelf for small items so nothing spills across the mirror reflection.
Pro tipUse one repeating symbol across both cabinet doors. Repetition makes it look like a planned design, not a sticker collection.
Watch outAvoid covering the mirror too heavily. If you can’t see inside, it turns into a decorative panel instead of a functional witchy cabinet.
12. Floor-to-Ceiling Curtain Panels in Oatmeal Linen Look
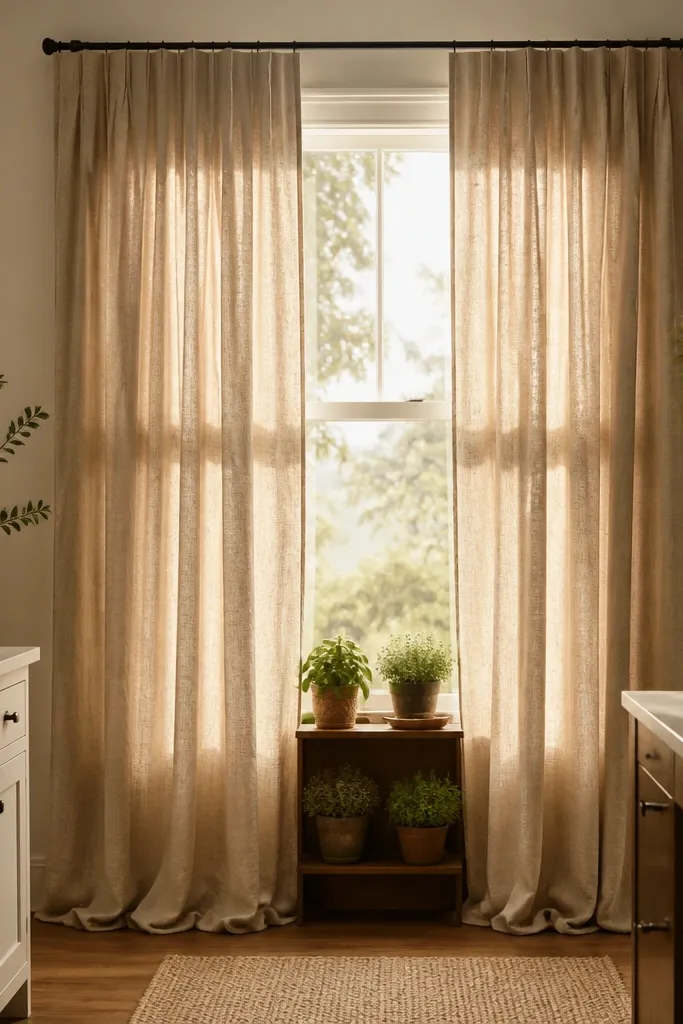
Curtains do more for witchy stardew valley house interior witchy than people think. Oatmeal linen look creates that cottage softness, and the texture makes the room feel hand-touched. It also makes your lighting glow warmer because the fabric diffuses it. Add one witchy element nearby — like a jar shelf or hanging herbs — and the whole room reads like a storybook kitchen.
Hang rods close to the ceiling so the window looks taller. Let the curtain pool slightly on the floor if your setup allows — about half an inch. Choose a fabric with visible weave, not smooth polyester. Keep the color slightly warm (oatmeal, cream-tan) so it pairs with brass and dark wood.
Steam the curtains before hanging. A crisp fold pattern makes even plain decor look intentional.
Skip bright white curtains. They pull the room into modern territory.