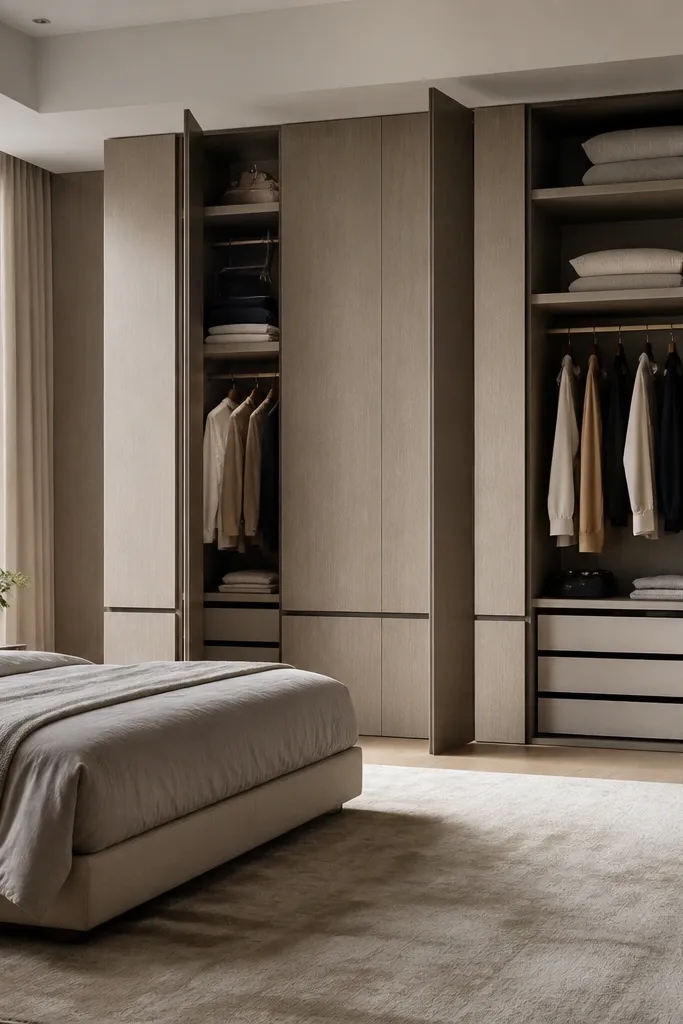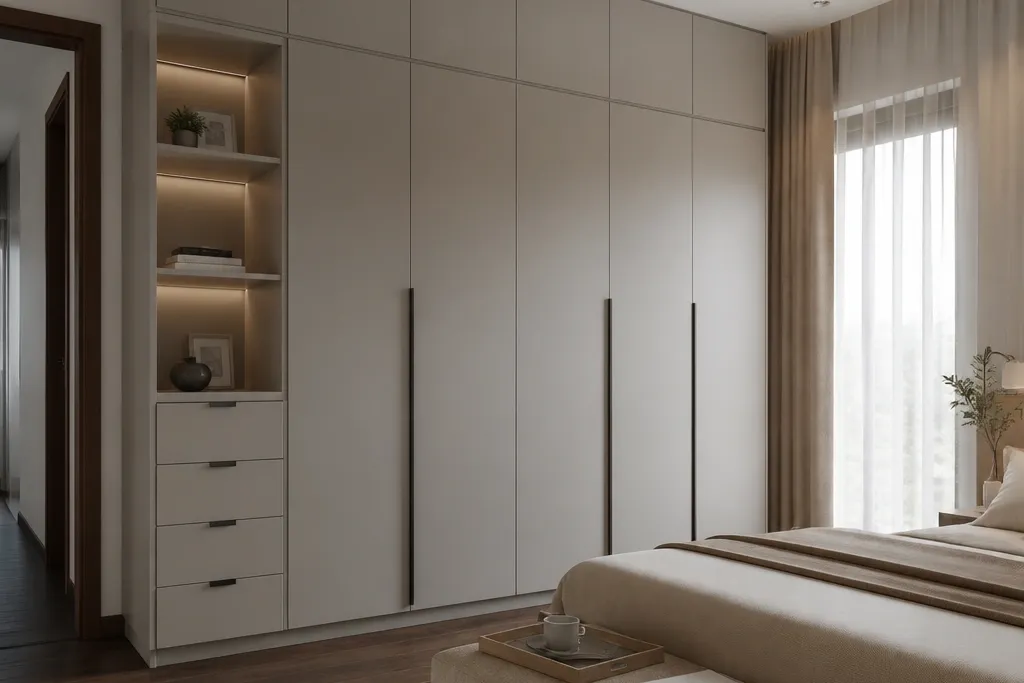
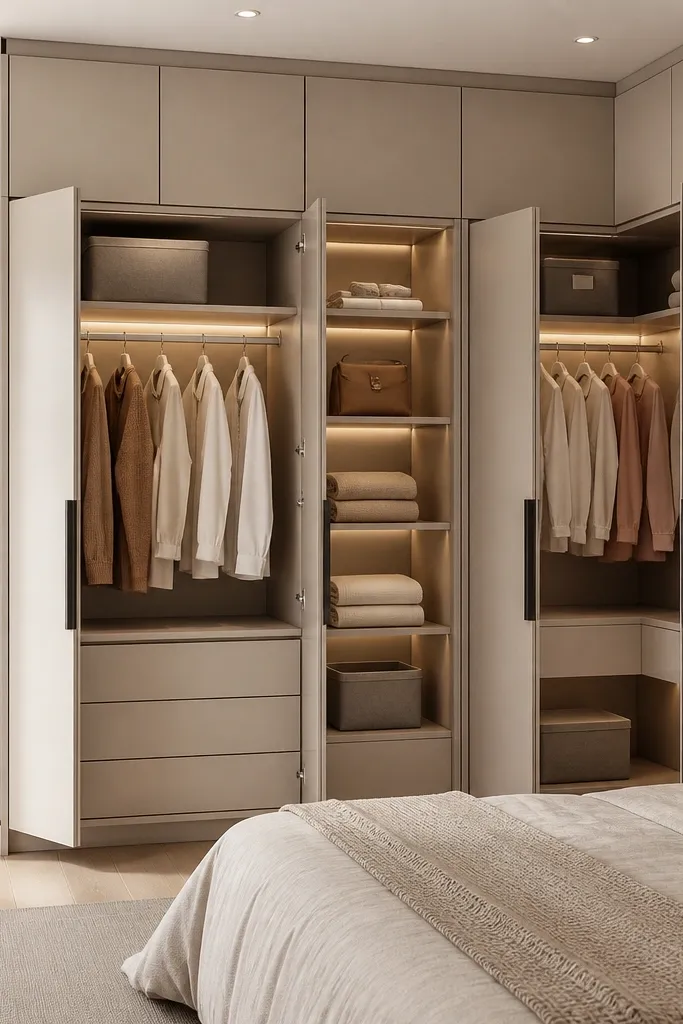
1. Two-Level Hanging Bay with Top Shelf Bridge
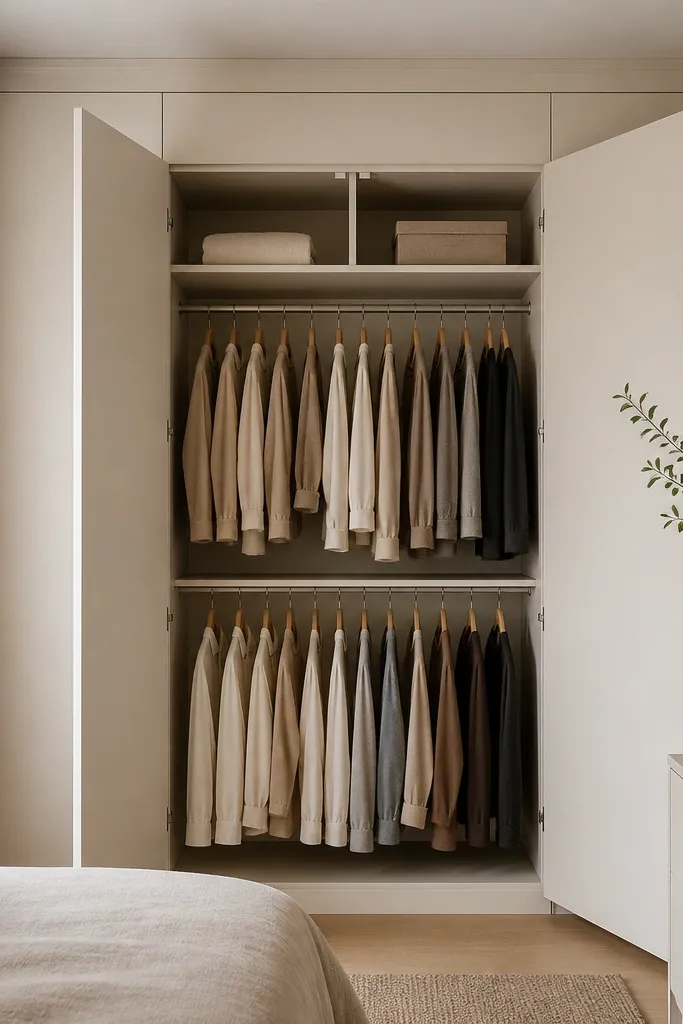
Keep the upper hanging rail about 120-130 cm from the floor and the lower rail around 80-90 cm so you can reach without a stool. Use a shelf depth of 32-35 cm for folded knits and keep the bridge gap around 8-10 cm so items don’t scrape when you close doors. This works best in bedrooms where the wardrobe is on the main wall and you need one clean, tall unit.
This design is for people who hang a lot but still fold frequently. The two-level hanging bay keeps shirts and tops separated from longer pieces, so you don’t end up with a tangled bar of clothes. The shelf bridge above gives you a place for folded sweaters or bags, but it stays visually tidy because it runs straight across the bay. I like the off-white matte finish because it hides smudges better than glossy doors near a bed.
Watch outAvoid putting a single full-height hanging space if you have lots of short clothes — it turns into one messy pile.
Pro tipInstall a small fabric divider curtain behind the hanging bay if you have mixed seasonal clothes; it stops dust from falling onto the shelf bridge.
2. Mirror-Front Wardrobe with Hidden Drawer Stack
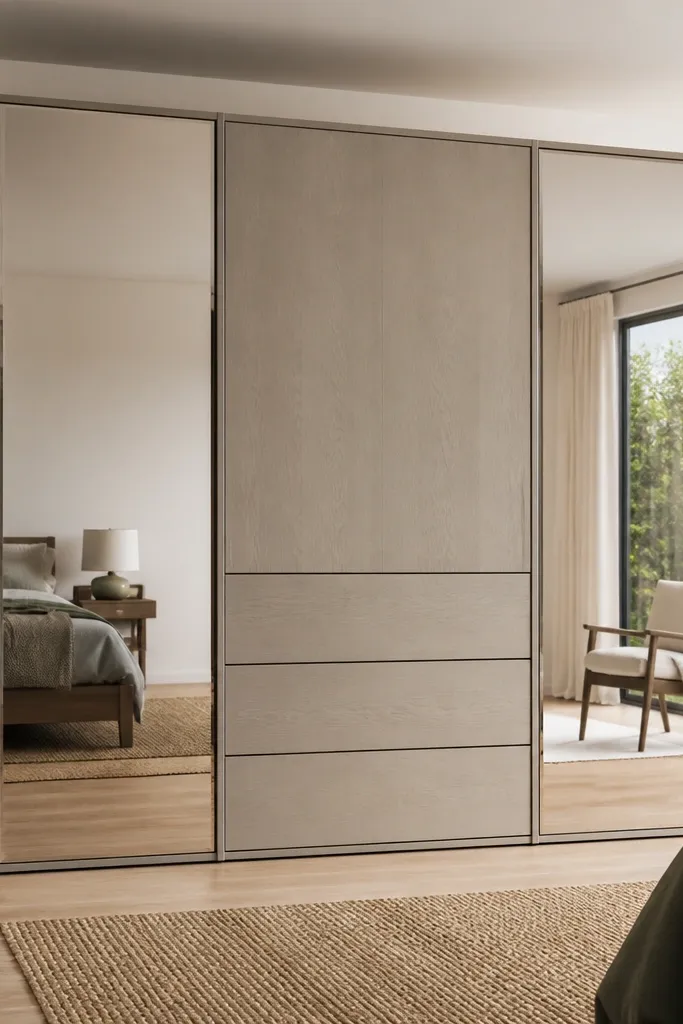
Place drawers at 60-70 cm height for the first drawer so you can access without bending. Use drawer widths around 60-90 cm total per bay, and keep each drawer depth around 45-50 cm. Choose a thin mirror frame (around 1-2 cm) and matte grey carcass so fingerprints don’t scream on the mirror edges.
Mirror fronts make the room feel larger, but the storage has to be practical or it becomes decoration only. The hidden drawer stack at the center is where you store daily items — socks, belts, folded tees — so you don’t rely on the top surface. Mirrors also help you spot uneven hanging and missing accessories while you dress. I’ve used this combo in smaller bedrooms because it visually stretches the wall without adding extra clutter.
Watch outSkip thick, heavy mirror frames if your room has limited space; they make the wardrobe look bulky and eat visual light.
Pro tipAdd felt liners inside drawers and a small divider for belts — it keeps everything from sliding into a single lump.
3. L-Shaped Almirah with Corner Pull-Out Shelf
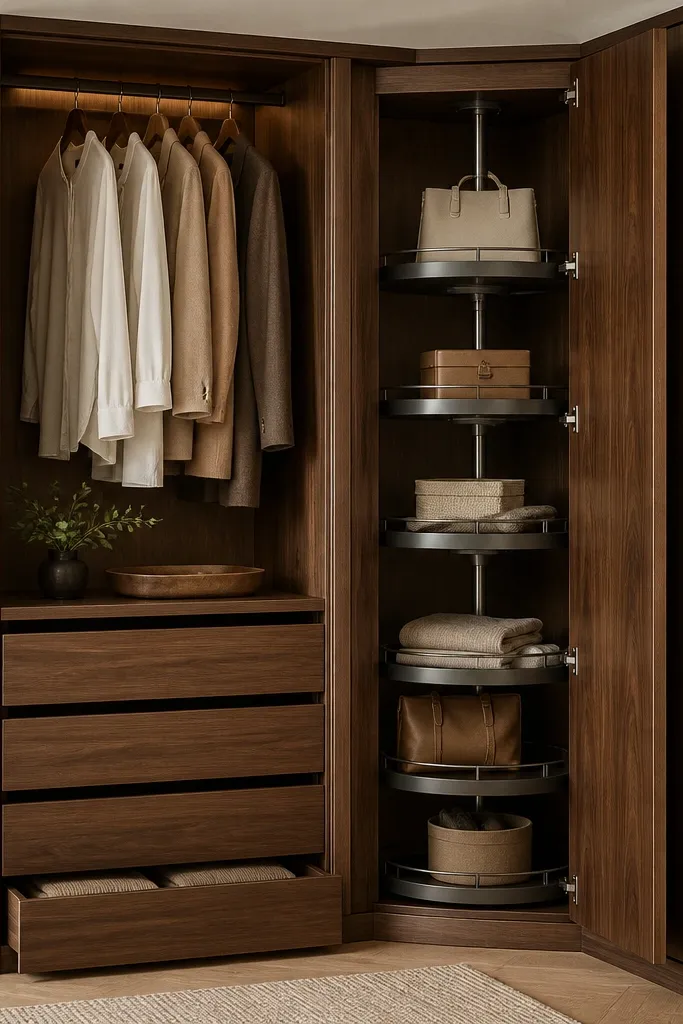
Build the corner section with a pull-out width of 60-70 cm and keep the depth at least 55 cm so items don’t catch. Put shoe organizers on the lower pull-out and keep the upper corner shelf for scarves or small bags. This design fits rooms where the wardrobe can wrap a corner without blocking the door swing to the bedroom.
Corners waste storage in most bedrooms, and you end up storing “stuff you can’t reach.” A corner pull-out shelf solves that by turning the hardest-to-access area into the most useful one. I like using it for shoes, bags, or folded scarves because you get full visibility when you pull it out. The L-shape also reduces dead wall space and makes the room layout feel intentional.
Watch outDon’t use a fixed corner shelf without access; it becomes a dust trap and you stop using it.
Pro tipLabel the shelves with small fabric tags on the pull-out handle — it sounds silly until you’re rushing in the morning.
4. Sliding Door Wardrobe with Vertical Organizer Rails
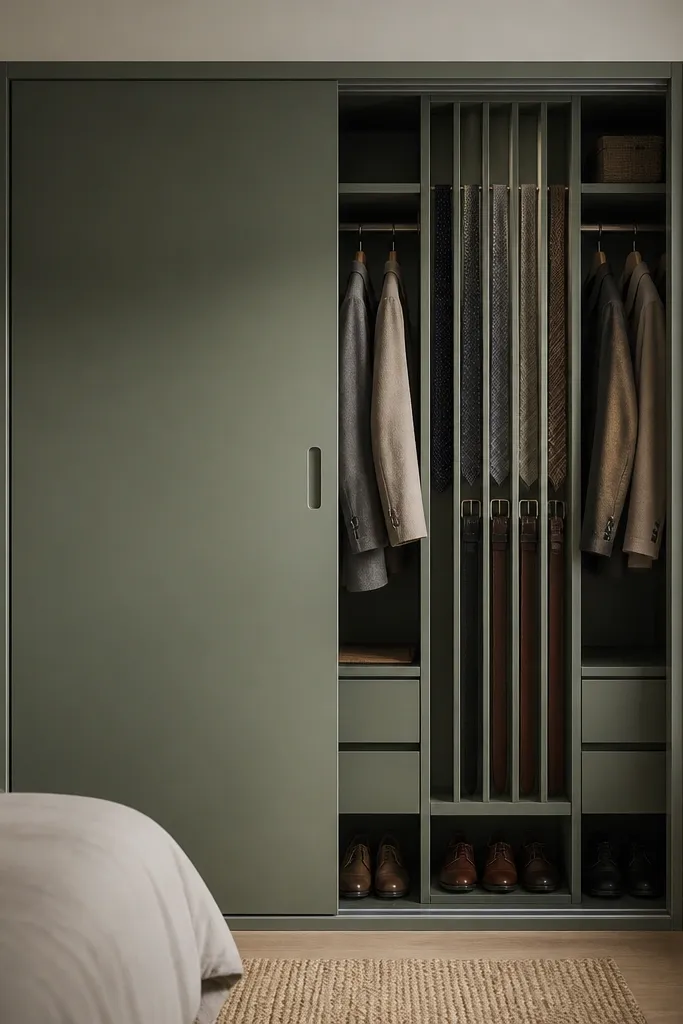
Sliding doors are the best move when your bed is close to the wardrobe wall. Vertical organizer rails turn long accessories into something you can grab in seconds. This is one of those designs that looks clean from the outside because everything is hidden behind the sliding panels. Inside, it feels like a system, not a box.
Choose a rail spacing of 6-8 cm for belts and ties so items don’t overlap. Keep hanging bays at 55-60 cm depth and use 2 rails per bay if you fold shirts frequently. Use a matte sage or muted blue exterior because sliding doors touch walls and fingerprints show less on textured finishes.
Add a soft light strip inside the wardrobe on the top edge so you can find items without switching on the ceiling light.
Avoid flat, bare interiors with no rails; sliding doors make it harder to rummage, so you need structure.
5. Drawer-First Wardrobe with Shallow Fold Trays
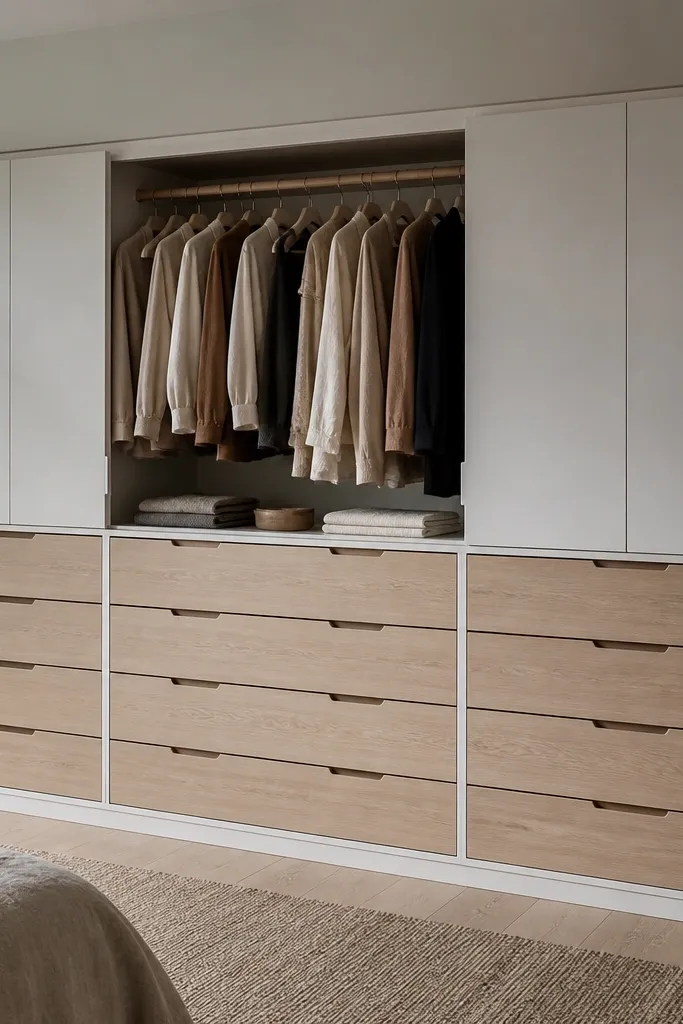
Use drawer heights around 12-18 cm for folded tees and 20-25 cm for jeans stacks. Keep drawer depth around 45-50 cm, and add dividers spaced 10-12 cm for socks and tees. Put the hanging section at the top for jackets or longer kurtas so it doesn’t eat drawer space.
If your clothes are mostly folded, drawers-first beats hanging-first. Shallow fold trays keep stacks from collapsing, and you can see everything at a glance. I’ve had friends switch from top-shelf dumping to drawer storage and the bedroom immediately looks calmer. It also works well for kids and teens because the system is easier to maintain.
Watch outDon’t make drawers too deep without dividers; the back becomes unused and you’ll start re-dumping items.
Pro tipMeasure your folded stack height before building trays; even a 2 cm mismatch makes drawers feel “too full.”
6. Open Niche Top with Closed Base for Clean Visuals
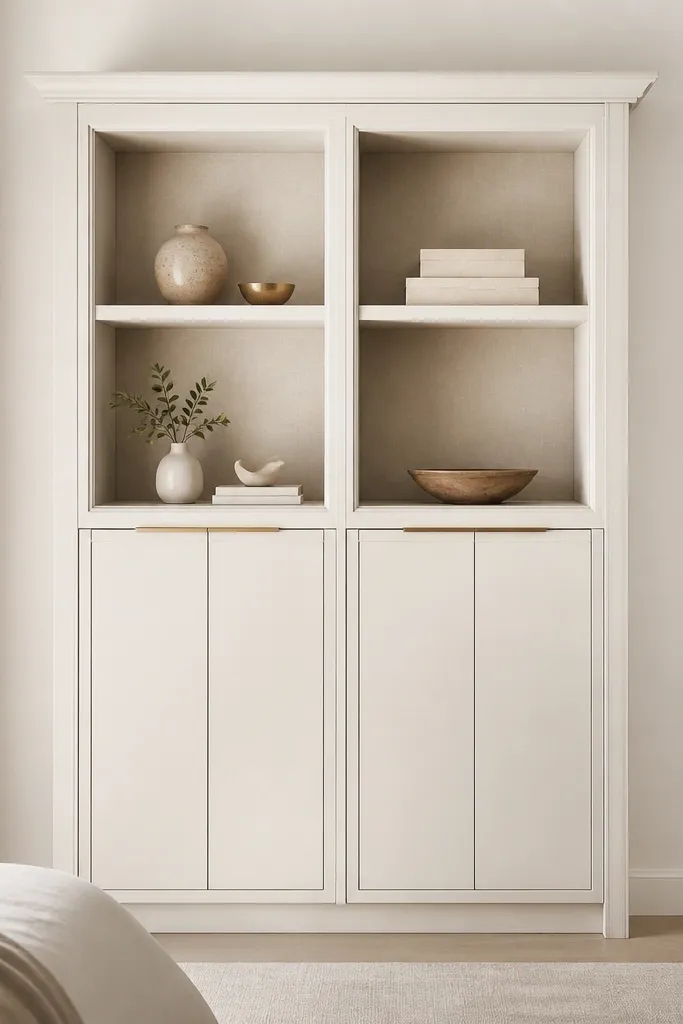
Keep niches shallow at 18-22 cm so items don’t look buried. Use glass or open shelves only where you can keep them neat; the base should stay fully closed. Ideal for bedrooms where you want the wardrobe to blend with a dressing area or vanity wall.
This design gives you the “pretty top” look without sacrificing the clean storage base. Open niches are great for things you actually use daily — perfume, a folded throw, a small stack of books — but closed doors keep the rest hidden. The closed base makes the wardrobe feel organized even when your bedroom is busy. I like using a soft back lining color (cream or light grey) so items look intentional.
Watch outAvoid open shelves if you’re messy; they turn into a visible pile and defeat the point.
Pro tipUse one color theme in niches: either all neutral bottles or all one metallic finish for hardware and frames.
7. Bedside-Lined Wardrobe with Slim Side Pull-Outs
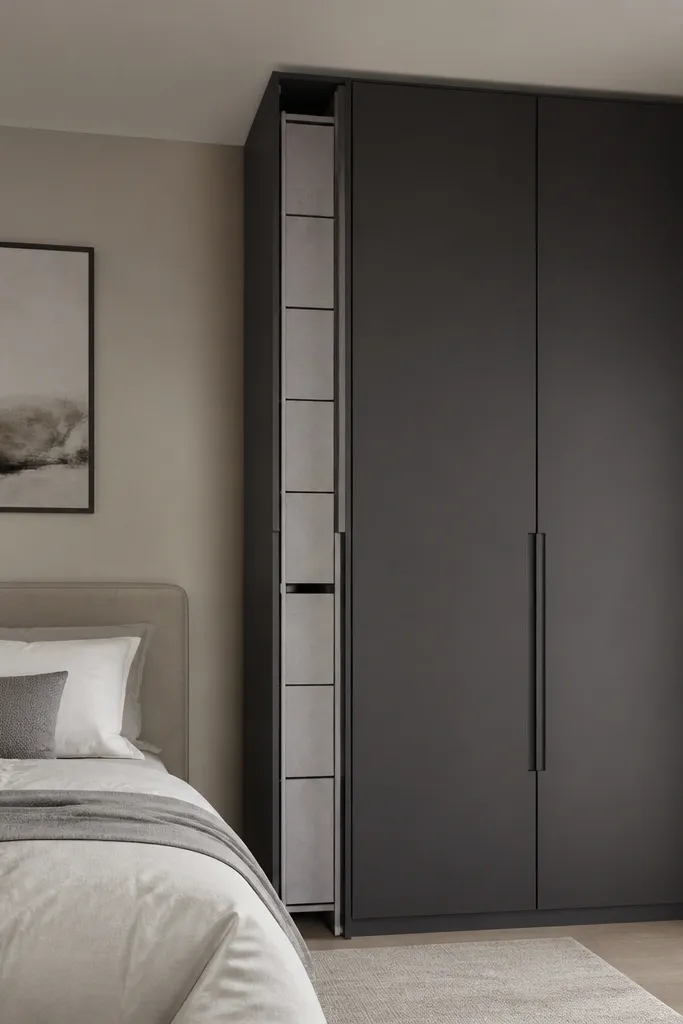
Use a side pull-out width of 20-25 cm and depth around 35-40 cm; it fits chargers, folded sleepwear, and small accessories. Install the first pull-out at 55-65 cm height so you can reach while standing or sitting. This works when your wardrobe is within 30-40 cm of the bed and the bed has a clean clear side space.
This is a practical trick when you want “grab storage” without walking across the room. Slim pull-outs at the side hold daily items like belts, bedtime wear, chargers, or small bags. It keeps the top of the wardrobe clear and stops you from storing random things on the bed edge. The charcoal exterior makes the wardrobe look grounded, and the lighter pull-out strip highlights what you can access fast.
Watch outDon’t place pull-outs too low; if the drawer handle sits near the floor, you stop using it.
Pro tipAdd a small tray insert for chargers so cables don’t tangle inside the drawer.
8. Textured Laminate Wardrobe with Lift-Up Shoe Cabinet
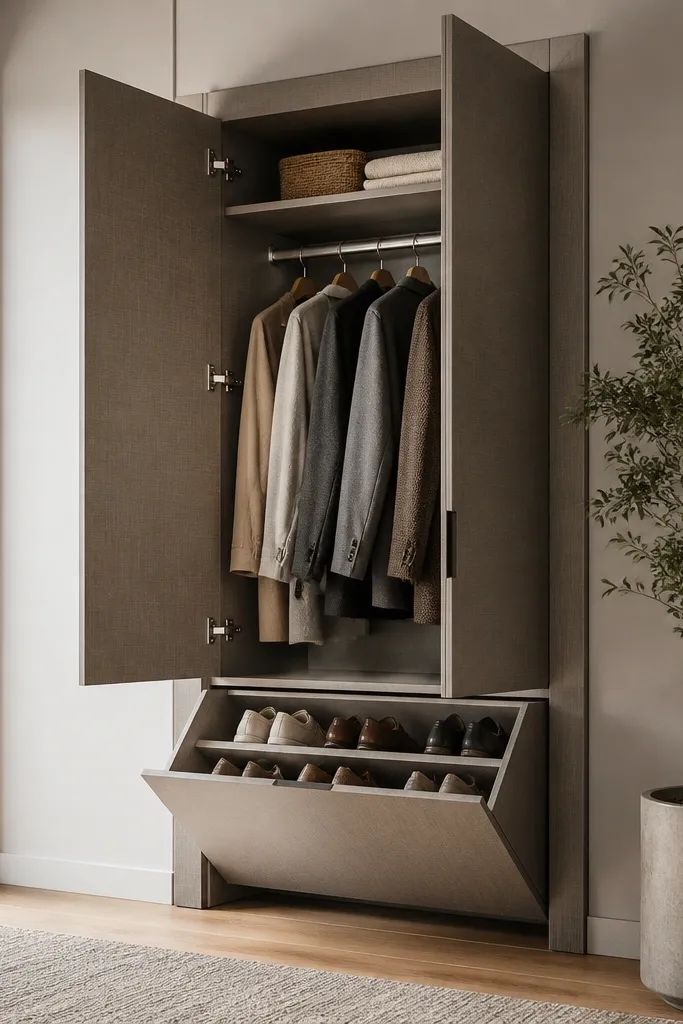
Shoes are the quickest way to ruin a tidy bedroom look, even if your clothes are organized. A lift-up shoe cabinet keeps them contained and stops the messy shoe line near the door. The angled shoe slots let you see pairs without forcing them in. Textured laminate hides scuffs from daily use better than smooth paint.
Keep the shoe compartment height around 35-45 cm and use angled inserts at about 30-35 degrees. Put the shoe cabinet at the bottom of the wardrobe so you don’t bend too far to store. This design fits bedrooms where the wardrobe is the main storage wall and you want shoes out of sight.
Wipe shoe soles before storing; it keeps the inside smelling neutral and prevents grime from staining the cabinet base.
Avoid flat shoe shelves with no airflow; they trap odor and you’ll hate opening the cabinet.
9. Two-Column Wardrobe with Pull-Down Hanging Rail
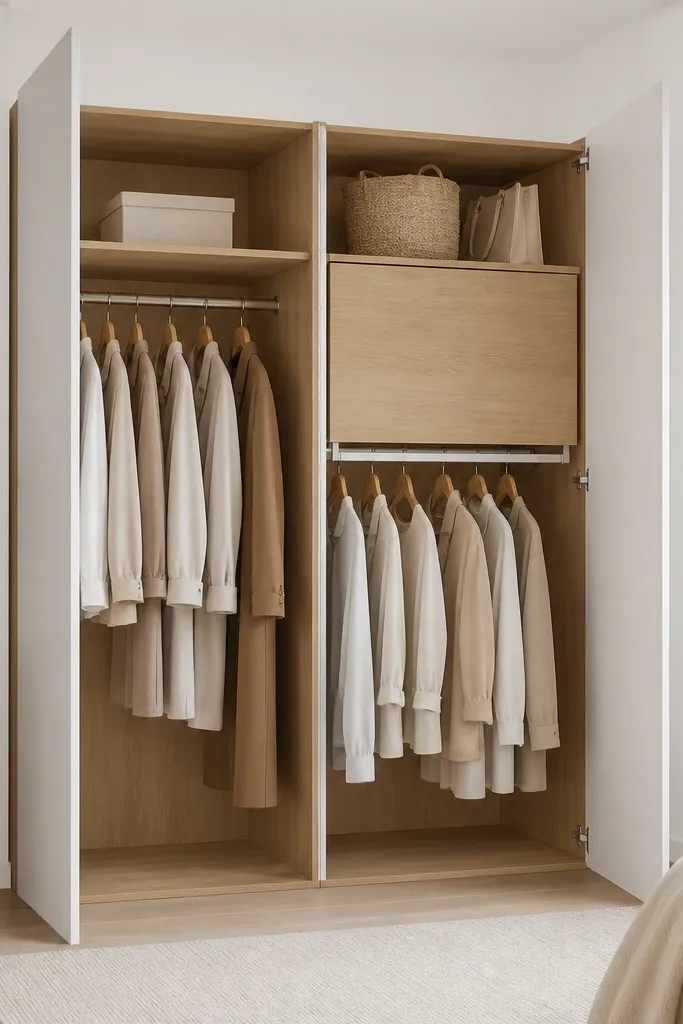
A pull-down rail is the fix for high storage that you can’t reach comfortably. It’s perfect for seasonal items like winter scarves, bulky kurtas, or long dresses you only use sometimes. The two-column layout keeps the wardrobe balanced and prevents the “one side is empty” look. I like pairing white carcass with light oak rails so the interior feels brighter.
Install the pull-down rail so the lowest hang position sits around 120-130 cm from the floor when lowered. Keep the top shelf above it at 35-45 cm height so you can store folded blankets or folded winter wear. This design works in bedrooms with higher ceilings or where the wardrobe reaches near the ceiling.
Use fabric storage bags for seasonal items so they don’t snag on the rail or collect dust.
Skip low-quality pull-down mechanisms; a wobbly rail makes you avoid using the top zone.
10. Slim Wardrobe with Vertical Spice-Style Drawer Inserts
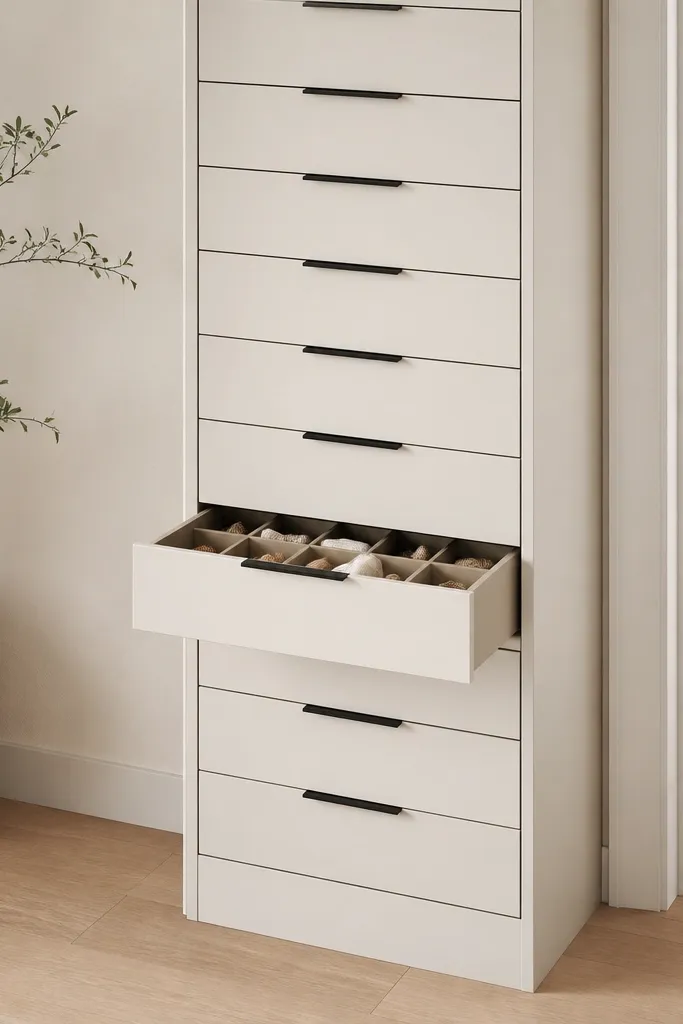
This design is for small bedrooms where width is limited but you still need serious organization. Vertical dividers turn one drawer into many compartments, so you can store socks, undergarments, and small folded items without mixing. The narrow profile keeps the wardrobe from dominating the room. I’ve used this approach in guest rooms and master bedrooms where the wardrobe is a secondary storage wall.
Keep drawer widths around 30-40 cm and use dividers that create compartments around 8-10 cm wide. Depth should be 45-50 cm so folded items sit without bunching at the back. Pair matte cream with black handles to keep the look crisp, and use soft-close slides so drawers don’t slam.
Fold items into “flat squares” before placing them in vertical compartments; it stops the drawer from bulging.
Don’t overcrowd small compartments; if you squeeze too much, you’ll pull everything out next time.
11. Wardrobe with Folded-Layer Shelf System and Rope Handles
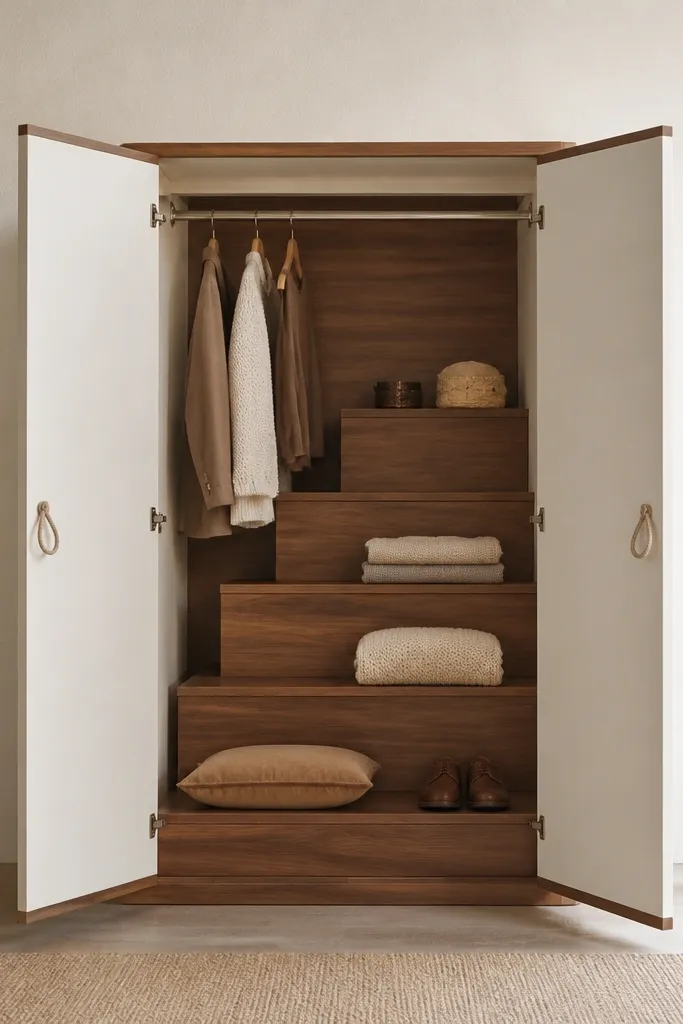
Set shelf depths around 34-38 cm and leave 25-30 cm vertical spacing between shelf levels for folded stacks. Use rope handles sized so you can reach easily around 100-120 cm from the floor. This works best for bedrooms where you fold a lot — tees, towels, and sweaters.
Layered shelves are the best way to keep folded items neat without using many drawers. The step-like setup lets you pull the front layer without disturbing the rest, which is what usually makes shelves look messy. Rope handles feel casual but practical; they also give you a better grip if your doors are tall and heavy. I like warm white with walnut trim because it looks soft but still clean.
Watch outAvoid flat shelves with no spacing; folded stacks slump and you end up with a leaning tower.
Pro tipUse fabric shelf liners in a neutral tone; it reduces friction so folded clothes slide smoothly back into place.