

1. Scalloped Paper Wall Planter Trays
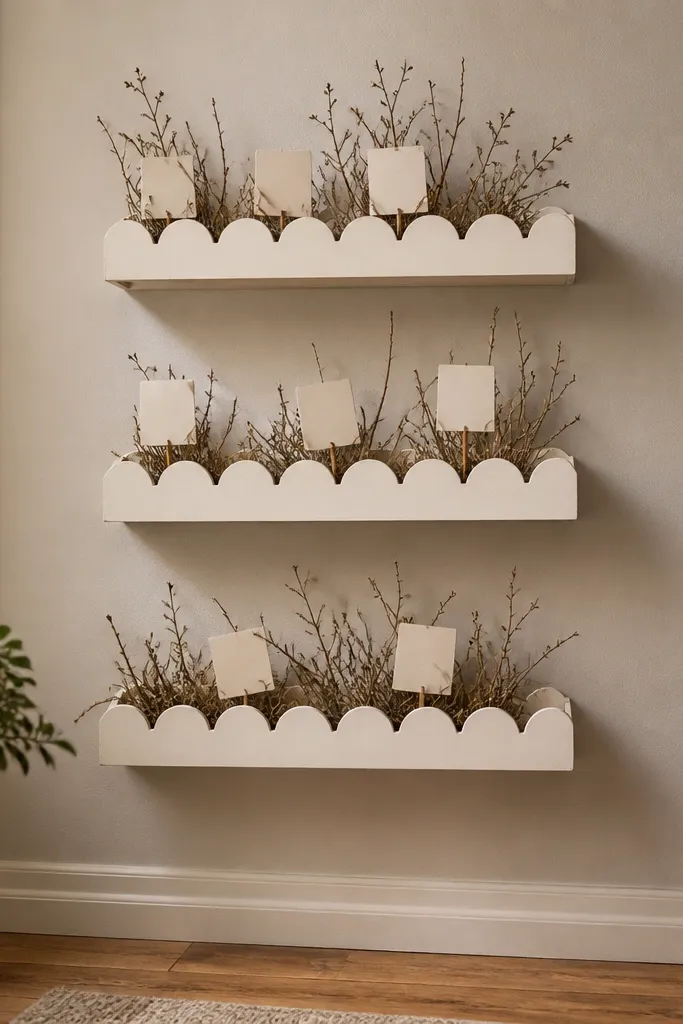
Cut a scalloped template by tracing a jar lid spacing on paper, then cut the shape from 2 layers of bookboard for stiffness and glue them together. Wrap the outside edges with matte cream cardstock (contact cement or PVA works) and seal the whole tray with matte Mod Podge. Attach a simple hanging rail behind the tray using picture-wire or D-rings, then mount it about 60 inches from the floor. Finally, add 2-3 faux stems and a label card tucked into the back so the tray looks “finished,” not empty.
This is the fastest way to make a blank wall look styled without buying real planters. The scalloped edges create a soft, decorative rhythm that looks good even from across the room. Build trays from cardstock glued onto bookboard so they hold a shallow “nest” shape for faux stems, then add tiny label cards so your craft room feels organized instead of random. Use cream paper with a warm brown ink label style for an artsy, cozy look that matches most craft furniture.
Watch outDon’t use thin paper alone; it collapses and the scallops lose their shape.
Pro tipMake three trays at once with the same scallop spacing. Stagger their heights by 4-6 inches so they look curated rather than lined up.
2. Book Spine Color-Block Organizer Wall
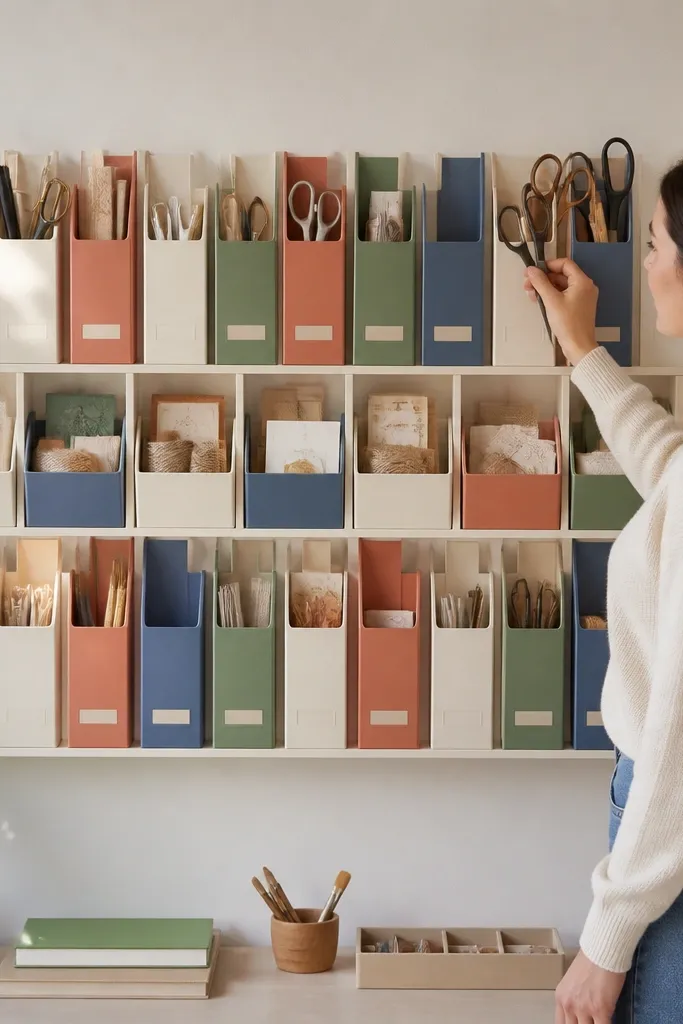
Start by measuring the tallest item you need to store (for example, 9 inches for a pair of scissors). Cut bookboard strips to that height plus 1 inch for the base, then glue a thin spine “cap” strip across the top like a book jacket. Cover fronts with matte cardstock in color-block panels (use a ruler to keep edges straight), then seal. Mount the strips in a grid above your desk, leaving 2-3 inches between each holder so items slide in easily.
If your craft room storage looks chaotic, this turns it into a clean gallery grid. The book spine motif is visual shorthand — it looks like a set of “decor shelves” even though it’s paper. You’ll create slim vertical holders for scissors, tape, or small craft bins, then label each one like a book title. Choose 4-6 color blocks that match your paper stash (cream, black, sage, terracotta) so the wall ties into your desk and shelving.
Watch outDon’t crowd the grid — tight spacing makes it look messy instead of organized.
Pro tipWrite labels with a fine-tip white gel pen on dark cardstock. It looks sharp and stays readable after sealing.
3. Paper Rope Coiled Candy-Stripe Storage Basket
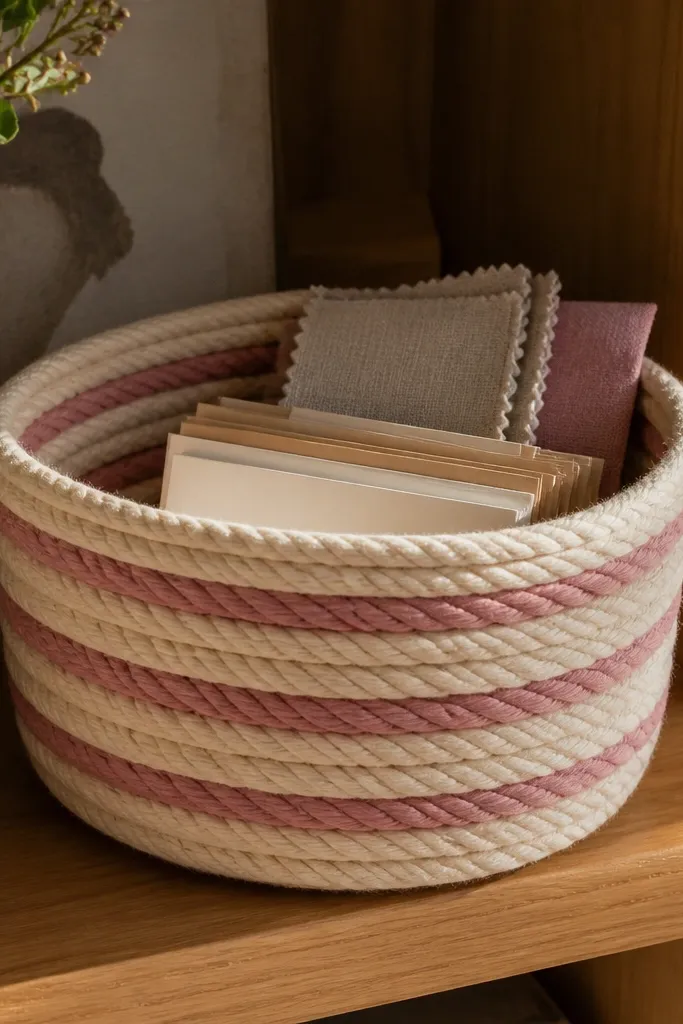
Make “paper rope” strips by twisting long strips of cardstock around a thin dowel or using a paper strip scorer to keep them consistent. Glue the coil base from the center outward using a hot glue gun, alternating cream and terracotta strips for the stripe effect. Once you reach your target size (about 9-10 inches wide), add a thicker rim by doubling the last 2-3 turns. Seal lightly with a matte spray sealer so the surface doesn’t get shiny and fingerprints don’t show.
This one looks like a designer basket, but it’s paper-based and easy to scale. The candy-stripe pattern gives you a strong focal point on a shelf, and the coil structure hides clutter by shaping it into a basket form. Use it for paper scraps, mini envelopes, or small fabric swatches. It’s ideal when you want storage that looks decorative, not utilitarian.
Watch outSkip glittery paper; it flakes when you seal it.
Pro tipKeep stripe changes every 4-5 coils. Too frequent and it looks chaotic; too spaced and it loses the candy effect.
4. Acrylic-Backed Paper Gallery Frames for Tools
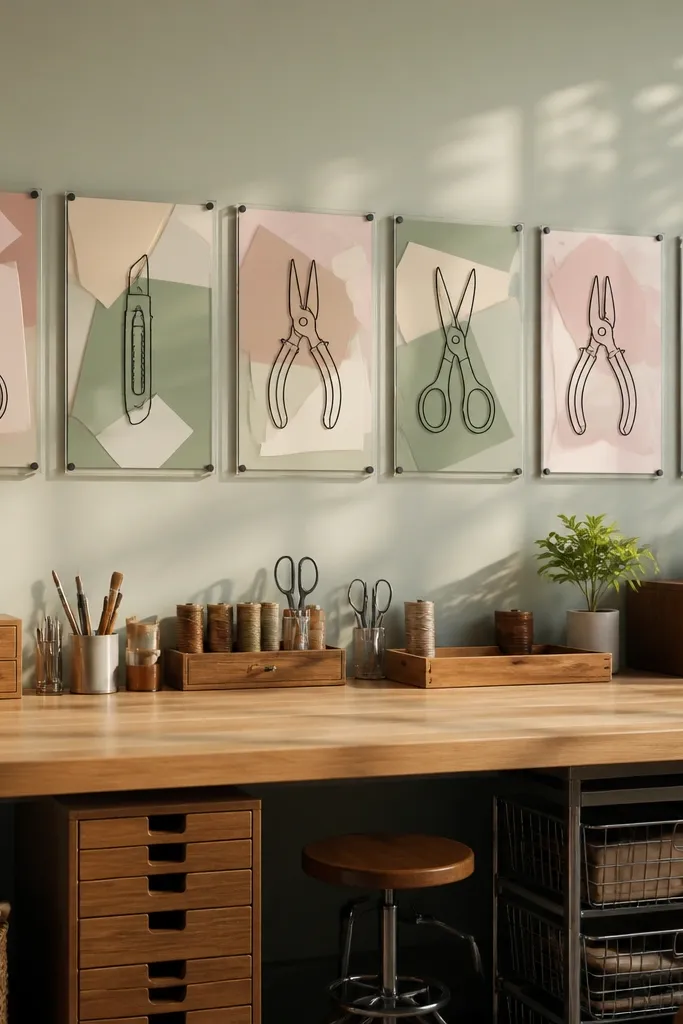
Buy a pack of small frame boxes (like 5x7 or smaller) or use cheap frames you can open. Cut backgrounds from cardstock — either solid cream or subtle dot paper — then glue tool outline silhouettes on top using a die-cut silhouette or hand-traced shapes. Create labels on narrow strips of paper and seal them with matte Mod Podge. Put acrylic or clear plastic inside, close the frame, and hang with picture hooks at eye level (about 56-60 inches).
Turn your most-used tools into wall art with frames that look like a tiny museum exhibit. This idea works because it’s flat and controlled: each tool has a spot, a label, and a background color. Use paper cutouts for tool silhouettes or simple line drawings, then mount the frames near your work zone so you can “read” your setup. Choose a consistent frame color like black or brushed brass so the set looks cohesive.
Watch outDon’t mix frame colors; it breaks the gallery look instantly.
Pro tipUse the same label font style across every frame by making one label template and replicating it.
5. Folded Paper Accordion Supply Organizer
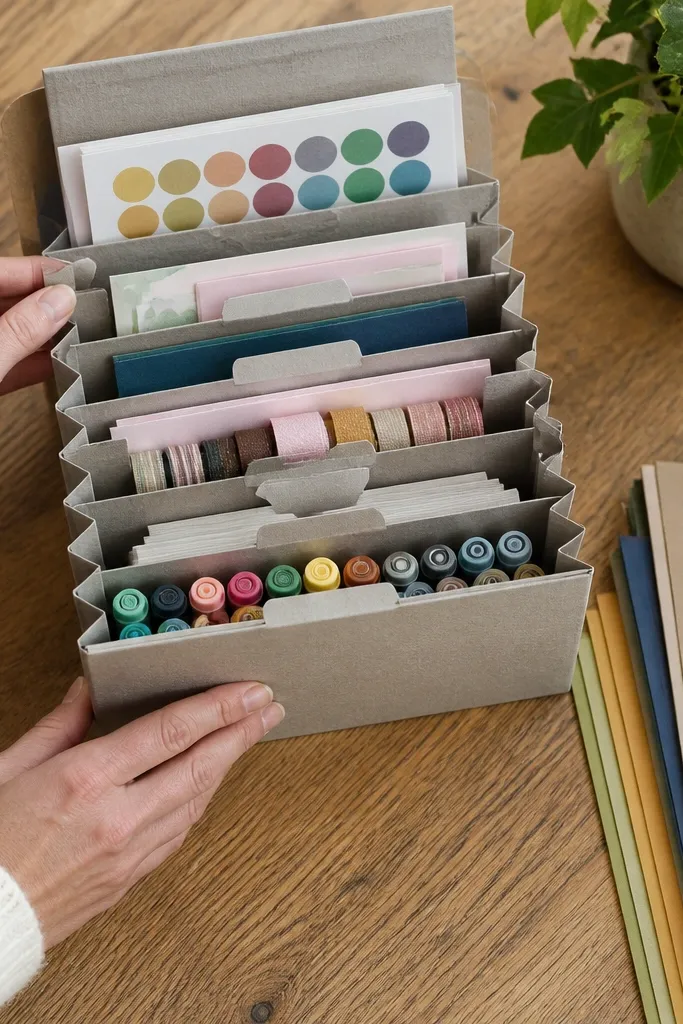
Cut a long rectangle from thick cardstock (around 20 inches by 10 inches for a medium organizer), then score and fold it into equal accordion segments (about 2.5 inches each). Glue the accordion edges to a base panel so it stands upright, then add a front cover strip. Create tabs by cutting triangles or rounded rectangles from accent cardstock and gluing them to the top of select compartments. Seal with matte Mod Podge and let it dry flat before you load it.
This is a desk-surface saver that still looks pretty. The accordion fold creates neat compartments without needing plastic dividers, and the tabs make it feel intentional instead of like a craft you made once. Use it for sticker sheets, ribbon, marker caps, or small wrapping paper samples. Make it in a neutral base with one accent color tab set so your desk stays calm even when your supplies aren’t.
Watch outDon’t skip scoring; without crisp fold lines, the accordion buckles and looks sloppy.
Pro tipLabel only the compartments you actually use weekly. Too many labels makes it look cluttered.
6. Paper-Quilt Hex Wall Hanging
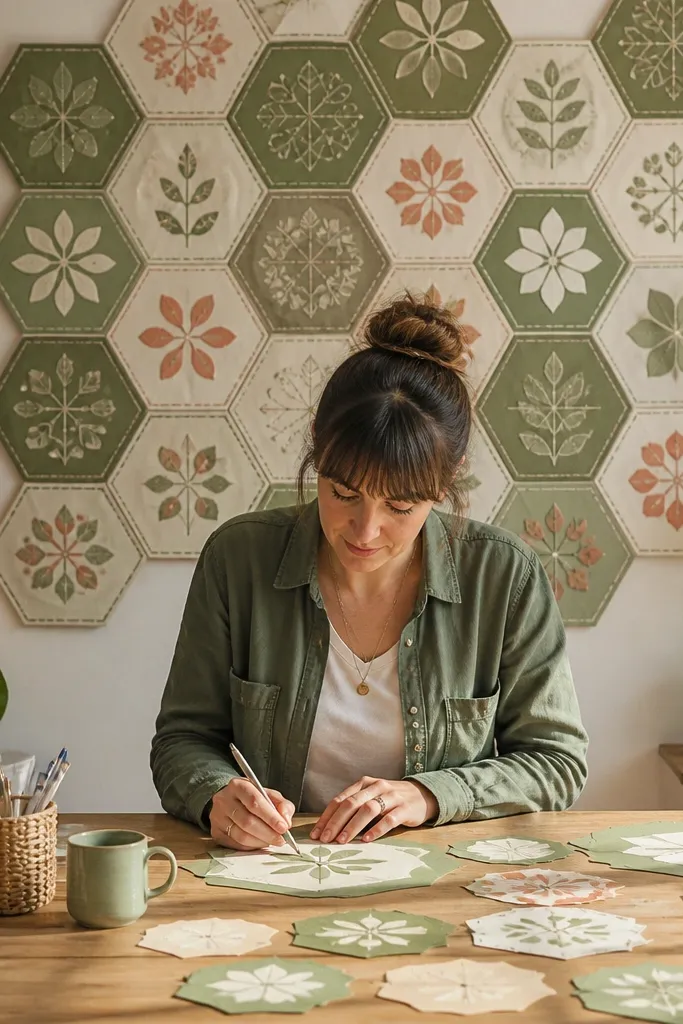
Hexagon patterns look cozy and organized, like a quilt panel, but you’re using paper so it stays lightweight. The stitched-look lines (made with white gel pen or faux stitching tape) give it texture without fabric. Hang it behind your craft table or above storage so it adds warmth and hides wall imperfections. Choose 10-12 hex colors that already exist in your paper stash so it looks collected, not forced.
Cut 12-18 hexagons from cardstock using a template (about 3-4 inches across flats). Arrange them on a flat surface and trace a simple “stitch” line on the seam edges, then connect them using thin strips of paper tape on the back. Add a thin backing sheet (foam sheet or cardstock) so it hangs flat. Seal lightly with matte Mod Podge and mount with a hidden hanging rod or two command-style picture strips.
Use one consistent “thread” color for the stitch effect — white or off-white looks best on colored hexes.
Don’t over-seal; heavy glue can warp the hexes and make the pattern ripple.
7. Layered Paper Arch Backdrop for Craft Desk
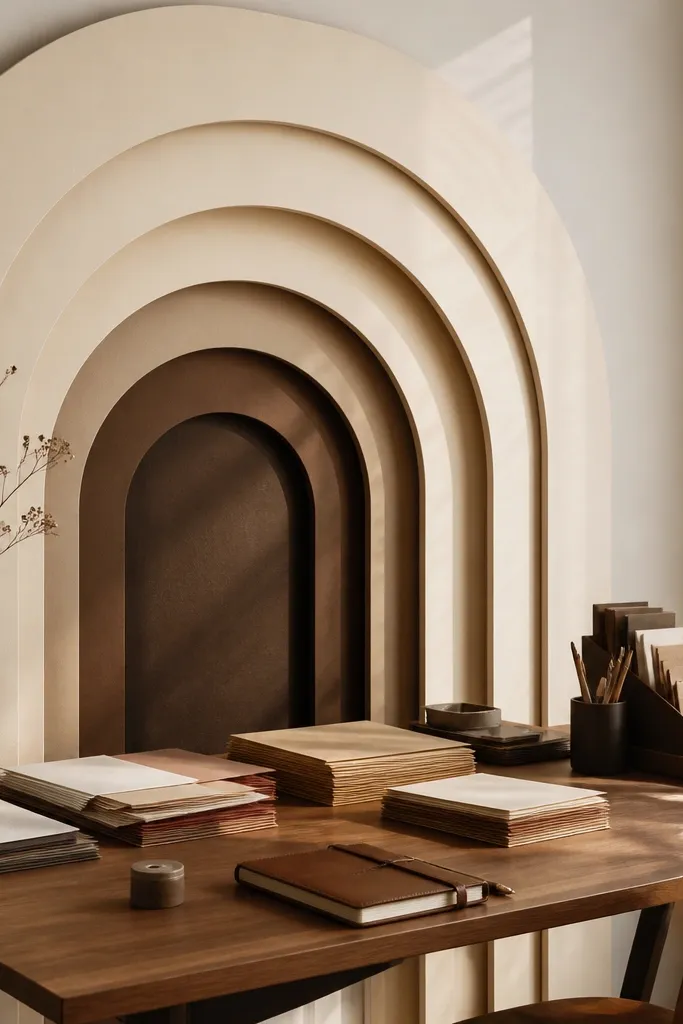
Cut three to five arch layers from bookboard: start with the largest at about 22 inches wide and 14 inches tall, then reduce each layer by 2 inches. Cover each layer with matte cardstock, keeping the inner edge crisp and straight. Glue layers together with 1/4-inch spacing so you get visible depth. Mount the back layer first on the wall, then add a simple shelf-style ledge or two anchor points so it sits level behind your desk.
A desk corner needs a backdrop, and layered arches do it without taking up space. The arch shape frames your work area, making photos look cleaner and making the corner feel finished. This works especially well if your desk sits against a blank wall and you want a “set” look. Use cream arches with black or deep brown layering lines so it reads modern but still warm.
Watch outDon’t use glossy paper; glare makes the layered edges look cheap.
Pro tipAdd a thin strip of textured paper (like linen-look) to the top arch only. One texture draws the eye without clutter.
8. Paper Punch Circle Garland for Cable-Free Lighting
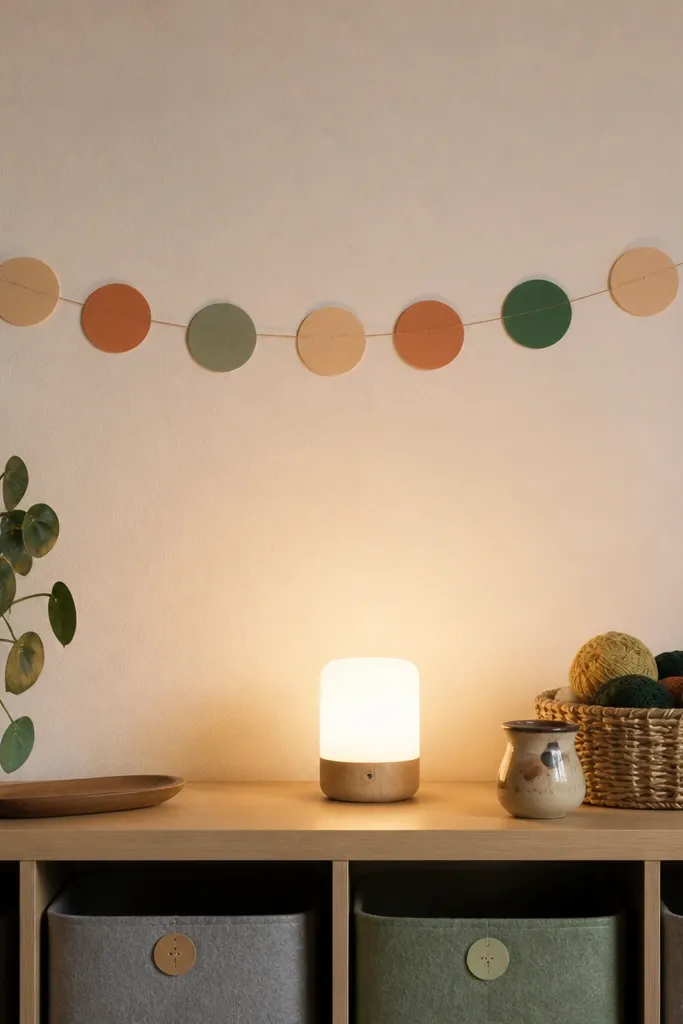
Punch circles using a 1.25-inch and 1.5-inch paper punch for size variation. Thread them onto thin twine with a small needle, or glue circles to a ribbon strip for a flat garland. Mix colors in a repeating pattern like cream-black-terracotta so it looks designed. Hang with two removable hooks across a 36-48 inch span, then lightly mist with matte spray sealer so edges stay crisp.
This is simple, but it turns a boring wall into a soft, decorative backdrop. Circle garlands look especially good in craft rooms because they mirror the shapes of your storage bins and labels. You can hang it above a pegboard, along a shelf edge, or behind a small light so the paper acts like a gentle visual frame. Choose 60-120 circles in 2-3 tones, then space them so the garland feels airy, not crowded.
Watch outDon’t hang it too low. Above eye level reads intentional; at desk height it turns into clutter.
Pro tipUse thicker cardstock for the circles you hang closer to eye level; thin paper looks flimsy.
9. Mini Paper Swatch Frame Board for Color Planning
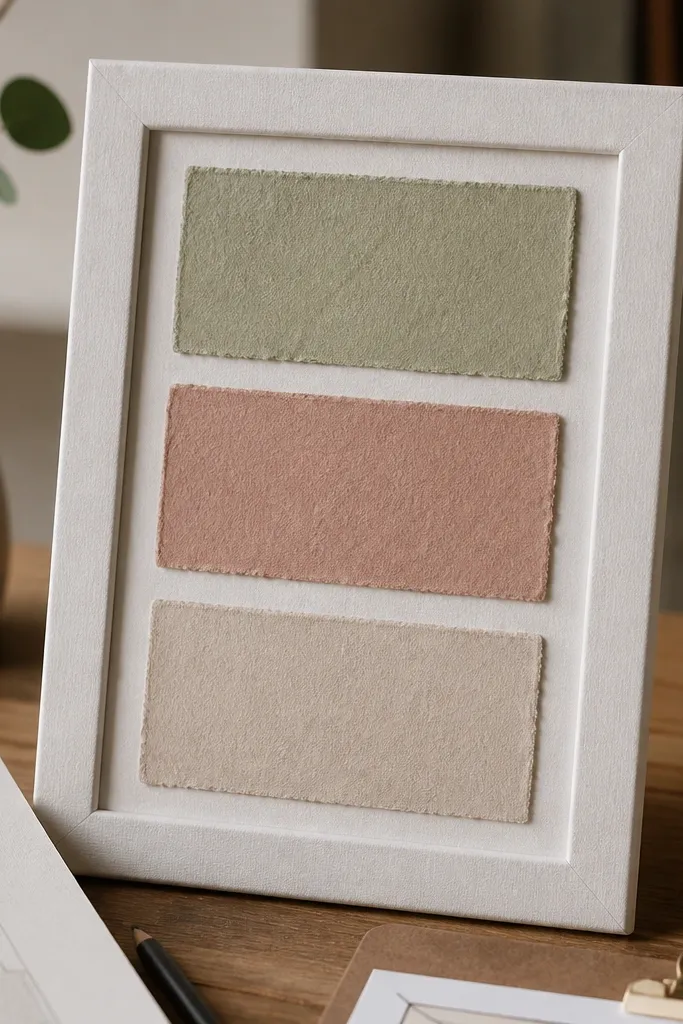
Use a large picture frame or stretched canvas frame (about 16x20). Cover the backing with felt or thick cardstock, then cut paper swatches into consistent sizes, like 2x3 inches. Glue swatches in a grid and add a small label strip under each row. Seal lightly with matte spray to prevent smudging, then mount on the wall near your paper storage or desk.
If you’re always digging through paper stacks, this gives you a visual system. The frame board format makes it look like art, but it’s actually a color planning tool. Keep swatches for your most-used palettes and label them by project type. It’s perfect for craft rooms where you need quick decisions and want your desk area to look neat.
Watch outSkip loose tape swatches. They peel and make the board look messy within weeks.
Pro tipGroup swatches by finish (matte, shimmer, textured) so you can pick the right look faster.
10. Paper Tray Liners That Make Open Shelves Look Styled
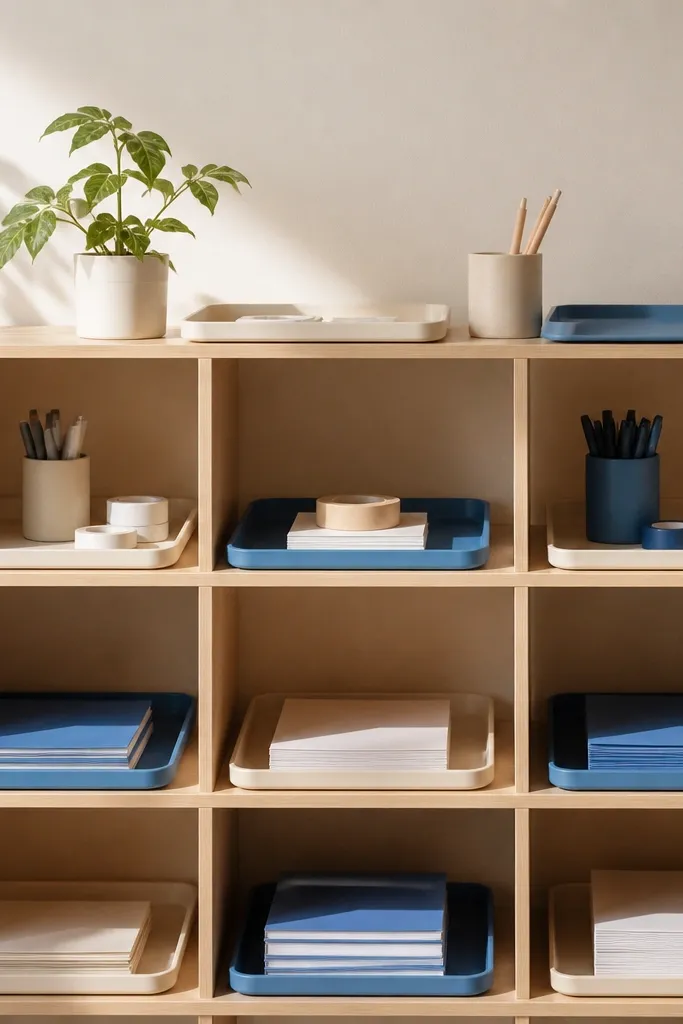
Open shelving can look messy even when you’re organized because everything sits on the same visual plane. Paper tray liners create a “floor” for each compartment, and that instantly makes your shelf look styled. Use them for drawer inserts, bin bottoms, or shallow trays to hold markers, tape rolls, and small paper stacks. Pick a pattern with clean edges — small dots, subtle stripes, or solid blocks — and repeat it across multiple shelves.
Measure one shelf compartment width and depth, then cut a liner from thick cardstock or bookboard with a 1/2-inch overhang on each side. Cover the top surface with your pattern paper and fold or wrap the overhang to the sides, gluing with PVA. Seal the surface with matte Mod Podge in two thin coats so it resists rubbing. Repeat for each compartment and keep the liner height consistent (about 1 inch) so the shelf looks uniform.
Use one pattern for the shelf floor and one solid accent for the bin fronts. It keeps the look balanced.
Don’t mix random patterns across compartments; it turns the shelf into visual noise.
11. Paper Rolled-Up Ribbon Storage with Label Bands
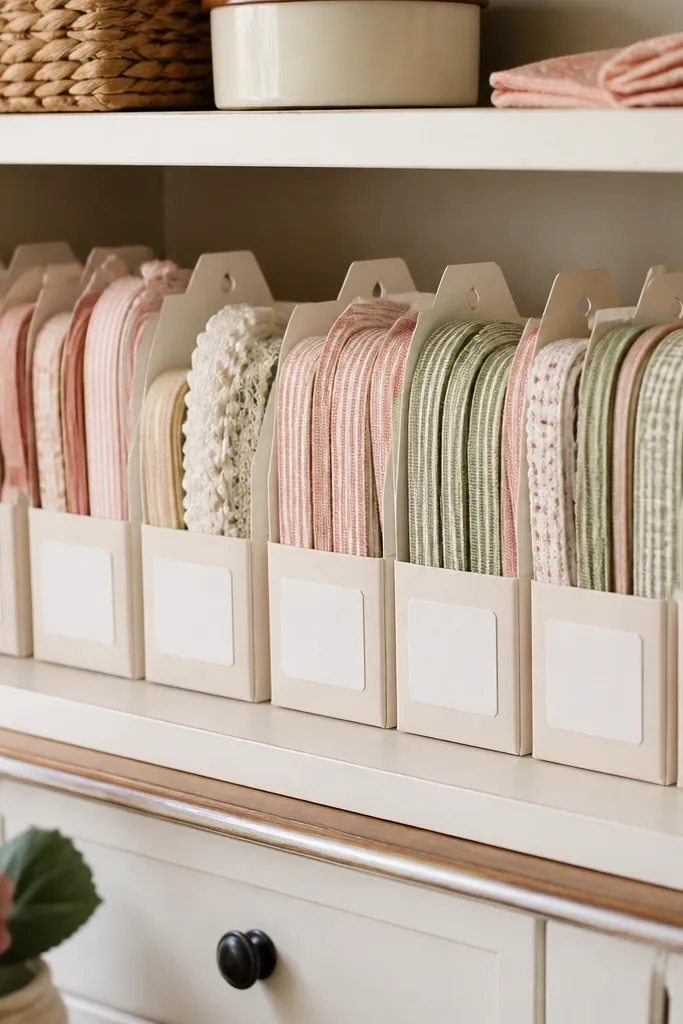
Ribbon and trim storage looks terrible when it’s just stuffed in bins. This paper band system turns small rolls into a tidy set you can grab quickly. The bands also hide the “messy middle” where ribbon ends stick out. It’s ideal for craft rooms where you wrap gifts, do card-making, or work with scrapbooking embellishments.
Roll ribbons tightly around a cardboard core (a toilet paper tube cut down works), then slide a paper band around each roll. Make bands from cardstock strips about 3 inches tall and wrap them around the roll, gluing the overlap on the back. Add a label strip on the front with ribbon color name or width. Stack rolls upright in a shallow tray or line them on a shelf with the bands facing out.
Write width numbers on labels (like 1/4 in, 3/8 in). It saves time when you’re matching trims to projects.
Don’t use thin paper bands; they collapse and the rolls start to slide.
12. Paper Mason Jar Style Organizer for Pens and Tools
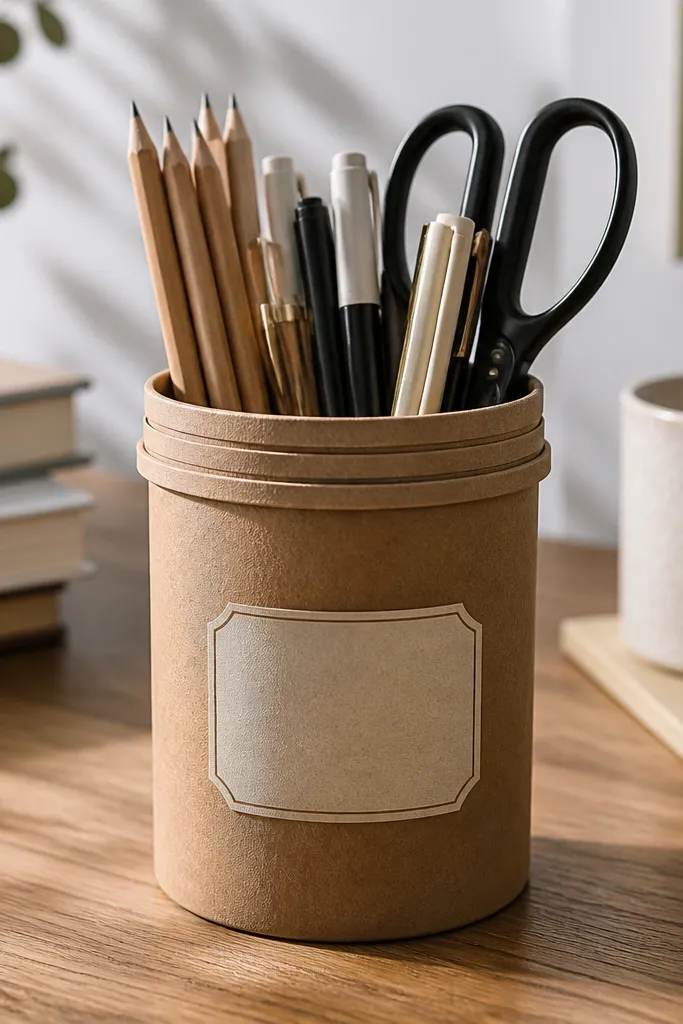
You get the mason jar look without needing a real jar, and it fits craft rooms where you want clean desk styling. The “lid” detail makes it feel intentional, and the cylindrical shape helps pens and tools stay visible. Use it on your desktop as a pen cup replacement, or place two side-by-side for scissors and markers. Pick a neutral jar body with a colored label band to match your paper palette.
Build a cylinder from bookboard by rolling a rectangle into a tube, then glue and clamp until dry. Cut a circle base from bookboard and glue it in, then make a “lid” ring from a thicker strip of board. Cover the cylinder and lid with matte cardstock, then add a label band around the middle using a contrasting color. Seal everything with matte Mod Podge and let it cure before loading pens.
Add a paper divider inside if you store markers. It keeps caps from mixing and makes the jar look neat.
Don’t skip the base reinforcement; a weak bottom makes the cylinder wobble.
13. Paper Tassel Garland for Pegboard Edges
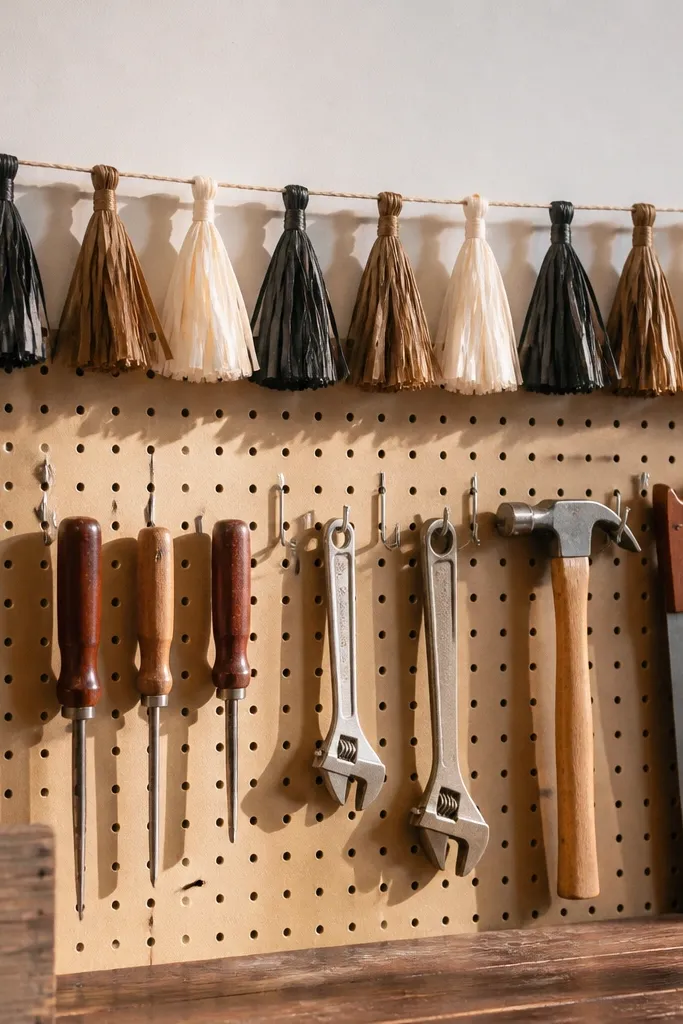
Pegboards can feel harsh — lots of straight lines, metal hooks, and tool clutter. Paper tassels soften the edge and give you a decorative boundary that makes the whole wall look designed. This works best along the top or side of a pegboard where your eye catches it when you walk in. Use short tassels in 2-3 tones and keep them consistent in length so it looks like a deliberate trim, not random craft scraps.
Cut strips of cardstock about 1 inch wide and 6 inches long, then fringe one end by cutting small slits up to about 1 inch from the top. Roll each strip around a thin dowel or pencil tip to form a tassel curl, then glue the top to a narrow ribbon strip. Attach the ribbon to the pegboard frame using small clips or zip ties so you can remove it later. Seal lightly with matte spray so the fringes don’t fray.
Use slightly thicker cardstock for the tassels at the ends of the garland. They frame the composition better.
Don’t make tassels longer than 6-7 inches; long tassels snag on bags and sleeves.
14. Paper Frame Shadow Box for Sticker Sheet Display
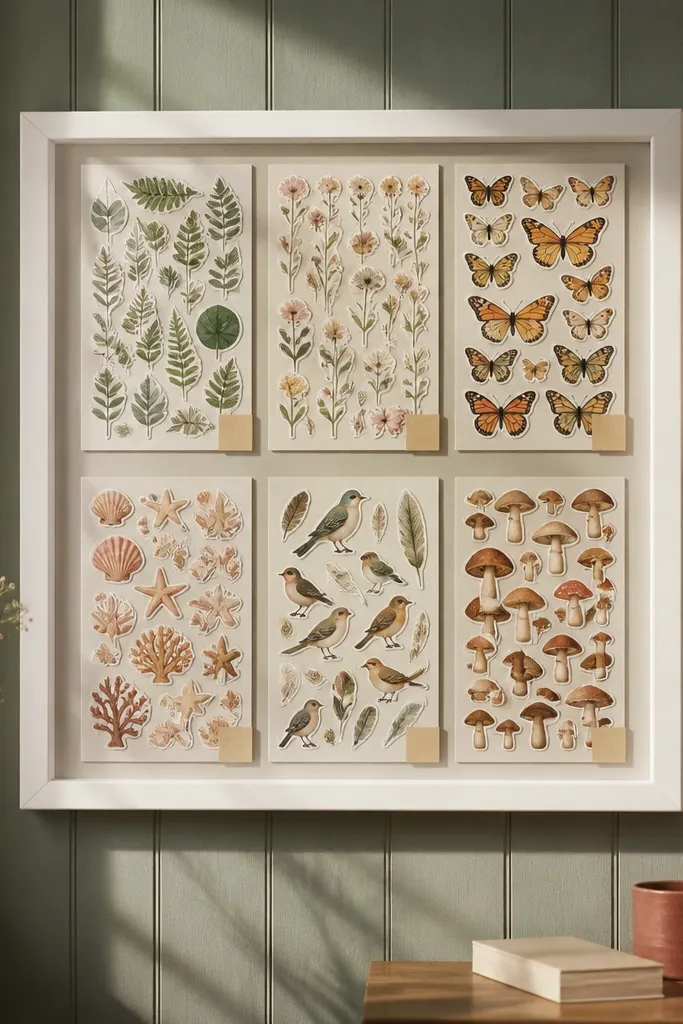
Sticker sheets and die cuts look chaotic when stacked. A paper shadow-box frame gives you a clean, front-facing display where everything looks curated. It also protects your best designs from dust, and the label cards keep you from forgetting what you own. This is a great choice when your craft room has limited counter space and you want wall storage that still looks cute.
Use a shallow shadow-box frame or a deep picture frame with removable backing. Cut a backing panel from foam sheet or bookboard and cover it with a solid matte cardstock background. Mount sticker sheets flat with small paper tabs at the corners so they don’t pop up, then add label strips at the bottom edge of each section. Seal the paper background only (don’t soak near stickers) and hang the frame near your work desk.
Group sticker sheets by theme (holidays, florals, animals) and keep each theme in one vertical column.
Don’t cram too many sheets; leave at least 1/2 inch between edges so the display reads clean.
15. Paper Origami Star Mobile for Ceiling Corner Glow
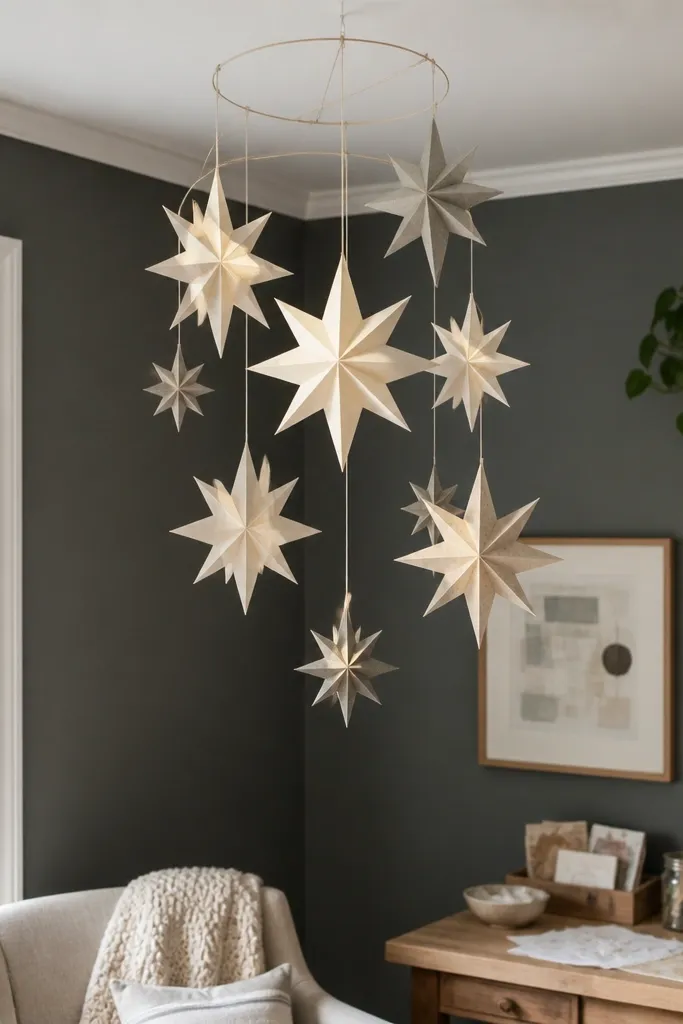
A ceiling corner is often empty, and paper mobiles fill that space with movement and light texture. Origami-style stars look crisp and graphic, and they photograph well because they catch room light from different angles. Hang it near a reading nook or above your craft table so it becomes a calm visual distraction while you work. Keep the palette limited and finish with matte sealer so the paper doesn’t look dusty.
Fold or cut star shapes from thicker origami paper or cardstock, aiming for 2 sizes (like 3 and 4 inches). Punch a tiny hole at the top point of each star and attach to thin fishing line or clear thread in a staggered pattern. Anchor the mobile to a ceiling hook using a small wire loop, then balance lengths so the stars hang at different heights across a 24-30 inch span. Seal the stars lightly with matte spray after assembly so they keep their edges.
Make the mobile asymmetrical with 1-2 larger stars and more smaller ones. It looks intentional and less “toy-like.”
Don’t hang it too close to overhead lights with heat; paper can yellow over time.



