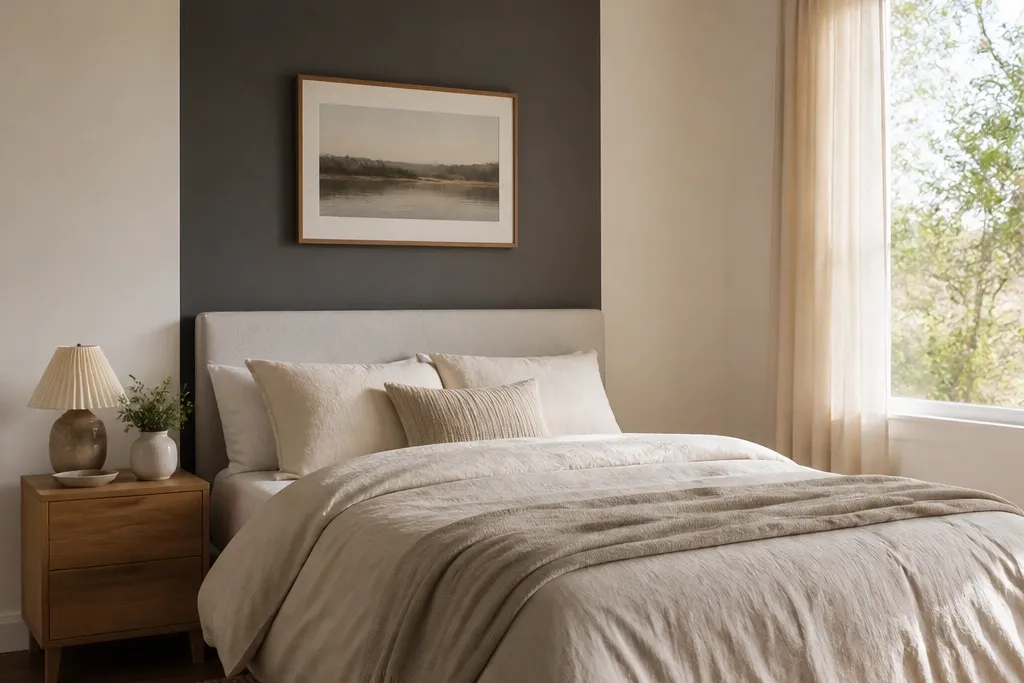

1. Warm white paint with a soft charcoal headboard backdrop
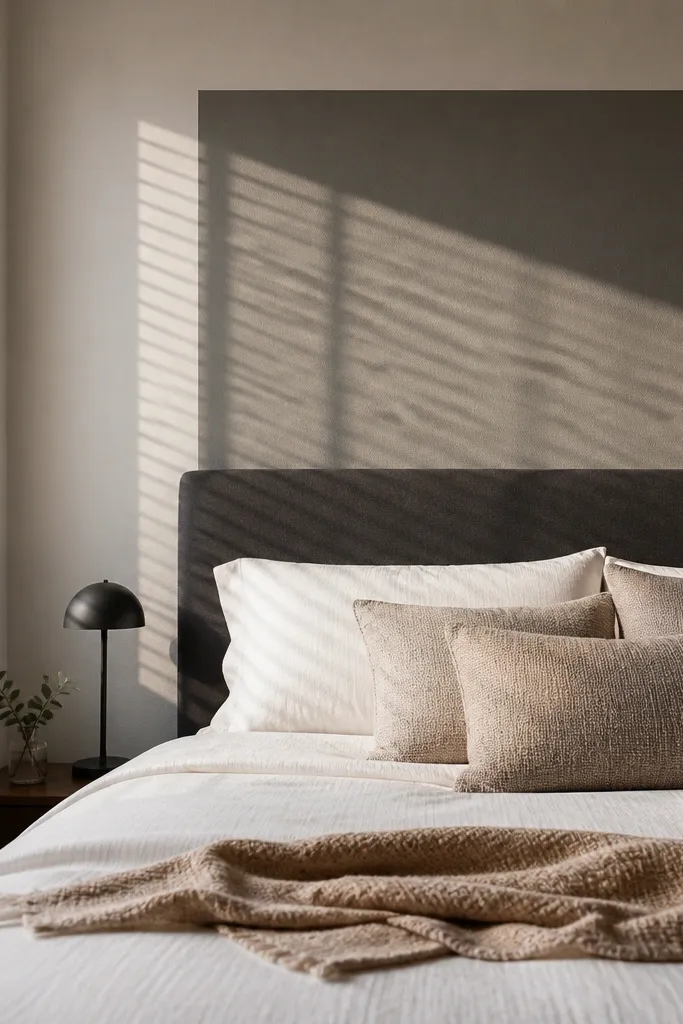
This is the cleanest “designer focal point” when you want calm but not boring. Paint the main wall a warm white, then create a charcoal backdrop rectangle behind the headboard area. The contrast makes the bed the hero, and the warm white keeps the room from feeling harsh. Use matte paint so small wall bumps don’t show through. This works best in bedrooms with neutral bedding and simple furniture, because the wall adds structure without competing with patterns.
Step 1: Measure from the floor to the top of your headboard. Mark a rectangle centered behind the bed at about 60-70% of the bed width, then tape the edges with painter’s tape. Step 2: Paint the charcoal rectangle with a matte interior wall paint; use a small roller for even coverage and cut in with a brush at the tape lines. Step 3: Let it dry fully, remove tape carefully while paint is still slightly tacky for the cleanest edge. Expect $25-60 for paint per room depending on coverage and brand.
If your bed is off-center, align the rectangle to the headboard, not the bed frame, so the wall looks deliberate.
Avoid glossy charcoal paint — it highlights uneven drywall and makes the whole wall look less smooth.
2. Black-and-cream vertical stripe wallpaper behind the bed
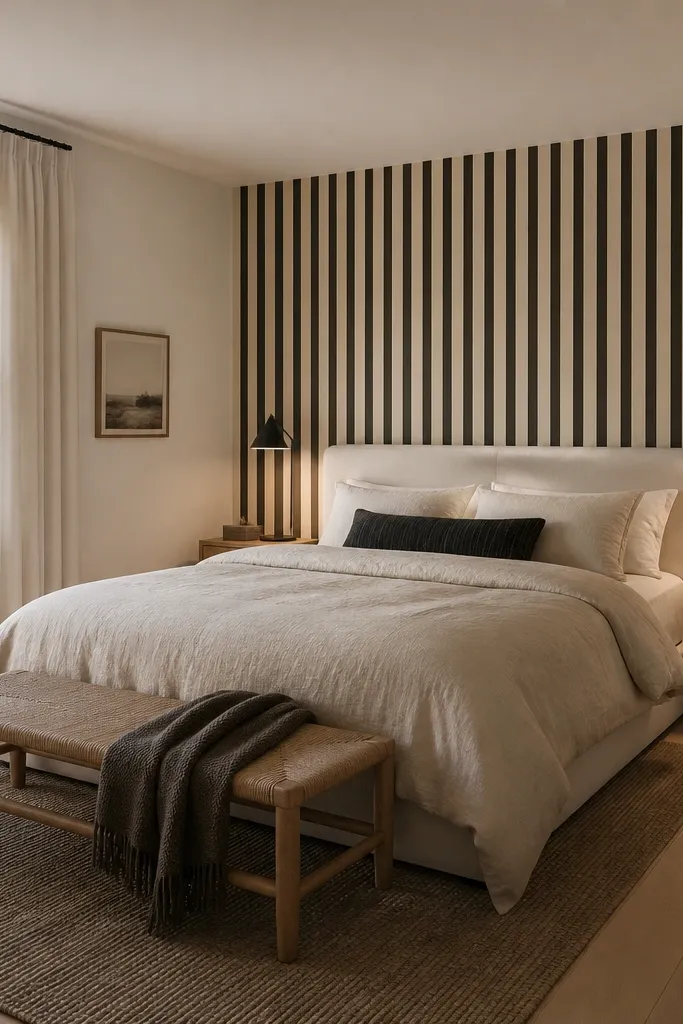
Vertical stripes make bedrooms feel taller and more “finished,” especially when the rest of the room is plain. Choose a black-and-cream stripe so it reads graphic without turning into a busy pattern. Hang it only on the headboard wall so you get one strong focal point instead of stripe overload. The cream base softens the contrast, which matters in bedrooms where you want rest, not drama. This is great for renters because removable wallpaper gives impact without paint commitment.
Step 1: Measure the wall height and wall width, then buy wallpaper with enough extra for pattern alignment. Clean the wall with a gentle degreaser and let it dry completely, then start at a plumb line marked with a level. Step 2: Apply panels from the center outward, smoothing with a plastic squeegee to prevent bubbles near outlets. Step 3: Trim around the edges and outlets with a sharp craft knife. Plan on 2-4 hours for a typical bedroom wall and about $60-120 for wallpaper depending on brand and coverage.
Match the stripe to your headboard center by aligning the first panel so the thickest stripe lands where your pillow line sits.
Don’t skip a plumb line — off-straight stripes look sloppy fast.
3. Peel-and-stick 3D geometric panels in warm greige
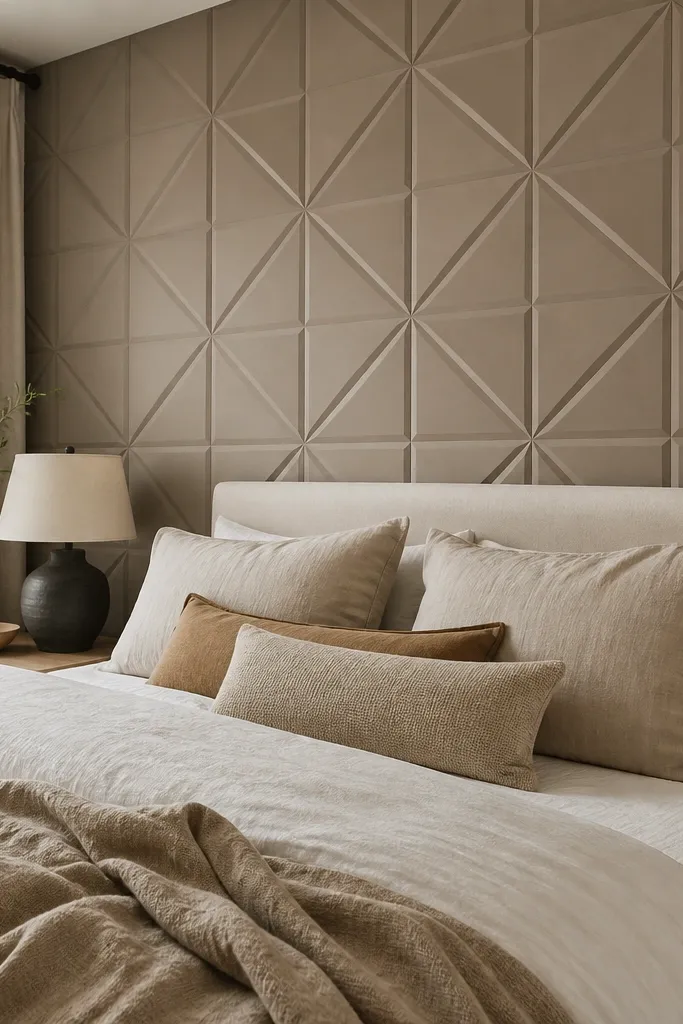
If you want a “wow” wall without painting, 3D panels are the easiest way to add depth. Pick a warm greige so the texture shows in shadow and highlights but still pairs with most bedding colors. The geometric pattern is photogenic because it creates small gradients as the light changes through the day. Keep the rest of the room simple so the wall doesn’t become visual noise. This works well when your bedroom has a lot of flat surfaces like white walls, light wood furniture, or minimal decor.
Step 1: Measure the accent wall area and map the panel layout so seams land at least 6 inches away from the bed’s centerline. Clean the wall thoroughly and let it dry; adhesive panels stick best on smooth, dust-free surfaces. Step 2: Start in the center row, press each panel firmly along edges, and use a straightedge to keep rows aligned. Step 3: Cut around outlets with a utility knife and test-fit before pressing permanently. Budget $80-200 depending on panel size and how many you need.
Use a foam roller lightly over each panel seam — it improves adhesion and keeps edges from lifting.
Avoid installing over peeling paint or textured dust — the panels won’t bond evenly.
4. Wood slat accent wall with a 2-tone stain look
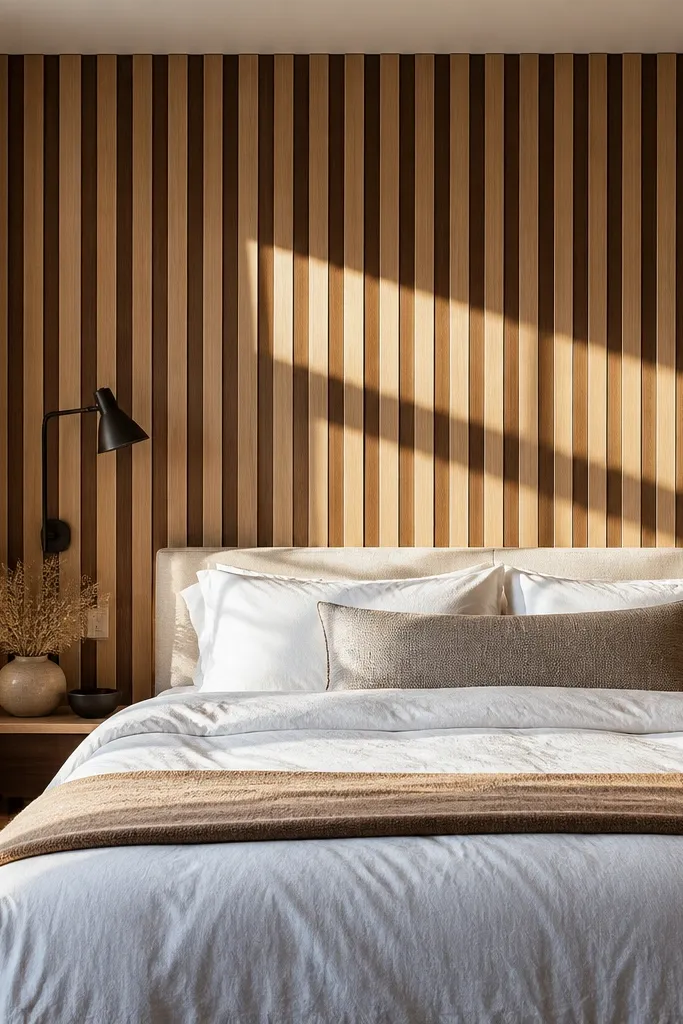
Wood slats are the quickest path to that “expensive hotel bedroom” feel. A two-tone stain look adds depth without needing complicated design — for example, alternate light oak and medium walnut slats. The slats catch light and create a soft shadow grid, which makes the wall look styled even with plain bedding. Go for a matte finish so it looks natural, not shiny. This is perfect if your bedroom already has wood furniture and you want the wall to match the warmth.
Step 1: Choose pre-made slat panels or slats on a backing rail, and decide your slat spacing. A beginner-friendly spacing is 1.5-2 inches between slats, with slats about 2.5-3 inches wide. Step 2: Mark studs or use wall anchors, then install panels horizontally or vertically centered behind the bed; keep the top edge aligned with headboard height. Step 3: Stain or seal if your slats are unfinished, using two coats and sanding lightly between coats. Expect $150-400 depending on material and whether you choose prefinished panels.
Paint or stain the wall behind the slats the same color as the darkest slat so shadows look intentional.
Don’t skip leveling — uneven slat lines read instantly in photos.
5. Fabric wall paneling in oatmeal with a box-stitch pattern

Fabric panels make a bedroom feel softer, and they photograph beautifully because the texture is subtle rather than flashy. Oatmeal or warm beige looks inviting, and box-stitch lines add structure that reads clean from across the room. This accent wall is also a practical choice if your room has echo or harsh lighting — fabric visually absorbs some sound and reduces glare. Pair it with crisp white bedding and simple wood tones for a calm focal point. It’s a great pick if you want a high-end look without a bold color wall.
Step 1: Measure the wall behind the headboard and buy modular fabric panels sized to cover that area. Use a stud finder, then install a thin backing rail or directly screw into studs depending on the panel system. Step 2: Start with the center panel, align edges, then work outward. Step 3: If panels have seams, keep the seam line centered so the wall looks symmetrical. Cost is typically $200-600 depending on panel size and thickness.
Choose panels with washable covers or removable inserts if your bedroom gets dust or pets.
Avoid glossy fabric finishes — they catch overhead light and look shiny in photos.
6. Bold navy half-wall with a white chair-rail line
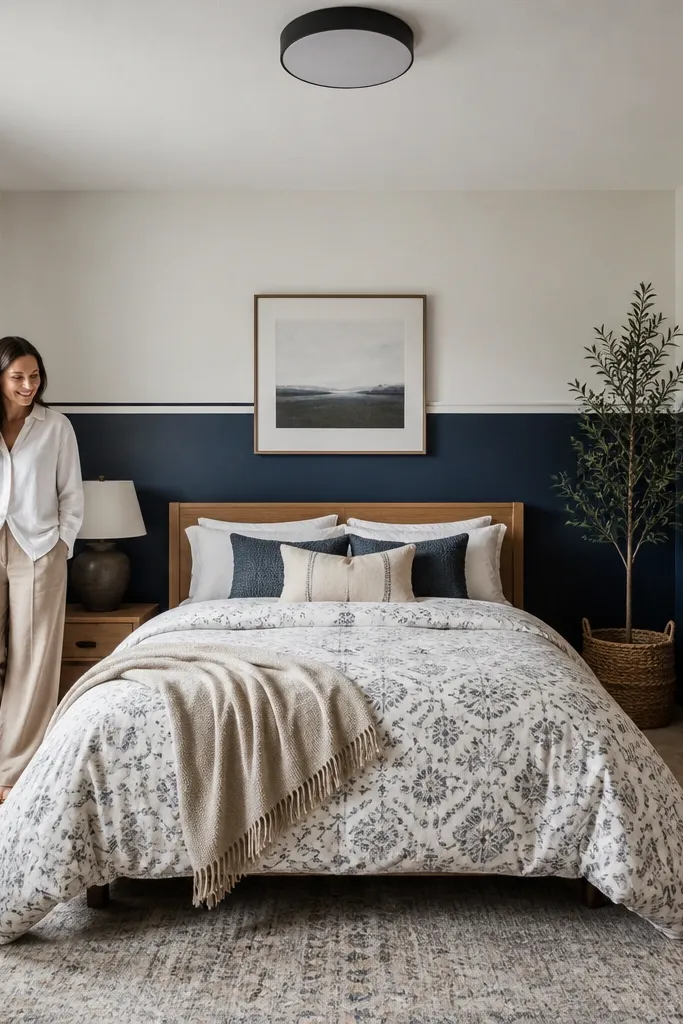
Half-wall accents are underrated because they look tailored and they’re easier to paint cleanly. Navy gives you depth and a dramatic focal point, while the white chair-rail line keeps the look crisp and prevents the wall from feeling too heavy. This works especially well in bedrooms with lower ceilings or patterned bedding, because it adds color without covering everything. The horizontal line also helps balance tall headboards. Choose matte navy for a smooth, cozy finish.
Step 1: Decide the height of the navy section, usually about 48-54 inches from the floor for a typical bedroom, then mark the line with a level. Step 2: Tape both sides of the chair-rail line and paint the navy first, then paint the trim/rail line white. Step 3: Remove tape after the paint skins over but before it fully cures for the sharpest edge. Plan on $40-100 for paint and tape, plus $10-30 if you add a simple vinyl or MDF chair rail.
If your bed is tall, raise the navy section slightly so it reaches the lower third of the headboard.
Don’t eyeball the height — a crooked line makes the whole bedroom look DIY.
7. Travertine-look peel-and-stick tiles in a stacked layout
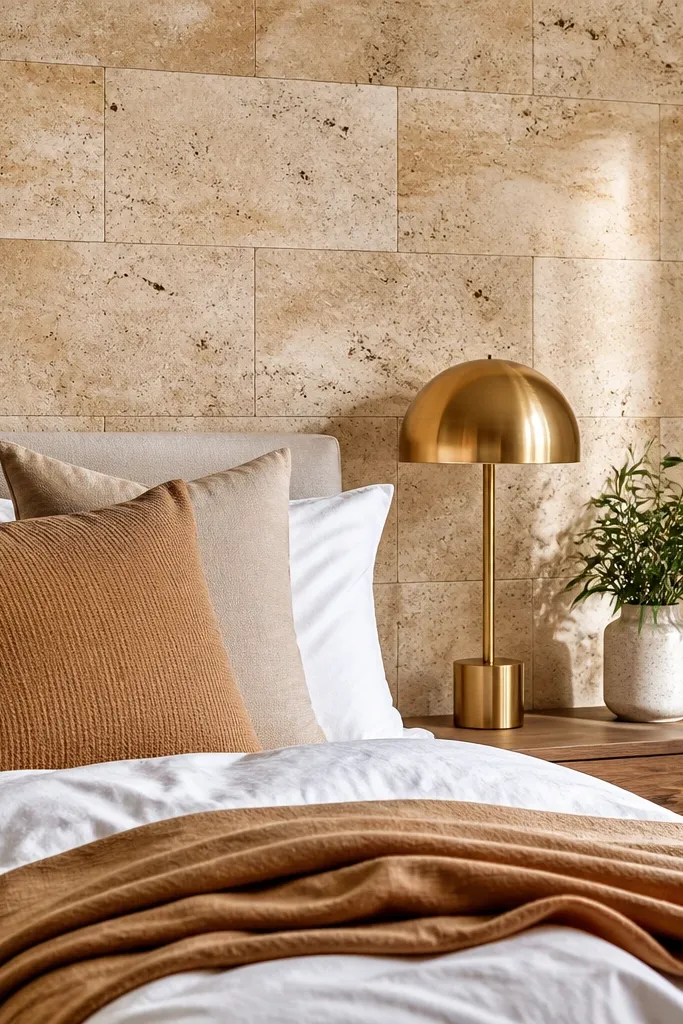
Tile is a shortcut to “high-end” because it has built-in variation and realistic stone texture. Travertine-look tiles in warm beige create a spa feel without going cold. A stacked layout (short edges aligned like bricks but with tile proportions) looks modern and reads clean in photos. Use this when you want a focal point that hides small wall imperfections better than paint. It’s best for bedrooms where you already have warm metals or wood — it ties the room together.
Step 1: Clean and smooth the wall, then lay out a dry run from the center so tile cuts land where they won’t show behind pillows. Step 2: Peel one tile at a time and press firmly, using a grout-line guide if the tiles have printed edges. Step 3: Cut around outlets with a tile trimming tool or a sharp utility knife for lighter tile sheets. Budget $70-180 for a typical accent wall depending on tile size and thickness.
Pro tipUse a light sand sponge on any edges that catch, so the seam lines stay flush.
Watch outAvoid applying over glossy paint — adhesive tiles won’t stick as well.
8. Monochrome mural effect with a simple gradient wash
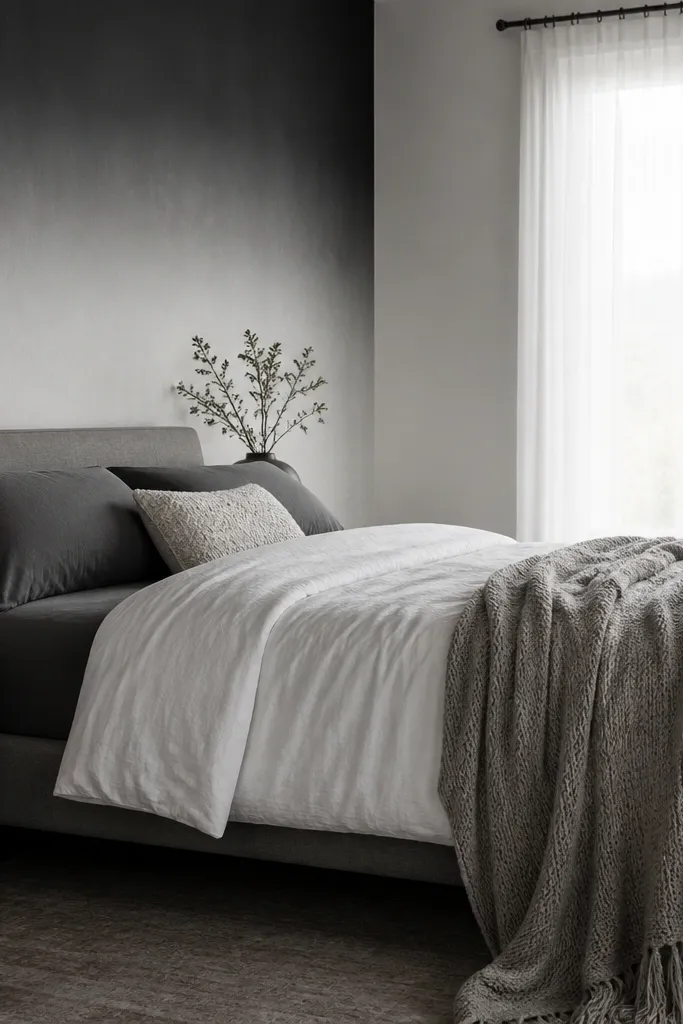
You don’t need a complex mural to get that editorial look. A monochrome gradient wash creates depth and moves the eye, especially behind a bed where pillows and bedding already create visual layers. Choose one color family like deep olive to sage, or charcoal to light gray. Keep the gradient smooth and vertical so it feels intentional and modern. This works best when your bedding is solid or lightly textured, because the wall does the visual work.
Step 1: Paint the entire wall your lighter base first, then tape a vertical guide where you want the darkest area to start. Step 2: Use a sponge roller or large sea sponge to dab the darker paint in a controlled fade from top down, blending edges as you go. Step 3: Feather the transition with a clean dry roller to avoid harsh lines. This is a $25-80 paint job, depending on how many gallons you need.
Pro tipTest the gradient on a spare piece of cardboard under the same light as your bedroom before committing to the wall.
Watch outDon’t use a brush for the fade — brush strokes show and make it look amateur.
9. Large-scale framed paneling look with MDF rectangles
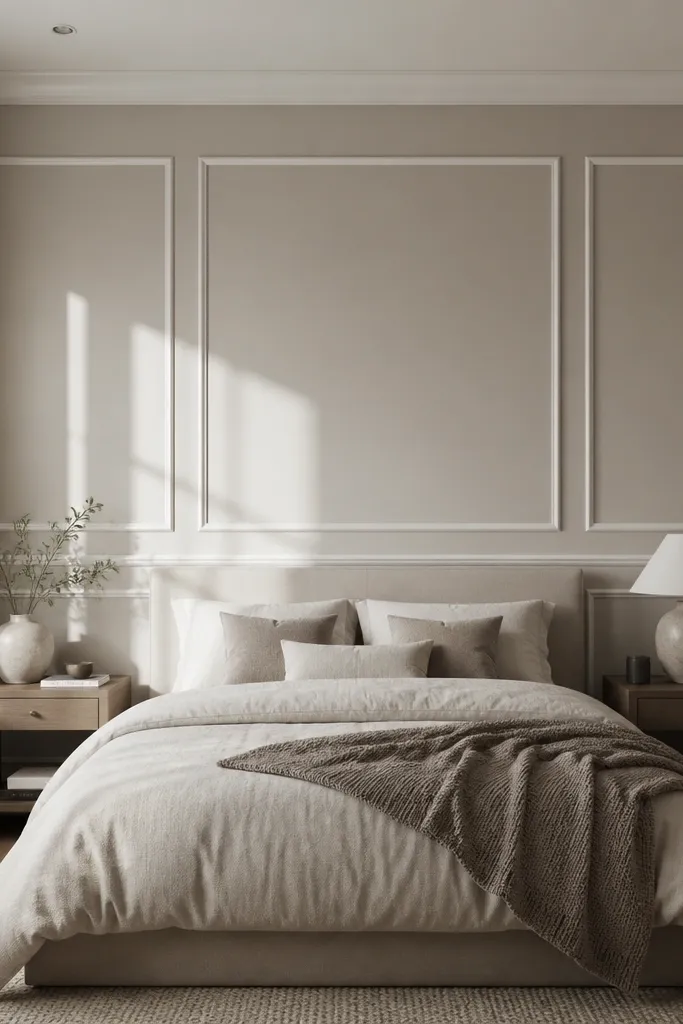
Boxy framed rectangles create a classic accent without needing wallpaper. Paint the wall a soft neutral like greige, then add MDF rectangles with a crisp white finish so shadows fall in the grooves. This looks sharp in photos because the raised lines create depth even under flat lighting. It’s also beginner-friendly if you use pre-cut MDF trim pieces and follow a grid layout. Great for bedrooms that already have traditional furniture lines or a headboard with clean edges.
Step 1: Choose a rectangle size that fits your wall — a good start is 12-16 inches wide per panel with 1-2 inches between frames. Mark a centered grid behind the bed, then attach MDF trim with construction adhesive plus small brad nails. Step 2: Fill nail holes with spackle, sand smooth, and prime the MDF. Step 3: Paint the base wall and the frames in separate coats so you don’t get messy edges. Budget $120-250 depending on MDF length and how many frames you install.
Pro tipUse a 2-foot level for long runs so your frames stay straight in every direction.
Watch outAvoid skipping primer on MDF — it drinks paint and looks patchy.
10. Matte sage paint with a single vertical ribbed stripe
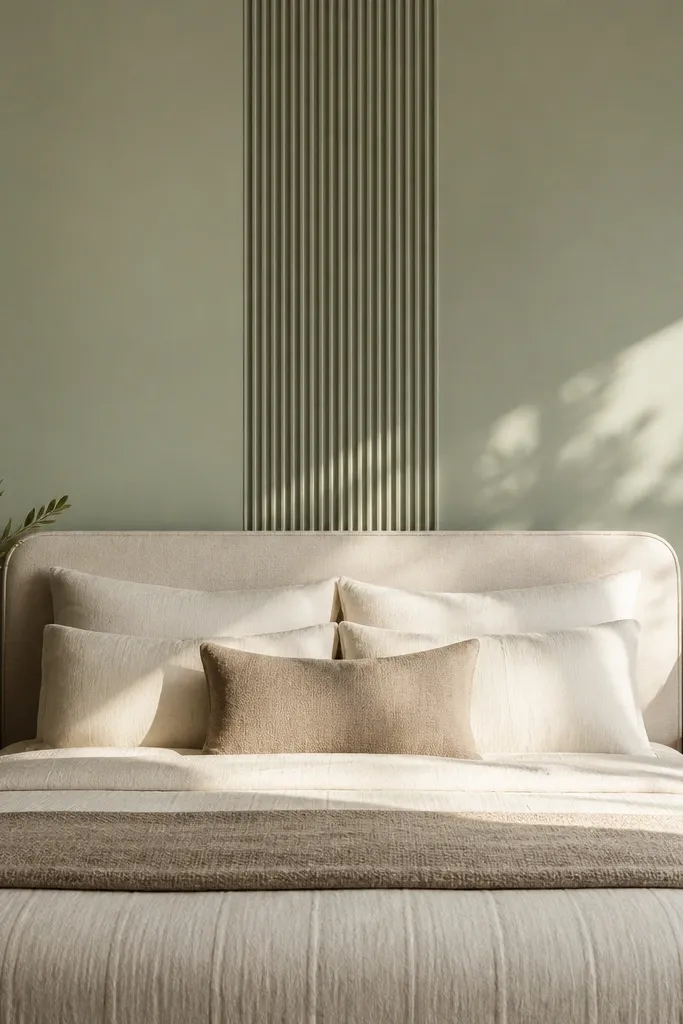
If you like subtle, this one reads stylish instead of plain. Paint the wall matte sage, then add a single vertical ribbed stripe using peel-and-stick ribbed panels or a slim wood trim strip. The narrow stripe gives you a focal point without covering the whole wall in pattern. It’s also forgiving if your walls aren’t perfectly smooth because the ribbing hides minor dents. Pair with white bedding and black or brass details for a clean modern look.
Step 1: Paint the wall sage first and let it dry fully. Step 2: Center the ribbed stripe behind the headboard and measure its width — start with 6-10 inches wide for a balanced look on most queen walls. Step 3: Apply peel-and-stick ribbing carefully along a taped centerline, then trim edges with a craft knife. Cost is usually $30-90 for paint and $20-60 for the ribbed strip.
Pro tipKeep the stripe perfectly centered, even if your bed isn’t — the wall should correct the composition.
Watch outDon’t pick a stripe width that’s too wide — it stops looking like an accent and starts looking like a stripey wallpaper.
11. Textured limewash effect with a whitewashed top coat
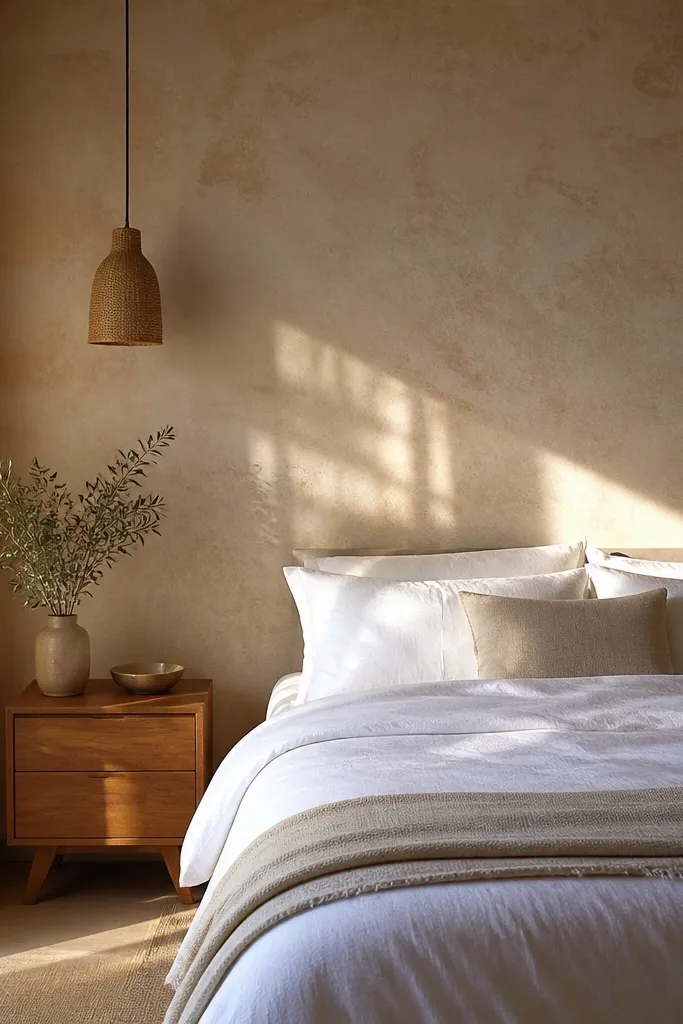
Limewash-style texture looks expensive because it breaks up light and hides uneven drywall. Go for a warm clay base and then a lighter whitewash top coat so the wall has depth but stays airy. This is one of the best accent wall choices for beginners because texture forgives small application mistakes. It also looks great with natural materials — linen bedding, rattan lamps, and light wood. If your bedroom lighting is harsh or uneven, limewash texture smooths out the look.
Step 1: Roll on a warm base coat and let it dry, then apply a limewash effect using a textured brush or sponge roller in thin layers. Step 2: Work in sections 2-3 feet wide and keep a “wet edge” so the texture blends naturally. Step 3: Add the whitewashed top coat lightly so you don’t lose the shadow depth. Expect $35-120 for materials depending on how large the wall is.
Use a damp cloth to soften harsh streaks while the top coat is still wet.
Avoid thick, heavy coats — they flatten the texture and look muddy.
12. Cane webbing accent wall in natural tan
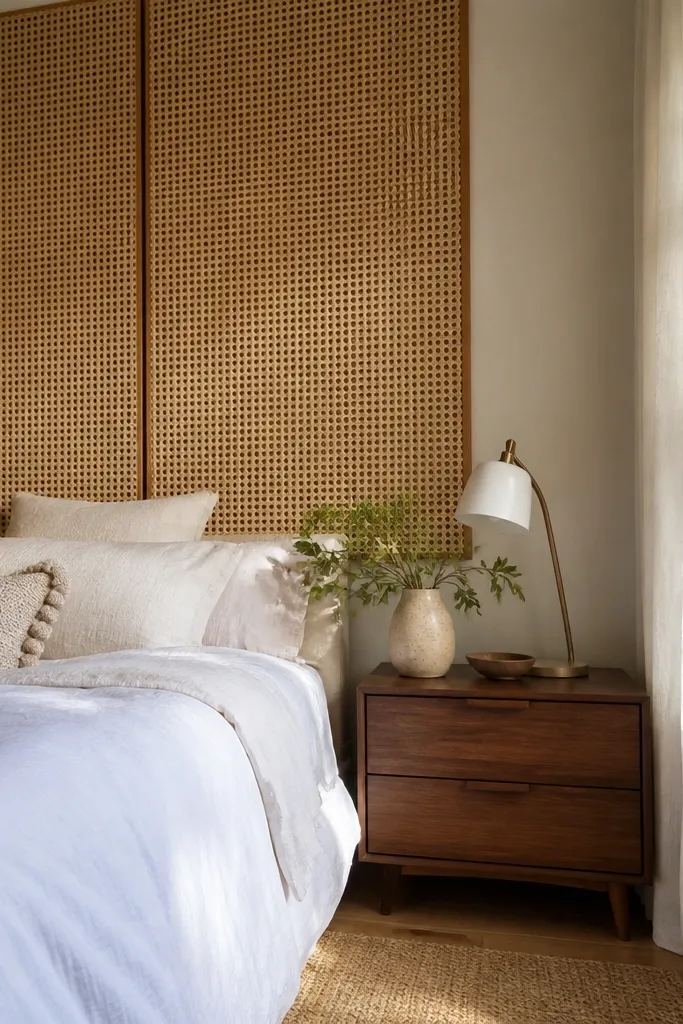
Cane webbing adds airy texture that still looks intentional. It’s visually light, so even if you choose a bold furniture setup, the wall doesn’t feel heavy. Natural tan pairs with white, cream, and warm wood, and it photographs well because the weave creates fine shadow lines. Mount it as panels so the edges look clean, then keep bedding simple so the wall stays the focal point. This is one of the best options when you want texture but don’t want paint.
Step 1: Measure the accent wall behind the headboard and order cane webbing panels sized to fit, with a frame thickness that matches your wall depth preference. Step 2: Attach the panels to the wall using screws into studs if possible, or use strong wall anchors and follow the panel manufacturer guidance. Step 3: Finish the frame edges with a matching stain or paint and fill gaps with caulk for a crisp seam. Budget $120-350 depending on panel size and framing.
Pro tipChoose a matte clear coat for the frame so the weave stays the visual star.
Watch outAvoid installing on a bumpy wall without spacing — the cane can warp and the pattern looks uneven.
13. Smoky ombre wallpaper with a subtle gradient pattern
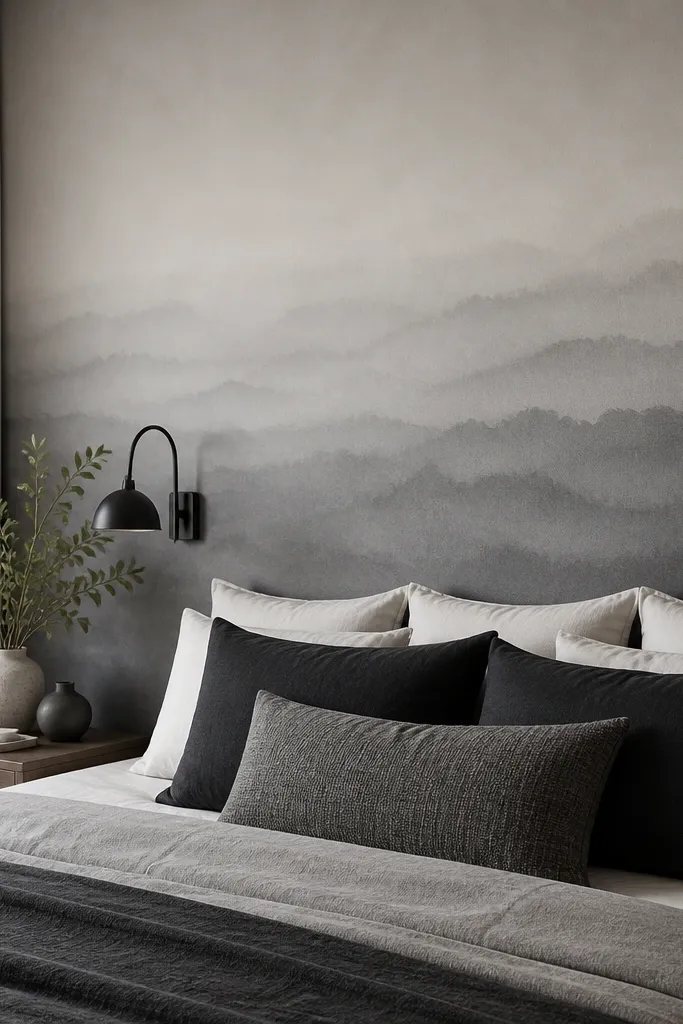
Ombre wallpaper gives you the depth of a painted gradient with less labor. Choose smoky gray tones so it looks modern and doesn’t clash with most bedding. The pattern should be subtle enough that it reads like a wash from across the room, not a busy print. This idea works when you want a focal point that feels calm and grown-up. It’s especially good for bedrooms with minimal decor where you need one strong visual layer behind the bed.
Step 1: Clean the wall, then measure and mark the starting point at the center behind the headboard. Step 2: Hang panels starting from a plumb line, smoothing each strip and matching the gradient so the darkest area hits the center. Step 3: Trim edges and seal seams if your wallpaper requires it. Expect $70-140 for wallpaper plus supplies like smoothing tool and seam sealer.
Keep the darkest point aligned with your pillow height so the wall looks like it’s “designed” around your bed.
Avoid stretching wallpaper while applying — it distorts the gradient and makes seams show.
14. Neutral botanical wallpaper with one oversized motif
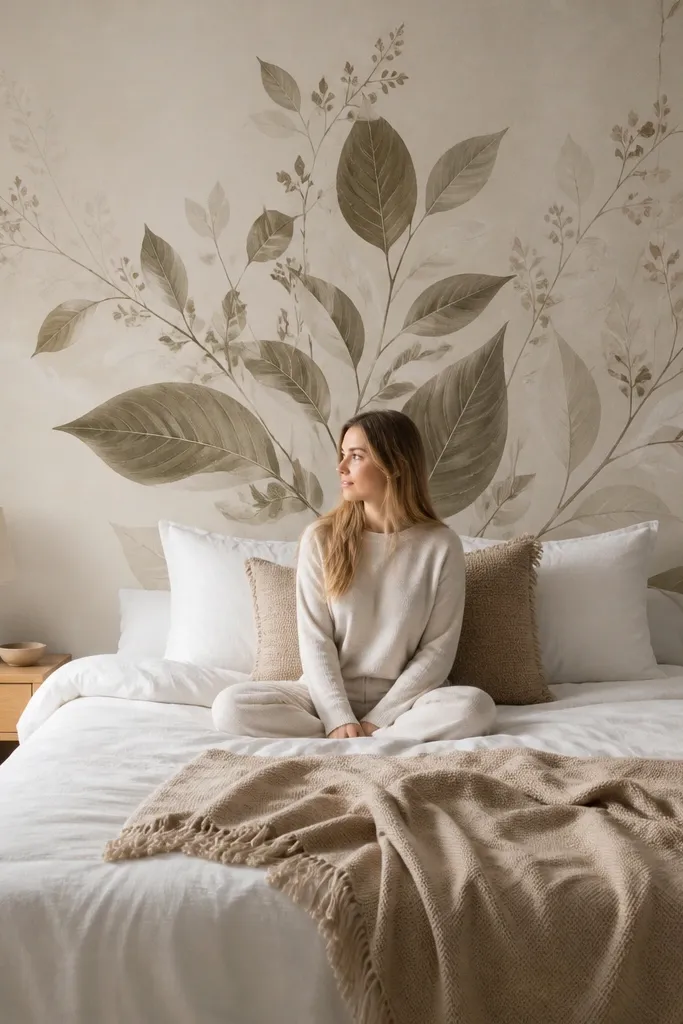
Botanical wallpaper can look classy when you avoid small busy prints. Pick a neutral botanical design with one oversized leaf or branch motif so the wall feels curated even if the rest of the room is simple. Use the accent wall behind the bed so the motif lands around the center of your pillows. Choose muted colors like sage, taupe, and dusty cream so it doesn’t overpower the room. This is a great option for people who want pattern but hate the “busy wallpaper” look.
Step 1: Find a wallpaper with a clear repeat and enough width to center the main motif on your wall. Mark where the motif should sit by measuring from the floor to your pillow line. Step 2: Install panels with careful pattern matching, then trim around outlets. Step 3: Press seams down and use a seam smoothing tool so the motif stays crisp. Budget $60-150 depending on wallpaper and room size.
Hang it so the main leaf points upward toward the headboard — it makes the room feel taller.
Avoid placing the motif too high — if it sits above the headboard, it looks random.
15. Monochrome photo-style wallpaper frame effect
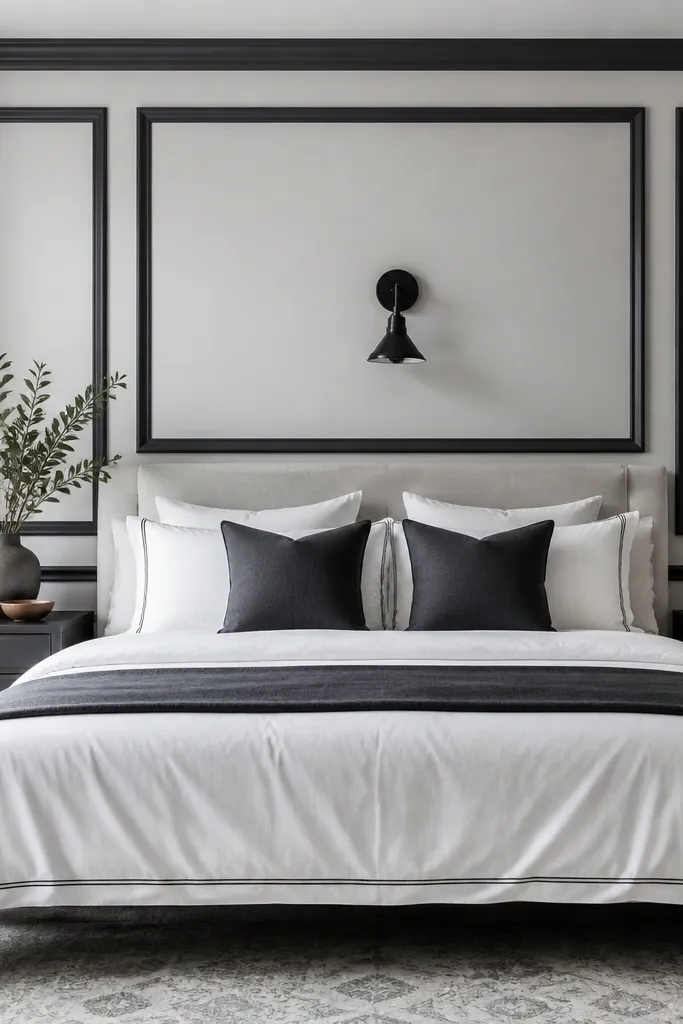
A frame effect wallpaper gives you the look of built-in molding or a gallery wall without the work. Choose monochrome gray or off-black so it stays calm and works with most bedding. The frame lines create a rectangle focal area that pulls your eye to the bed, even in a small room. This is a strong option when you want “stylish focal point” but your furniture is already colorful. It looks best with solid sheets, simple curtains, and one metal finish.
Step 1: Measure the wall area and plan to place the “frame” around the headboard height, typically starting 8-12 inches above the top of the mattress line behind the pillows. Step 2: Apply wallpaper using a center start, then match the frame edges by aligning panel seams to the border lines. Step 3: Trim carefully at corners and around outlets so the border stays clean. Expect $60-140 for wallpaper plus tools.
Pro tipUse a matte paint on the ceiling edge near the wall so the border looks crisp instead of floating.
Watch outAvoid glossy bedding in the same tone — it competes with the frame lines and looks messy in photos.