
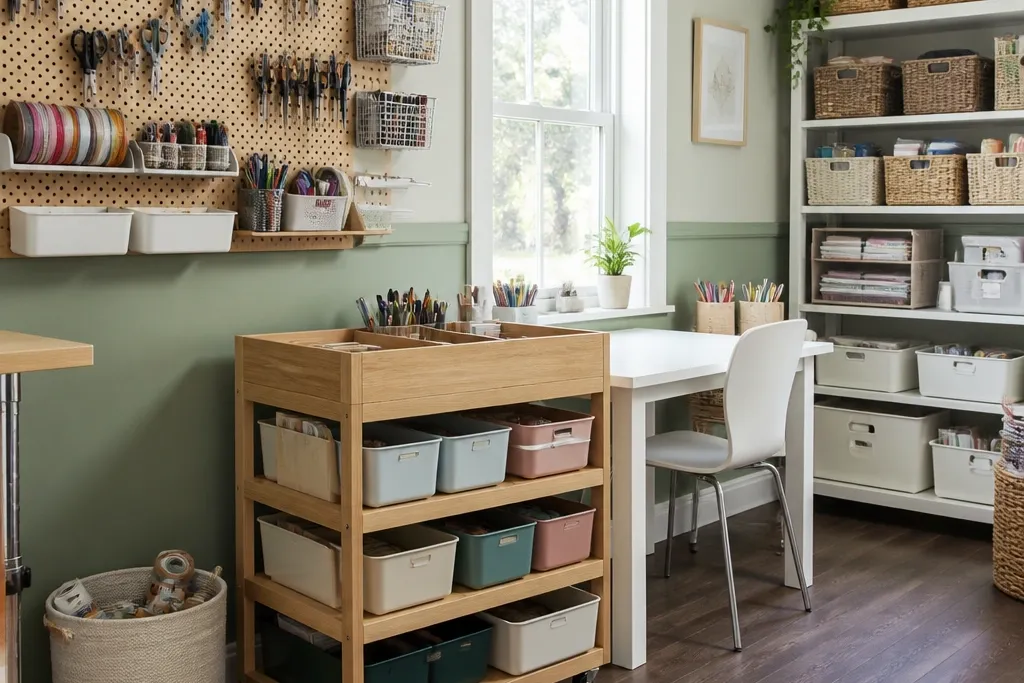
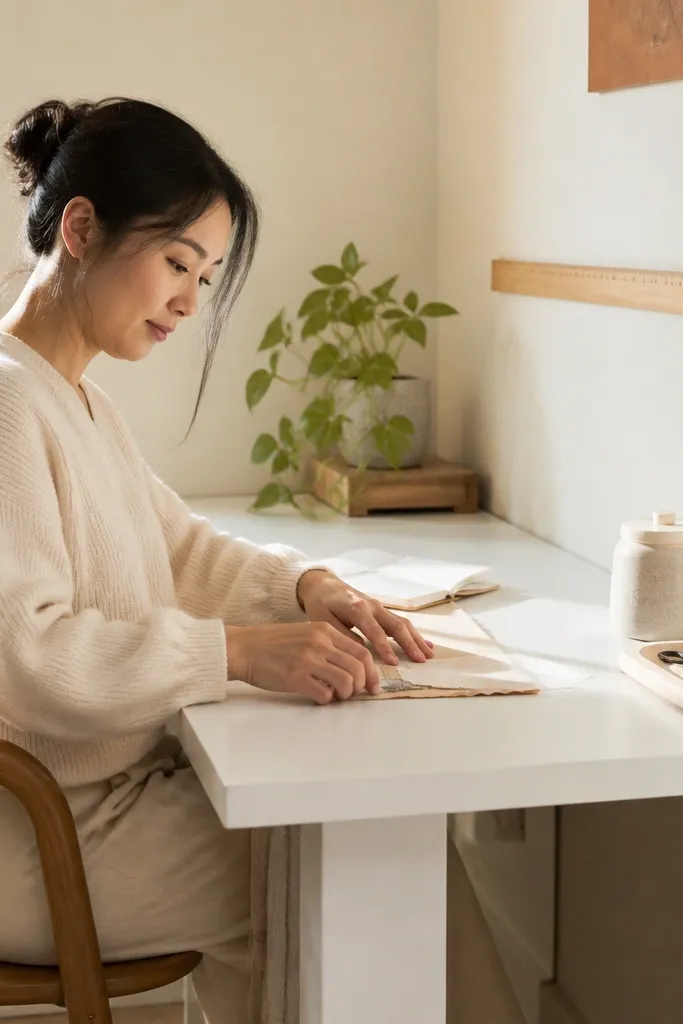
1. Pegboard tool wall with color-matched labels
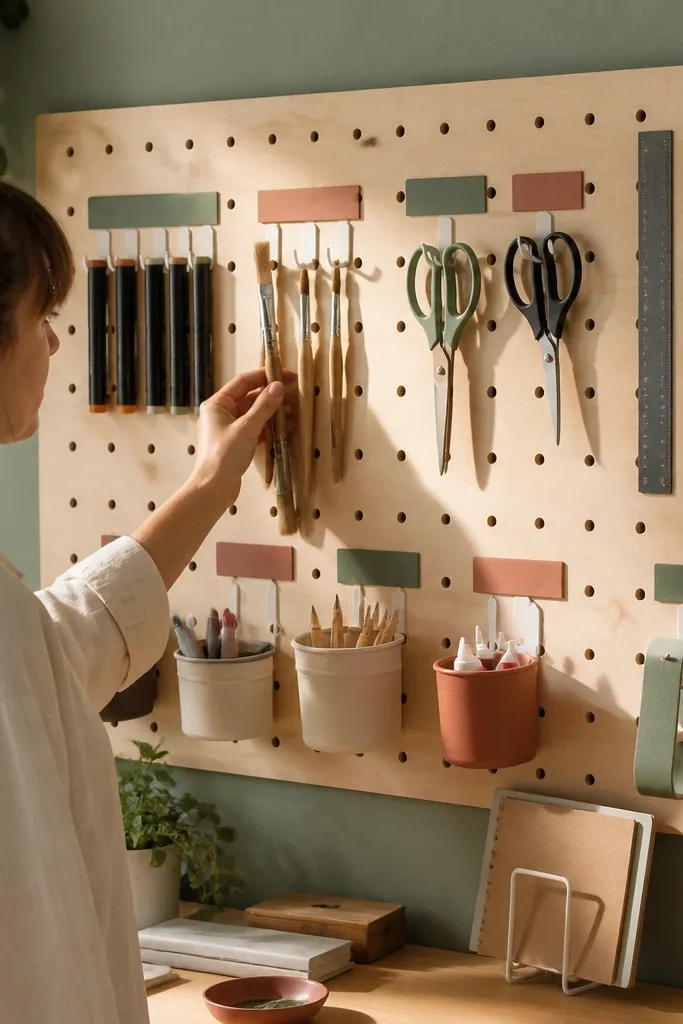
A pegboard tool wall makes your craft room look organized even when you’re actively using it. The board turns everyday tools into a neat grid, so the room reads “designed” instead of “stuff everywhere.” Use a pegboard in a light neutral (white, cream, or pale oak stain) so it doesn’t darken your workspace. Then add labels that match your storage bins — for example, terracotta labels for clay bins or sage labels for green bins. This solves the classic beginner problem where tools disappear and you waste time digging through drawers.
Start by marking a grid on your wall and choosing a pegboard size that fits your main work area — a common sweet spot is about 24x36 inches. Install it so the bottom edge sits around 56-60 inches from the floor, then place the most-used tools at eye level. Add hooks in a mix of single hooks and double rails, then write labels on matte label paper and seal them with clear tape so they survive glue and dust.
Label only categories you use daily (scissors, tape, brushes, adhesives) and leave the rest unlabeled to keep the wall from feeling busy.
Don’t hang every tool at once — start with the top 10 items you reach for weekly.
2. Woven basket shelf system with matching bin sizes
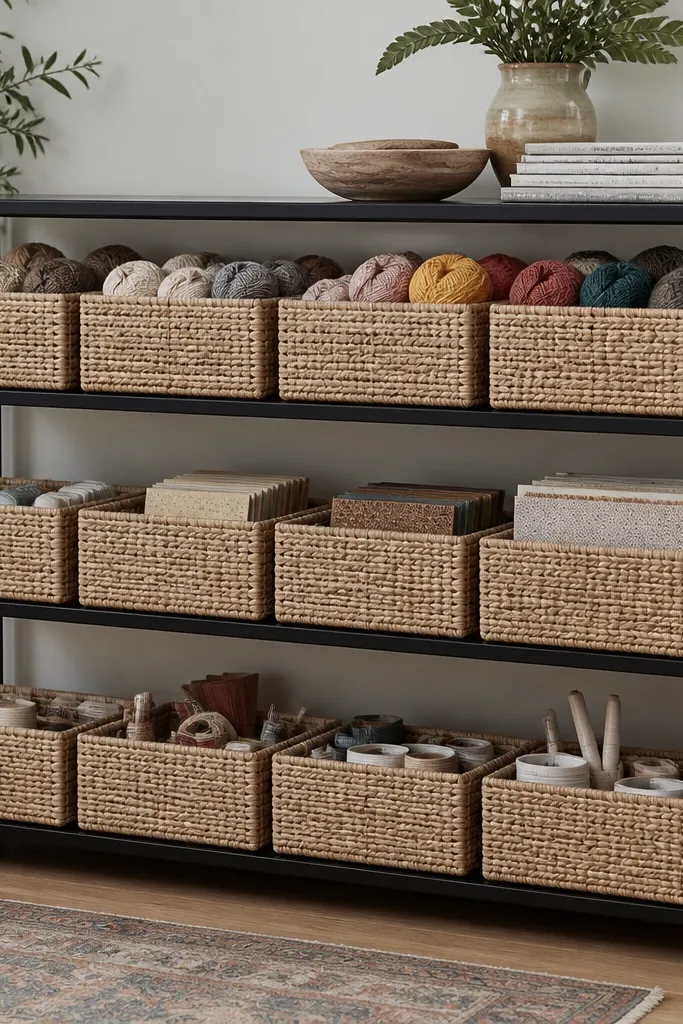
Open shelving looks good when the contents look consistent. Woven baskets in matching sizes are a fast fix because they hide messy supplies while still showing enough to find things quickly. Pick shelves in warm wood or a simple black frame so the baskets look intentional against the background. Choose baskets with similar weave thickness so the texture doesn’t look random. This is beginner-friendly craft room decor ideas that also improves function: you stop “storing” and start “locating.”
Choose shelves with a depth of about 10-12 inches so baskets sit securely without tipping. Install two shelves: one at roughly 60 inches high for easy access and one higher at about 75-80 inches for overflow. Buy 6-10 baskets in two sizes, then sort supplies by category and place the largest items in the wider bins first.
Pro tipAdd one small decorative object per shelf only — a ceramic jar or a stack of books — so the rest stays functional.
Watch outAvoid mismatched basket sizes across the same shelf — that’s what makes open shelving look chaotic.
3. Clear acrylic drawer blocks for tiny supplies
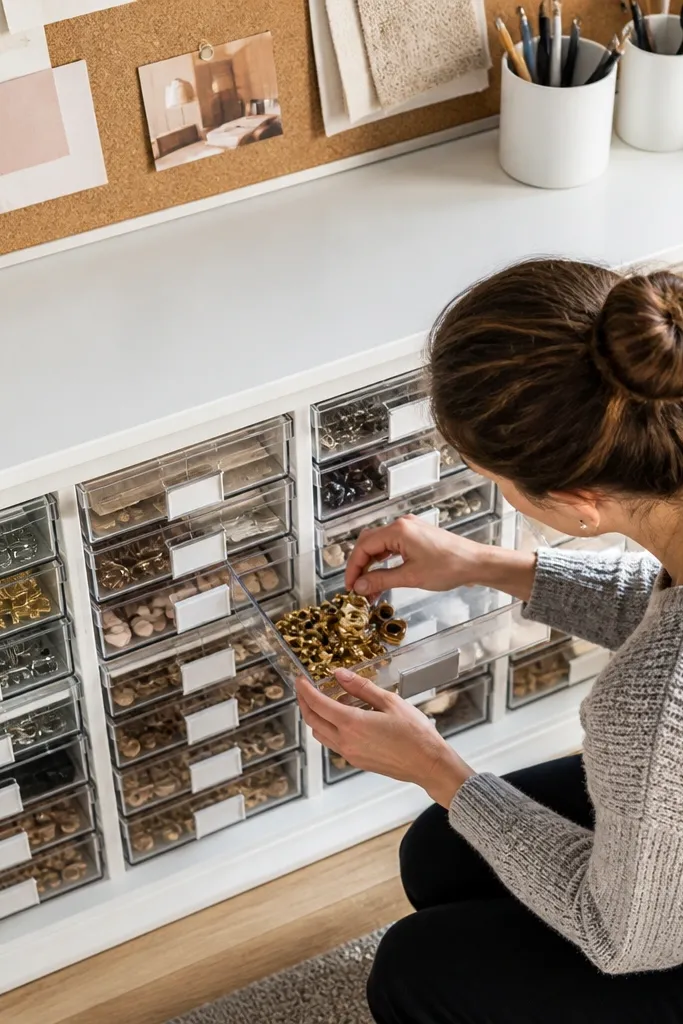
If your craft room has tiny items that vanish, clear acrylic drawer blocks make the room look clean while your supplies stay visible. The transparent front keeps you from rummaging, and the drawer grid creates a tidy visual pattern. Choose drawer blocks with solid color labels or label tabs so the unit looks coordinated. This is especially good for paper clips, brads, button sets, charms, and bead mixes. It solves the “I can’t find it” problem that makes people dump things into larger bins.
Sort tiny supplies into groups of 10-30 items each, then measure one drawer opening to avoid buying blocks that don’t fit your stash. Place acrylic drawers in a cabinet top or on a desk side shelf so they’re within reach. Label each drawer with a short category name and a count range (example: “Brads 50-80”) using waterproof label tape.
Use a consistent label color scheme (all black text on white tape, or all white on black) so the drawers look like a set.
Don’t mix loose bagged items and drawer items in the same visual space — it breaks the clean look.
4. Gallery wall of framed craft templates
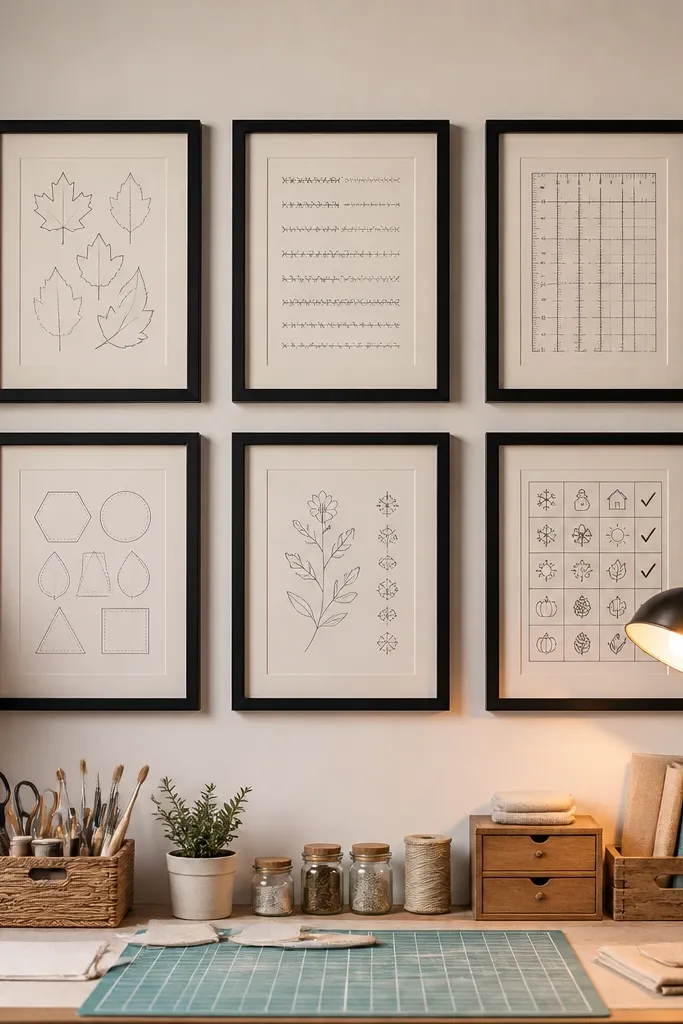
A gallery wall turns your craft workflow into decor. Instead of hanging generic art, frame practical templates: paper cutting guides, embroidery stitch charts, measured ruler prints, or even seasonal craft checklists. Use frames in one finish (matte black or natural wood) and keep the mat color consistent (cream or light gray). This makes the wall both pretty and useful, so your room doesn’t rely on clutter to look “creative.”
Pick a wall section about 48-60 inches wide and plan a grid: for example, 5 frames across and down with small spacing. Print templates at a size that fits standard frames (8x10, 11x14) so you’re not custom cutting paper. Mount the frames with painter’s tape first to confirm alignment, then insert templates with a simple backing clip or corner mounts.
Pro tipChoose one accent color for all prints (like muted coral or soft teal) so the wall feels cohesive.
Watch outSkip glossy prints — glare makes the wall look messy in daylight.
5. Desk-side rolling cart with labeled tiers
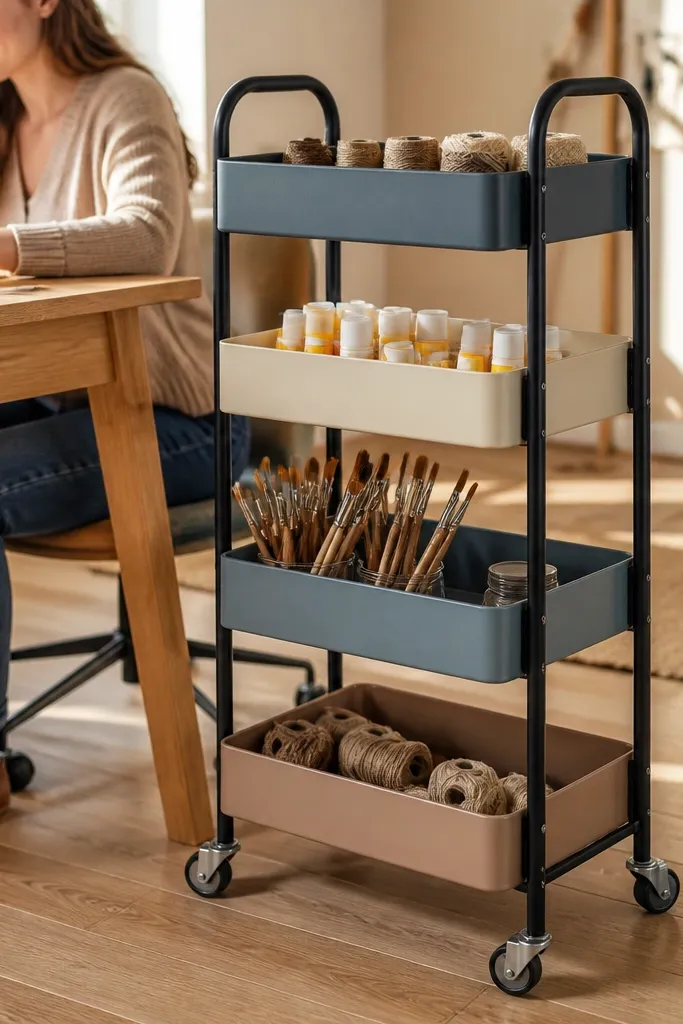
A rolling cart is the fastest way to add storage without remodeling. Keep it beside your main desk so supplies are within arm’s reach, which stops you from walking back and forth and leaving mess behind. Use a cart with 3-4 tiers and add bins or trays that match in color. This creates a clean vertical pattern next to your work surface. It’s beginner-friendly craft room decor ideas that makes the room look organized because the cart becomes a visible storage system, not hidden clutter.
Measure the gap between your desk and the wall or chair — aim for at least 18 inches clearance so the cart rolls smoothly. Choose bins that fit each tier depth, then label them with a consistent font style using label tape. Load the cart by workflow: top tier for daily tools, middle for active project materials, bottom for backup supplies.
Put a small tray on the top shelf for “currently using” items so the cart doesn’t become a dumping zone.
Don’t store paper and glue together in the same bin — the visual mess gets worse fast.
6. Color-blocked fabric storage wall in two heights
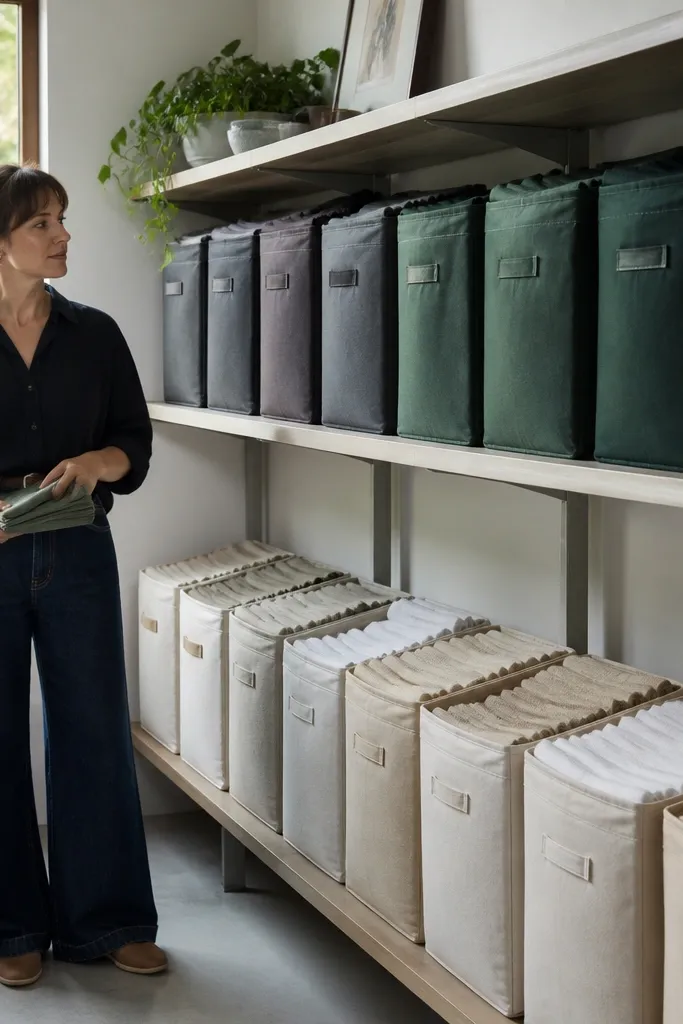
Fabric storage looks best when it’s treated like a design feature. Instead of random stacks, arrange fabric bins by color — think light neutrals in one area, darker colors in another. Use two heights: one low shelf for frequently used fabrics and one higher shelf for overflow. This makes the room look curated, and it also speeds up grabbing materials for projects. If you quilt, sew, or do mixed-media, this is beginner-friendly craft room decor ideas that makes your stash visually satisfying.
Choose wall shelves or a cabinet section with at least 12-14 inches depth so folded fabric doesn’t bow. Sort fabric into 4-6 color groups, then assign each group to one shelf section. Add bins with matching lids or open fronts; keep the low shelf for “weekly” fabrics and the higher shelf for “monthly” fabrics.
Fold fabric to the same thickness every time; uneven folds look sloppy even if the colors match.
Avoid mixing prints, solids, and scraps in the same bin — it creates visual noise.
7. Peg rail for scissors, tape, and glue bottles
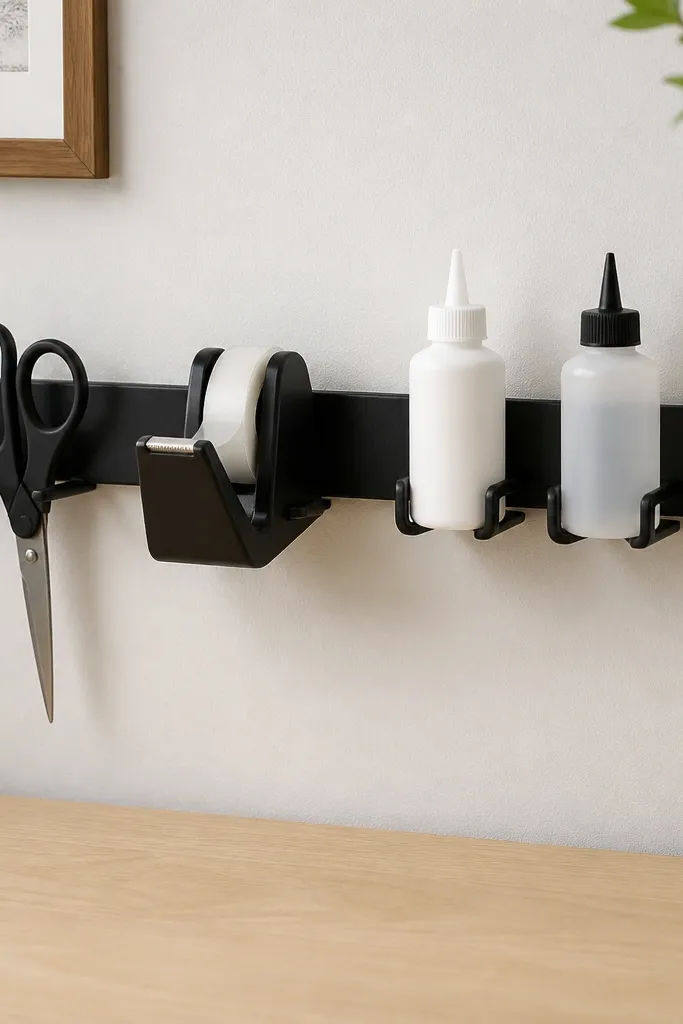
A peg rail is cleaner than a full pegboard when you only need quick access to a few tools. The long rail creates a neat line, and the hooks keep bottles and scissors upright. Choose a rail in black or brushed brass depending on your room hardware, then hang only the tools you use daily. This keeps your surfaces clear while your “active tools” look like intentional decor. It’s a great option when your wall space is limited and you want beginner-friendly craft room decor ideas that still look sharp.
Pick a rail length that matches your work area — 24-36 inches is a good starting range. Install the rail so it sits about 2-4 inches above your desk surface, then use hooks sized for your bottles and scissors. Hang items by frequency, with the most-used ones closest to the center of your work zone.
Pro tipUse one hook style for all tape and one for bottles so the line looks consistent.
Watch outDon’t overload the rail — if everything is hanging, nothing looks organized.
8. Magnetic craft supply organizer on a metal board
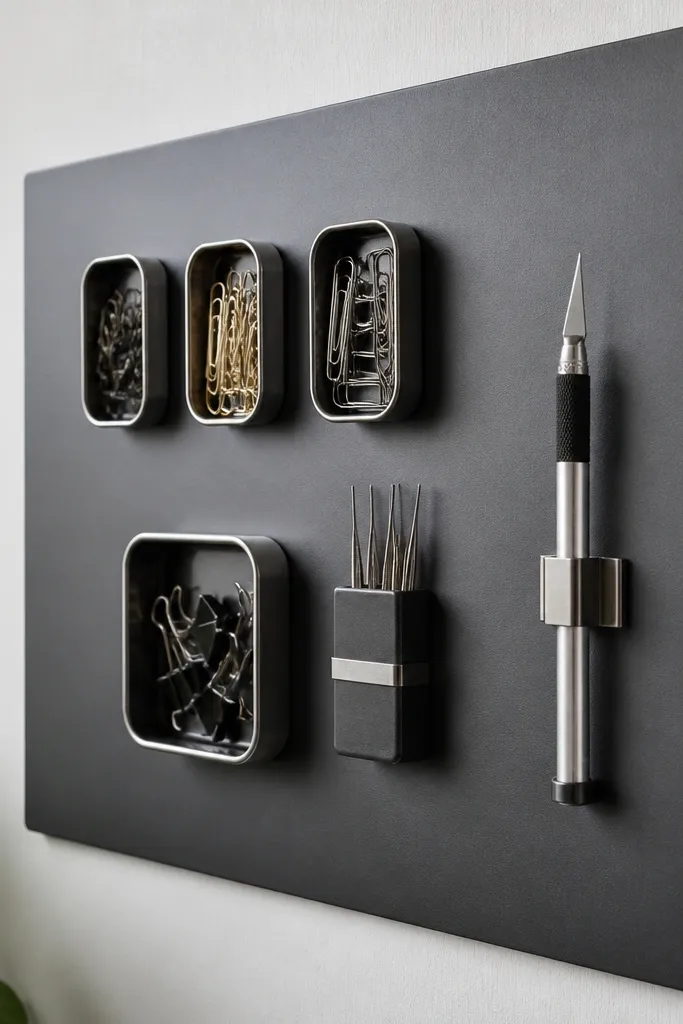
Magnetic organization makes craft rooms look slick because it creates a clean metal grid. Put a metal board (painted steel or a slim magnetic panel) on the wall and use magnetic tins for clips, needles, and small metal pieces. Add magnetic tool holders for scissors or craft knives if your blades are safe to store that way. This keeps metal supplies from scattering and makes the wall feel like a system. It’s beginner-friendly craft room decor ideas that also prevents the “metal parts lost in drawers” problem.
Mount the metal board at a height where you can grab items without stretching — aim for the center around 60 inches from the floor. Stick magnetic tins in a consistent pattern and group by type (fasteners together, needles together). Add one small tray for frequently used tools and keep other tools in a separate storage bin.
Pro tipStick to 2-3 tin sizes so the board looks designed instead of random.
Watch outDon’t store heavy tools with magnets too loosely — if they slide, the look becomes messy fast.
9. Labelled vertical file for paper projects and patterns
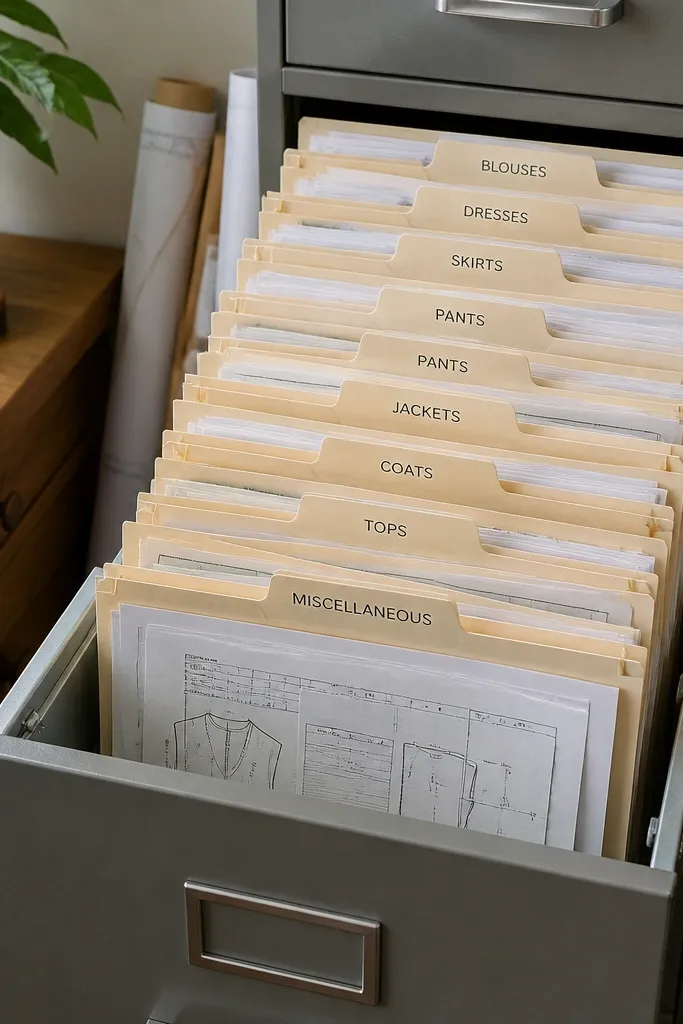
Paper is the hardest craft material to keep tidy because it doesn’t look messy until it’s everywhere. A vertical file system makes patterns, templates, and printed instructions look intentional. Use folders with labeled tabs and keep them standing upright so you can flip through quickly. Choose a cabinet color that matches your room — white or light oak looks clean and doesn’t fight with craft supplies. This is beginner-friendly craft room decor ideas for anyone who ends up with stacks on the desk.
Pick a cabinet or shelf that can hold folders vertically; measure folder width and plan for 2-3 inches of breathing room. Install or place the file so the top is reachable without a step stool. Label by project type (quilting, card making, mixed media) and keep each label consistent in font and color.
Use plastic sleeves for patterns you reuse so the folder stays crisp and the labels stay readable.
Avoid stuffing folders flat — collapsing paper creates the “mess by default” look.
10. Matte black pegboard with natural wood shelves
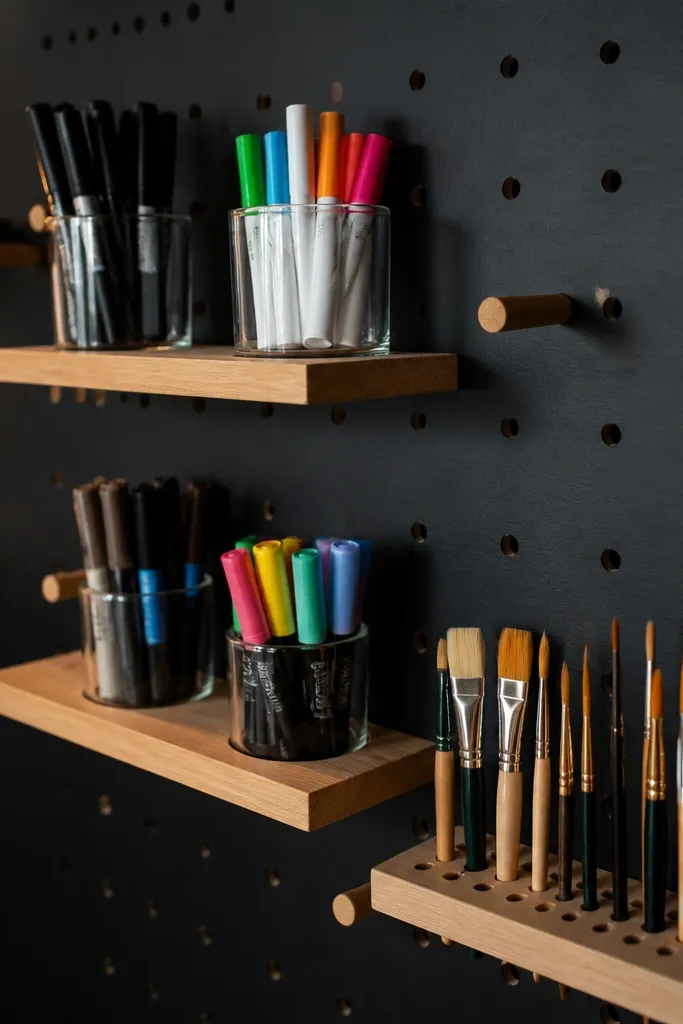
If your room feels plain, contrast is the fastest upgrade. A matte black pegboard gives you a strong, modern backdrop, and natural wood shelves soften it so the wall doesn’t feel harsh. Put small jars or cups on the shelves for markers, paint pens, or brush heads that dry upright. The dark board hides minor scuffs, and the wood adds warmth so the craft room still feels friendly. This delivers beginner-friendly craft room decor ideas that look high-end without expensive furniture.
Hang the matte black pegboard first, keeping the bottom around 56-60 inches from the floor. Add two small wood shelves (about 12-16 inches wide each) centered over your main tool area. Place jars with matching lids or similar shapes, then group items by type so the wall reads as a system.
Pro tipKeep jar labels minimal — one color or one style — so the black background stays clean.
Watch outDon’t mix glossy jars and matte jars together — the wall starts to look inconsistent.
11. Floating shelf with paintbrush cup and drying rack
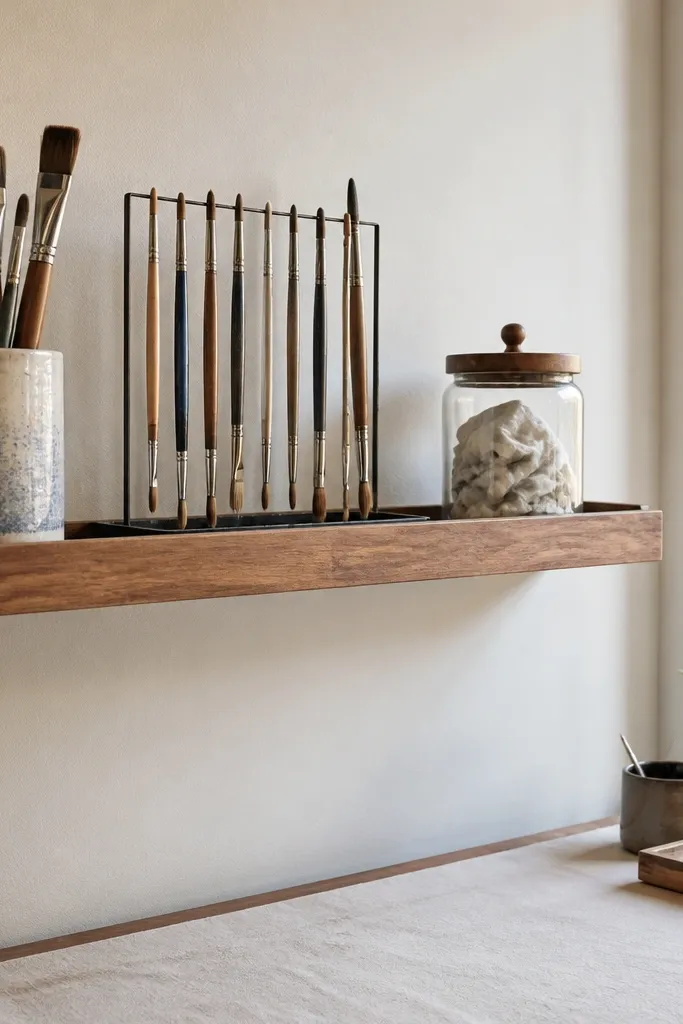
Craft rooms look messy when wet tools live on the desk. A small shelf dedicated to brush care keeps the workspace tidy and adds a practical design element. Put a cup for clean brushes, a drying rack for wet brushes, and one storage jar for brush cleaner or cloths. Choose a shelf with a lip or mounting bracket so items don’t slide. This is beginner-friendly craft room decor ideas that improves day-to-day organization while looking purposeful in photos.
Install a floating shelf above your sink or water area if possible, or at least near your painting station. Keep the shelf depth around 6-8 inches so cups fit without taking over the wall. Place drying rack first, then add the brush cup and one labeled jar, leaving a little empty space for drying drips to look controlled.
Use matching jars (same height and lid style) to make the shelf look like a set, not random containers.
Don’t store drying brushes directly next to paper supplies — it looks messy and can damage materials.
12. Fabric-covered storage cubes with a matching color theme
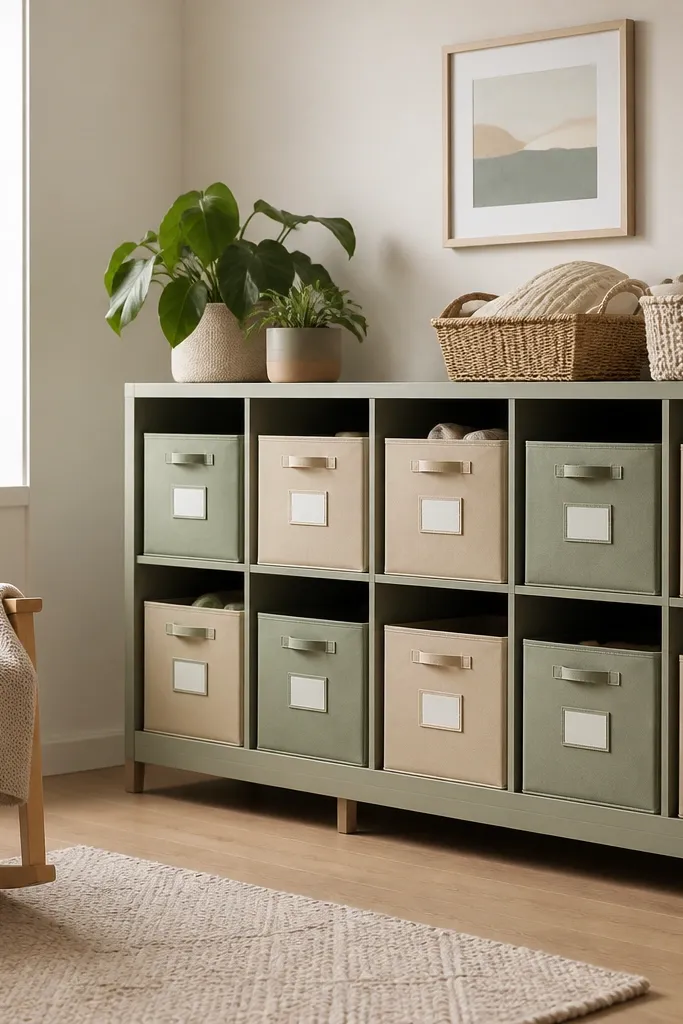
Storage cubes look great when the fabric matches the room palette. Choose cubes with fabric fronts in two complementary colors, then fill them with bins that match those colors. Label only the front-facing bins so you can scan quickly from the doorway. This method makes a craft room look organized even when you don’t have time to sort perfectly, because the cube fronts hide clutter and keep the visual rhythm. It’s beginner-friendly craft room decor ideas for people who want soft, cozy decor rather than industrial shelves.
Pick cube units with square openings and measure a bin that fits each square with about 1 inch of clearance. Arrange cubes in a grid so the color blocks align, then add labels to the front of the bins. Fill each cube by project type, not by material, so you grab the whole kit at once.
Pro tipKeep one cube for “in progress” and don’t label it; it prevents overthinking and keeps the rest looking clean.
Watch outAvoid mixing bright patterns with solid fabric fronts — it makes the cube wall feel busy.
13. Corner inspiration board with cork + pushpins
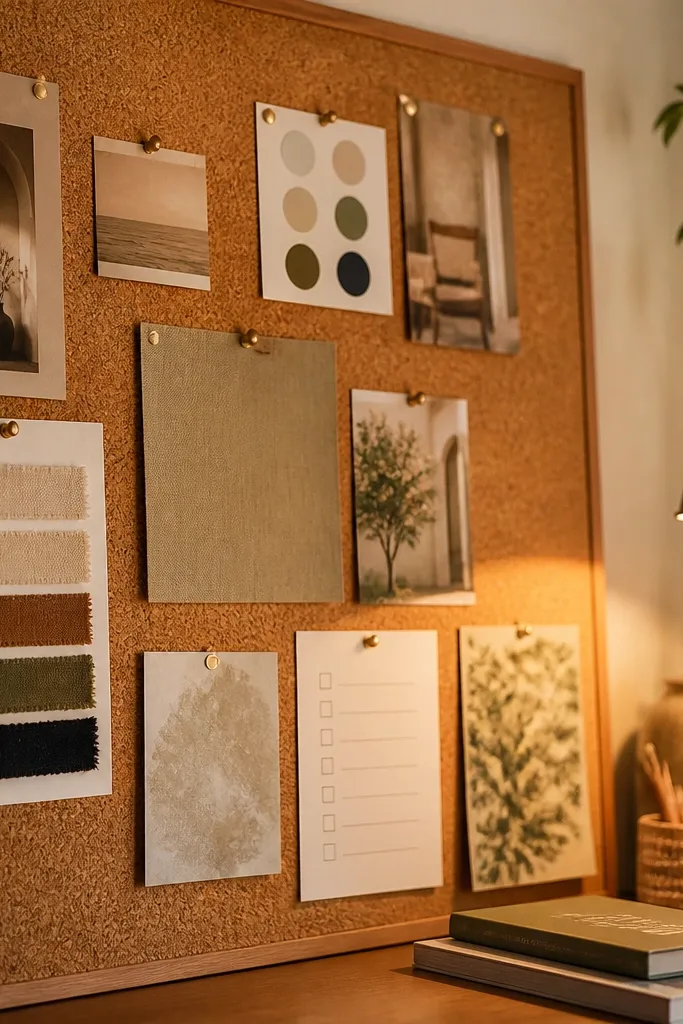
An inspiration board can look tidy when it’s built on cork. Cork has a natural texture that hides pin holes and makes paper look intentional. Put it in a corner near your main workstation so you can reference ideas without leaving the desk. Use pushpins in one color family (brass, black, or red) and keep the board mostly to 3-5 clusters: sketches, color swatches, and one checklist. This keeps the space creative without turning into a paper dumping wall.
Mount a cork panel in the corner so the top sits around 70 inches from the floor for easy reach. Group materials into sections with a little spacing between clusters so it doesn’t look crowded. Use small frames or tape borders for swatches to keep the board visually organized.
Pro tipUse the same paper size for swatches (like 4x6) so everything on the board lines up visually.
Watch outDon’t pin full stacks of paper — one layer only makes the board look controlled.
14. Drawer organizers for adhesives and tape rolls
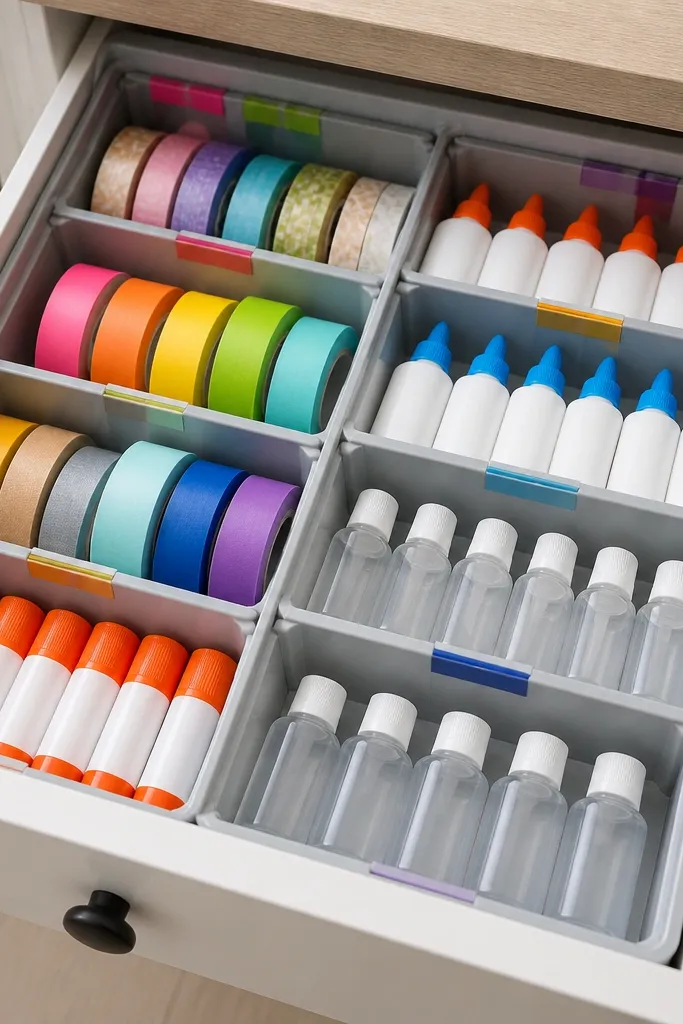
Surface clutter often comes from drawers that don’t hold shape. Drawer organizers turn adhesives and tape into a neat pattern that disappears visually until you need it. Choose inserts with compartments that match your biggest items first: tape rolls, glue bottles, and glue sticks. Keep the drawer area consistent with a single label style and place the most-used adhesive near the front. This is beginner-friendly craft room decor ideas that makes the room look organized because the drawer fronts stay clean and the contents stay in place.
Measure the drawer interior width and depth, then buy inserts with a height that leaves at least 1 inch of clearance for lid or drawer movement. Sort adhesives into three groups: daily use, occasional use, and backups. Place daily items in the front compartments and backups toward the back so the drawer doesn’t get messy.
Pro tipWipe labels with a dry cloth before sticking them so they don’t peel from glue residue.
Watch outSkip loose “junk bins” inside drawers — they undo the whole point of organizing.
15. Open cubby display for finished projects with a clear rotation rule
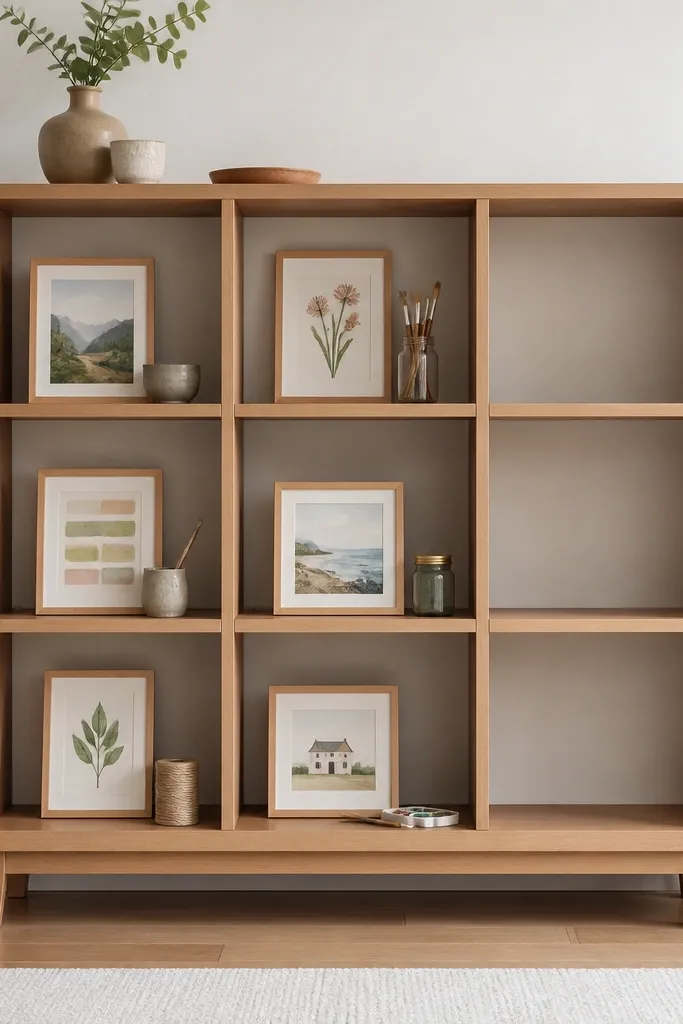
Displaying finished work makes a craft room feel alive, but only if it has boundaries. Open cubbies with a rotation rule keep your display from turning into storage. Use 6-9 cubbies and treat each cubby like a small stage: one framed piece, one small object, and one supporting item like a book or a jar. Keep frames in the same finish so the display looks cohesive. This solves the beginner problem where finished projects pile up and start to look like clutter.
Install or arrange a cubby unit where you can see it from your desk without turning your whole body. Choose a matching frame finish and standard sizes for most pieces so they align. Create a rotation plan: remove one older piece when you add a new one, and keep the number of displayed items fixed.
Use a consistent height for objects (roughly 6-10 inches tall) so cubbies look balanced.
Don’t mix oversized art with tiny crafts in the same cubby — the scale imbalance looks messy.



