
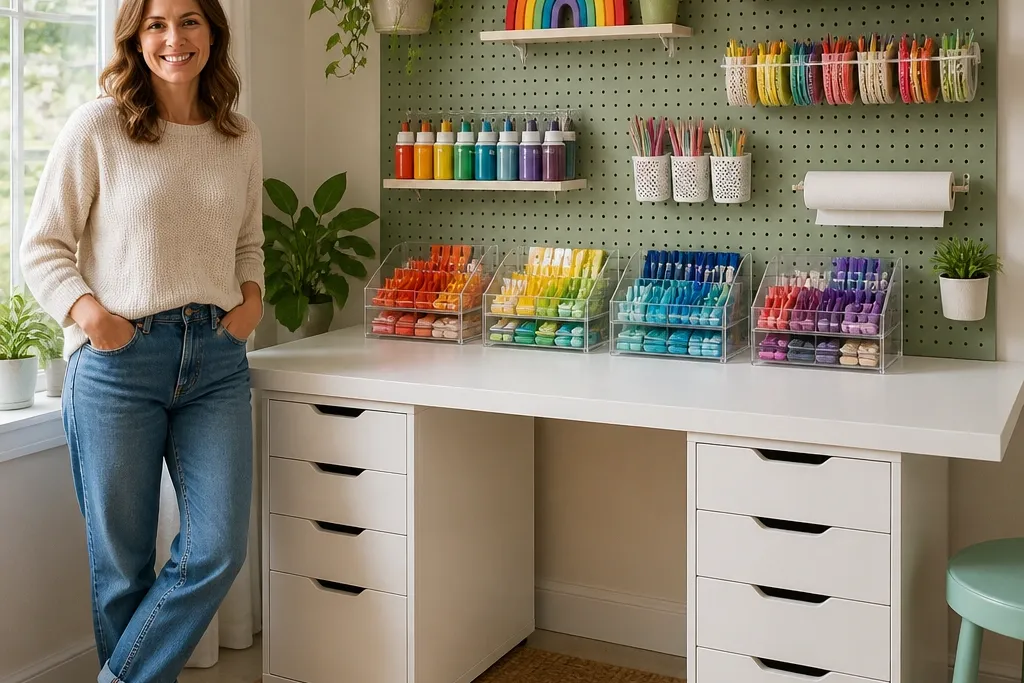
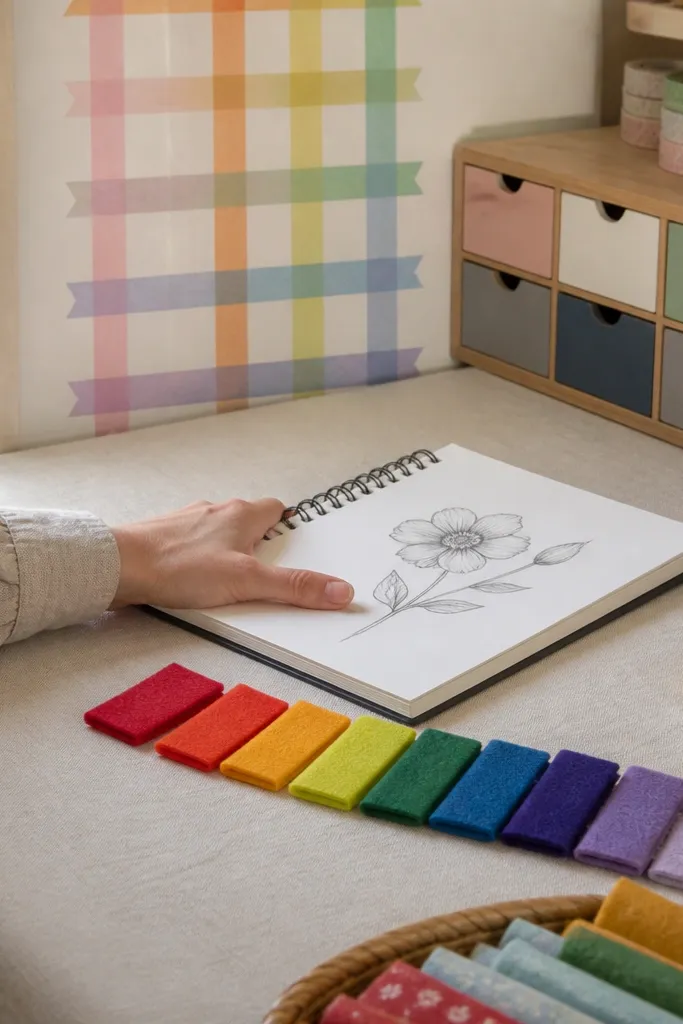
1. Rainbow Label Rail for Desk Supply Caddies
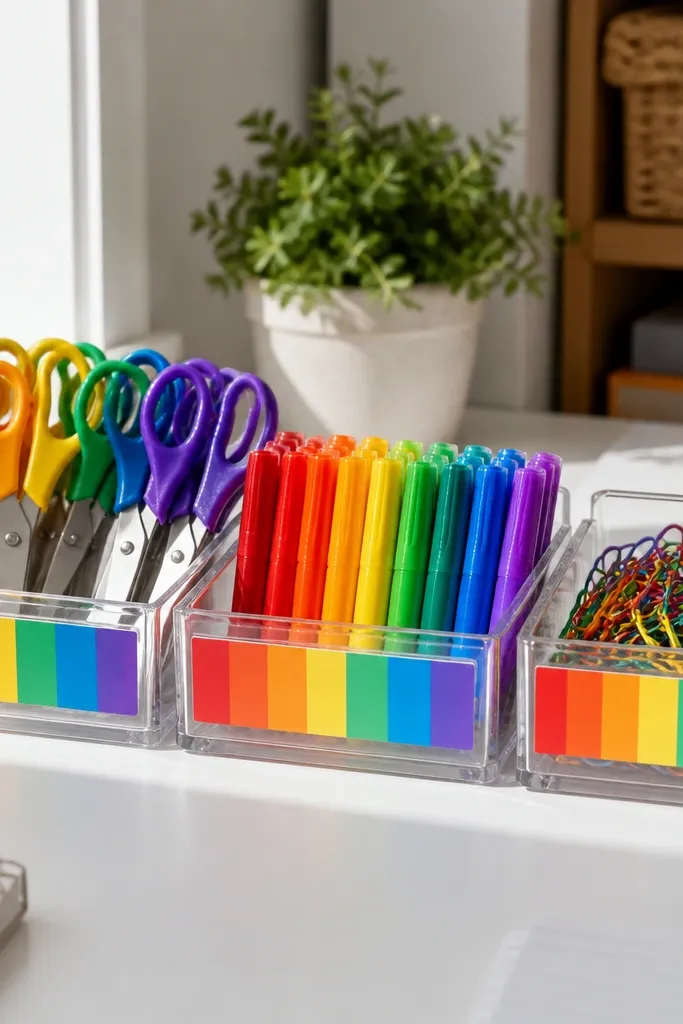
This is the fastest way to make beginner-friendly rainbow craft room decor look organized. Use a single strip of labels that runs red to violet across your caddies, so the rainbow becomes a system instead of scattered color. Clear or light wood bins keep the focus on your materials, while the labels provide the bright punch. Pick matte label paper or label tape so it doesn’t reflect desk lamp glare. Place it above the bins at a consistent height so the whole desk reads clean in photos.
Start with six matching caddies (clear plastic, glass, or light wood) and line them up side-by-side. Measure the top front edge of your caddies and cut label strips to that width minus about 1/8 inch for easy fit. Then write each bin name in a simple font and apply the labels in rainbow order. Finally, mount the label rail or sticky strip along the wall or underside of a small shelf so it sits 2-3 inches above the bin lids. Cost is low: label tape or matte label paper is usually $10-20 for a good set.
Use the same letter color on every label (either black or charcoal) so the rainbow stays the main event, not mixed typography.
Don’t mix glossy labels with matte bins — the reflections make the rainbow feel messy.
2. Pegboard Rainbow Tool Spacing
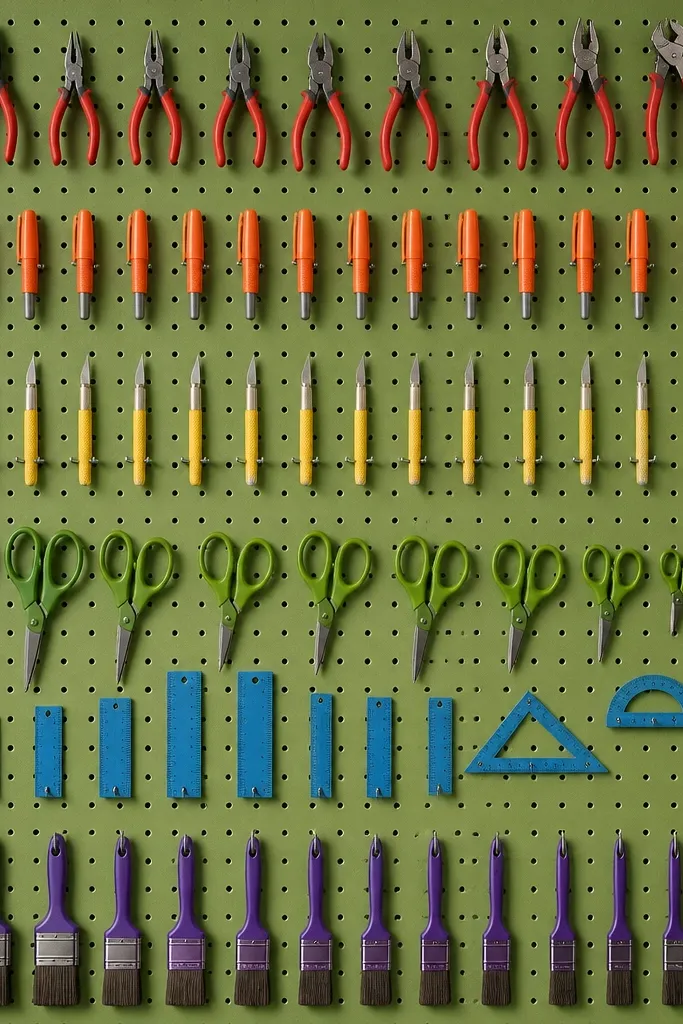
A pegboard looks tidy even when you add color, which is why it’s perfect for a craft room. The rainbow effect works best when the hooks and tool handles share the same color families, not when you paint everything wildly. Stick to five to seven color blocks across the board and keep the spacing equal so the grid stays calm. Use matte spray paint on hooks if you want a custom rainbow, then let the pegboard itself stay neutral (white or natural wood). This makes your tools easy to find and makes the room look styled, not cluttered.
Begin by choosing a pegboard size that matches your wall space, like 2x4 feet for a common craft wall. Paint or buy rainbow-colored peg hooks in red, orange, yellow, green, blue, and purple, leaving the pegboard frame neutral. Then plan placement with two rules: keep 2-3 inches between each color section and keep all hook heights within 2 inches of each other. Finally, hang only small, lightweight tools (scissors, tape dispensers, mini cutters) so the board stays photogenic and not overloaded.
Group tools by use, not by color only — tape and glue near the desk, cutting tools near your work surface.
Skip random single hooks scattered around — color needs blocks to read as a design.
3. Rainbow Washi Tape Wall Grid
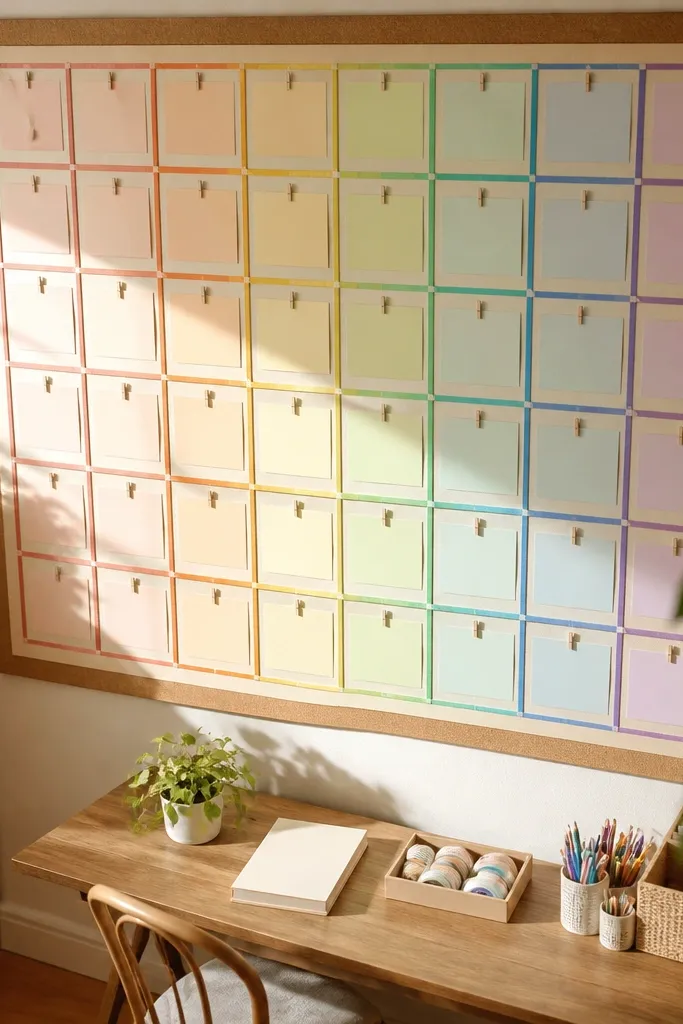
Washi tape is beginner-friendly because it’s forgiving and removable, but it still gives you a real design. Make a grid using rainbow washi strips, then add tiny clips or paper labels inside each square for a rotating “what I’m working on” display. The key is keeping the grid structure consistent — same square size and same spacing. Use warm white paper cards so colors pop without looking neon. This solves the problem of empty wall space and makes your craft room feel active without adding physical clutter.
Start by marking a rectangle on the wall with painter’s tape, like 24x30 inches. Apply washi tape in vertical and horizontal lines to make squares about 3-4 inches wide. Then place a small cardstock card or clip in each square with a short label (like “cards,” “sewing,” “stickers,” “markers”). Finish by swapping cards monthly as projects change. Effort is low and cost is usually $8-20 for a rainbow set of tape rolls.
Use one tape width for the grid (for example 15mm) so the design looks intentional instead of pieced together.
Don’t cover large areas with thick layers of tape — it looks bulky and catches dust.
4. Six-Frame Rainbow Gallery with Mat Borders
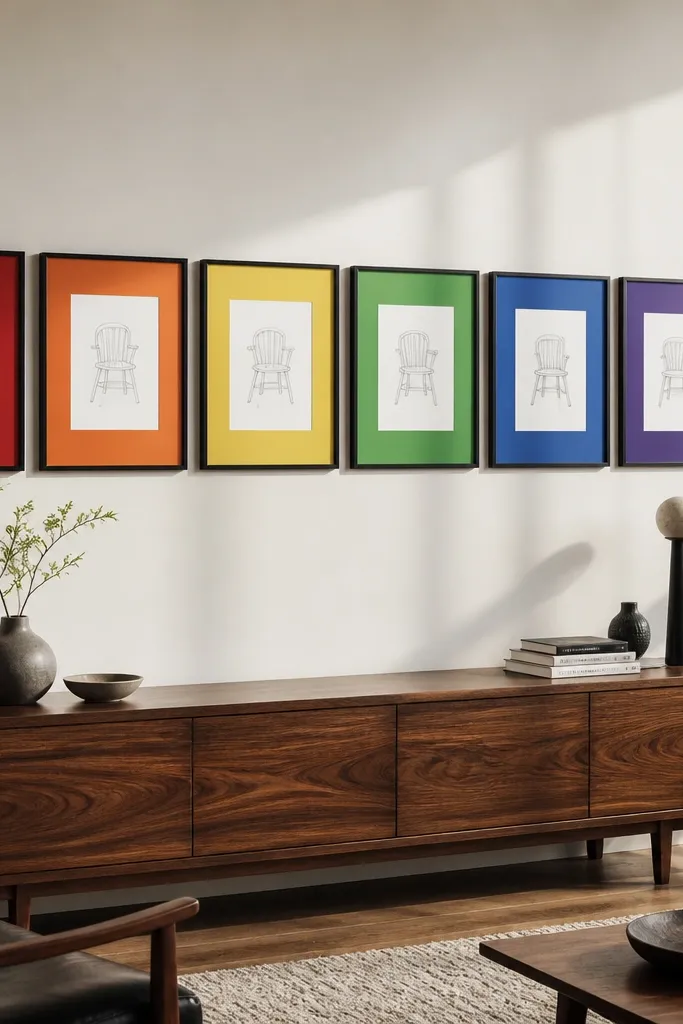
If you want rainbow craft room decor that looks like real interior design, gallery frames do it. Choose six matching frames and use solid-color mats in rainbow order, leaving the artwork simple: white paper with small line drawings, minimalist icons, or craft-themed stamps. Mat borders keep the colors clean and separated, so the rainbow reads crisp instead of chaotic. This works great above a desk, where you need something visually calm but bright. Use matte glass or skip glare-prone acrylic if your room has strong overhead lighting.
Pick frames with the same outer dimensions, like 8x10 inches, and buy six. Cut or purchase six mat boards in rainbow colors and keep the inner opening the same size for each frame. Add lightweight paper art inside — even a single stamped shape centered on white works. Hang the frames as a single row or a 2x3 grid, with the center of the top row around 60 inches from the floor. Budget check: matching frames plus mats often land around $60-120 depending on quality.
Pro tipUse black or dark gray ink for all the tiny paper art so everything ties together across the rainbow.
Watch outDon’t mix frame finishes (gold, chrome, black) — it fights the rainbow order.
5. Rainbow Thread Spool Display Ladder
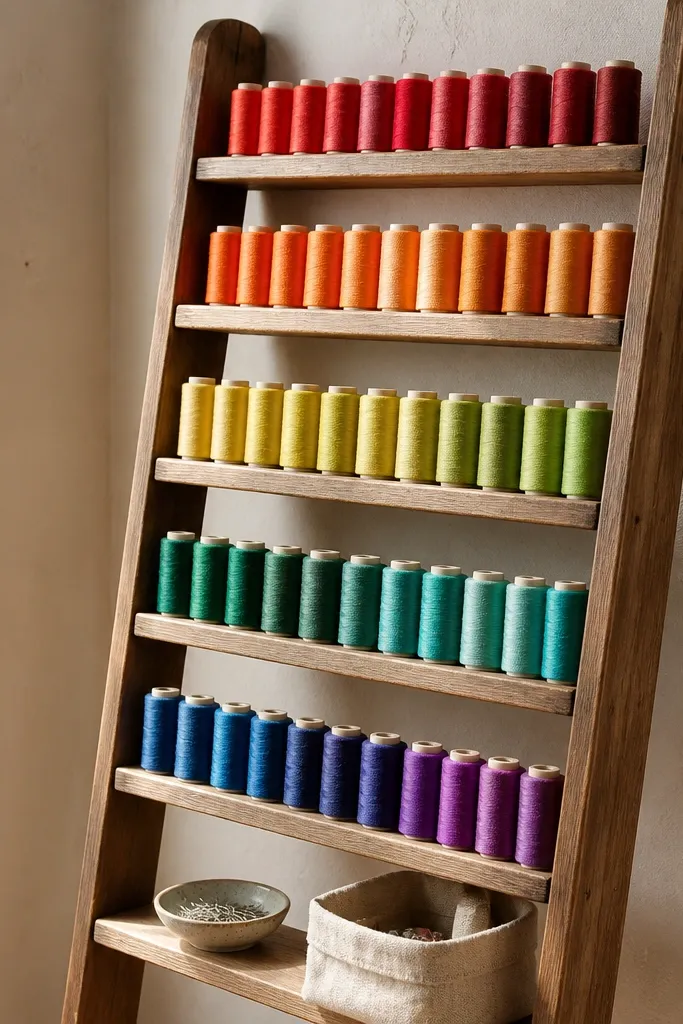
Thread spools are already color-coded, so the trick is turning them into a display. A small ladder shelf or leaning rack makes spools look intentional and easy to browse while you craft. Arrange spools by rainbow order on the rungs: red to violet across the ladder so your eye gets a clear pattern. Keep the ladder in natural wood or matte white so the colors stay the star. This is perfect for sewing, embroidery, or card-making ribbon work, and it looks good in corner light because spools add texture.
Choose a small ladder shelf about 24-36 inches tall, with rungs spaced 3-5 inches apart. Place it near your sewing station or next to a pinboard, not across from a bright window where glare can wash out colors. Line up spools so the labels face outward, then tuck thin ribbon or thread ends into a simple binder clip at the bottom rung to keep things tidy. Finally, add a neutral basket under the ladder for odds and ends so the base doesn’t look cluttered. Cost is moderate: expect $25-80 for a ladder rack plus maybe $10-30 for a few missing spools.
Pro tipUse a small piece of clear tape to secure loose thread ends to the spool rim — it keeps the display clean.
Watch outSkip mixing spool sizes randomly — keep one main spool diameter so the ladder looks uniform.
6. Color-Block Paper Organizer Wall Pocket
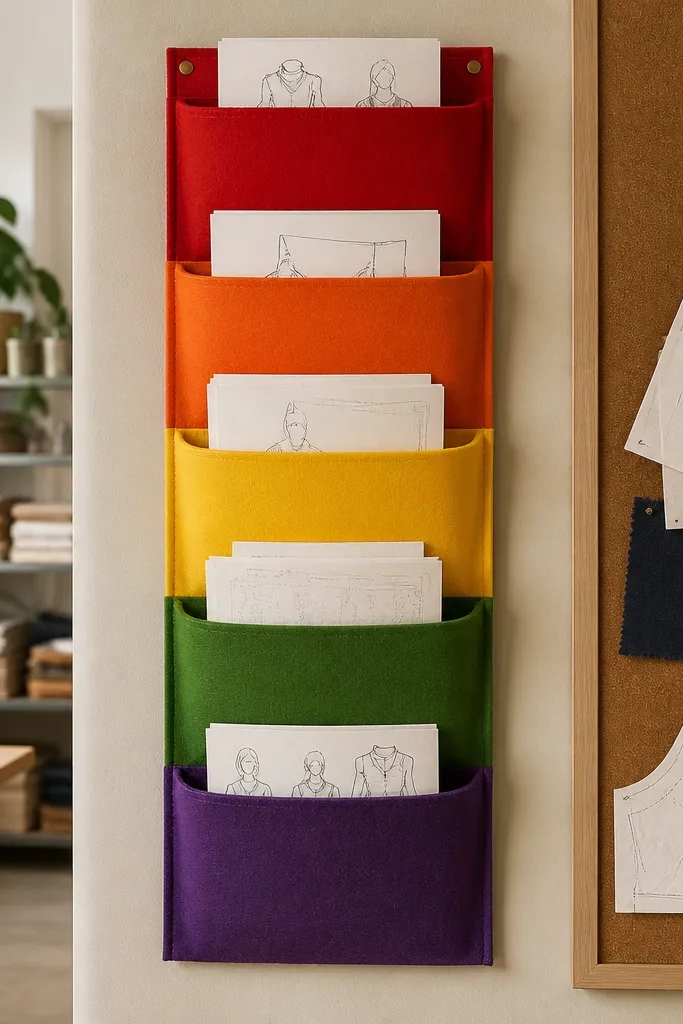
Wall pockets turn paper chaos into a rainbow system. Use color-block pockets (felt, fabric, or acrylic organizers) and assign one color family per pocket. The beauty here is vertical organization: paper stacks look neat, and the rainbow reads from across the room. Choose pockets that are at least 10 inches wide so you can store cardstock without bending it. Keep the wall pocket background neutral so the colors stay bright without looking like a children’s closet.
Measure the wall area where your paper goes, then pick a pocket organizer that fits within that width, like 24-36 inches wide. Mount it at a comfortable reach height — about 48-54 inches from the floor for top pockets. Label each pocket with a small matte label in black text and keep cardstock stacks aligned with the pocket opening. Add a bottom pocket for scraps in a neutral bin so you don’t ruin the rainbow order with mixed scraps. This setup usually runs $20-60 depending on pocket material.
Store paper by shade, not by brand — a soft yellow cardstock and a mustard cardstock should go next to each other for a smoother rainbow.
Don’t stuff pockets past the opening — bent edges make the whole wall look sloppy.
7. Rainbow Storage Bins Under Desk with Color Order
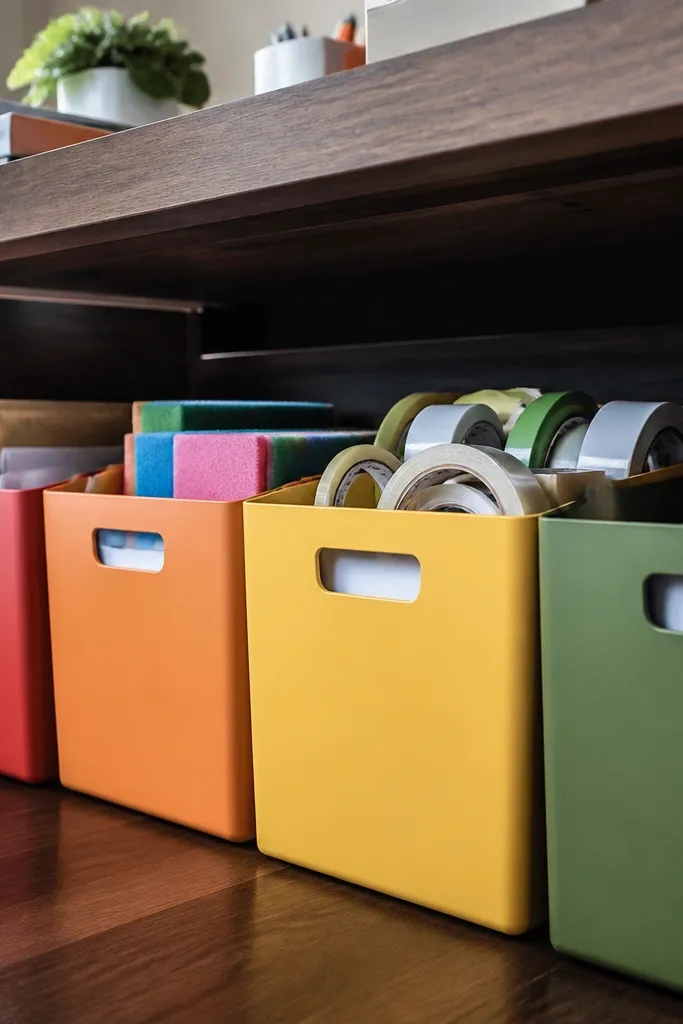
For beginner-friendly rainbow craft room decor, the desk under-area is where you either hide clutter or make it look intentional. Line up bins under the desk in rainbow order so your supplies look styled even when you’re busy. Use four to six bins max — enough for color, not enough to overwhelm. Choose bins with matte lids or fabric bins to reduce glare, and keep labels consistent in size. This solves the “my craft room looks messy even when I clean” problem because everything has a visible home.
Start by clearing the under-desk space and measuring the depth and width so bins don’t scrape the baseboard. Pick bins that are shallow enough to slide in and out, like 10-12 inches deep. Arrange them left to right by rainbow order and apply matching labels on the front. Then assign categories: reds/oranges for adhesives and tape, greens for cutting tools, blues/purples for paper stacks or stamps. Expect $25-90 total depending on bin size and quantity.
Use the same label tape width on every bin so the front view looks designed, not improvised.
Skip mixing bin heights — uneven stacks make the rainbow look like clutter.
8. Rainbow Corner Shelf with Ceramic Paint Pots
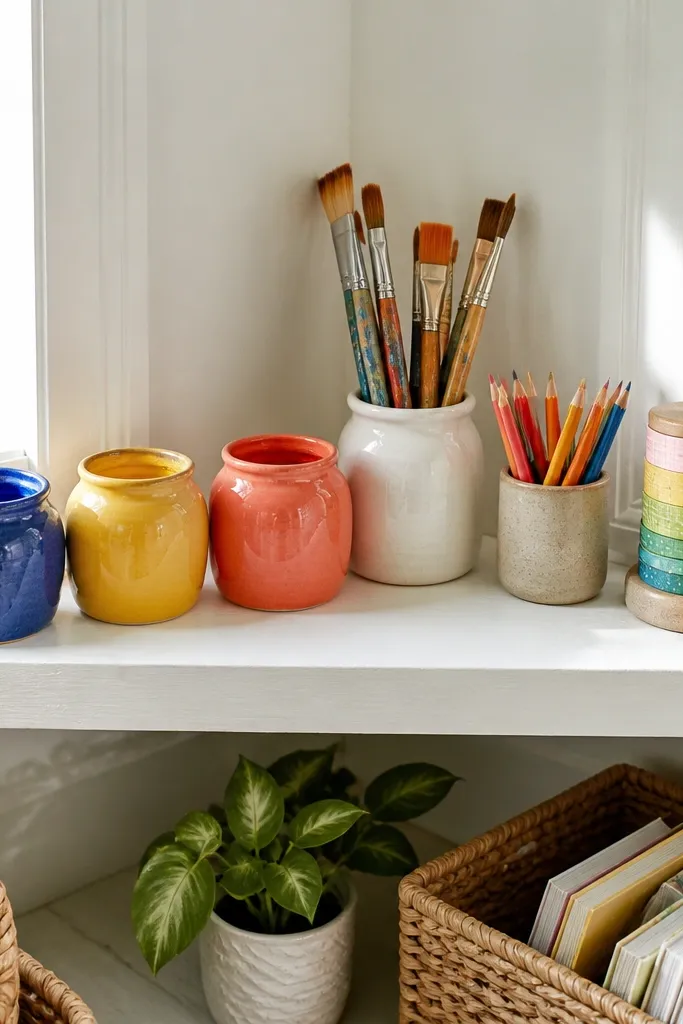
A corner shelf is a photogenic spot because it catches light from two directions. Use ceramic paint pots or small jars in rainbow colors and keep the rest of the shelf styling minimal: one brush jar, one pencil cup, one tape roll holder. The rainbow stays clean because you’re limiting the number of items and choosing matching textures (ceramic or glass). This works for acrylic paint, watercolor brush storage, or marker overflow. Keep the shelf backing neutral and don’t add too many small knickknacks that compete with the colors.
Pick a corner shelf with a width around 10-14 inches per side so it fits tight corners without looking bulky. Place it about 6-12 inches above your work surface height so items are reachable. Group jars by color: put red/orange on the left side of the shelf and green/blue/purple on the right, leaving one small neutral space for a label card. Use matte ceramic or frosted glass so it doesn’t glare. Cost is usually $30-100 for the shelf plus a few jars.
Pro tipAdd a small strip of painter’s tape under each jar footprint — it helps you reset the arrangement quickly after you clean.
Watch outDon’t stack jars on top of each other — it makes the shelf look crowded in photos.
9. Rainbow Felt Garland with Clip-On Tags
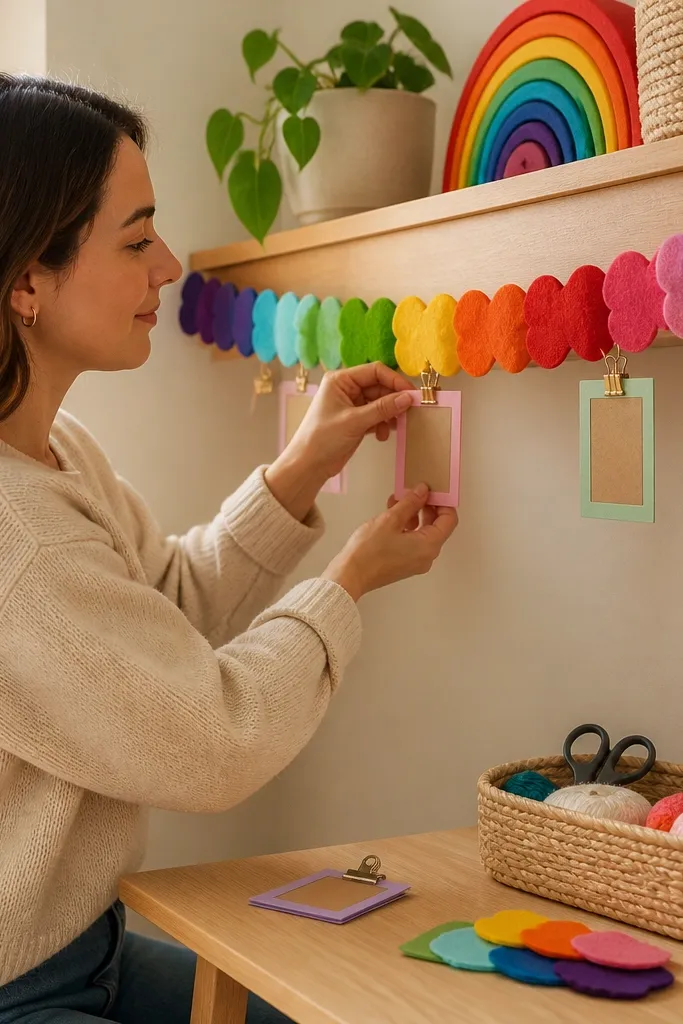
Felt garlands bring warmth and softness, and they photograph well because you get texture, not just flat color. The beginner-friendly part is that you can keep it modular: hang the garland above a craft table, then clip on small tags for projects, supplies, or seasonal themes. Use rainbow felt shapes in consistent sizes (like 2-3 inch circles or triangles) so it looks ordered. Add a neutral banner card behind the garland if your wall is busy. This solves the empty-above-desk problem without needing a full gallery wall.
Cut or buy felt pieces in six to seven rainbow colors and thread them onto a cotton string with a simple stitch or glue dots. Hang the string using two hooks and keep it centered above the work area, with about 1-2 inches of sag. Use small clothespins to clip tags made from cardstock or thick paper, and write one short label per tag. Finish by spacing tags so each color zone has at least one tag. Expect $15-40 if you’re buying pre-cut felt shapes and clothespins.
Pro tipUse black or deep navy marker on the tags for readable contrast on all felt colors.
Watch outSkip neon felt — it can look harsh under indoor lighting.
10. Rainbow Book Spine Art for Craft Shelf
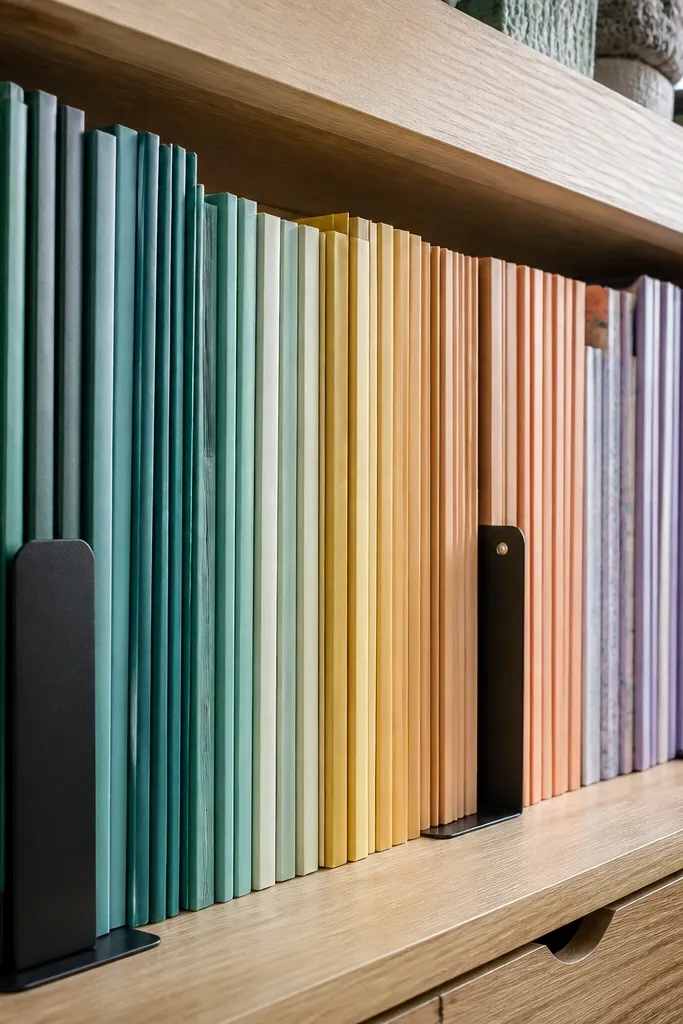
You don’t need to buy special décor if you use what you already have. Arrange craft books, pattern booklets, and storage binders so their spines create a rainbow gradient across a shelf. For beginner-friendly rainbow craft room decor, the trick is to control the gaps: keep the books straight, use bookends, and fill missing colors with plain binders covered in colored paper. This turns storage into décor and makes your shelf look styled even when you’re mid-project. Choose matte paper covers so the rainbow looks soft rather than glossy.
Start with a shelf width that can fit a rainbow sequence, like 30-36 inches. Arrange books by spine color from red to violet, then add two bookends to lock the line. For missing colors, wrap plain binders in construction paper or matte cardstock and secure with book tape. Keep all spines facing outward and align their bottom edges so the rainbow looks even. Cost ranges $10-40 if you add only a couple of covered binders.
Pro tipAdd a neutral storage basket on the shelf bottom so small supplies don’t spill into the rainbow line.
Watch outDon’t mix spine heights wildly — uneven stacking makes the gradient look accidental.
11. DIY Rainbow Marker Holder in a Clear Acrylic Tray
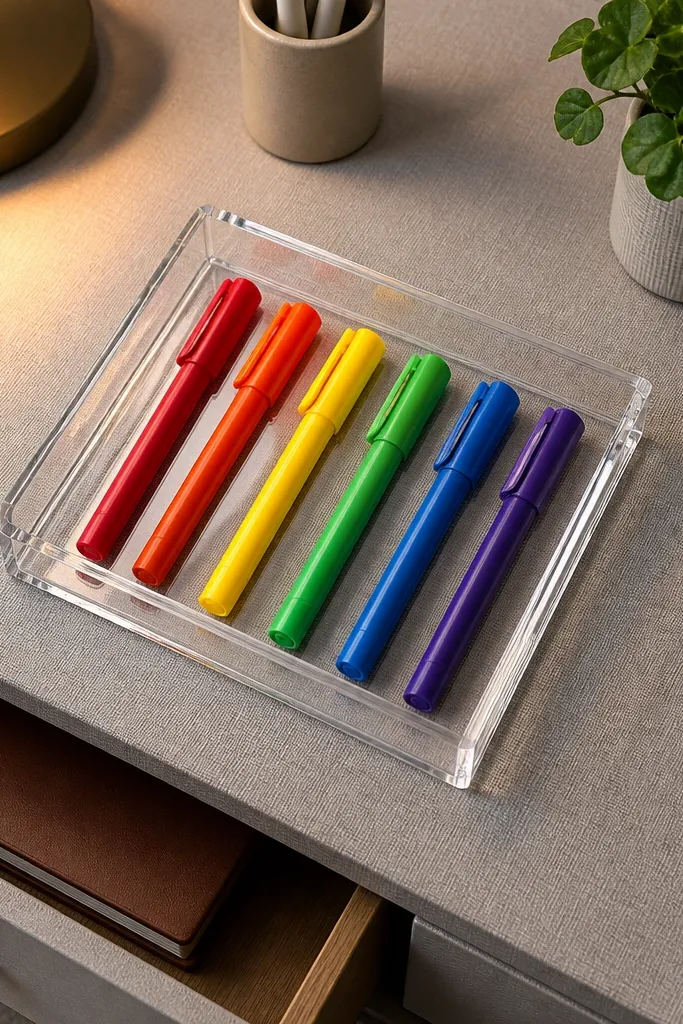
Markers are the easiest rainbow material because the colors already exist. A clear acrylic tray gives you a clean, photo-ready surface, while the marker sorting gives you instant visual order. Use the rainbow order left to right and keep marker caps facing the same direction so the tray reads like design, not a pile. This is great for a desk corner where you want to grab supplies fast. If your markers are glossy, the tray helps you control the visual noise by keeping everything in one frame.
Choose a clear tray sized to your desk — a 12x18 inch tray works for most craft desks. Sort markers by color family and stand them upright with caps aligned on one side. If your tray has no dividers, add removable acrylic divider strips or use folded cardstock walls to create color lanes. Label the edge of the tray with a small matte label strip in rainbow order. Cost is usually $20-60 for the tray plus any divider material.
Pro tipWipe the tray with a microfiber cloth before photos — fingerprints make clear acrylic look messy fast.
Watch outSkip random marker sizes in one row — keep the same marker type in each color lane.
12. Rainbow Peg Rail for Hanging Craft Storage Bags
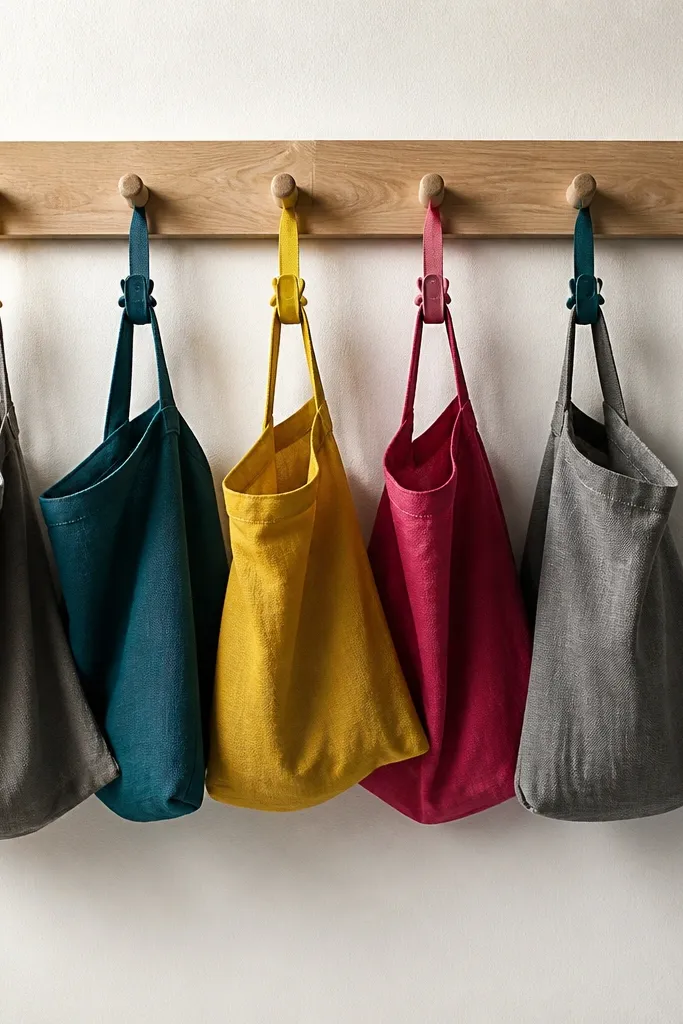
Hanging storage bags keep your craft room beginner-friendly because you don’t need to reorganize constantly. A peg rail lets you attach bags at consistent heights and swap them when you change projects. For a rainbow look, use fabric bags in solid rainbow colors or add removable colored clips and tags to a neutral bag set. Keep bag openings facing the same direction so the rainbow reads as a tidy row. This gives you a usable display for stickers, die cuts, and mini embellishments without taking up desk space.
Install a peg rail or use a small wall rail system where you can hook items securely. Pick four to six bags and size them so each bag is about 6-8 inches wide with a flat backing that sits against the wall. Hang them in rainbow order, then add a small matte label on each bag front. Keep the top of the highest bag around 64-66 inches from the floor for a balanced look. Budget usually sits around $30-90 depending on bag quality.
Use the same clip style for every bag so hardware doesn’t add extra visual clutter.
Don’t let bags dangle at different lengths — it makes the rainbow look uneven.
13. Rainbow Desk Lamp Shade Color Pops
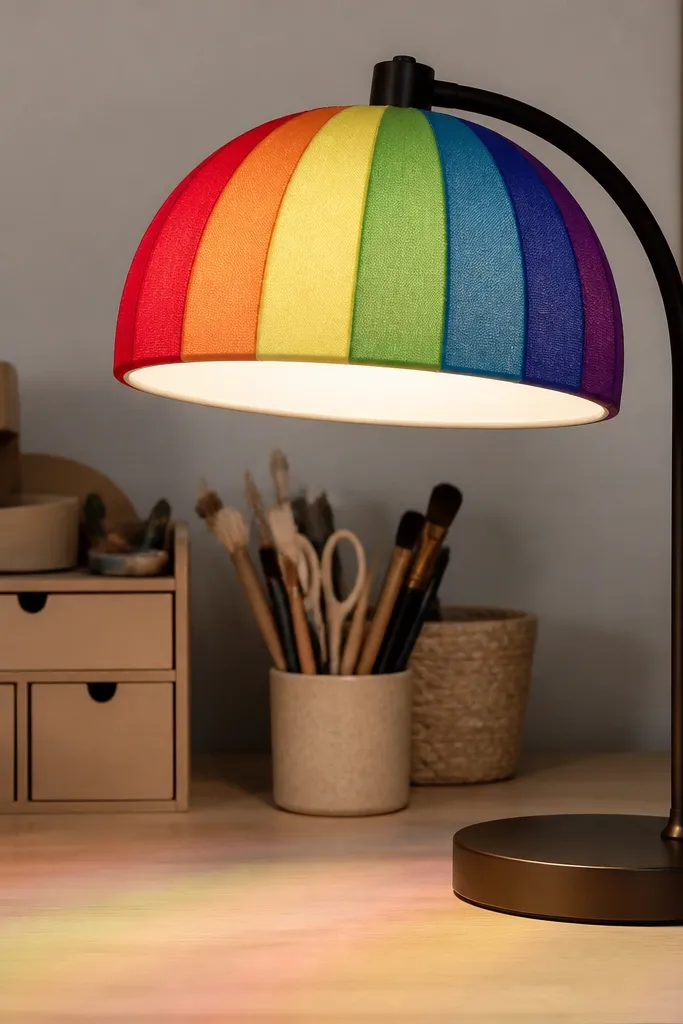
Lighting is the secret weapon for rainbow craft room decor because it changes how your colors read. A lamp with a rainbow-styled shade or colored diffuser panels can make your desk feel bright without adding more objects. Choose a shade with matte fabric or a frosted diffuser so the light spreads softly. Place it so it lights your work area, not the wall behind you, and aim for warm-neutral bulbs (2700K) to keep colors cheerful instead of greenish. This solves the problem of rainbow décor looking flat under harsh overhead lights.
Pick a lamp base you like and choose a shade with six-color panels or a gradient that matches red-to-violet. Measure the desk space so the lamp doesn’t block your work surface — keep the shade width under about 12 inches for smaller desks. Use a warm bulb around 2700K and test the look by turning it on in the evening. Then place your rainbow organization items directly under the lamp so the colors look intentional. Expect $40-120 depending on lamp and shade options.
If you can’t change the lamp, add a colored paper diffuser sheet inside a plain shade to get a similar effect.
Skip cool daylight bulbs (5000K+) — they make reds and purples look harsher.
14. Rainbow Washable Paint Drip Wall Art Above Storage
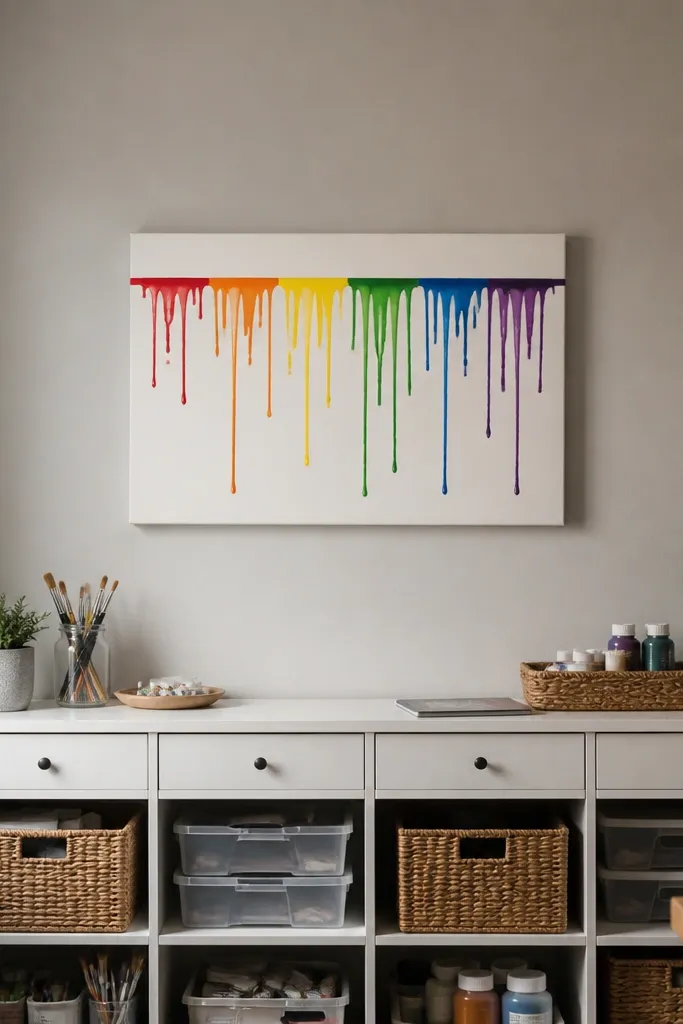
This is the one “statement” piece that still feels beginner-friendly because it uses a simple process and a controlled size. Paint drips look playful but can look high-end when you keep the canvas narrow and the background neutral. Use a straight horizontal line as the drip start point, then let drips fall in rainbow order: red, orange, yellow, green, blue, purple. Matte paint works best because it avoids glare and looks soft under indoor lighting. Hang it above a shelf or storage unit so it frames your craft zone.
Tape off a rectangle on the wall about 20-28 inches wide, then paint a clean off-white background inside the taped area. Draw a thin line where the drips start, then use a small brush to apply rainbow paint in bands with consistent thickness. Let drips vary slightly, but keep the maximum drip length around 6-8 inches so it doesn’t become messy. Remove tape while paint is still slightly tacky for cleaner edges. Cost is low: paint and tape are usually $15-35.
Pro tipUse painter’s tape edges and a small foam roller for the background — it makes the whole piece look crisp.
Watch outDon’t paint on textured walls without priming — the drips look uneven and hard to read.



