
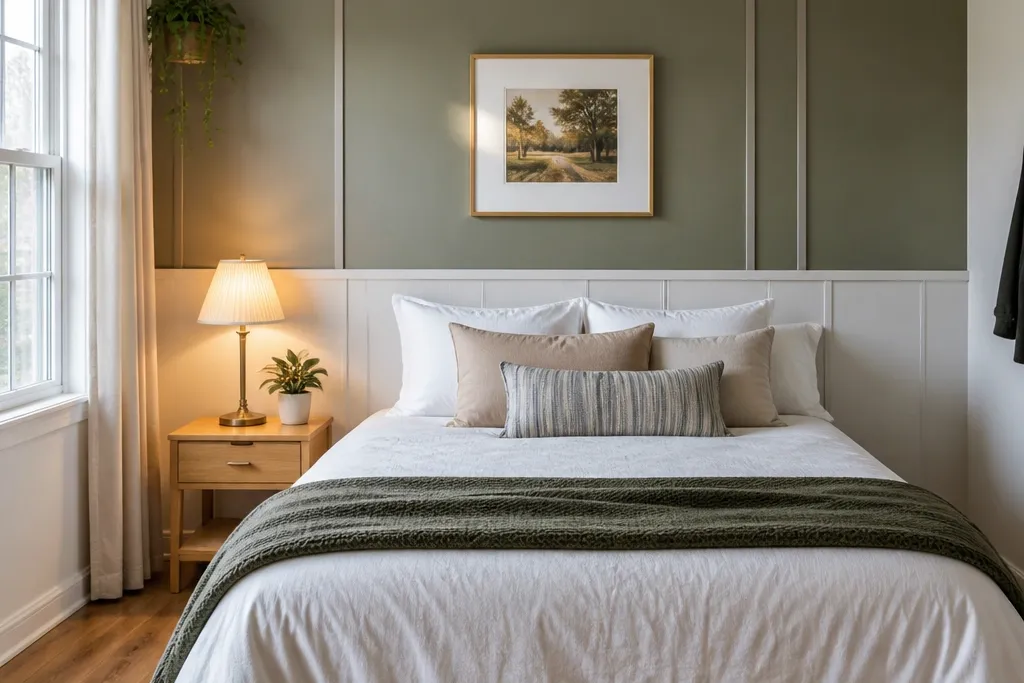
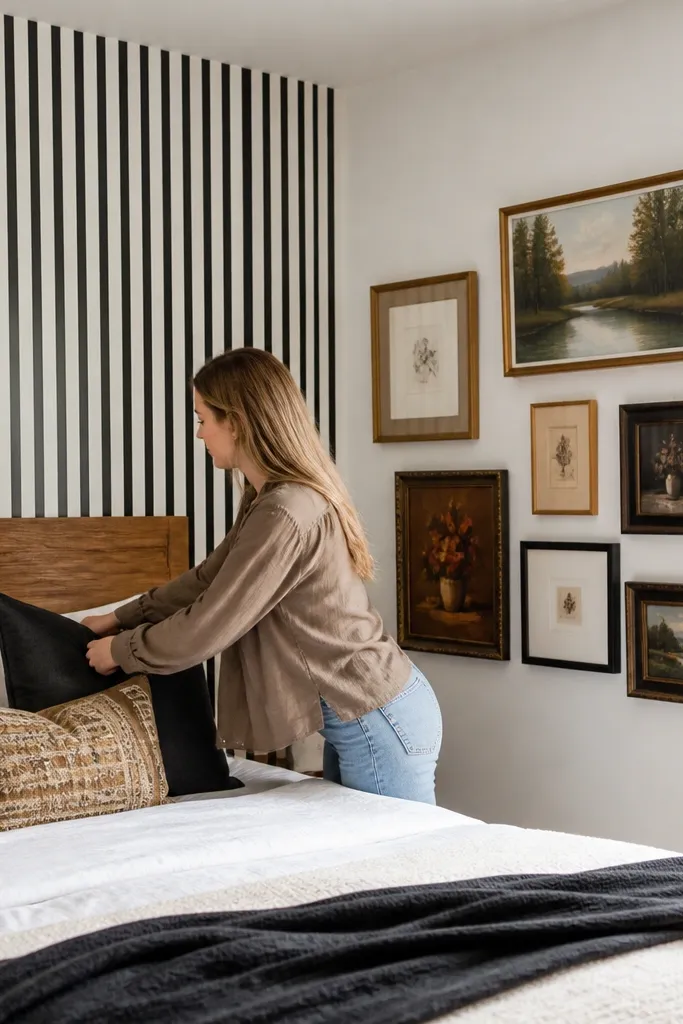
1. Matte warm white with a 4-inch trim border
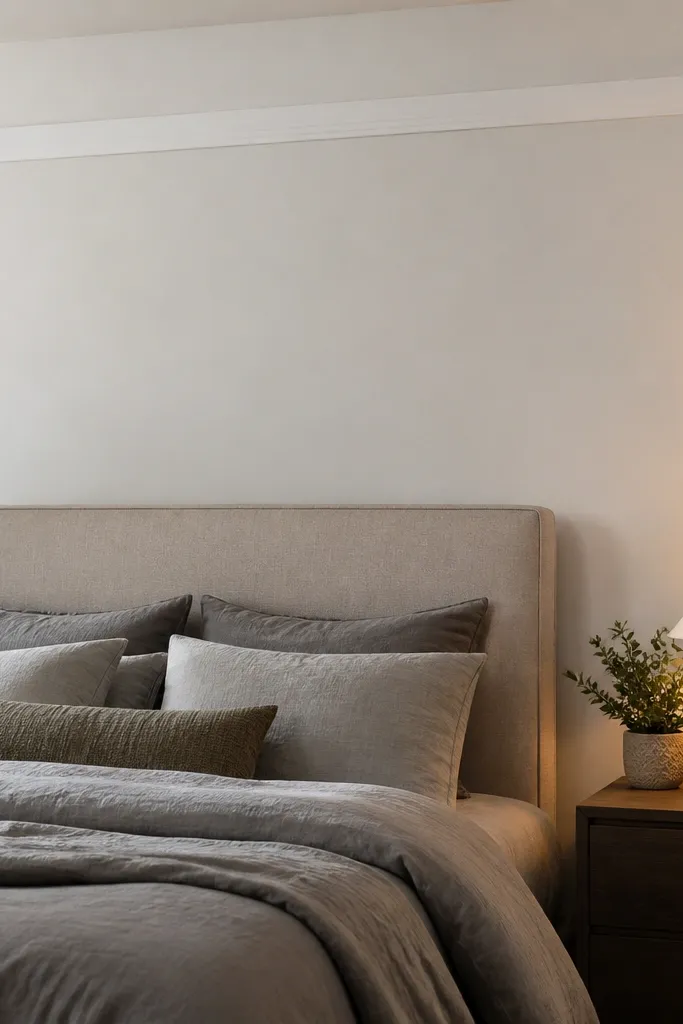
If your bedroom feels flat, this is the cleanest fix: keep the wall light, then add a defined shape behind the headboard. A matte warm white reduces glare and hides small wall imperfections, while the 4-inch trim border creates instant structure even in small rooms. The rectangle framing makes the bed feel “built-in,” which is the whole point of an accent wall. Choose a trim color that’s slightly deeper than the wall, like creamy off-white or soft greige, so the border reads clearly in both day and night lighting. This works especially well for renters because you get a designer look without committing to bold color everywhere.
Measure the headboard width and center the rectangle so it’s about 6-12 inches wider than the headboard on each side. Mark the outline with painter’s tape, then tape a second guide line 4 inches inside the outline for a consistent border width. Paint the wall first, let it dry fully, then install pre-primed MDF trim or casing strips using finishing nails and wood glue (plus caulk at seams). Prime and paint the trim in the slightly deeper tone, and remove tape only after the trim paint is dry to touch.
Pro tipUse a 2-foot level while taping the rectangle — a wall that’s off by even 1/4 inch looks crooked once the room is lit.
Watch outDon’t choose a trim color that’s the exact same shade as the wall — the border disappears.
2. Charcoal half-wall behind the headboard
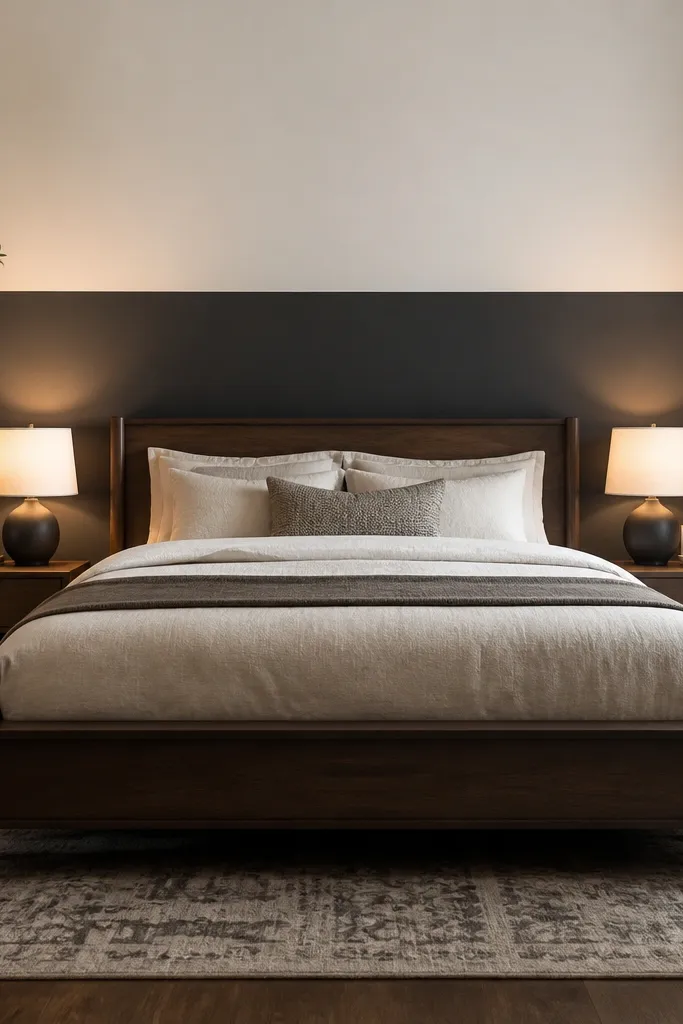
A charcoal half-wall gives you drama without shrinking the room. The key is placement: stop the darker color at about mid-wall height behind the headboard, then keep the upper portion a soft white. That horizontal split makes the bed area feel styled and adds depth, while the lighter top keeps the ceiling from feeling lower. This is a great choice for bedrooms with light wood furniture and warm bedding, because charcoal pairs cleanly with tan, cream, and natural linen. It also hides scuffs better than bright colors because charcoal stays visually calm.
Find the headboard top edge and decide the split around 48-54 inches from the floor (adjust by your ceiling height so it sits behind the headboard). Tape a perfect horizontal line with a laser level or long level, then paint the upper section first in soft white. After the upper paint cures, tape again along the split and roll the charcoal section using a roller cover made for smooth walls. Finish with angled brush work at edges, then remove tape after the paint is dry to the touch.
Choose a matte or eggshell paint for charcoal, not glossy — gloss shows roller marks and makes mistakes obvious.
Don’t let the split line wobble — crooked lines make the whole wall look unfinished.
3. Sage green panel look with 1x2 wood slats
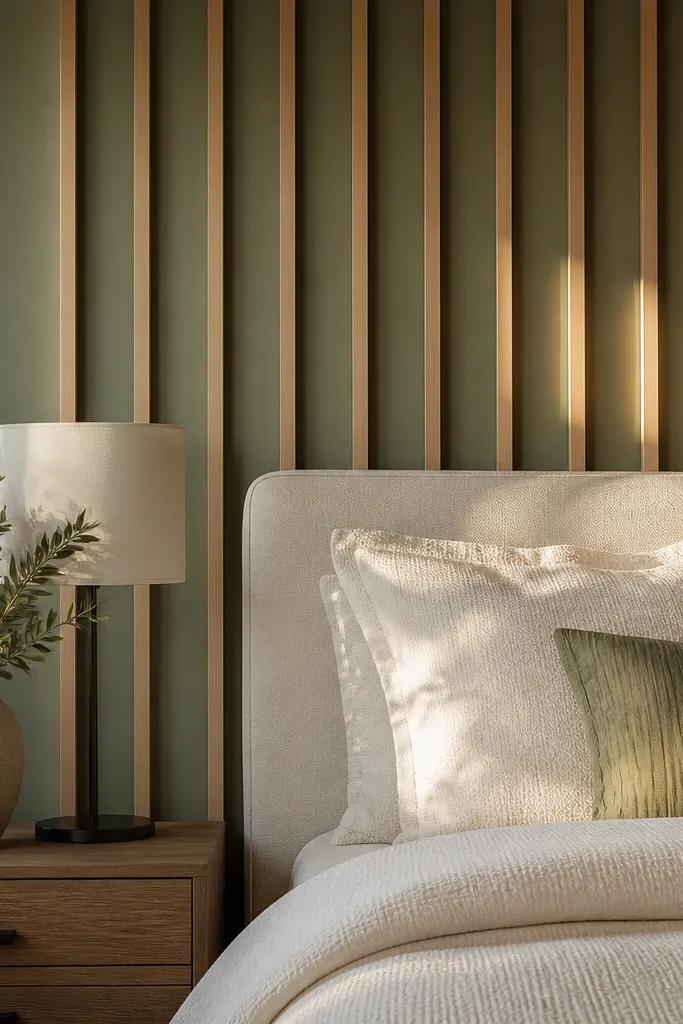
Vertical slats add texture that reads expensive even when materials stay cheap. Paint the wall sage green (matte), then mount thin 1x2 slats vertically to create a panel effect behind the bed. The slats catch light and create shadows, which gives the wall depth at night when you’re using bedside lamps. This look works well if your bedroom has light wood, rattan, or white bedding because sage feels calm and fresh. It’s also forgiving because minor wall unevenness is hidden behind the slat spacing.
Plan slat spacing at 2-3 inches on center for a modern rhythm; for a medium bed wall, use fewer wider gaps for a cleaner look. Mark a level starting line behind where the headboard will sit, then find studs with a stud finder and mark fastening points. Paint the wall sage first, let it dry, then mount slats with wood glue plus 2-inch finishing screws into studs. Caulk the seams, sand lightly, and touch up paint on the slats so everything reads one cohesive surface.
Pre-paint the slats before installation if you want the smoothest finish; touch-up after is still needed, but less.
4. Faux plaster in warm greige with a sponge technique
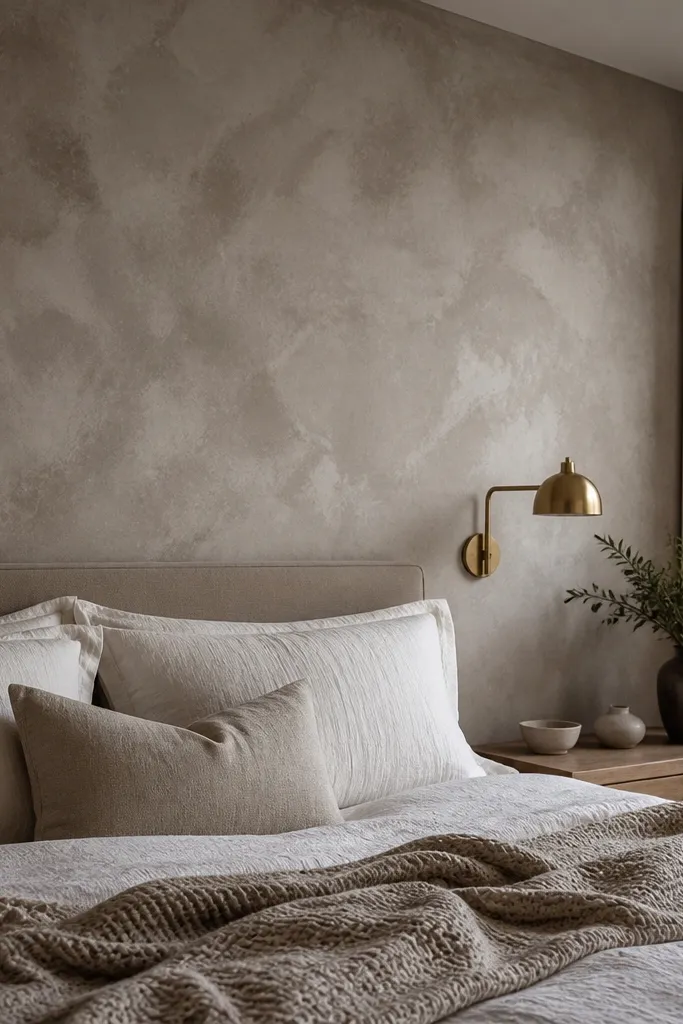
If you want an accent wall that looks like it came from a design store, faux plaster is the route. Warm greige with a sponge texture hides small flaws and adds subtle movement — the wall looks different from every angle. It’s not a flat color block, so it feels layered without needing extra furniture. This works well in bedrooms with neutral bedding and brass or black fixtures because the texture adds warmth and dimension. The best part: the “imperfections” look intentional, which saves you from obsessing over minor roller lines.
Use a plaster-texture product or a faux finishing compound designed for walls, then mix and tint to a warm greige tone. Apply a base coat if your system calls for it, let it set, then sponge on the top layer using a natural sea sponge in light, irregular passes. Work in sections so edges don’t dry hard; keep your pressure consistent to avoid harsh ridges. When dry, lightly knock down the highest peaks with a fine sanding sponge, then seal with a matte wall sealer.
Pro tipTest on a small scrap panel first and adjust your sponge pressure — too much pressure creates blotches that read messy.
5. Black-and-white vertical stripes using peel-and-stick vinyl
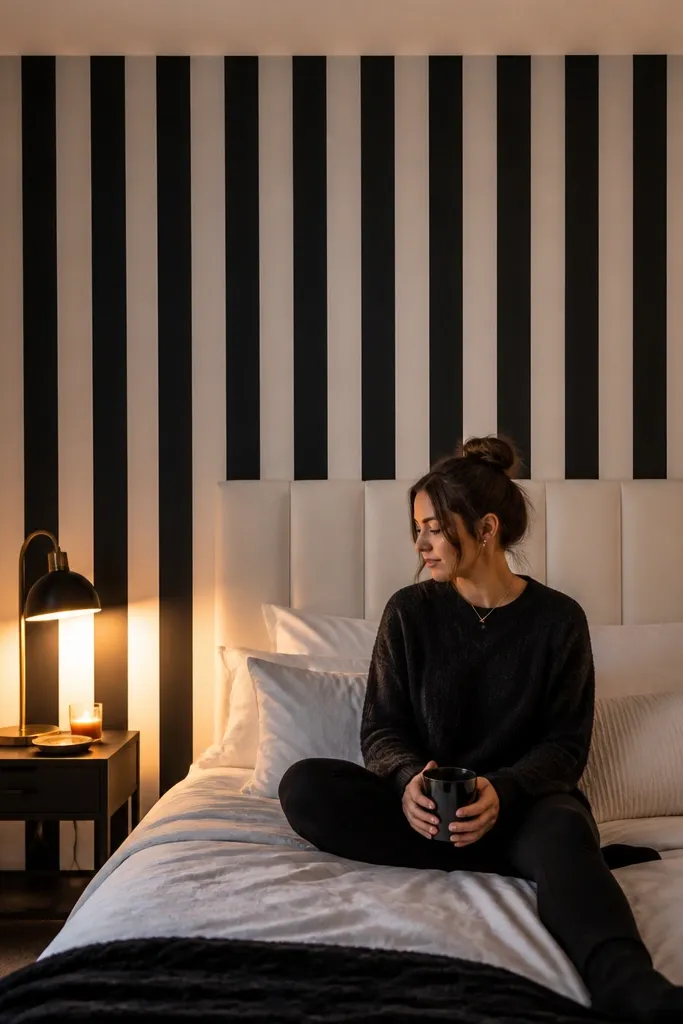
Vertical stripes can make a ceiling feel taller, and peel-and-stick makes it budget-friendly. Go with black and crisp off-white stripes for high contrast that looks sharp in photos and under lamps. This works best if your bed is against a wall with decent height because stripes need vertical room to do their job. It also hides the fact you’re not drilling — the pattern gives the wall a “designed” look immediately. Choose vinyl that’s meant for walls, not thin paper, so it doesn’t wrinkle and lift at edges.
Clean the wall with a degreaser wipe, then patch and sand any bumps; stripes show every ridge. Start the first strip at a marked plumb line using a level so the pattern stays straight. Apply strips from top to bottom, using a plastic smoothing tool to push air out as you go. After the last strip, trim carefully with a sharp utility knife and a straight edge; re-check corners and press edges firmly.
Pro tipPlan your stripe start so the headboard lands between stripe lines — it looks cleaner than splitting stripes under the bed frame.
6. Navy geometric shapes with painter's tape triangles
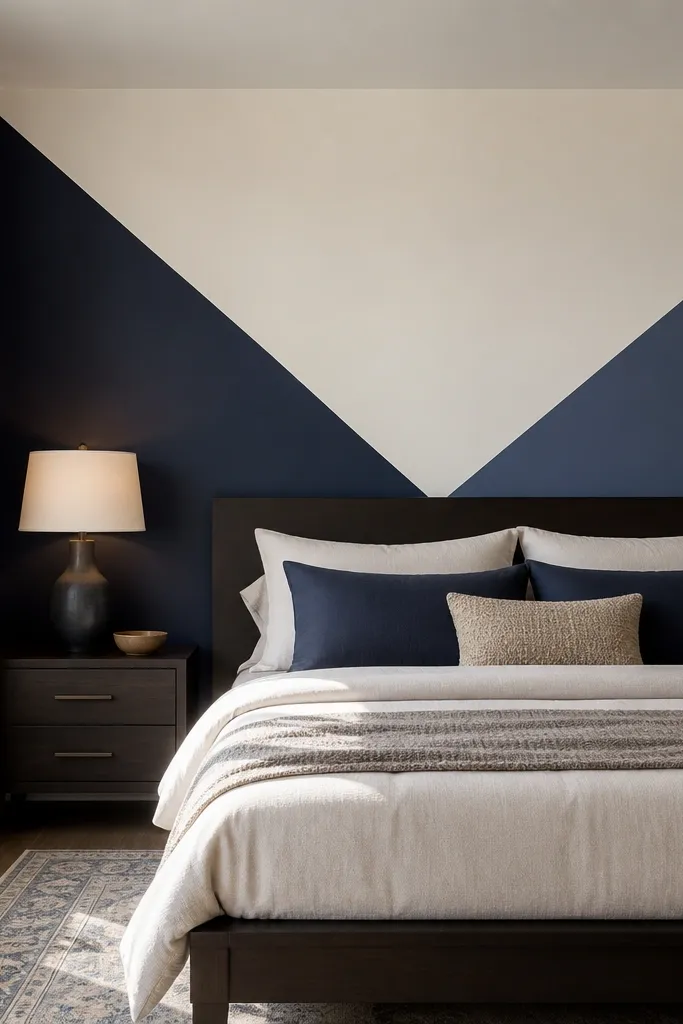
Geometric walls look bold, but they don’t have to be messy. Painter’s tape triangles create a modern pattern that frames the bed and adds motion without wallpaper. Use a soft warm white base, then paint two shades of navy (one deep, one slightly lighter) for dimension. This is a strong pick if your room has simple furniture and you want the wall to do the talking. The tape edges make the lines look crisp, which is what turns “DIY” into “designed.”
Pick a triangle grid that fits your headboard width, typically 6-10 inch triangle sides for a medium wall. Tape a few anchor lines first, then build the triangle pattern with tape one layer at a time so you can remove sections without smearing paint. Paint the first navy shade, let it dry fully, then tape over the areas for the second navy shade. Peel tape slowly at a 45-degree angle once the final paint is dry to touch.
Pro tipUse the same roller direction for each paint layer — it helps keep the sheen consistent inside the shapes.
7. Wood-look peel-and-stick panels in herringbone
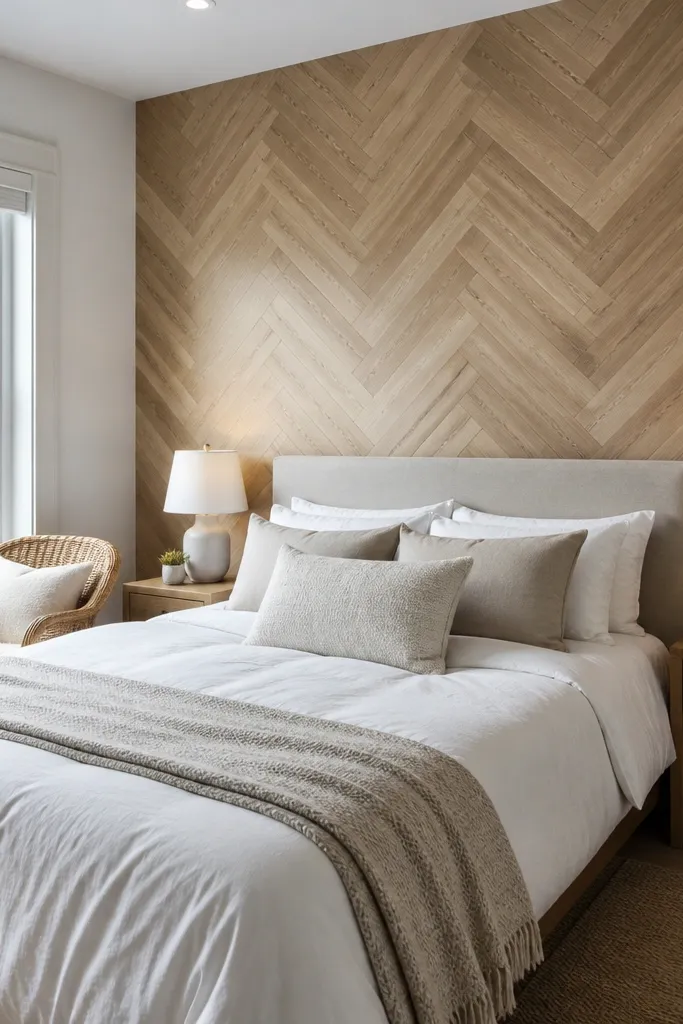
Herringbone is the fastest way to make a bedroom feel custom, because the pattern creates angled shadows. Wood-look peel-and-stick panels keep cost down while still giving you the warmth of real wood. Choose a light oak tone if your room is small or north-facing; choose a medium walnut tone if you have warm lighting. This works best when the wall is mostly clear behind the bed, since the pattern needs clean lines to read. It also pairs well with white bedding, black frames, and natural textures like jute or linen.
Measure the wall area behind the headboard and dry-fit a small section to see where the cuts will land; keep the most visible area centered. Clean the wall thoroughly and let it dry, then start from the centerline so the pattern stays symmetrical. Apply panels in rows, pressing firmly and aligning edges as you go; use a ruler to keep angle consistency. Trim at the edges and around outlets if needed, then seal only if the product instructions require it.
Pro tipIf your wall has outlets or switches, stop the pattern cleanly and frame around them with a simple trim strip.
8. Fabric wall art using a tension rod frame
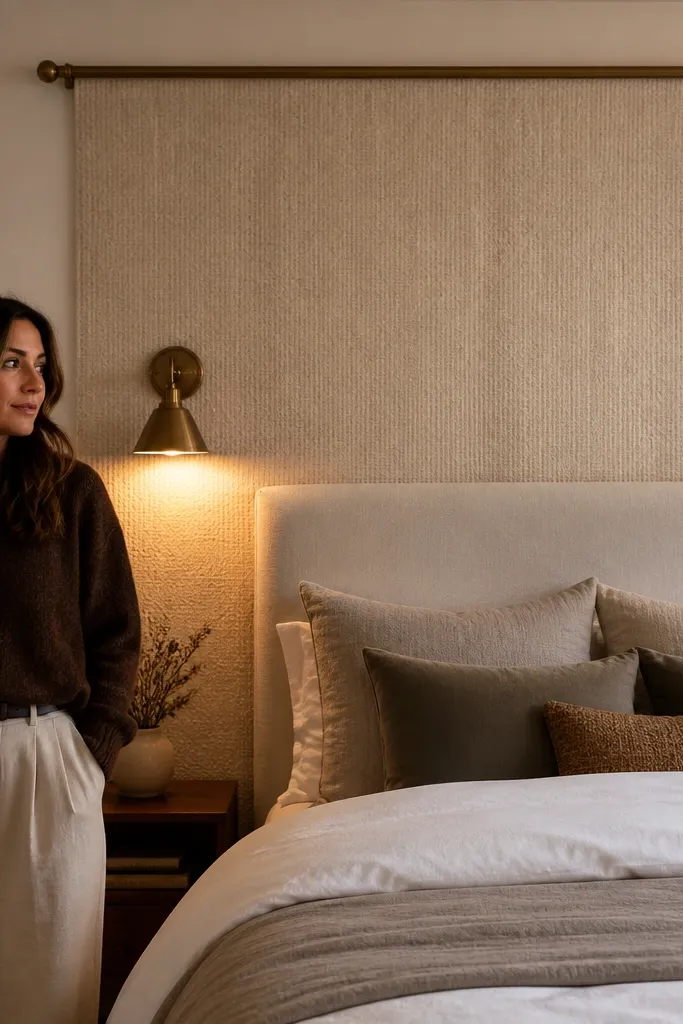
Fabric turns an accent wall from “painted” to “soft and cozy,” and it looks great in bedrooms where you want calm. Use a tension rod frame (or a simple wood frame you mount) and stretch a textured fabric like linen blend, heavy cotton, or woven bouclé in a neutral tone. The wall becomes a backdrop for your headboard and makes the whole space feel warmer, especially with warm lighting. This is also a smart move if your wall has minor imperfections you don’t want to patch. Choose a fabric with visible weave so light catches it and the wall doesn’t look flat.
Measure the area behind the headboard and build a frame or install a tension rod system so the fabric has 2-4 inches of extra width for pull. Hang the rod at the top first, then pull fabric taut and secure the bottom with fabric clips or a staple-less method if using tension hardware. Smooth wrinkles with your hands, then adjust tension until the fabric drapes evenly across the bed zone. Finish by trimming excess and adding a simple edge casing or decorative trim if your frame shows.
Pro tipPick fabric with a thicker weave than you think you need; thin fabric wrinkles and looks cheap under direct light.
9. Color-blocked headboard wall with a wide vertical band

Color blocking creates a graphic focal point with less risk than full-wall color. Use a soft neutral base and add a single wide vertical band behind the headboard — think 12-18 inches wide depending on bed size. The band can be a deep tone like espresso brown, muted olive, or terracotta to add personality without overwhelming the room. This works great for bedrooms with patterned bedding because the wall stays simple and the band anchors the look. It also makes the room feel intentional even if you don’t want trim, slats, or wallpaper.
Paint the entire wall first in your base color and let it dry. Mark the vertical band centerline with a level, then tape both edges of the band and measure width (usually 14-16 inches for a queen bed zone). Paint the band color with painter’s tape edges, remove tape while paint is dry to touch, and touch up any micro-bleed with a small angled brush. Let cure fully before moving bedding close to the wall.
Choose a band color that matches one element in the room, like a throw pillow or rug accent — it makes the wall look planned.
10. 3D wall panel accent in matte off-white
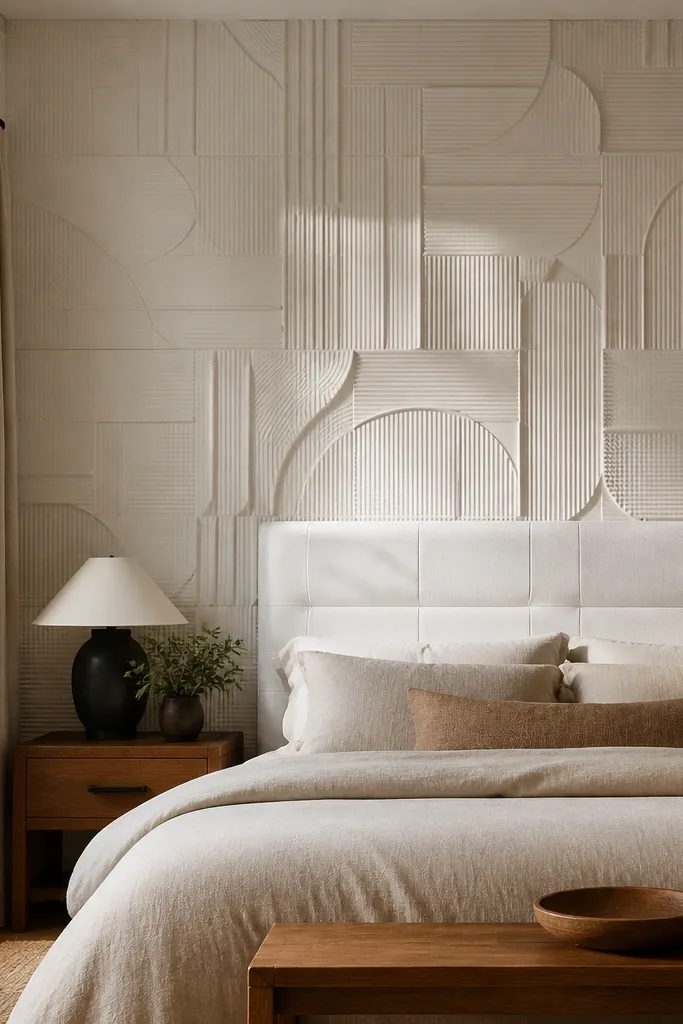
3D panels give you depth without dark colors, which is perfect if you’re worried about the room feeling heavy. Matte off-white panels keep the accent wall bright while the raised pattern creates shadow lines that look expensive. A grid or geometric relief behind the headboard makes the bed area feel like a hotel suite. This is a strong choice for small bedrooms because you get visual interest without adding color contrast that can shrink the space. Pair it with simple bedding so the texture stays the star.
Pick panel sheets with a relief pattern designed for walls, and check the total thickness so it doesn’t interfere with headboard placement. Patch and sand the wall flat, then apply construction adhesive in beads on the back of panels. Start at the center and work outward, using a level to keep rows straight; press firmly and wipe excess adhesive. Caulk seams, then paint the panels with a matte off-white that matches your ceiling trim for a smooth, unified look.
Paint the panels after installation — matching the sheen and tone matters more than choosing the perfect panel color.
11. Rust terracotta with a rag-rolled finish
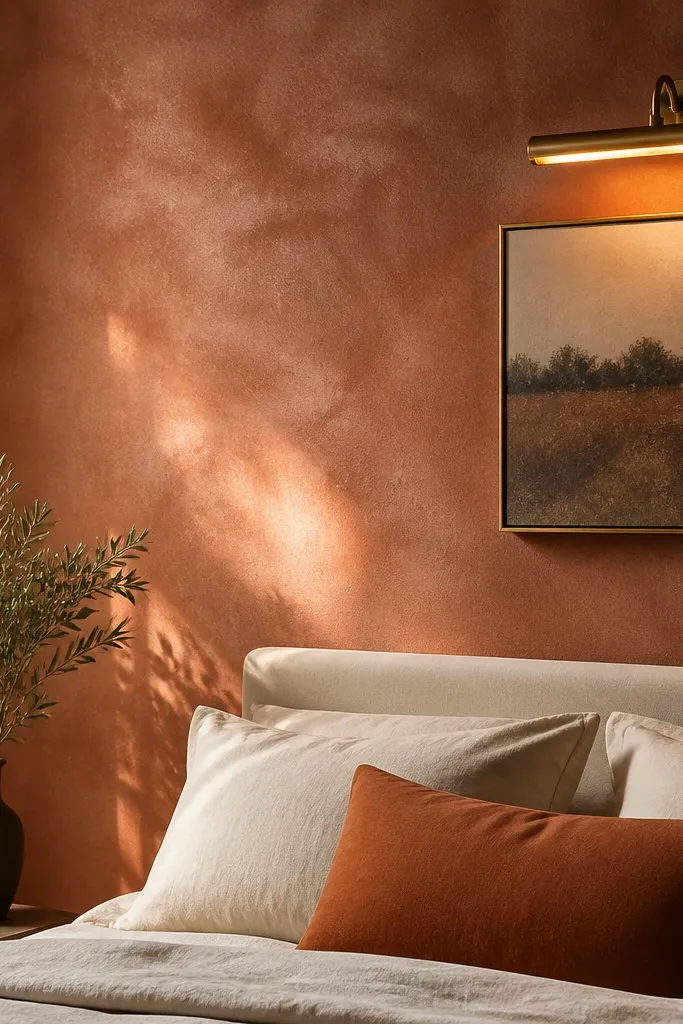
Terracotta can look rich without going dark, and rag-rolling makes it look handcrafted. Use a terracotta paint and apply it with a roller, then soften the surface with a rag in light passes to create subtle variation. The texture helps the wall avoid looking flat or streaky, which is the biggest risk with bold colors. This accent wall looks amazing with white bedding, warm wood nightstands, and black metal lighting. It also photographs well because the texture catches light in a way smooth paint can’t.
Prime bare drywall or patch areas, then roll on a solid coat of terracotta as your base. While it’s still slightly tacky, use a clean rag to dab and lightly roll the surface in random directions; don’t overwork one spot. Let it dry fully, then do a second pass only if you want deeper color — stop before it looks striped. Finish with a matte topcoat if the paint system calls for it, so the wall stays soft and hides imperfections.
Keep a single rag for the whole wall so texture stays consistent; switching rags halfway creates uneven pattern density.
12. Light oak board-and-batten with white paint
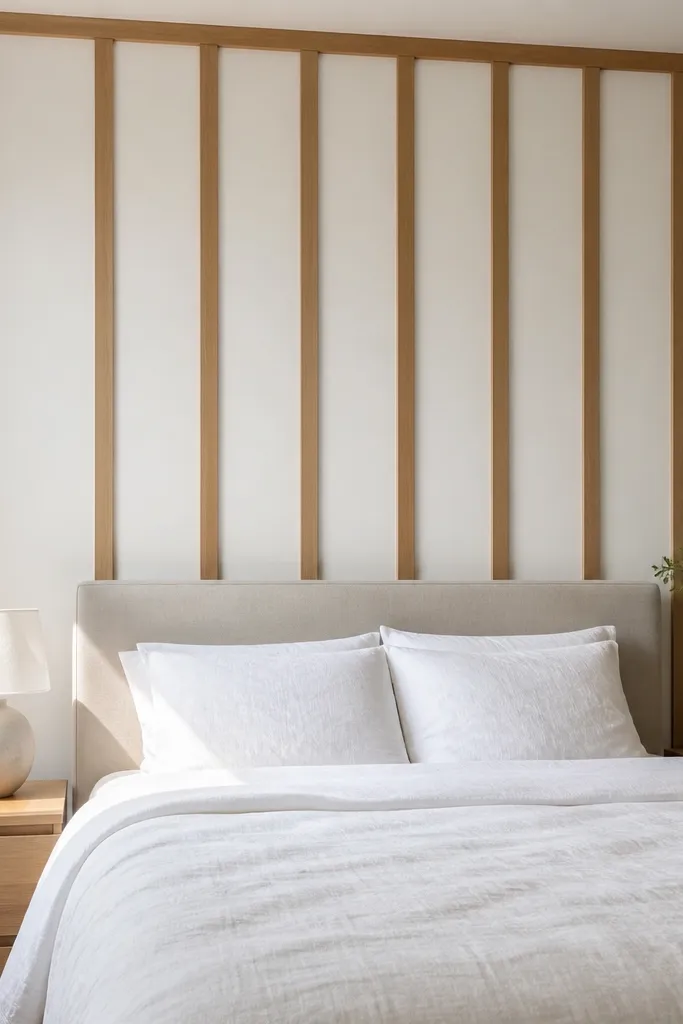
Board-and-batten gives you classic structure, and mixing white with light oak keeps it modern. The look is clean and photo-friendly because the vertical lines pull the eye up and make the headboard area feel built. Use white on the wall and paint or stain the battens in a light oak tone for warmth. This works well in bedrooms with white bedding and neutral rugs, and it makes a simple bed frame look intentional. The raised lines also hide small wall waviness better than a flat paint-only accent.
Mark a centerline behind the headboard, then decide your batten spacing — 12-16 inches on center looks right for most bedrooms. Attach 1x2 battens into studs or with proper anchors, keeping everything level and straight using a long level. Paint the background wall white, then stain or paint the battens light oak tone; seal if you stain. Caulk seams where battens meet the wall, then lightly sand caulk once dry before a final paint touch-up.
Pro tipDon’t skip caulk at the edges — the crisp shadow line is what makes board-and-batten look high-end.



