
1. Painted Pegboard Frame with Color-Coordinated Hooks
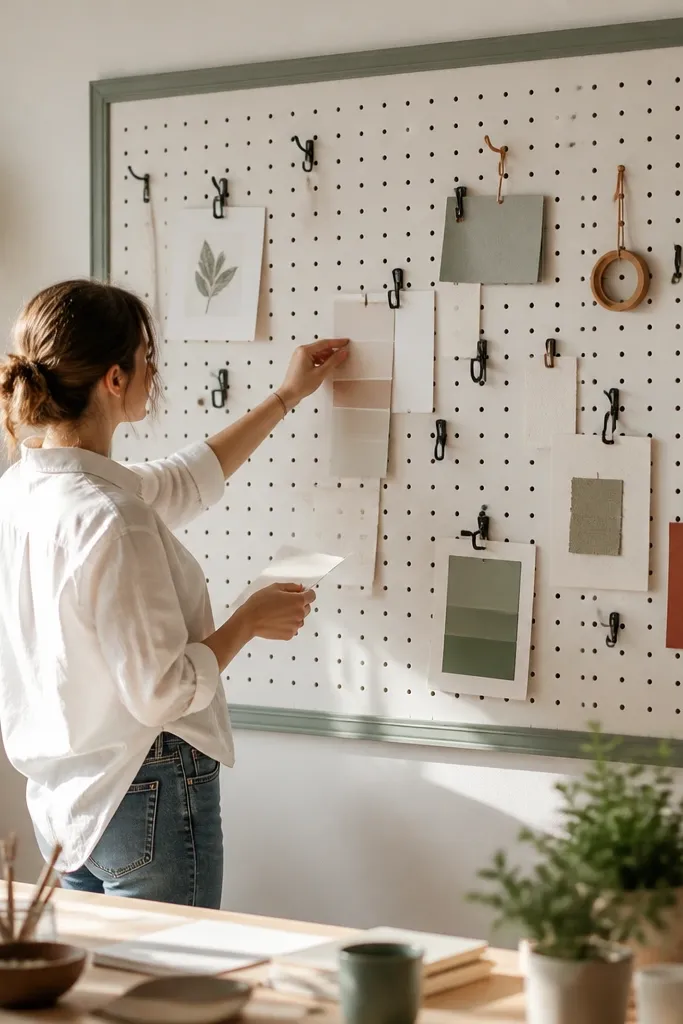
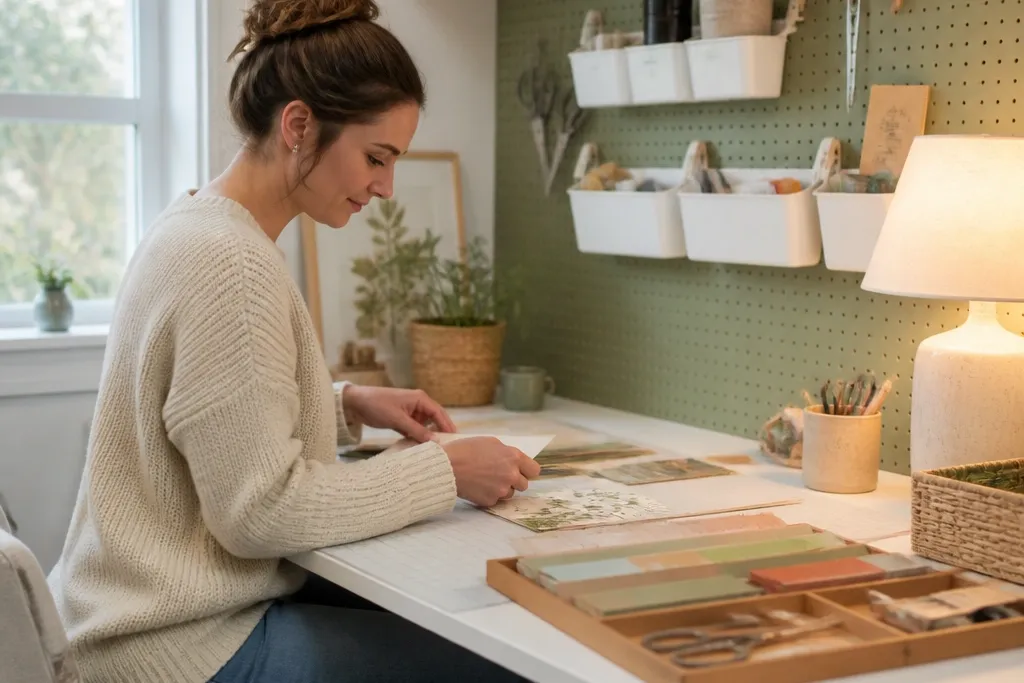
A pegboard wall looks instantly tidy because it turns “random tools” into a planned layout, and a painted frame makes it feel like decor instead of hardware. Choose a calm frame color like sage, terracotta, or warm white, then keep the pegboard itself light so paper and labels stay readable. Add hooks in two tones (black plus brass, or white plus wood) so you get visual rhythm without clutter. This setup is great for craft rooms where you have a desk but no clear supply landing zone; it keeps scissors, rulers, and tape where your eyes already go.
Start by measuring the wall space behind your main work area and buying a pegboard panel that fits cleanly with 2-4 inches of breathing room on each side. Paint only the frame edges with a semi-gloss cabinet paint, let it cure, then mount the pegboard with level spacing. Finally, hang tools so the biggest items sit closest to eye level and smaller ones fill the gaps; use 2-3 matching label tags for bins on the lower hooks.
Use clear tape labels on the bin fronts, but keep the bin colors limited to two shades so the wall stays calm.
Avoid mixing five hook styles and five label fonts — it stops reading as intentional.
2. Fabric Basket Wall for Yarn and Fabric Offcuts
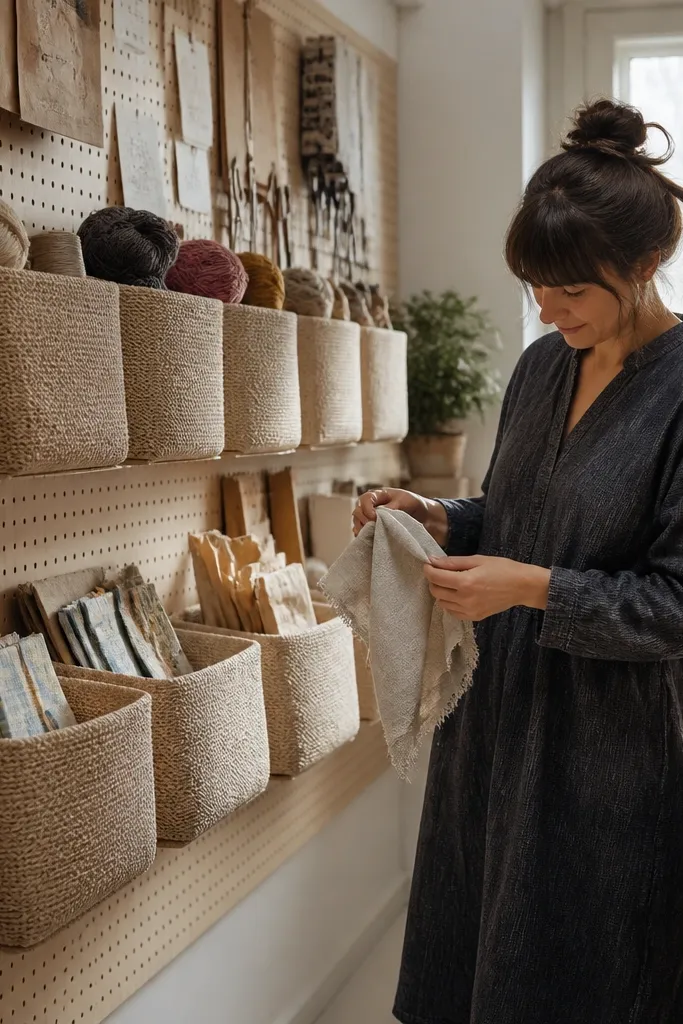
Pick 6-10 baskets that look cohesive in texture, not necessarily identical in color, and measure the width of the wall so you can keep consistent spacing. Install two hanging rails or a French cleat strip so basket bottoms sit about 18-22 inches from the floor for the top row and 10-14 inches for the bottom row. Drop baskets in place, then add a simple sorting rule: yarn goes upright in the deeper baskets, offcuts lie flat in the shallower ones.
If your craft room gets visually noisy fast, fabric baskets solve it by hiding the “in-progress” mess while still looking soft. Mount baskets at two heights: one line for yarn and thread spools, another slightly lower for fabric offcuts and pattern paper. The woven texture adds warmth, and the neutral basket colors keep the room cozy even when you’re working with bright materials. This idea works especially well for sewing, knitting, and paper crafting because it reduces the constant pile that forms beside your desk.
Watch outDon’t mount baskets too high — if you have to reach, you stop using them and the floor pile returns.
Pro tipLine the basket bottoms with thin cotton fabric so yarn doesn’t snag and the baskets look smoother in photos.
3. Corkboard with a Matching Fabric Pin Cushion Border
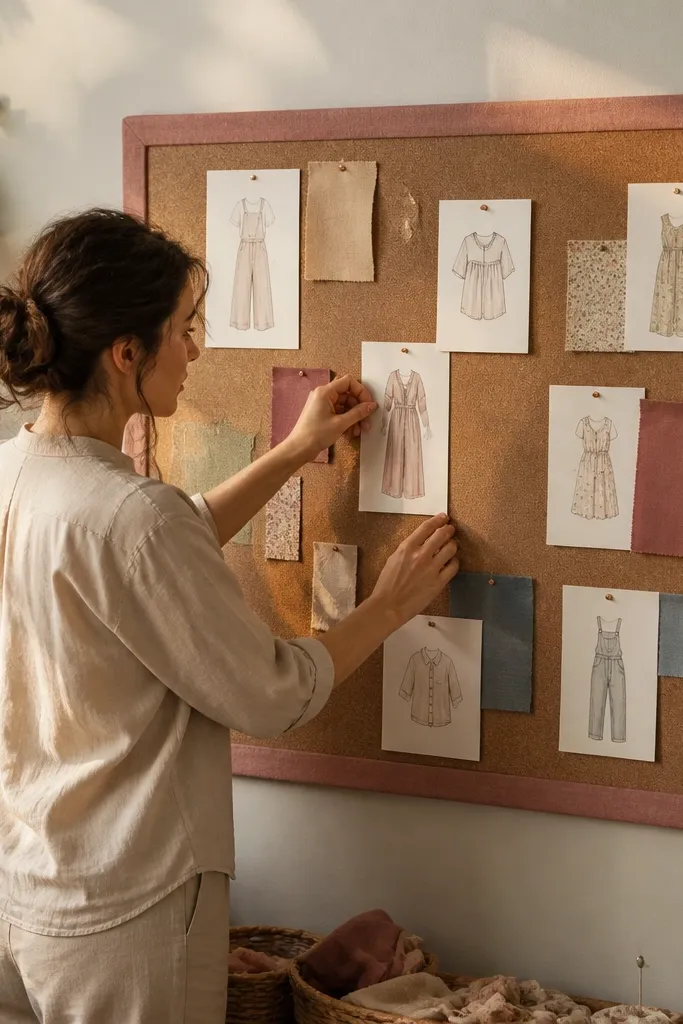
Buy a corkboard sheet or panel sized to fit above or beside your desk, then measure the perimeter for border strips. Wrap fabric around a thin backing strip (like craft foam or a folded cardboard edge), staple it cleanly, and attach the border to the cork using spray adhesive. Finish by adding 2-3 pushpins sets in one color family and pinning your top reference materials using binder clips for quick swaps.
A corkboard is practical, but a fabric border makes it look like a finished panel you’d hang in a living room. Cover the border with a medium-weight cotton or linen in a warm color like dusty rose, mustard, or olive, then keep the cork surface clean and spaced. Pin only what you need — a few project sheets, a color palette card, and one reference photo — so it doesn’t become a clutter board. This is ideal for craft rooms where your “plan” lives on scraps of paper, and you want it visible without turning the wall into chaos.
Watch outAvoid a thick, messy border — a narrow strip looks tidy and makes the board feel intentional.
Pro tipUse binder clips for paper edges so you can change projects without pulling pins and warping corners.
4. Desk Backdrop Shelf with Two Trays and One Small Plant

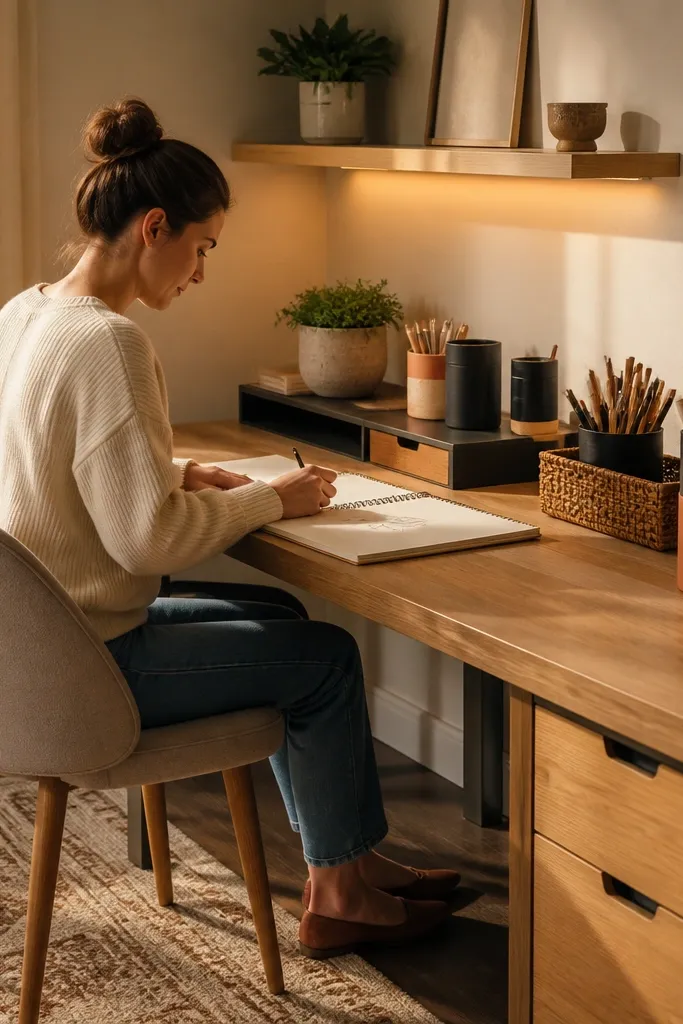
Choose a shelf depth of about 5-7 inches so it doesn’t feel bulky, then mount it 4-6 inches above the desk surface. Place two trays on the shelf: one for frequently used items (tape, markers) and one for odds you want to keep contained (paper clips, mini scissors). Add a compact plant in a ceramic pot and keep the plant leaves slightly below the shelf line so it looks tidy.
A backdrop shelf is an easy way to make a desk look styled even when supplies are out. Put it behind your work surface so the items you reach for are in front, but the “decor” sits above and behind. Two trays keep small tools from visually multiplying, and one small plant (real or faux) adds life without taking up workspace. This works best if your desk is against a blank wall or a plain wall — the shelf creates a cozy frame around your main work area.
Watch outDon’t add more than two trays plus the plant; too many objects turns the shelf into another clutter zone.
Pro tipMatch tray finishes — ceramic + ceramic or wood + wood — so the shelf reads cohesive at a glance.
5. Soft Runner Rug in Warm Neutral with a Rubber Pad
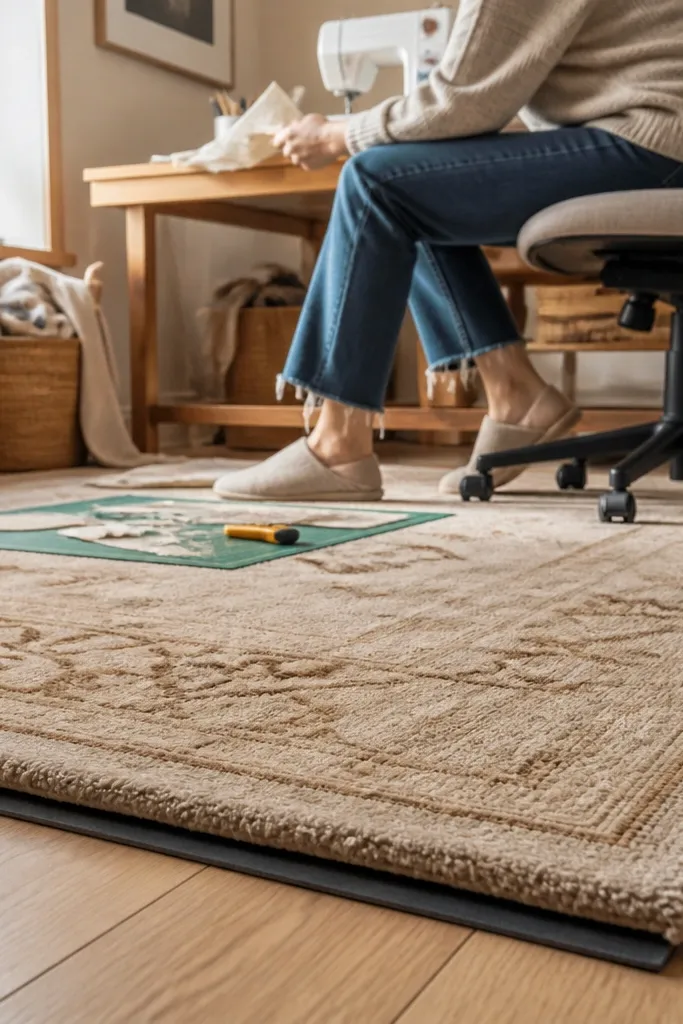
Measure the walking path in front of your desk and aim for a runner that leaves 6-10 inches of floor visible at each end. Choose a runner width that fits your chair movement without snagging; 24 inches is a good starting point for many desks. Add a non-slip rubber pad sized to the runner and place it so the pad edges are tucked under the rug, then vacuum once to remove any fibers.
Craft rooms feel harsh when the floor is bare, especially if you’re cutting, ironing, or standing for long sessions. A runner rug adds softness underfoot and visually warms the whole room, even if everything else is simple. Go for a warm neutral with a subtle pattern so it hides small dust and paper flecks. The rubber pad matters because it keeps the rug from creeping — that movement makes the room feel chaotic. This is a strong choice if your workspace sits on tile, laminate, or hardwood and the sound echoes.
Watch outAvoid a shag rug — paper scraps and tiny bits collect and the room loses that clean look fast.
Pro tipIf you use a rolling chair, pick a low-pile runner so the chair wheels don’t catch.
6. Wall-Mounted File Ledge for Paper Projects
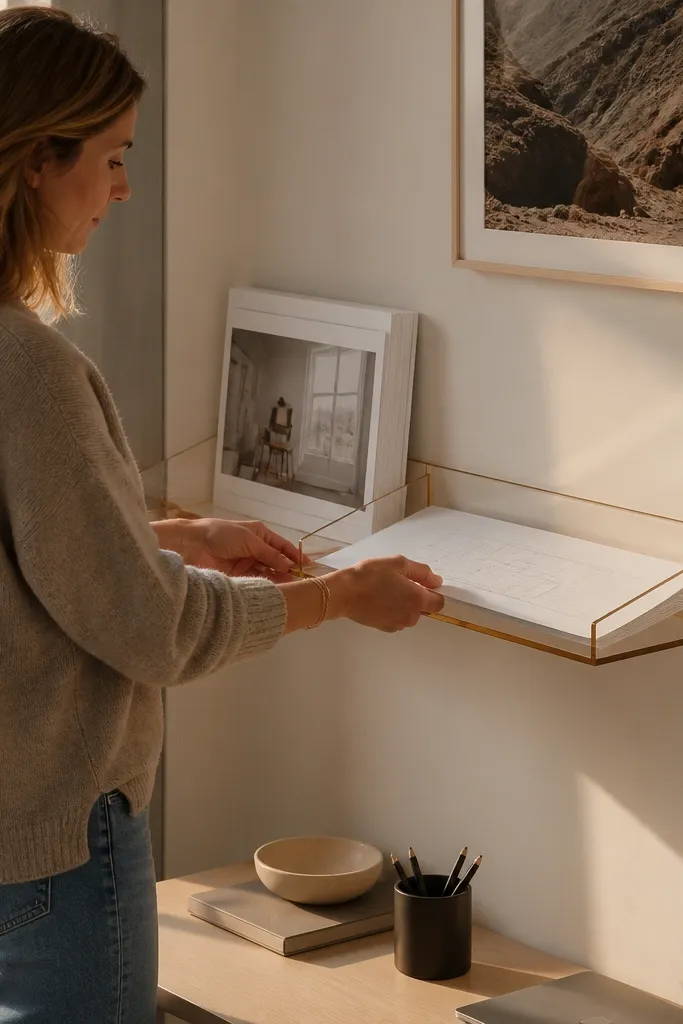
Find a spot beside your desk where you can reach without twisting — usually 6-12 inches from your main work surface. Install a ledge with a slight lip so paper doesn’t slide; aim for 10-12 inches deep and 2-3 feet long. Add two trays: one for active materials and one for templates, then label both with simple tags so switching projects is quick.
Paper piles make a craft room look messy even when the rest is organized. A wall-mounted file ledge keeps projects flat and visible, so you can grab the right sheet without digging through stacks. Use two slim trays or one tray plus a divider so the “current” project stays separate from “reference” paper. This is perfect for paper crafts, scrapbooking, and pattern work where flatness matters. The ledge also creates a clean horizontal line that makes the room feel calmer.
Watch outDon’t mount it too high; if you have to reach up, you’ll stop using it.
Pro tipUse a light wood ledge or painted wood so it doesn’t compete with your paper colors.
7. Drawer Inserts in Two Textures for Markers and Tools
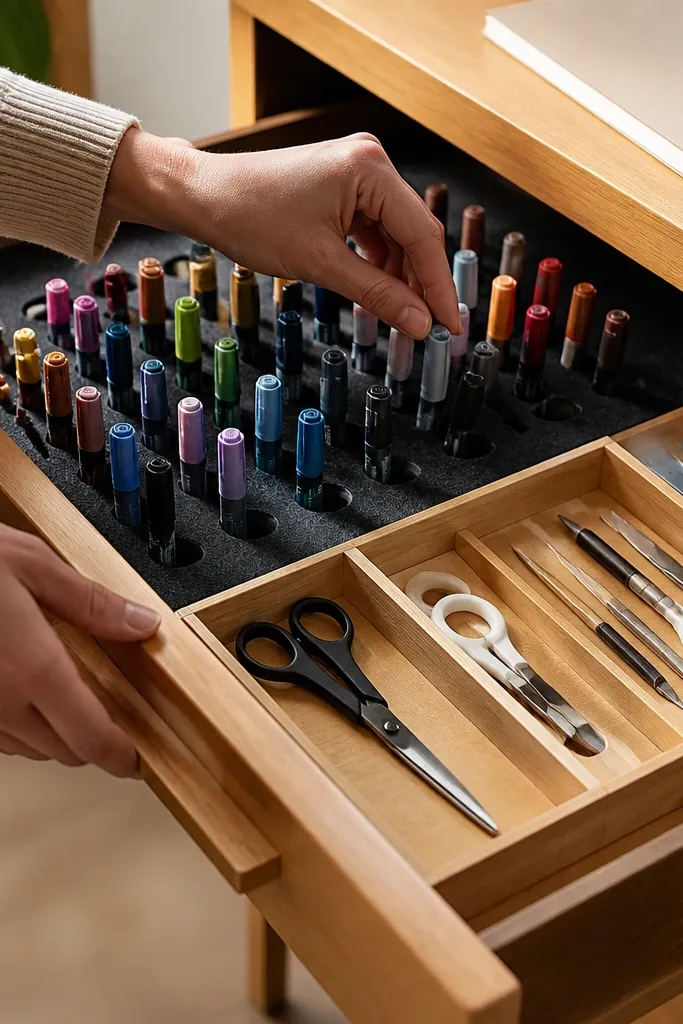
Measure the inside dimensions of one problem drawer and choose inserts that fit with minimal gaps. Line the marker side with felt or foam so caps don’t scratch and markers don’t roll, then place a rigid insert for heavier tools. Sort by height: tall items on one side, shorter items on the other, then use a small label on the front edge of the drawer.
Cozy craft rooms look good partly because drawers don’t spill. Drawer inserts make your tools look intentional when you open them, and that visual order affects the whole room’s feel. Pick two textures for contrast: felt for markers and smooth plastic or wood for cutting tools. When your markers stand upright and your scissors have a dedicated slot, the drawer stays neat even during busy weeks. This works best when your desk drawers hold mixed supplies and you keep finding them scattered across the desktop.
Watch outAvoid one big empty insert; you want compartments that stop items from shifting.
Pro tipKeep one “junk” slot small and specific (like paper clips) so loose scraps don’t spread everywhere.
8. Two-Color Label System with Linen-Covered Tape Flags
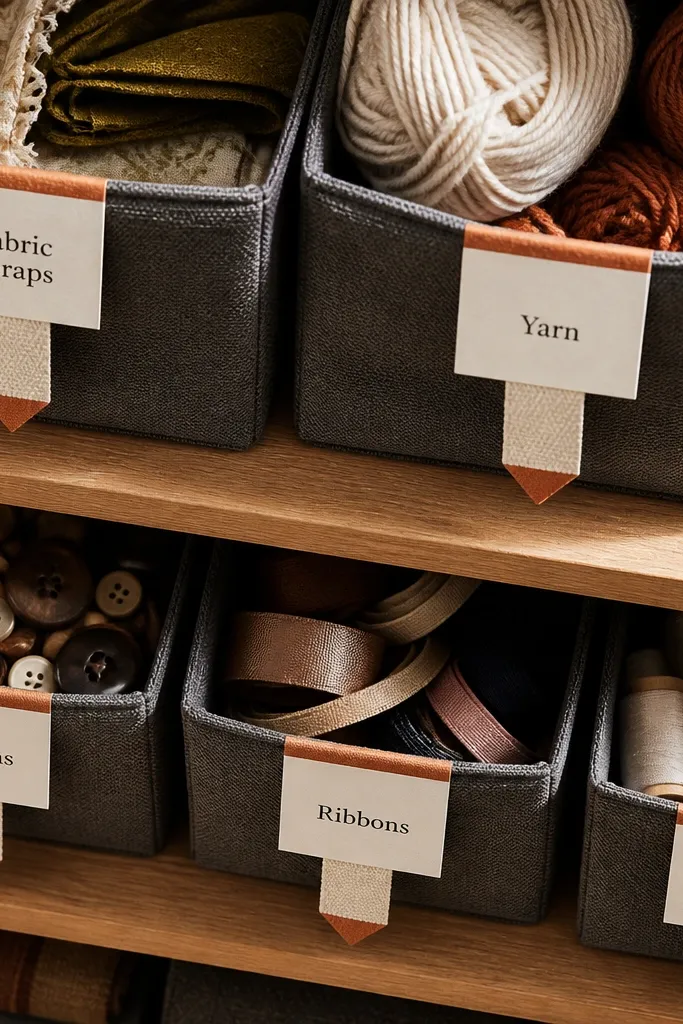
Choose a label style you can repeat: tape flags with straight edges or small strip labels on bin fronts. Pick two colors and stick to them for the entire room, then print or write consistent text sizes. Apply labels at eye level on each container, then group bins by category using the same color accent for each category (for example, terracotta for paper, black for tools).
Labels are the fastest way to make quick and easy craft room decor look like a real system. A two-color label scheme — black text on warm white and terracotta accents — makes your bins and containers look styled instead of random. Linen-textured tape flags look softer than glossy labels and blend with cozy decor. Use labels on bin fronts and on a few key containers, not on every single jar, so the room stays calm. This idea is best for craft rooms where supplies live in mismatched containers and you lose time hunting for the right thing.
Watch outDon’t use neon labels or tiny fonts — they look busy and defeat the cozy look.
Pro tipLabel only the outside-facing containers; inside labels create clutter and don’t improve usability.
9. Paper Storage Cubes with Matching Canvas Covers
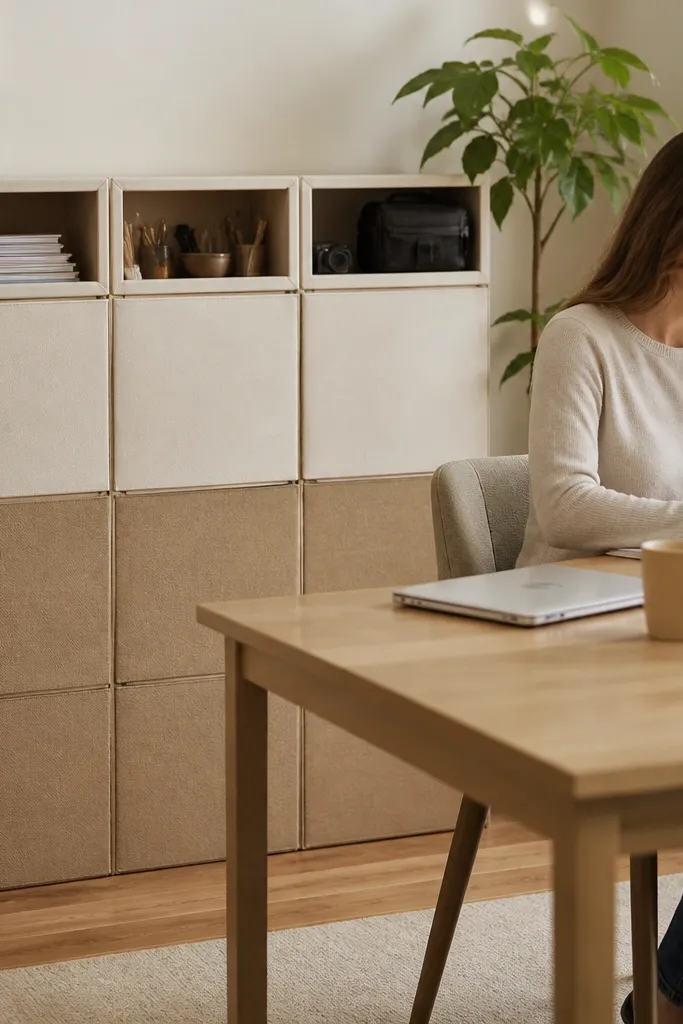
Measure your cube unit and buy canvas covers that match the cube dimensions; aim for a snug fit so covers don’t sag. Install cubes in a single straight run near your desk or wall, then slide covers on and leave only one or two cubes uncovered if you want easy access. Add dividers inside the covered cubes so paper stays flat and tools stay upright.
Cubby storage is practical, but it looks messy unless you soften it. Matching canvas covers turn open cubes into neat “blocks” that look like decor, not storage. Choose covers in two neutral tones and keep the cube layout simple: one row for paper, one row for small tools, one row for kits. This is a great fit for craft rooms that need visual calm because your supplies are always visible. The canvas also hides the micro-clutter that makes the room look busy in photos.
Watch outAvoid mixing hard plastic bins and open cubes in the same row — it makes the room look mismatched.
Pro tipKeep the cube colors limited to cream and taupe for a warm, cohesive look.
10. Warm Bulb Task Lamp with a Swing Arm
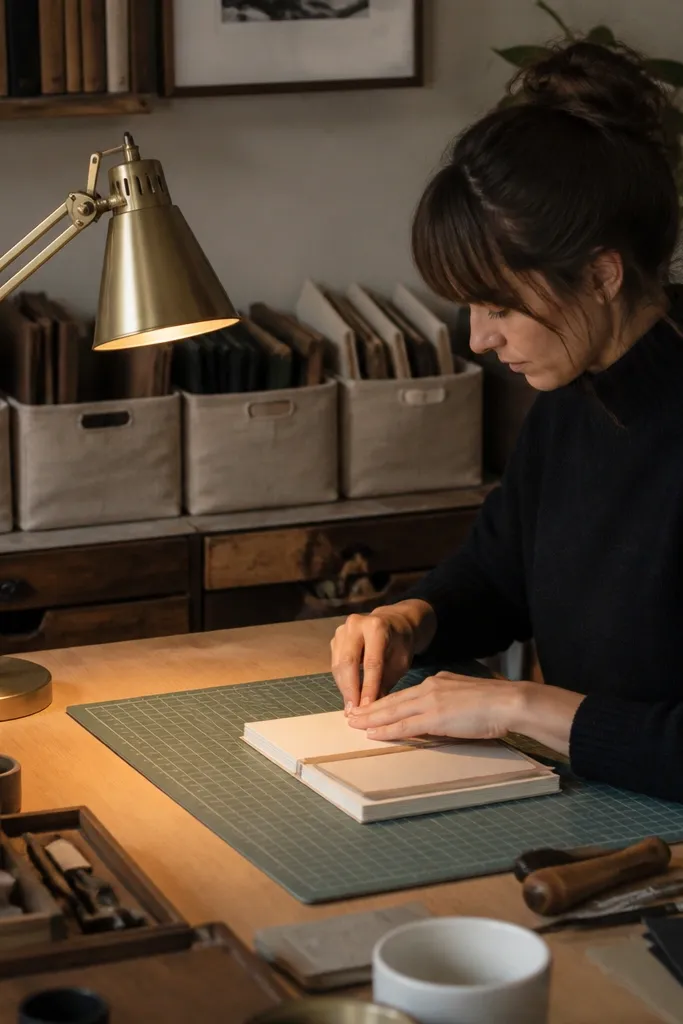
Lighting changes the vibe more than people think, and craft rooms need glare control. A swing-arm task lamp lets you aim light exactly where you cut, trace, or stitch, so your workspace looks tidy and inviting instead of dim. Use a warm bulb around 2700K so paper looks creamy, not blue-gray. The lamp also reduces the “overhead light glare” that makes craft surfaces look messy. If your room feels cold, harsh, or tiring, lighting is the quickest fix that still looks intentional.
Choose a swing-arm lamp with an adjustable head and place it on the side opposite your dominant hand so you don’t cast shadows. Mount it on the desk edge or a sturdy base and aim the light at the work surface, not the wall. Install a 2700K LED bulb and test with your cutting mat and paper — adjust the angle so there’s no glare on glossy sheets.
Use a matte shade or frosted diffuser so the light feels soft instead of harsh.
Avoid cool white bulbs at 4000K — they flatten colors and make the space feel less cozy.
11. Gallery Wall of 3 Frames with One Consistent Color Mat
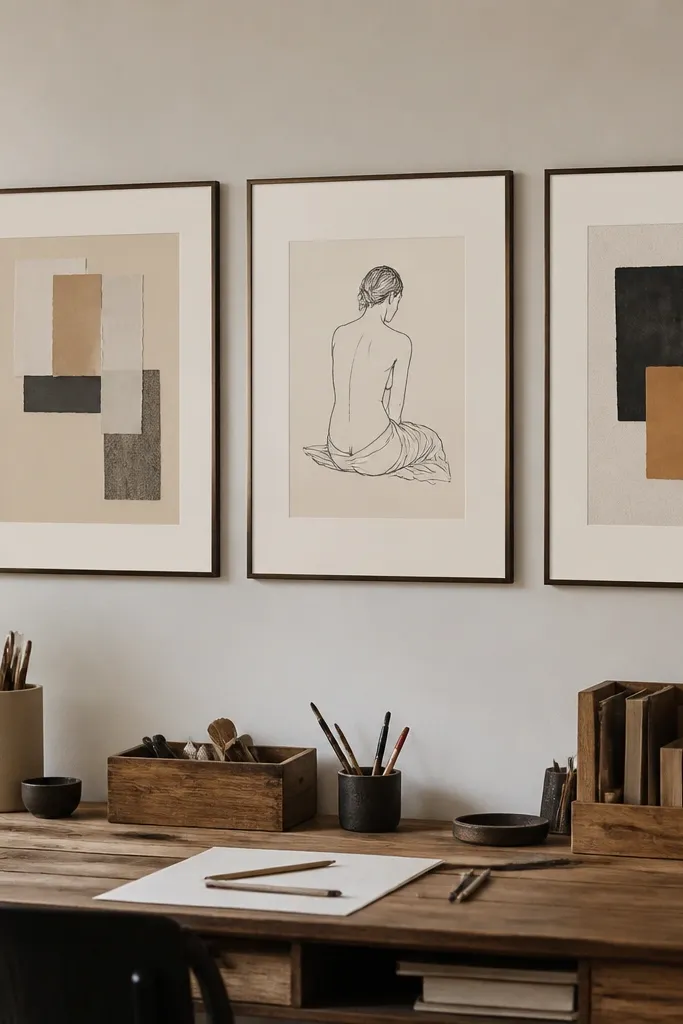
A craft room can look unfinished when the walls are blank, even if the desk is organized. A tight gallery wall of three frames gives structure and makes the space feel like a designed studio. The trick is consistency: use the same mat color in all three frames (warm white or oatmeal) and vary only the artwork. Put one frame slightly higher than the other two so it feels balanced, not symmetrical. This works best for small craft rooms where you need the wall to do the heavy lifting visually.
Pick three frames that match in finish (brass, black, or light wood) and choose mats in one warm tone. Arrange the frames on the wall on the floor first, keeping the middle one centered above your desk. Hang with measured spacing so the top edges align; then add simple prints tied to your craft (color palettes, line art, or botanical sketches).
Use prints with a limited color palette so they don’t fight with your supplies.
Avoid mixing frame finishes — two finishes is where it starts to look accidental.
12. Pegboard Shelf Ledge for Finished Items and Supplies
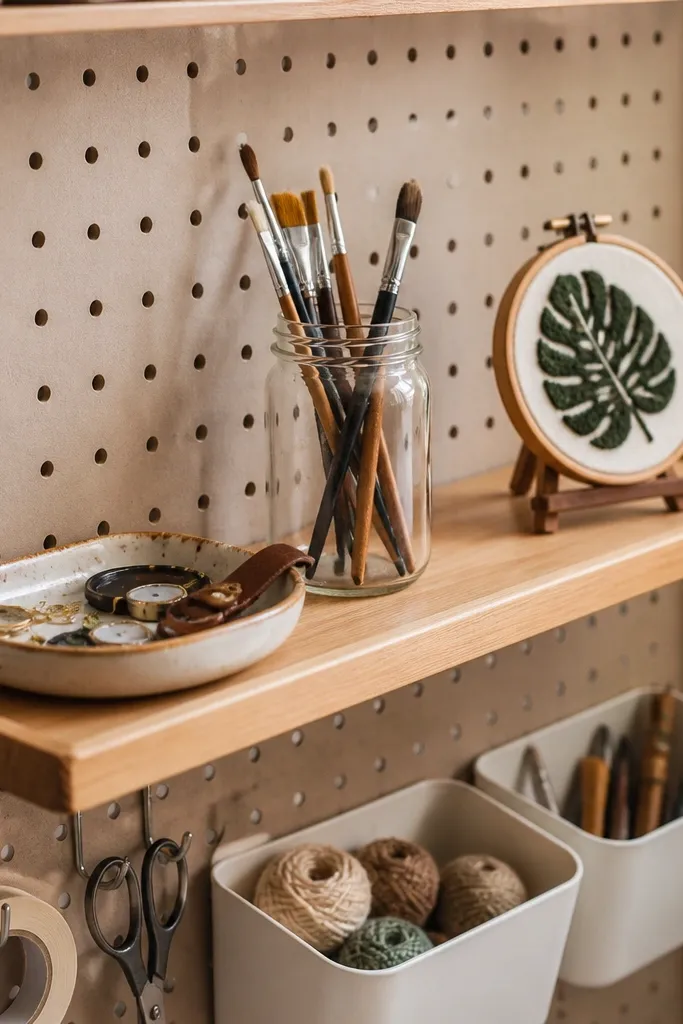
Mount the pegboard first, then add a small shelf centered above your most-used tools; a 12-18 inch shelf works well. Seal or finish the shelf wood with a matte clear coat so it blends with other decor. Place one labeled bin on the shelf for “daily supplies,” add a brush jar, then show two finished items for personality.
A shelf attached to pegboard gives you vertical storage without extra bulky furniture. It’s also a great way to display finished pieces while still keeping your active tools organized below. Choose a wood shelf in a warm tone, then keep the items on top limited: one small tray for accessories, one jar for brushes, and a couple of finished items. This keeps the shelf photogenic and cozy instead of turning into a dumping surface. It’s a smart solution if your craft room is small and you want storage that doesn’t eat floor space.
Watch outAvoid stacking finished items too high — it looks cluttered fast.
Pro tipKeep the shelf items at one height level; mix tall jars with flat trays so it looks intentional.
13. Hanging Clear Tool Organizer with Fabric Backing
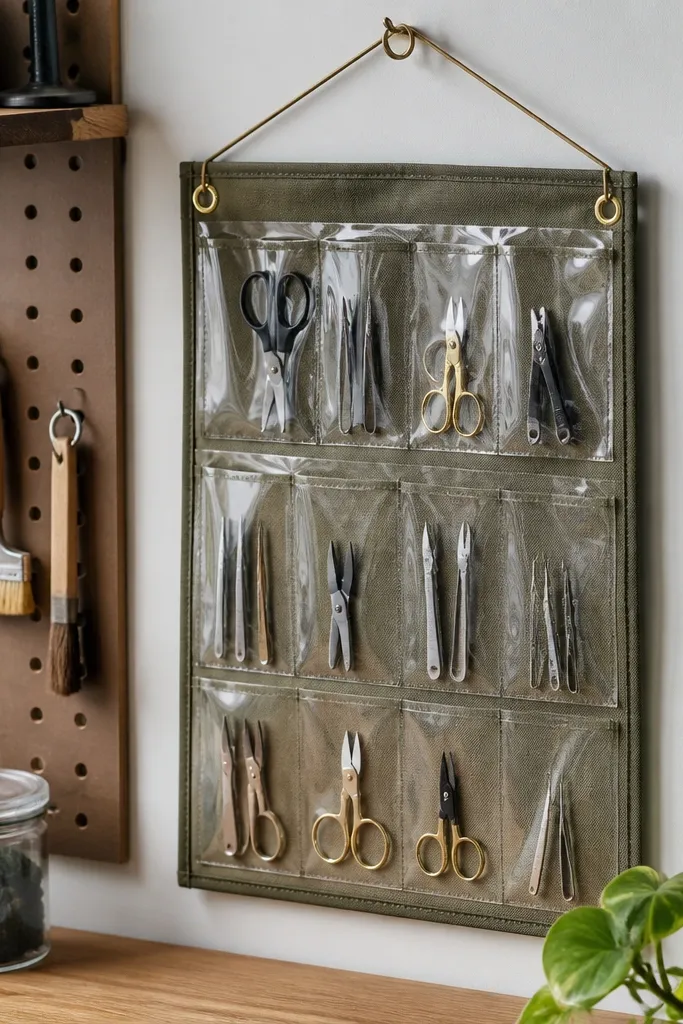
Clear organizers look modern, but the inside can still look messy if the background is bare. Add a fabric backing behind clear pockets so the tools look cleaner and the whole organizer matches the room’s color scheme. Choose a fabric in a warm neutral or a muted tone like olive, clay, or oatmeal. This is perfect for small craft rooms where you need quick access and don’t want tools scattered on the desk. The clear front still makes it easy to grab what you need without opening multiple containers.
Cut fabric to the size of your hanging organizer backing area and attach it behind the clear pockets using adhesive strips or clips so it stays flat. Hang the organizer at arm height near your cutting station, about 10-15 inches above your work surface. Fill pockets by category: rulers together, scissors together, tape and small tools together, then add simple labels on the pocket edges.
Use one fabric color for the whole organizer so the tools stand out without visual noise.
Avoid too many pocket sizes — if everything is different, the organizer looks chaotic.



