
1. Linen-look fabric wall hanging behind your desk
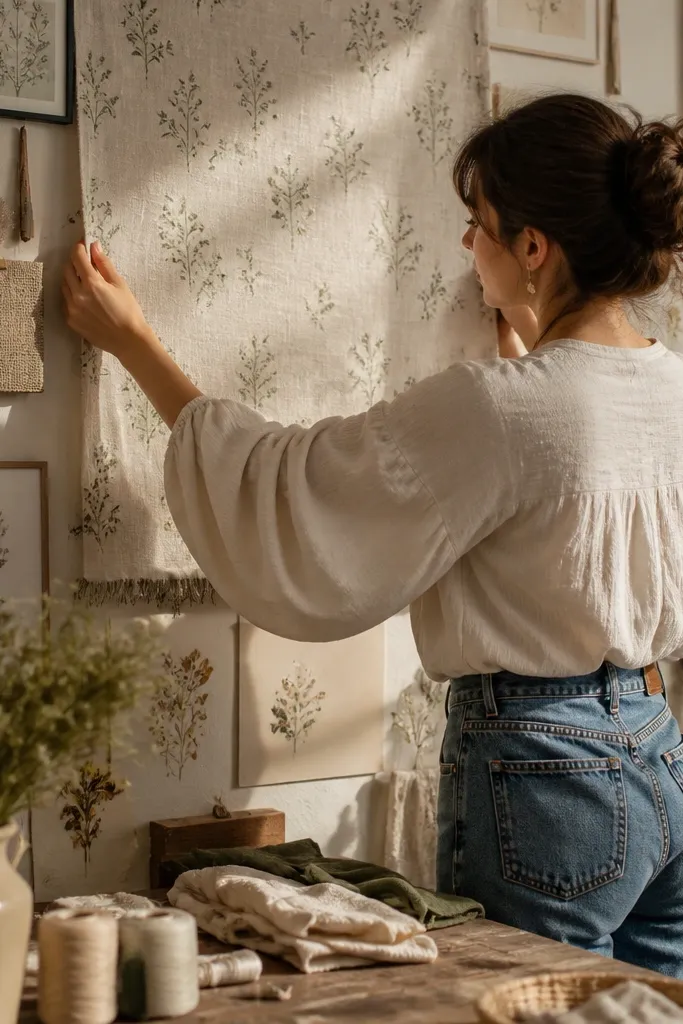
Step 1: Pick a hanging method that won’t fight removal. Use a removable curtain rod-style tension setup if you can place it on trim; otherwise use two weight-rated removable hooks spaced wider than the fabric width. Step 2: Center the hanging so its top edge sits about 4-6 inches above your desk’s top line. Step 3: If the fabric is light, add a second support point near the bottom using a removable hook and a thin cord so it doesn’t sag and look messy.
Put a linen-look wall hanging behind your desk to create the cottagecore “soft backdrop” effect that makes everything else on the wall look intentional. Choose a fabric with a visible weave and a print that’s small-scale — think tiny sprigs or faded florals — because large motifs can overpower craft clutter. Warm off-white or oatmeal fabric keeps the palette gentle, and the texture hides slight wall imperfections common in rentals. This works especially well in small craft rooms where you don’t have room for a full gallery wall, and it gives you a photo-friendly background for supplies, planners, and pinned patterns. Hang it high enough that your chair doesn’t block it, but low enough that it frames your work area.
Watch outDon’t hang a silky or shiny fabric — it catches overhead light and makes the whole wall look less cozy.
Pro tipChoose a fabric with a slightly wrinkled drape. Pressing it flat makes it look like wall art; a natural fold looks more cottagecore.
2. Removable gallery grid with botanical prints in matching frames
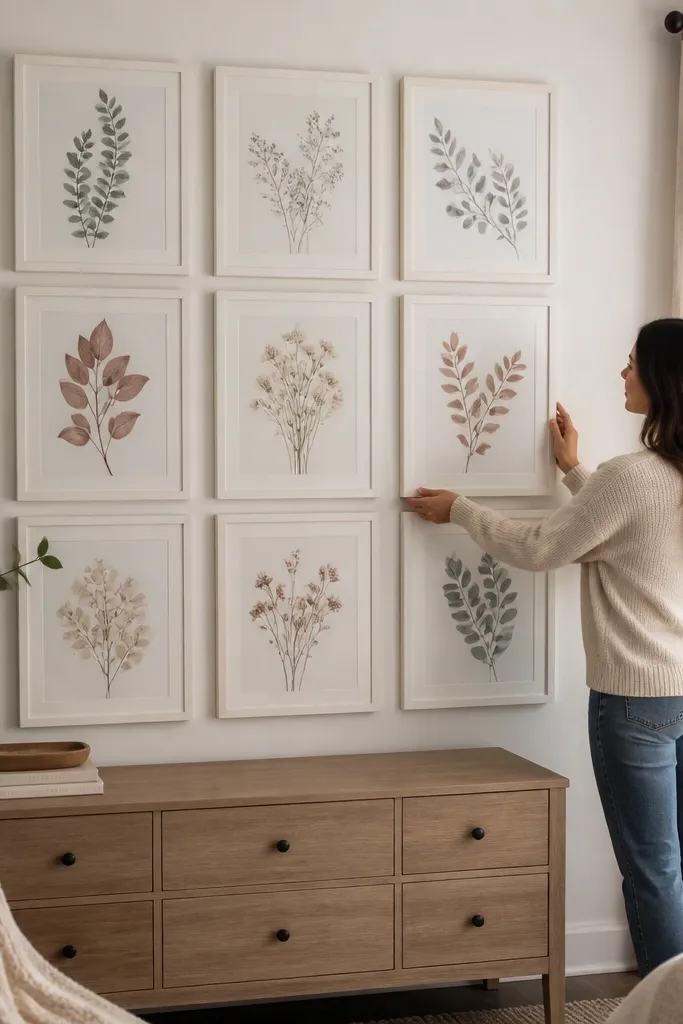
Step 1: Arrange six frames on the floor first: two rows of three, with 2-3 inches between frame edges. Measure the total width and then mark two vertical center points on the wall with painter’s tape. Step 2: Use removable hooks rated for the frame weight and attach at the back hanging points, not the middle of the frame. Step 3: Hang the top row first, then the bottom row, adjusting spacing by eye so the grid looks straight.
A removable gallery grid gives you instant charm while staying organized. Use matching frames so the wall looks curated even if the prints are different. I recommend white or warm cream frames with a soft matte finish, not glossy plastic, because matte frames blend with cottagecore textures. Stick to a limited print palette: sage green, muted terracotta, and dusty blue on off-white paper. This setup is ideal when you want visual inspiration without hunting for the right place to pin things — the grid reads clearly above a desk, cutting mat, or cutting table. It also works in renters' spaces because the frames can be removed cleanly at move-out.
Watch outAvoid mixing frame colors like black and natural wood together — it reads mismatched instead of cottagecore.
Pro tipPrints look better when they share margins. Use mats or choose prints with similar border sizes so every piece lines up.
3. Peel-and-stick fabric wallpaper swatches for a "patchwork" wall
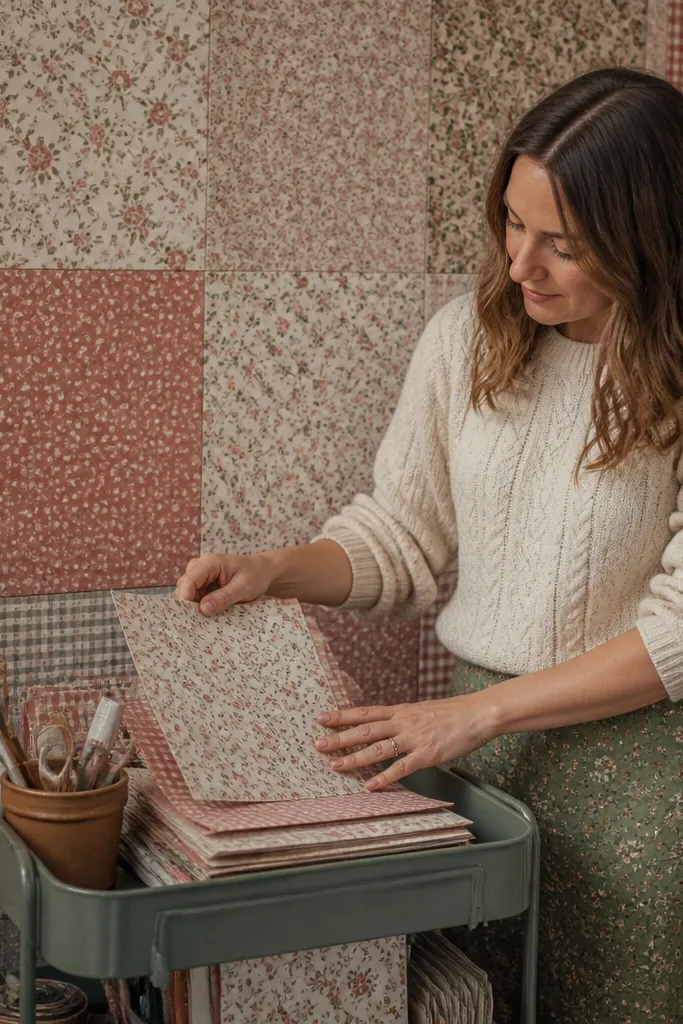
Step 1: Clean the wall with a gentle all-purpose cleaner and let it dry fully. Step 2: Plan a grid layout first on paper — for example, 3 squares across and 3 down, each about 10-12 inches — then tape the corners to keep spacing even. Step 3: Press each square firmly with a plastic smoothing tool and seal edges by running a fingernail along the border. After it’s on, add your decor using removable hooks that land between squares.
Patchwork swatches are cottagecore at its most renter-friendly. Peel-and-stick fabric-look wallpaper (or removable wallpaper panels) lets you create a quilted backdrop without any measuring chaos or permanent changes. Choose 6-10 small squares in coordinating patterns: one ditsy floral, one tiny gingham, one vine print, and the rest in solid muted backgrounds. This works great for craft rooms because you can place functional items on top of the patchwork — like a pinboard, small shelves, or a ribbon display — and the wall stays cohesive. The quilt effect also hides minor marks and uneven paint, which is common in rental units.
Watch outDon’t place patchwork directly behind a high-heat lamp or near a window with strong sun — removable adhesive can loosen.
Pro tipPick one “anchor” pattern that repeats in two squares. It makes the patchwork feel designed rather than random.
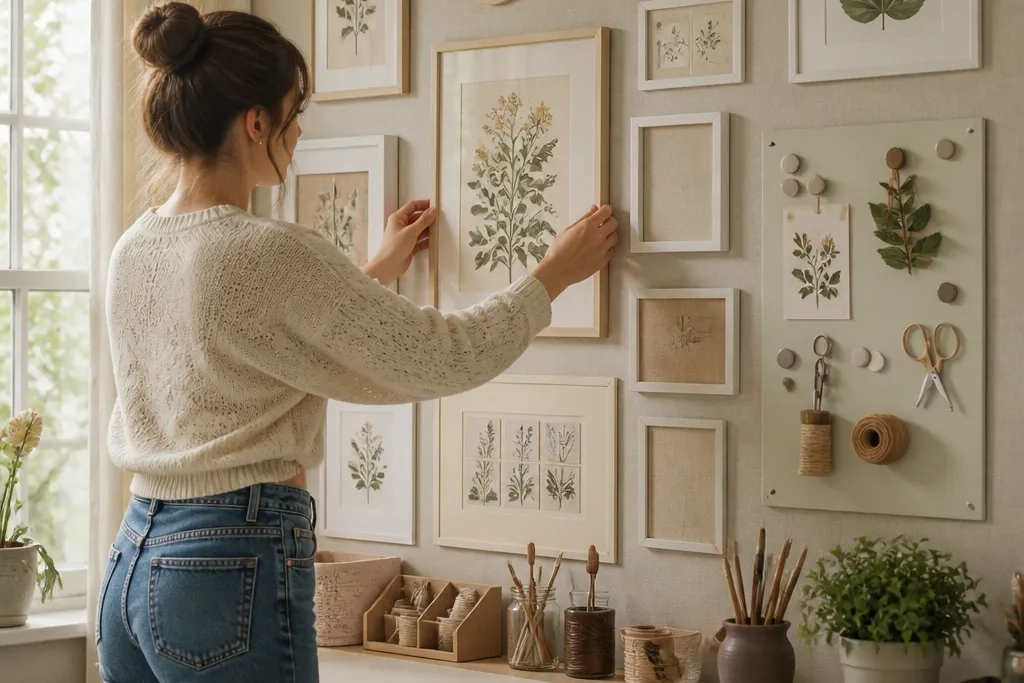
4. Magnetic botanical tool board for patterns and metal accents
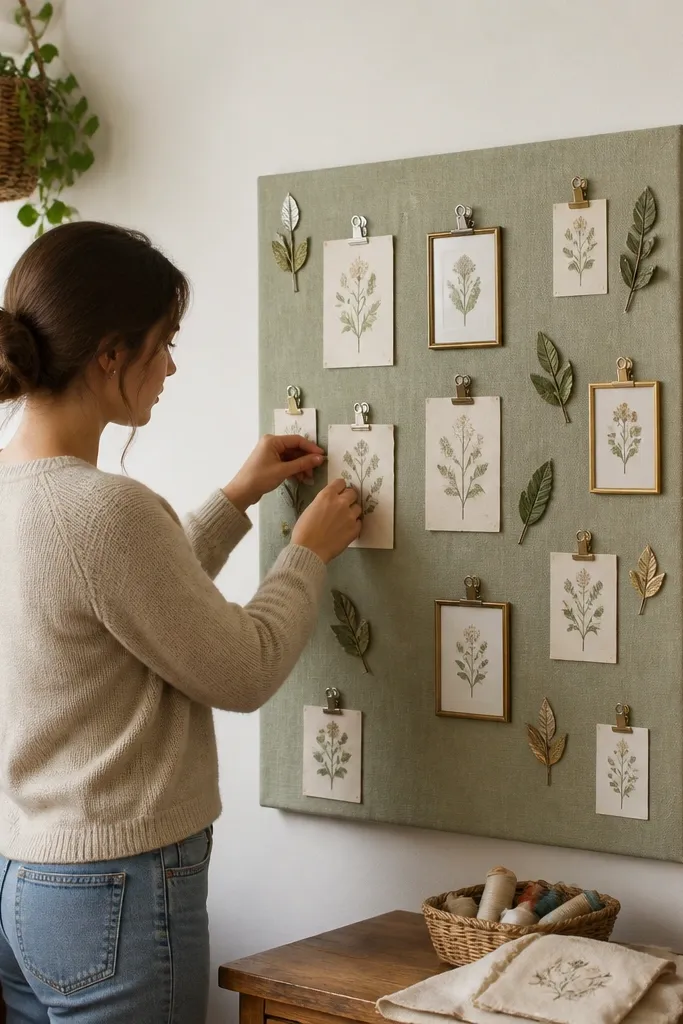
Step 1: Choose a board size that matches your work flow, like 18x24 inches for a small craft room wall. Mount it with a removable mounting system or rated hooks at the back corners. Step 2: Apply a magnetic sheet backing if your board isn’t already decorative, then smooth edges. Step 3: Add your pattern holders first (paper clips or small frames), then arrange magnets into a gentle cluster so the surface doesn’t look too busy.
A magnetic board brings cottagecore style into the functional zone. Cover it with a removable fabric magnetic sheet or a magnetic-friendly backing in sage or cream, then add slim magnets shaped like leaves, small clips, or vintage-style frames. This is a smart renter option because you can mount the board using a single removable rail system or hang it like a framed panel. Use it for paper patterns, metal craft tools, and tiny envelopes for notions. It looks charming because the botanical magnets echo the cottagecore vibe, and it stays useful because everything has a home. Place it beside your desk or above your cutting area so you can grab supplies without digging through drawers.
Watch outDon’t spread magnets everywhere — it turns into visual noise and makes the board harder to scan.
Pro tipKeep magnets grouped by function: patterns together, notions together. It looks curated and is faster to use.
5. Removable pegboard with painted wood-tone hooks
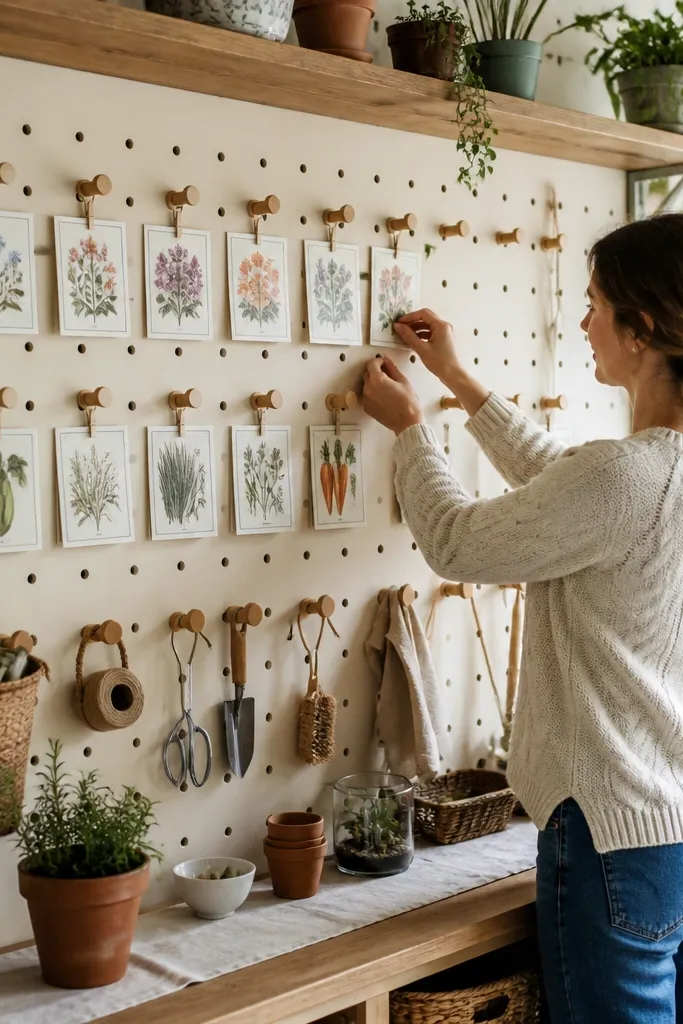
Step 1: Use a lightweight pegboard panel sized around 24x36 inches so it stays manageable with removable hardware. Mount it using multiple weight-rated removable hooks or a removable rail system, placing supports at the board’s top and bottom corners. Step 2: Install hooks and clothespins first, then hang tools by weight so heavier items are lower. Step 3: Add one or two small ribbon strings with removable clips across the top third for “pretty but practical” storage.
Pegboard is the craft-room workhorse, but it doesn’t have to look like a garage. Paint a pegboard in warm off-white, then use wood-tone hooks and small clothespins to add cottage texture. Add a few framed mini prints above the pegboard so it feels like decor, not storage. This idea is perfect when your desk is too small and you need vertical organization. The pegboard also solves a common renter problem: supplies end up on surfaces because you don’t have permanent shelving. With removable mounting, you get the storage without drilling.
Watch outAvoid using bright plastic hooks — they ruin the cottagecore palette.
Pro tipPaint the pegboard matte. Glossy pegboard reflects light and makes crafts look messier.
6. Washi tape border + removable labels on a cork board
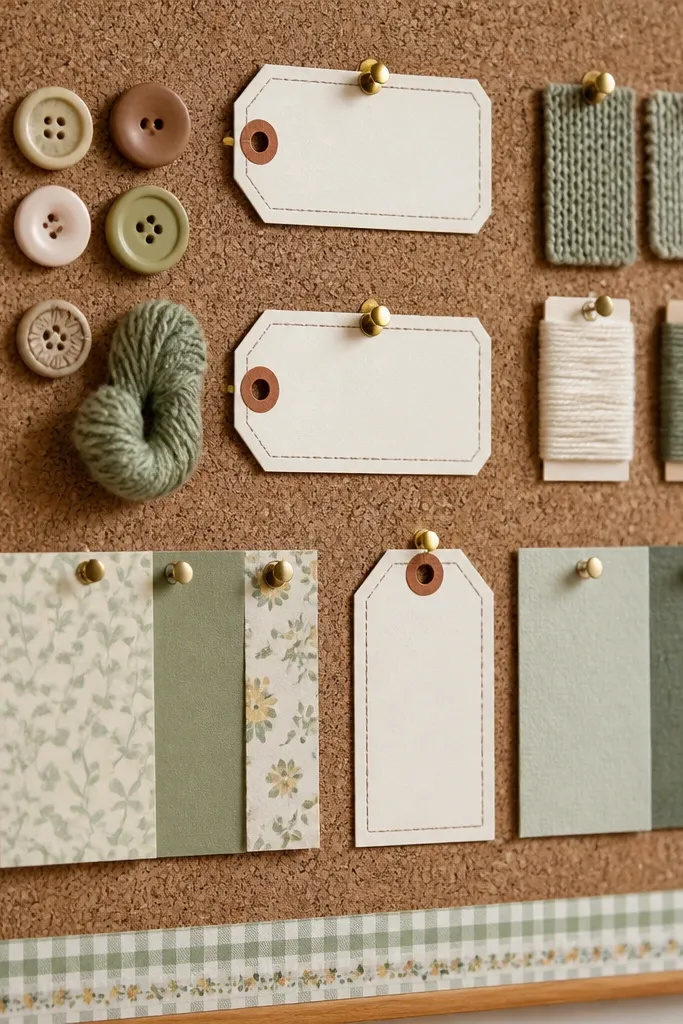
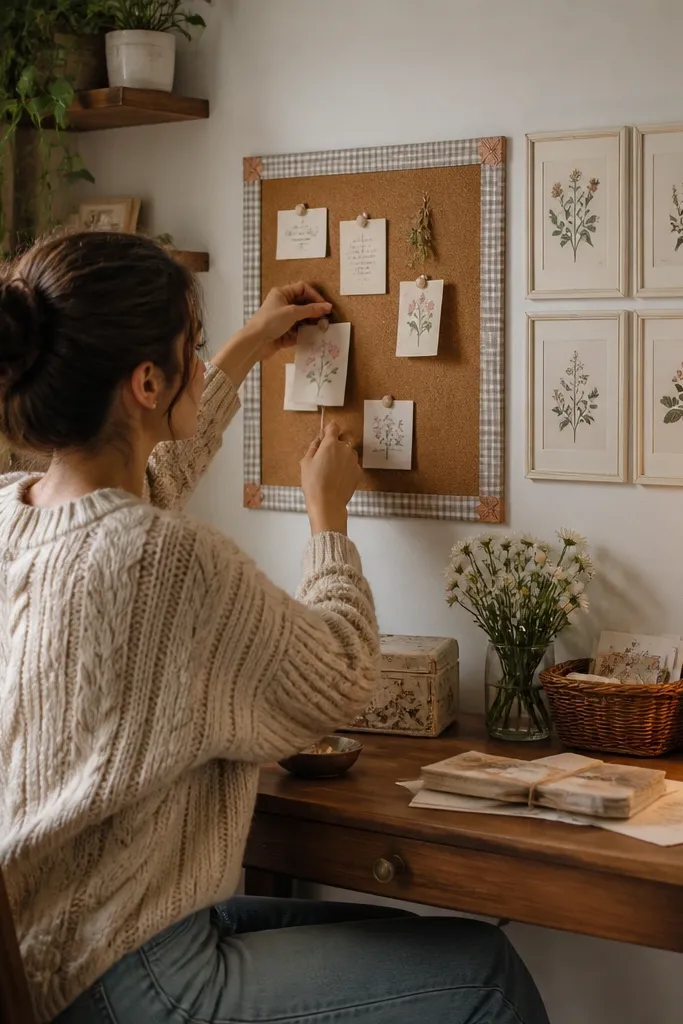
Step 1: Buy a cork board with a thin frame, then measure the inside edge to plan the tape border width — aim for 1 inch. Step 2: Apply washi tape around the edges in a clean loop, smoothing each corner with your thumbnail. Step 3: Create labels using removable label tape or sticker labels and place them in a simple grid. Step 4: Hang the board with two removable hooks at the top corners, then pin your most-used items first.
Cork boards are classic for a reason, and washi tape makes them cottagecore without adding bulk. Frame a cork board with a soft border of washi tape in a gingham or tiny floral pattern, then add removable labels for paper, buttons, and yarn. The labels keep your wall from becoming a “stuff board,” and the tape border makes it look like decor instead of a utility item. Hang it above your desk or near your supplies so it’s within arm’s reach. This is renter-friendly because you can use removable hooks for the board and remove the labels at move-out.
Watch outDon’t cover the whole cork board in pinned items. Leave breathing space so the grid still reads.
Pro tipUse one label style across the whole board: same font size, same color. It makes the cottagecore look feel intentional.
7. Vintage-style floating shelf with removable clamped brackets
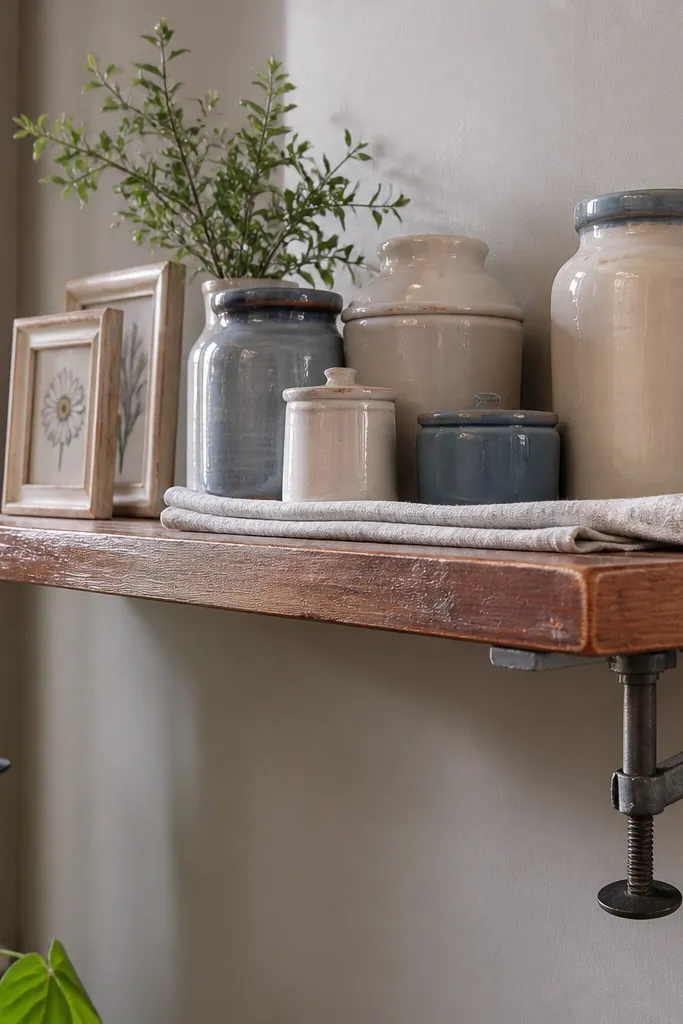
A small floating shelf gives you that cottagecore “collected over time” look, but you can keep it renter-friendly with clamp-style brackets. Use a warm wood shelf with a slightly distressed finish, then style it with ceramic jars, small framed seed packets, and a folded linen runner. This works best for craft rooms where you want to display jars of supplies without cluttering the desk. The shelf also creates a horizontal line that balances a busy pegboard or gallery wall. Keep items grouped by height: jar cluster on one side, framed botanicals on the other, and a small tray in the middle.
Step 1: Choose a shelf length around 24-30 inches so it fits above a desk without looking oversized. Step 2: Install clamp-style brackets on the wall surface only if your wall type allows a tight grip; otherwise use removable hooks rated for the shelf weight. Step 3: Style with 3-5 items max, keeping the largest items at the ends and the smallest in the center. Add a linen runner under the jars for a softer look.
If you can, pick jars with matching lids. The repetition looks cottagecore even when you change contents.
Don’t overload the shelf. More than five items makes the wall feel cluttered fast.
8. Ribbon and twine wall with removable clips for cards and swatches
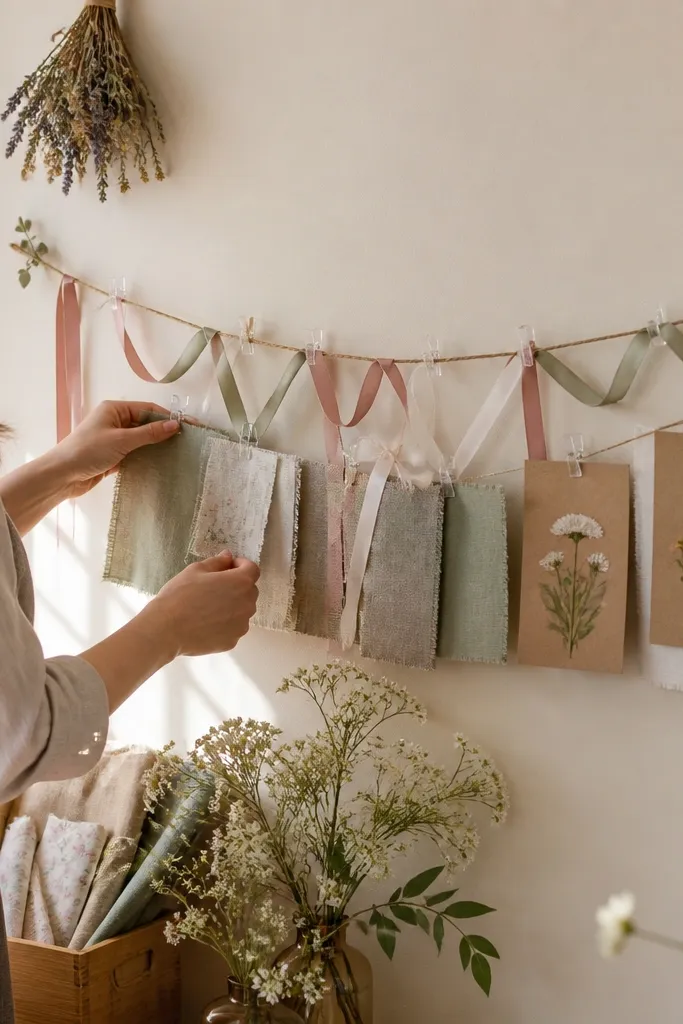
Step 1: Mark four anchor points with painter’s tape, spaced roughly 10-12 inches apart, and install removable hooks at each. Step 2: String twine between anchors, then add clothespins or clip rings at 2-3 inch intervals. Step 3: Attach a few ribbons vertically from one horizontal line to create variation, then hang swatches in small groups by color family.
Twine and ribbon lines look charming because they add movement and soft edges. For craft rooms, use them to display fabric swatches, greeting cards, or paper samples so you can compare colors without pulling out drawers. Choose a neutral twine (natural jute) and ribbons in dusty rose, sage, and warm cream. This decor is renter-friendly when you use removable hooks for the anchor points and small removable adhesive clips for the line ends. It looks best when the display is slightly off-center — like a diagonal-ish grid — so it feels crafted rather than straight-laced.
Watch outAvoid thick craft rope. It reads too rugged and kills the cottagecore softness.
Pro tipFold swatches consistently and keep the top edge aligned. It makes the whole line look styled, not random.
9. Pressed flower shadowbox wall cluster with removable hooks
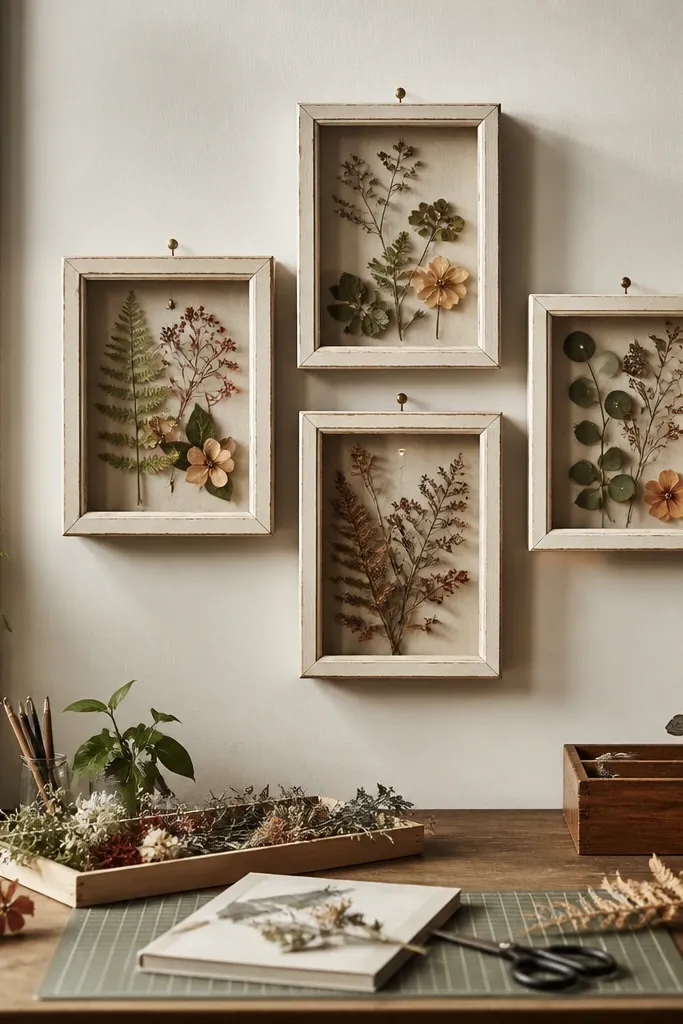
Step 1: Use shadowbox frames sized around 5x7 inches so the cluster looks intentional, not scattered. Step 2: Lay them on the floor in a triangle arrangement, then measure the cluster width and mark the center point on the wall. Step 3: Hang the biggest shadowbox first, then add the others with removable hooks so each frame’s top edge aligns within 1/4 inch for a clean look.
Shadowboxes give cottagecore a polished look because pressed botanicals have depth and texture. Arrange three to five small shadowboxes in a cluster above your desk, using frames in warm cream or natural wood. For the best photogenic effect, choose botanicals with varied colors but similar contrast — pale greens, muted pink petals, and light tan leaves. This idea works when you want decor that also feels personal without taking up desk space. It’s also renter-friendly if the frames are lightweight and you hang them with removable hooks at the back.
Watch outAvoid mixing frame finishes like black metal and shiny brass. Stick to one finish family.
Pro tipAdd one shadowbox with a neutral dried grass specimen. It ties the cluster together when your pressed flowers vary in color.
10. Cottagecore chalkboard menu for weekly craft planning
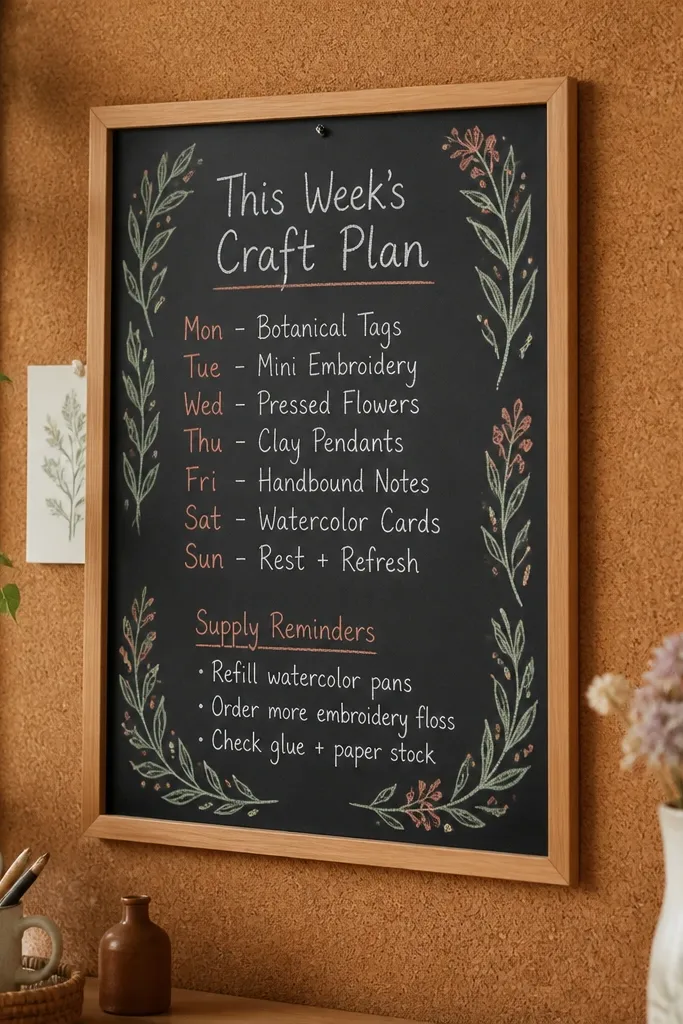
Step 1: Choose a chalkboard with a wood or cream frame, not a bare metal board. Step 2: Use painter’s tape to mask a border and keep your writing straight — then remove tape for crisp edges. Step 3: Hang it so the writing sits at eye level from your chair, usually about 56-60 inches from floor to the board’s center. Step 4: Use chalk markers for the border so the color stays clean under lighting.
A chalkboard can look cottagecore when it’s framed and lettered like a menu board. Use a small framed chalkboard (around 18x24 inches) and write your weekly craft plan, supply reminders, and project names with a simple script. Add a botanical border using chalk markers in sage and muted terracotta so it matches the room palette. This is great for craft rooms because it turns your wall into an at-a-glance planning tool, reducing the “where did I put that?” scramble. For renters, it’s easy: hang it with removable hooks and repaint or wipe at move-out.
Watch outAvoid cramming ten lines. A chalkboard that’s too full reads messy and feels stressful.
Pro tipWrite with a “two-tone” system: project names in one color, deadlines or supply notes in a second. It looks designed without extra decorations.
11. Vintage botanical wallpaper panel behind a cork board
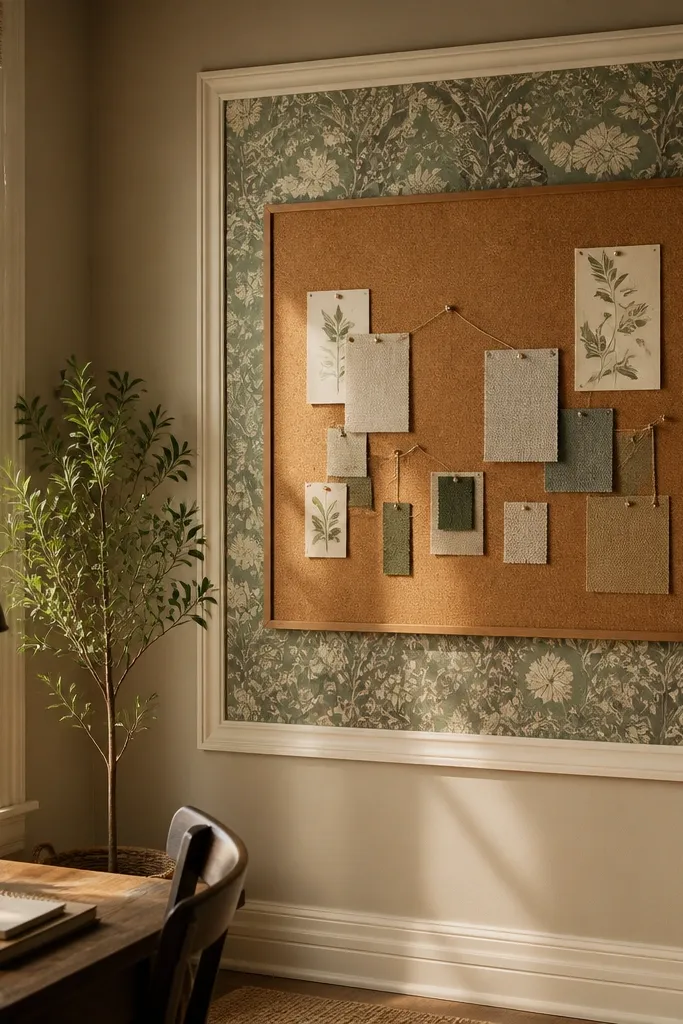
This one is for craft rooms that have a functional board but need it to look styled. Put a removable botanical wallpaper panel behind a cork board or pinboard so the cork becomes the focal point. Choose a panel with vintage-style leaves in muted greens and cream, not bright modern florals. The result is a layered look: soft pattern behind, practical pins in front, and a cottagecore frame around it all. It solves the problem of “my cork board looks utilitarian” while staying renter-friendly because the wallpaper panel comes down without patching.
Step 1: Buy a removable wallpaper panel sized slightly larger than your cork board, leaving 1-2 inches of border around the edges. Step 2: Apply the panel first, smoothing from the center outward. Step 3: Mount the cork board using removable hooks, placing the hooks so they land near the wallpaper’s border area where you won’t disrupt the design. Step 4: Pin only a few key items so the wallpaper pattern still reads.
Match your pinboard colors to the wallpaper leaves: sage tape labels and cream paper notes look cohesive.
Don’t choose a wallpaper panel that’s the same color as the cork frame. You need contrast to separate layers.
12. Woven basket wall display with removable hanging rods
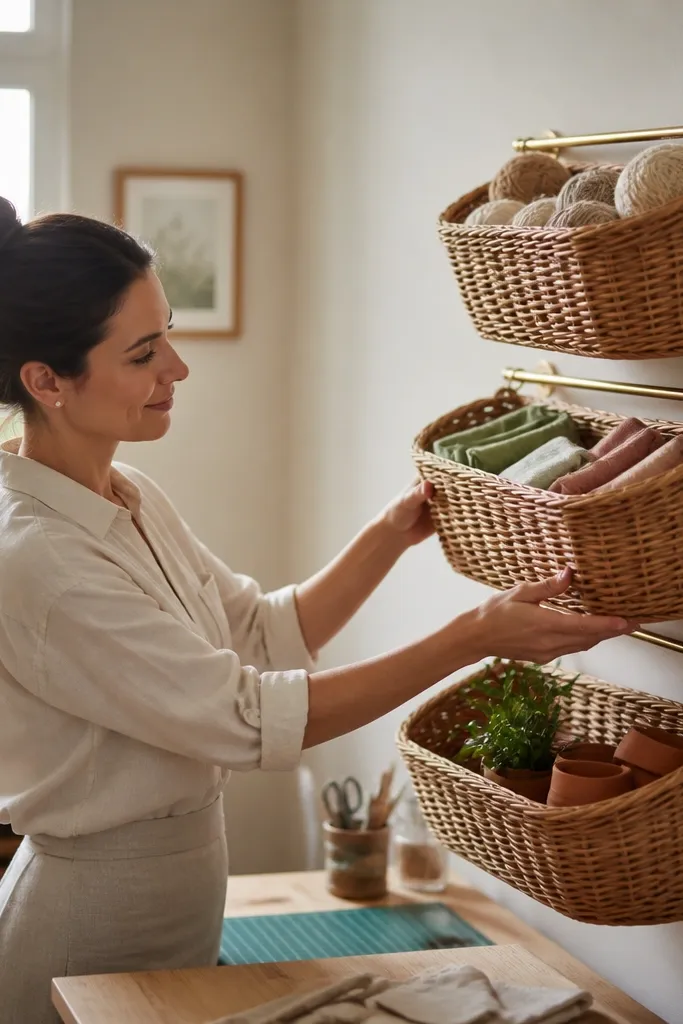
Step 1: Choose basket sizes around 10-12 inches, 14-16 inches, and 18-20 inches tall, and check weight while empty. Step 2: Install removable hooks or a thin rod system at the basket mounting points, spacing them so the baskets don’t overlap visually. Step 3: Fill them with one type of item per basket for a clean look, then add a small linen liner to keep colors soft.
Woven baskets add instant cottagecore texture because they look handmade and warm. Instead of one basket, do a set of three in different sizes, mounted with removable hanging rods or weight-rated hooks. Use them for supplies that you want visible: yarn balls, fabric scraps, or small plant pots (if you keep them light). This is a great option for renters because baskets hide mess — a stack of tools looks intentional when it’s inside a woven texture. Put the baskets on the wall near your desk or storage corner so you can grab without opening drawers.
Watch outAvoid metal baskets with a shiny finish. They read industrial against cottage textures.
Pro tipUse baskets with open fronts so you can see what’s inside. Closed baskets look cute but frustrate actual crafting.
13. Renter-friendly window frame style art using removable tape hinges
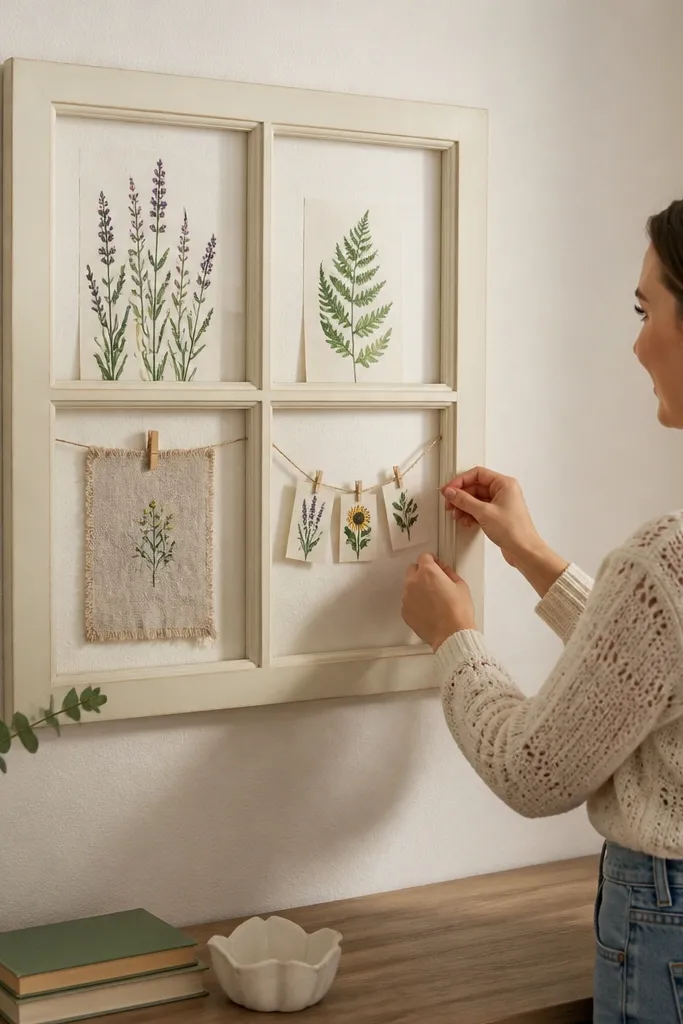
Step 1: Pick a frame around 20-30 inches wide so it shows up in photos but doesn’t dominate a small room. Step 2: Attach lightweight backing board to hold prints or fabric inside the frame, then seal edges with a thin layer of glue or tape. Step 3: Hang using two removable hooks at the frame’s top hanging points, then center it so it aligns with your desk edge.
If your craft room wall feels plain, a faux window frame style piece makes it look like there’s a story behind the wall. Use a lightweight MDF or wood frame (or a frame kit) painted warm cream, then insert botanical prints, a tiny fabric sampler, or a small string of seed packet labels inside. This idea works because it gives you a clear focal shape, and it looks great even with minimal surrounding decor. It’s renter-friendly when you hang it like a picture with removable hooks or use removable adhesive strips rated for the frame weight. Place it above a desk corner to create a “view” feeling while you work.
Watch outAvoid heavy, glass-front frames. They’re harder to hang safely with removable hardware.
Pro tipUse one botanical print and one fabric swatch inside. Two materials look curated without looking busy.
14. Vintage recipe card wall with removable frame and clip rails
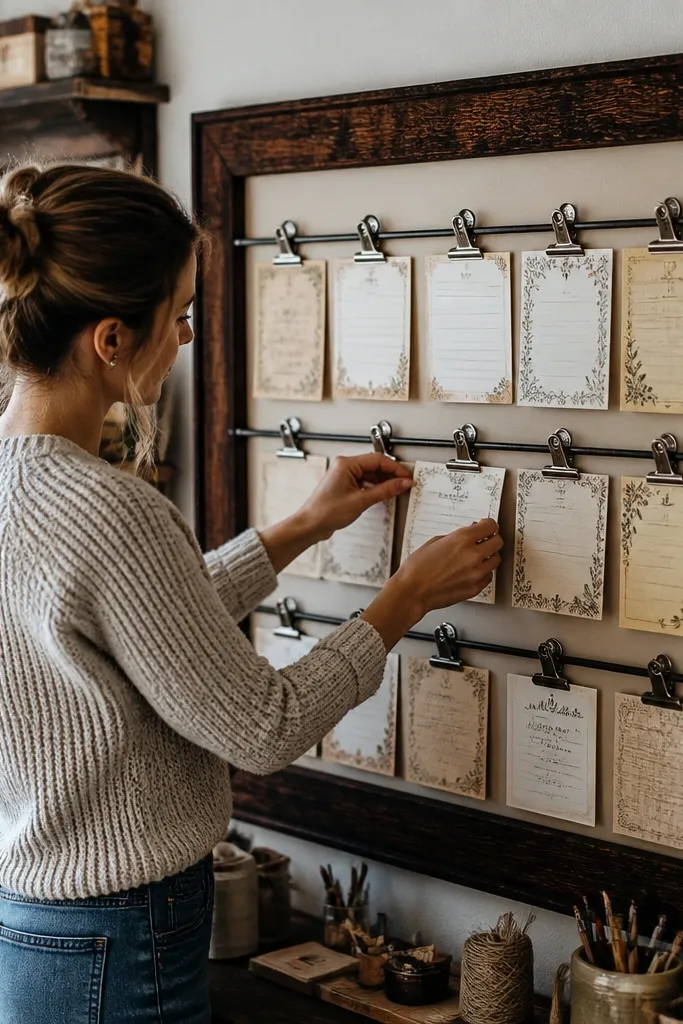
Step 1: Choose a frame with depth enough to hold card clips, around 1-2 inches deep, and paint it warm cream if needed. Step 2: Install small clip rails or clothespins on removable adhesive strips inside the frame, spaced about 3-4 inches apart. Step 3: Add 6-10 cards, mixing handwritten and printed cards so it looks collected. Step 4: Hang the frame using removable hooks at the top corners for even weight distribution.
Recipe card displays are cottagecore gold because they look like handwritten archives. Use a deep frame or a board inside a frame, then add clip rails so you can swap cards as projects change. Write card prompts for techniques — like “stitching practice,” “paint color mixes,” or “paper cuts for cards” — and print a few on cream paper with simple botanical doodles. This gives you a charming wall while keeping your craft process organized. It’s also renter-friendly because the entire piece hangs like a picture and cards are easy to remove later.
Watch outDon’t use clip rails that are too modern-looking. Black plastic clips can fight the cottagecore vibe.
Pro tipUse uniform card sizes (like 4x6) so the wall looks neat, even when you swap cards.



