
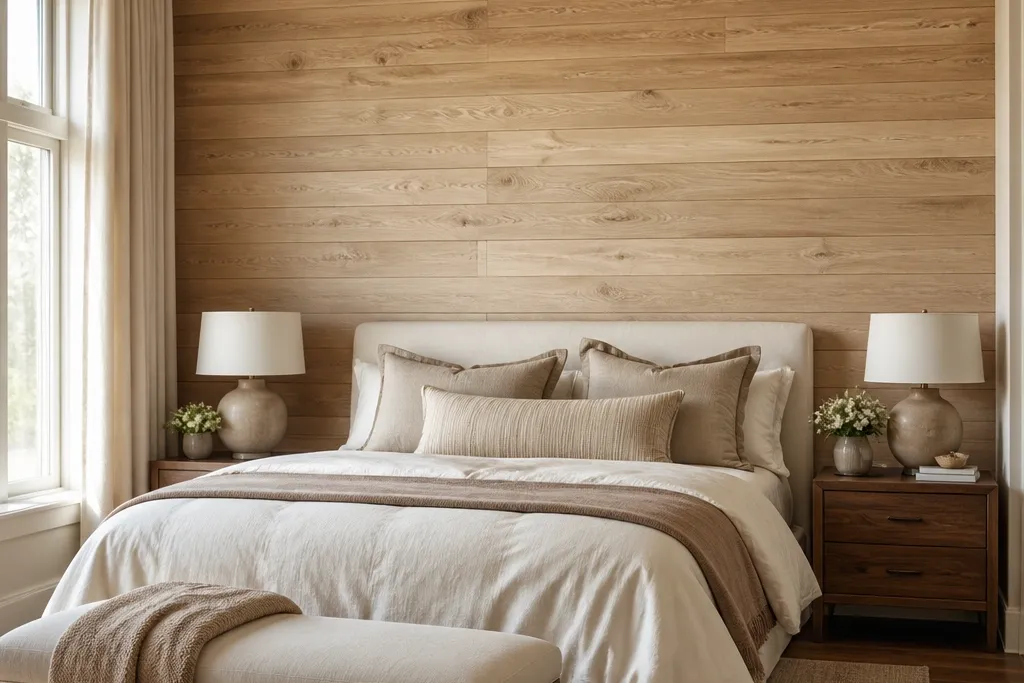
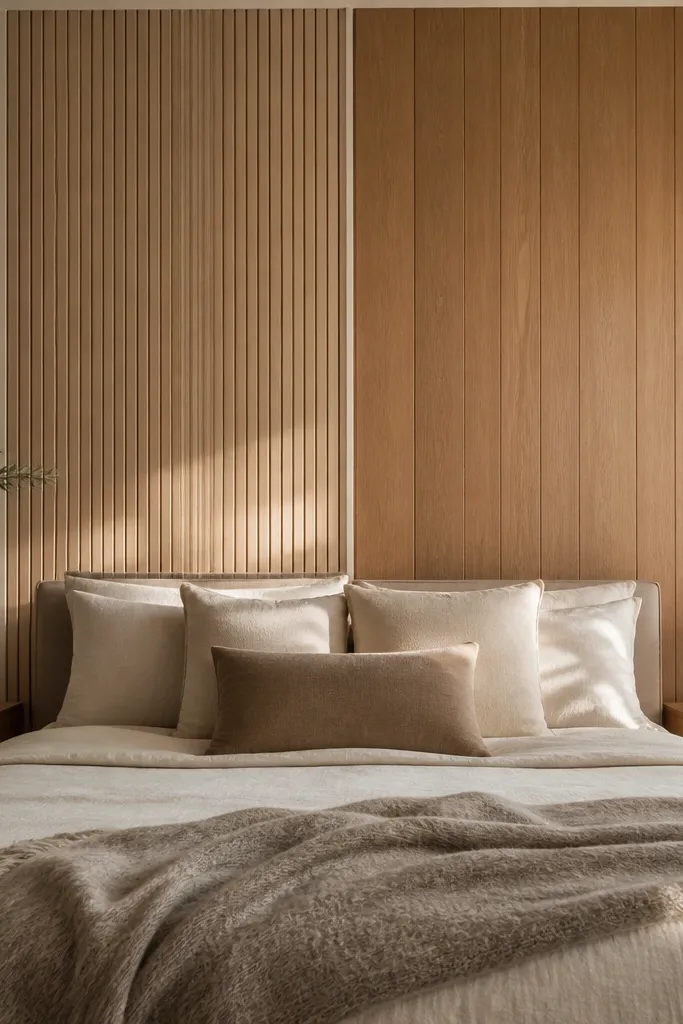
1. Light oak plank wall behind a centered bed
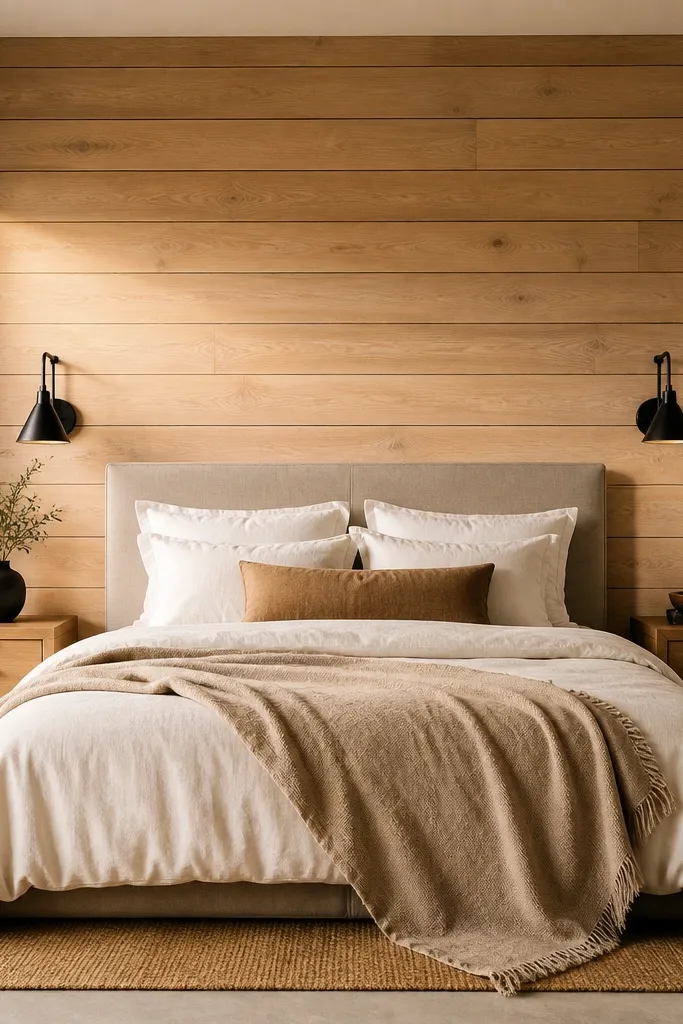
This is the cleanest way to get that warm natural look without making the room feel heavy. Use light oak boards with a matte or satin finish so the grain shows but glare stays low. Keep the planks horizontal if your ceiling is low — it visually stretches the wall sideways. The wall reads calm and “designed” because the tone stays close to neutral, letting bedding and curtains do the color work. It also solves the builder-beige problem: the room stops looking like it’s missing a focal point.
Measure your headboard width and aim for the accent wall to extend 6-12 inches past each side. Install boards with a consistent reveal of 1/8 to 1/4 inch; use spacers or a scrap shim so every seam lines up. Start by mounting a flat, level backing frame or furring strips, then screw boards into the studs or battens. Finish by filling nail holes, sanding lightly, and applying a matte wood sealer or stain + topcoat system. Budget is moderate: expect to spend more on real wood boards, but it looks the most authentic.
Use a color-matched trim cap at the top edge so the wall looks like it was always there.
Don’t use glossy “varnish shine” — it kills the warm, soft look in photos.
2. Whitewashed oak slats with a slim reveal
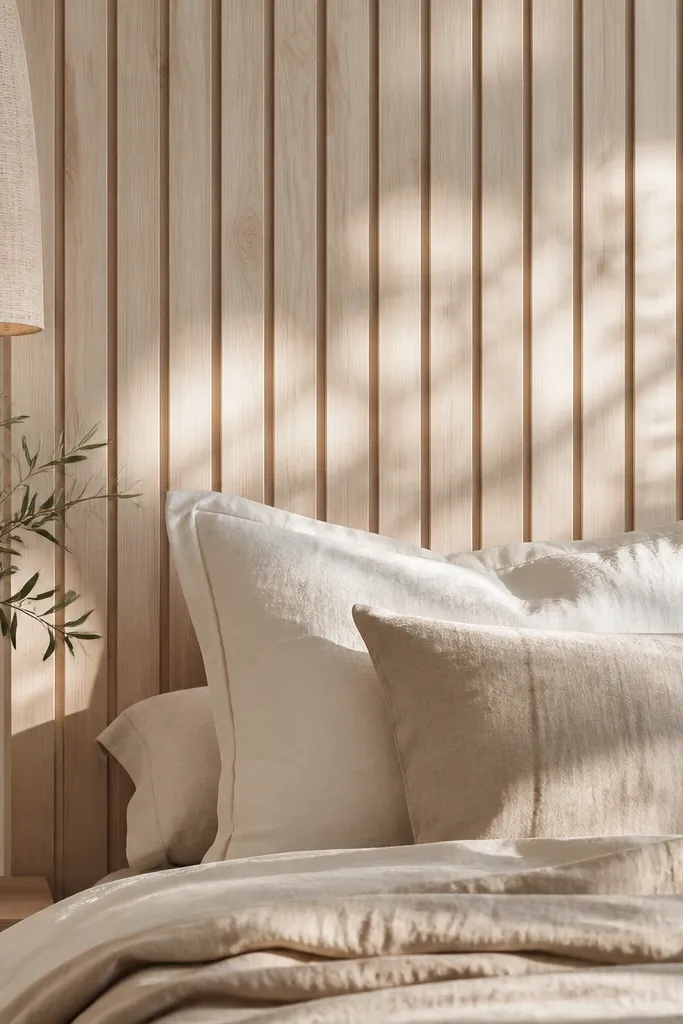
Whitewashed oak gives you the natural warmth while keeping the bedroom bright. The trick is to use slats, not thick planks, and keep the reveal slim so the grain reads refined. Choose slats around 2 inches wide with consistent spacing, then finish with a matte clear coat so the wash stays soft. This style is great when you want a coastal-modern vibe but still want wood texture to show up clearly. It also fixes the “my room is too pale” feeling because the slats add depth even without strong color.
Pick slats that are straight and uniform, then dry-fit them on the floor to confirm spacing. Mark a level starting line and install horizontal ledger strips or a vertical backing grid depending on your slat direction. For a wall behind the bed, center the slat layout and aim for symmetrical margins on both sides. Screw slats into the backing, then fill any tiny gaps with matching wood filler and touch up stain if needed. Finish with a matte topcoat; plan on an afternoon for prep and a full day for installation.
Pro tipAdd 1/2 inch shadow gap trim at the edges if you want the slats to look built-in.
Watch outDon’t vary the spacing — uneven reveals make the wall look DIY.
3. Smoked oak vertical slats for a taller, cozier feel

Vertical slats in a smoked or charcoal-leaning oak tone make the bedroom feel warmer and visually taller. The darker finish absorbs light, so choose a matte topcoat to keep it cozy instead of shiny. This works especially well if your bedding is light (cream, taupe, oatmeal) because the wood becomes the anchor. The vertical lines also solve a common issue: a bed against a plain wall looks “stuck” at eye level. With vertical slats, the wall gives the room a sense of height and structure.
Choose slats about 2 to 3 inches wide and plan for a 1/4 inch reveal. Start by finding the bed centerline and mark a plumb reference line on the wall. Install a backing grid with consistent spacing so slats hit studs or battens cleanly. Mount slats from the top down, using spacers to keep reveals even. Finish by sanding edges smooth and applying a matte topcoat; you’ll get the best look when the finish looks like stained paper, not glossy furniture.
Pro tipPair with brass or warm black hardware (light fixtures, frames) to match the smoked tone.
Watch outSkip high-gloss finishes — they look cold on dark wood.
4. Walnut veneer panels with a clean picture-frame border
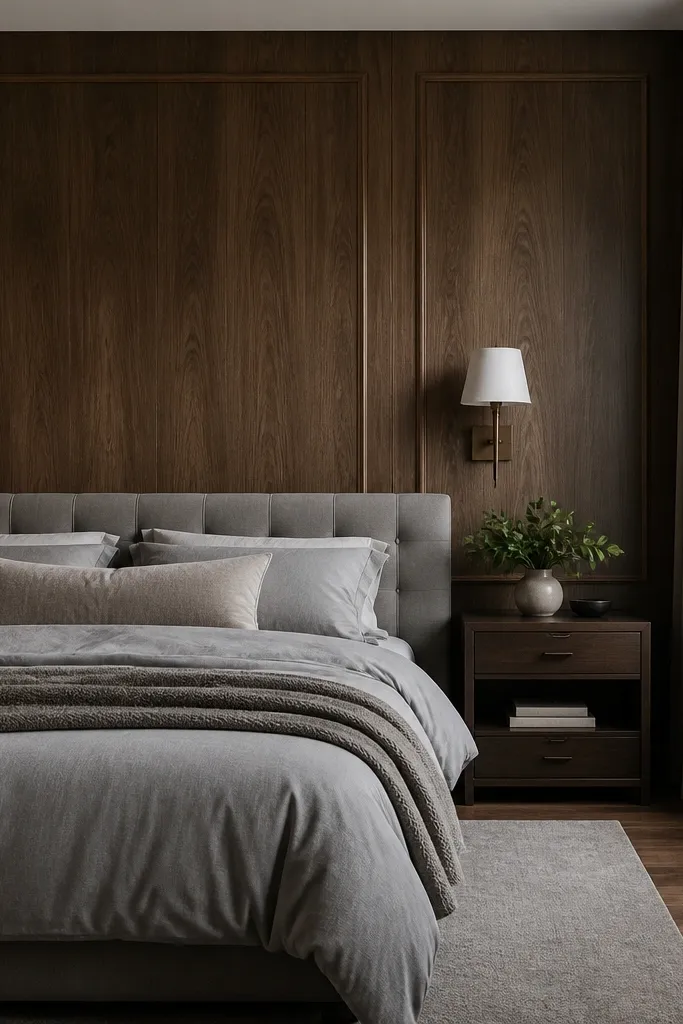
A walnut veneer panel wall looks expensive because it reads like furniture-grade material, even when you keep the design simple. The best version has a thin picture-frame border in the same wood tone or a slightly lighter walnut to create a crisp edge. Use a matte veneer with a clear topcoat so the grain shows without reflecting harsh light. This style is perfect when your bedroom already has strong bedding texture (boucle, linen, knit) and you want the wall to feel steady and warm. It also solves the problem of “wood looks busy” by keeping the surface mostly uninterrupted.
Measure the area behind the headboard and decide on a border width of about 1 to 2 inches. Cut veneer panels to fit within the frame and test seams on the floor first. Use a plywood substrate or MDF backing for a flat surface, then adhere veneer with contact cement or veneer adhesive. Install the border trim last so it hides any edge irregularities. Finish with a matte clear coat; cost is medium-high because veneer and substrate add up, but the visual payoff is strong.
Pro tipDry-fit the trim with spacers so the border thickness looks consistent around the whole wall.
Watch outDon’t rush veneer edges — rough seams show up immediately under bedroom lighting.
5. 3D wood battens with diagonal corner accents
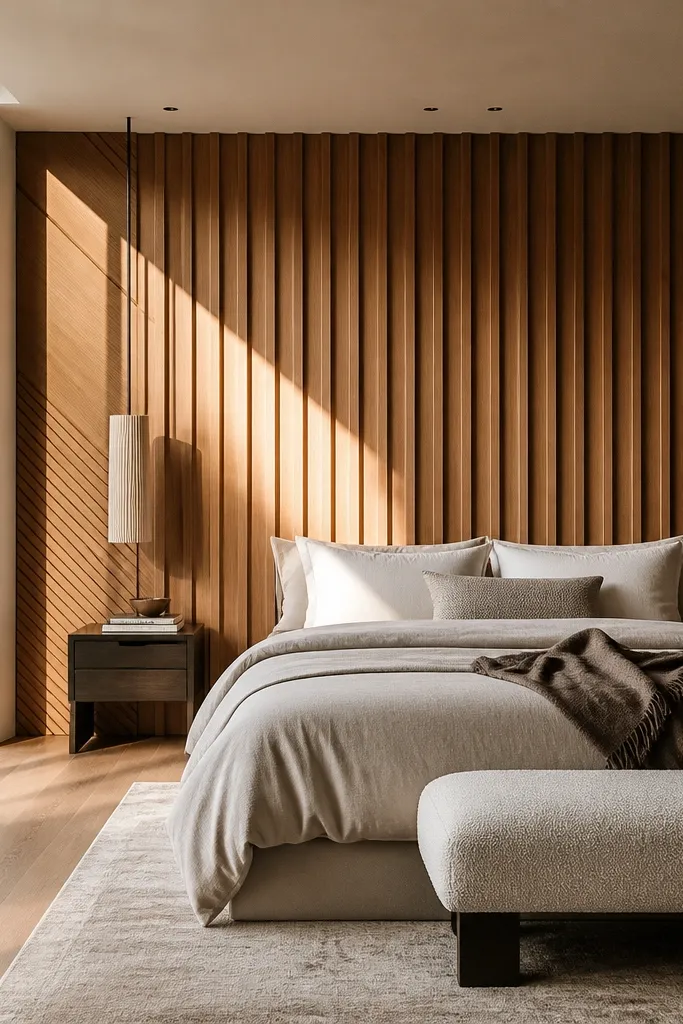
If you want the wood accent wall to look like it has depth you can almost touch, go for 3D battens. Use battens that project slightly (think shallow relief) and keep the main layout straight — then add diagonal corner pieces to catch light. The diagonal detail makes the wall feel custom without turning it into a pattern overload. This is a great option for modern bedrooms with simple bedding because the wall does the visual work. It solves “my wall is pretty but flat” by adding shadow lines that change through the day.
Plan your main batten grid first: for example, 2-inch battens with 1/4 inch reveals. Build the backing so battens sit at the same projection depth (often 3/4 inch to 1 inch depending on materials). Mark the corner diagonal runs, then cut battens so they meet cleanly at the diagonal edges. Install the straight grid, then add the diagonal corner pieces last. Paint or stain the battens and backing consistently, then seal with a matte topcoat.
Use the same stain direction across all pieces so the grain tone stays uniform.
Don’t mix projection depths — uneven shadows look sloppy.
6. Herringbone wood accent wall with a matte finish
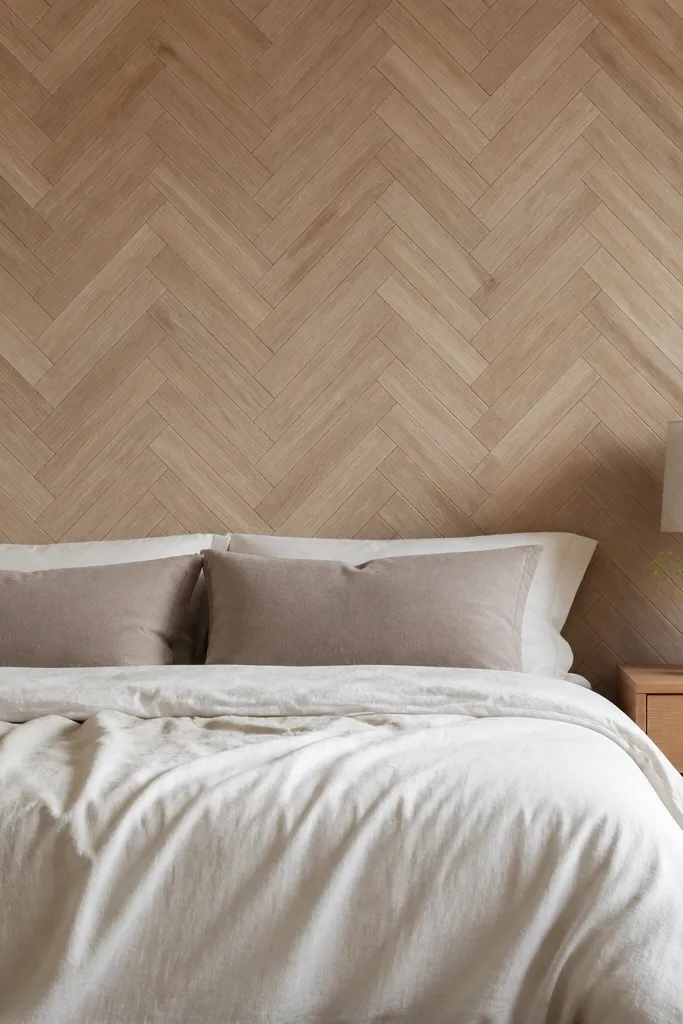
A herringbone layout is the fastest way to make a bedroom look designer because the pattern creates movement even in neutral bedding. Keep the wood tone warm — medium oak or natural ash reads inviting. Choose small-format pieces (like 2-3 inch wide strips) so the pattern is crisp, not chunky. Matte finish is key: it keeps the texture from looking glossy and cheap. This wall solves the “my wood wall looks like everyone else’s” issue by giving you a signature pattern that still feels natural.
Measure your headboard area and build a simple grid on the floor to plan the herringbone angle (commonly 45 degrees). Cut strips to length, dry-fit them, then install on a flat substrate like plywood or over a batten frame. Use a consistent gap of around 1/16 to 1/8 inch between strips for a clean look. After installation, fill any tiny edge gaps, sand smooth, and apply a matte sealer. Expect more labor than slats; plan for careful cutting and test-fit time.
Use a laser level for the first row — one crooked row ruins the symmetry.
Skip pre-planning the layout — herringbone needs exact line control.
7. Vertical shiplap with a slightly darker top rail
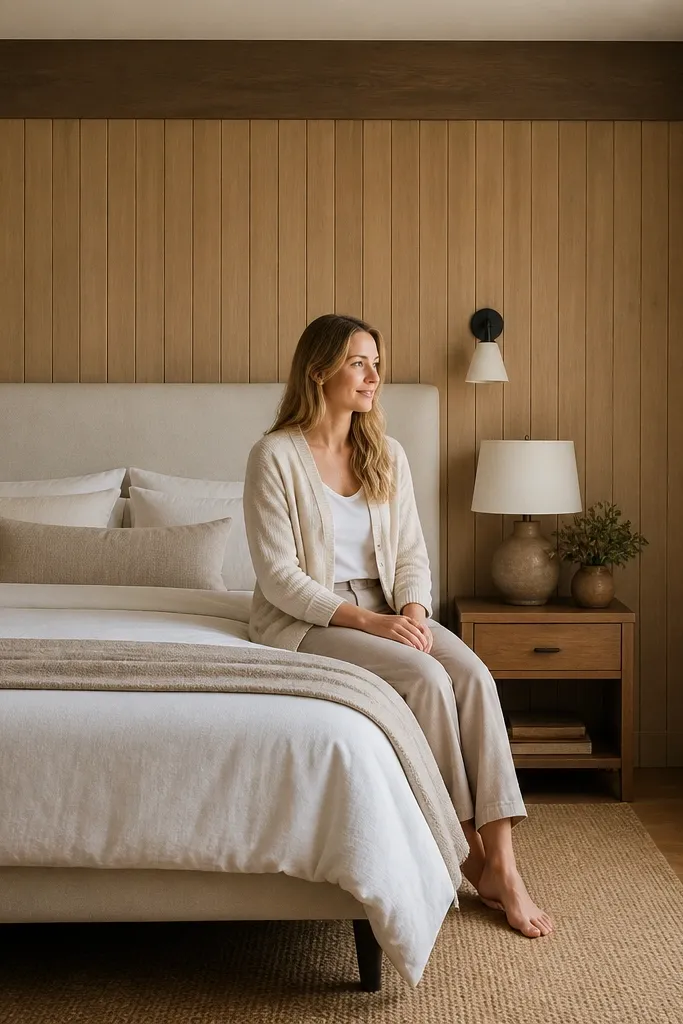
Vertical shiplap gives you classic texture, but adding a slightly darker top rail makes it look intentional and architectural. Keep the main shiplap in natural oak or light stain, then use a darker stain for the top band about 6-8 inches tall. This creates a built-in feel that frames the bed without adding extra furniture. It’s great for bedrooms that need height and structure, especially if your headboard is mid-height. The contrast also keeps the wall from blending into light walls.
Pick shiplap boards with consistent profiles and plan your spacing based on the board’s tongue-and-groove system. Install the shiplap vertically on a level backing grid, starting from the left side and working across. Add the darker top rail after the shiplap is installed so you can align it perfectly. Use caulk in the seams and fill nail holes, then sand and apply stain + topcoat for both the main field and rail. This is mid-effort: straightforward boards, but you need clean finishing lines.
Caulk the seams lightly, then wipe off excess — it makes the wall look seamless and premium.
Don’t use two different wood species without checking undertones — the contrast can turn muddy.
8. Reclaimed-look plank wall with limewashed edges
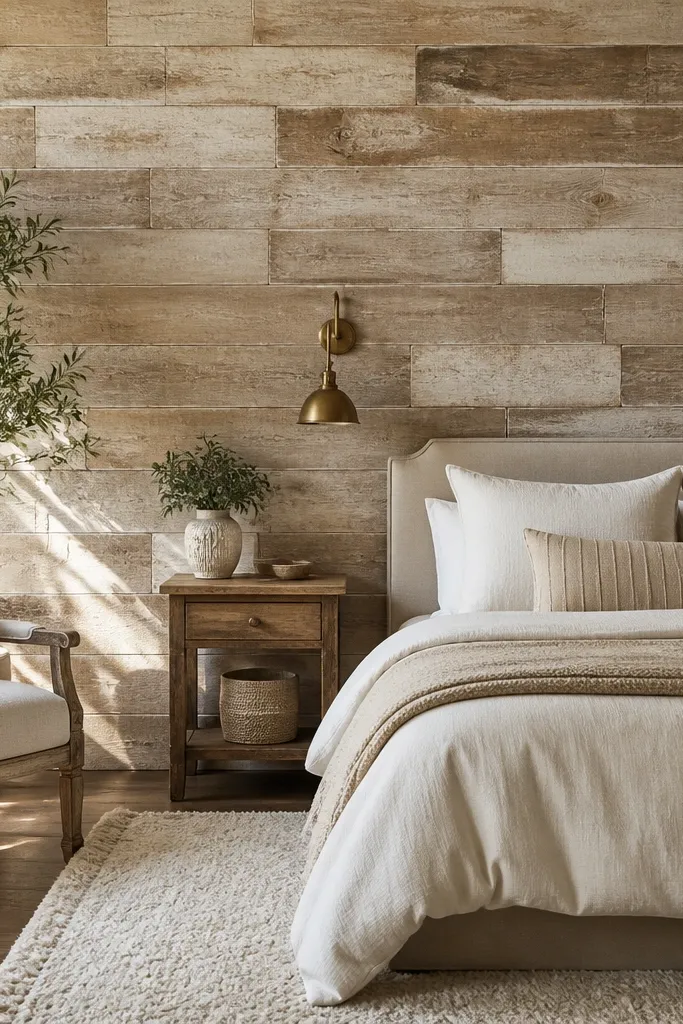
Reclaimed-look wood adds character, but the best version doesn’t look chaotic. Use planks with varied widths, then unify the wall with a limewashed edge treatment so the seams look deliberate. The lime wash should be subtle — a pale cream that softens dark grain. This works beautifully in bedrooms with warm whites, textured bedding, and natural fibers like jute or linen. It solves the problem of “reclaimed wood looks dirty” by controlling the tone and keeping the finish matte and clean.
Choose planks that are all the same thickness so the wall stays flat. Arrange them on the floor first to balance dark and light pieces, then mark the order. Install on a backing frame and keep a consistent reveal of about 1/4 inch for that reclaimed seam look. Limewash only the edges and a light pass over the surface, then seal with a matte clear coat. Plan on extra time for stain matching and drying between coats.
Use a damp rag wipe after the lime wash to keep it soft instead of streaky.
Skip random placement — reclaimed looks best when you curate the mix.
9. Two-tone wood ombre accent wall behind the headboard
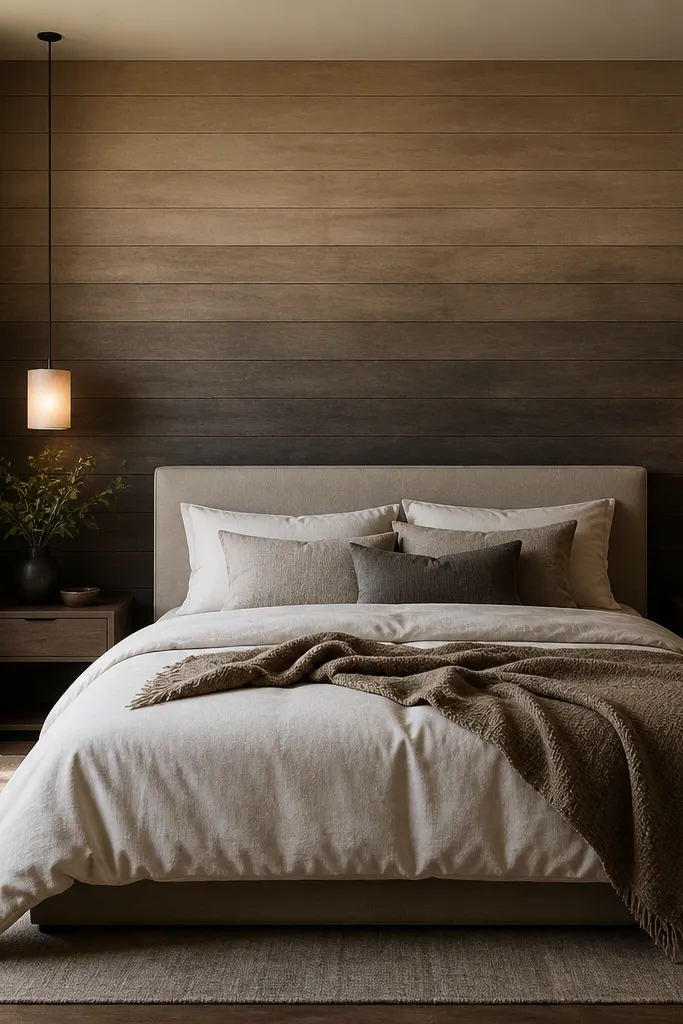
A subtle ombre effect turns a wood accent wall into a mood. Start darker at the bottom and transition to lighter at the top using the same wood species, so it still feels natural. Use horizontal planks for the ombre to read smoothly, and keep the finish matte so it looks like stained plaster rather than a craft project. This style is perfect for bedrooms where the bedding is neutral and you want the wall to bring warmth without adding color. It also solves the “neutral room needs depth” issue with a gradient that photographs well.
Pick uniform planks and stain them in three batches: dark, medium, and light. Install the boards first as a clean horizontal run, then apply stain by sections — for example, 1/3 of the wall at a time. Blend the transition areas with a dry brush so there’s no hard banding. Let each section dry fully before sealing. This is labor-heavy because you’re staining in layers, but the result looks custom.
Mask the edges with painter’s tape to keep the stain boundary crisp while blending the center lightly.
Don’t use two different woods — ombre looks messy when undertones fight.
10. Rustic knotty pine slats with a warm amber clear coat
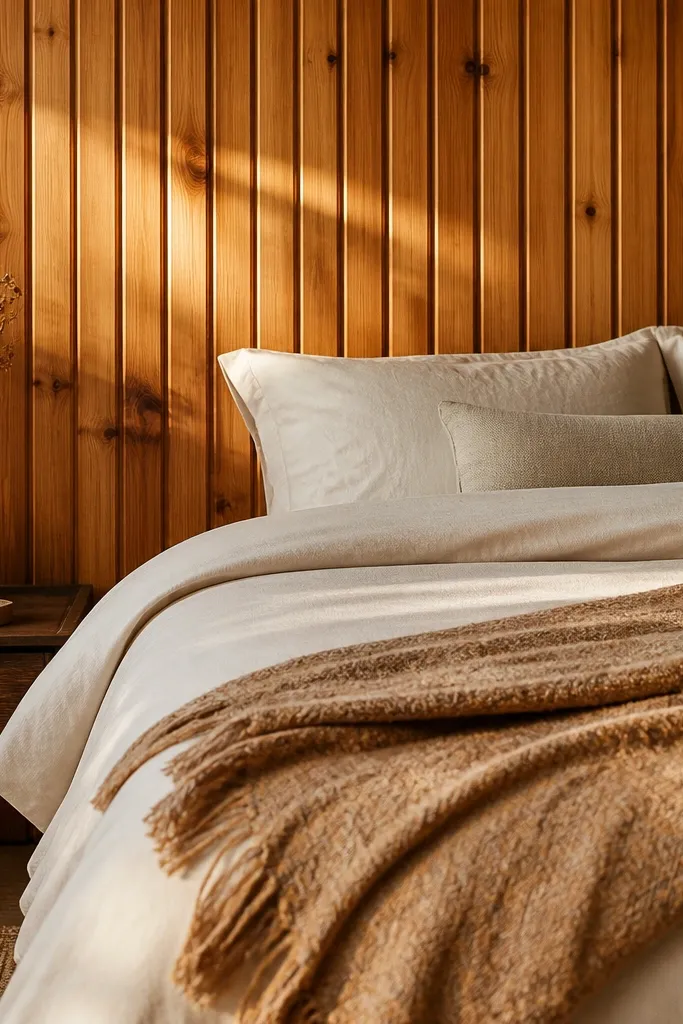
Knotty pine brings warmth and a lived-in feel, and it looks especially good when your bedroom has warm lighting. Use narrow slats, keep the spacing tight, and finish with an amber-toned clear coat that deepens the knots. The wall becomes the cozy anchor for a cabin-inspired bedroom without needing lots of decor. This solves the “my bedroom feels too sterile” problem by adding organic texture and warm color temperature. It also looks great with wool throws and darker wood furniture.
Choose pine boards with visible knots and similar thickness so the surface stays even. Sand to smooth the grain edges, then wipe clean before staining or finishing. Install slats with a consistent reveal around 3/16 to 1/4 inch on a backing grid. Apply clear coat in thin layers, letting each coat dry and checking color depth under the room’s light. Expect more surface work because pine knots can soak unevenly; plan for at least two or three coats.
Use warm bulbs around 2700K so the amber finish looks intentional, not yellow-green.
Don’t skip sanding knots smooth — roughness shows under bedside lighting.
11. Fireplace-style wood paneling look with vertical rails
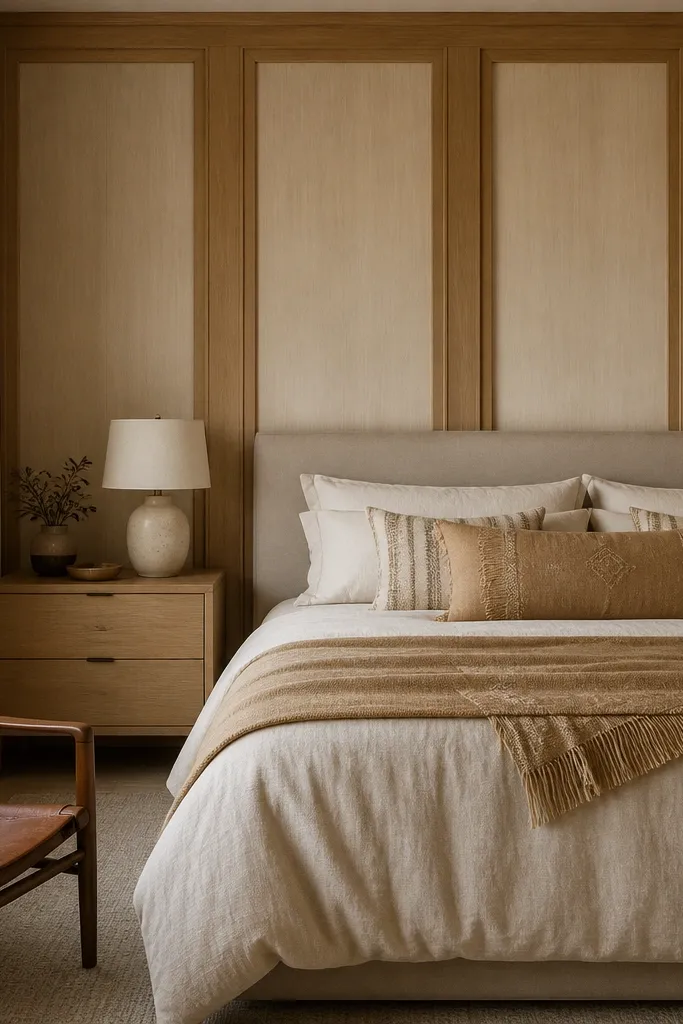
This idea borrows the look of classic paneling but keeps it bedroom-friendly. You get a structured, tailored wall by combining vertical wood rails with simple flat fields. Use a medium oak tone for the rails and keep the field panels a matching, slightly lighter wood or painted off-white. The contrast makes the wall read architectural, not rustic. It solves the problem of a plain wall by giving you built-in-like geometry without complex patterns. It also photographs well because you get crisp lines and shadow definition.
Pick a rail width of about 1.5 to 2 inches and decide your panel field size, like 10-14 inches wide. Install horizontal and vertical backer strips so rails screw into solid points. Cut rails and attach them in a grid centered behind the bed. Fill nail holes, then either stain the rails and paint the fields or use matching wood for both. Finish with a satin topcoat on wood surfaces and a durable paint on the fields.
Pro tipKeep the rail spacing consistent from top to bottom so the geometry looks straight even in wide photos.
Watch outDon’t make the fields too small — it turns into visual noise.
12. Black-brown stained wood slats with warm white bedding
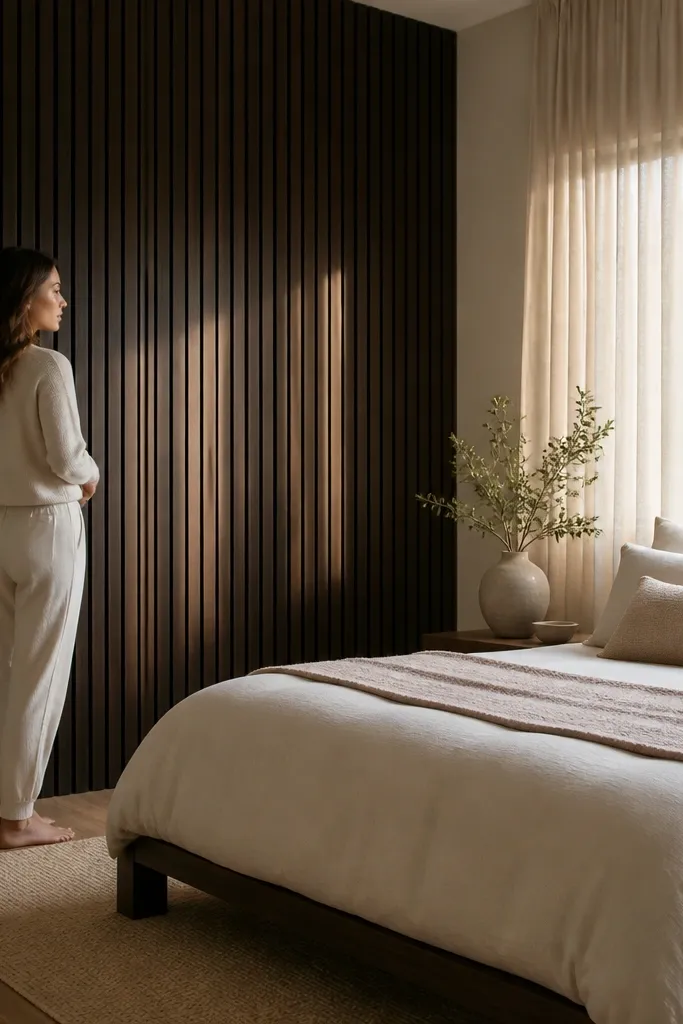
Dark stained slats can look elegant and warm when you keep the rest of the room light. Choose a black-brown tone (not true black) so the grain still shows and the wall doesn’t feel like a dark door. Pair it with warm white bedding and light curtains to keep the room airy. This style is great for modern bedrooms that need a strong focal point without adding paint color. It solves the “I want drama but not clutter” wish because the slats create texture and depth in one clean move.
Install slats about 2-3 inches wide with a 1/4 inch reveal. Sand and stain the slats before installation if you want more even coverage, then seal with matte topcoat. Mount on a backing frame so slats align perfectly in a centered layout behind the headboard. Use a level line for the first slat and keep spacing with spacers. Finish by adding edge trim and caulking tiny seam gaps for a built-in look.
Pro tipAdd a thin LED strip behind the headboard line if your room allows it — the warm glow makes the slats look dimensional.
Watch outAvoid high-contrast white paint directly on the same wall edge without trim — it looks harsh.
13. Oak and linen mixed wall with wood panel ledge
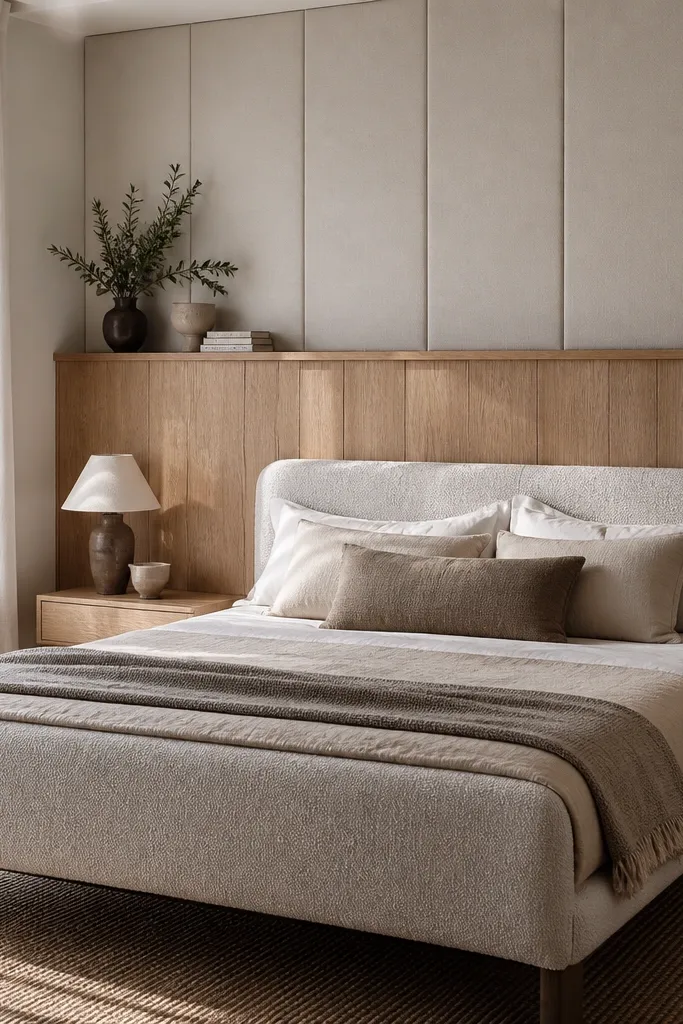
This is for people who want wood warmth but hate the idea of a full wood wall. Do a wood panel ledge at headboard height and cover the upper portion with linen-look fabric panels in a warm neutral. The mix creates a softer look and keeps the room from feeling too “hard.” Use light oak for the ledge and a matte finish so it blends with natural textures. This solves a specific problem: some bedrooms get visually noisy when every inch is wood. Here, the wood anchors the space while fabric adds calm.
Mount a wood ledge horizontally behind the bed at roughly 30-36 inches from the floor, depending on your headboard height. Build a simple frame for the fabric panels so they stay taut and straight. Attach the wood ledge first, then install fabric panels above with fabric stretched over the frame and stapled on the back. Finish the wood with matte sealer, then pin or velcro the fabric frames in place. Cost is moderate: wood is simple, and fabric panels are cheaper than full paneling.
Pro tipUse off-white linen panels with a warm undertone, not bright optic white, so it reads cozy.
Watch outDon’t skip a taut frame — sagging fabric looks sloppy next to clean wood.
14. Half-wall wood accent with vertical slats and open top
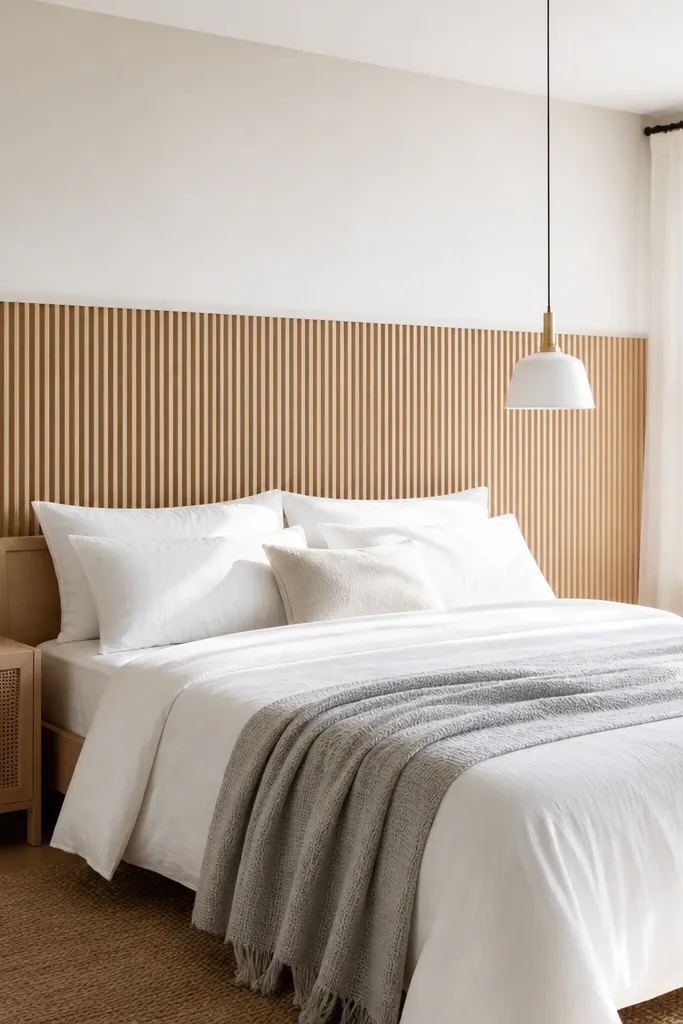
A half-wall wood accent is a smart choice when you want warmth but don’t want to darken the room. Use vertical slats on the lower portion, stopping around 48-60 inches from the floor, then leave the upper wall painted in a warm white. The vertical slats still add height and texture, but the open top keeps the room feeling light. This is ideal for bedrooms with tall windows or low natural light where a full wood wall would feel heavy. It solves the “I love wood but my room is small” issue with a layout that stays breathable.
Decide your height line first — 54 inches from the floor is a strong starting point for most beds. Mark a level stopping line and install the vertical slats only below it. Use a backing grid so slats are straight and screw into solid points. Add a horizontal trim board at the top edge of the slats to make the stop line look intentional. Paint the upper wall after wood installation and caulking so the transition looks crisp.
Keep the painted upper wall one shade warmer than you think, so it harmonizes with the wood undertone.
Don’t end slats abruptly without a top trim — the cut line looks temporary.
15. Beech tongue-and-groove wall with a soft curved headboard niche
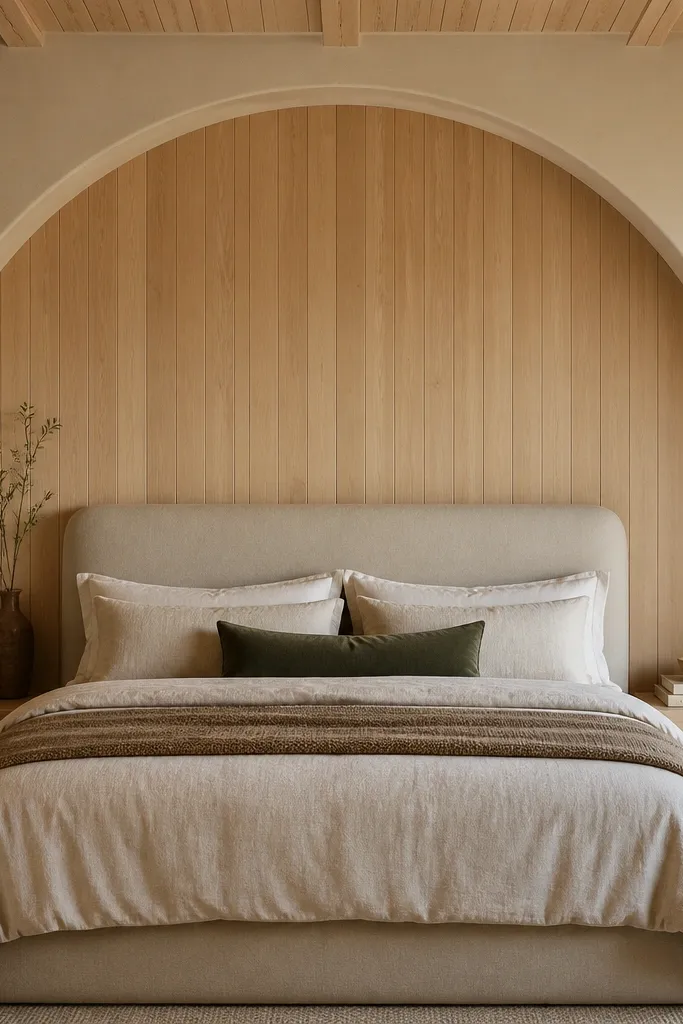
This one is for people who want warm wood without the “straight-line” look. Use beech tongue-and-groove boards in a pale honey tone, then carve a shallow curved niche around the headboard so the wall feels custom. The curve breaks up the bedroom’s usual rectangles and makes the bed area look softer and more inviting, which is exactly what a warm, natural look needs. The beech stays bright in morning light, while the groove lines add texture that reads cozy even at night. It also solves the common problem of a flat accent wall looking a little harsh beside pillows and bedding — the niche gives everything a natural frame.
Step 1 — Layout and boards: Mark the headboard centerline and measure the bed width. Plan a niche that is about 6-8 inches deep, with a curve radius that lands roughly 10-14 inches beyond each side of the headboard; use 1x6 inch beech tongue-and-groove boards (or rip to match your wall thickness) and keep board ends aligned to the curve edges. Step 2 — Build the curve: Cut a curved backing template from 1/2-inch plywood, then screw it to wall studs or a ledger so the curve is solid. Install the tongue-and-groove boards onto the backing, leaving a 1/4-inch expansion gap at the outer edges, then fill gaps with matching wood filler and sand smooth. Step 3 — Finish: Apply a clear matte wood finish in two thin coats (water-based is easiest for pale beech) and lightly sand between coats with 180 grit. Cost is moderate: expect a weekend of work for a typical queen room, plus materials for boards, plywood backing, screws, filler, and finish.
Pro tipPaint the niche interior the same finish level as the boards, not gloss — matte keeps the curve cozy. Hang a single round mirror above the bed so the curve echoes it and the whole wall reads intentional.
Watch outDon’t run the tongue-and-groove boards straight over uneven drywall — flatten the wall first or the grooves will look wavy.



