
1. Galvanized Tray Wall for Tool Jars
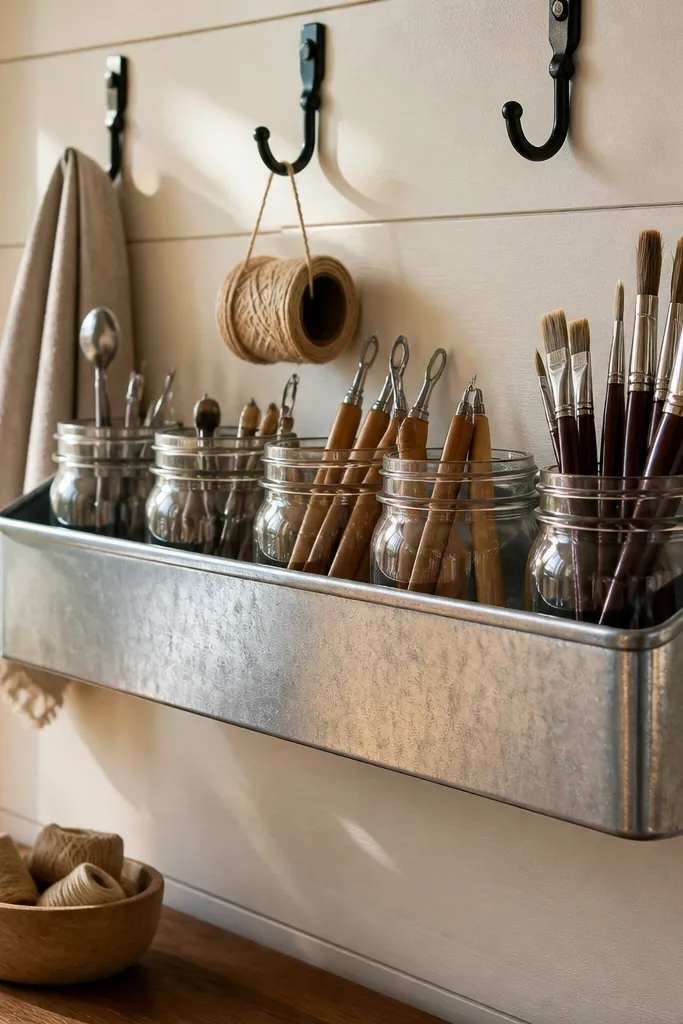
A galvanized tray wall makes craft tools look like decor instead of clutter. The farmhouse win is the contrast: cool metal against warm white and natural wood. Use short jars in consistent heights so the whole row reads neat even when you’re actively using supplies. This setup also handles the year-round problem of “where do I put everything while I’m working?” because tools stay visible but grouped. It’s best for a narrow wall section near your desk or cutting area where you need quick grab-and-go.
Start by choosing a galvanized tray about 24-30 inches long and mounting it at eye level, roughly 60-66 inches from the floor to the tray rim. Fill it with 5-8 identical glass jars or small apothecary jars, then add simple black or dark brown labels (vinyl labels work cleanly). Finally, place your most-used items in the front two jars and keep the rest behind so the display looks intentional instead of random.
Pro tipStick to one lid finish (all black or all clear) so the jars look like a set, not separate purchases.
Watch outDon’t mix jar shapes and label styles — mismatches look messy fast.
2. Linen-Covered Supply Baskets on Open Shelves
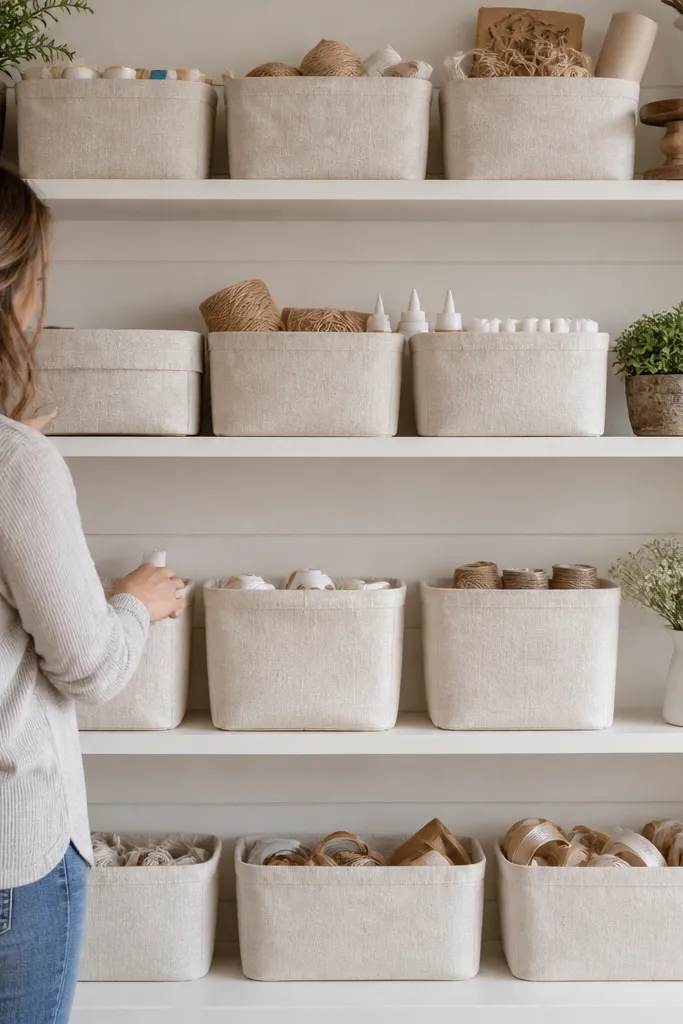
Open shelving looks farmhouse and airy, but craft rooms get chaotic quickly. Linen-covered baskets solve that by adding soft texture while hiding paper stacks, ribbons, and extra glue. The key is to keep the basket sizes consistent across shelves so the visual rhythm stays calm. Add only a few decorative objects per shelf — think small ceramic pieces or a single framed print — so the baskets do the organizing. This idea is perfect for craft rooms where you want the shelves to stay year-round without swapping everything every season.
Measure your shelf depth first, then buy or make baskets that fit with about 1-2 inches of clearance on each side. Line the shelves with baskets first, then add a short row of small decorative items only at the top edge of one shelf. Finally, tuck your daily-use supplies into the front basket on each shelf and keep the back basket for overflow.
Pro tipUse linen baskets in two tones only (natural and oat) for a cohesive farmhouse look.
Watch outAvoid leaving baskets empty or half-filled — flat, saggy liners look untidy.
3. Dark Wood Peg Rail with Hanging Tool Layout
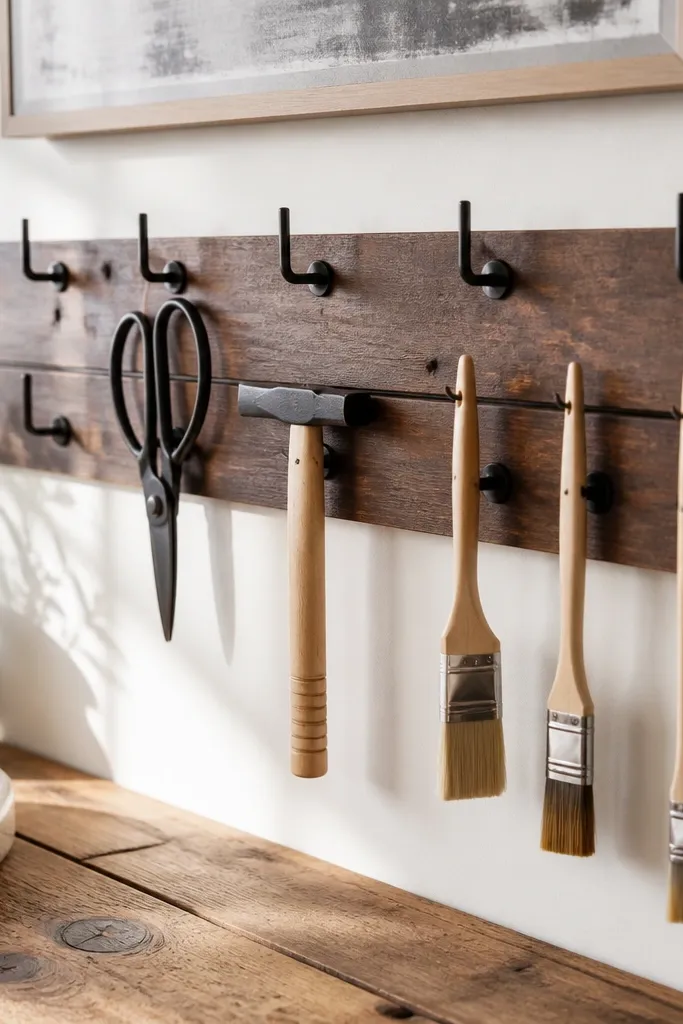
A peg rail turns “tool mess” into a designed wall feature. Dark wood and black metal hooks read farmhouse-modern, and hanging tools keeps your desk surface clear while still looking styled. The farmhouse part is the repeatable grid: same spacing, same hook sizes, tidy arrangement. Year-round craft room decor needs this kind of stability because paper and yarn change constantly, but your tool layout can stay fixed. Put it on the wall beside your work table where you reach for scissors, measuring tape, and paintbrushes.
Mount a 36-inch peg rail on the wall so the bottom rail sits about 10-12 inches above the work surface. Install hooks in a consistent pattern: lighter tools on top hooks, heavier items like tape measures lower hooks. Hang 6-10 items max at first, then add small galvanized buckets or a narrow tray for tape and clips so small pieces don’t scatter.
Group tools by color family (black-handled scissors together, wood-handled brushes together) for an instant “designed” look.
Skip overcrowding — if every hook has something, it reads cluttered instead of curated.
4. Picture Ledge with Farmhouse Photo + Craft Notes
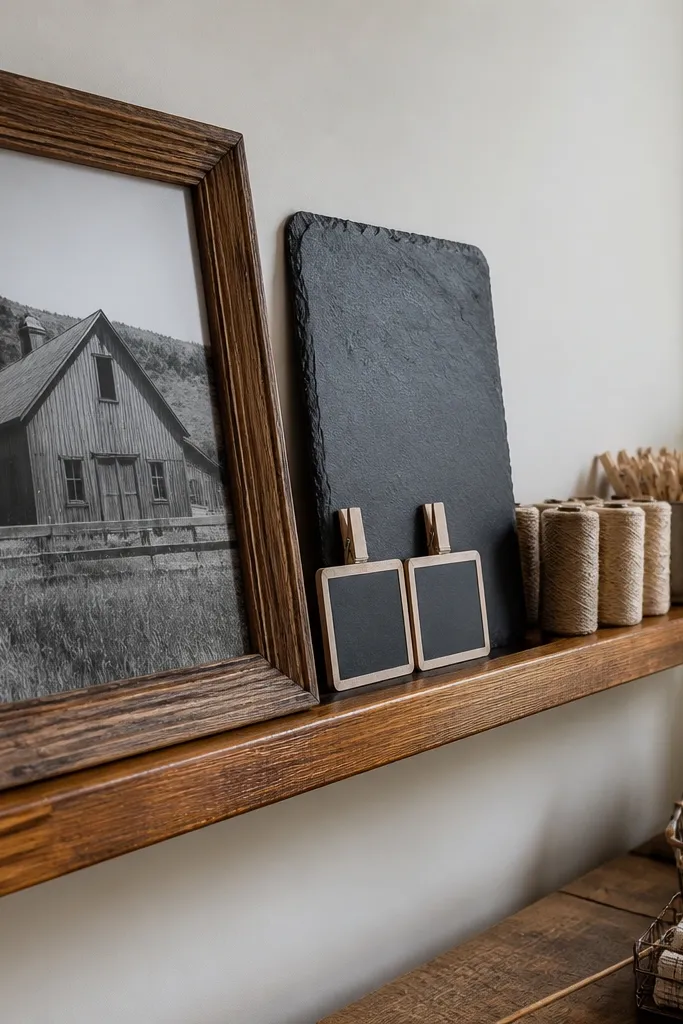
A picture ledge gives you a horizontal styling surface that doesn’t fight your storage. The farmhouse look comes from a simple framed print in warm wood, plus small chalkboard or slate-style notes that feel handmade. For year-round craft room decor, this is one of the best setups because you can swap seasonal cards without changing the whole arrangement. Keep the display focused: one frame, one small tray, and a couple of craft-adjacent items. It also helps with the common craft-room issue of “my wall is empty until I add something, then it’s too busy.”
Install a 24-30 inch picture ledge 60-64 inches from the floor. Place one medium frame centered, then add a small tray (wood or distressed metal) below it. Finish with two small items like a folded linen scrap and a chalkboard sign, leaving at least 2-3 inches of empty space between objects.
Pro tipUse the same frame size throughout the ledge so your wall reads consistent even when you swap signs.
Watch outDon’t put more than 5 objects per ledge — craft rooms already have visual noise.
5. Shiplap-Style Panel Accent Behind the Cutting Table
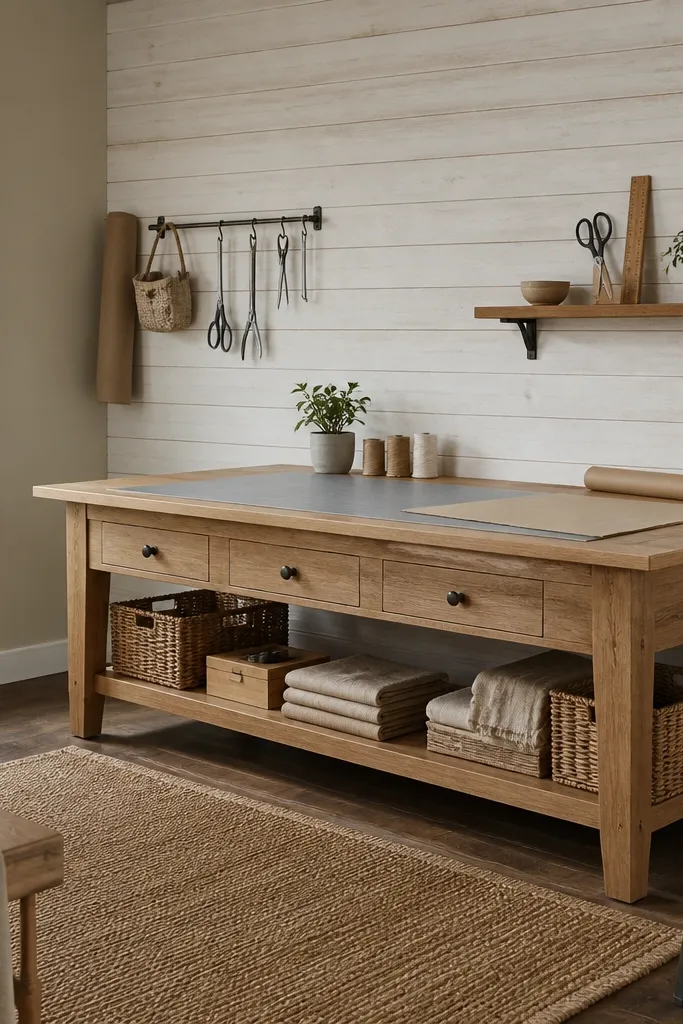
A shiplap-style panel behind your cutting table makes the whole room feel intentional, even if the rest is practical. The texture reads farmhouse instantly, and it gives you a clean backdrop for hanging tools or placing a small shelf. Year-round craft room decor needs a stable visual anchor because your work setup changes constantly. With a panel accent, your messy moments still look “designed” since the background is consistent. This works especially well in rooms with plain painted walls that make everything look random.
Pick a shiplap-style board product or peel-and-stick panels and plan for the panel height to cover the wall space behind the table plus 6-10 inches above it. Paint or finish it warm white to match your room (avoid bright blue-white). Then add one small shelf for jars or a couple of hooks, keeping everything centered so the panel doesn’t feel busy.
Match your shelf hardware color to the panel accents — dark hardware on warm white looks best.
Don’t leave the accent bare — a few anchored items are what make it feel like decor.
6. Vintage-Style Rolling Cart as a Tiered Tray Display
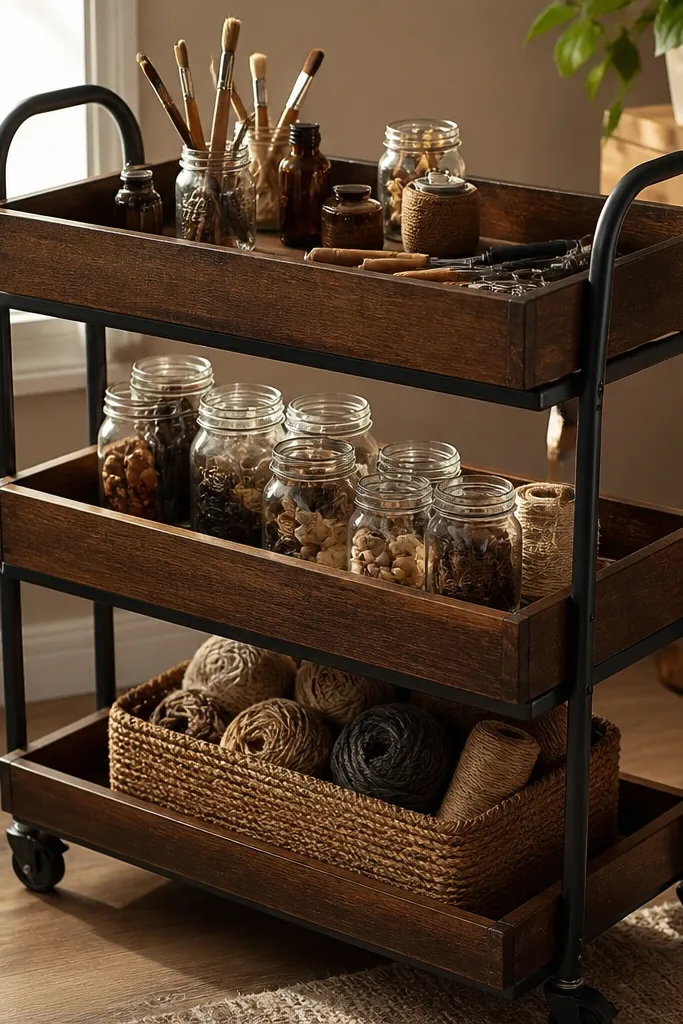
A rolling cart is farmhouse-friendly and craft-room realistic because it moves with your projects. Style it like a mini station: top tray for your current tools, middle tray for supplies you grab daily, bottom shelf for overflow. The farmhouse look comes from tray edges, wood-toned shelves, and metal frames in black or bronze. This solves the problem of “decor that gets in the way” because the cart holds it all in one place. It also looks good year-round because the cart is always there, and you only swap what sits on top.
Choose a cart with at least two trays and a width around 16-20 inches so it fits beside a desk without blocking walkways. Place it 10-14 inches from the work surface so you can reach across easily. Add 3-5 matching jars on the top tray, then place a small linen cloth folded neatly under a jar or next to a craft book on the middle tray.
Use one tray liner (cotton canvas or natural paper) across the trays so the cart looks styled even when supplies change.
Skip random loose items on the cart shelves — they turn into visual clutter instantly.
7. Rustic Ladder Shelf for Yarn + Hanging Tags
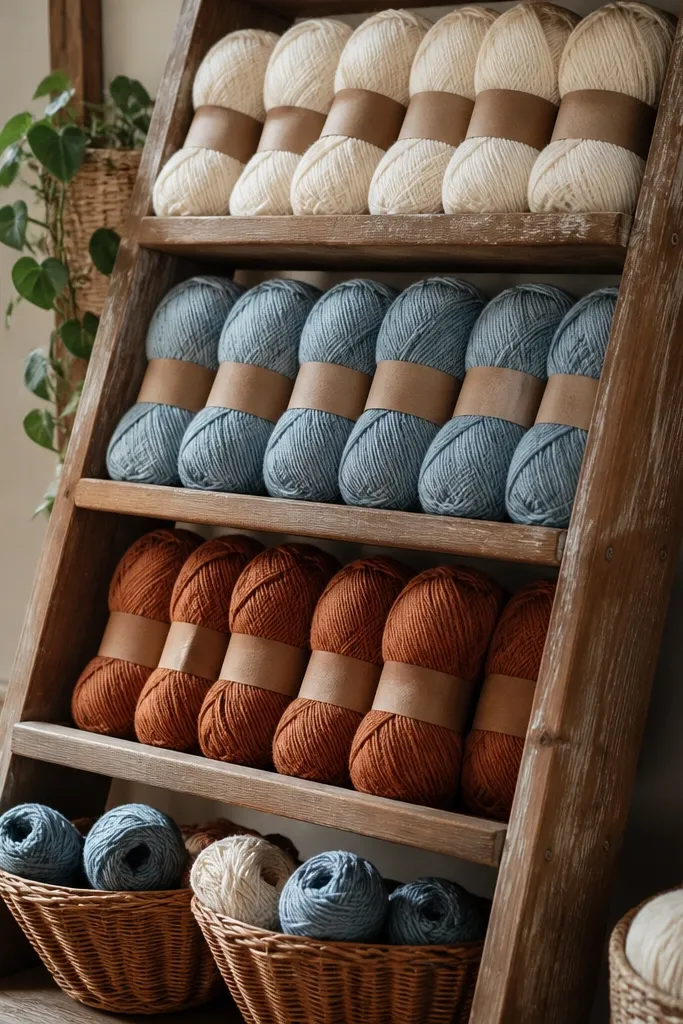
A small rustic ladder shelf gives you vertical farmhouse charm and a place to store yarn without hiding everything. Yarn looks cozy when it’s organized into color blocks, and the ladder silhouette makes it feel like decor even when you’re not using it. Add kraft tags or small fabric labels to make it look handmade and year-round. This is great for craft rooms where you need storage that also feels like a feature on the wall or in a corner. It’s especially photogenic because the vertical lines make the room feel taller.
Pick a leaning ladder shelf around 5-6 feet tall and secure the base with a wall anti-tip strap if you have kids or pets. Add baskets or wooden rungs for yarn storage so skeins don’t slide. Hang kraft tags from hooks on the sides or label small jars at the ladder’s top rung, then leave one rung for decorative items like a small framed quote or a bundle of dried greenery.
Organize yarn by tone (cream + beige + tan, then rust + brown) instead of mixing everything — it reads farmhouse and calm.
Don’t store yarn in a single loose pile — it looks messy, even if the room is otherwise styled.
8. Black Metal Peg + Wooden Shelf Combo for Ribbon Control
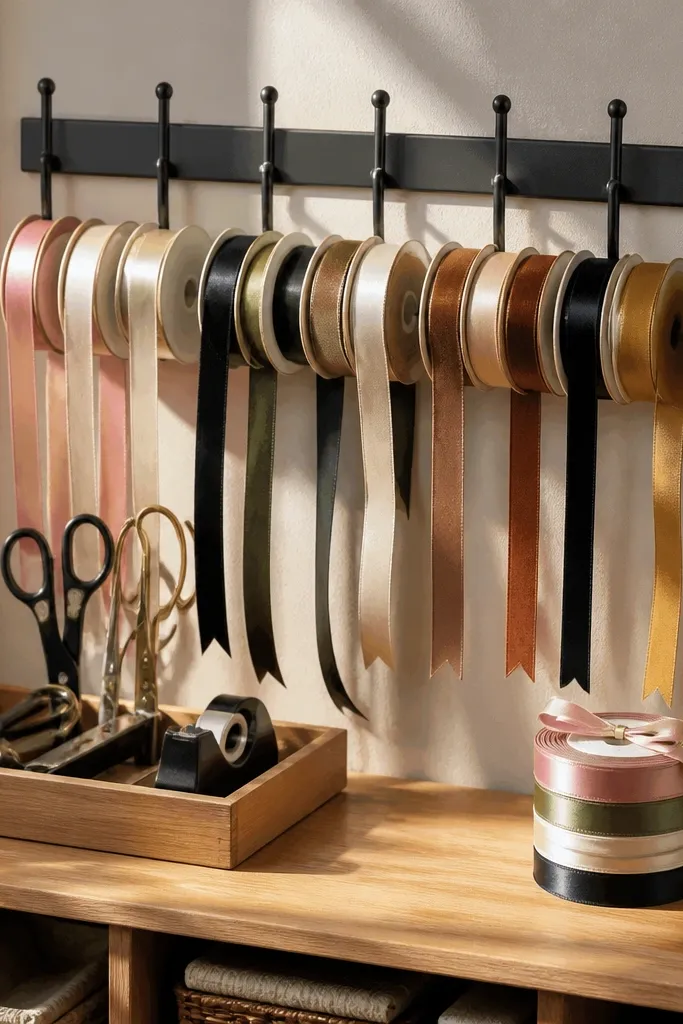
Ribbon is the craft-room chaos king. This setup controls it by giving ribbon a dedicated hanging home while still showing a farmhouse aesthetic. The black metal peg keeps the look crisp, and the small wooden shelf lets you stage a tray for scissors or a ribbon cutter. For year-round craft room decor, this works because ribbon spools are attractive when they’re lined up and labeled. It’s best for a wall near your workspace where you can grab ribbon without rummaging through bins.
Mount a small wooden shelf (about 20-26 inches wide) and a black peg panel underneath it, keeping the peg hooks evenly spaced. Use ribbon organizers or spool holders on the hooks so spools hang flat. Then add a slim tray on the shelf with only two items: a cutter and one small roll of tape, leaving space so the wall doesn’t look packed.
Label only the top row of spools with small tags so the display looks intentional, not like a filing cabinet.
Skip clear plastic organizers on the peg — they catch glare and ruin the farmhouse vibe.
9. Farmhouse Desk Backdrop with Linen Panel and Brass Clip Lights
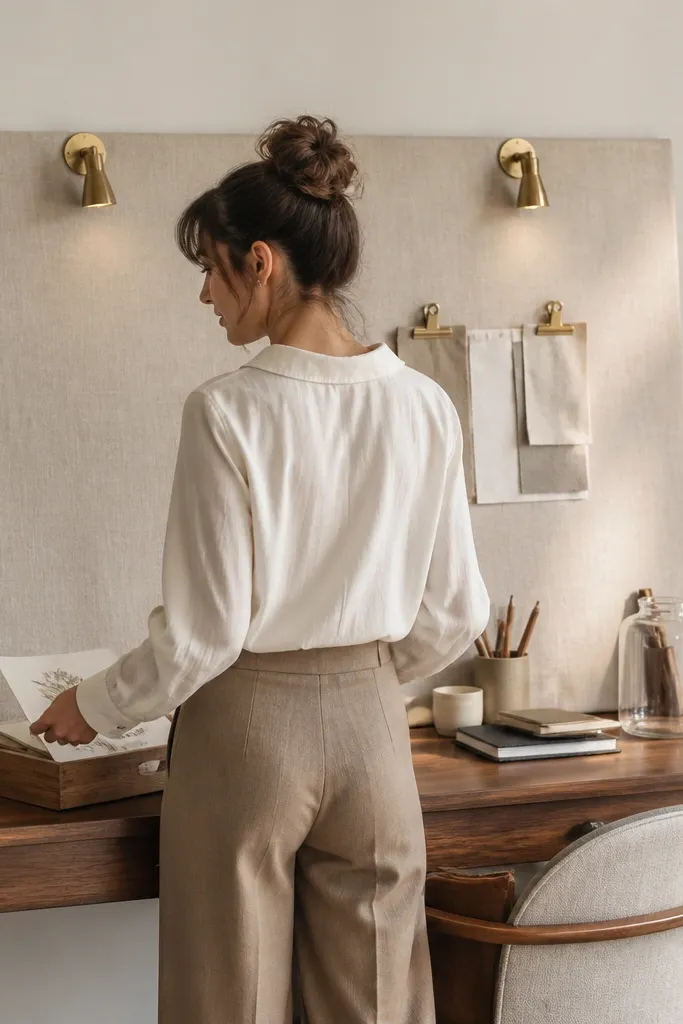
If your desk is the main visual in the room, a linen backdrop makes everything around it look warmer and more cohesive. Linen adds the soft farmhouse texture that hides the fact that craft rooms are full of paper, tape, and half-finished projects. Add brass clip lights for a gentle glow and a functional light source for late work sessions. Year-round craft room decor benefits from lighting that doesn’t change with seasons, and brass reads cozy without turning yellow. This is ideal for a desk wall where you currently have blank paint that makes the room feel unfinished.
Hang a linen panel on a tension rod or simple wall hooks, aiming for a width that covers the space from about 6-8 inches beyond your desk edges. Install two small brass clip lights on the sides or upper corners so the light hits your work surface, not the wall. Finish by adding 3-5 hooks for a small tote, measuring tape, or a fabric pouch, then keep the desk surface styling under 20-25% visible area.
Pro tipUse warm bulbs (2700K) so your linen and wood tones look consistent in both daylight and evening.
Watch outDon’t cover the whole wall with heavy fabric — too much linen can make the room feel crowded.
10. Distressed White Cabinet with Clear Labelled Jars on Top
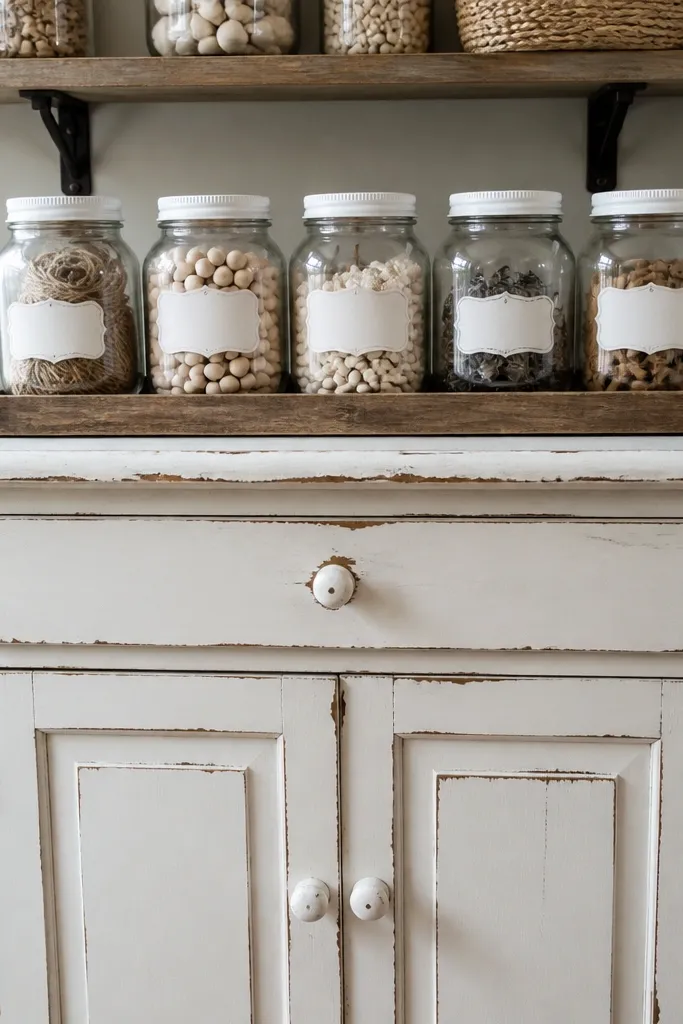
A distressed white cabinet gives you closed storage for craft clutter, and the top jars make it look styled instead of hidden. Farmhouse decor gets its charm from the contrast: worn white cabinet fronts plus clean, uniform jars. Clear jars let you see supplies without opening doors, and labels keep the display tidy year-round. This is perfect when your room has a lot of small items like buttons, beads, glitter, and paper scraps that otherwise spill across surfaces. Keep the top arrangement limited so the cabinet stays photogenic, not busy.
Choose a cabinet with doors and at least one adjustable shelf inside, then place it where you can see it from your work zone. On top, arrange 6-10 matching clear jars with wooden or kraft labels, keeping the tallest jars in the back row. Label by category, not by project, so you don’t have to relabel every time you start a new craft.
Use the same jar lid color across every jar — black lids or natural cork look best with farmhouse furniture.
Don’t stack jars randomly — staggered heights look good only when the spacing is even.
11. Corner Gallery with Black Frames and One Farmhouse Quilt Throw
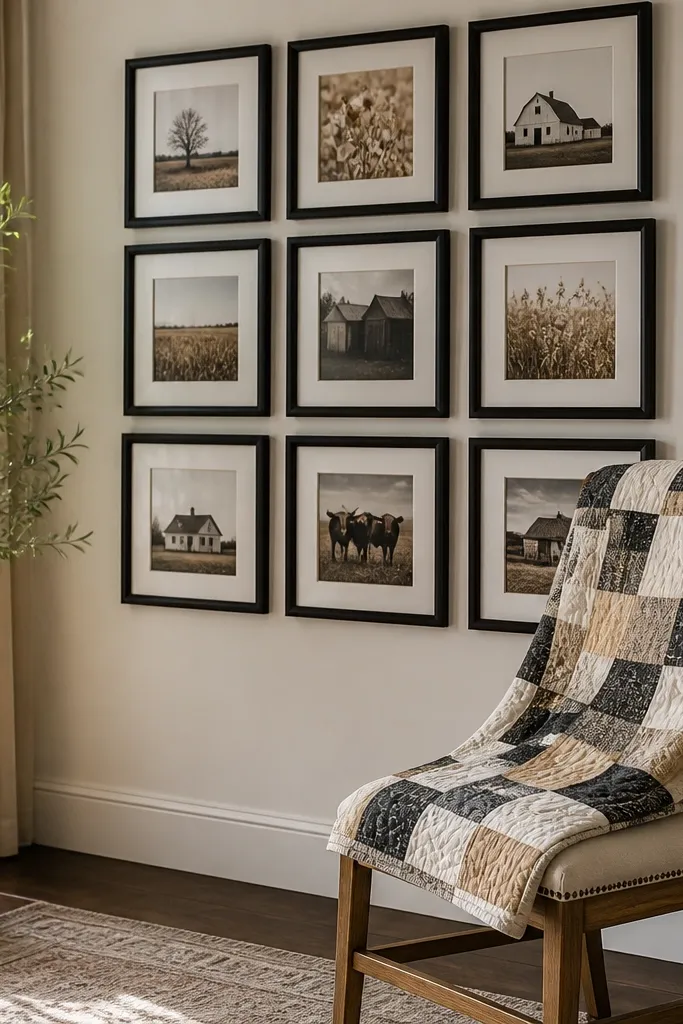
A corner gallery makes craft rooms feel like living spaces, not workshops. Black frames on warm white walls add farmhouse contrast, and a single quilt throw brings in the cozy texture that reads “seasonless.” The trick for year-round craft room decor is to keep the quilt folded and visible, not draped everywhere. That way you get warmth and softness without blocking storage or furniture functions. This setup is best for corners near a chair, reading nook, or small side table where you want a cozy anchor.
Arrange 3-5 black frames in a tight grid on the corner wall, keeping consistent mat colors and frame sizes. Hang at eye level so the center of the grid sits about 58-62 inches from the floor. Place one quilt throw on the chair back or on a nearby bench, folded so it shows a clear pattern and stays neat.
Choose quilt patterns with a limited palette (cream, tan, black) so it still looks right in summer and winter.
Skip mixed frame sizes with mixed mat colors — it reads like a random wall instead of a gallery.
12. Open Closet Door Hack with Farmhouse Storage Rails
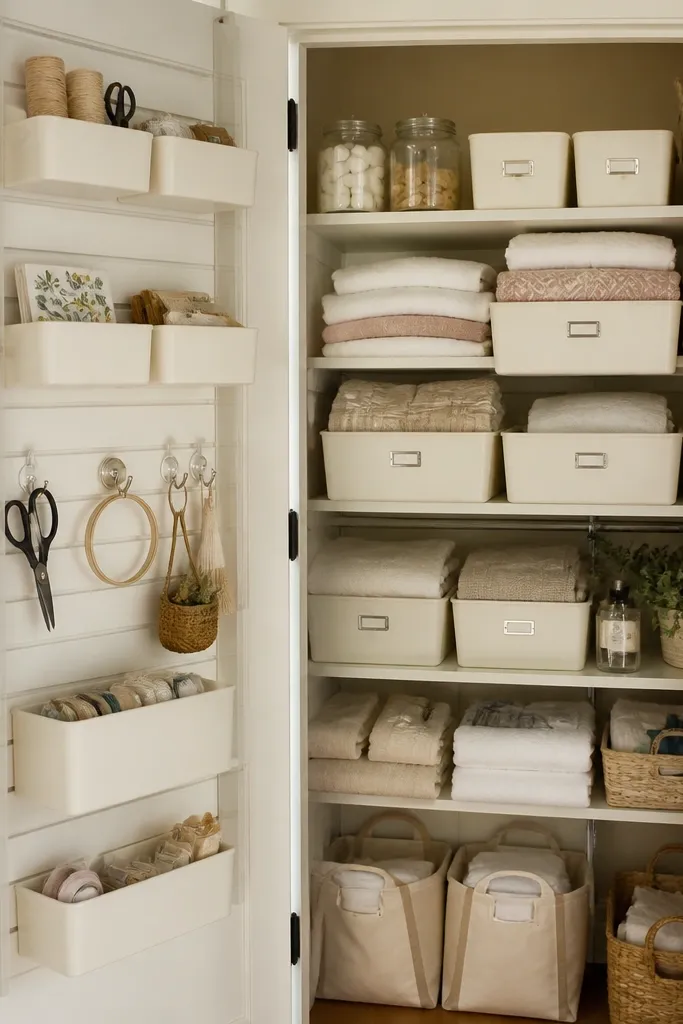
If you have an open closet or pantry door in the craft room, you’re sitting on cheap year-round storage decor. Add farmhouse storage rails to the inside and use labeled bins and baskets so your supplies look organized instead of chaotic. The door becomes a backdrop where everything stays visible but controlled, which is exactly what craft rooms need. Put a small wreath or seasonal greenery at the top for a subtle change, but keep the rails and bins consistent. This is ideal for craft rooms with a lot of vertical space and nowhere to put bins without blocking furniture.
Install two horizontal rails inside the door area, leaving about 8-10 inches from the top for a small decorative element. Use lidded bins or woven baskets that slide cleanly onto the rails, then label them with category labels. Add a small tray at the bottom for tape and scissors, and choose one bin style across the door so it looks like a system.
Use kraft labels with a black marker style — it looks farmhouse and doesn’t feel like office organization.
Don’t leave the closet door half-used with random items — the inside needs to look like one plan.
13. Tray-and-Candle Styling for the Craft Table Edge
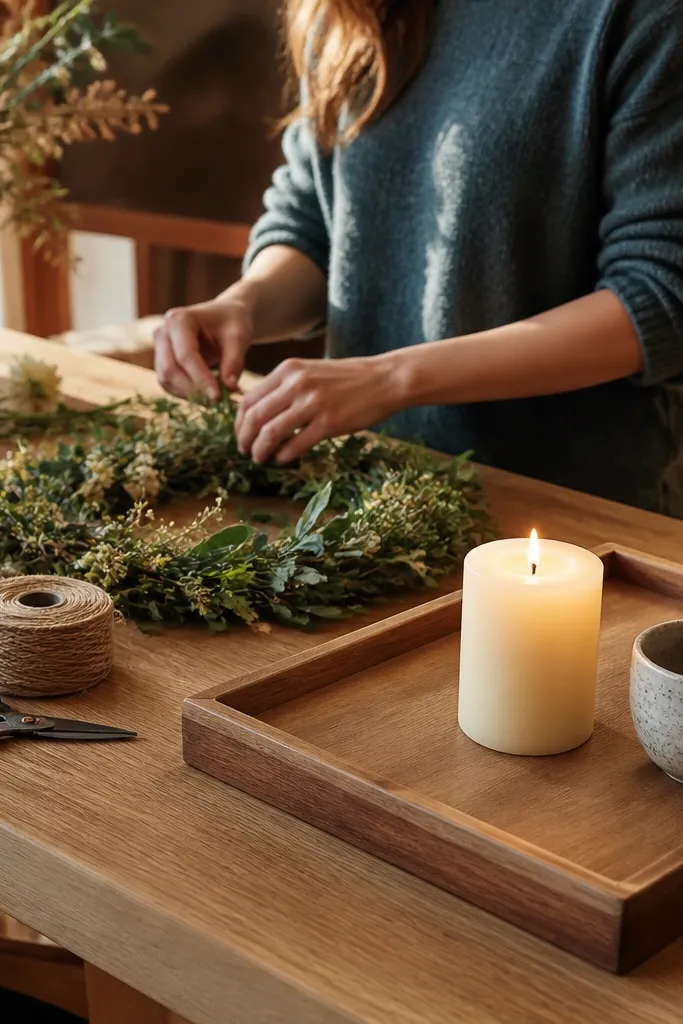
A craft table edge often becomes the dumping ground for glue sticks, pens, and receipts. The farmhouse fix is to reserve a small “styling zone” using a tray and one candle or lamp. This keeps the year-round craft room decor look cozy even when the rest of the table is mid-project. Choose a wood tray with slightly raised edges so items don’t slide, and use a linen runner underneath for texture. It’s a simple way to make your workspace feel like home, not storage.
Pick a tray that fits the table without blocking your work area — aim for about 14-18 inches wide. Add a folded linen runner under the tray, then place 2-3 items only: one candle in a simple holder, one small jar for pens, and one small craft book or card. Keep the tray on the same side of the table every time so the room looks consistent in photos.
Pro tipUse flameless candles if you’re working with paper — they keep the cozy look without the risk.
Watch outDon’t use too many tall items — vertical clutter makes the table feel crowded.
14. Farmhouse Window Sill with Seed-Box Planters for Seasonal Swaps
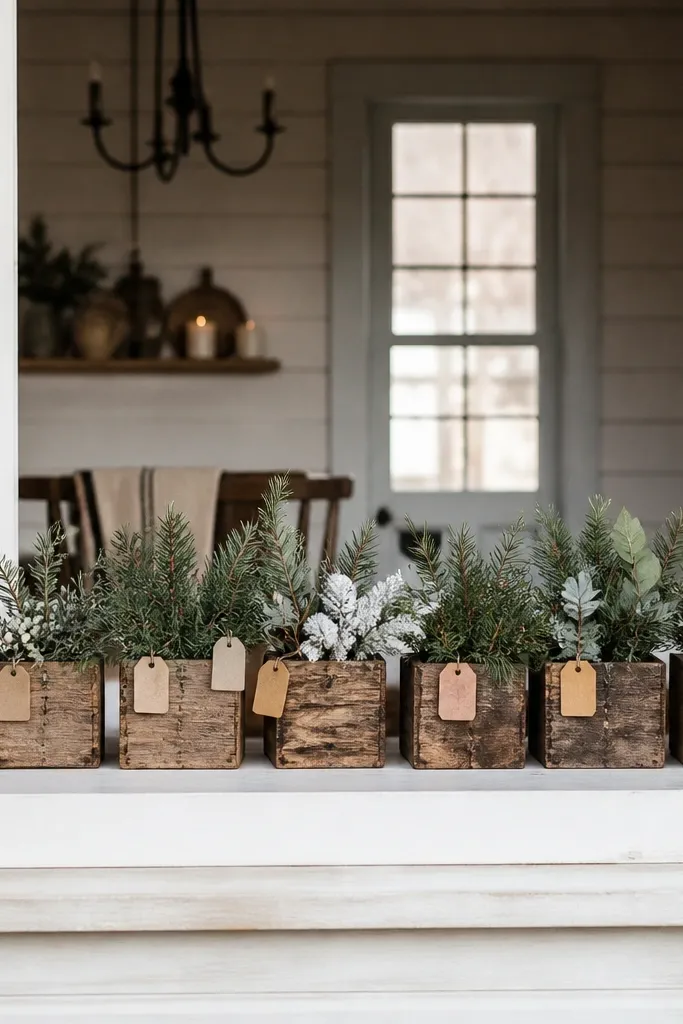
Your window sill is prime real estate for year-round craft room decor because it frames the room naturally. Seed-box planters and small wood crates look farmhouse, and they’re perfect for swapping in a new seasonal greenery or faux stems without touching your main storage. The look stays coherent because the planter style doesn’t change — only the plant material does. This also helps with a common craft-room issue: daylight makes everything look messy, so having a tidy, styled window area keeps the room feeling calm. Place it where you can see it from your desk.
Measure your sill depth, then choose two or three seed-box planters that sit flat without overhang. Add a thin liner and fill with moss, faux stems, or small seasonal picks; keep heights within 6-8 inches so the sill doesn’t look cluttered. Leave one planter as a “neutral” container with dried grasses or a simple evergreen bundle that works year-round.
Pro tipUse the same potting moss color across planters so the textures match even when you swap stems.
Watch outSkip tall, crowded arrangements — a sill should look airy, not like a floral shop.
15. Rustic Wood Crates as Drawer Substitutes for Labels and Paper
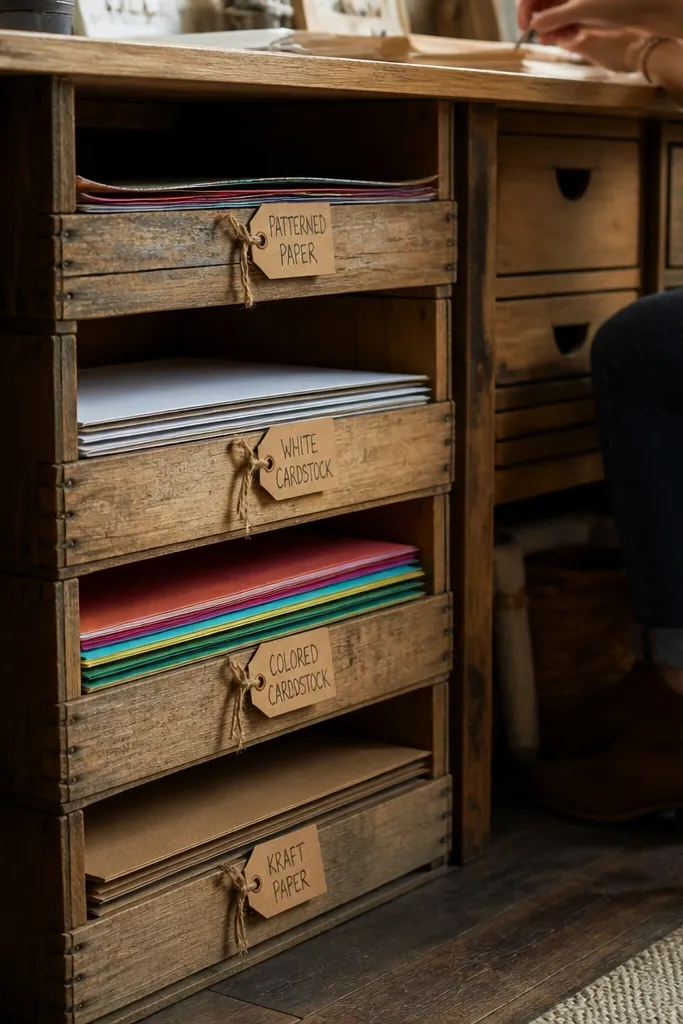
Wood crates give you farmhouse texture and solve a craft-room storage headache: paper and cardstock slide around and get ruined. Using crates as drawer substitutes keeps paper upright and visible while still looking styled. The rustic finish adds warmth, and the labels keep your storage functional year-round. This is especially helpful if your craft desk has no drawers or if your current bins look too plastic and modern. Place crates along a wall or under a shelf where they’re easy to access while you work.
Buy crates with similar dimensions so stacks look uniform, then sand any rough edges and wipe with a damp cloth. Insert paper dividers or manila folder stacks so paper stays upright inside each crate. Label the front with category names (cardstock, patterned paper, envelopes) using kraft paper labels and a clear tape top for durability.
Pro tipUse one label style across all crates, and keep label text short so it looks like farmhouse signage, not a spreadsheet.
Watch outDon’t stack crates randomly — uneven stacks make the whole room feel messy.



