1. Linen desk tray with pen wells
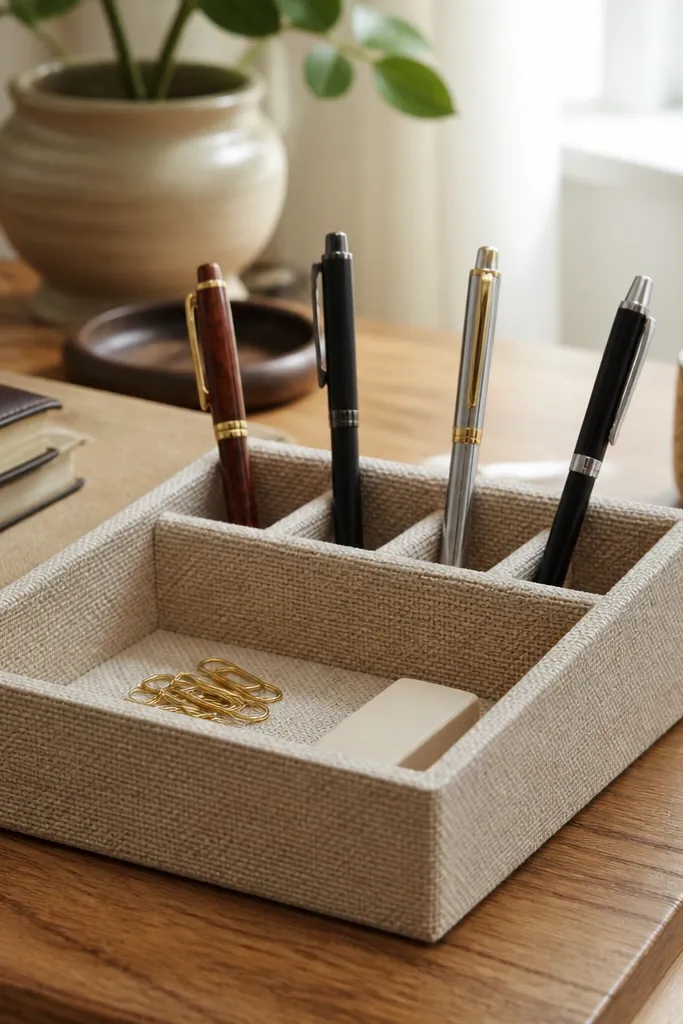
A linen desk tray instantly turns scattered stationery into a “designed” surface. Choose a tray with pen wells or small compartments so pens don’t roll and loose items don’t migrate. Keep the tray in a consistent spot — usually near your dominant hand — so the desk always looks arranged even when you’re mid-session. Linen in cream or oatmeal softens the whole setup and looks good under both daylight and warm lamps. It also helps visually separate your active materials from the rest of the desktop, which is what makes the space feel calmer and more focused.
Pro tipPick one accent color for the stationery inside the tray, like black pens with a tan notepad cover.
Start by measuring your desk width and picking a tray that leaves at least 6-8 inches of free writing space on the side you use most. Then place it 2-3 inches from the desk edge so it doesn’t look cramped. Add a slim notepad, one pen cup (or the tray compartments), and a small sticky-note pad — keep it to essentials only. If you’re buying, prioritize linen or linen-look fabric with a firm base so it doesn’t sag over time.
Watch outDon’t fill the tray with every item you own — that defeats the tidy, styled effect.
2. Book riser + open binder display
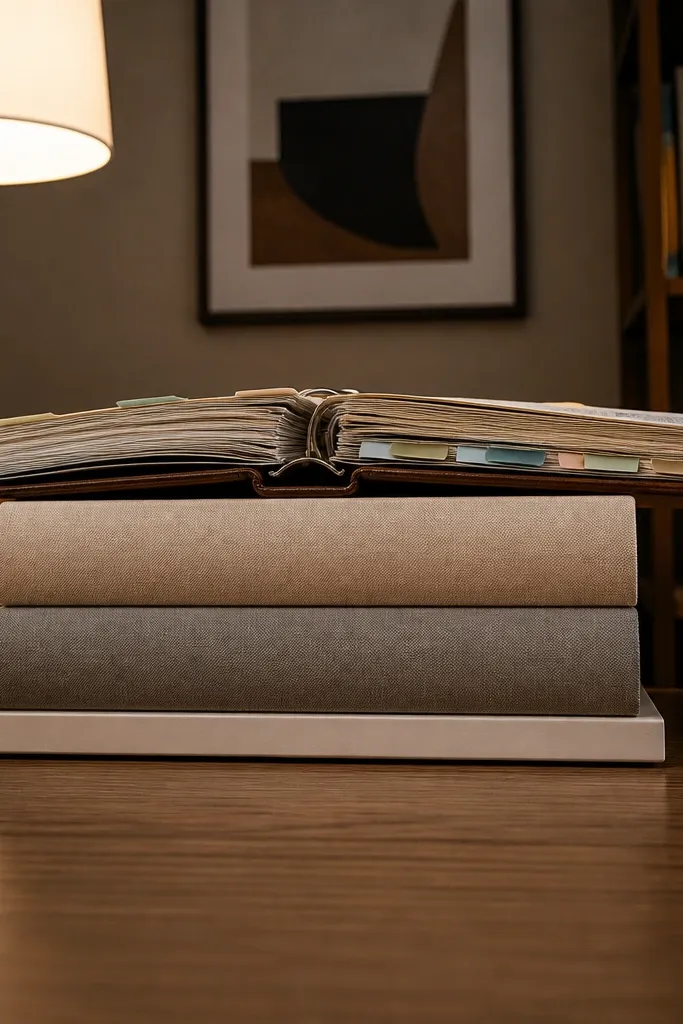
A book riser is one of the fastest ways to make study table decor look intentional because it creates height and a clear visual tier. Use a slim riser or a stack of 2-3 hardback books in matching tones, then place an open binder or a ring-file on top. This gives you a “display” area that still supports studying, so the desk looks styled even when you’re actively working. Choose covers in neutral colors like charcoal, camel, or off-white; they blend with almost any chair and wall. The open binder also makes your workspace feel ready, not abandoned.
Pro tipUse book spines as your color cue — repeat one tone across the riser and any frame on the wall.
Place the riser slightly behind your writing zone so your elbows and forearms stay clear of it. Keep the binder centered on the riser and leave 1-2 inches of breathing room on the edges. If your desk is small, use only one tier: one riser and one binder, then keep the rest of the desk clear. Finish by adding a slim ruler or bookmark strip aligned with the binder spine for a clean, straight look.
Watch outAvoid towering stacks that block your light or force you to lean forward.
3. Warm task lamp with a matte shade

Lighting changes the entire mood of a study table. A warm task lamp with a matte shade makes the desk look soft and cohesive, not harsh and clinical. Aim for a warm bulb around 2700K-3000K so your paper and decor colors look natural. Matte finishes reduce glare on screens and keep photos clean — glossy lamp bases reflect light and create messy highlights. Position the lamp so it lights your page from the side, not straight into your eyes. This decor idea also improves productivity because your writing area feels comfortable and evenly lit.
Choose a lamp with an adjustable arm or a shade that can tilt; set it on the side opposite your writing hand. Start by placing the light 10-14 inches from your notebook area, then adjust until there’s no glare on the screen. Use a warm bulb and avoid dim, cool lighting that makes paper look gray. If you have limited space, pick a clamp-on lamp and attach it to the desk edge.
Add a small switchable bulb timer if you study at night so the light stays consistent.
Don’t place the lamp behind the monitor — it creates shadows across your notes.
4. Cable path tray for a clean backside look
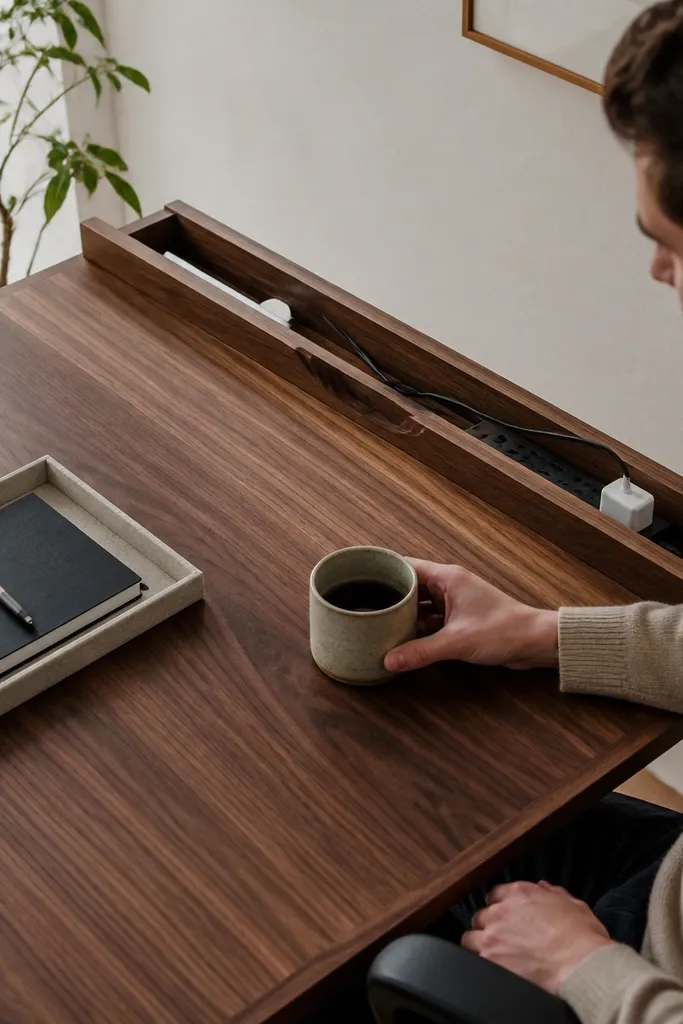
Most study tables look “messy” even when the top is tidy because cables spill over the edges. A cable path tray fixes the background clutter that ruins the look in photos and in person. You’re building a controlled route for your charger, power strip, and any extra cords. Choose a tray that matches your desk color — white for light desks, dark for walnut or black desks. This idea makes the desktop feel more premium because the visual noise is removed at the source.
Pro tipLabel the chargers with small tape tags so you grab the right one without dragging cords around.
Locate your power outlet and measure the distance to your desk edge so you don’t end up with slack cables everywhere. Install a slim adhesive cable tray under the desk or along the back edge, then route your cords into it. Tuck the power strip into a small box or organizer so it doesn’t hang. Finish by tying cords with fabric Velcro straps and leaving only enough slack for movement.
Watch outDon’t coil cables randomly on the desk edge — that creates a visible knot line.
5. Mini wall grid for notes and reminders

If your desk surface fills up with papers, move the visual clutter upward. A mini wall grid or cork panel above the study spot gives your notes a dedicated home, so your desktop stays clean. Choose a small grid that sits above your working area, not across the whole wall. Use it for one function only: upcoming deadlines, reminders, and a weekly checklist. Pin notes with color-coded clips to add a subtle accent without adding more objects on the desk. This makes the study table look styled because the composition becomes intentional.
Measure the space above your desk and aim for a board width that’s roughly the same as your desk width minus 4-6 inches. Mount it so the bottom edge sits about 6-10 inches above your writing surface. Pin 5-10 items max — enough to look active, not chaotic. Use binder clips or small metal clips in one or two colors, then keep pins consistent.
Use a single color for “today” notes and a different color for “deadlines” so it reads fast.
Avoid pinning every paper you own — a wall grid still looks messy if it’s full.
6. Woven pen cup + small ceramic catchall
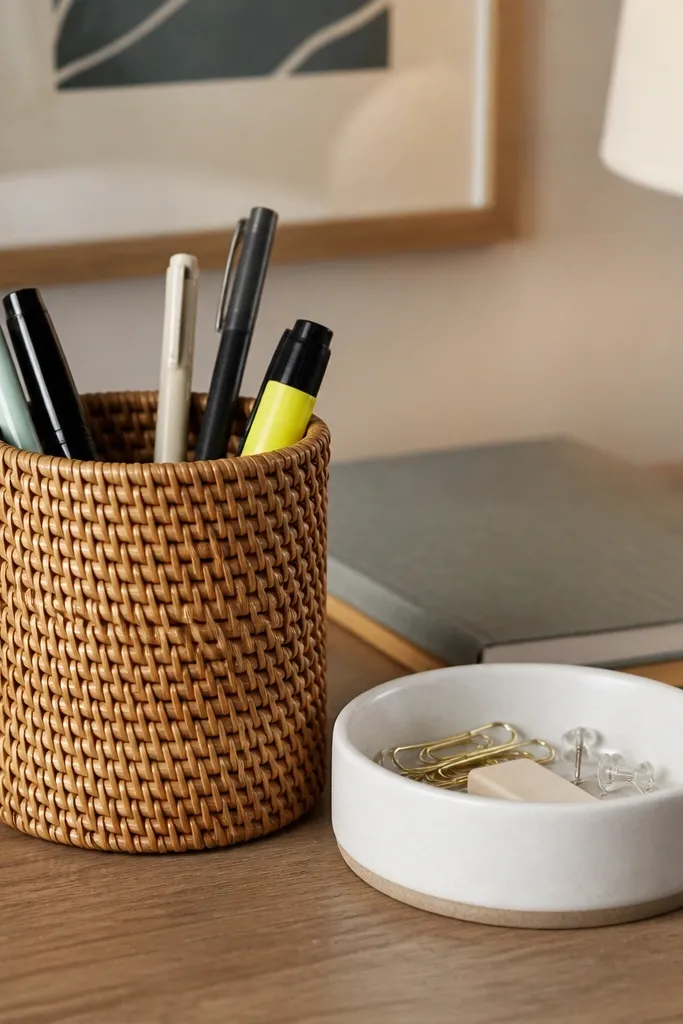
This combo works because it adds texture and creates a two-zone system on the desk. The woven pen cup handles everyday tools, while a small ceramic catchall holds tiny items that usually disappear — paper clips, erasers, thumbtacks. Ceramic in white, sand, or light stone looks clean and photogenic, and it helps the desk feel curated rather than random. Choose one metal accent only — either brass or black — and keep it consistent across the catchall, clips, or nearby decor. This is a beginner-friendly study table decor idea because it’s simple, cheap, and instantly tidy.
Pro tipKeep the ceramic dish empty 20% of the time — it looks styled instead of overstuffed.
Place the woven pen cup near your dominant hand and leave a 4-6 inch gap to the ceramic dish so the items don’t blend visually. Add only the tools you use daily — 3-5 pens, one highlighter, and a small eraser. If your desk is small, use one catchall for everything tiny and avoid multiple mini dishes. Wipe ceramic with a dry cloth to remove dust buildup so it stays bright.
Watch outDon’t mix too many textures at once; pick woven plus ceramic, then keep everything else smooth.
7. A framed A4 print with a slim black frame
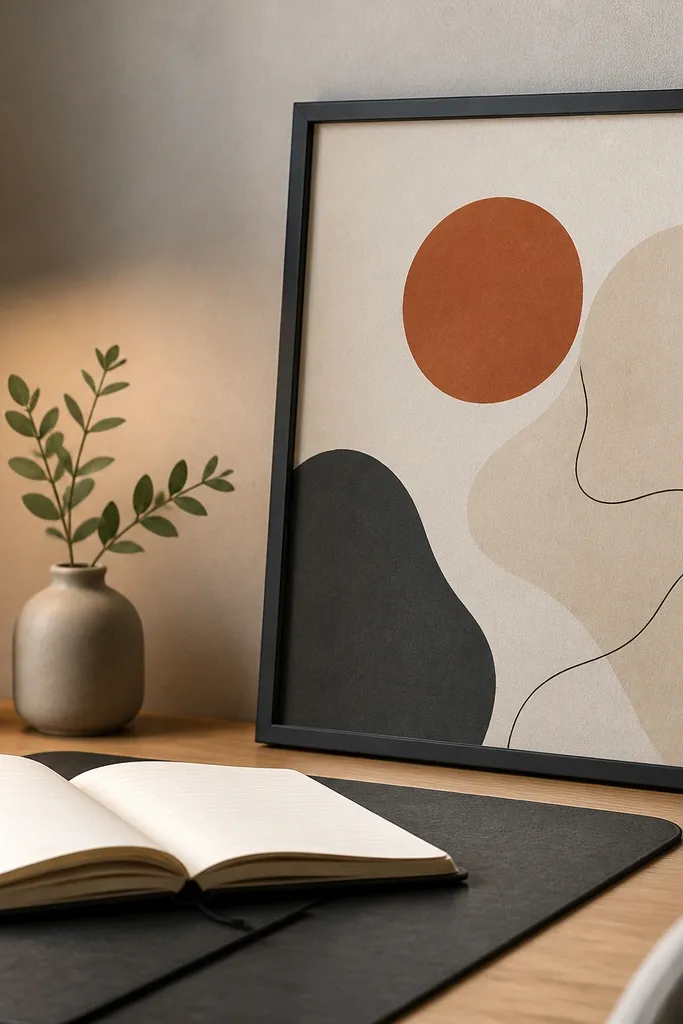
A framed print adds personality without cluttering your desk. Choose an A4 or A3 print in neutral tones or one calm accent color, then put it in a slim black frame for a crisp, modern look. Place it above the desk or slightly to the side so it becomes a visual anchor when you sit down. Slim frames look cleaner than thick ones because they don’t fight with books, binders, and screens. This decor also solves a common problem: desks that feel like “just furniture” instead of a workspace you enjoy using.
Pick a frame that matches your lamp finish — matte black with matte black metal accents. Mount it so the center aligns roughly with your monitor’s top third, or place it 2-4 inches above your riser. Use picture-hanging strips if you rent, or wall anchors if you can drill. Keep the print simple: lines, minimal typography, or a single-color illustration.
Use a print with lots of negative space — it makes the whole desk area feel calmer.
Avoid busy patterns behind your screen — they can distract while you read.
8. One statement plant in a matte pot
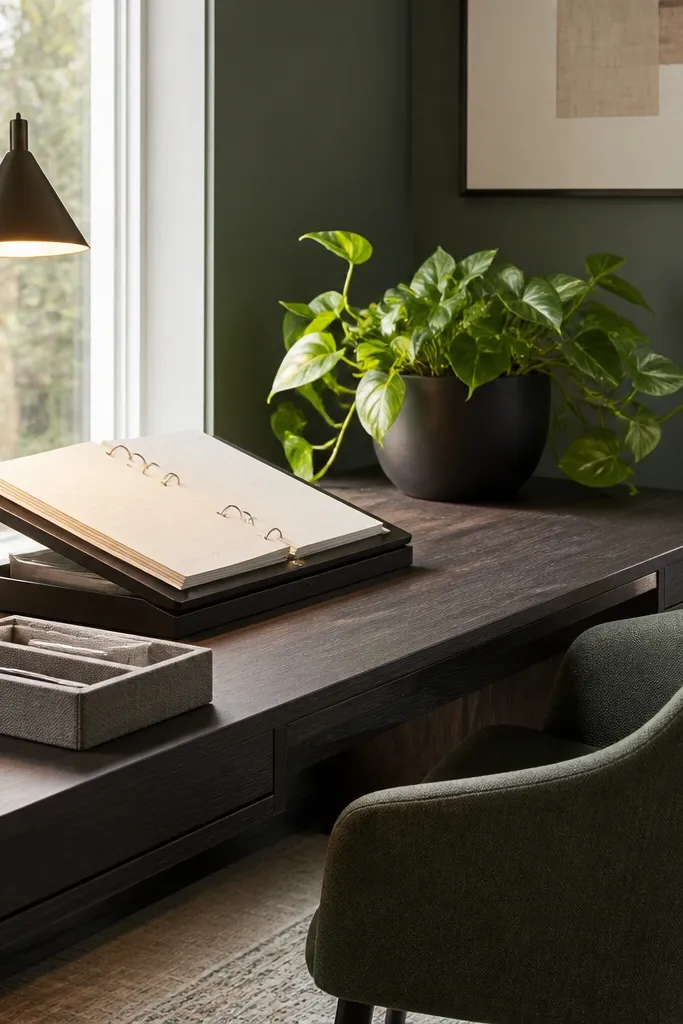
A single plant makes a study table look alive, but you have to choose the pot and placement right. Go for a matte pot in off-white, clay, or charcoal so it doesn’t look shiny and cheap under warm lighting. Place it on the far corner of the desk or on the non-writing side so it doesn’t block your workspace. Use a plant with upright or tidy growth like snake plant, ZZ plant, or a small jade — they stay photogenic without daily fuss. This idea works for beginner-friendly study table decor ideas because it’s low-effort and visually grounding.
Choose a pot that’s 4-6 inches wider than the plant’s root mass, then add a saucer to catch water. Place it at least 8 inches away from your notes so leaves don’t brush papers. Rotate the plant once a week so it grows evenly toward the light. If you’re worried about maintenance, use a faux plant with realistic leaves and a real pot — the look matters more than the label.
Wipe leaves monthly with a damp cloth so the plant stays crisp in photos.
Don’t place a tall plant directly beside your lamp — it creates odd shadows.
9. Desk mat in warm neutral leather-look

A desk mat makes your workspace look finished because it creates one clean surface area for writing and organizing. Pick a warm neutral leather-look in sand, taupe, or warm gray, and keep it large enough that it sits under your notebook and the tray. The mat absorbs the “floating” look of loose paper and gives your setup a calmer base. It also protects your desk from ink marks and scratches, which matters if you study daily. This is a beginner-friendly decor move that instantly makes the desk look intentional.
Measure your desk surface and choose a mat that covers at least the writing zone — usually 60-70% of the top area. Position it so the front edge aligns with the desk edge, then place your notebook centered on the mat. Add a tray on top of the mat if you want a defined zone, but keep the tray footprint small so you still have room to write. Wipe the mat with a damp microfiber cloth to keep it looking smooth.
Use a notebook cover color that matches the mat undertone — warm beige with warm cream, not cool gray.
Don’t go for a high-gloss mat; it reflects light and can make photos look harsh.
10. Slim clock + quiet timer on the side
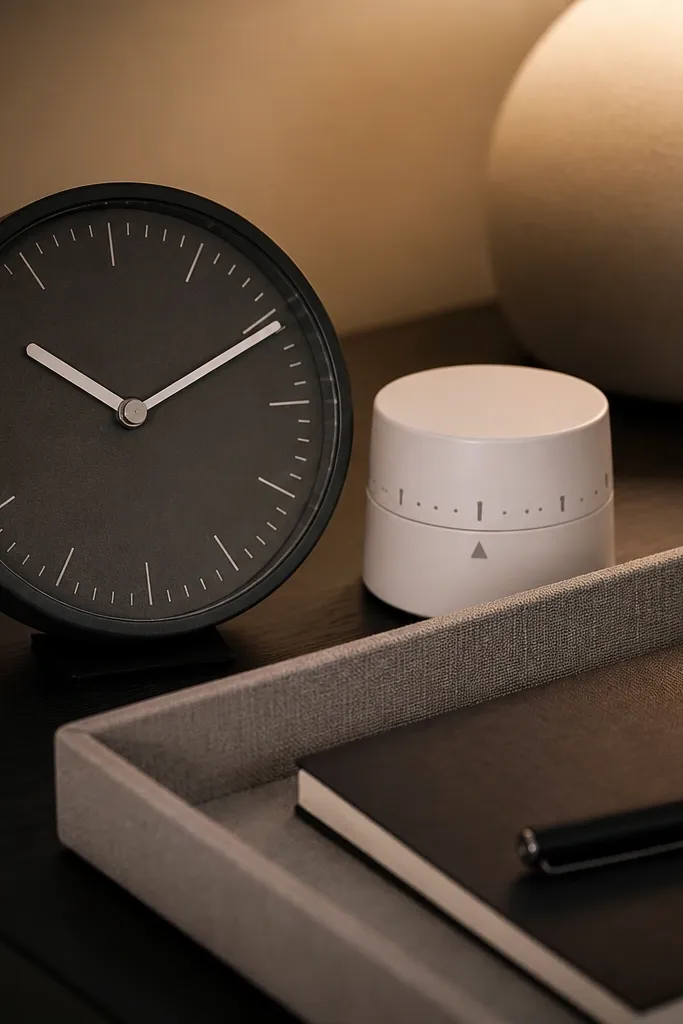
Time display is functional decor, and it looks clean when you choose minimal pieces. A slim wall clock or desk clock in white, cream, or matte black adds structure to your workspace without adding clutter. Pair it with a small timer you can glance at during study sessions. Keep the timer small and monochrome so it doesn’t fight with notebooks and screens. This setup helps productivity because you stop checking your phone, and visually it makes the desk feel organized. It also looks great in photos because the lines are simple.
Place the clock on the non-writing side, about 10-12 inches from where you sit, so it’s visible without turning your head too far. If using a desk timer, keep it within arm’s reach but not on top of your notebook. Choose one display style only — either digital or analog — to keep the look cohesive. Power it with batteries or a charger hidden under the desk to avoid visible wires.
Set the timer display to a color that matches your accent (black, white, or warm gray).
Avoid multi-color timers; they create visual noise when you’re trying to focus.
11. Monochrome organizer stack with drawer inserts
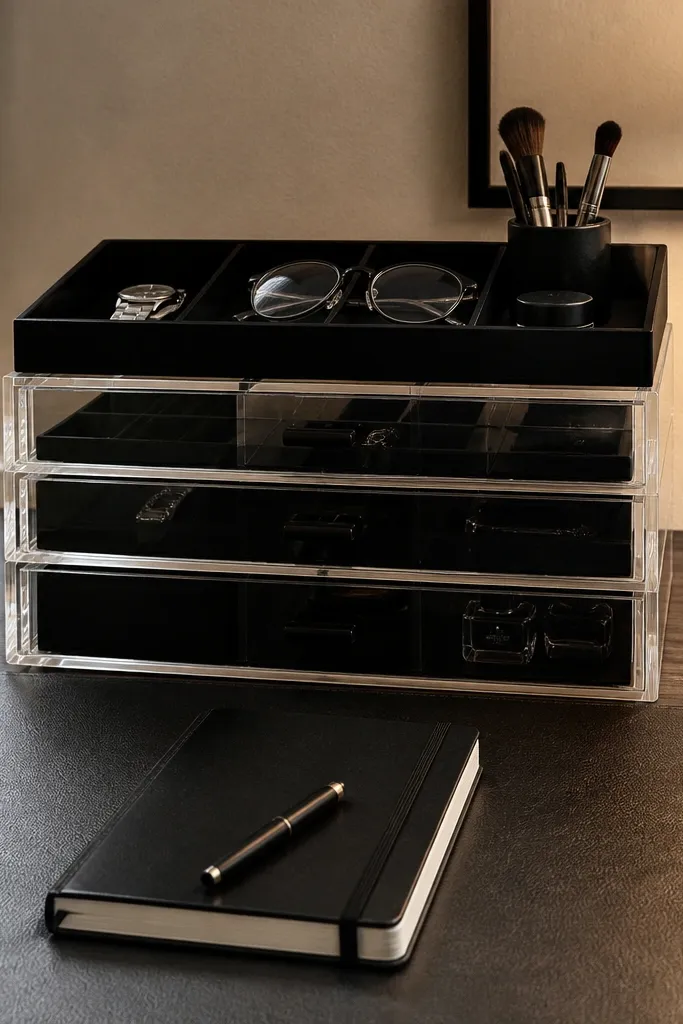
A monochrome organizer stack makes your desk look styled because it controls the storage look. Choose a stack with one or two drawers and a top tray for daily items, then keep everything inside. Matte black, matte white, or clear acrylic with black accents all work, but pick one family so it reads cohesive. This idea is great for beginner-friendly study table decor ideas because you can hide the messy parts — extra stationery, spare chargers, cable adapters — and still have a beautiful top surface. It also reduces the urge to leave things out.
Pick an organizer height that doesn’t block your lamp or your line of sight, usually 6-10 inches for desktop stacks. Place it at the back corner of your writing zone so the front stays free. Sort items into the drawer inserts: one for paper, one for pens, one for small electronics. Keep only the top tray items you use daily; everything else goes inside.
Use label stickers in one font and one color so the drawers look designed, not random.
Don’t overfill drawers — a slightly empty drawer looks cleaner than a packed one.
12. Desk-side bookends in matching metal
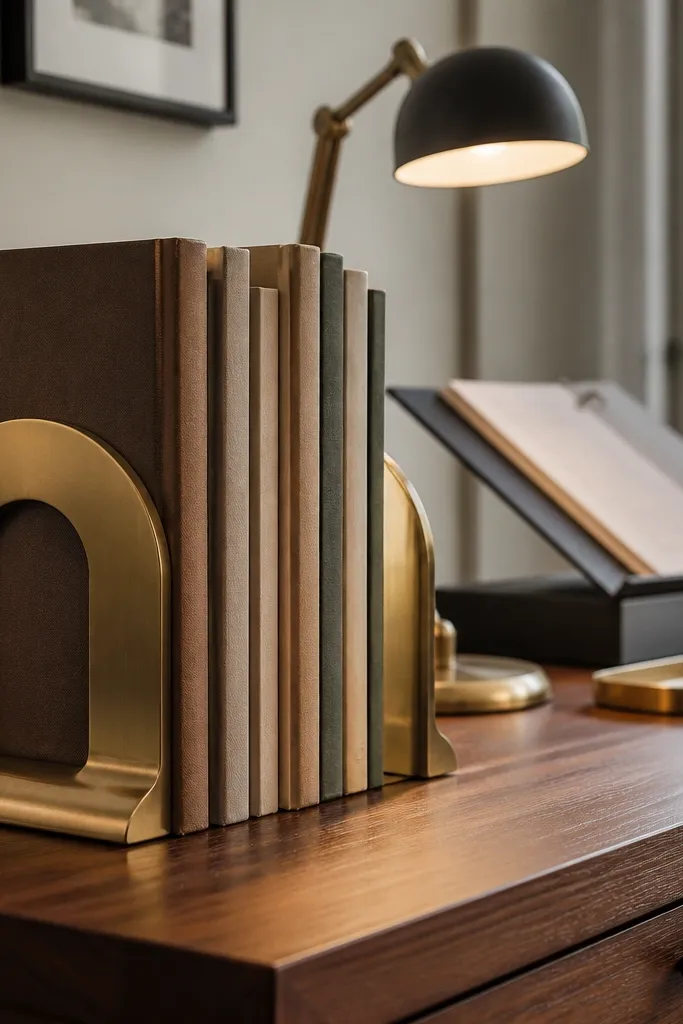
Bookends give you that “styled bookshelf” look right on your study table. It’s a decor win because vertical spines create clean lines and make the desk feel structured. Choose matching metal bookends in matte black or brushed brass, and keep the books mostly aligned. Select covers that coordinate — even if the books are different, the spine colors should repeat. This also helps studying because you can grab a textbook quickly without digging through a pile. The result looks intentional, not temporary.
Place bookends at the back edge of your desk so they don’t crowd your writing space. Leave 1-2 inches between the book spines and the bookend for a neat gap. Use 2-4 books maximum in the display; the goal is visual order. If your books are too thick, switch to thin bookends or use one bookend plus a vertical file holder.
Turn one cover outward and keep the rest spine-forward so you get one focal color without clutter.
Avoid leaning book piles; they look like you stopped sorting mid-way.
13. Tray + small marble-style coaster for mug
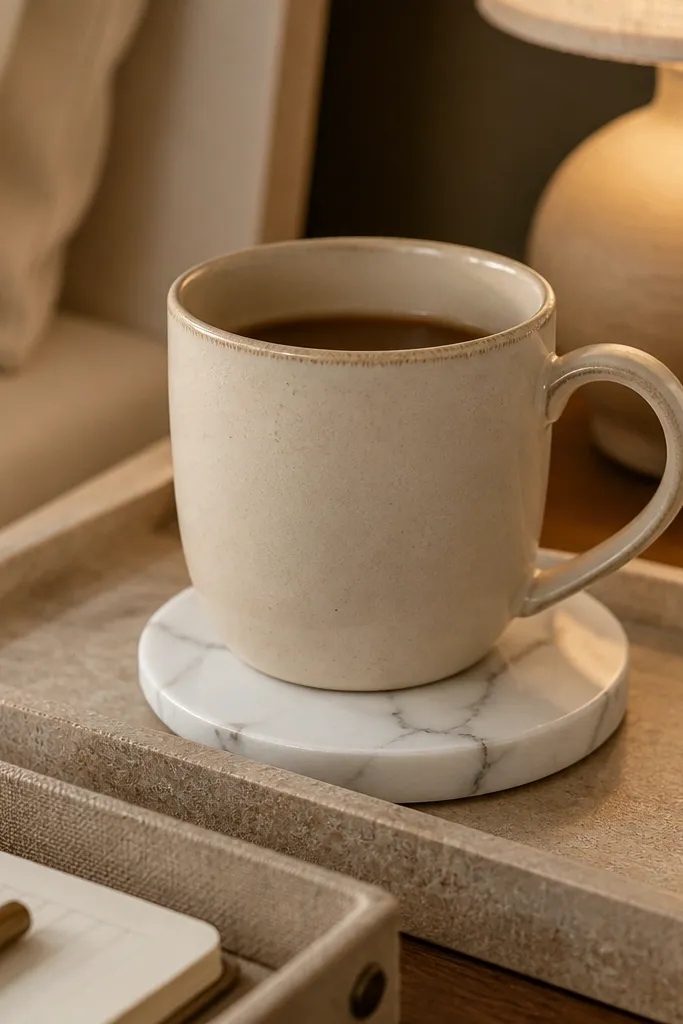
A mug on a desk usually ruins the look because it creates spill risk and random condensation rings. Put it on a small tray with a coaster so the drink area looks contained and intentional. Choose a marble-style coaster in white with gray veining or a stone-look tray in warm beige. Keep the mug simple — ceramic in cream, light gray, or matte black — and avoid novelty shapes that add visual clutter. This idea is photogenic and practical because it keeps your workspace dry and your decor tidy.
Pro tipChoose one mug color that matches your lamp finish for a cleaner, more designed look.
Place the tray on the far side of your desk, not near your notebook. Add a coaster under the mug, then center the mug on the tray with a little breathing space around it. Keep a small cloth or paper towel nearby but hidden in an organizer, not on the surface. If your desk is small, use a flat coaster and skip the tray, but keep the mug isolated from paper.
Watch outDon’t set the mug directly on the desk mat; condensation can stain and ruin the clean base.
14. Rainbow-free sticky note placement system
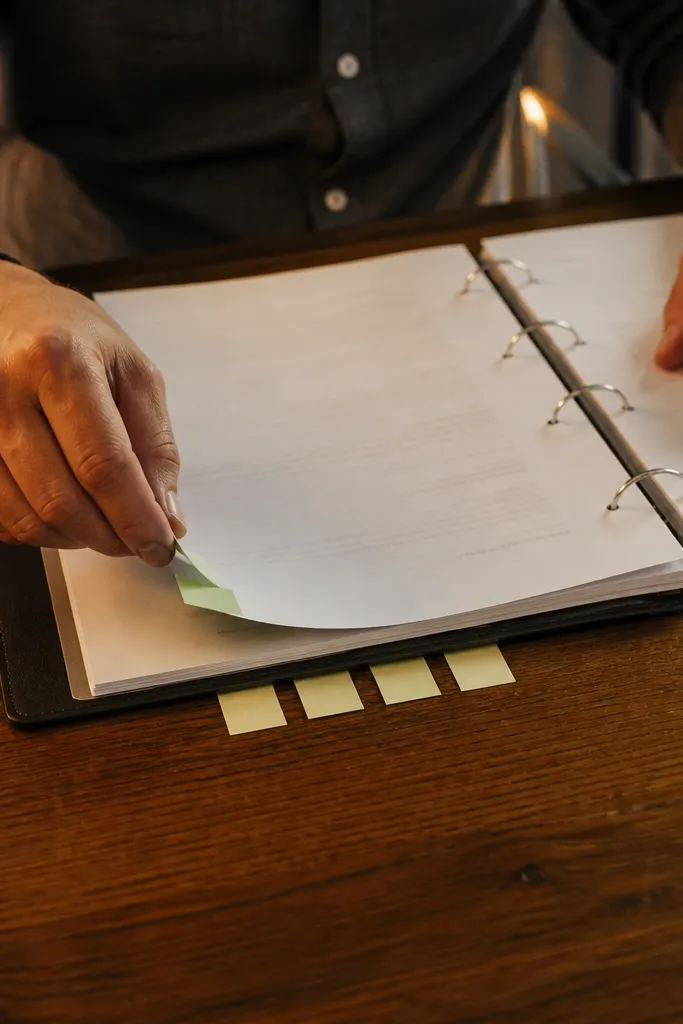
Sticky notes can make a desk look chaotic fast because of the colors and the random placement. For beginner-friendly study table decor ideas, use a strict system: only two note colors and only two locations. Put one color on your current page marker and the other on a short “next steps” strip. Use a small sticky-note holder or a slim clip to keep them off the desk surface when you’re not using them. This makes the desk look styled even when you’re actively working, and it reduces the distraction of constantly moving notes around.
Pick two sticky note colors that match your palette, like cream + muted sage, or white + light gray. Place one sticky on the top corner of your notebook for “current task” and keep the rest in a small holder. For “next steps,” use a vertical strip on the side of your binder or on the wall grid. Keep the total sticky notes visible at any time to 3-6 pieces.
Write in one consistent pen color so the notes look like they belong together.
Avoid mixing too many sticky colors; it looks messy even if the desk is organized.
15. Desk shelf with a single line of decor
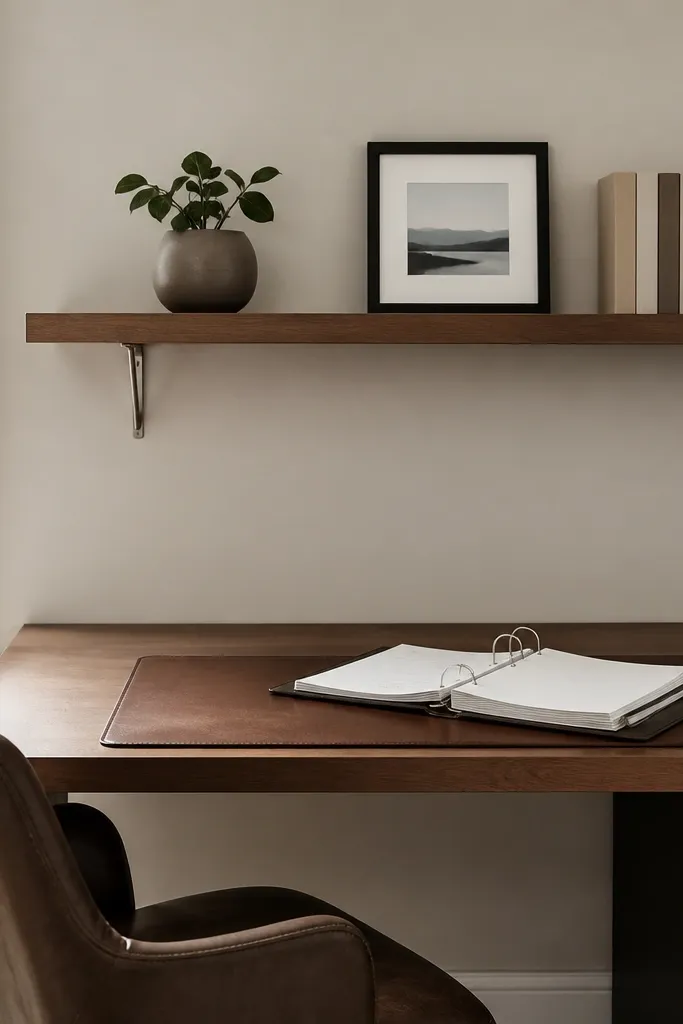
A small wall shelf above your desk creates a clean top layer, so the desktop stays for working. Keep it to one line of decor: one plant or candle, one frame, and one stack of books aligned by height. This is the kind of decor that looks expensive because there’s negative space and repetition. Choose shelf brackets and frame finishes that match your lamp or chair hardware. The shelf also solves the problem of “where do I put decor without taking up desk space?” It looks great in photos because it frames the study area.
Pro tipPick one material for the shelf decor — all ceramic, or all wood — to keep it visually calm.
Install a shelf about 12-18 inches above the desk surface so it doesn’t block your view while reading. Use a small shelf length that matches your desk width minus 6-10 inches. Arrange items with height control: the tallest item in the middle, shortest on the ends. Keep cords off the shelf and use a candle or plant that doesn’t require frequent moving.
Watch outDon’t clutter the shelf with random knickknacks; one extra item is all it takes to look messy.