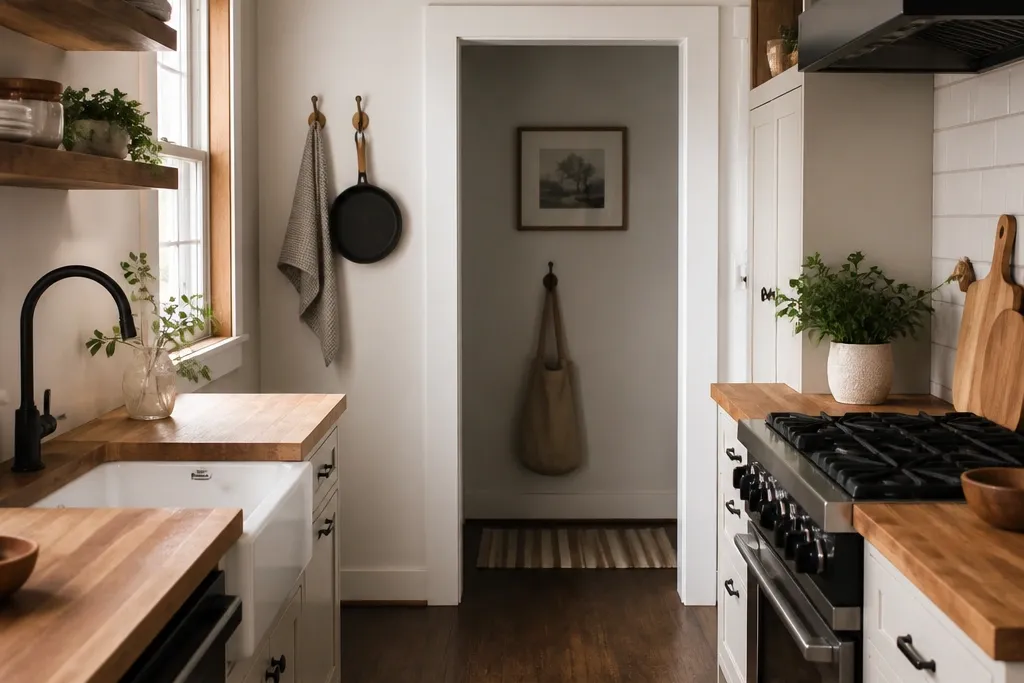
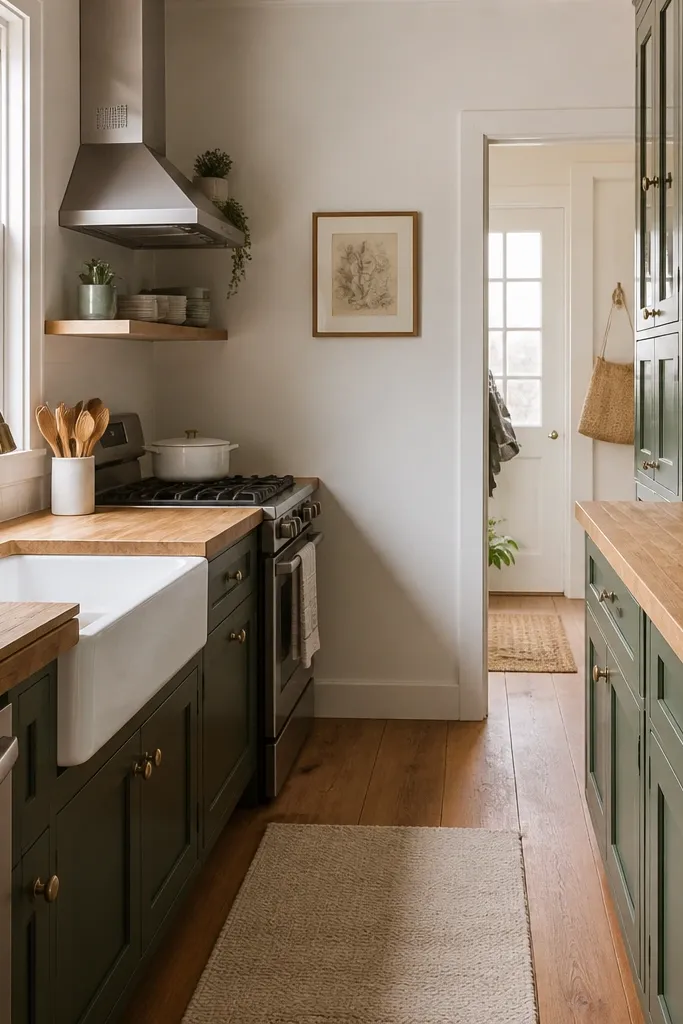
1. Honey butcher block with white shaker and matte black pulls
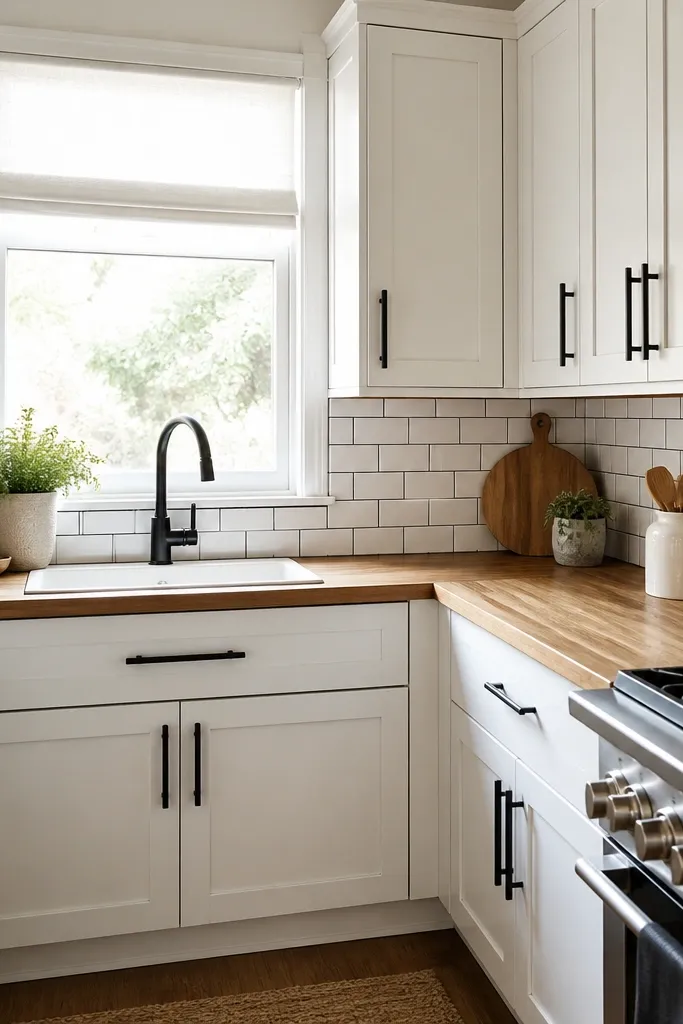
The honey stain makes the wood grain glow without turning yellow-orange. White shaker cabinets keep the room bright, and matte black hardware adds crisp contrast that doesn’t fight the warm wood. Darker grout in the subway tile gives definition, so the counters look intentional even in a tight footprint. The combo reads clean up close because the finishes stay in the same “matte” world.
Use a butcher block with a square edge or lightly rounded edge so it doesn’t look bulky. For backsplash, run tile from counter to under-cabinet height, then stop — keep it at about 18 to 20 inches. Choose a faucet with a matte black finish and match it to the drawer pulls.
Pro tipRub a little mineral oil into a scrap of the same wood after staining to preview how warm it will look under kitchen lighting.
Watch outAvoid glossy black hardware — it reflects the wood and makes the whole kitchen look cluttered.
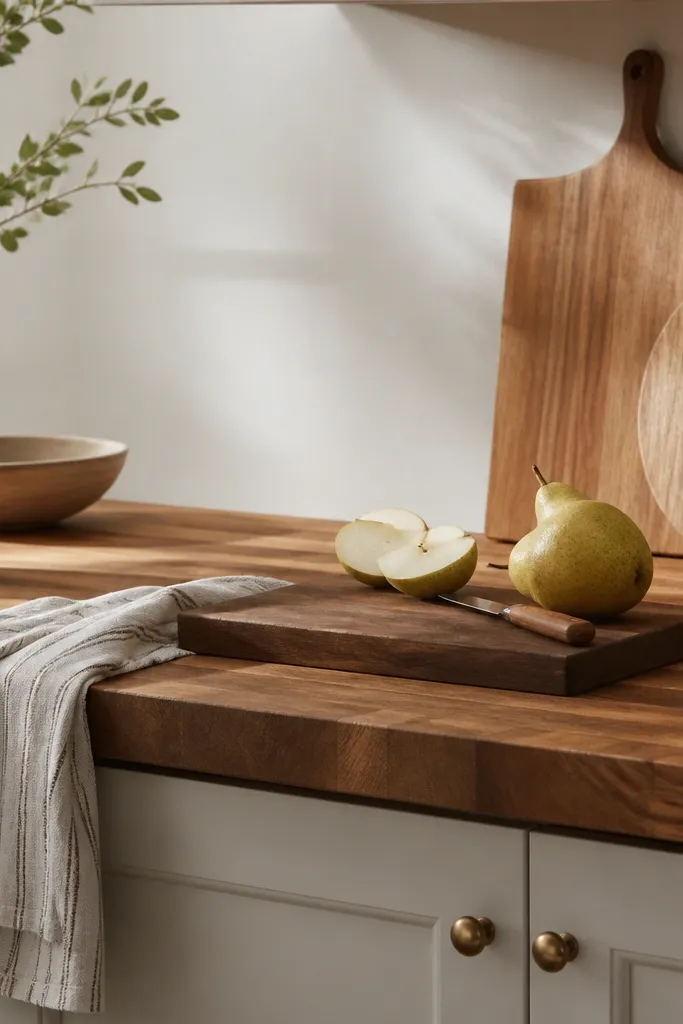
2. Natural butcher block with sage cabinets and brass accents
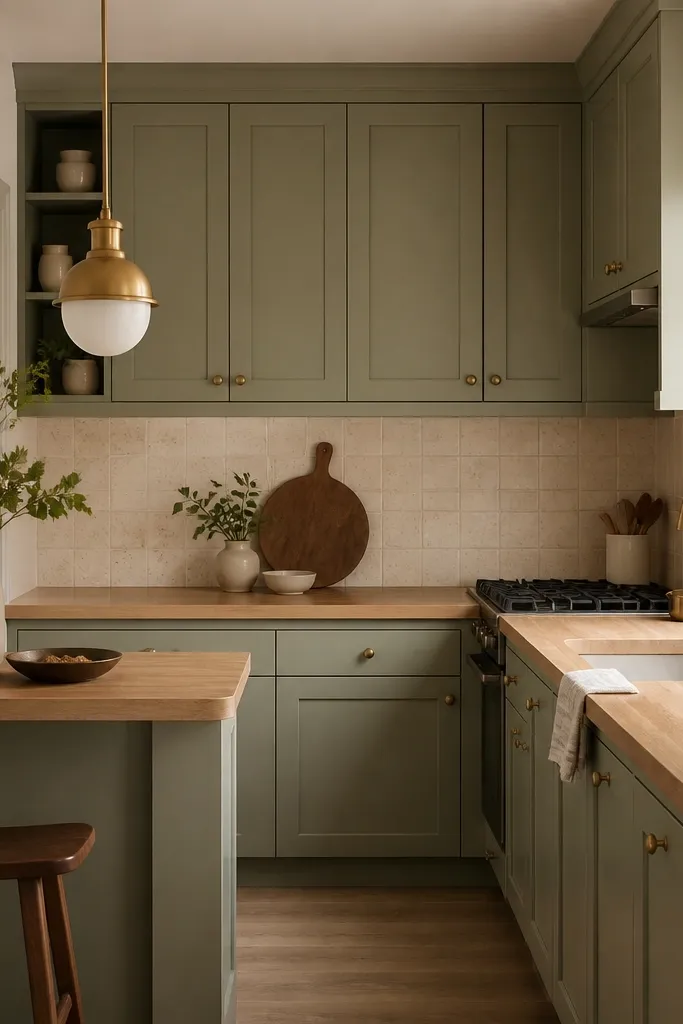
Natural butcher block keeps the room airy, and sage paint adds color without taking over. Brass accents warm up the palette and make the wood grain feel richer. The speckled cream backsplash hides minor splashes, which matters in small kitchens where you notice mess faster. This look works because the wood stays light and the accents are warm, not shiny.
Go for a clear matte sealer so the wood stays “natural” instead of ambering. Use cabinet paint that leans gray-green, not olive-heavy. Keep brass accents limited to knobs and a single light — too many finishes make small spaces feel busy.
Pro tipIf your cabinets are already cool-toned, hold a brass sample next to the counter in daylight and again at night before committing.
Watch outSkip bright chartreuse sage — it clashes with the wood grain and makes the counters look dirty.
3. Walnut butcher block with two-tone cabinets (cream + charcoal)
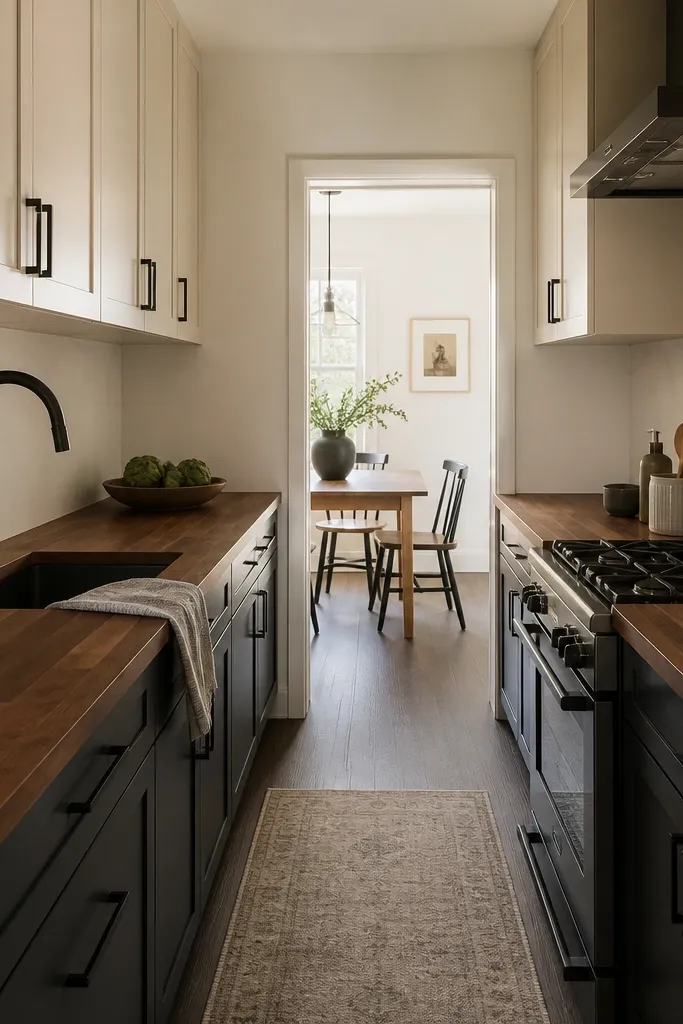
Walnut adds depth, and two-tone cabinets give structure so the kitchen doesn’t look like one flat color block. Cream uppers bounce light, while charcoal lowers ground the space. Large-format backsplash keeps visual lines long and calm — perfect when your room is narrow. Dark hardware ties the charcoal and walnut together without adding shine.
Choose a walnut stain that still shows grain — avoid very dark “black walnut” stains that hide texture. Keep the backsplash minimal: one consistent color, no busy pattern. If you have a small window, place it above the sink and keep the countertop clutter-free to keep sight lines clean.
Use a 2-inch overhang or a slightly thicker front edge so walnut doesn’t look thin on camera.
Don’t add a high-contrast patterned runner to the floor if the cabinets are already two-tone.
4. Butcher block peninsula with white beadboard paneling
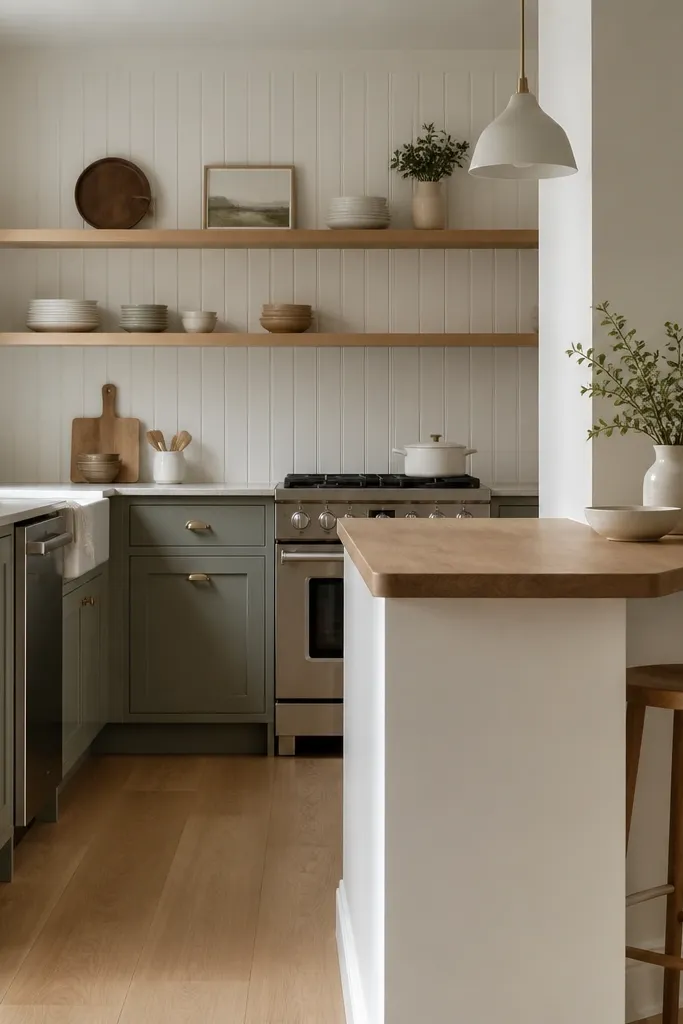
Beadboard gives texture without color noise, so your eye reads the wood grain as the main detail. The peninsula shape is helpful in small layouts because it creates a working zone without a bulky table. The wood edge looks crisp against the painted beadboard, especially if you use matte white paint. This look feels cozy even when the kitchen is small.
Use butcher block on the peninsula with a 1.5-inch-thick profile, then add a small toe-kick trim that matches the cabinet paint. Paint beadboard a true soft white (not bright blue-white). Keep countertop accessories minimal: one cutting board and a small utensil crock.
Pro tipSeal the underside of the peninsula top too — water drips happen there and they show later.
Watch outAvoid open shelving stuffed with mismatched jars — beadboard already adds visual texture.
5. Light gray-washed butcher block with modern flat-front cabinets
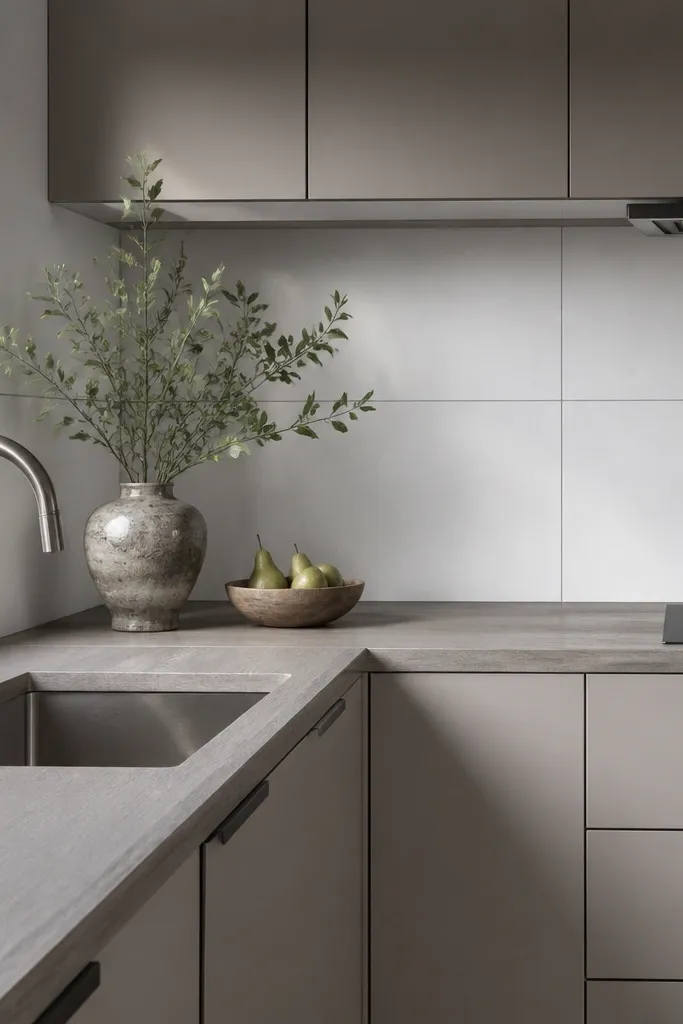
Gray-washed butcher block keeps the wood looking modern instead of rustic. Flat-front cabinets give straight lines, and the minimal backsplash keeps the whole space from feeling crowded. Brushed steel works because it doesn’t scream “appliance store shine” next to matte wood. This setup looks good in small kitchens because the palette stays close in tone and the lines do the decorating.
Ask for a gray wash stain or do a light dye wash over natural block, then seal with matte water-based polyurethane. Keep the backsplash grout light and thin. Choose a faucet with a single finish and avoid mixing chrome and stainless.
Pro tipBefore sealing, wipe the sample with a damp cloth — gray stains look different once the wood dries.
Watch outAvoid heavy farmhouse black hardware — it fights the flat-front look.
6. Two-tier butcher block bar with vertical shiplap wall
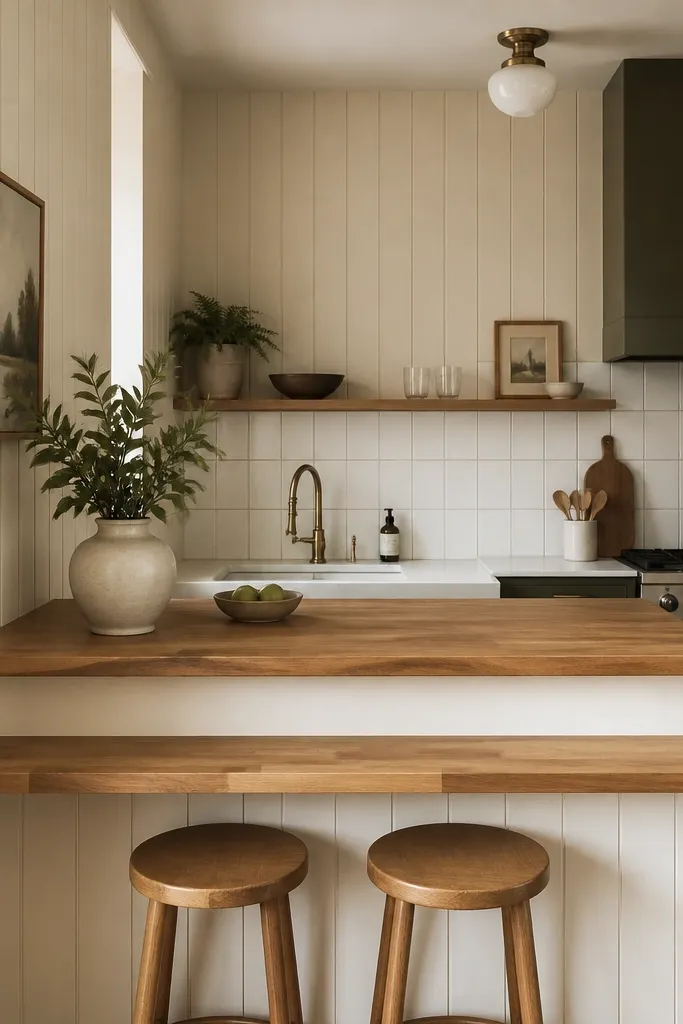
A two-tier setup is practical because it gives you food prep and a separate spot for quick meals. Vertical shiplap adds height, so the kitchen doesn’t feel like it’s shrinking inward. The butcher block anchors everything with warmth. Keep the wall color off-white and warm so it doesn’t turn the wood gray.
Use a butcher block for the main counter and a thinner butcher block panel for the lower tier if you want it lighter visually. Wrap the bar edge with the same wood finish so the tiers match. Put backsplash only where you splash — behind the cook zone or sink.
Stagger the vertical trim boards so the lines align with cabinet doors, not the corner — it looks more intentional in tight corners.
Skip busy patterned shiplap paint — keep it plain so the wood grain stays the focal texture.
7. Butcher block with white tile herringbone and warm brass faucet
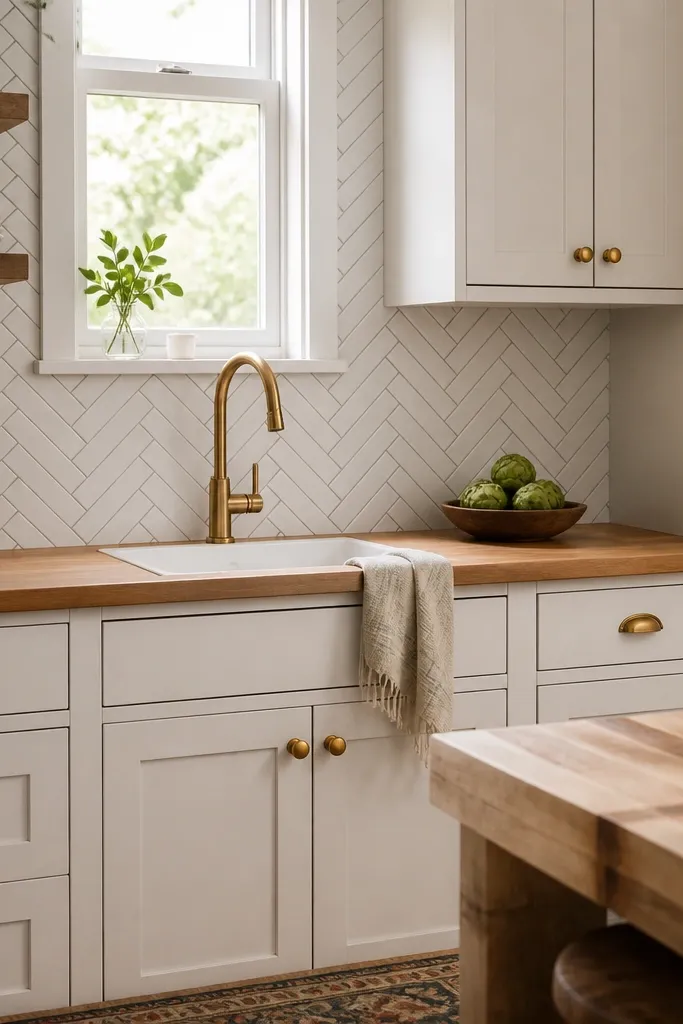
Herringbone adds movement, but because it’s white and light gray it stays calm. The warm brass makes the butcher block look more golden, not orange. This combo works in small spaces because the backsplash pattern is controlled and doesn’t spill into the whole wall. The wood keeps the room from feeling sterile.
Use a matte sealer so the wood doesn’t compete with tile shine. Keep the herringbone area to the sink and prep zone, not full-height. Choose brass with a satin finish, not polished yellow.
Pro tipDry-fit one tile row and center the pattern so it lines up with the sink cabinet doors — misalignment looks bigger in small kitchens.
Watch outAvoid dark grout with light tile — it makes the counters look dirty faster.
8. Charcoal cabinets with butcher block and white ceramic subway backsplash
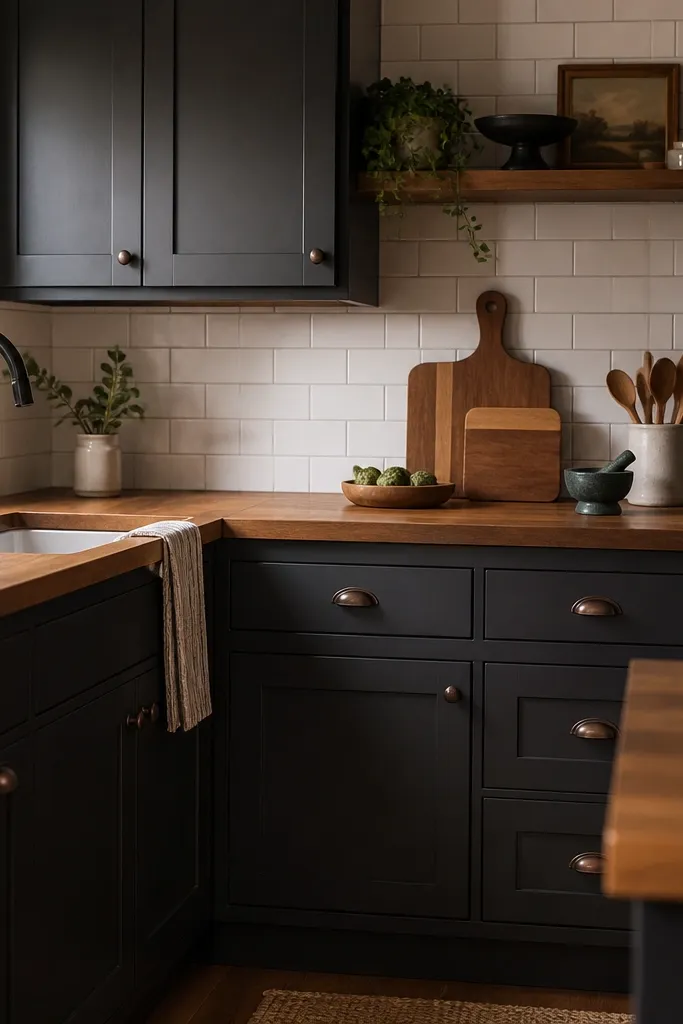
Charcoal cabinets give drama, but the butcher block warms the look so it doesn’t feel like a basement. White subway tile keeps everything bright and gives you a crisp line behind the counter. Light gray grout makes the backsplash feel clean instead of high-contrast. Matte black hardware ties the charcoal to the wood without adding shine.
Pick a butcher block stain that reads brown, not orange — I like medium walnut tones with visible grain. Keep the backsplash at 18 to 20 inches if you have upper cabinets; if you don’t, go to the ceiling. Use a faucet that matches the cabinet hardware finish.
Pro tipUse a cabinet paint sample on the same wall where the countertop will sit — charcoal can look blue or green depending on light.
Watch outAvoid pairing charcoal with a very pale butcher block — the contrast looks harsh and makes the kitchen feel smaller.
9. Butcher block with olive walls and linen curtains
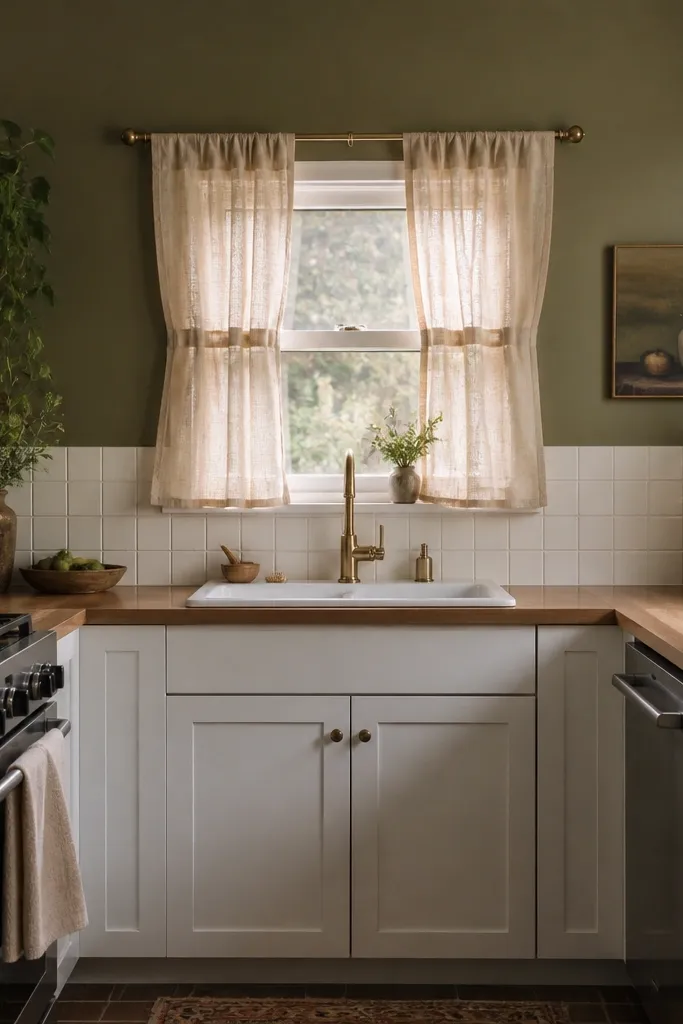
Olive walls plus butcher block feels grounded without going heavy. Linen curtains soften the window area so the kitchen doesn’t feel like a showroom. The key is keeping the backsplash neutral — off-white tile and simple grout keep the wood grain as the star. This look works because the color is on the wall, not competing with the counters.
Use a butcher block finish that stays matte and doesn’t yellow too much; a clear matte sealer is your friend. Choose linen curtains with a slightly loose weave and hang them high enough to make the window taller. Put a light runner only if your floor is very blank; otherwise keep it minimal.
Wash the linen once before hanging so it drapes instead of standing stiff.
Skip patterned curtains — olive already adds color and the room gets loud fast.
10. Butcher block under open shelving with white and oak accents
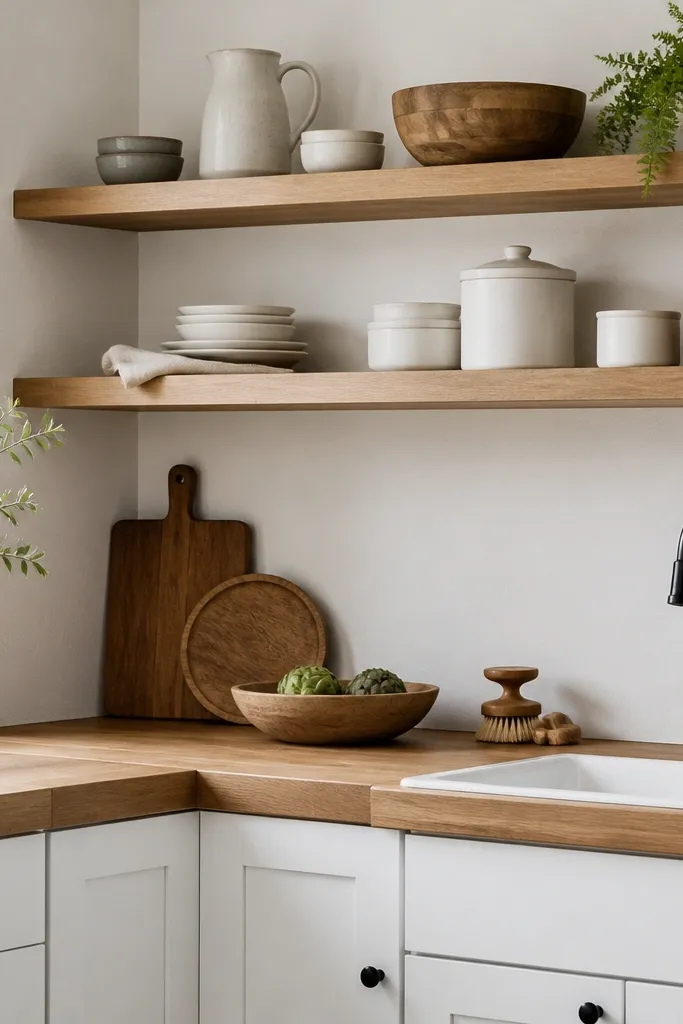
Open shelving makes small kitchens feel bigger when you keep the shelf color story tight. Butcher block below open shelves gives you a warm horizontal band, and white canisters keep the shelf from looking cluttered. The oak accents match the wood grain so nothing looks random. This arrangement looks good in real life because you can see what’s stored and it stays curated by choice, not by hiding.
Mount shelves so they leave 12 to 16 inches of space above the countertop. Use matching canisters in two sizes — don’t mix ten styles. Keep the butcher block edge clean and seal it fully so it handles wiping and daily splashes.
Label canisters in small black text on the underside so the top stays clean.
Avoid stacking books or mismatched baskets on the shelf — it turns open shelving into visual noise.
11. Butcher block with cream built-ins and a black peg rail
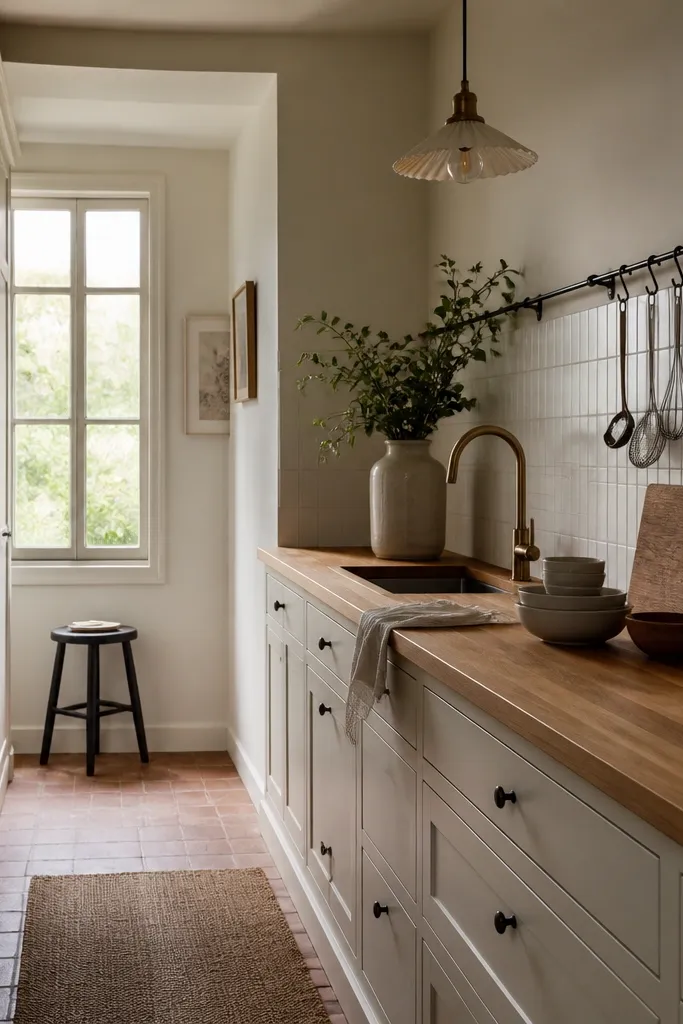
A peg rail is practical in small spaces because it removes bulky counter storage. Cream built-ins keep the room bright, and the black rail adds a strong line that frames the wood. The backsplash stays minimal, so your eye doesn’t bounce around. This look is especially good if you cook often and you need tools in reach.
Install the peg rail centered over a prep zone, not over the sink. Use matte black hooks and keep utensils hanging in one direction so it looks orderly. Seal the butcher block and use a board for daily prep to protect the surface.
Hang your most-used tools first: spatula, whisk, ladle. Leave empty hooks so the wall doesn’t look crowded.
Don’t put the rail too low — it blocks cabinet doors and makes the counter area feel smaller.
12. Butcher block with white quartz-looking tile and brass outlet covers
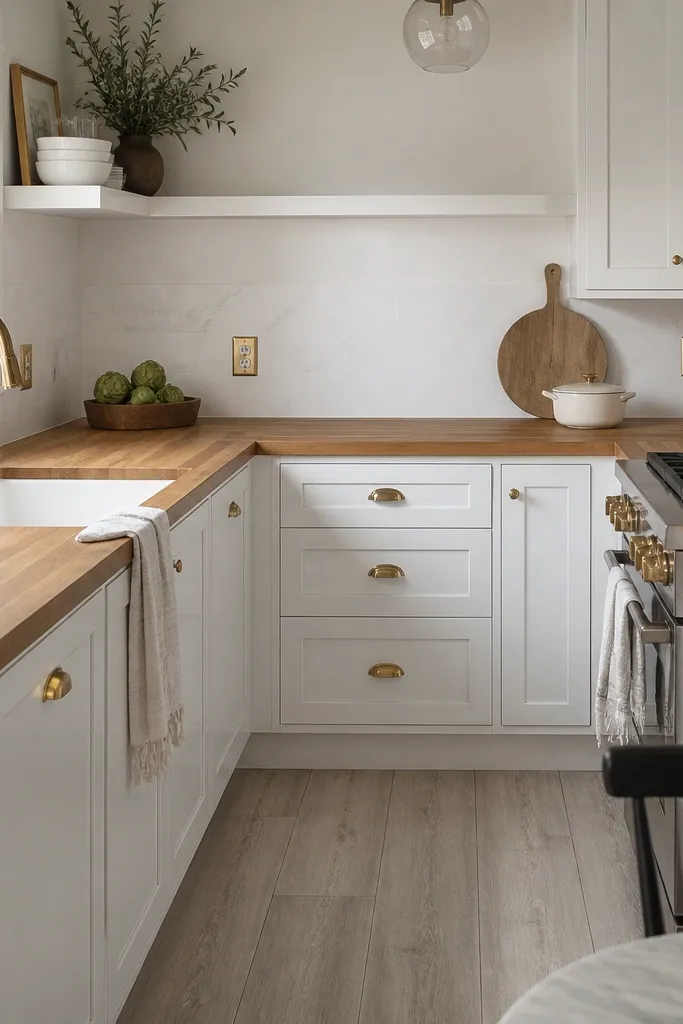
Quartz-look tile gives you the “stone” feel without the heavy look of real slabs. Subtle gray veining stays gentle, so the butcher block doesn’t get overpowered. Brass outlet covers are a tiny detail that makes the whole kitchen feel finished, especially up close. This combination looks upscale because the finishes are coordinated and the tile pattern is restrained.
Keep your backsplash tile grout a warm light gray so it doesn’t clash with wood warmth. Use a brass faucet or matching brass lighting, but keep it to one metal family. Choose a butcher block stain that reads warm neutral, not orange.
Replace outlet covers and switch plates before you do your final styling. It’s cheap and it changes the whole look instantly.
Avoid mixing brass and chrome — the kitchen reads confused.