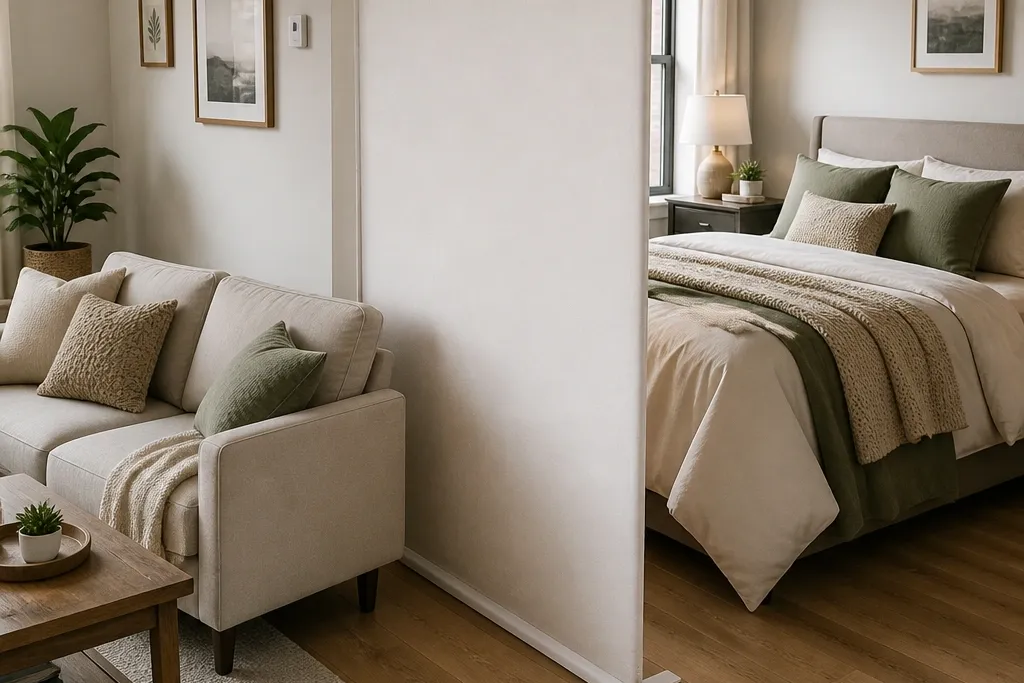
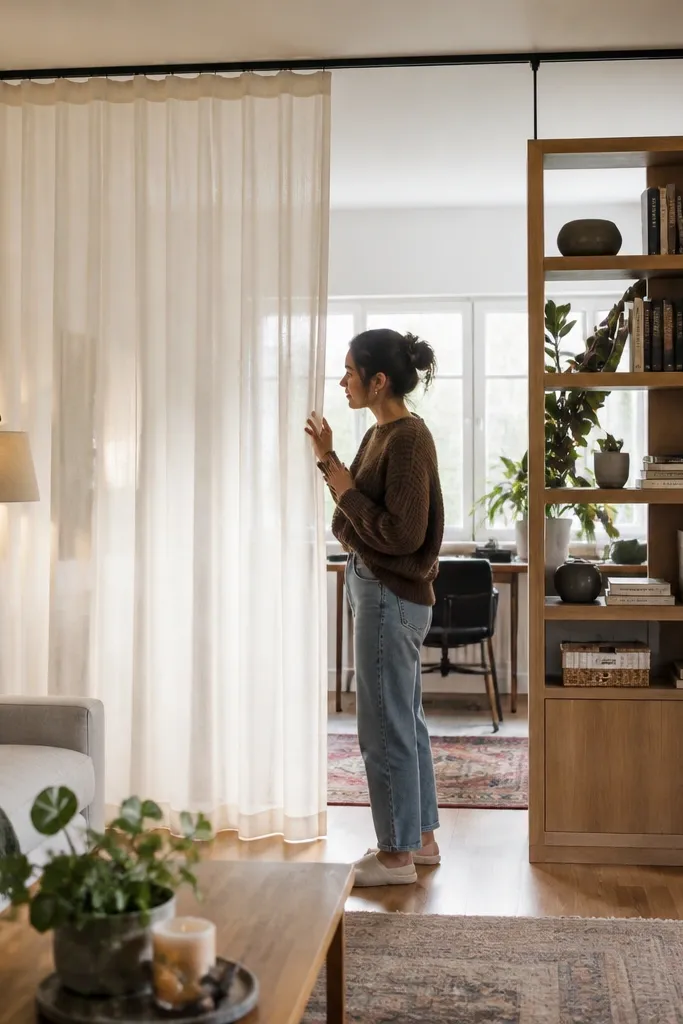
1. Ceiling-track sheer curtain wall
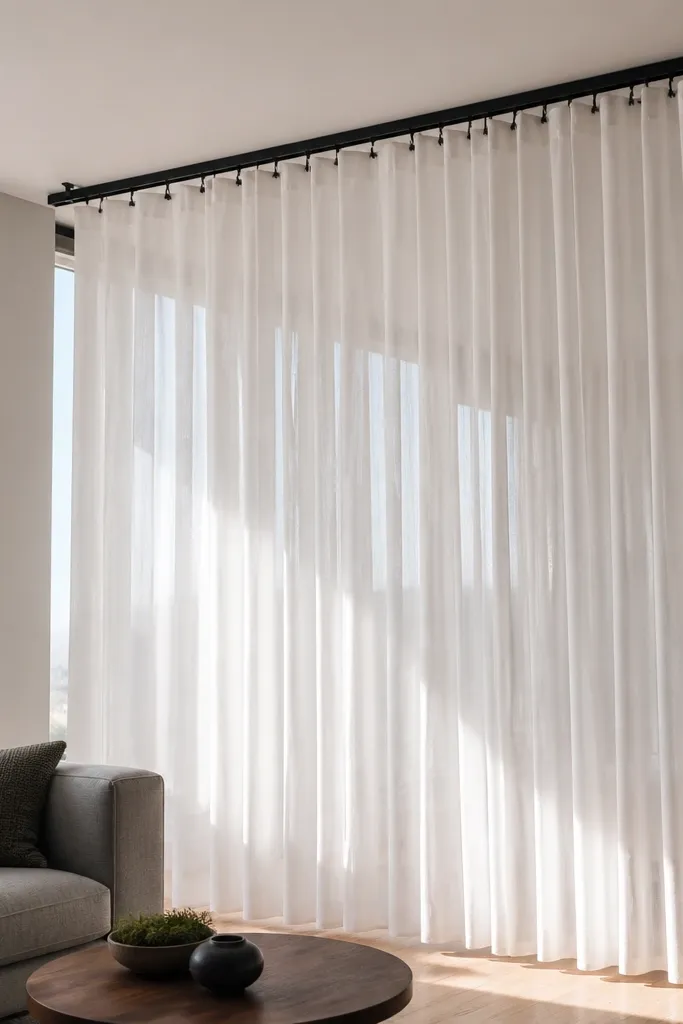
This is the easiest beginner-friendly room divider idea that still looks polished. Sheer curtains separate zones by breaking up sight lines while letting daylight stay bright, which matters in small rooms. Choose a ceiling track so the fabric hangs straight and high, not bunched at window height. For style, go with an off-white sheer that doesn’t look gray in daylight, and pair it with a slim curtain rod cover or track hardware for a clean look. It works best when you need flexible privacy for a sleeping nook, a desk corner, or a TV zone that you want to hide at night.
Measure the divider width first, then add 6-10 inches on each side so the curtains overlap when closed. Install a ceiling track 2-4 inches from the ceiling line (or flush, if your ceiling is low) and run it across the entire separation area. Hang two curtain panels so they meet in the center with a small overlap. Finally, pull the curtains closed when you want separation and leave them open during the day to keep the room feeling bigger.
Use curtain weights or a light hem weight so the panels fall flat instead of billowing.
Skip floor-length sheers that pool into puddles; they make the divider look messy and shrink the space.
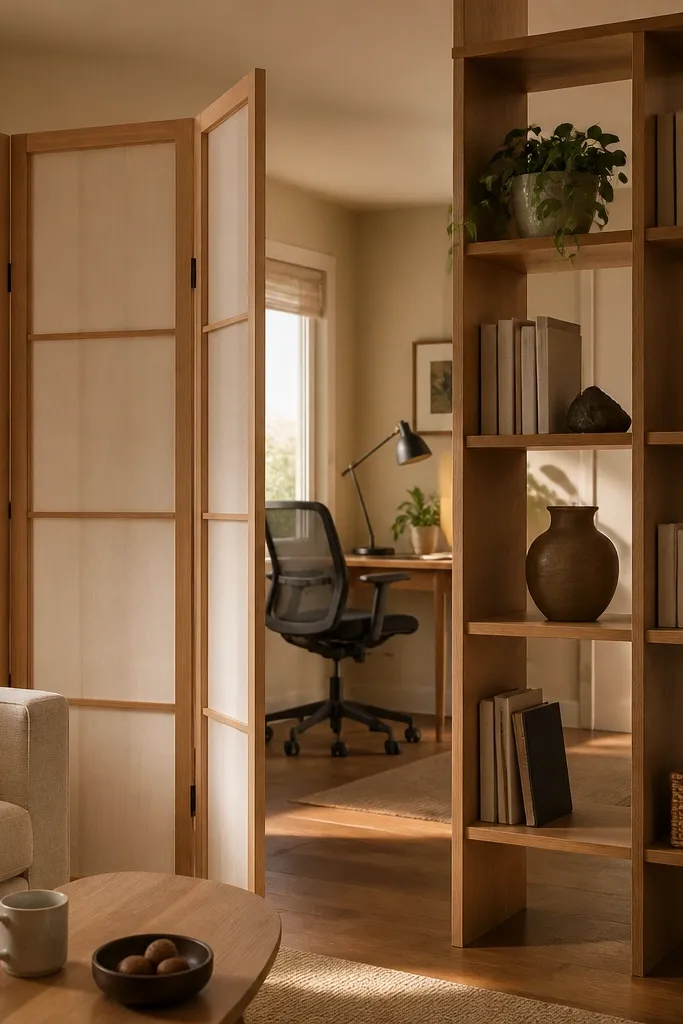
2. 3-panel folding screen with fabric panels
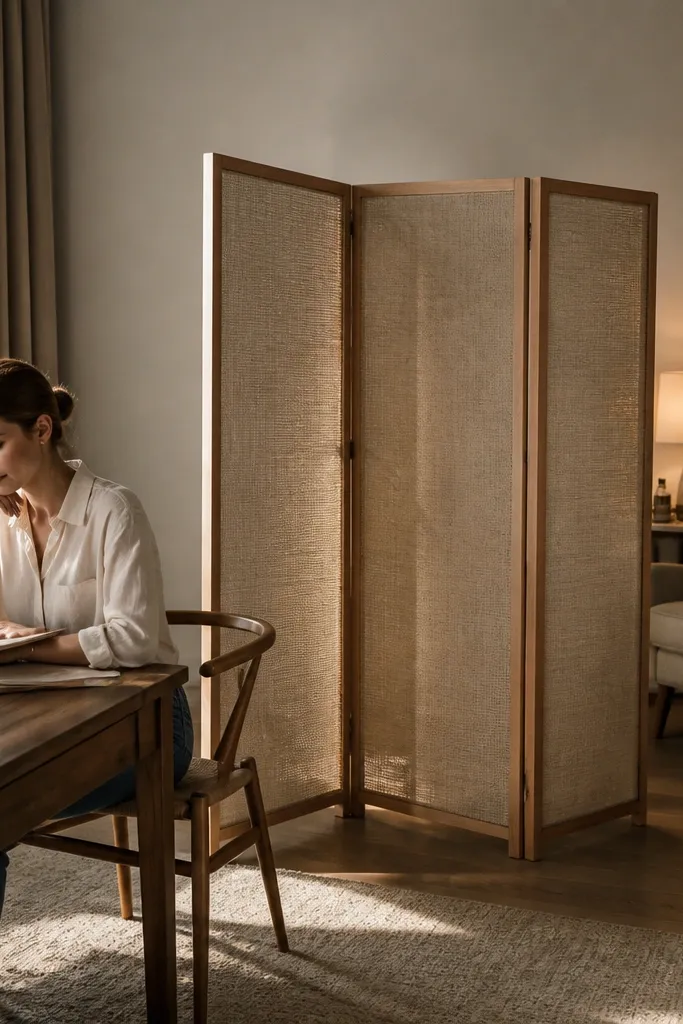
A folding screen is a beginner-friendly room divider idea because you can move it without measuring wall anchors. Fabric panels soften the look and reduce glare, so your space feels cozy instead of boxy. Pick a screen with three panels and a height around 66-72 inches so it covers more than just the top half of your view. A neutral fabric in warm white or oatmeal makes it blend with most decor styles and keeps the divider from looking like a temporary afterthought. This works well behind a sofa, near a bed, or to carve out a “quiet zone” in a studio without blocking all light.
Set the screen on a rug edge or a runner where you want the “boundary” to land, not in the middle of open walking space. Start with the screen straight, then angle it 10-20 degrees toward the room to create a corner feel. Choose fabric panels that are thick enough to reduce visibility; thin organza reads more decorative than private. If the room is narrow, keep the screen centered so you don’t create an awkward gap that looks like a mistake.
Pro tipTie the screen to your room by matching one fabric color to a throw pillow or bedding shade.
Watch outAvoid screens with glossy finishes; they catch light and make the divider look harsher than you want.
3. Bookcase divider with open shelves
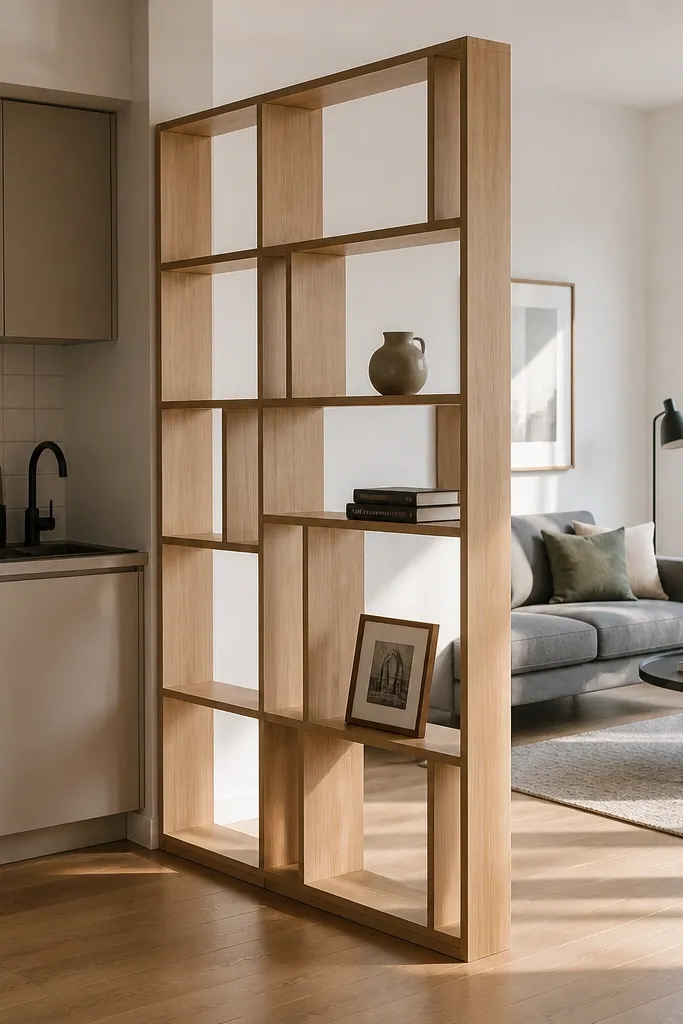
An open-shelf bookcase divider gives you real separation and storage, which is why it’s a favorite for small-space living. The open sides still let light travel, so the room doesn’t feel like it has a wall. Go for a divider height around 60-72 inches and a depth of 10-12 inches so it doesn’t eat floor space. Light wood with a matte finish looks airy and keeps the shelves from looking bulky. Style it with a mix of books and a few decor objects so the divider reads intentional from both sides.
Measure the space where the bookcase will sit and confirm you have clearance for walking past the divider. Place it so the shelves face the main room and the solid back (if it has one) faces the less-used side. Load the shelves with items you already own first; then add 2-4 coordinating bins or boxes to clean up visual clutter. If it wobbles, add an anti-tip strap to a stud or use felt pads on the floor.
Pro tipUse book stacks that vary by 2-3 inches in height; it looks curated without looking overdone.
Watch outDon’t fill every shelf line-for-line; empty space looks better than visual noise in small rooms.
4. Tall slat wood panel divider
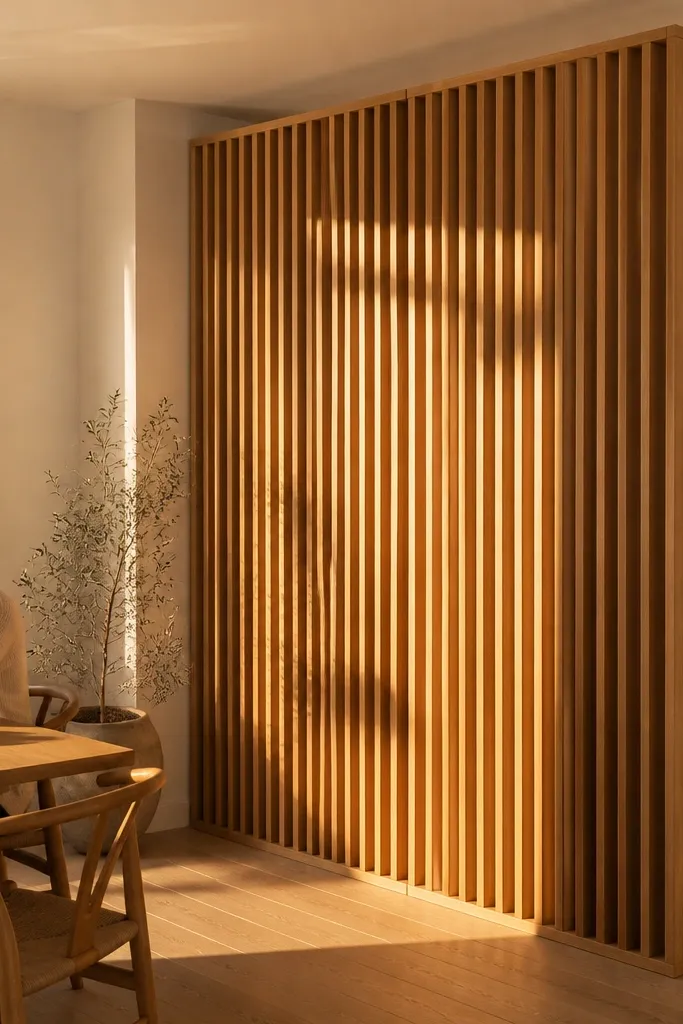
Slatted wood panels create separation without making the room feel sealed off. The gaps cut down direct sight lines, while the slats add a strong design texture that looks expensive even when it’s simple. Choose a slat width around 1-2 inches with spacing that feels airy, and keep the overall height around 70 inches for real privacy. A pale oak or warm birch tone reads bright and works with neutral furniture. This divider is great for separating a dining table from a living area, or carving out a workspace where you want less visual distraction.
Pick a slat panel size that matches your room width; for a beginner install, aim for a freestanding panel around 32-48 inches wide. Place it 12-18 inches away from the wall if you want it to “float” and let light move behind it. If it’s not freestanding, mount only if you can anchor into studs; otherwise choose a freestanding frame. Style the top edge by leaning a small plant or art against it so it looks finished, not temporary.
Pro tipMatch the wood tone to your existing furniture legs or frames so the divider blends instead of competing.
Watch outAvoid super-tight slat spacing; it blocks light and turns into a heavy wall effect.
5. Pegboard with fabric bins
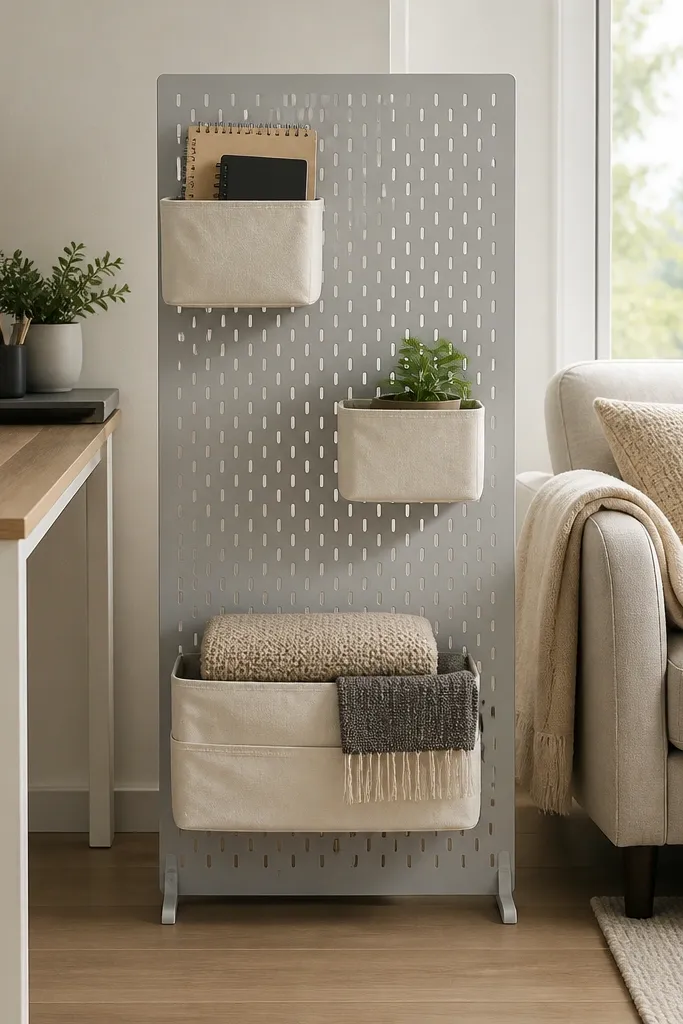
Pegboard is a clever beginner-friendly room divider idea because it’s structured, customizable, and it looks intentional even in small rooms. When you add fabric bins, it becomes both a divider and a storage system, cutting down clutter that makes spaces feel smaller. Choose a panel color like matte white or soft gray so it doesn’t look industrial. For visual separation, mount or place the pegboard at about 60-72 inches tall, and keep the bins on one side only for a cleaner look. It’s ideal for entry zones, laundry corners, or a work area where you want everything off the floor.
Use a pegboard panel width that fits your space without blocking walkways, typically 30-48 inches wide. If freestanding isn’t possible, mount it using wall anchors into studs where you can — otherwise choose a framed pegboard stand. Attach hooks first, then add bins by clipping or screwing brackets so the weight stays secure. Finish by hanging a few lightweight items like a folded throw or small baskets to create visual rhythm.
Pro tipKeep bins in one fabric color family (cream, sand, or charcoal) so the pegboard stays calm.
Watch outSkip heavy metal decor on every hook; too many items makes the divider look chaotic.
6. Macrame curtain on a tension rod
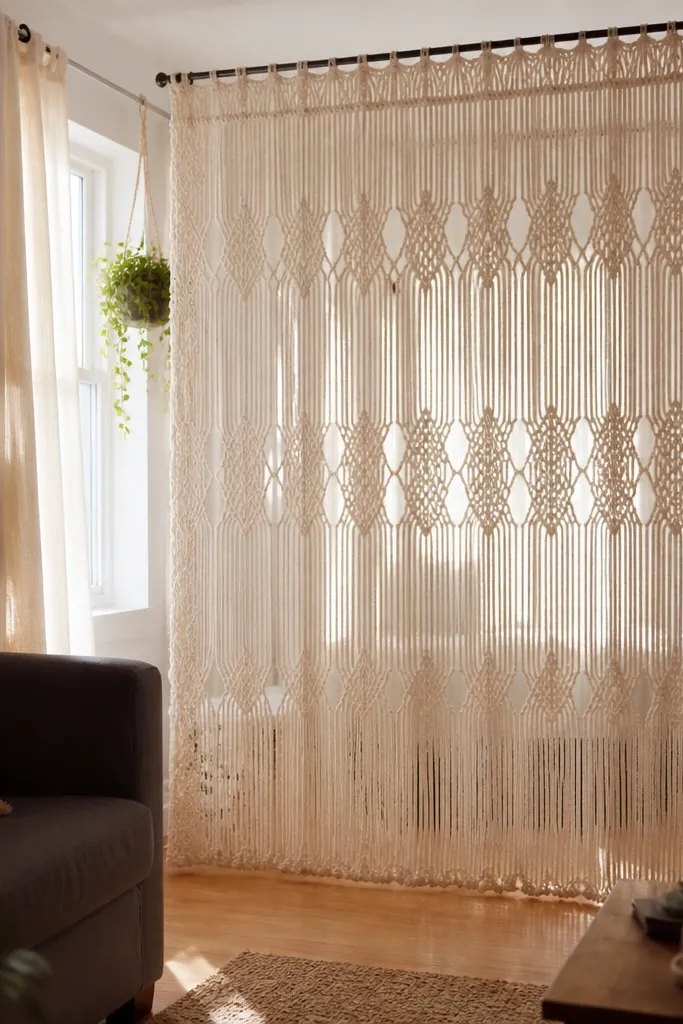
Macrame looks handmade and airy, which makes it a great beginner-friendly room divider idea for renters who don’t want drilling. It separates visually by adding texture and movement, but it still lets light pass through. Pick a curtain length that reaches 1-2 inches above the floor so it doesn’t drag or collect dust. A warm neutral color like natural tan or oatmeal works with most small-space palettes. This is best for splitting a reading nook from the rest of the room, or softening the area around a bed without blocking all airflow.
Measure the width of your separation area and install a tension rod at about 72-80 inches from the floor. Hang the macrame curtain so it sits centered and doesn’t twist; adjust the ties at the top if needed. If the rod sags, add a second tension rod closer to one end for support. Finally, move the curtain slightly forward so it creates a clear boundary at eye level.
Pro tipPair it with a textured rug or woven basket nearby so the divider texture doesn’t feel random.
Watch outDon’t use a super-sheer macrame that looks like wall art; choose one with enough strands to actually break sight lines.
7. Woven room divider with a top rail
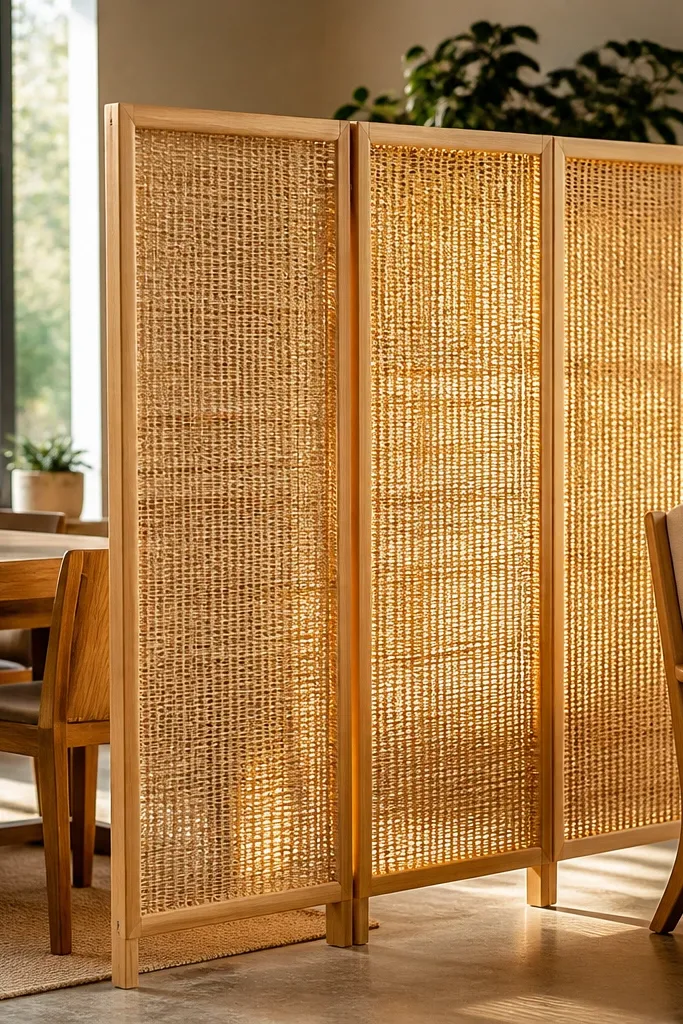
Woven room dividers create separation that feels warm and natural, without the heaviness of solid panels. The weave pattern breaks direct views, so you get privacy without turning off the light. Look for a divider with a top rail in light wood or brushed metal so it looks stable and finished. Height around 65-72 inches is the sweet spot for small rooms because it gives you coverage at eye level. This idea works well for dividing a living area from a kitchenette, or adding privacy around a bed in a studio.
Choose a woven divider panel that stands on its own and fits the width of your space, usually 30-50 inches wide. Place it near a wall only if you can keep one side from blocking your main path; otherwise float it slightly away from the wall. If the divider has adjustable feet, use them to keep it level so it doesn’t lean. Style the base with a slim rug or floor mat to visually anchor it.
Keep the floor styling simple near the divider; woven texture looks best when the floor is calm.
Avoid tall dividers that are too narrow; they wobble and look flimsy in photos.
8. Sliding barn door on a track
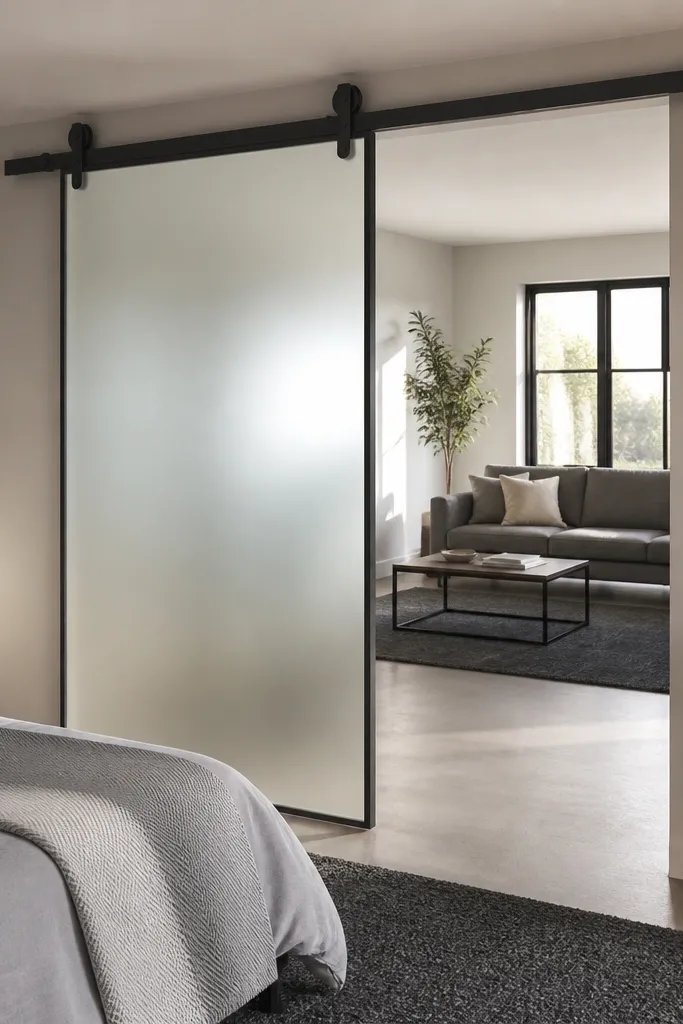
A sliding barn door creates the most dramatic separation in a small space, and it’s still beginner-friendly if you follow a straightforward track setup. It blocks sight lines and sound more than most soft dividers, which matters when you’re separating a sleeping area from a living space. Choose a door with frosted glass only if you want light transfer; otherwise go solid for privacy. A matte black track and a light wood door looks sharp without feeling heavy. This divider is best when you’re tired of partial separation and want the room to feel like two zones.
Measure door width so the panel overlaps the opening by 4-6 inches when closed, then choose a track length that covers that overlap. Install the track to ceiling or sturdy header framing, using the supplied mounting template if you have it. Hang the door and check clearance so it doesn’t scrape the floor; add a door stop if needed. Once it slides smoothly, add a simple trim frame or magnetic door keeper so it stays aligned.
Use a door color that matches your biggest furniture piece — light wood with light furniture, or dark door with dark accents.
Don’t mount the track too low; it makes the opening look smaller and ruins the clean look.
9. Rattan panel screen with feet
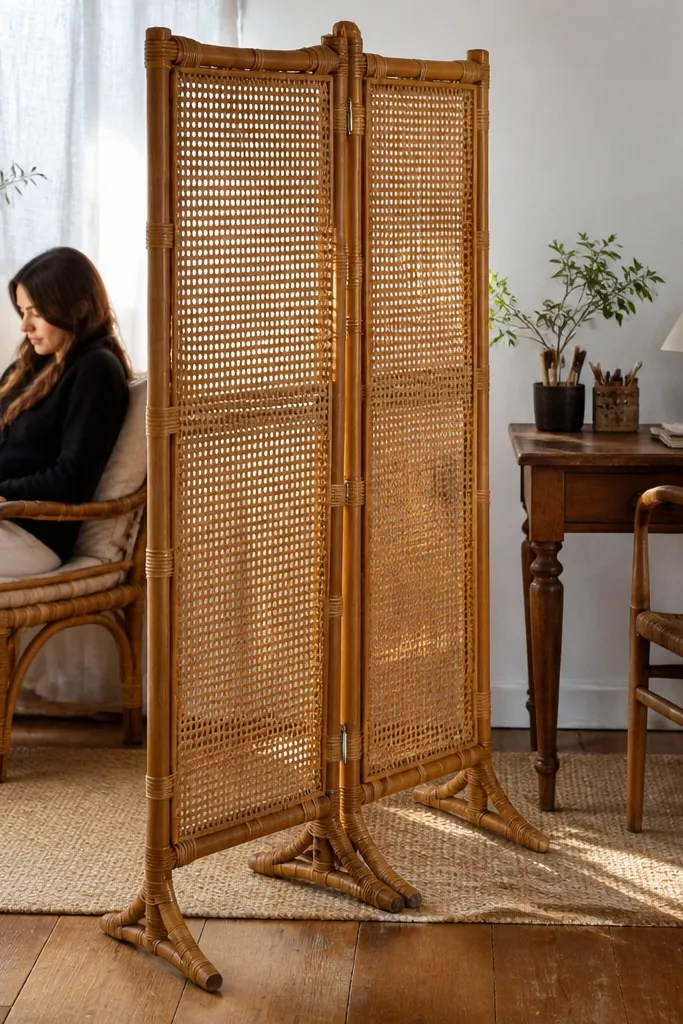
Rattan panels add pattern and softness, which makes them photogenic and beginner-friendly. The open weave gives you light flow, while still breaking up direct views enough to feel like separate zones. Look for a screen with sturdy feet and a frame so it doesn’t sag in the middle. Keep the color warm and consistent — natural rattan or honey tone works best with small-space neutrals. This divider is great in a dining + living combo where you want the dining area to feel contained without blocking daylight.
Choose a screen around 66-72 inches tall and set it at the edge of the dining area so it visually “contains” the table. Angle it 10 degrees toward the seating to create a natural corner. Place it on a rug so the feet don’t look like they float; a 6x9 or smaller rug under the dining zone helps. Add one matching rattan accessory nearby like a basket to tie the look together.
Pro tipKeep rattan styling minimal on the divider side; the texture already does the work.
Watch outSkip screens with uneven weaving; they look crooked and cheap in photos.
10. Faux plant privacy wall with trellis panels
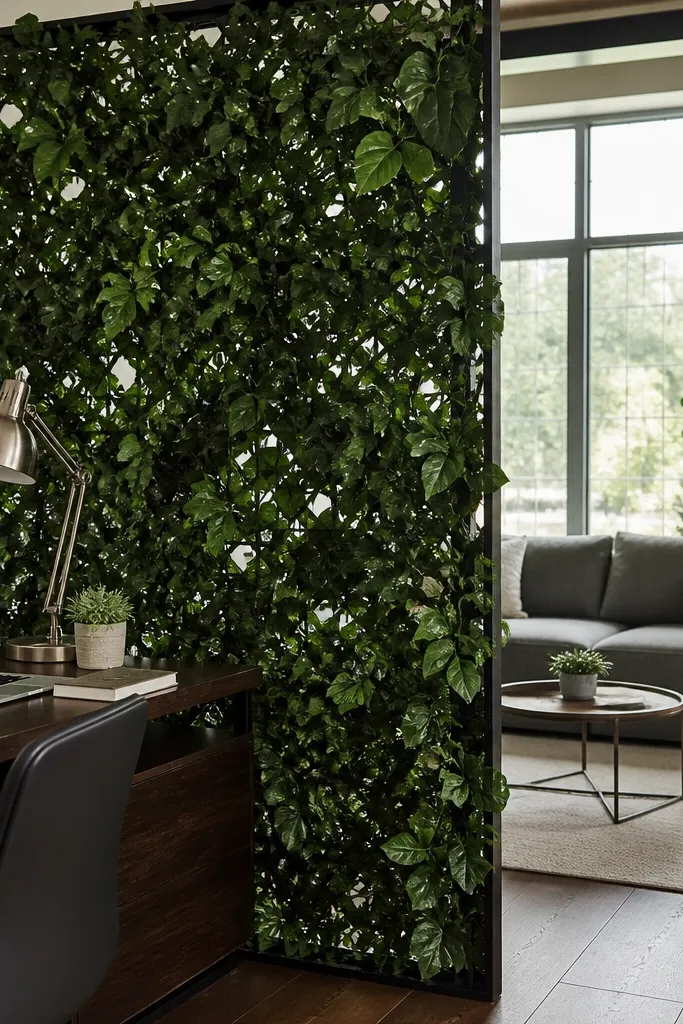
If you want privacy that looks lush, trellis-style panels with faux greenery give you instant separation. The grid behind the leaves blocks direct sight lines, so the desk area feels hidden without needing a solid wall. Choose panels with a dense leaf layer and a natural green tone that doesn’t look neon under indoor lighting. For small spaces, place two panels side-by-side with a slight overlap so the boundary looks continuous. This works best in a studio where you want a “green room” feeling around your work area.
Pick panels around 60-70 inches tall and 24-36 inches wide each, then plan an arrangement that covers your separation width. Stand the panels on a rug or mat so they don’t slide. If the panels come with frames, connect them with the included brackets; if they don’t, use zip ties around the trellis edges. Finish by adding a slim desk lamp or wall art on the divider’s “public” side so it looks designed.
Pro tipBlend the leaves at the overlap by trimming a few strands so you don’t see a hard seam.
Watch outAvoid sparse greenery; it looks like decoration, not privacy.
11. Window film + curtain rod combination for a faux wall
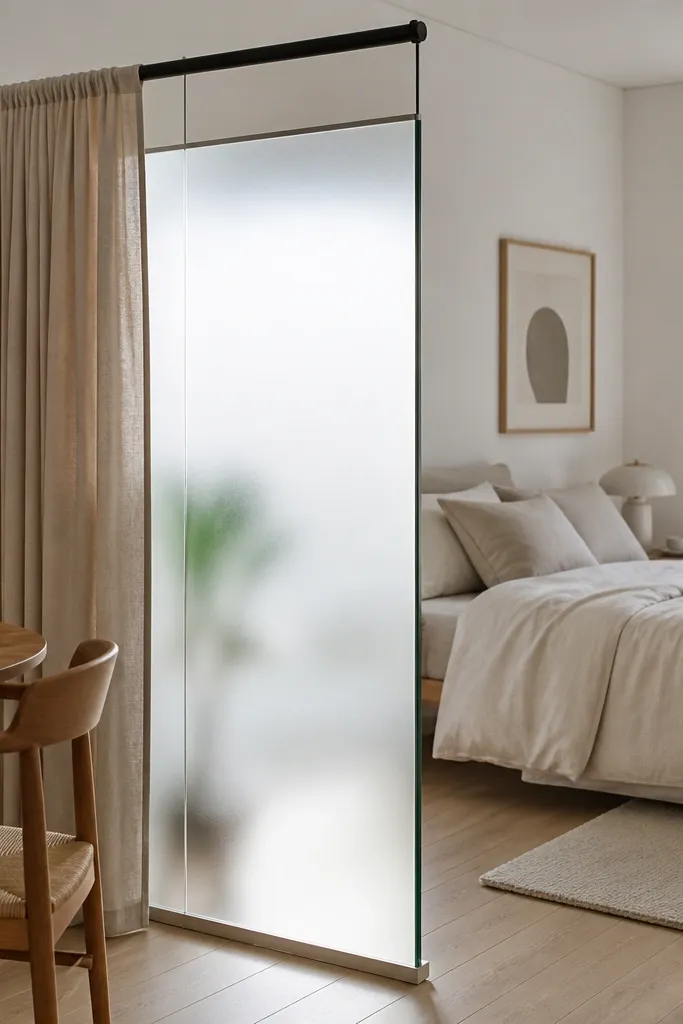
This is a smart, beginner-friendly trick when you want a divider that looks like it belongs — without building a wall. Use a small freestanding panel or existing glass surface and apply frosted window film so it blocks visibility while still letting light through. Add a curtain rod in front so you get fabric softness and a finished look. The frosted effect gives you privacy at eye level, while the sheer curtain hides the film edge lines. It’s a great option for separating a bathroom-adjacent nook, a doorway area, or a studio corner near a window.
Cut or size your divider surface first; frosted film needs a flat, clean surface. Clean the glass or panel thoroughly, then apply window film according to the roll instructions, smoothing from the center outward. Mount a curtain rod above the panel so the sheer curtain hangs to the same height as the film. Finally, overlap the curtain slightly so it covers the film edges when closed.
Choose frosted film that reads white, not blue-gray, so it doesn’t shift the room’s color temperature.
Don’t apply film over dust; fingerprints and specks show instantly once the light hits.
12. Layered folding screen with a hanging curtain panel
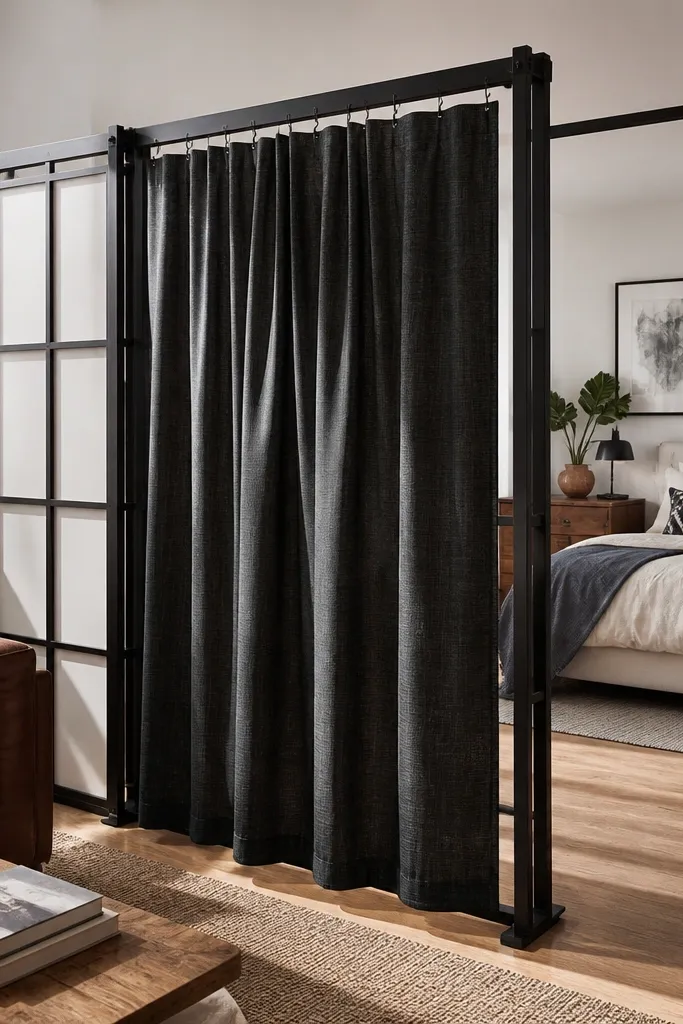
This idea looks custom because it mixes two divider styles in one clean system. Use a folding screen as the structural base, then hang a curtain panel from the top crossbar or with small clips. The curtain adds softness and better sight blocking, while the screen frame keeps the shape crisp. Choose a screen in black or warm wood and a curtain in a matte fabric, like linen blend, to avoid shiny reflections. This works in small rooms where you want separation but don’t want the divider to look like a single flat sheet.
Start with a folding screen that matches your room palette, ideally 3 or 4 panels at 66-72 inches tall. Drape a curtain panel over the front half of the screen so it covers the center area where people look. Use matching clips or a lightweight rod attached to the screen top to prevent slipping. Place the layered divider so it aligns with a rug edge or furniture line for a “designed” look.
Keep the curtain panel length consistent on both sides so it doesn’t look lopsided when you close the divider.
Skip mixing too many patterns; one textured divider + one fabric panel looks intentional.
13. Upholstered bench back divider
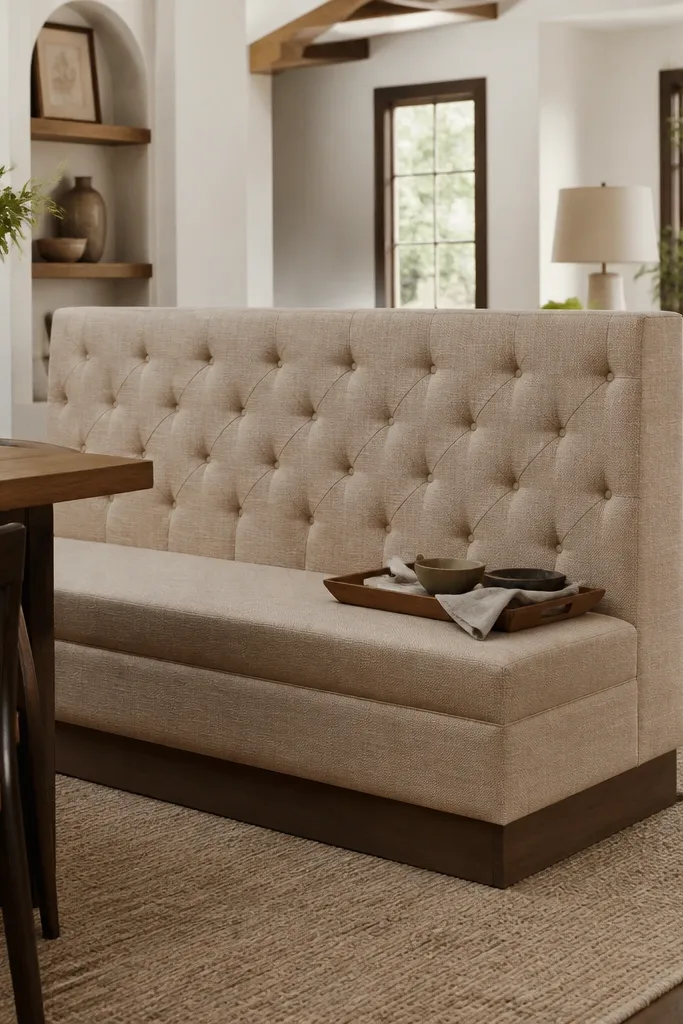
A high-backed upholstered bench is a room divider that doubles as seating, so you’re not losing function. The fabric back blocks sight lines and adds comfort, which makes the divider feel more like furniture than a barrier. Pick a bench height around 36-42 inches if you want gentle separation, or choose a taller back if you’re trying to block more of the view. Use a performance fabric in a neutral tone so it looks clean and doesn’t snag easily. This works well behind a sofa, at the edge of a dining space, or to create a transition zone in a studio.
Measure the divider width so you can center it between two furniture pieces; 48-60 inches is a common sweet spot for small spaces. Place the bench so its back faces the area you want to separate and leave at least 18 inches for comfortable movement. If the bench has legs, use a rug pad or rug edge so it doesn’t drift. Style the bench side with a single tray or two cushions so it reads like part of the decor, not a storage hack.
Pro tipUse one color family for the bench and one nearby soft item like a throw blanket to make the separation feel planned.
Watch outAvoid low-back benches; they don’t block enough at eye level to create real separation.
14. Accordion fabric screen in a bold color
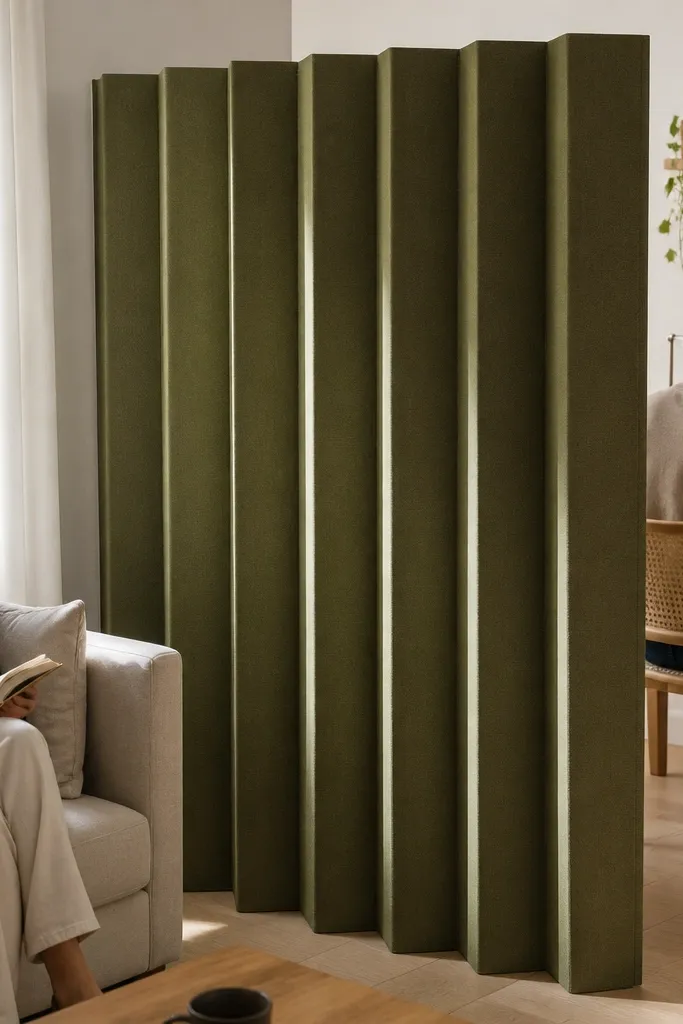
An accordion fabric screen is one of the most beginner-friendly room divider ideas because it folds out only when you need it. The look is graphic, and that’s why it photographs well — you get a clear color block that separates zones instantly. Choose a bold color like deep olive, terracotta, or navy, then keep the rest of the room neutral so it doesn’t overwhelm. For separation, aim for a height around 68-72 inches so it covers the eye line. This works in tiny studios where you want a quick visual boundary for a bed, a workstation, or a TV area.
Pick an accordion screen with a width that matches your separation span, then test the fold length so it doesn’t take over the walkway. Place it on a rug or mat where the feet won’t slide, and extend it until it creates a clear boundary. If it has adjustable sides, set it so the edges align with furniture lines. Style the “behind” side with fewer items so the divider color stays the focal point.
Pro tipAdd one matching accessory — a pillow, lamp base, or framed print — in the same color for a finished look.
Watch outDon’t pick a bright color if your room has already got multiple loud patterns; the screen will look like clutter.
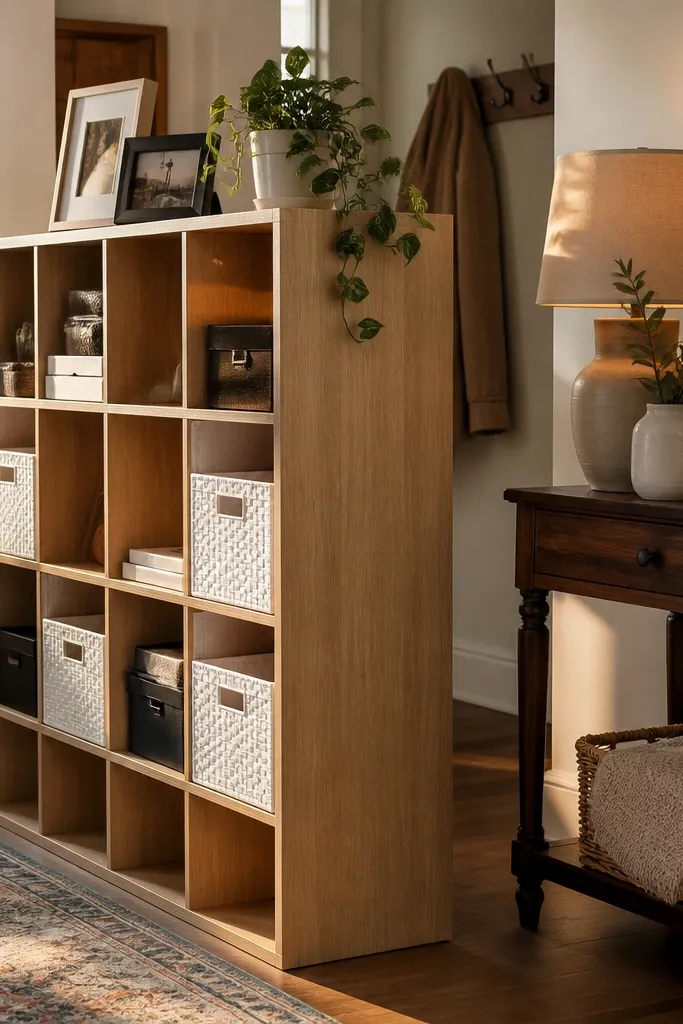
15. Stacked crate divider with matching bins
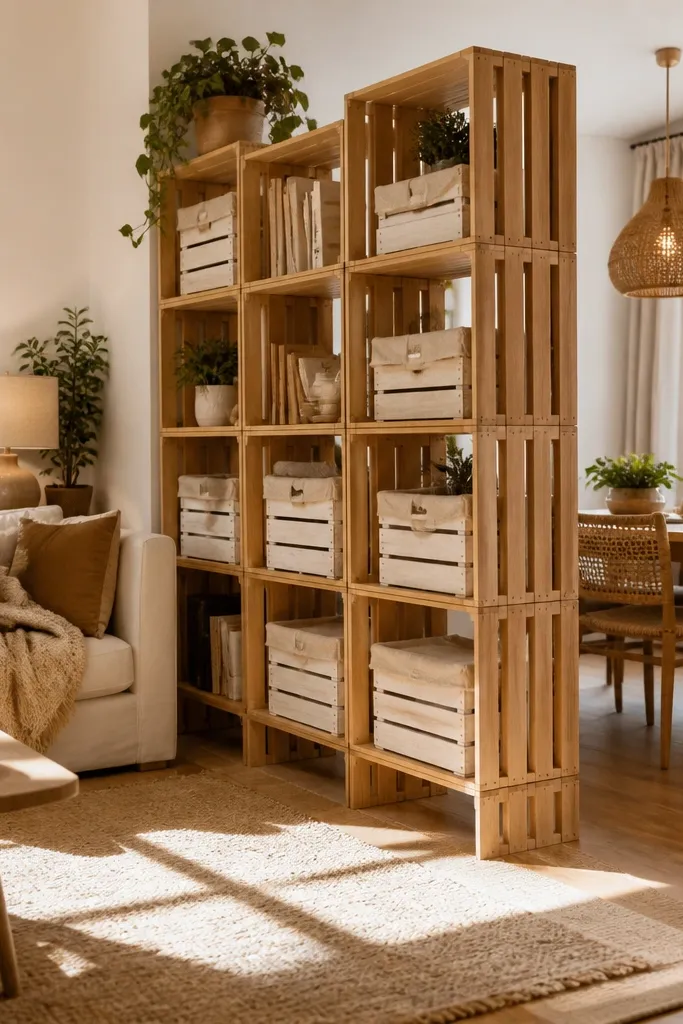
Stacked crates create separation with a built-in rhythm, and they stay budget-friendly. Because crates are open, the room stays bright, but the stacked structure still breaks up sight lines. Choose crates that look clean and uniform in color, like light oak or whitewashed wood, so it doesn’t look thrown together. Add matching bins so the divider becomes useful and stops the “random storage” vibe. This divider works best for separating a small entry from a living zone, or creating a mini pantry area in studios.
Build a divider that’s roughly waist to head height — around 48-72 inches — using crates that stack evenly. Place the divider against a wall or at a slight angle so it doesn’t look like a pile; an angle of 10-15 degrees makes it feel intentional. Insert bins after stacking, not before, so you can adjust spacing for the look. Finish by adding a single top layer like a tray or plant to anchor the composition.
Use bins in two sizes max; too many bin styles makes the divider feel messy.
Skip mismatched crate colors; it reads like storage, not design.