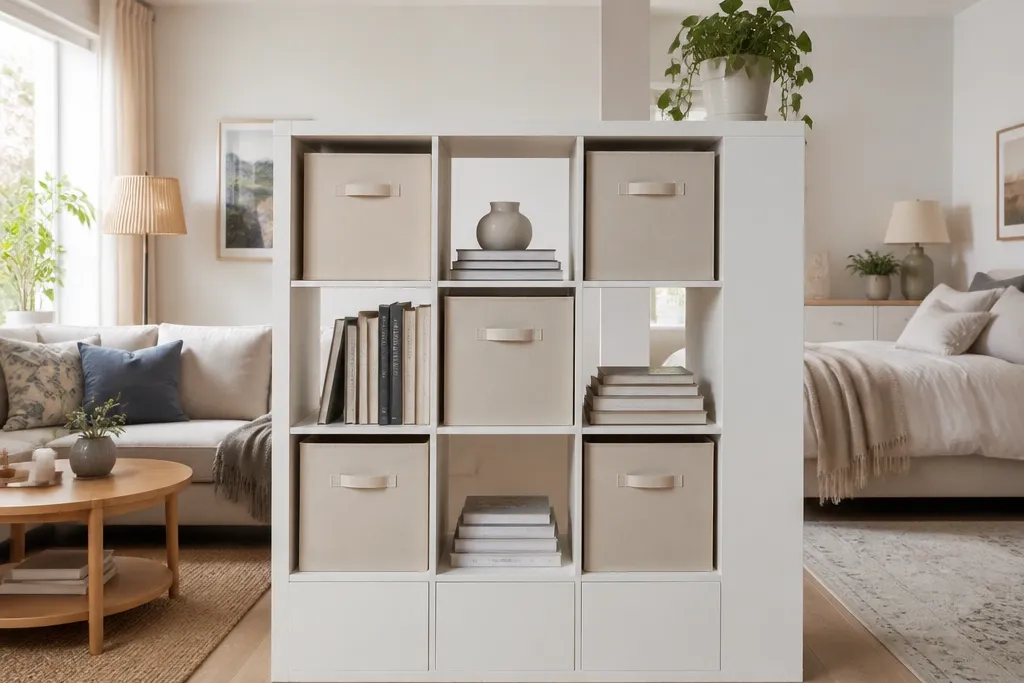
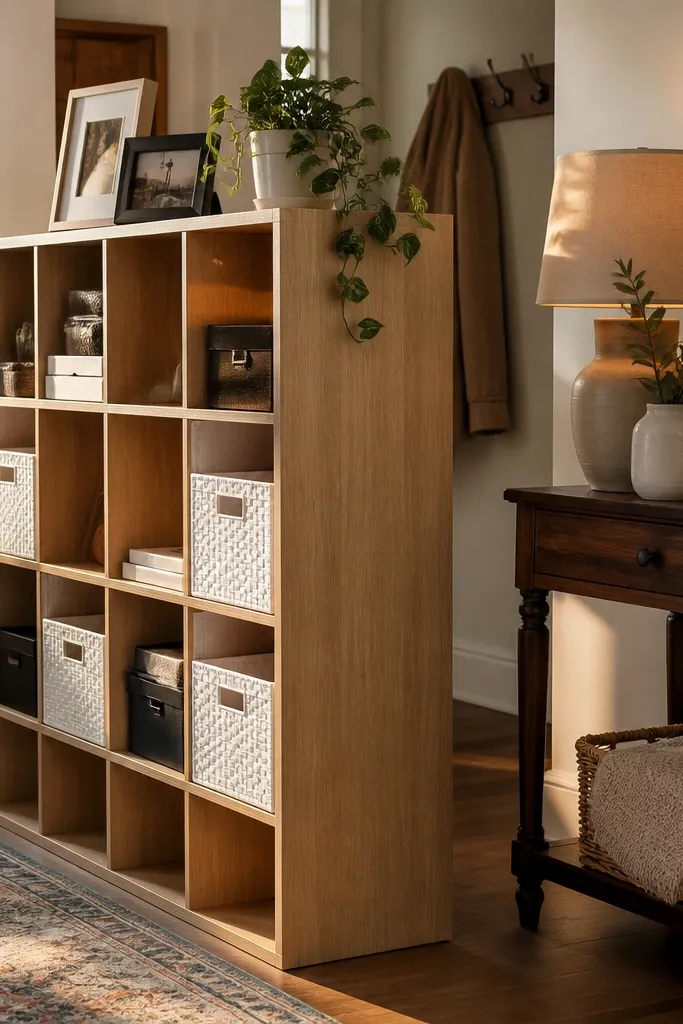
1. Barn-door style divider with cloth bins
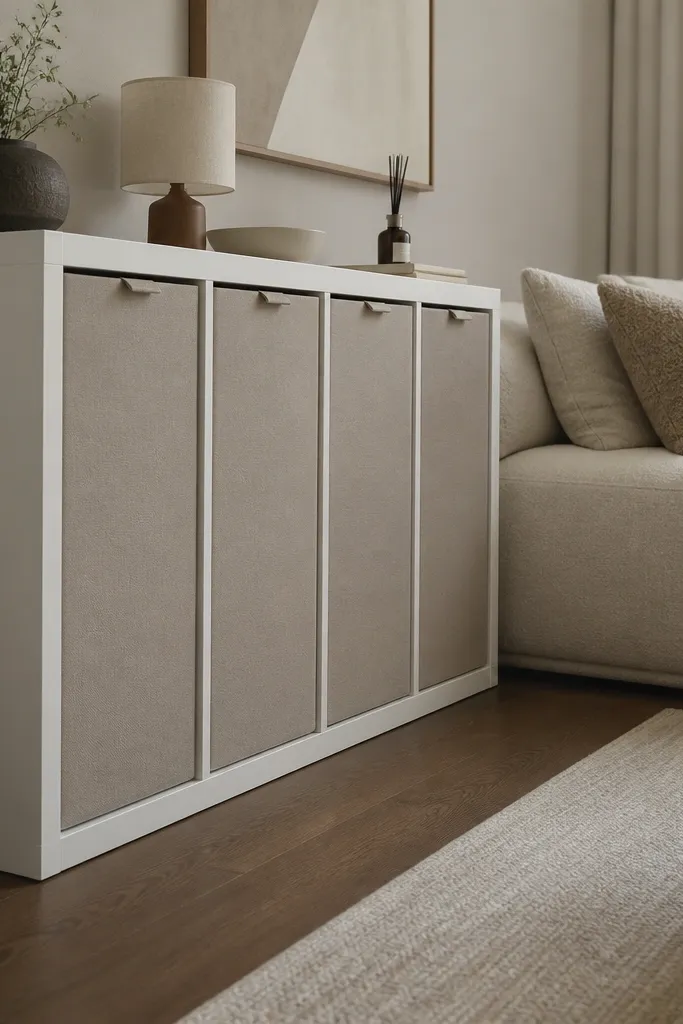
This look turns a Kallax divider into something that reads like furniture, not storage. Use a white Kallax with deep cloth bins in a warm neutral (oat or greige) so the compartments look uniform and calm. The visual trick is keeping the bins vertical and same-height where possible, which makes the divider feel taller and cleaner. Put a narrow linen runner across the top and add one or two low objects so the divider feels finished from both sides. It’s great for separating a living area from an entry corner where you want privacy from clutter but still want light to move through.
Measure your space first, then pick a 2x4 or 2x3 Kallax so the divider doesn’t swallow the walkway. Place it perpendicular to the sofa or along the wall edge that you want to define, leaving about 36-40 inches for passing when the divider is in the middle of the path. Then slide matching cloth bins into each compartment (aim for the same bin height pattern across the top two rows), and finish by adding a linen runner on top with two small trays or books spaced evenly.
Choose bins with the same weave direction. Even a small mismatch in texture shows up fast on a divider.
Don’t mix bin heights in every row — it makes the divider look messy instead of intentional.
2. Black Kallax with rattan fronts for a warm, separated nook

Matte black changes the whole vibe. It frames the room separation sharply and makes the divider look like a design element, especially against light walls. Put rattan bins in most compartments so you get texture without visual clutter, and leave a few open slots for books or a small plant to keep it from feeling too boxed in. This works well in small living rooms where you want a distinct “zone” for a desk, reading chair, or pet area without darkening the entire space. The rattan lightens the black, so the divider still feels warm rather than heavy.
Pick a matte black Kallax (or paint/finish one to match) and choose rattan bins that fit the internal compartment width snugly. Position the divider so the black edge faces the main sight line from your entry or sofa, not the side that gets ignored. Fill the bottom two rows with rattan bins, leave the top row partially open for books, and place a single plant on a small tray in one corner compartment to pull the look together.
Stick to one rattan tone (natural, not mixed honey and dark brown). The mismatch looks busy on black.
Avoid leaving random open compartments scattered — it breaks the calm rhythm and shows clutter.
3. White Kallax with linen drawers for a clean, hotel-like split
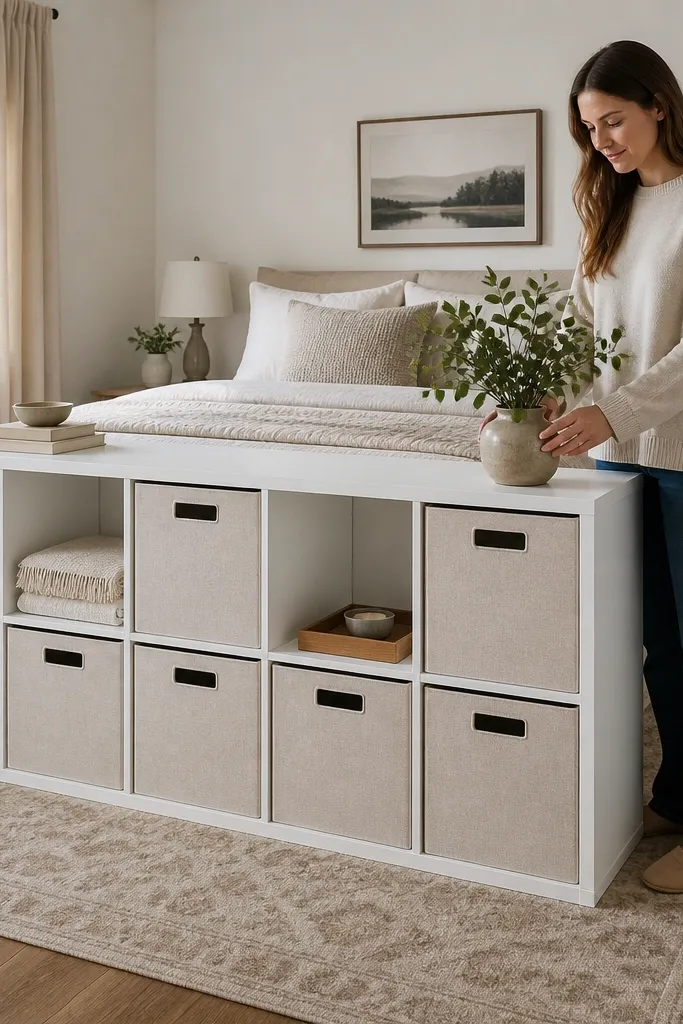
If you want the divider to look crisp from every angle, linen drawer boxes are the move. A white Kallax gives you a bright base, and linen drawers hide cables, chargers, and everyday clutter that usually ruins a small separation. Keep the drawer boxes in a consistent color family (natural linen or soft stone) and leave a few compartments open for books or baskets. This look is especially good for separating a bedroom corner from a small workspace where you need to hide tech mess fast. The linen texture adds softness, so the divider doesn’t feel like flat storage.
Choose a white Kallax and measure the compartment openings so the drawer boxes fit without gaps. Place the divider where you want the zone line, then style the top surface with just one long object (like a shallow tray) and two book stacks at opposite ends. Load drawers into the lower rows first, then use open compartments for items you actually want to reach daily. Finally, check the divider from the room’s main entry — adjust drawer placement so the drawer fronts align in straight columns.
Use drawer boxes with front handles that are the same color (black or brass). Tiny handle mismatches look chaotic.
Don’t over-style the top — a busy top makes the whole divider feel cluttered.
4. Tall 4x2 Kallax with stacked books as the separating "spine"
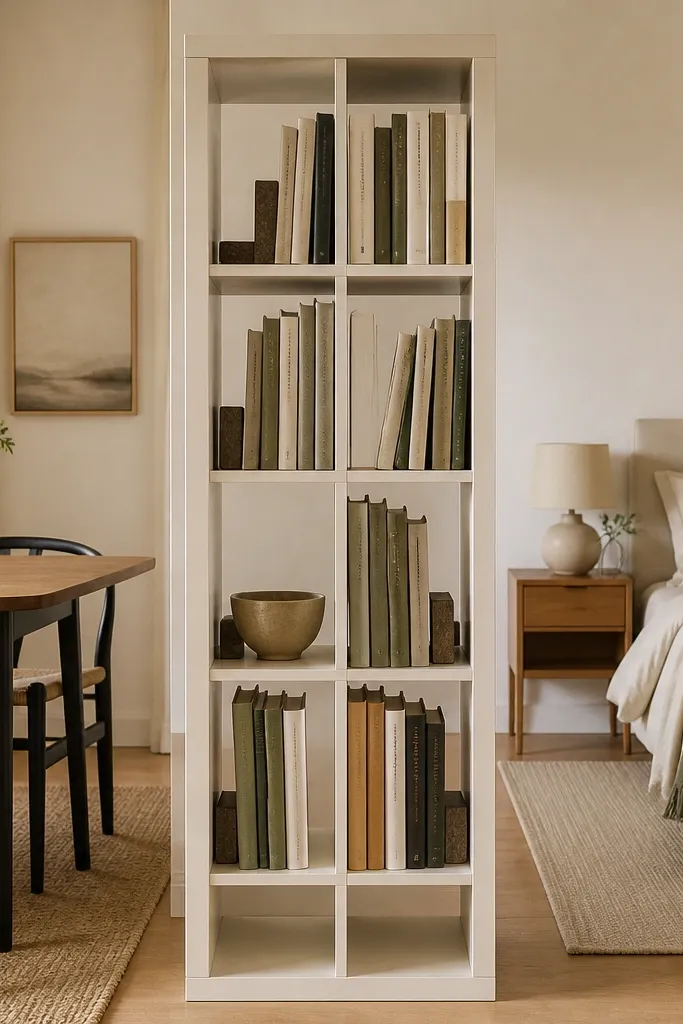
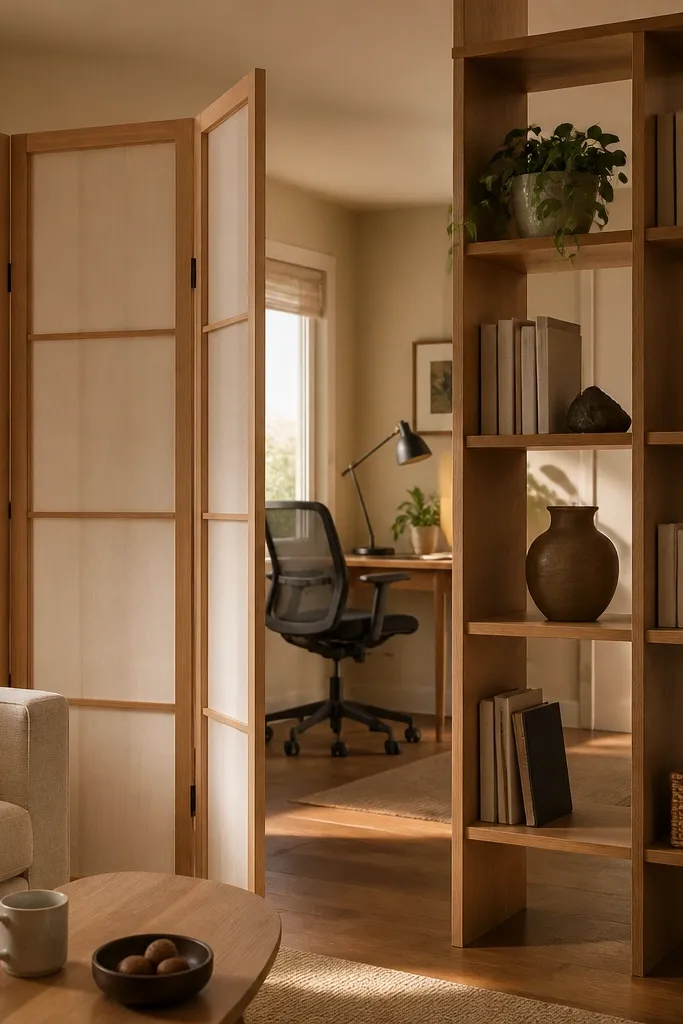
This is the most photogenic way to use Kallax as a separator: make the divider a “spine” of books. A tall 4x2 unit creates a strong vertical rhythm, which makes the separation feel intentional and built-in. Use book stacks that run consistently — same height per column — and keep the rest of the compartments filled with neutral bins or baskets in a single tone. The compartments become a graphic pattern, so the divider reads as decor even when you’re storing stuff. It works best in a living room that needs a clear line between seating and a reading or dining area.
Start with a tall 4x2 so the divider has enough height to visually define a zone. Place it so the book-facing side gets the best light, then build the styling in columns: pick three to five book colors and keep each column within that palette. Fill the remaining compartments with bins that match the same visual height as the book stacks, then top it with one low object (like a ceramic vase) centered on the unit.
Pro tipOrient books upright for height, then add one horizontal stack in the lowest open compartment to break the grid.
Watch outSkip mixed-height book piles across adjacent compartments — it breaks the clean line that makes this divider look high-end.
5. Two-tone Kallax: natural wood + white bins
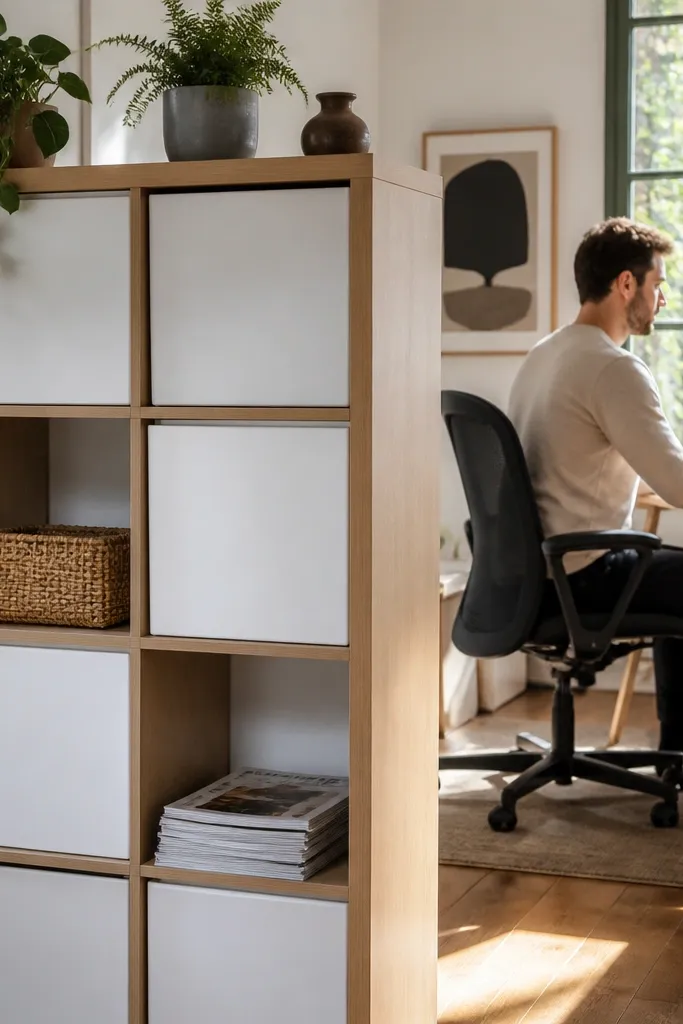
Two-tone is how you get “stylish storage” without spending on custom cabinetry. Keep the Kallax in natural wood or a light oak finish, then use white bins for the majority of compartments. This makes the divider look bright and clean, while the wood adds warmth so it doesn’t feel like a warehouse wall. Leave a few compartments with open storage for items you want to display — like a plant and a stack of art books. The separation is still clear, but the divider doesn’t look harsh. Great for small dining areas that need separation from a kitchen or entry without feeling dark.
Choose the Kallax finish first, then buy bins that match the compartment depth and height. Set the divider so it faces the room with the brighter wall color — white bins look best against light surfaces. Load bins in a consistent pattern (for example, bins in the middle and bottom rows, open display in the top row), then add one plant in a basket-lined compartment and one flat tray on top. Check alignment: adjust bin placement until the top edges form a straight line across the unit.
Use bins with matte fronts, not glossy. Gloss catches light and makes the divider look uneven in photos.
Don’t mix white bin shades (bright white and off-white). They read as different categories on the grid.
6. Linen curtain privacy layer on a Kallax divider
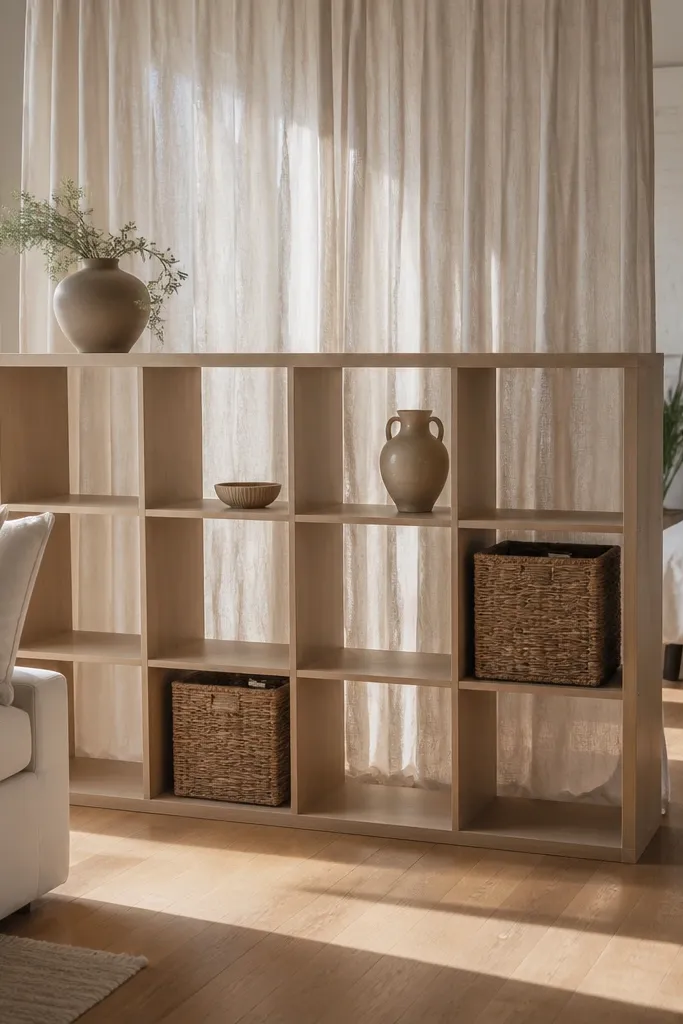
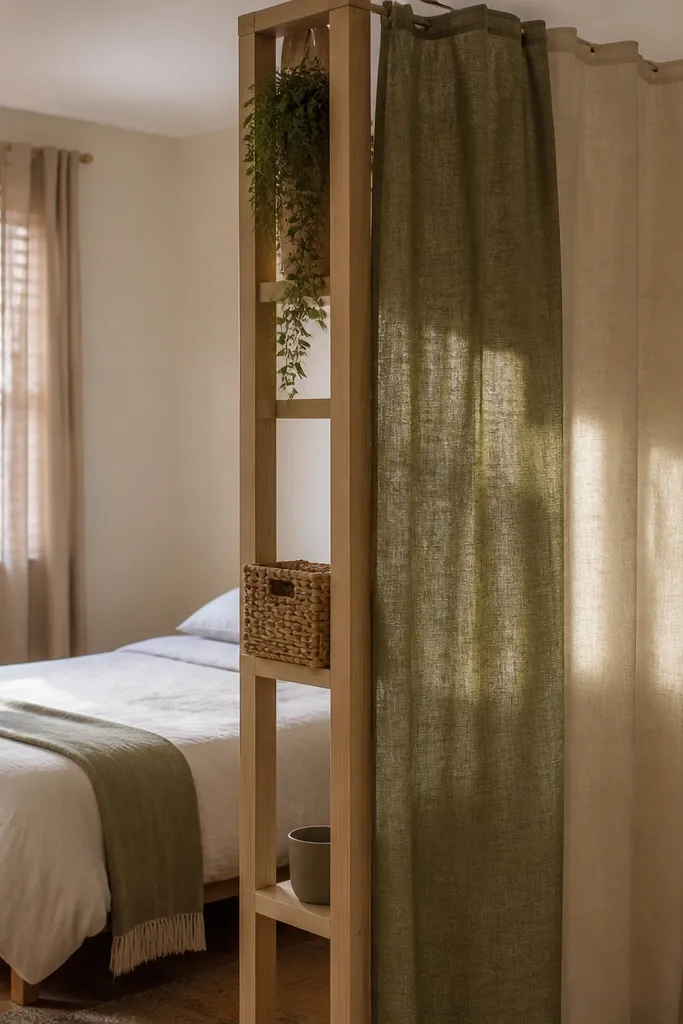
If you need separation more than storage, this is the look. Use a 2x4 Kallax with mostly open compartments, then add linen curtain panels behind it so you get a soft privacy screen. The linen drapes lightly, hiding visual clutter and creating a gentle “room behind the divider” effect. Keep the compartments styled with low, uniform items — like woven baskets, folded throws, or a few books — so the open grid still looks intentional. This works well for studio apartments where you want a sleeping area or office nook that feels private without building walls.
Place the Kallax first, then install two wall-mounted hooks or a slim tension rod behind it at about 78-82 inches from the floor so curtains hang with room to breathe. Hang linen panels so they overlap slightly in the center, then pin or tie the bottom corners with fabric ties so the drape doesn’t billow into the walkway. Style the compartments with a consistent basket color and keep open spaces for a few tall items to maintain the divider’s vertical structure.
Pro tipChoose medium-weight linen that holds shape. Very sheer linen flutters and looks sloppy from angles.
Watch outDon’t let curtain seams sit dead-center over messy compartments. Hide the seams behind the best-looking basket columns.
7. Gallery-wall styling with matching frame photos
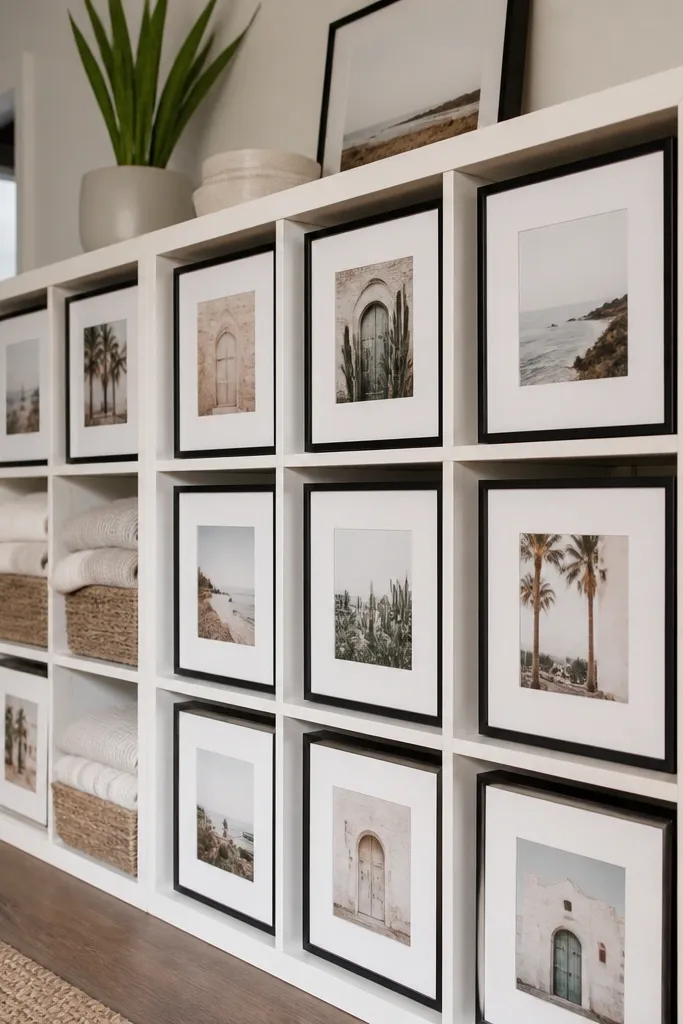
This is how you make a divider feel like decor instead of storage. Use a white or light wood Kallax and fill each compartment with a matching frame or photo insert. When the frames are consistent in size and color (black frames or white frames), the grid turns into a gallery wall that happens to store things. Keep only a few compartments for baskets, and use the rest for framed photos, small art prints, or slim keepsake boxes. It’s ideal for entry-to-living separations where you want the divider to impress right away and look good in photos.
Pick a frame size that fits your compartment opening with minimal gaps, then buy frames in a single finish. Place the Kallax facing the main viewing side, then map your layout before filling: alternate frame compartments with one or two basket compartments for balance. Insert photos in a consistent theme (family photos, travel prints, or monochrome art) and keep the basket color neutral. Finally, add one larger framed piece on the top surface or use a shallow tray to ground the top line.
Use black frames for high contrast if your wall is warm white or cream.
Avoid mixing frame finishes (wood + black). The divider reads mismatched instantly.
8. Rug-backed divider: float it over a runner
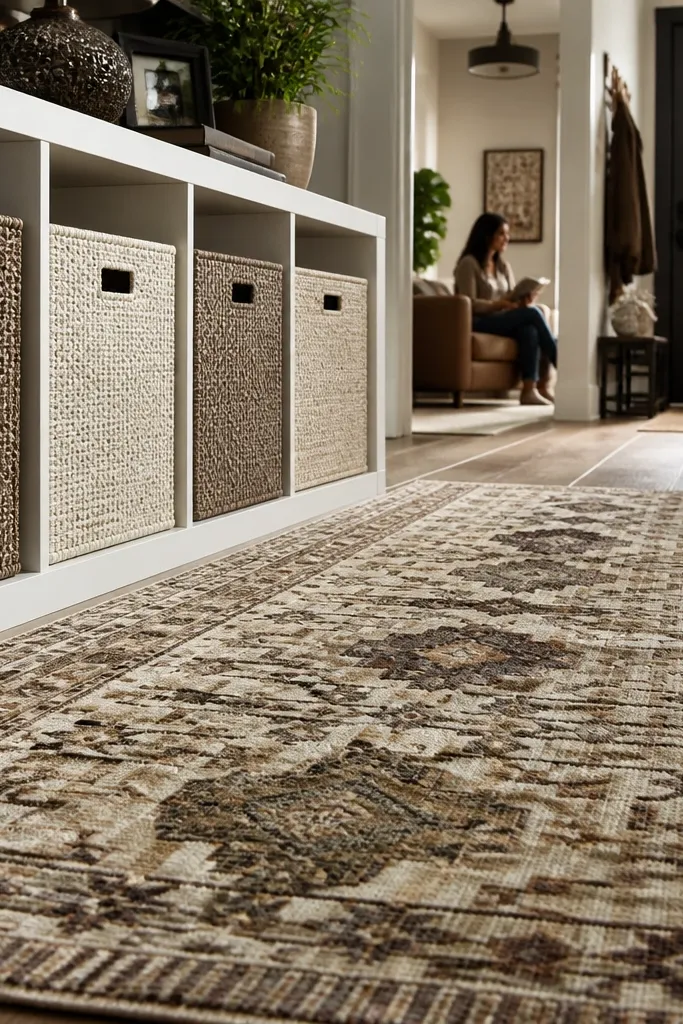
This look uses the floor to make the divider feel like part of the room layout. Put the Kallax on top of a low-pile runner or a patterned rug that repeats a color in your bins. The rug acts like a “baseboard” visually, so the divider doesn’t look like it’s sitting alone. Fill compartments with baskets that match the rug’s palette: one neutral tone plus one accent (like black and sand, or cream and muted olive). The result is a separation that looks anchored and styled, not temporary. Works best when the divider sits in the middle of a room or between two seating zones.
Choose a runner that extends at least 10-14 inches beyond each side of the divider so it frames the base. Place the Kallax centered on the rug, then build the compartments with basket colors pulled from the rug pattern. Keep top styling minimal: one long tray or a single object in the center. If the divider blocks a pathway, keep the rug edges visible so the room still feels navigable.
Match one basket color to the rug’s dominant light tone, not the loudest pattern color.
Don’t use a high-contrast rug if your bins are already busy — the divider grid will fight the floor.
9. Mirrored insert compartments for instant brightness
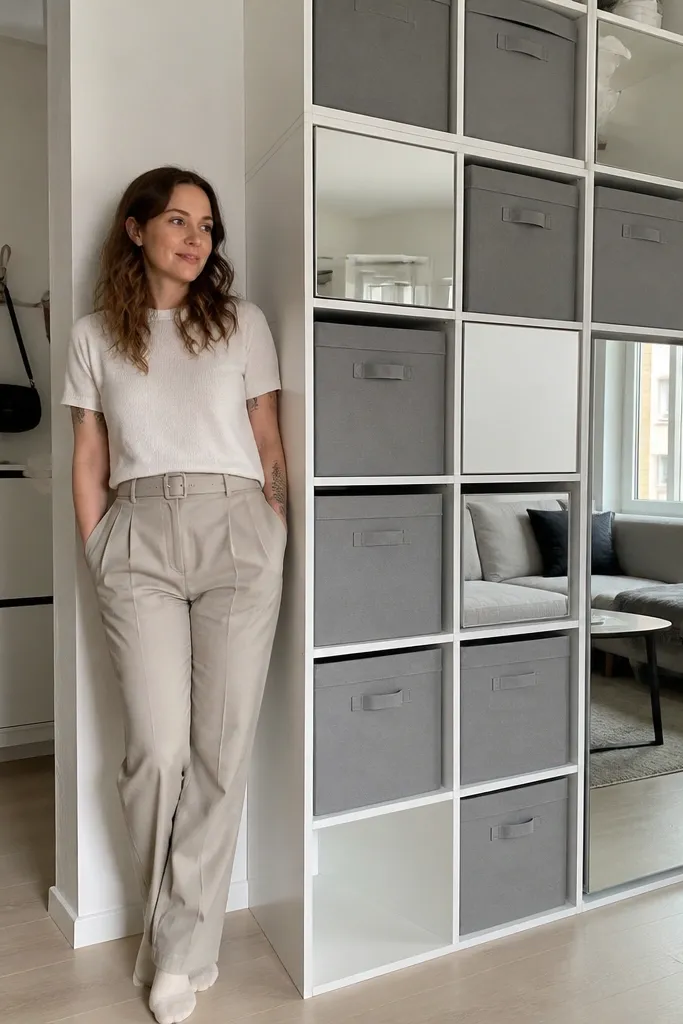
Mirrors in compartments make a small divider feel bigger without changing the footprint. Use a Kallax with mostly closed storage, but add mirrored inserts to a few compartments so the room reflects light and makes the separation feel less heavy. The trick is to limit mirrors to two or three compartments per row, not every space, so it stays clean. Pair mirrored inserts with woven baskets or matte fabric bins in sand or charcoal. This is great for narrow studios or hall-adjacent living areas where you want separation but the room needs light bouncing back into it.
Decide how many mirrored compartments you want — two or three per unit looks designed. Measure the compartment openings and cut mirror panels to fit with thin adhesive mirror mounting tape or a clear mounting frame insert. Place mirrored compartments at eye level when you’re standing in the room, then fill the rest with baskets for clutter control. Finish by adding a simple top tray in a matte finish to keep reflections from looking scattered.
Use mirrors with a clean edge and minimal bevel. Heavy bevels can look dated and distract from the grid.
Don’t put mirrors next to shiny glossy bins. The glare stacks and looks messy.
10. Pegboard-backed Kallax for organized craft storage separation
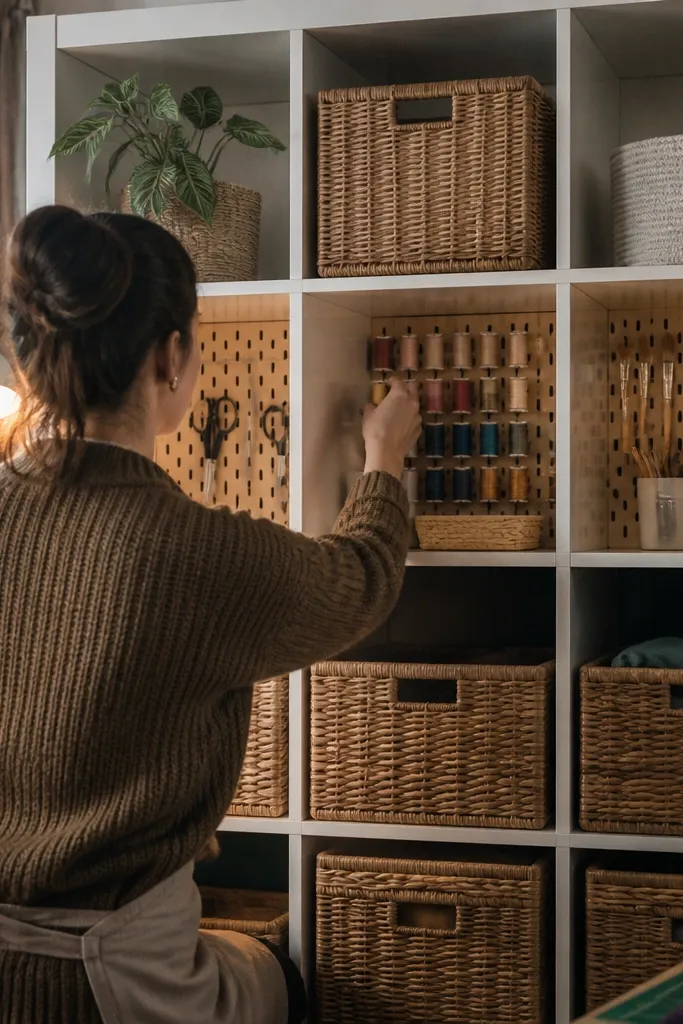
This turns separation into a working wall. Attach a pegboard backing behind or inside selected compartments so tools, scissors, and small accessories have a place, while the front still shows neat bins. It’s visually strong because the pegboard creates a grid texture behind the Kallax openings, and you get a clear system for supplies. Use a limited palette: black pegboard + natural wood accents, then label bins with simple tags in one font style. This setup works for a craft corner, kids homework zone, or a small home office where you need the divider to help you stay organized.
Pick a Kallax size where you can reach the compartments comfortably from both sides — a 2x4 is easiest. Install pegboard behind the unit by mounting it to a backing frame or using a compatible insert panel that sits flush; secure it so it doesn’t sag. Then add small hooks and a few horizontal ledges for heavier items like scissors or rulers. Fill remaining compartments with labeled bins, and place the divider where the crafting side gets the best light.
Label only the bins that hold small items. Overselling labels makes it look like storage, not decor.
Skip loose hanging tools. If they sway, the divider looks chaotic instead of organized.
11. Sliding curtain panels on a Kallax track for a true room split
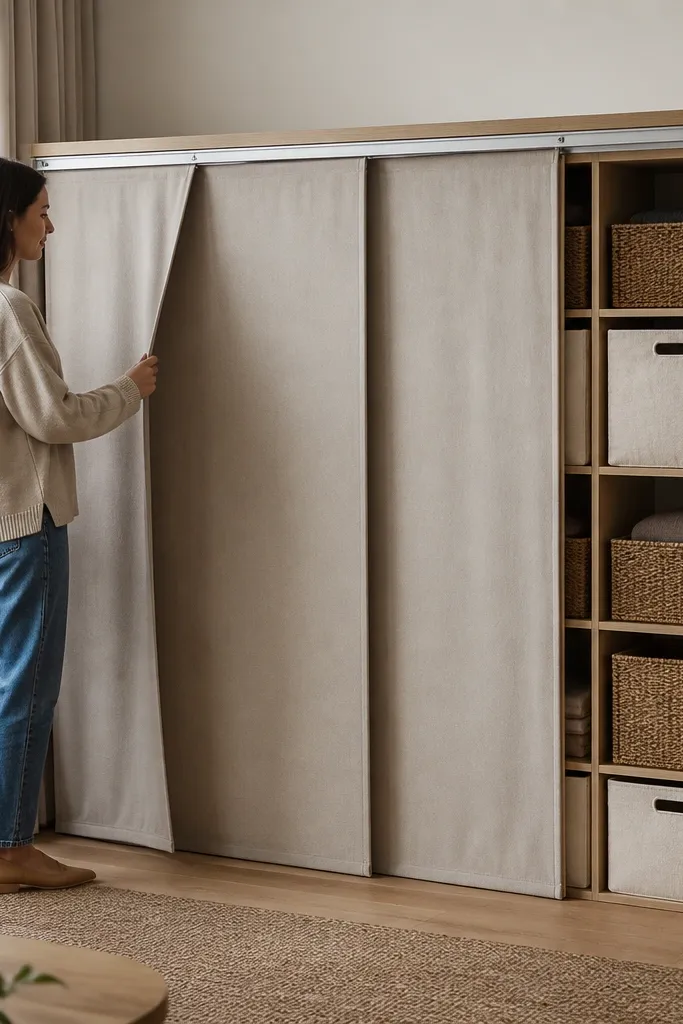
For real separation in a small space, this uses motion. A Kallax set up with sliding curtain panels lets you open the space for daylight and close it for privacy. The look stays clean because the curtain edge hides the compartments you don’t want to see at night. Choose linen or cotton panels in a light neutral, and keep the Kallax compartments styled behind them with baskets and a few display items. It’s perfect for separating a sleeping nook from the rest of a studio without building a permanent wall. The curtain line also adds a strong horizontal visual that balances the Kallax grid.
Mount a slim track above the divider span (or across two wall points if you’re not mounting to the Kallax itself) so panels slide smoothly. Hang two curtain panels sized to overlap slightly, then pull them closed to cover the compartments you want hidden. Style the visible compartments first, then fill the covered ones with uniform baskets so closing looks good. Allow clearance for the curtain to slide without scraping bins — leave about 1 inch gap between panel hem and the front of the Kallax.
Use curtain panels with a top pocket for the rod or rings. It keeps the edge straight and photo-ready.
Don’t hang curtains too short. A short hem makes the divider look unfinished and cheap.
12. Two Kallax units back-to-back with a single long top shelf
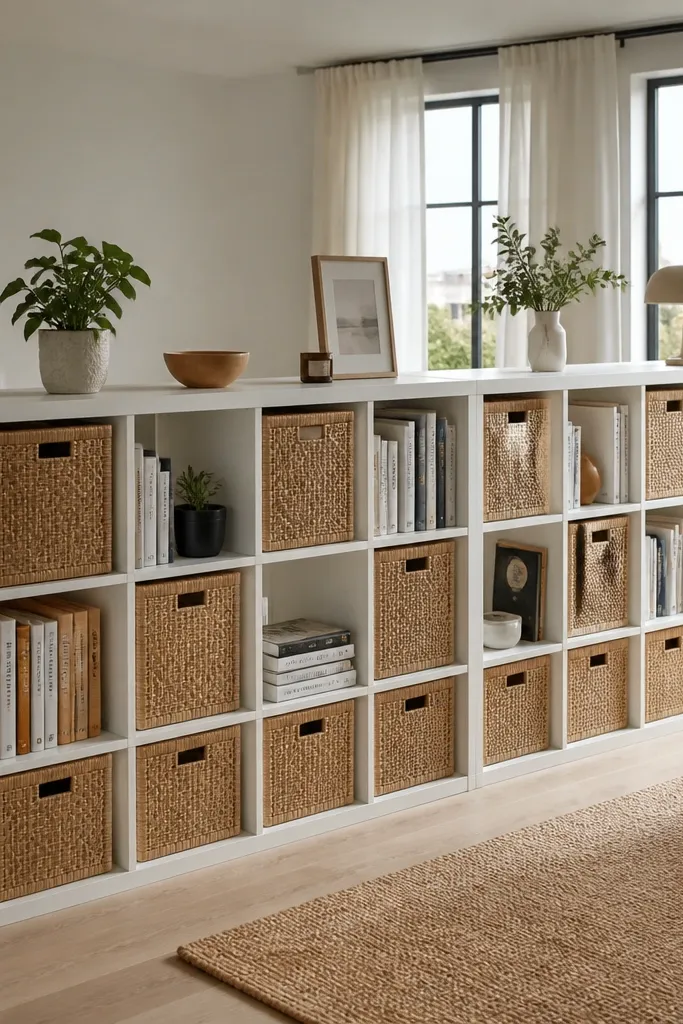
This is the “built-in” look for small spaces. Use two Kallax units back-to-back so the storage is hidden from direct view from most angles, and add one long top shelf to tie them together visually. The shelf makes the whole divider feel like a furniture wall, not two separate pieces. Fill the compartments with matching baskets on both units, then leave a narrow strip open on each side for books or decor so the room still feels breathable. It’s ideal for studios that need a strong separation line between a bed and a living area, where you want storage on both sides without clutter leaking out.
Position two Kallax units back-to-back with a small gap if you need wiring access, then anchor them so they don’t shift (wall brackets are worth it). Install a long top shelf across the two units using brackets or a shelf system that can hold weight. Fill compartments with the same basket sizes across both units for symmetry, then style one compartment column on each side for visual interest. Finally, set the shelf height so it clears doorways and doesn’t block light from nearby windows.
Match basket fronts across both units. That symmetry is what makes it look custom.
Don’t leave one unit styled neatly and the other chaotic. Back-to-back makes mismatches obvious.