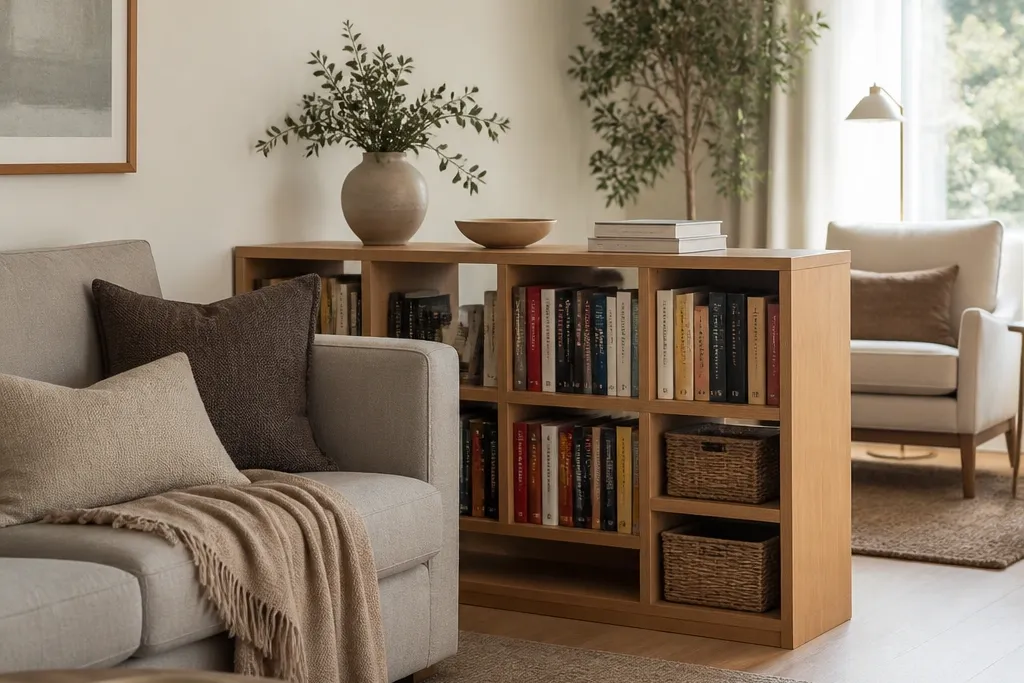
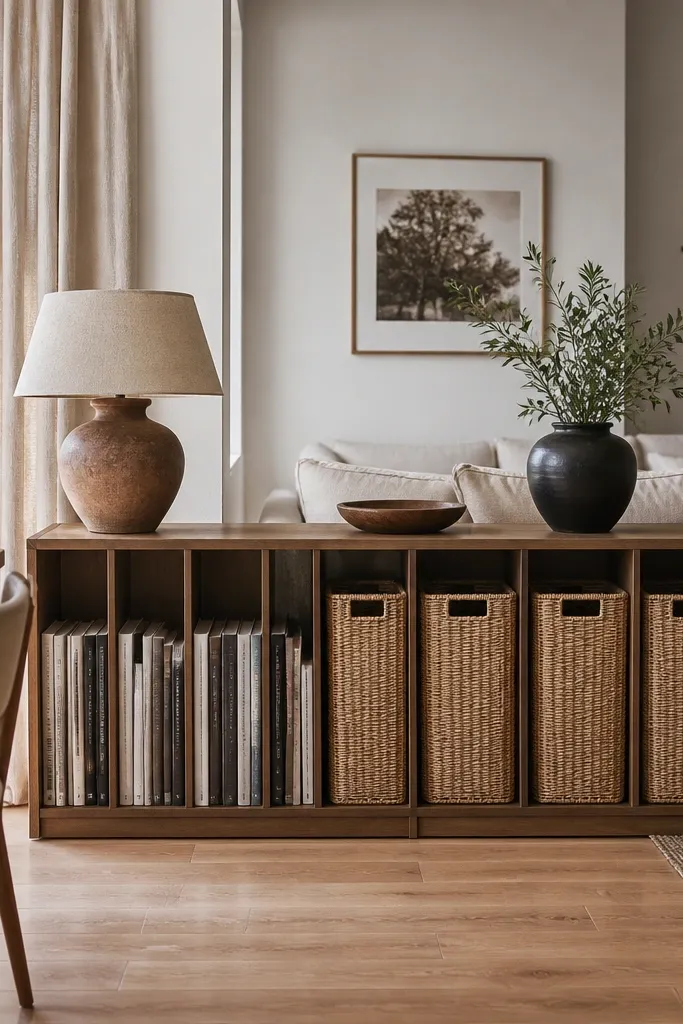
1. Chest-Height Ladder Shelf Divider With Book-Front Styling
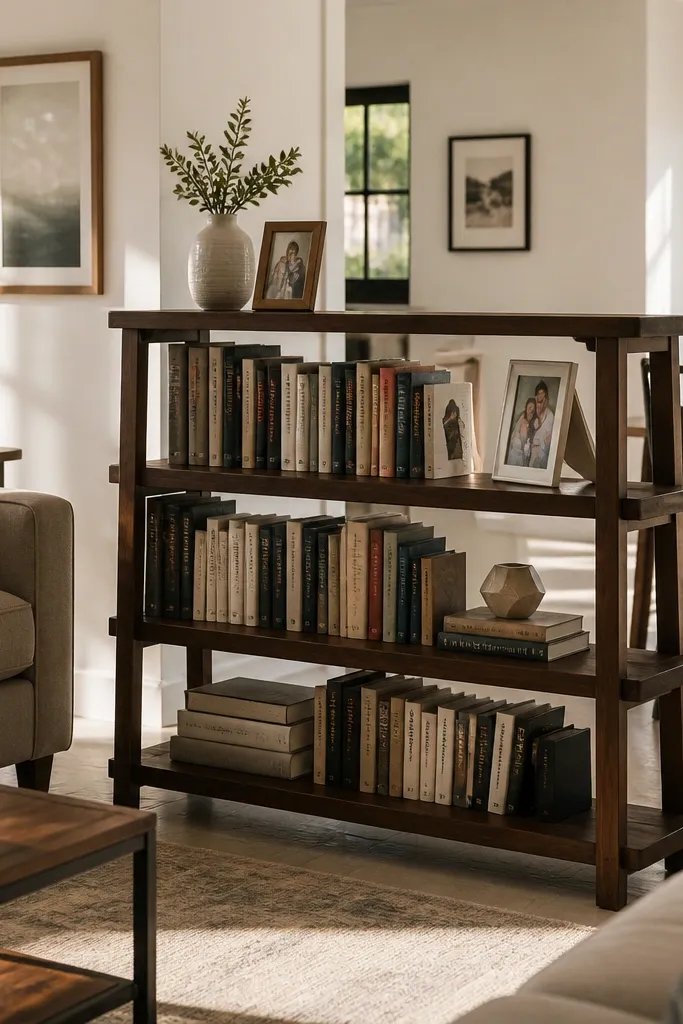
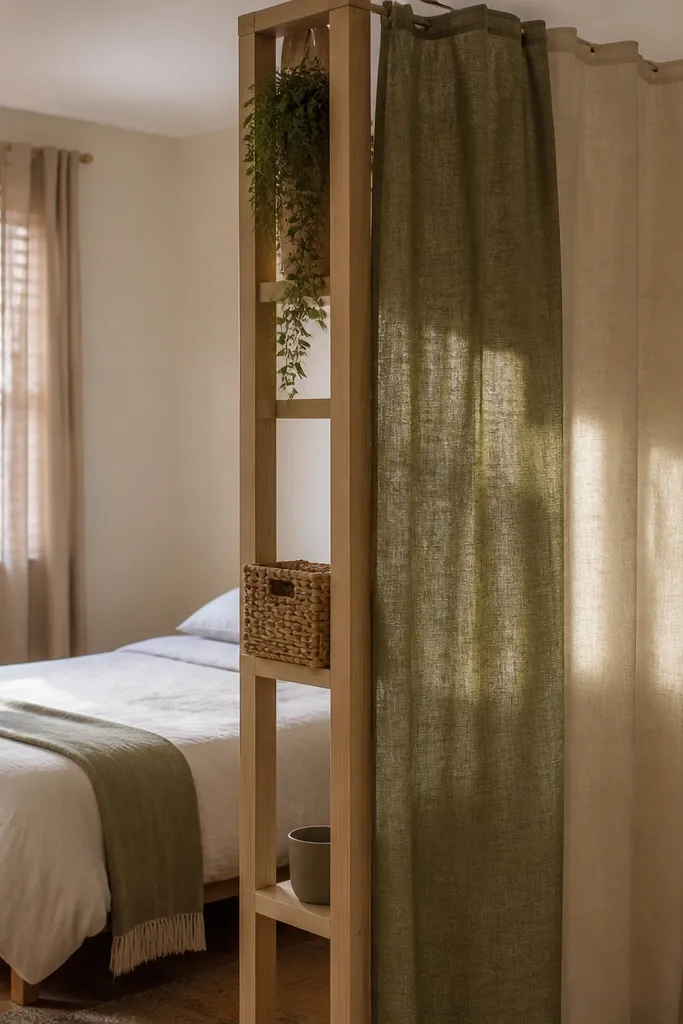
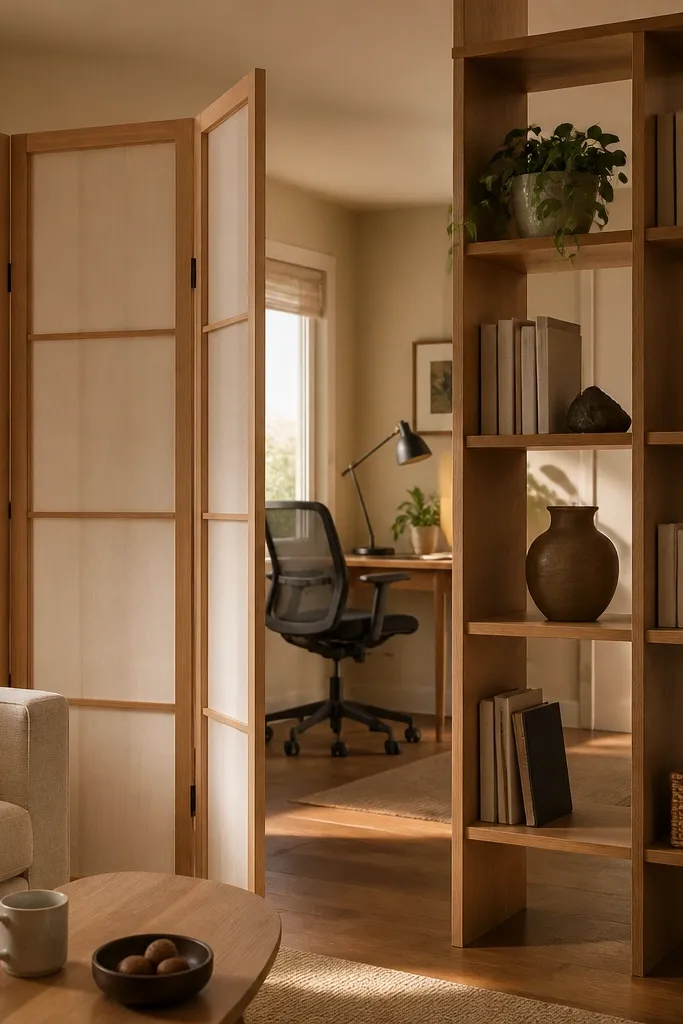
This is the divider I’d start with in a small living room because it separates zones without cutting off light. A ladder shelf is open on the sides, so the room still reads bright even when you’re creating a clear boundary. Keep the shelves around 36-48 inches tall and store books so their spines face outward — the divider becomes a graphic wall of color. Choose a matte finish (white or light oak) so it looks calm rather than glossy and harsh. It’s especially good when you want an “office corner” or reading nook feel inside one room.
Start by measuring the divider footprint where you want the zones. For a ladder shelf, plan for about 24-30 inches of width and place it so you have at least 30 inches of walkway clearance behind it. Then pick shelves with 3-5 rungs or adjustable shelves so you can fit tall books without gaps. Style by placing books by spine color or by height, then top the unit with one tray and one lamp to make the top surface purposeful.
Pro tipUse bookends that match the finish of the shelf so the divider looks like a single design, not a stack of parts.
Watch outAvoid filling every shelf with mixed-height clutter — empty space is what keeps the divider airy.
2. Tall Slim Back-to-Back Bookshelves for a Real Wall Effect
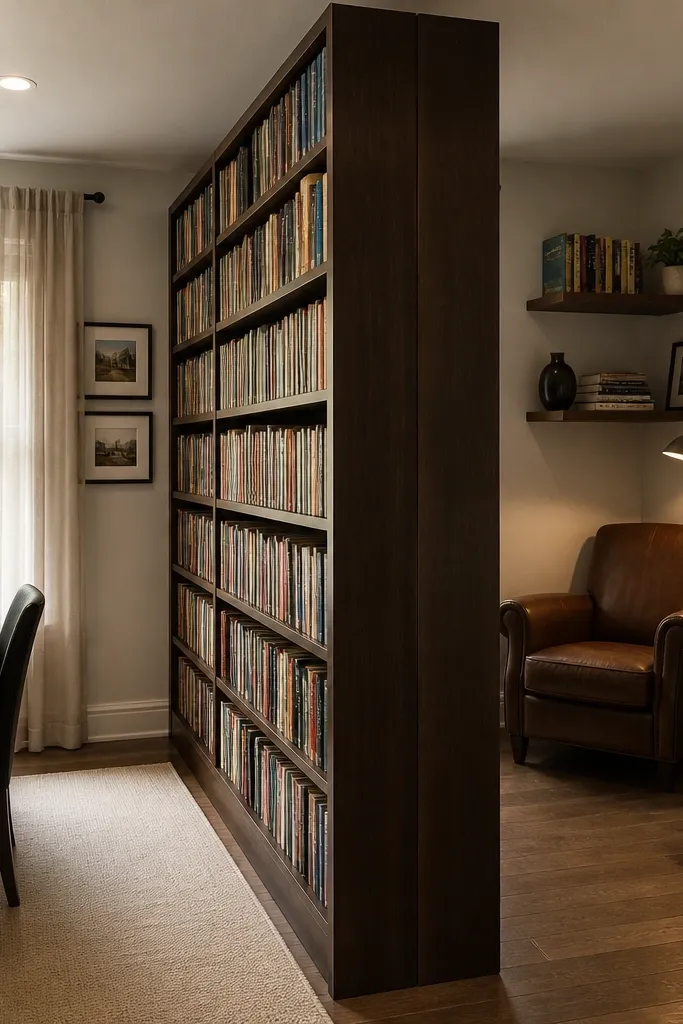
If you need actual separation, tall slim bookshelves do it better than a single bulky unit. Back-to-back placement creates a thicker boundary so sound and visuals feel more contained, while the slim depth keeps the room from feeling swallowed. Aim for shelves that are about 72 inches tall and 10-12 inches deep each, so you get storage and a “wall” feel without taking over the floor. Use the same finish on both so the divider reads cohesive. This setup is great for studios where the divider needs to define a bed, desk, or kitchen-facing line.
Start by choosing a depth that fits your room plan. If the room is narrow, stick to 10-12 inches deep units and leave at least 32-36 inches of walkway between the divider and the nearest furniture. Place the first bookshelf, then push the second directly behind it so the backs meet or nearly meet. Style one side for reading access (spines outward), and the other side for storage (mix stacks with a few visible book sets) so both sides look intentional.
Add a thin rug under the divider line to visually anchor the “wall” and stop it from floating.
Skip mismatched heights or finishes — two different tones read messy fast, especially in photos.
3. Open Cube + Closed Cabinet Combo Divider
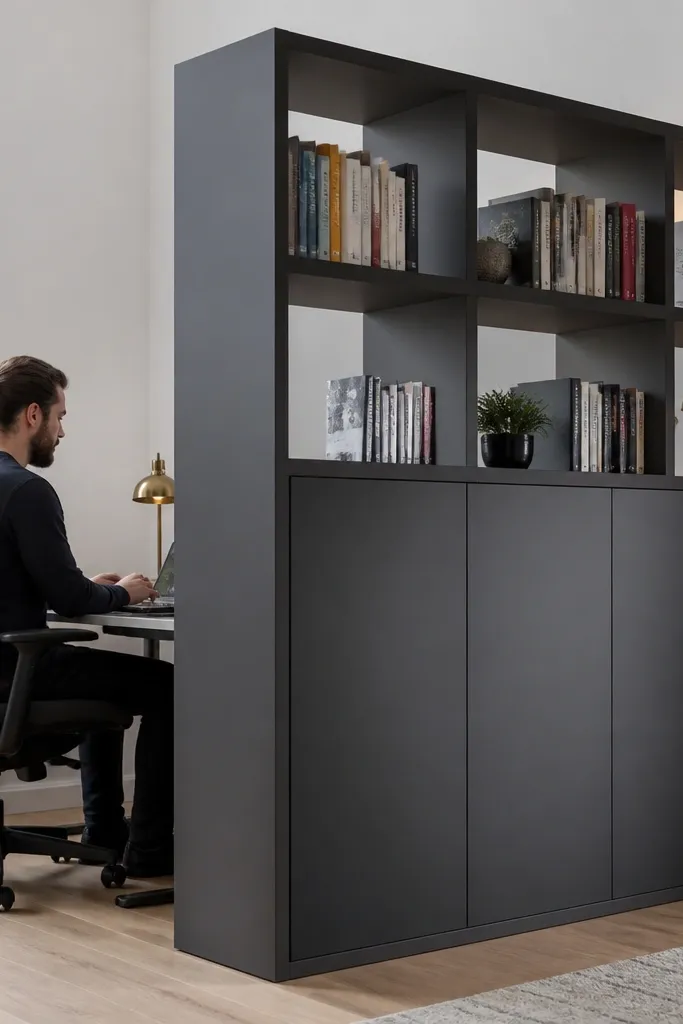
This divider is for people who hate dusted clutter. The trick is mixing open cubes (for pretty books and objects) with closed cabinets (for cables, chargers, craft supplies, or anything that looks messy). The visual result is clean because the “mess zone” is hidden, while the open shelves still create the airy, organized look. Go for a unit with a strong grid — cubes around 12 inches wide look tidy in small rooms. Use a medium wood or soft white so the closed doors don’t look like a random storage box.
Start by selecting a unit where the closed section is at least one-third of the height. Place it perpendicular to the sofa or bed so it blocks the line of sight into storage. Then style the open cubes with 1-2 stacks of books per cube, and keep objects to three types max (books, small basket, ceramic). Finally, label or color-coordinate what goes behind cabinet doors so the divider stays useful, not just pretty.
Keep closed cabinet doors a smooth finish and use hardware in a single metal tone like brushed brass or black.
Don’t fill open cubes with random bags — baskets are fine, bags are visually loud.
4. Room Divider With Bookshelves on Both Sides of a Sliding Panel
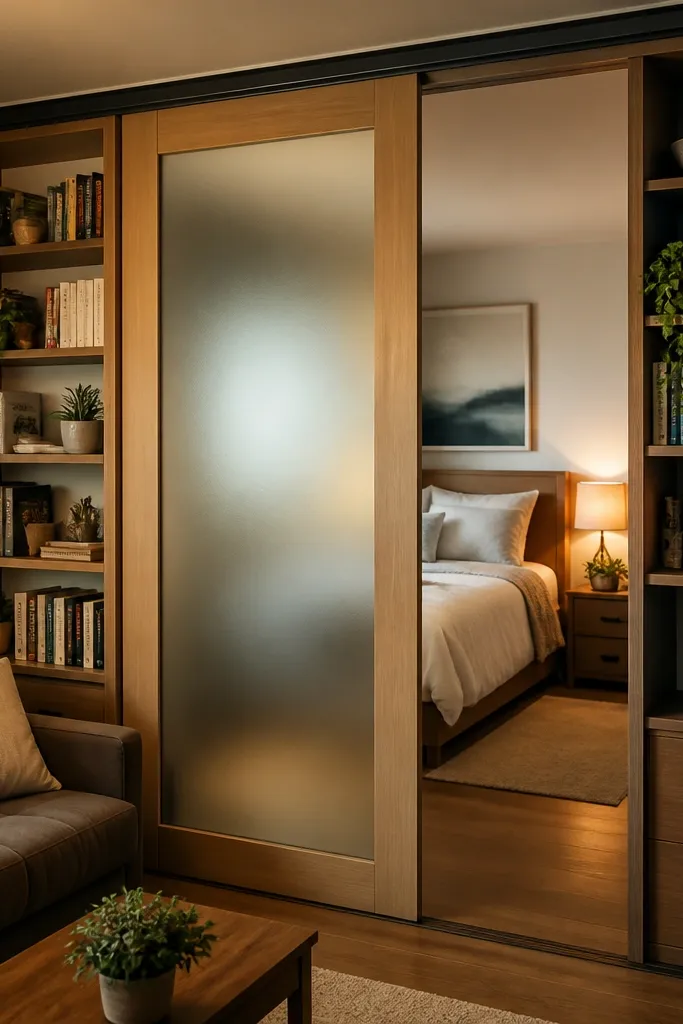
This idea is for small spaces where you need flexibility. Bookshelves on both sides give storage and structure, while a sliding panel in the middle lets you open up when you’re entertaining and close things off when you want privacy. It looks architected because the center panel creates a clear “track” line. Choose a panel in linen fabric or a wood slat screen so the divider feels soft instead of like a rigid wall. This setup works well in studio apartments where a bed or home office needs to disappear at night.
Start by measuring the height for the sliding track. If you can’t mount into studs above, use a ceiling track rated for the panel weight. Place the two bookshelves first with a gap sized to the panel (usually 1-3 inches more than the panel width for smooth sliding). Then install the track and test the slide before styling. Style both bookshelf sides with books facing outward on the top shelves and baskets on the lower shelves so the divider stays tidy.
Pro tipUse a panel color that matches your wall trim so the center reads like part of the room, not an add-on.
Watch outAvoid heavy glass panels in small rooms — they show clutter and create glare.
5. Corner-Stack Divider Using a Single Bookcase Turned 45 Degrees
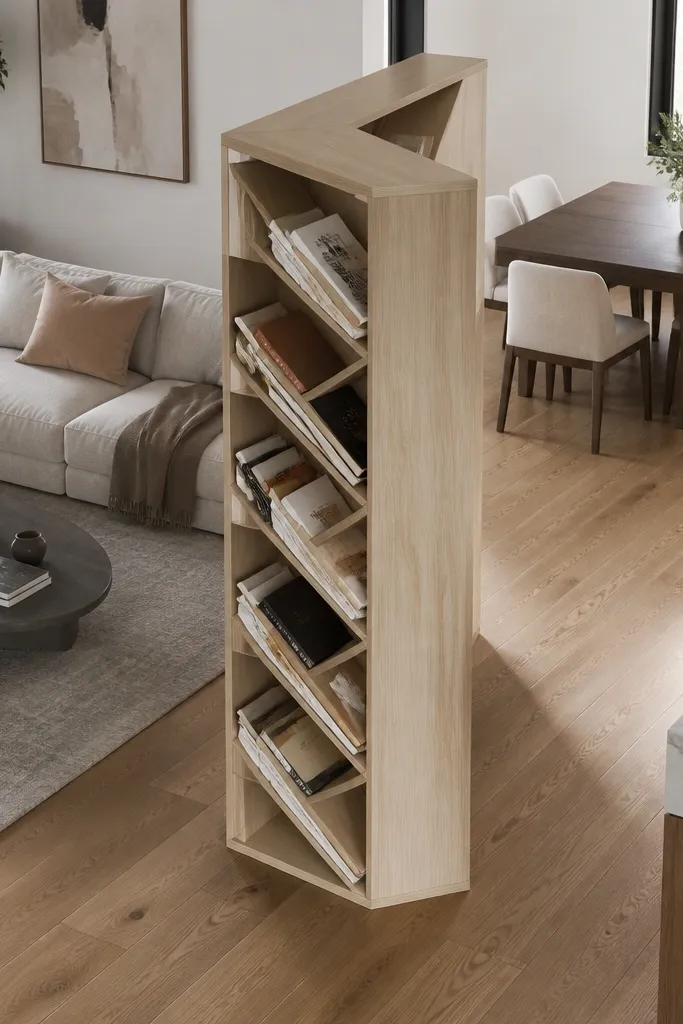
Diagonal placement is a sneaky way to create separation without buying a bigger unit. Turn a bookcase about 45 degrees in the corner so it breaks up the straight sightline from one zone to the other. The room feels more “planned” because the divider doesn’t look like it was shoved in. Choose a bookcase with 4-6 shelves so it reads structured; shallow depth helps too. This is best for small dining-living combos where you want to visually separate seating from the entry or kitchen line.
Start by marking the corner and measuring the diagonal path. Then choose a bookcase depth under 14 inches so you don’t choke the walkway. Place it so the shelves face into the room zones you want to separate, and keep the top shelf aligned with nearby furniture height for a cleaner visual line. Style by putting tall books on the bottom shelves and lighter decor on top, then leave one shelf mostly open so the divider doesn’t look heavy.
Pro tipUse a runner rug that points toward the divider so the diagonal feels intentional, not accidental.
Watch outDon’t place it flush to the wall if it blocks a door swing or opening — the layout becomes annoying fast.
6. Double-Deck Divider: Low Bookshelf Base With Tall Decorative Shelves Above
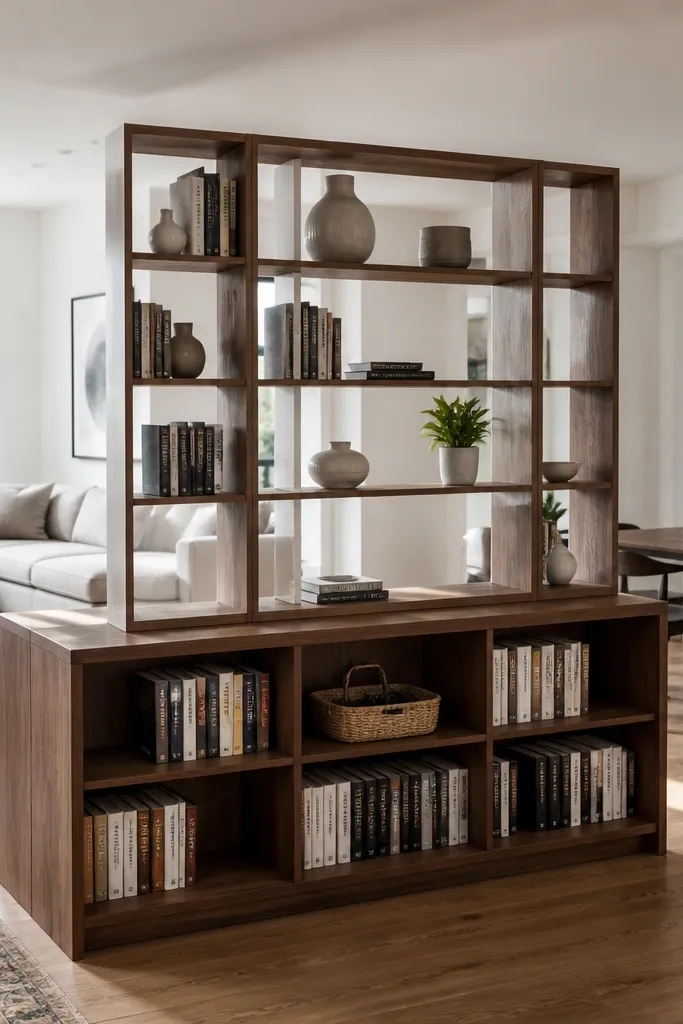
This layered approach gives you separation plus storage without making the entire divider one heavy block. Keep the base bookshelf around 28-32 inches tall for everyday access and use the taller section above for books you don’t reach for daily. The visual trick is stagger: taller shelves sit higher, so the lower zone stays open and the room doesn’t feel top-heavy. Pick a consistent material for both pieces — same wood tone or same paint color — so it reads like one system. This is ideal for apartments where you want an entry-to-living transition that still feels light.
Start by finding two shelf units that match in width or can be aligned to the same stud spacing. Secure the lower unit first, then measure the gap to fit the upper unit without wobble. Use a level and shims if the floor is uneven. Style the base with baskets and a few books stacked horizontally, then place vertical book rows on the taller shelves. Leave the topmost shelf with one larger object, like a tall vase or framed print, so it doesn’t look cluttered.
Pro tipColor-match the basket textiles (cream, black, or natural) to keep the divider calm from every angle.
Watch outAvoid mixing two different finishes like walnut and white in the same divider — it reads like two purchases, not a plan.
7. Slatted Wood Shelf Divider With Thin Books and Airy Spacing
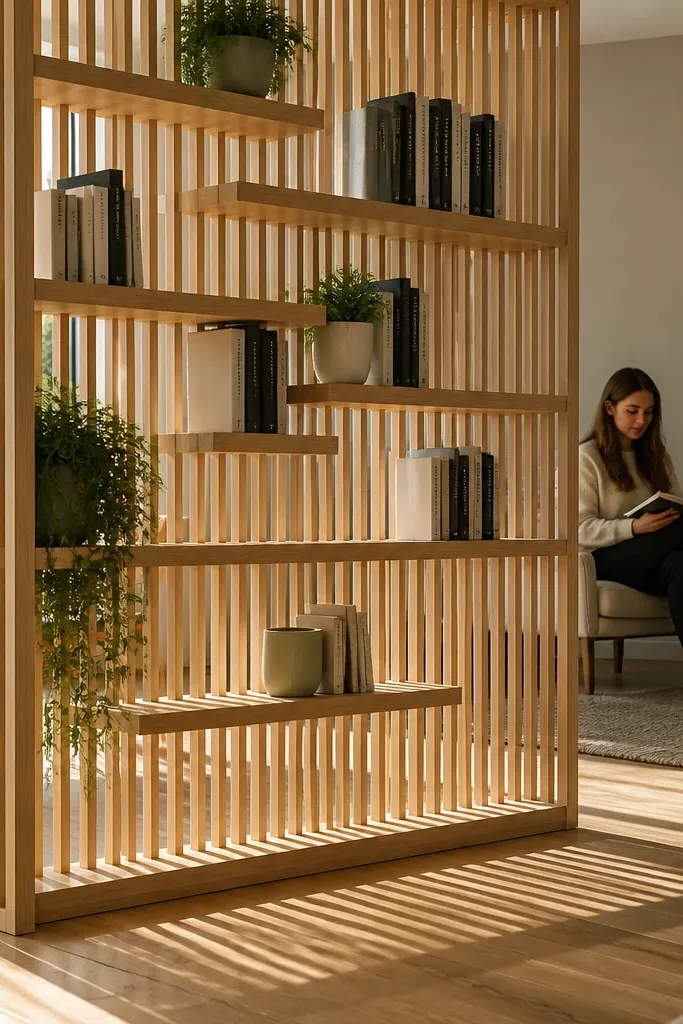
Slats add texture and softness, which matters when you’re dividing a small room. Because the shelves are open and the lines are thin, it feels more breathable than a solid bookcase. This works especially well for people who want to display books without cramming them. Use a light wood or pale stain and keep the book sizes consistent — thin paperbacks and slim hardcovers look best. It’s a good pick for bedrooms or reading corners where you want separation but still want the room to feel calm.
Start by choosing a slatted unit with enough support that books don’t sag. Place it perpendicular to your bed or chair so it blocks the main sightline but doesn’t block a window. Then style by leaving one slat gap between book stacks so the divider has rhythm. Finish with a small tray on top that holds a single lamp or candle holder. If the room is bright, avoid glossy varnish so the slats don’t glare.
Pro tipUse fabric book sleeves or wrap covers in solid colors for a cleaner, more uniform look.
Watch outDon’t put oversized thick books in every slot — it makes the slatted divider look cluttered and uneven.
8. Tall Bookshelf Divider With Built-In Photo Rail Styling
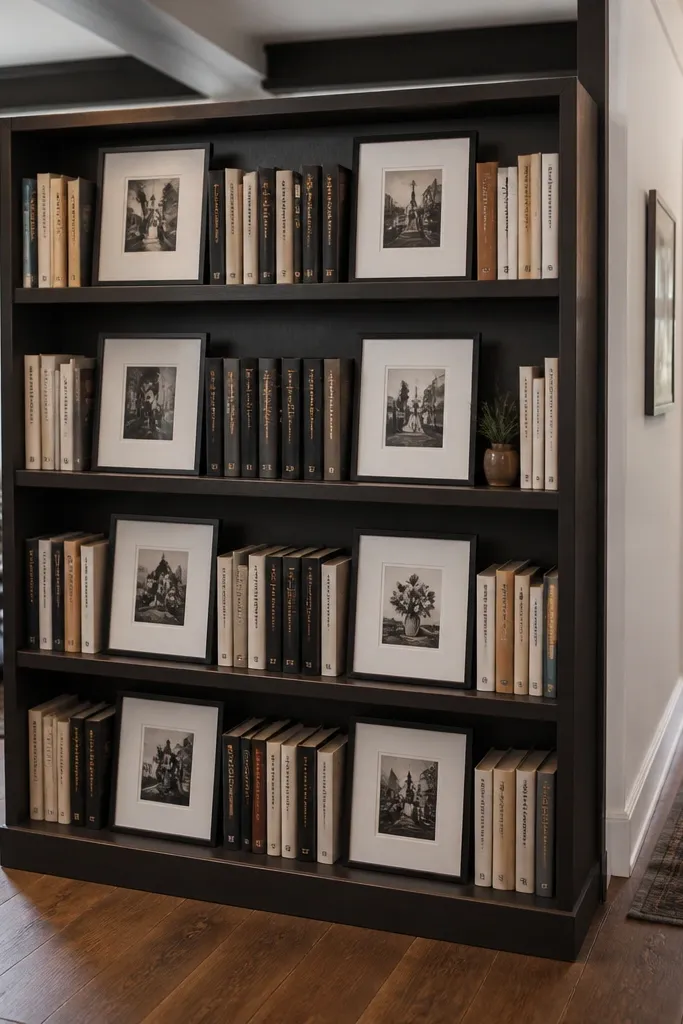
This is a styling-first divider idea. Add a consistent “photo rail” line across the shelves using frames that match in size or color — black frames, white mats, or natural wood frames. It makes the bookshelf look like a designed wall instead of a random storage shelf. Keep the bookshelf height around 66-72 inches so the line of frames reads intentional. Use neutral books in the same color family so the frames stand out. This works well in living rooms and hall-adjacent spaces where you want the divider to look like decor.
Start by picking frame sizes that repeat (for example 8x10 and 5x7 mats) so the rail looks clean. Place the bookshelf so the photo rail sits at about eye level when you’re standing — typically around 60 inches from the floor to the center of the frames. Then style books by grouping: one shelf is mostly neutral spines, another has a single color accent. Finally, add two larger objects at the ends (a clock or tall vase) to frame the middle.
Pro tipUse painter’s tape to plan the frame grid on the shelf before you commit — it saves you from crooked spacing.
Watch outAvoid mixing too many frame colors — three metal tones in one divider looks messy.
9. Bookshelf Divider With Hanging Storage Under the Top Shelf

When you need storage but hate clutter on shelves, hanging storage under a top shelf solves it. The visual effect is lighter because you’re not stacking everything horizontally. Choose a bookshelf divider with an open lower zone or add under-shelf hooks and rails to hang baskets. Use wire baskets or fabric organizers in a single color so it looks cohesive. This works great in small kitchens nearby living rooms or entries where you store mail, umbrellas, kid gear, and tote bags.
Start by selecting a divider with enough clearance under the shelves (at least 10-12 inches) for hanging baskets. Install a simple rail or hooks anchored into the shelf frame, not just thin backing. Then hang baskets by category: mail and documents, small bags, or seasonal items. Keep books on the top shelves with spines outward, and leave the hanging zone for the messy stuff. Use one larger basket for bulk and smaller baskets for quick grabs.
Pick basket colors like black, natural, or cream and stick to them across every hanging compartment.
Skip clear plastic organizers — they show everything and make the divider look busy.
10. Wide Low Bookcase Divider With Two Armchairs Facing Each Other
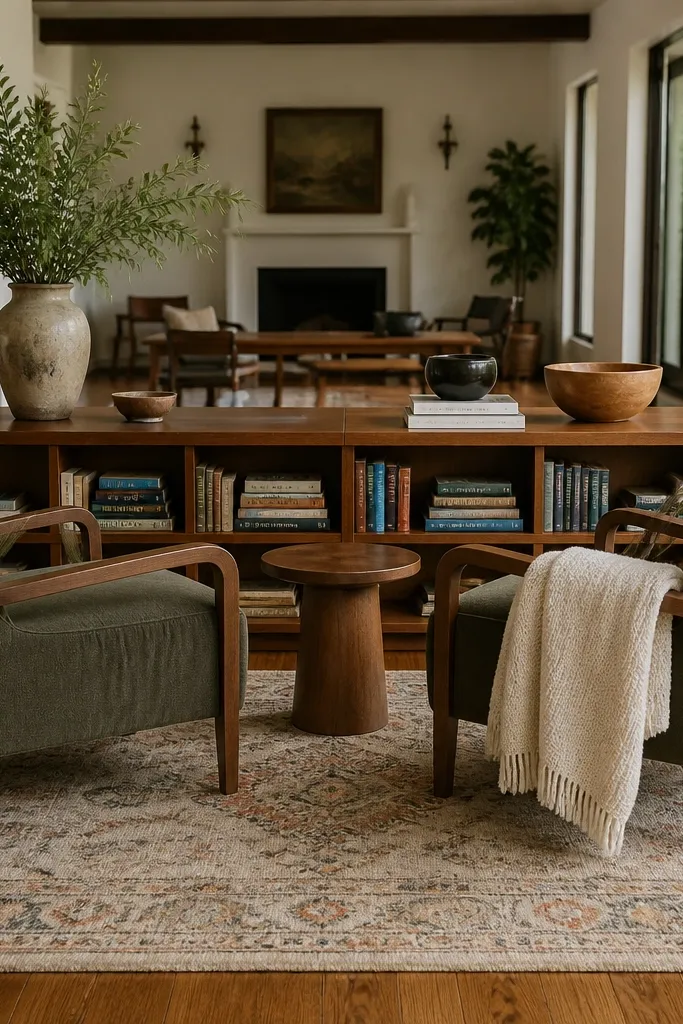
Low, wide dividers are the best move for small rooms that still need a conversation setup. A bookcase around 24-30 inches tall lets you separate seating from another zone while keeping faces visible. Put the divider behind or beside the seating arrangement so it acts like a back wall without blocking movement. Choose a wide unit, around 48-72 inches long, so the boundary feels real. Style with a few book stacks and larger decor items, not a dense grid, so the divider looks designed not stuffed.
Start by measuring the length of the seating area and picking a divider that spans most of that width. Place it so you have at least 30 inches of walking space around the front chair. Style the shelves in bands: one band of books, one band of baskets, one band for larger decor. Add two matching small lamps or candle holders at the ends if the top shelf is visible from both sides. Keep book stacks to 2-3 per shelf so the lines stay clean.
Pro tipAdd a thin curtain behind the divider if you want softness; even a simple white linen panel makes the divider look less “built.”
Watch outAvoid placing a low divider in the middle of a walkway — it becomes a bump hazard fast.
11. Painted Bookshelf Divider in Two Tones With Color-Blocked Spines
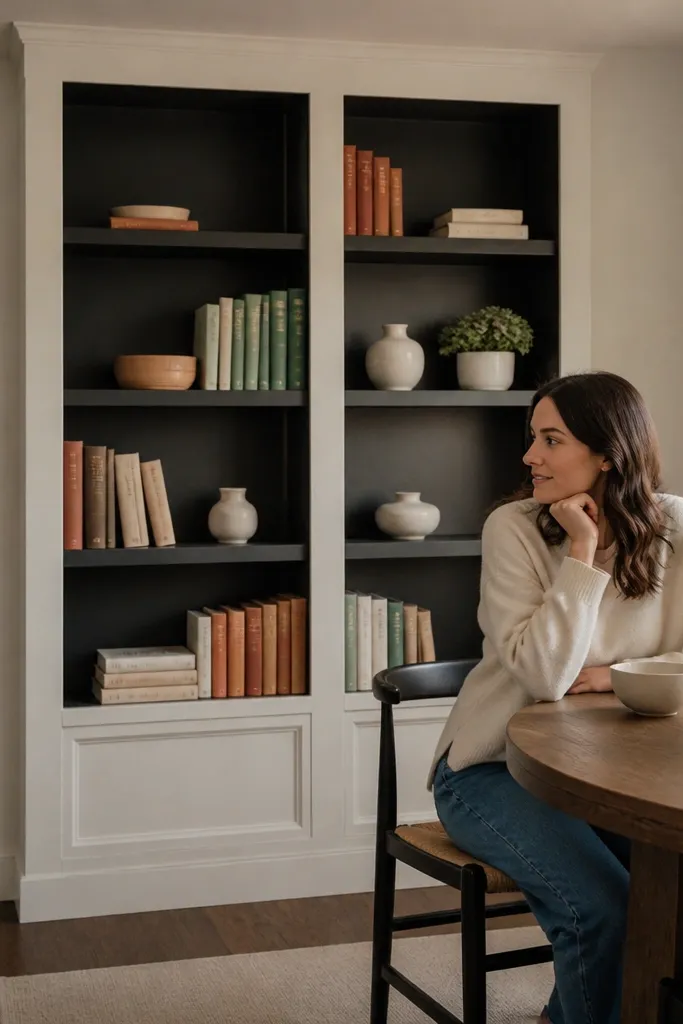
Two-tone paint makes the bookshelf divider look like furniture, not storage. Paint the frame one neutral (soft white or warm gray) and leave the shelf interior in a contrasting tone (charcoal, sage, or a warm wood). Then style books with color-blocked spines so the divider reads like art. This looks extra good in small rooms because your eye sees structure first, clutter second. It also helps if your book collection is mixed — you can control the look by grouping spines intentionally.
Start by choosing a unit that has flat shelf interiors you can paint. Lightly sand, clean, then use a bonding primer and a durable enamel topcoat so it doesn’t scuff. After it cures, place the divider where you want the “feature boundary” — usually behind a sofa or at the edge of a desk area. Style by grouping books into 3 color families per shelf and keep the rest either empty or filled with matching neutral stacks. Finish with one sculptural object on top to anchor the composition.
Use painter’s tape to mask clean edges and create a crisp line between the two paint tones.
Don’t color-block with every color you own — three families per shelf keeps it looking intentional.
12. Bookshelf Divider With Built-In Desk Shelf for a Micro-Office
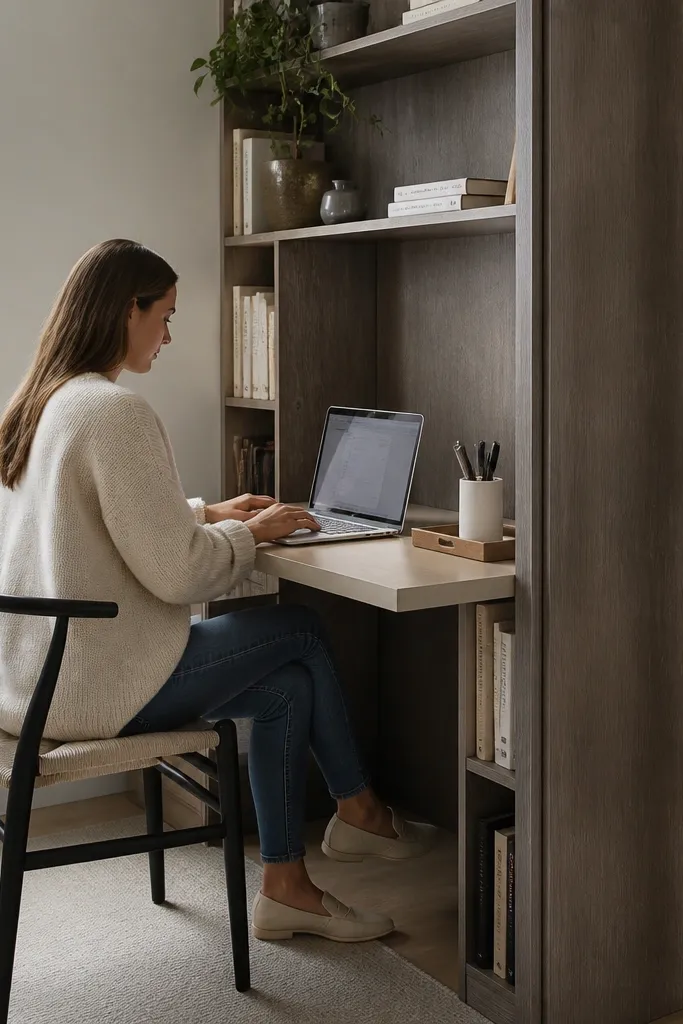
If you’re dividing a small room for work, a bookshelf divider with a desk shelf is the cleanest layout move. You get separation and a functional surface without adding a separate desk that eats floor space. Look for a unit where the top or middle shelf can hold a small laptop tray or a thin desk panel. Keep the workspace surface around 30-32 inches high so it feels like a real desk, not a shelf you crouch over. This idea looks sharp when you style books vertically and keep the desktop area minimal.
Start by measuring your chair height and aiming for a desk surface around 30-32 inches. Then choose a divider with a shelf strong enough for a laptop plus a small lamp (add a thin plywood desk top if needed). Place the divider so the desk faces the window or the main light source. Style the shelves above with a few book categories and a slim organizer, then keep the desk surface to one lamp, one tray, and a notebook. Add cable management with a clip rail under the shelf so cords don’t hang.
Use a light-colored desk surface like white laminate or pale wood so the divider doesn’t look too heavy at work height.
Skip deep shelves as a desk if you can’t reach across comfortably — the divider becomes annoying to use.
13. Woven Basket + Bookshelf Divider for a Soft, Organized Look
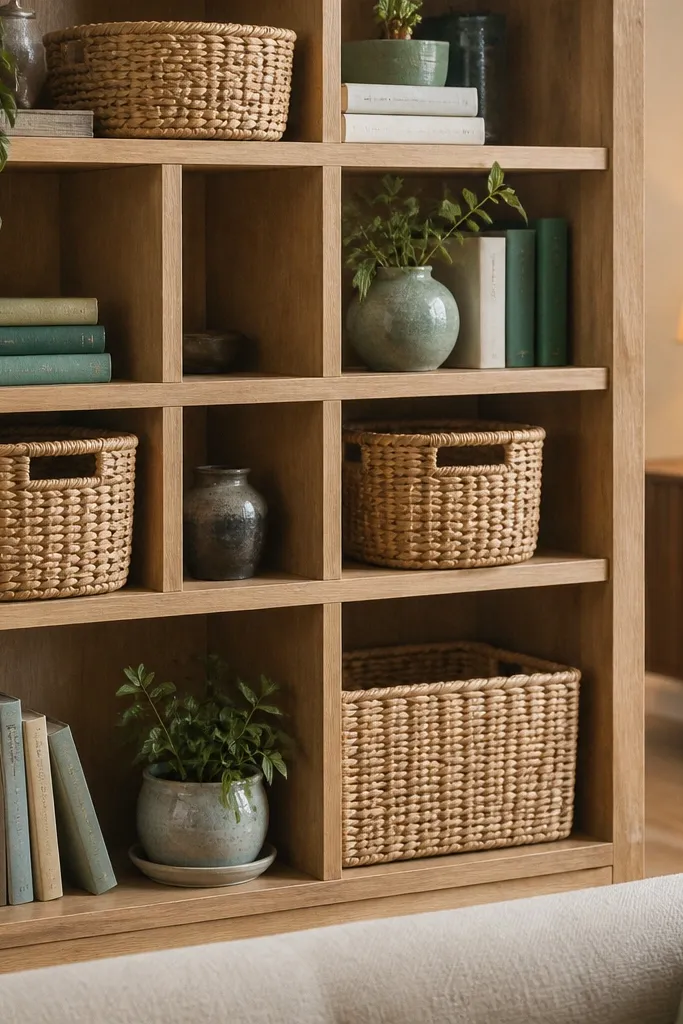
This divider turns storage into texture. Woven baskets hide clutter and make the divider look warm and intentional, which is exactly what small spaces need. Use a bookshelf with open shelves and enough width for baskets — aim for baskets that fit snugly without forcing. Keep books stacked neatly on top of or beside baskets so the divider reads organized. Choose natural rattan or light seagrass baskets to keep the palette airy. This setup is perfect for nurseries, small living rooms, and entry zones where you want practical storage that still looks pretty.
Start by measuring shelf openings so baskets fit without gaps larger than about 1 inch. Then place baskets on alternating shelves and stack books in between. Keep book stacks aligned so spines face outward on every visible shelf. Add one larger basket at the bottom and smaller baskets above so the divider has a clear visual hierarchy. Finally, place a tray on top with one functional item like keys or a small plant.
Pro tipStick to one basket shape across the divider, like round or rectangular, so it looks designed instead of collected.
Watch outAvoid mixing random basket sizes on the same shelf line — it creates visual noise.