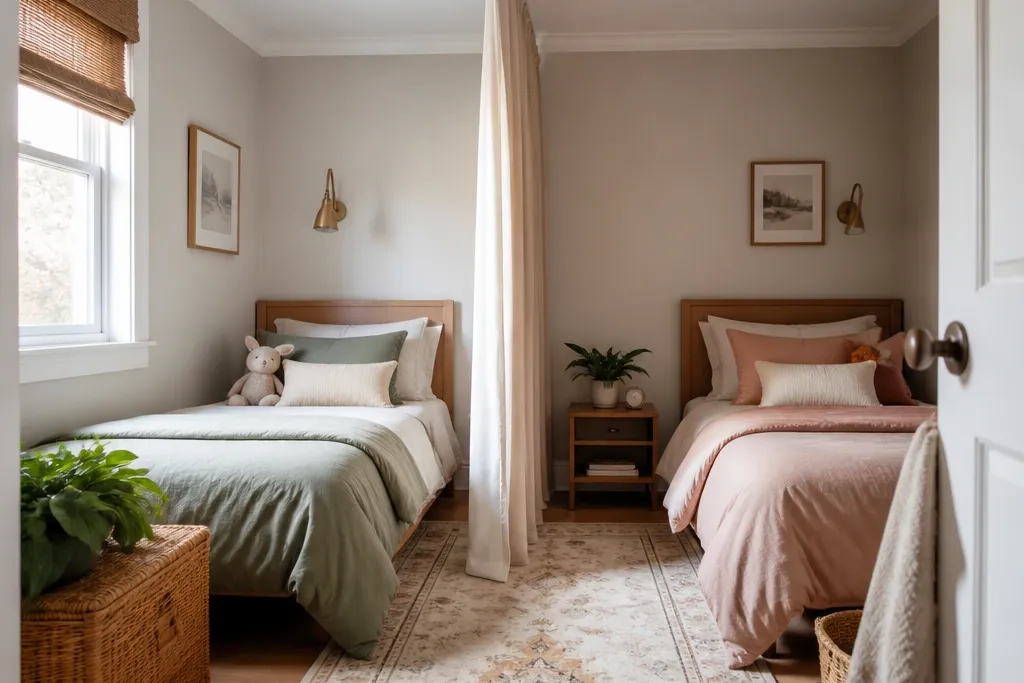
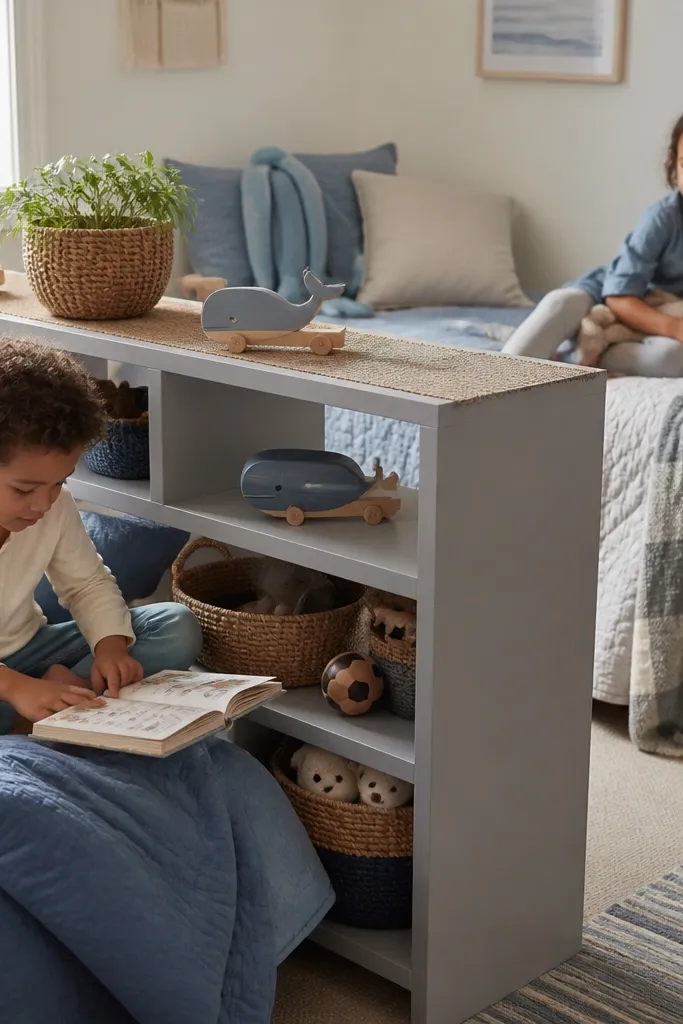
1. Weighted curtain panel with a ceiling track
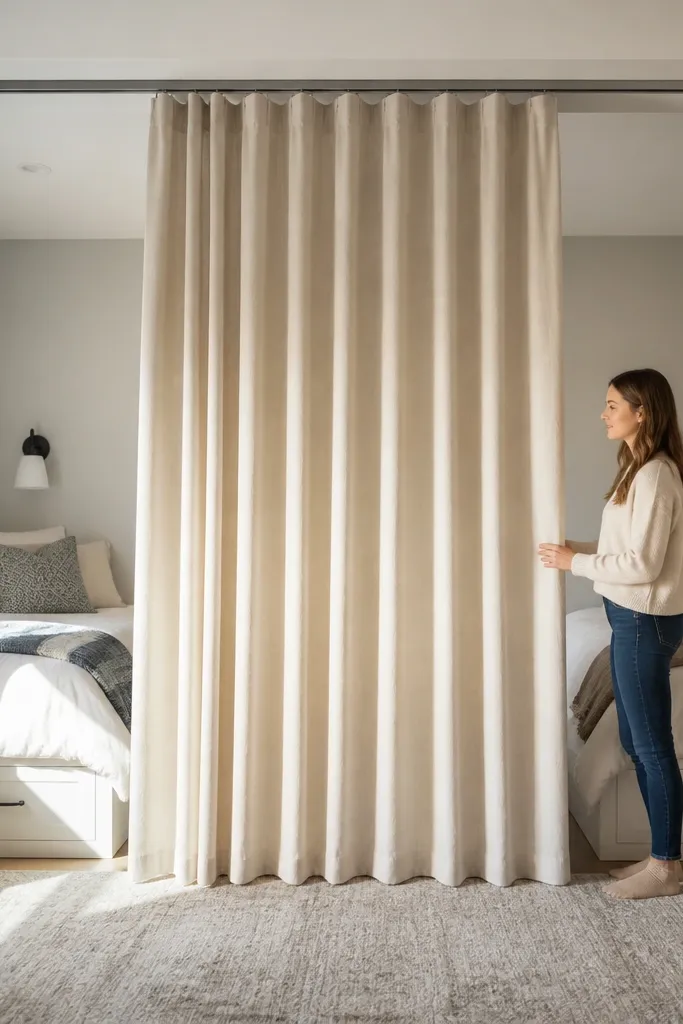
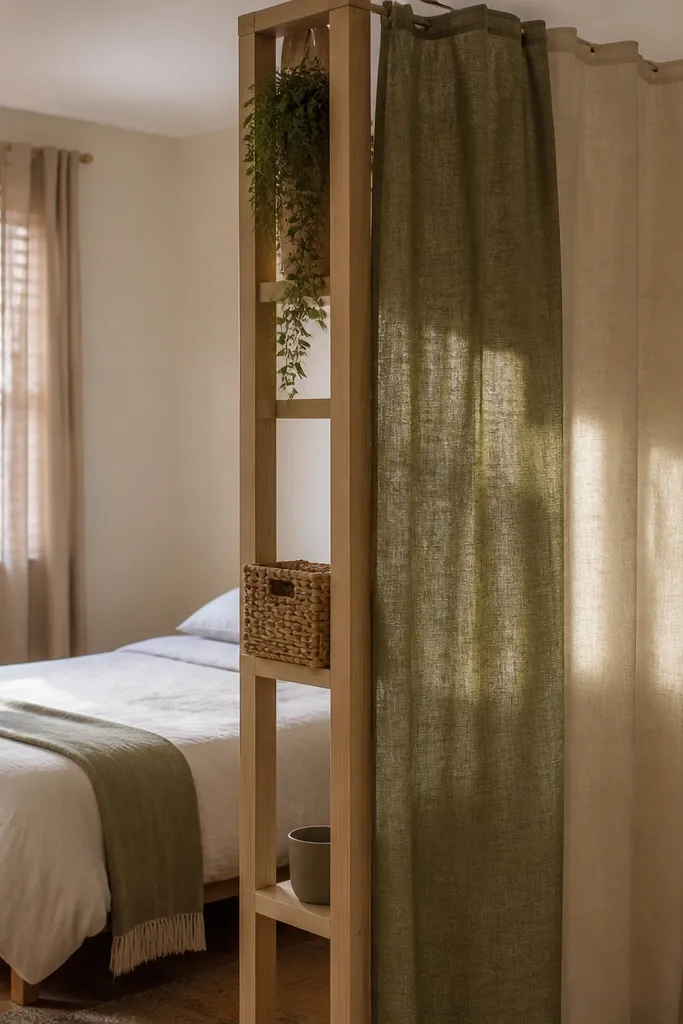
This is the cleanest way to get privacy in shared spaces without losing floor area to bulky furniture. A ceiling track keeps the fabric line straight and makes the divider feel built-in instead of temporary. Go for a heavy curtain in cream, light gray, or soft beige so it blocks distractions during sleep but still looks warm. Add a weighted hem so the panel hangs smoothly and doesn’t billow when kids walk past. It works best between two beds or along a narrow wall where a free-standing screen would feel too wide.
Measure the span between bed edges and add 6-10 inches of coverage past each side so it actually blocks sightlines. Install a ceiling track (or two parallel ceiling rails if the panel is wide) using wall/ceiling anchors that match your ceiling type. Hang a single heavy panel per side with a rod pocket or grommets and use a fabric that feels thick when you pinch it. Finally, test the pull path with both kids at the same time so the curtain opens without hitting a nightstand or door.
Use a curtain color that matches the bedding on both sides, then add one small matching accessory (like a bedside lamp shade) to tie the divider into the room.
Skipping a weighted hem — your curtain will float and look messy the first week.
2. Two-tone slatted wood screen with a fabric runner
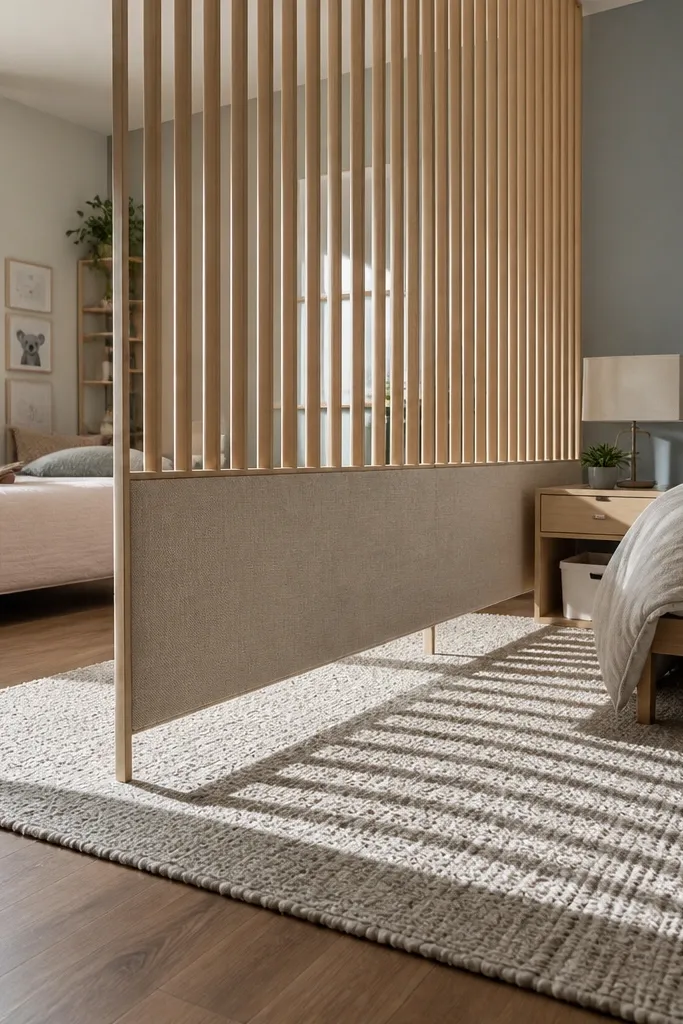
Slatted screens look designed and keep the shared room feeling airy, which matters in small bedrooms. The trick is contrast: use light wood slats (or a light oak finish) and ground the bottom with a fabric runner or rug strip in a warm neutral. The slats create soft separation for sleep and focus, but the gaps let light pass so the room doesn’t feel cut in half. Choose a screen with a slight frame — even a simple rectangular border makes it feel intentional. This divider shines in rooms where desks face each other or where you want quiet separation without blocking the window.
Pick a screen width that covers the main sightline between beds, usually 48-60 inches for twin setups. Place it so the slats sit centered to the “shared” area, not offset near one bed edge. Add a fabric runner under the screen that’s 2-3 inches wider than the base footprint to stop slipping and reduce visual clutter. If the screen is lightweight, anchor the top to the wall with a discreet anti-tip strap or use non-slip pads under the legs.
Match slat spacing to the rest of the room — if you have a lot of stripes or blinds, choose slats with a similar visual rhythm.
Buying a screen with wide, uneven slats — it looks unfinished and doesn’t block distractions.
3. Backless open shelving divider with basket inserts
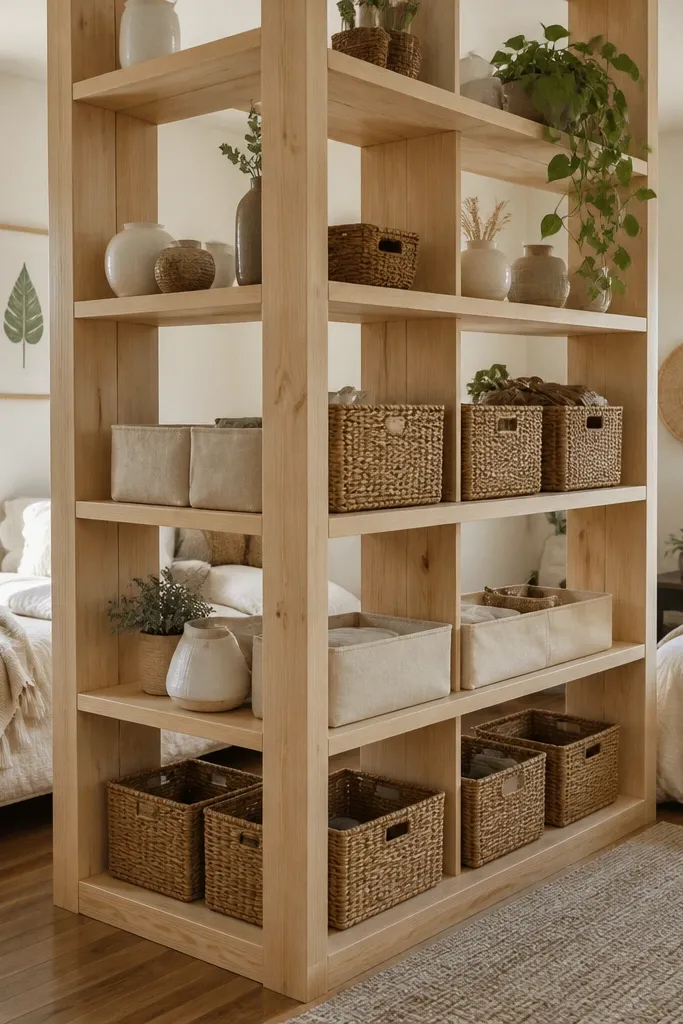
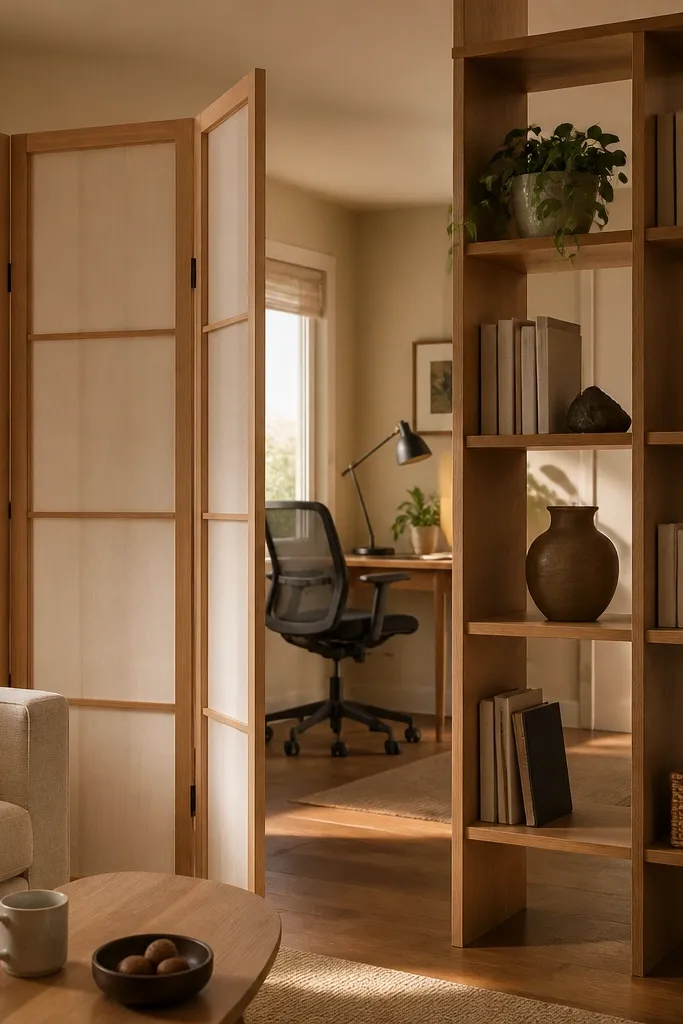
Choose a shelving unit or two matched units total width around 60-72 inches so it spans the shared area. Anchor the shelving to the wall — the divider is tall, and kids will inevitably test it. Add baskets sized to the cubbies so there’s no empty awkward space; aim for baskets that fill at least 80% of each opening. Finish by styling only the top two rows with visible items and keeping the lower rows for daily-use items.
Open shelving gives you separation plus storage, and it keeps the room from turning into a storage disaster. A backless or partially open shelf divider is the best move for small spaces because it doesn’t trap light. Use baskets in matching colors (cream, natural, or muted blue) to hide the mess and keep the look tidy. If you’re dividing for homework, place the shelves so the “quiet side” gets books and supplies inside closed baskets, while the other side gets display items in the open cubbies. This works great between two desks or between a play zone and sleep zone where you want easy reach.
Watch outOver-stuffing open cubbies — the divider turns into visual noise fast.
Pro tipUse the same basket style on both sides to make the divider look like one planned system, not two separate shelves.
4. Pegboard rail divider with fabric bins
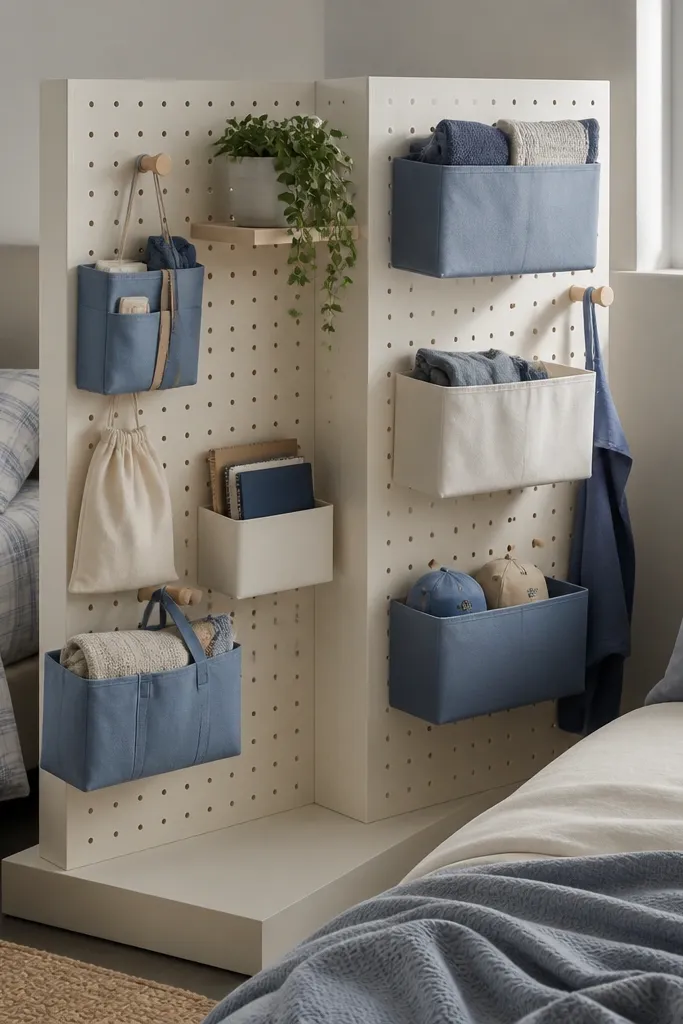
Pegboard looks modern, and it’s one of the best divider options for kids who need visible organization. Instead of hiding everything, you give each side a “home base” for backpacks, art supplies, and small projects. The pegboard structure is light visually but strong in function, and it doesn’t block all light like a solid panel would. Add fabric bins on hooks so the divider stays soft and kid-friendly, not industrial. This divider works best in shared rooms where one or both kids have a desk setup and need a clear place for daily items.
Buy a pegboard panel or a modular pegboard system sized to about 48-60 inches tall and 24-36 inches wide. Mount it to a stable frame or wall support so it doesn’t wobble, then add hooks and a couple of rails for heavier items. Attach fabric bins with grommet hooks or strap clips so they can be removed for washing. Place it at the boundary between beds or near the desk corner, then keep the bottom bins for items kids grab without dragging everything out.
Group hooks by use — one zone for backpacks, one for headphones, one for art — so kids don’t mix up storage.
Hanging heavy items on tiny hooks — pegboard needs weight-rated hardware.
5. Hanging bead curtain with a color-matched tieback
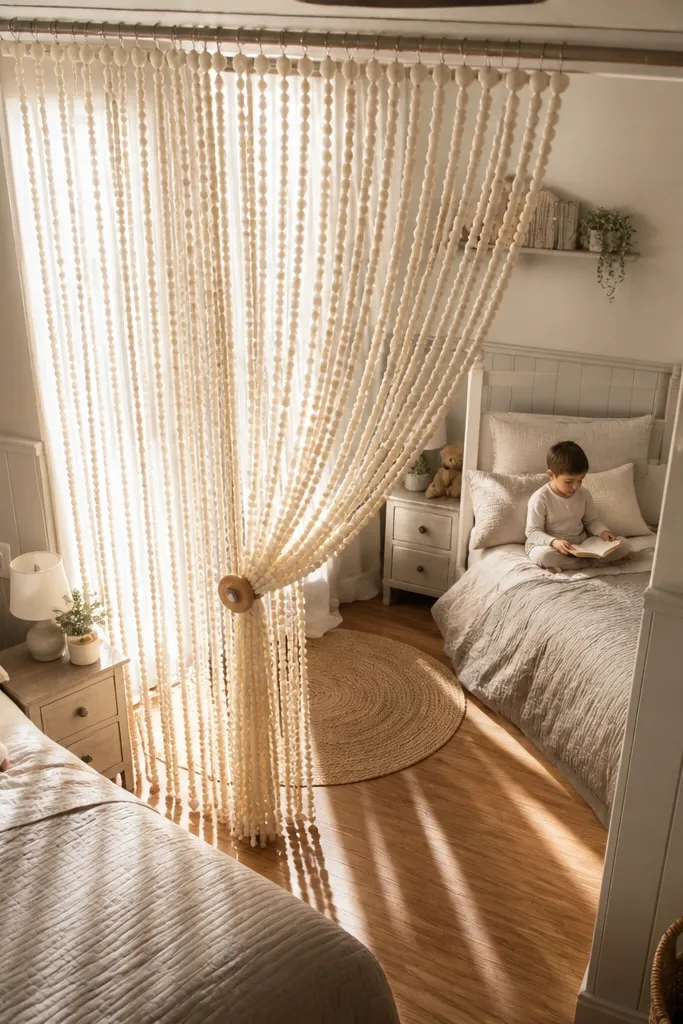
A bead curtain is playful and photogenic, and it creates a soft barrier without feeling heavy. The look is instantly “kids' room” but you can keep it classy by choosing a neutral bead color like warm cream, light wood, or muted sand. Add a tieback so the curtain can be pulled to one side during the day, opening up the room and making it feel bigger. This divider is great when you want separation for changing or bedtime routines but the room still needs airflow and light. Use it in corners where you can mount a track or ceiling hook securely.
Install a ceiling-mounted track or a strong tension rod at the divider line, aiming for a height around 60-72 inches from the floor. Choose beads that hang evenly and are light enough that the curtain doesn’t twist — test by lifting the curtain gently before final mounting. Add a fabric tieback in the same color family as the beads so it looks styled, not random. Finally, position the divider so it overlaps the bed edge by 6-10 inches, reducing sightlines between kids.
Match the tieback fabric to one pillow color, not the whole bedding set, so it feels intentional.
Using a slippery hardware setup — wobbly mounts make the curtain twist and snag.
6. Foldable fabric screen in two matching panels
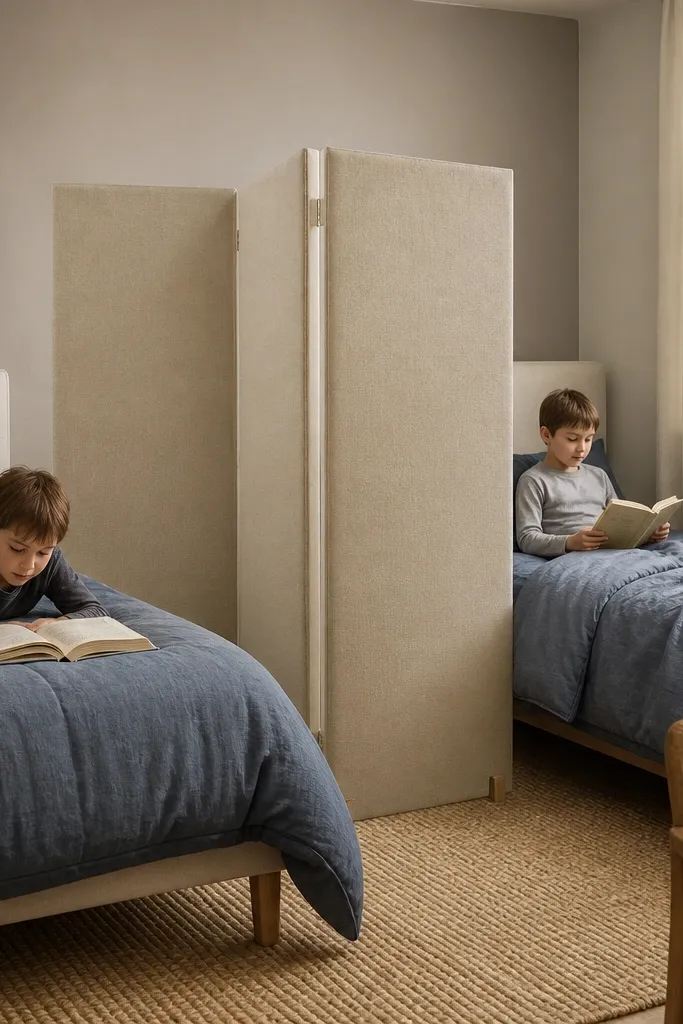
Measure the area you want to separate and pick a screen width that covers at least the center sightline between kids, usually 50-70 inches wide total. Place the screen on a rug or use non-slip pads under the feet to prevent sliding. If you’re using two panels, angle them slightly (about 10-15 degrees) so the shape blocks direct sightlines while keeping the room feeling open. Cover the screen with slipcovers if the fabric shows stains easily — look for removable panels that you can wash.
Foldable screens give you flexibility and a polished look, especially when kids grow and you need the room to change. Choose a fabric screen in a solid neutral with a subtle weave so it looks soft and warm in photos and in real life. Use two matching panels if you need more width — a single narrow screen looks like a temporary prop. This divider works well for dividing a shared room during study time and then folding it away when you want open floor space for play. It’s also a good option if you can’t anchor anything to the wall.
Watch outChoosing a screen with shiny fabric — it catches light and looks cheap in daylight.
Pro tipUse one rug under both beds and let the screen feet sit on it; it makes the divider feel grounded and not floating.
7. Lattice panel with sheer inner layer
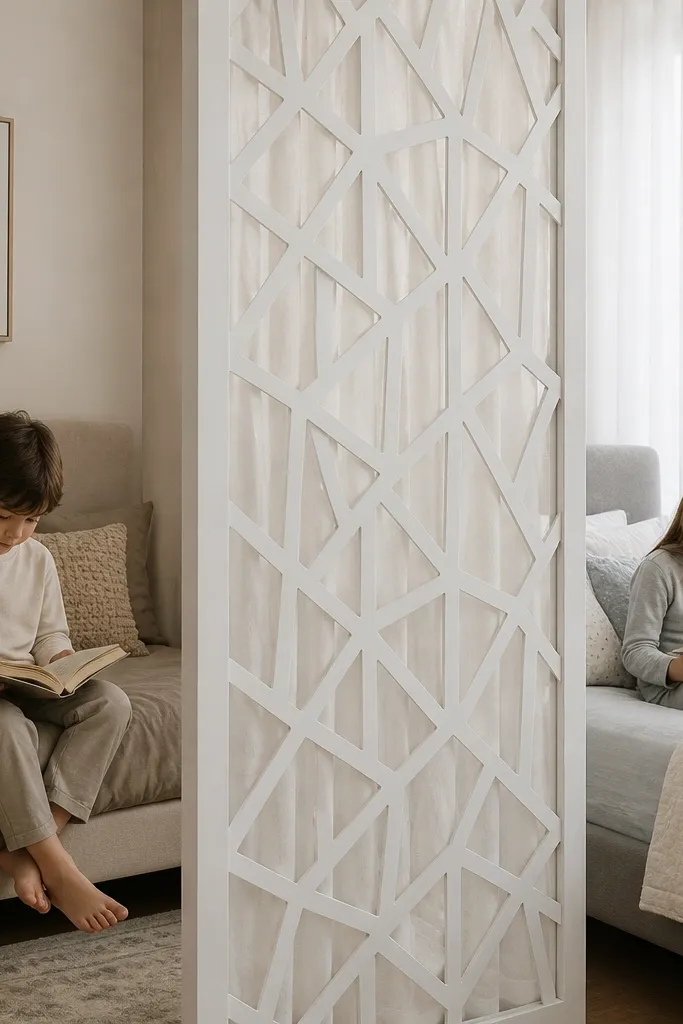
Mount a lightweight lattice panel to a freestanding frame or directly to the wall using sturdy brackets, targeting 60-72 inches height. Add a sheer curtain behind or attached to the frame with small clips so it drapes smoothly through the lattice. Start by hanging the sheer across the full width, then adjust so it overlaps the lattice by about 2-3 inches on each side. Finally, place a small floor mat under the bottom so the sheer doesn’t drag and the whole setup looks neat.
This combo gives you the best of both worlds: structure plus softness. A lattice panel creates a clear, architectural divider line, while a sheer inner layer adds privacy without making the room dark. Keep the outer lattice white or painted light gray to match most kids' bedding palettes, then choose a sheer in cream for warmth. The lattice also hides clutter visually because it breaks up sightlines. This is ideal for shared rooms where you want a “designed” look but still need light to reach the window side.
Watch outSkipping the sheer layer — lattice alone doesn’t block enough for bedtime privacy.
Pro tipChoose lattice size with medium openings — too open looks like a rack, too closed looks heavy.
8. Bookcase divider with a low pass-through window
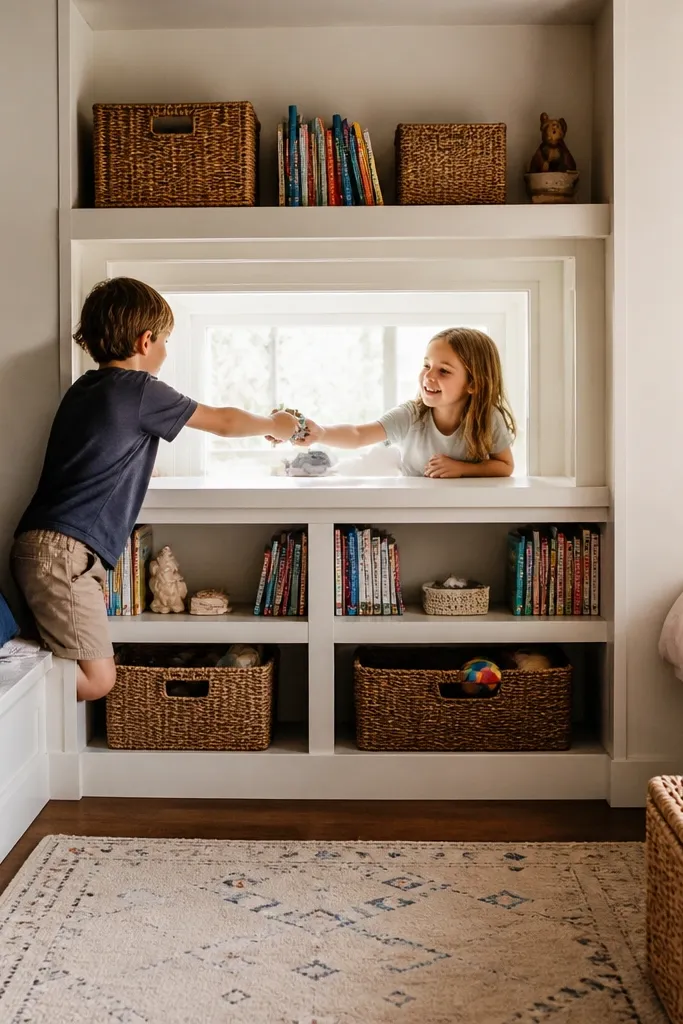
A bookcase divider gives you real separation and the look of built-in cabinetry. The pass-through window is what makes it work for shared spaces — kids can hand items back and forth without crossing the whole room, and it keeps the divider from feeling like a wall. Choose a low-to-mid height bookcase around 48-56 inches tall so it blocks sightlines but doesn’t crush the room. Paint it the same color as trim or keep it natural wood with a matte finish. This divider is perfect for shared rooms where you want storage first and privacy second.
Choose a bookcase with a stable base and enough depth for baskets and books; target around 12-14 inches depth. If you’re modifying, create a rectangular cutout window in the center area at about 22-28 inches from the floor for easy reach. Sand edges, seal with paint or clear coat, then install a simple backing board so items don’t fall through. Anchor the bookcase to the wall and style the top with books standing upright, then hide daily clutter in baskets below.
Keep the window edges clean and square — it makes the whole divider look intentional instead of DIY-rough.
Using a flimsy bookcase without anchoring — kids lean and pull, and it’s a safety issue.
9. Rolling closet panel divider with chalkboard strip
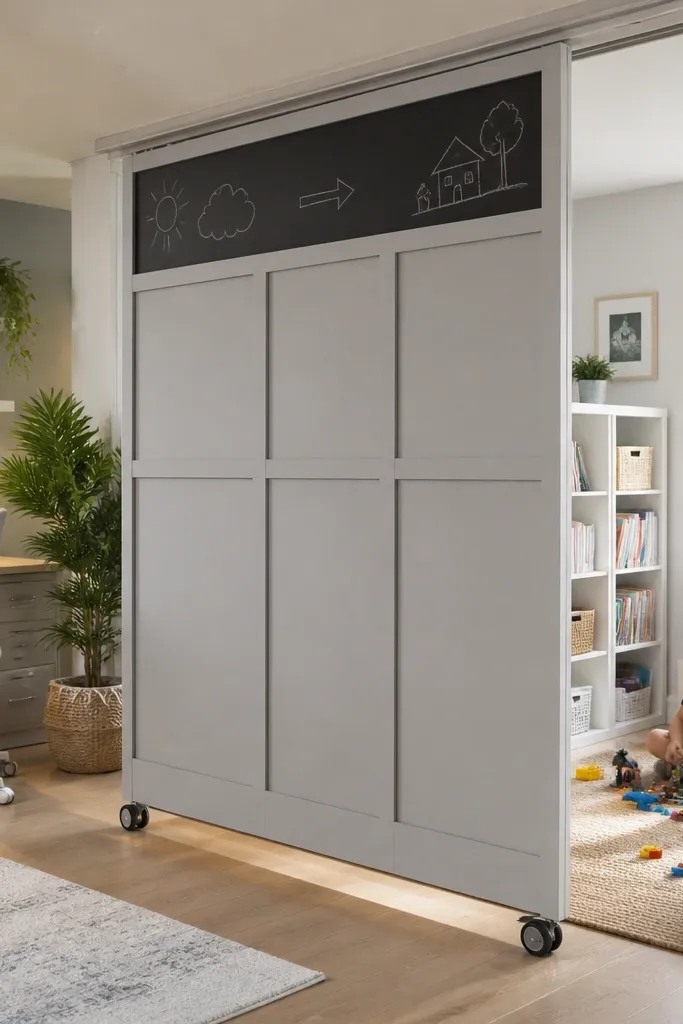
Buy or build a framed sliding/rolling panel sized to about 56-72 inches tall and 24-36 inches wide. Install caster wheels designed for furniture so the panel rolls smoothly on carpet and hardwood. Attach a chalkboard strip at kid height (around 36-44 inches from the floor) so both kids can reach. Finally, place the panel on the divider line between beds or between a desk and play area, leaving at least 18 inches of clearance for comfortable movement.
A rolling divider gives you privacy on demand, which is smart for shared rooms that need to switch between sleep, play, and homework quickly. The closet-panel look feels familiar to kids, and it looks tidy because it’s framed and structured. Add a chalkboard strip to turn the divider into a daily tool — label bins, write the day’s schedule, or keep a simple “quiet voices” reminder. Use a neutral frame color like white or light gray, and add a chalkboard in black or dark green. This divider is great in rooms with a shared doorway or a narrow layout where fixed dividers feel too permanent.
Watch outPutting the chalkboard too low — it gets smudged and kids stop using it.
Pro tipUse removable labels inside bins so the chalkboard stays for messages, not constant rewriting.
10. Faux headboard divider made from upholstered panels
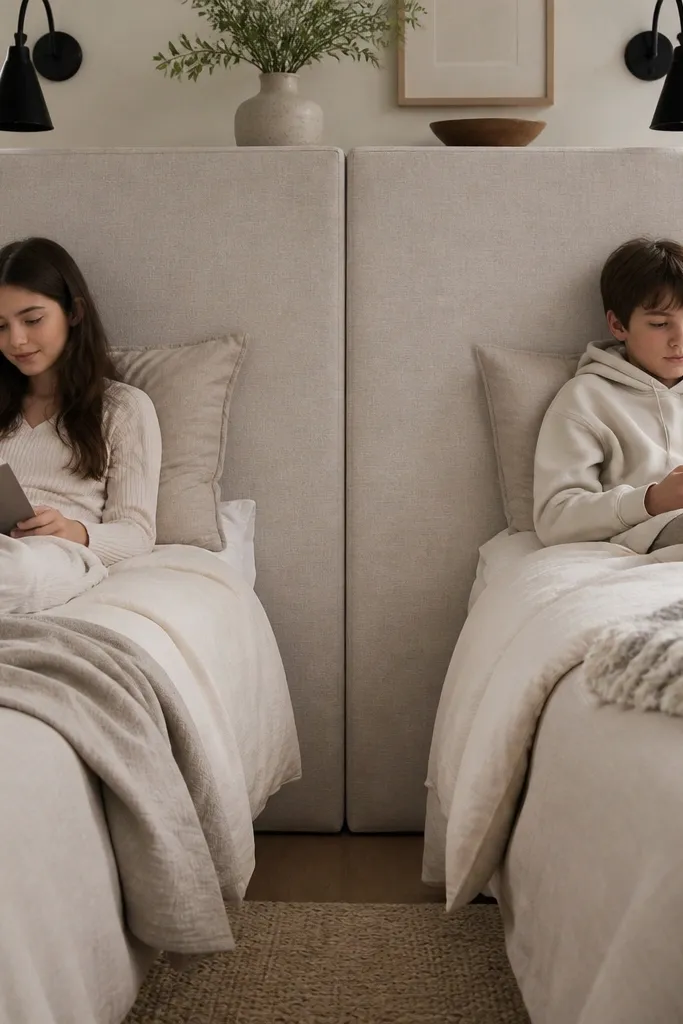
If the divider needs to look like it belongs with the beds, upholstered panels win. Treat it like a faux headboard wall: two matching upholstered panels create a strong visual boundary and make the sleeping sides feel separate. Choose a durable fabric like performance linen or a tight-weave cotton blend in oatmeal, sand, or soft gray. Add tufting or piping only if you want a classic look; simple panels look cleaner and hide wear better. This divider is best when the shared room has two beds aligned along one wall and you want privacy without adding a separate “thing” in the middle.
Measure the bed widths and place the panels so each kid gets a distinct backdrop behind their pillow area. Target panel height around 36-48 inches above the mattress, then decide if you want it full height (up to 60-72 inches) for stronger separation. Use plywood backing, then wrap with foam and fabric; keep seams tight so it looks tailored. Mount with heavy-duty picture hooks or cleats into studs, then add a small ledge or shelf only if it doesn’t crowd the wall.
Match the fabric tone to the rug, not the walls, so the divider blends into the room’s “soft” color story.
Choosing thin upholstery — it will sag and look sloppy after a month of use.
11. PVC-free hanging privacy panels with grommet ties
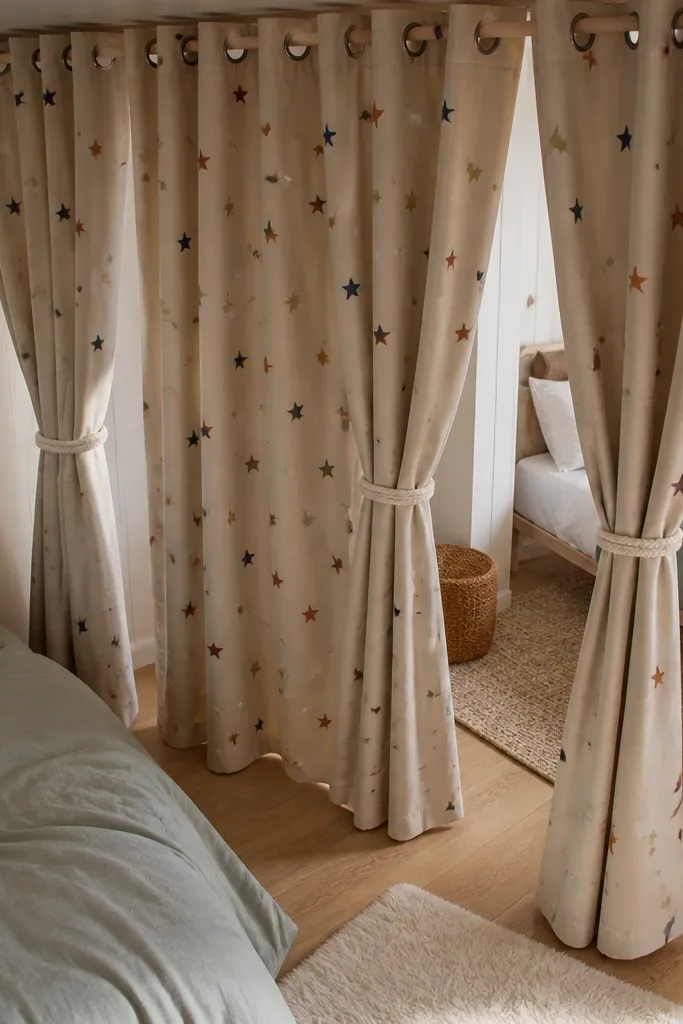
Choose two fabric panels sized to cover the divider line, typically 24-36 inches wide each and 60-72 inches tall. Use grommets along the top edge and hang them from a tension rod or ceiling hooks with matching ties. Pull the ties to adjust the overlap so each panel blocks the center sightline between beds. Anchor the bottom corners with small tie-backs or weighted fabric strips so the panels stay in place when kids walk by.
These panels create privacy with a light footprint, and they look clean because the ties pull the fabric into neat sections. You get the softness of curtains but with a more tailored look since each panel is its own piece. Pick a printed fabric with big motifs like stars, simple stripes, or animal silhouettes, then keep the color palette limited to two shades so it doesn’t feel chaotic. This works well for shared rooms where you want the divider to move slightly depending on bedtime routines. It also helps in rentals where you can’t commit to a permanent track installation.
Watch outUsing flimsy cotton that wrinkles hard — it looks messy fast in kids' rooms.
Pro tipUse the same fabric for both panels and reverse the pattern placement so it looks symmetrical, not random.
12. Room divider wall with removable vinyl decals
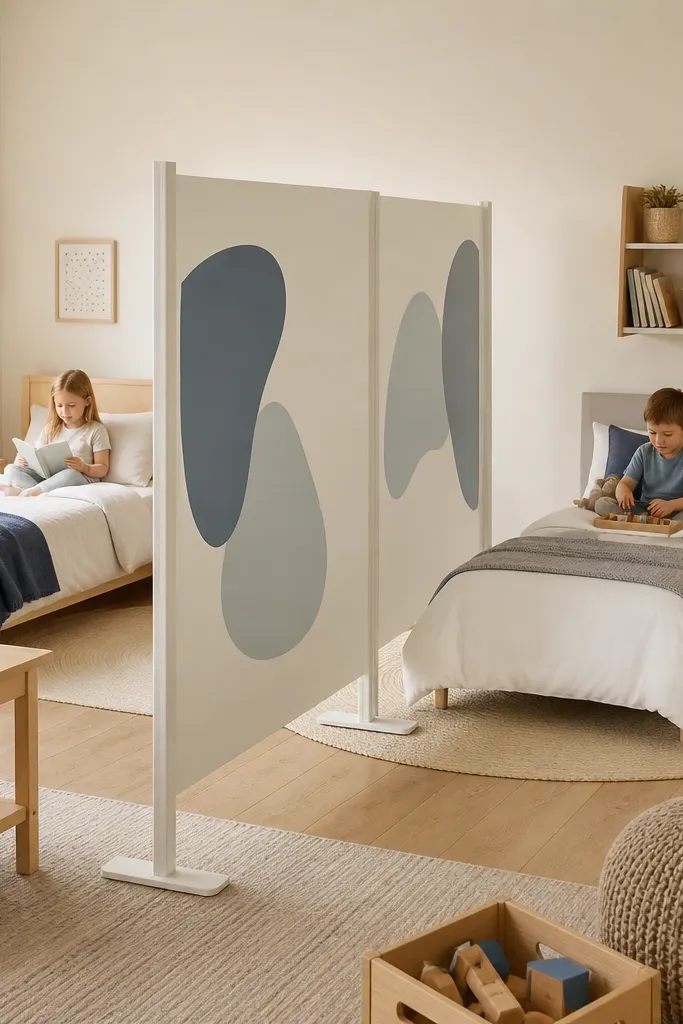
This is a smart aesthetic trick for shared spaces: you make the divider feel like part of the room theme instead of a generic barrier. Use a matte-finish temporary divider panel system or a large fabric panel on a frame, then add removable vinyl decals for each kid’s side. Keep the base color neutral so it doesn’t fight the bedding, then add name decals, simple shapes, or a coordinated scene. The removable part matters because kids change interests; you can swap decals without replacing the divider. This divider is best in shared rooms where you want the separation to look fun and personalized.
Start with a neutral divider base in matte white, light gray, or warm cream, sized to cover the main sightline between kids — typically 60-72 inches tall. Add removable vinyl decals on each side at eye level, around 40-54 inches from the floor. Use a straight edge to apply decals so lines stay crisp, and keep the design scale consistent so the divider looks balanced. Finish by placing a small floor storage tray on each side so the divider also organizes shoes or small toys.
Keep decals to one theme per side — one kid gets stars, the other gets moons — so the room looks coordinated even when it’s playful.
Overloading the divider with tiny stickers — it turns into visual clutter.