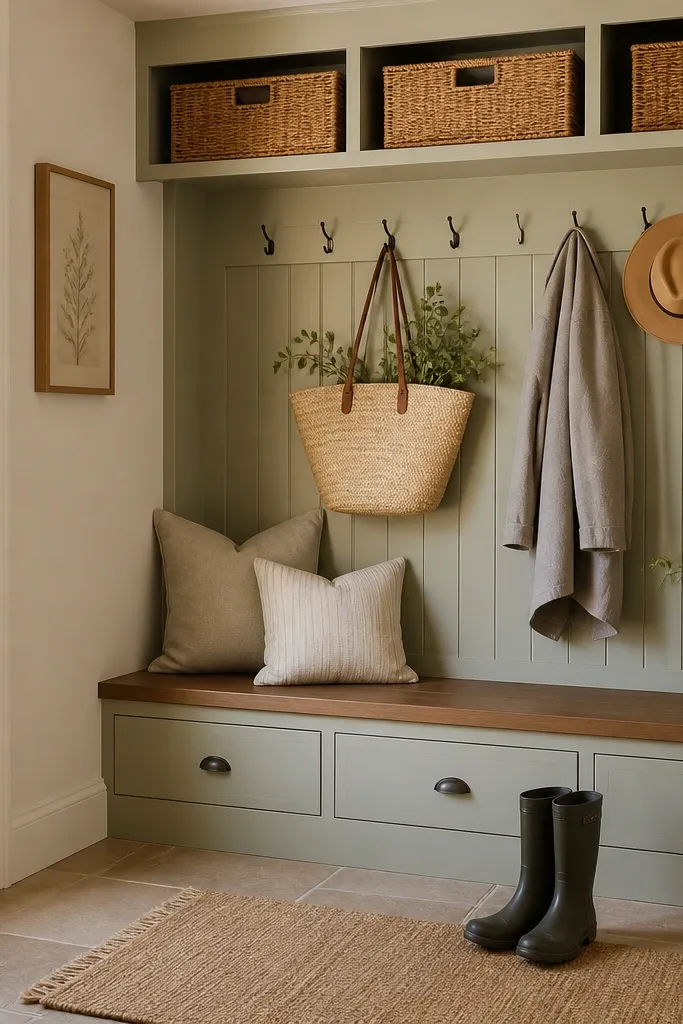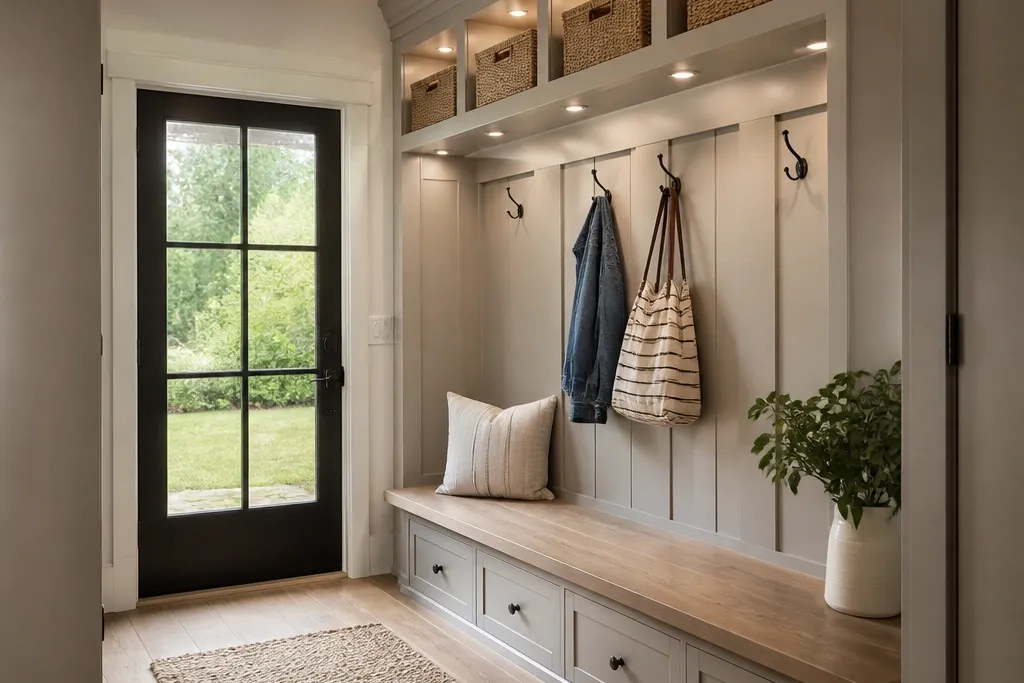
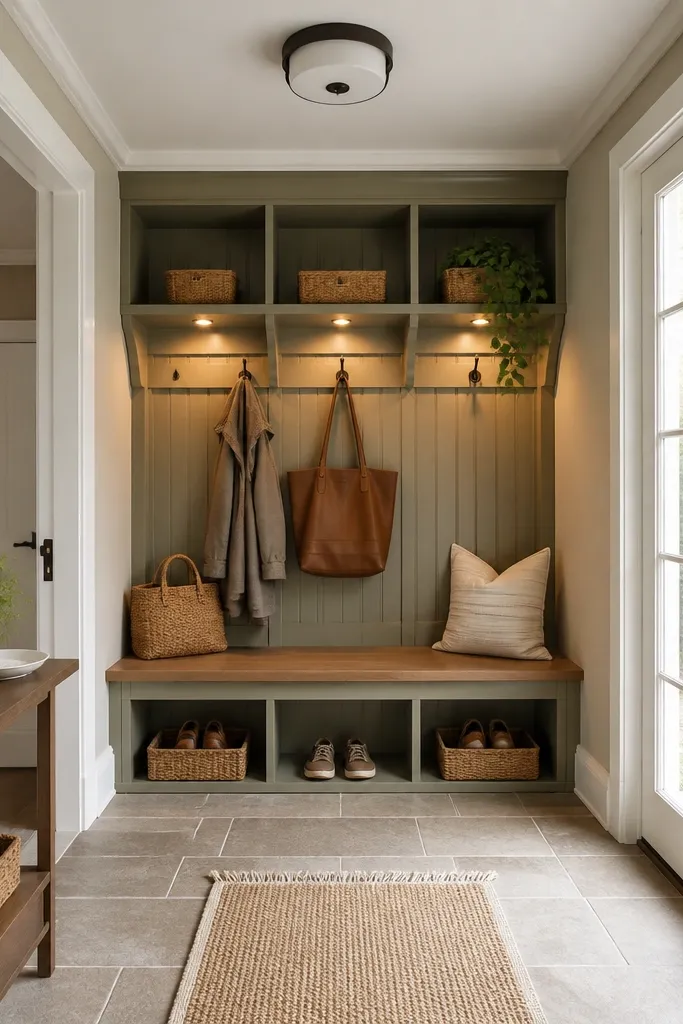
1. White Shiplap Cubbies with Warm LED Shelf Lighting
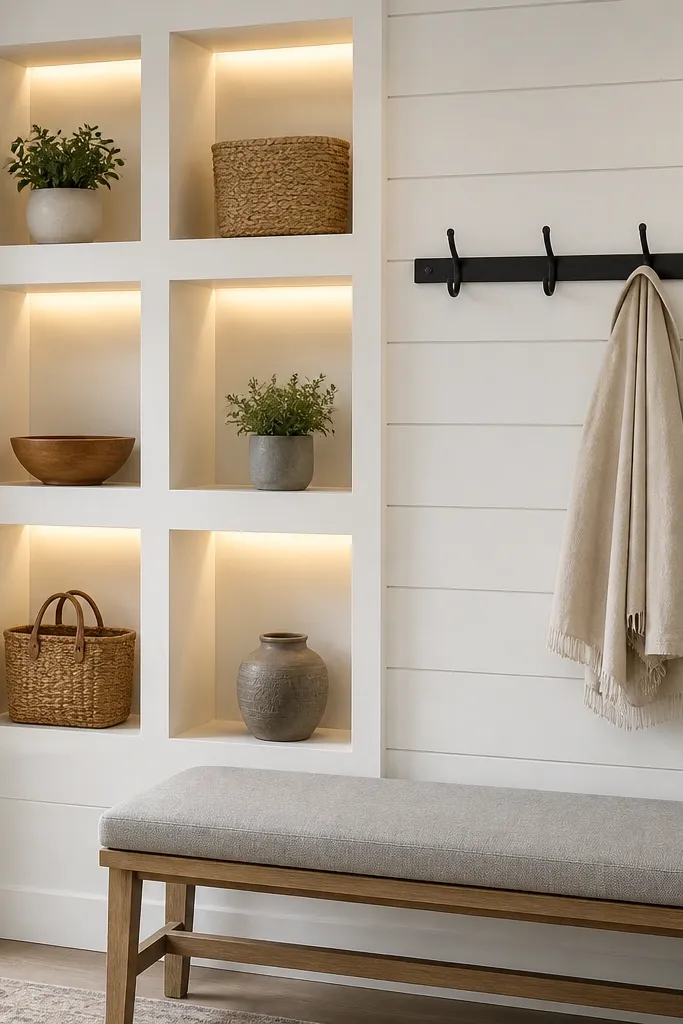
This setup works because the cubbies are visible but controlled. Shiplap keeps the farmhouse feel crisp, while the warm LED strip under the shelf turns each cubby into a “grab point” for hats, gloves, and small bags. I like pairing white walls with black hooks because it makes the storage lines look intentional. The bench below gives you a place to sit while you deal with boots and wet socks.
Use 1x6 shiplap boards painted a soft white (I’ve had good luck with warm whites that don’t go blue). Mount the cubbies so the openings sit around 12 to 16 inches from the bench seat height — low enough to reach, high enough to avoid shoe chaos. Add a plug-in LED strip inside a shallow aluminum channel under the top shelf so the light doesn’t show as a bright line.
Pro tipPut a small label inside each cubby door edge — even handwritten on painter’s tape — and the whole system sticks for kids.
Watch outDon’t mount LED strips directly on raw wood or MDF without a diffuser channel; it looks like a flashlight taped to your wall.
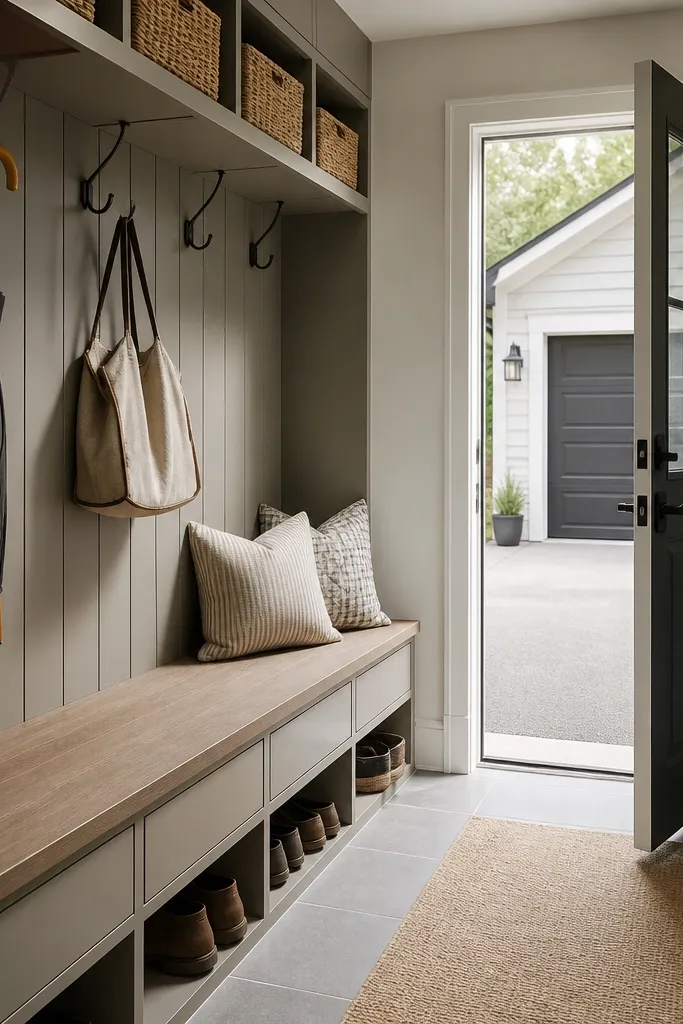
2. Reclaimed Wood Bench with Under-Seat Shoe Drawers and Sconce Glow
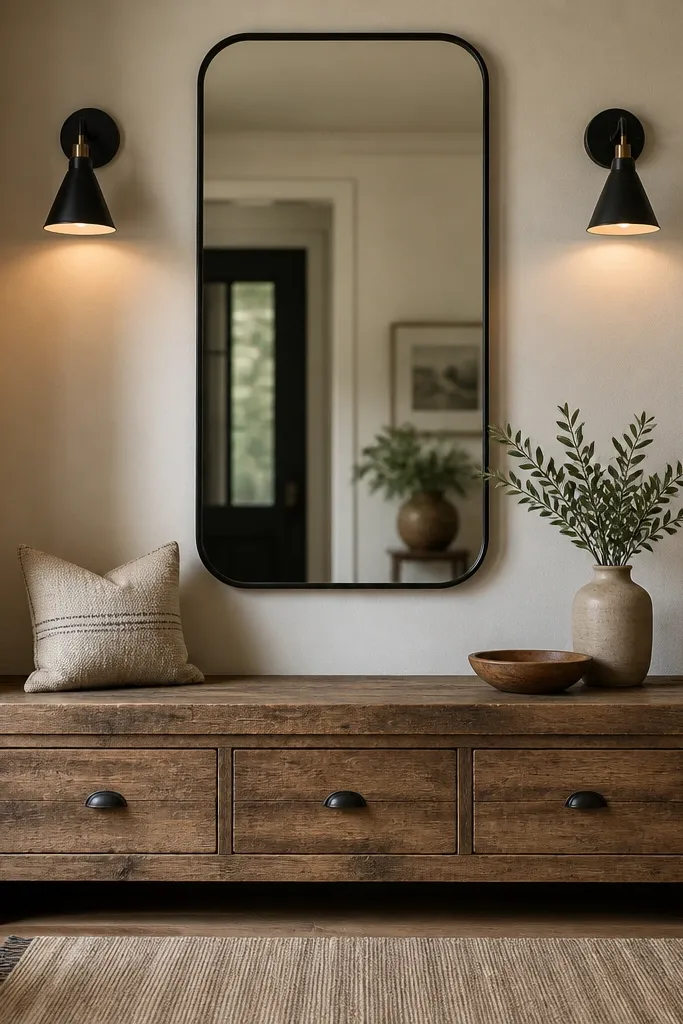
You get that farmhouse “warm wood” look without sacrificing function. The drawers keep boots and extra shoes out of sight, while the reclaimed bench top handles scuffs and wet boots better than soft fabric surfaces. Sconce glow makes the area feel styled even when the drawers are closed. It also helps you see what you’re grabbing when you’re rushing out the door.
Build or buy a bench with drawers sized around 20 to 24 inches wide each for adult shoes, then leave 2 inches of clearance under the bench front for easy vacuuming. Use a matte clear topcoat on the reclaimed wood so scuffs don’t turn shiny. Choose sconces with shades or glass diffusers and aim them slightly downward toward the bench top.
Pro tipAdd a small tray on top of the bench for keys and loose change so you don’t end up dumping items back into the drawers.
Watch outSkipping a clear finish is a mistake; raw reclaimed wood grabs dirt and water spots fast.
3. Black Metal Ladder Shelf with Hanging Baskets and Lighted Lower Shelf
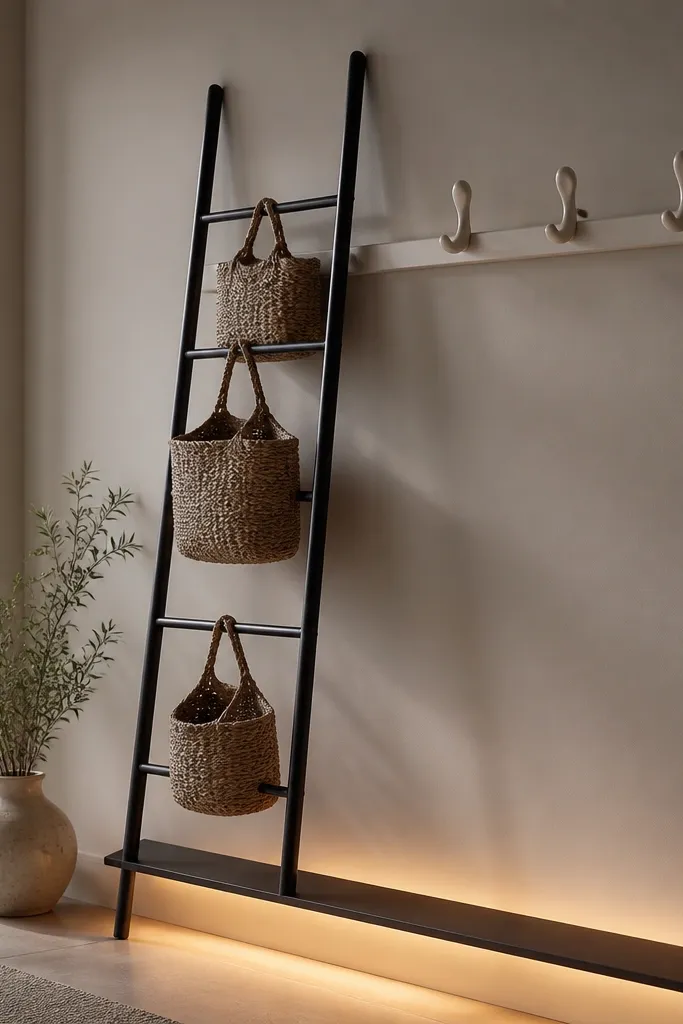
This is a farmhouse-friendly way to add storage lights without building a full cabinet. The ladder shelf creates vertical order, and the hanging baskets keep smaller items contained. The LED strip under the lower shelf makes the bins look intentional and makes it easier to find things at night. Pair black metal with woven textures for that lived-in farmhouse vibe.
Mount the ladder shelf with proper anchors — the top should be secured into studs if possible. Choose basket sizes so the largest basket is for bulky scarves and the smaller ones are for gloves or pet leashes. Put the LED strip under the bottom shelf so the light spills onto the baskets without lighting directly into your eyes.
Use two baskets for “daily” items and keep the rest for weekly swaps. That’s how you avoid the basket pile-up.
Don’t hang baskets too low; if they sit below 8 inches from the bench line, they get bumped by shoes.
4. Cream Console with Glass-Front Top and LED Inside Cabinet
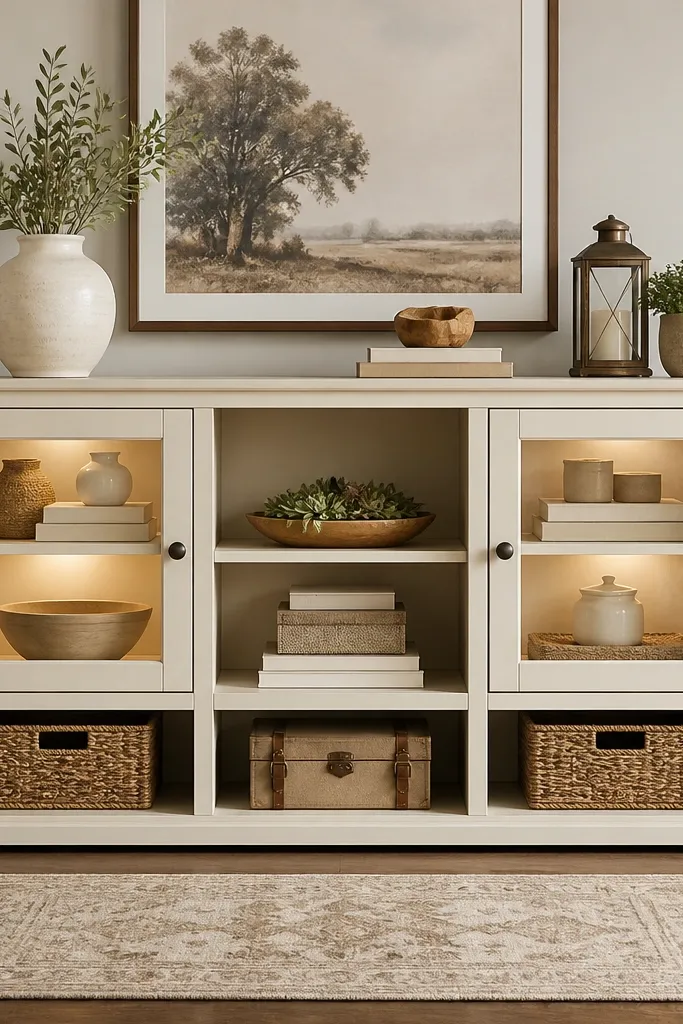
Glass-front storage makes the entry feel curated, and the inside LED keeps it readable. I like placing everyday items in the open cubbies and using the glass cabinets for “nice but practical” stuff like spare mittens and seasonal decor. The LED inside the cabinet adds warmth without glare, and the cream paint keeps the farmhouse tone soft. It’s a great option when your entry is visible from the living room.
Pick a console with cabinet depth around 12 to 16 inches so you can fit baskets without scraping. Add LED strip lighting with a plug-in driver placed behind the console — you want the wire hidden. Use warm glass cleaner on the glass; fingerprints show up fast with LED lighting.
Pro tipUse two matching basket sizes inside the open cubbies so the whole console looks organized even when it’s busy.
Watch outDon’t use cool white LED (4000K+); it turns the cream paint gray.
5. Board-and-Batten Wall Hooks with Motion-Activated Under-Cabinet Lights
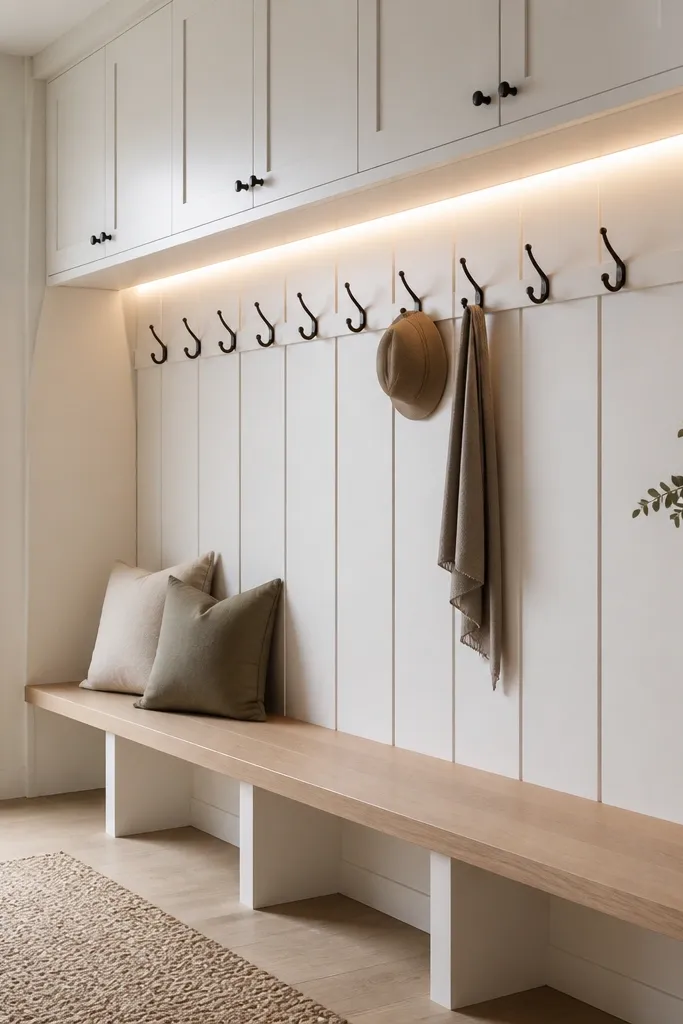
This is the entryway version of convenience lighting. Motion-activated LEDs cut down on fumbling for keys and gloves, especially in the dark months. Board-and-batten gives you farmhouse texture, and under-cabinet lighting keeps the light close to where you hang items. With a bench under it, you get a clean drop zone for wet coats.
Install the hooks so the highest hook is around 70 inches and the lowest is around 52 inches for kids and adults. Mount the narrow cabinet about 18 to 22 inches above the bench seat so it’s reachable but not bulky. Use a motion sensor LED strip kit with a built-in dimmer if you want softer light at night.
Aim the under-cabinet lights slightly toward the hooks, not straight down, so coats don’t cast harsh shadows.
Skipping dimming is a mistake; bright motion lights can feel harsh in the evening.
6. Rattan-Front Shoe Cabinet with LED Toe-Kick Lighting
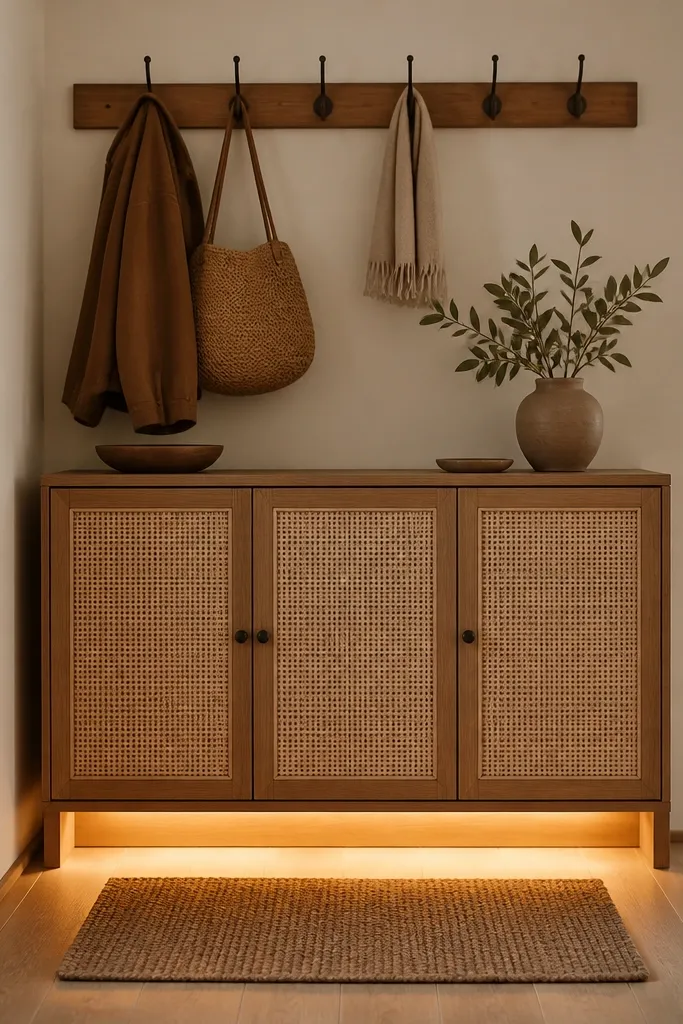
Rattan doors hide shoe mess while letting a little airflow through. Toe-kick lighting makes the cabinet feel intentional and helps you spot scuffs and loose laces without turning on overhead lights. It also looks farmhouse because rattan and light wood textures belong together. This setup is great for entries that have no overhead lighting or only one harsh ceiling fixture.
Choose a shoe cabinet with at least two shelves so you can separate sneakers from boots. Mount hooks above the cabinet so coats don’t hang over the cabinet edge. Install LED strip lighting along the toe-kick with a diffuser cover — keep the visible strip hidden under the cabinet face.
Put a small tray inside the cabinet bottom for wet shoe inserts and let it dry out on a mesh rack once a week.
Don’t place toe-kick lighting too bright; if you can see the LED beads, it looks cheap.
7. Dark Stained Wall Shelves with Plug-In LED Inside Open Shelves
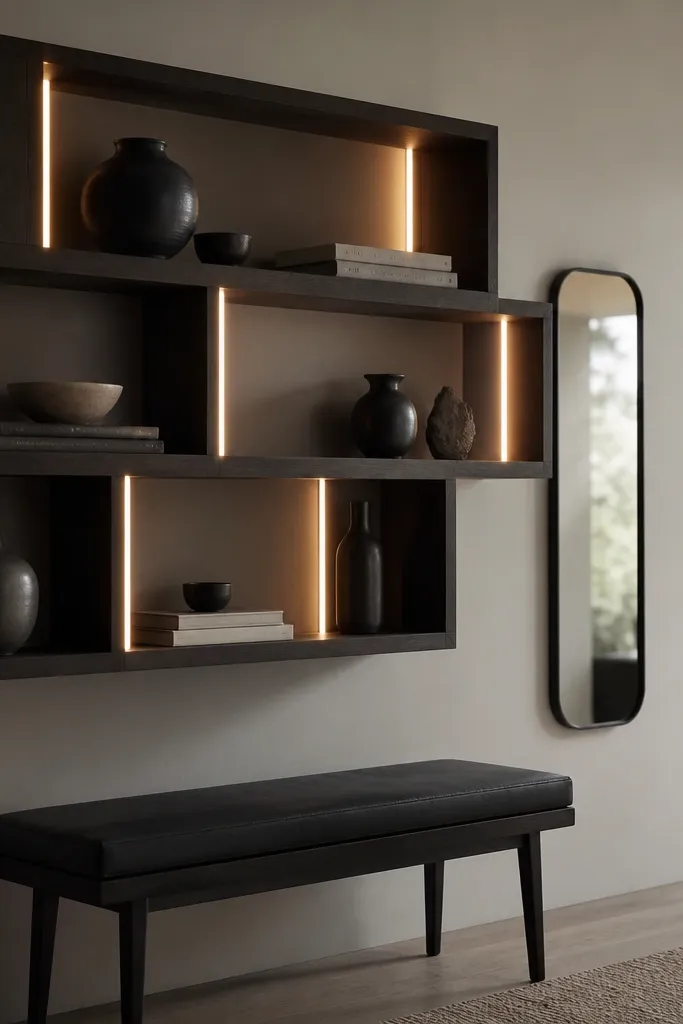
Dark wood makes farmhouse feel moody in a good way, and the inside LED turns the shelves into a “display + storage” hybrid. I use this when the entry gets natural light and you want the storage to look decorative. The LED glow helps you find items in the open shelves without cluttering the whole wall with bright lighting. It’s also a smart choice for people who don’t want glass cabinets.
Use shelves that are at least 7 inches deep so items don’t fall forward. Mount the shelves high enough that shoes won’t bump the bottom shelf, then keep the lowest shelf around 24 to 30 inches from the floor. Plug-in LED strips are easiest here — mount the driver inside a hidden cable channel.
Stick to three categories per shelf: daily items, seasonal accessories, and backups. Everything else gets a bin in the bottom of the bench.
Don’t mix too many wood tones; pairing dark shelves with light pine trim can look messy fast.
8. Farmhouse Corner Mudroom with Narrow Cabinet and Vertical Light Strip
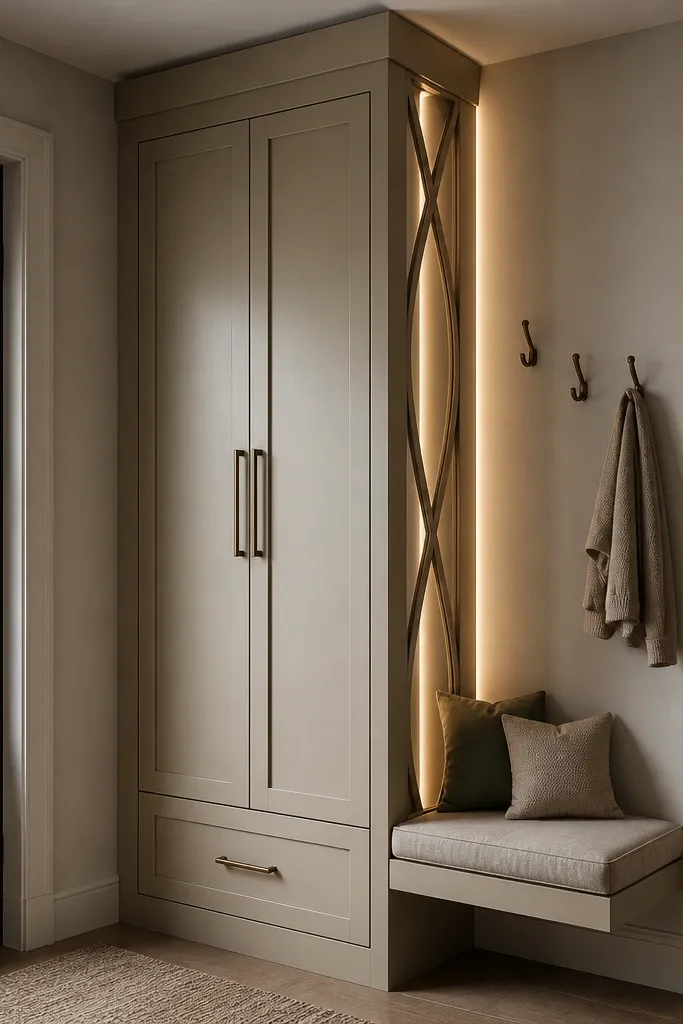
Corners are awkward, but they’re perfect for storage when you keep the footprint slim. A tall narrow cabinet uses the wall height you’re already paying for, and the vertical light adds a soft glow that makes the corner feel less dark. I like this design because it keeps the “mudroom system” out of the middle of the hallway. The light also helps when you’re reaching for gloves in the evening.
Pick a cabinet width around 12 to 16 inches so you can still pass without bumping it. Put the hooks on the adjacent wall within reach from the bench seat. For the vertical light, use a thin LED strip behind a decorative trim piece so you see glow, not the strip itself.
Pro tipAdd one pull-out drawer for “wet stuff” (umbrella, damp mittens) and line it with a washable mat.
Watch outDon’t mount the cabinet too high; if the top shelf is unreachable, it becomes a dust shelf.
9. Bench + Coat Rail Combo with LED Ledge Above Hooks
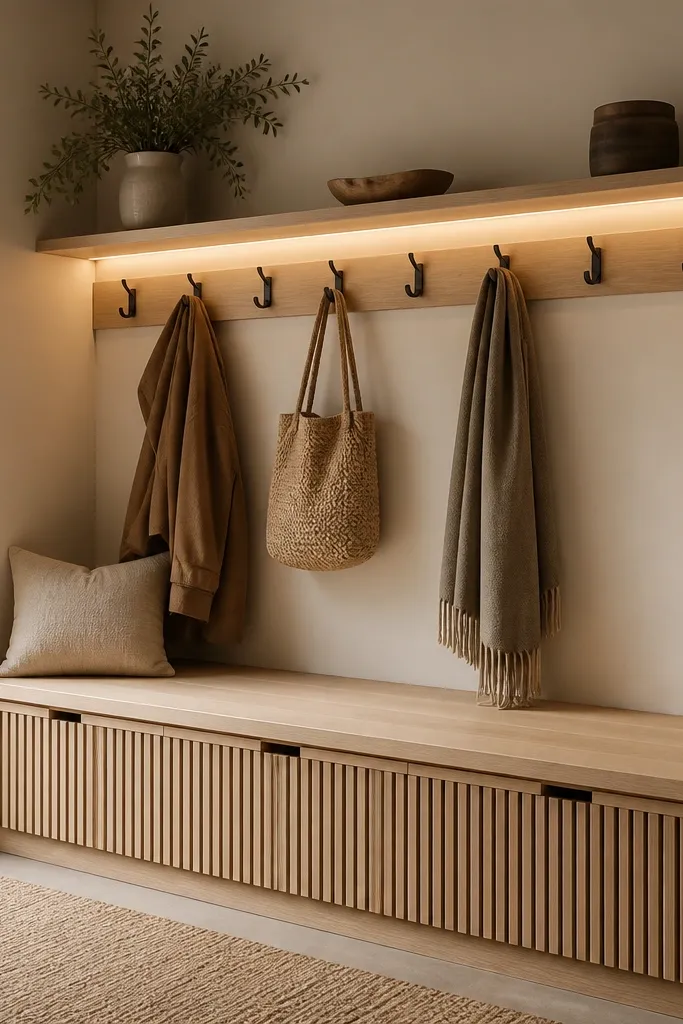
This combo is practical and looks intentional because the coat rail and bench share the same line. The LED ledge makes the hooks easy to use in dark weather, and it highlights the rail like a design element. I like using light wood here because it keeps the entry from feeling heavy. The ledge also gives you a place for a small lantern or a basket for mail, which makes the area feel finished.
Install the coat rail so it’s about 66 inches from the floor to the rail top. Keep the bench depth around 14 to 16 inches so your knees don’t hit the base when you sit. Use a warm LED strip under the ledge and hide the cable in a white cord channel.
Pro tipUse S-hooks for leashes and scarves; they slide off faster than cloth loops.
Watch outDon’t place the LED strip too far back under the ledge; if it’s hidden, you lose the “spotlight on hooks” effect.
10. Rustic Media Console Mudroom with Side-By-Side Shoe Bins and Drawer Lighting
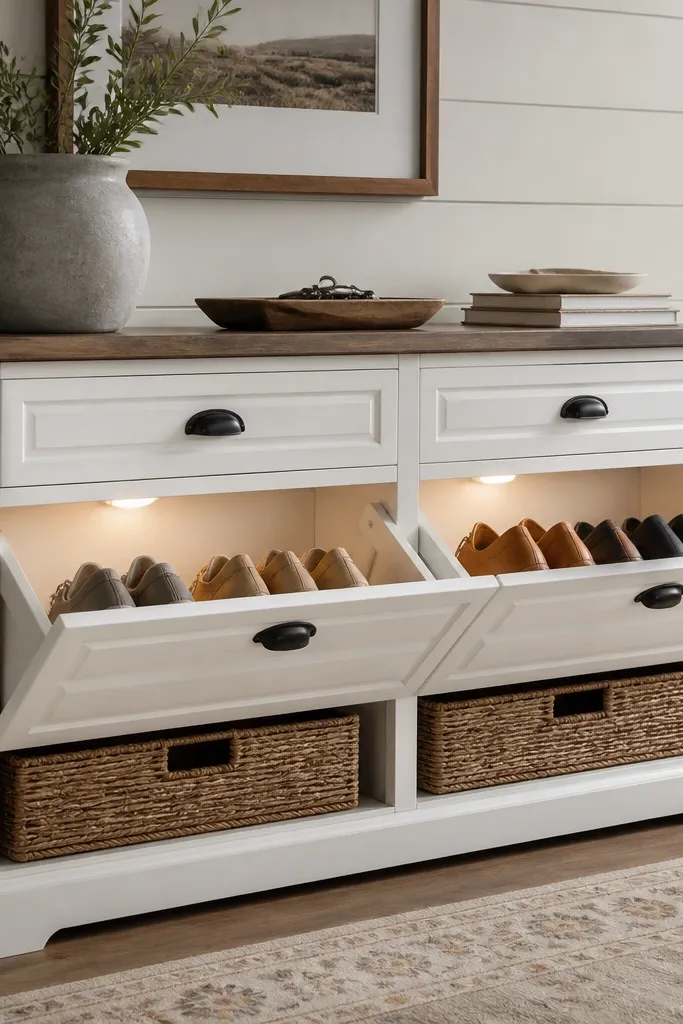
Drawer lighting is one of those things you don’t notice until you live with it. It makes chargers, spare gloves, and cleaning supplies easy to find without turning on every light in the house. The shoe bins keep the floor area tidy, and the console gives you a flat surface for a basket and a mirror. Farmhouse look comes through in the painted finish and dark knobs.
Use removable bins with handles so you can pull them out and dry wet items. Install puck lights inside drawer boxes with a simple plug-in transformer or hardwired kit if you already have wiring access. Keep drawers sized so they don’t scrape when you pull them — leave 1/8 inch clearance on each side.
Pro tipLabel bins with a color dot system: tan for winter shoes, blue for everyday sneakers, green for sports gear.
Watch outDon’t wire puck lights with loose connections inside drawers; vibrations make them fail.
11. Galvanized Planter Wall with Hooks and Battery LED Fairy Lights
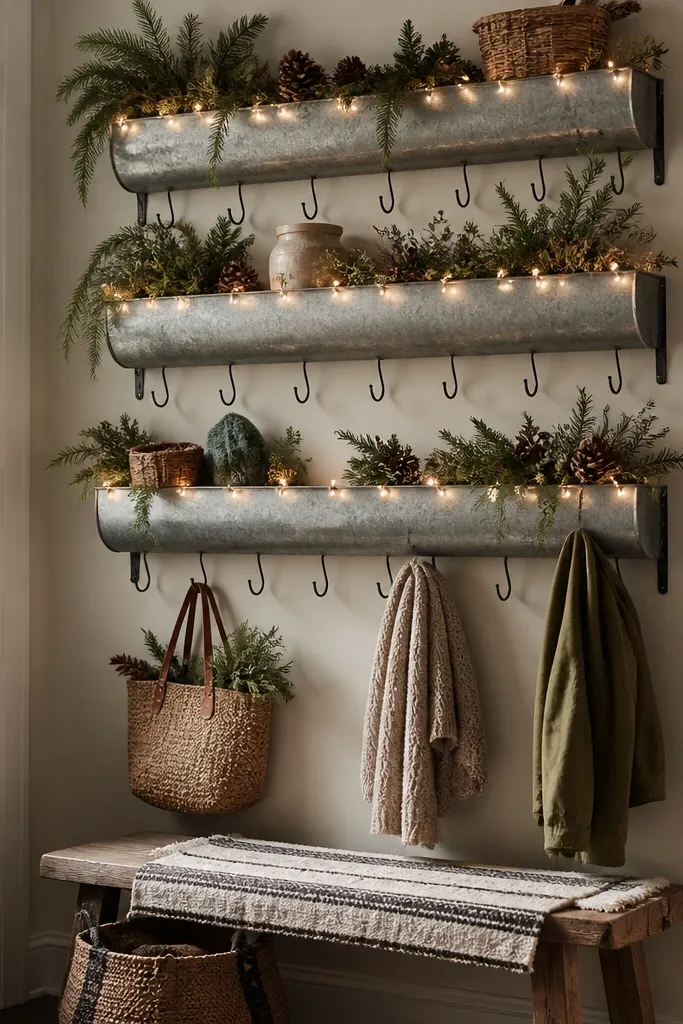
This is farmhouse charm with a practical angle. The planters act like shallow storage for gloves, sunglasses, and small bags, and the hooks below handle coats. Battery LED lighting is perfect when you don’t want to run wiring, and the warm glow makes the space feel cozy. It also works in rentals because everything can be mounted with removable hardware if your landlord allows.
Choose planters with flat front edges so hooks mount securely underneath. Put the planters at staggered heights: top around 60 inches, middle around 48, bottom around 36. Battery lights should be routed behind the planter lip so the bulbs aren’t directly visible.
Use zip ties to bundle the battery wire along a hidden corner — it looks cleaner than loose loops.
Don’t place fairy lights where you’ll brush them with coats; the bulbs break fast.
12. White Cabinets with Open Shelf Run and Rope-Turned Storage Lights
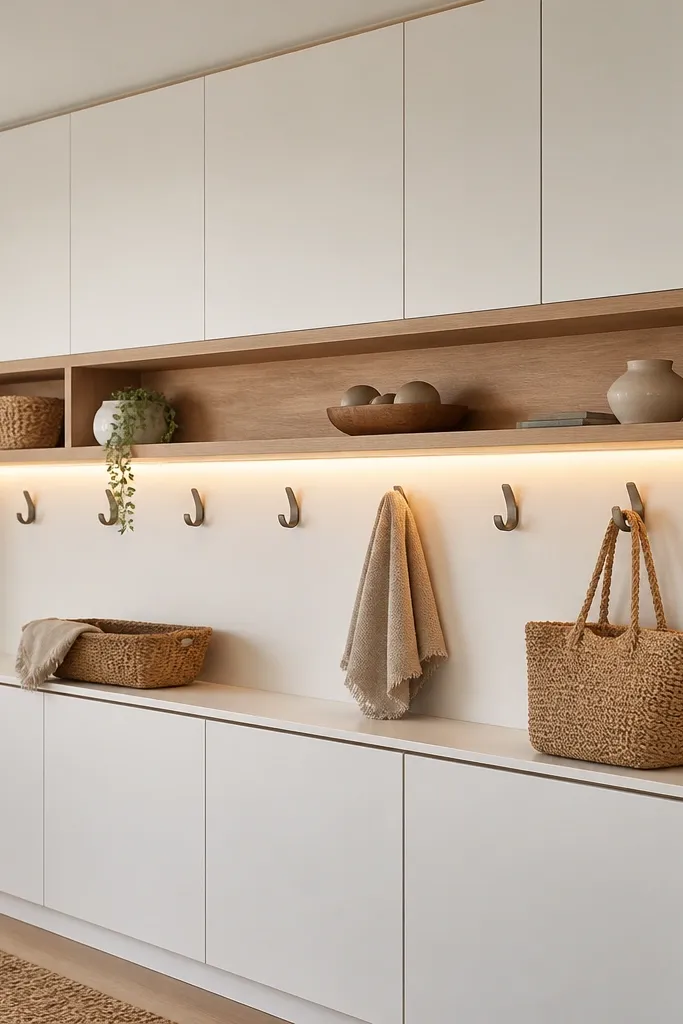
Open shelves break up a full cabinet wall, and the warm lighting keeps them from looking bare. The rope detail adds farmhouse texture without going full rustic everywhere. I like this design when the entry is narrow but you still want a built-in look. The shelf lights make items feel “displayed,” but they still function as storage.
Install cabinets so the open shelf section is between 10 and 14 inches deep. Add an LED strip under the shelf and run it along the underside edge — that gives a soft wash rather than a spotlight. Use black hooks and black cabinet pulls so the rope detail doesn’t look random.
Pro tipAdd two small baskets on the open shelf for daily items so the shelf stays tidy even when you’re tired.
Watch outDon’t overfill open shelves; if you can’t see the shelf line, it looks cluttered instead of styled.