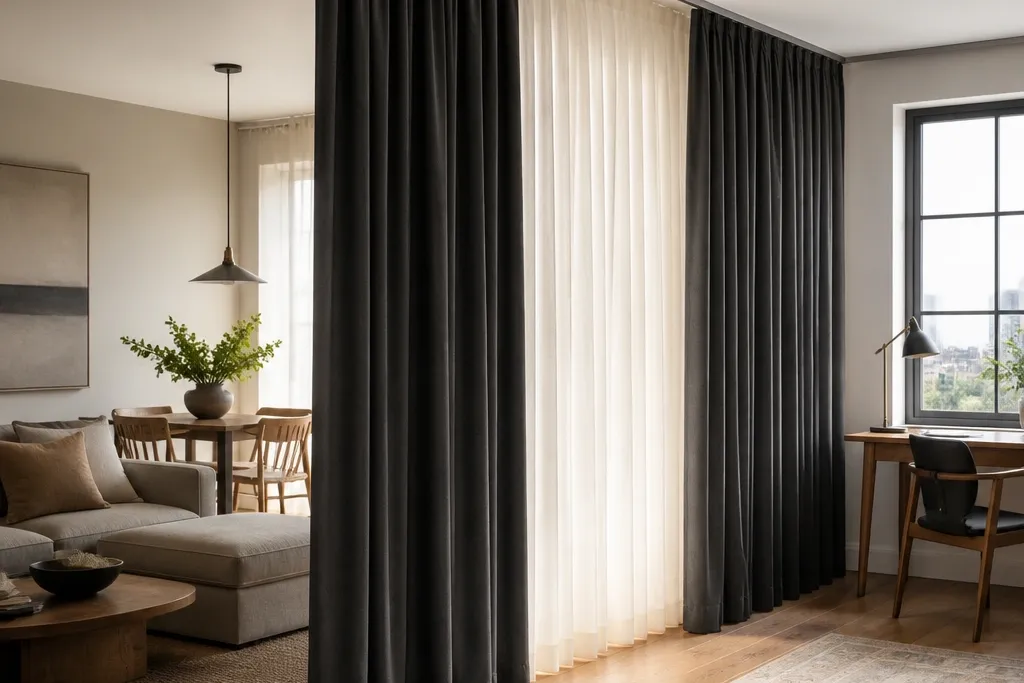
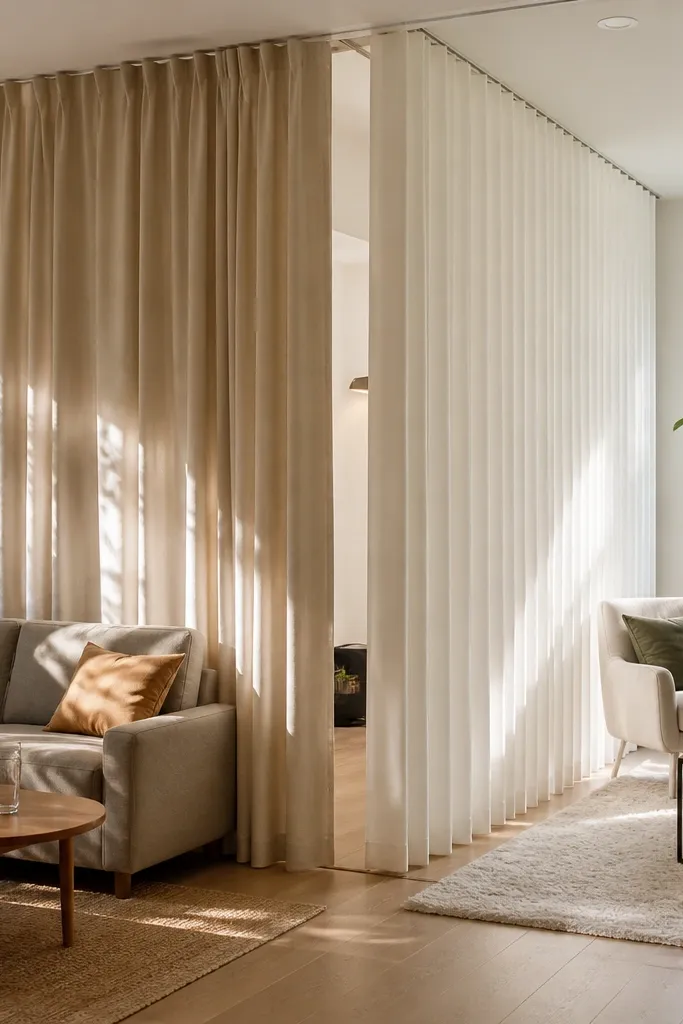
1. Blackout linen-blend panels with a ceiling track
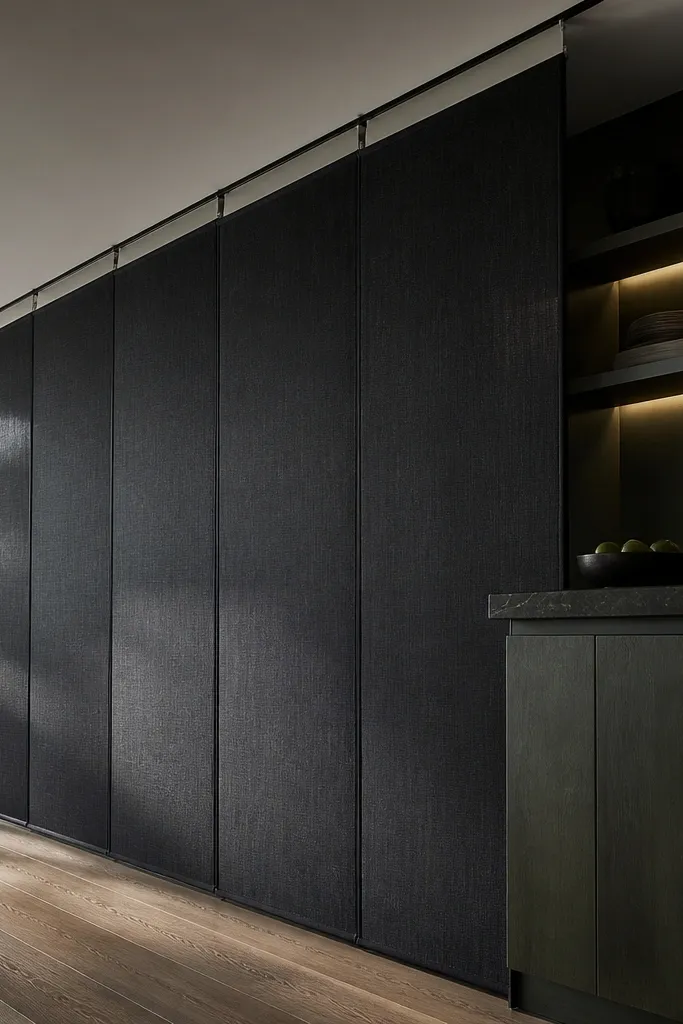
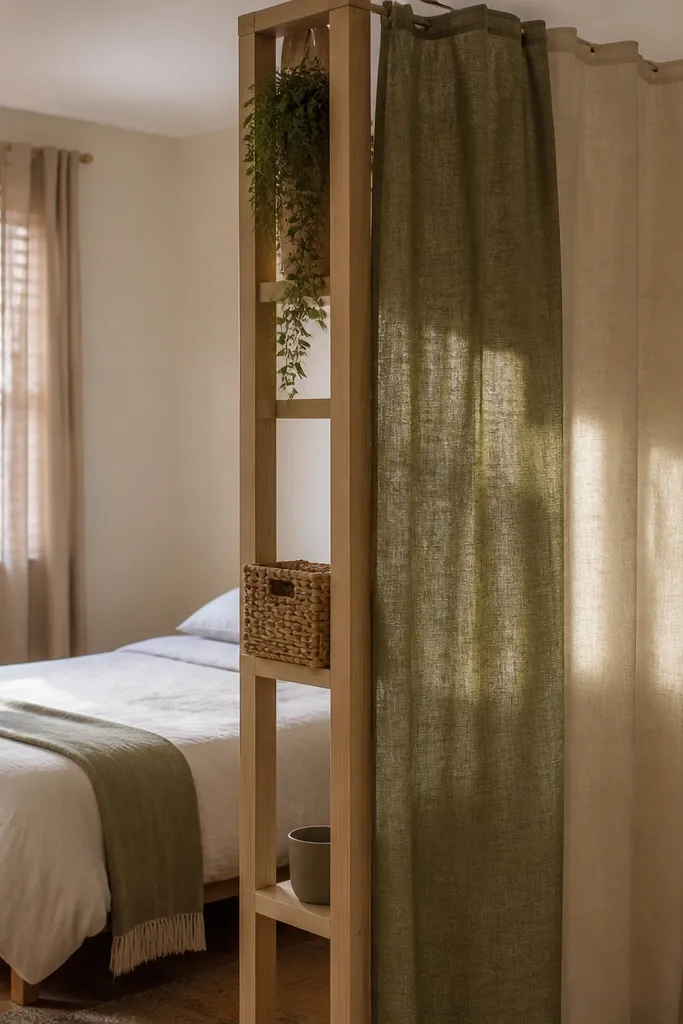
If you want separation that feels like a room, go with near-blackout fabric and a top that stays perfectly straight. Charcoal or deep olive linen-blend panels hide clutter, cut down light spill, and make the divider look like it belongs. A ceiling track keeps the curtain from drooping in the middle, which is the fastest way to make a divider look cheap. In a studio, this setup cleanly separates the bed zone from the living zone without building anything. It also works great behind a desk when you need focus and less visual noise.
Measure the divider width and add 6-12 inches past each side so the curtain closes fully when pulled. Install a ceiling track at the height of your ceiling crown line or about 2-4 inches below it, then hang two panels wide enough to overlap slightly in the center. Use near-blackout curtains with a sewn header, and if the fabric is light, add hem weights or choose weighted curtains so the bottom edge stays flat. Budget is usually $60-140 for the curtains plus $25-80 for the track hardware, depending on length and brand.
Pro tipChoose a matte finish fabric (not shiny) so the folds don’t look “plastic” under daylight.
Watch outDon’t use thin sheers if you’re trying to create privacy.
2. Sheer-to-opaque layered curtain combo for soft separation
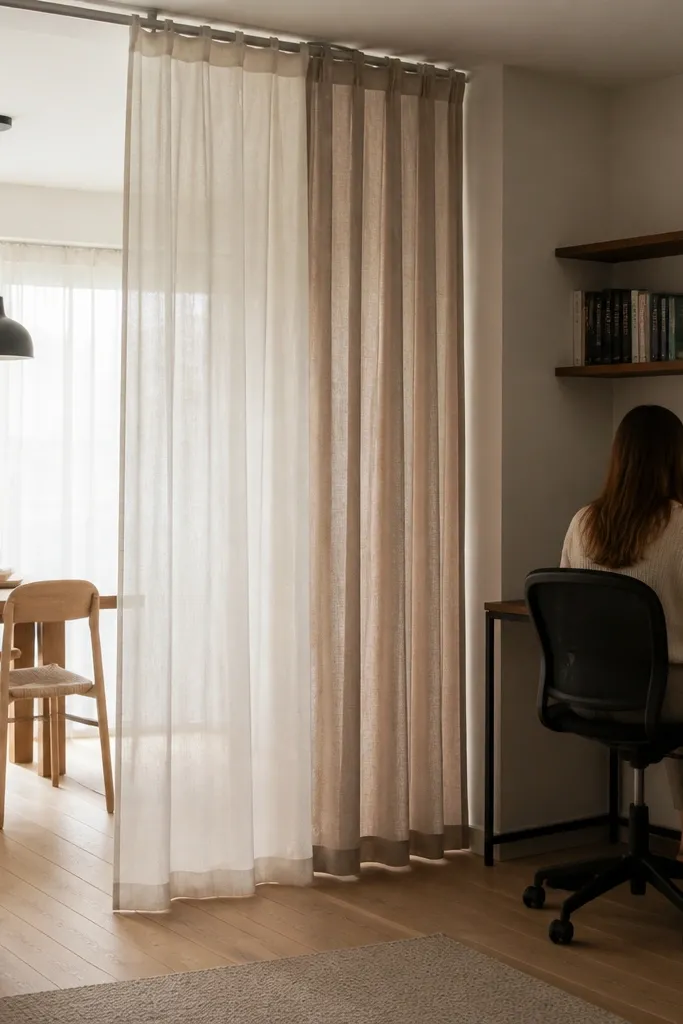
Layering is how you get both separation and brightness. Use a sheer panel in the same color family as your opaque layer: white over oatmeal, or cream sheer over sand. The sheer keeps the room from feeling chopped up, while the opaque layer gives you the option to close for privacy at night. This looks especially good in small spaces because it creates depth — the sheer catches light, and the opaque panel defines the boundary. Put it where you want “zones” rather than full privacy, like separating a reading corner from the couch area.
Hang two curtain layers on separate rods or a double-rail track so each layer moves independently. Start with the sheer layer first, centered to cover the divider width, then add the opaque layer behind or in front depending on the look you want (opaque facing you reads most defined). Plan for curtains that total 1.5x your opening width so the folds are visible even when closed. If you’re working on a budget, buy one solid opaque set and reuse the sheer panels from a previous window treatment.
Match the opaque curtain color to a dominant room element like your rug or bedding so the divider blends instead of sticking out.
Avoid mixing high-contrast colors for a layered divider unless you’re intentionally going for a bold design wall.
3. Macramé curtain with a weighted bottom for airy privacy
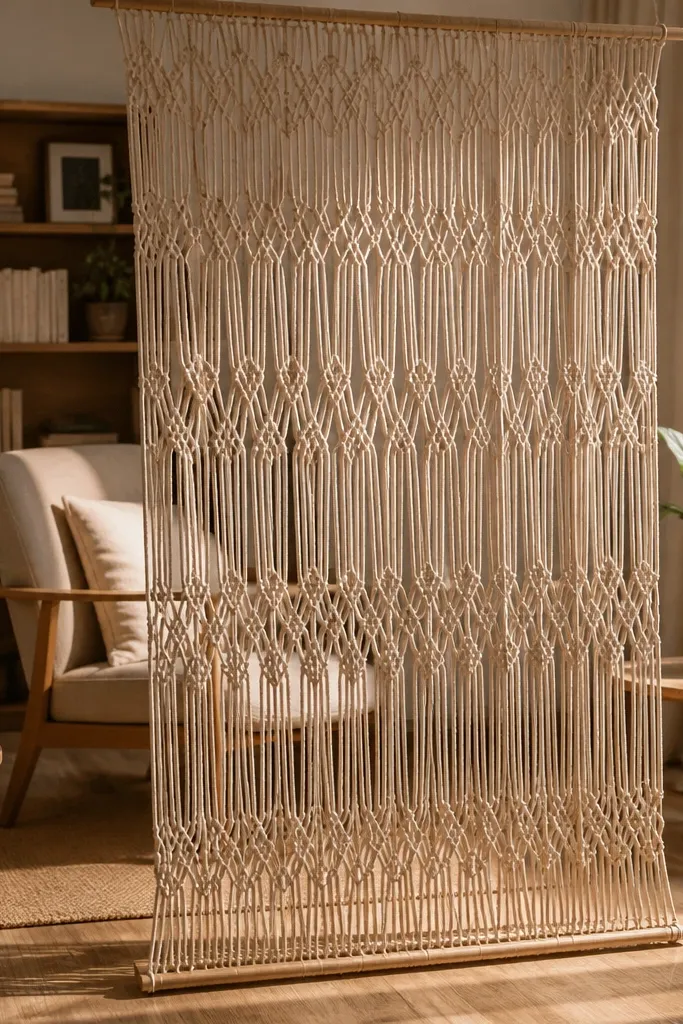
Macramé is the photogenic divider option that still lets light move. A natural-beige macramé curtain creates texture, softness, and a clear boundary without making the room feel smaller. The key is a weighted bottom so it hangs straight; without weights, the knotting lifts and leaves uneven gaps. This works best in living rooms, studios, and entryways where you want privacy from sightlines but still want the room to feel open. Pair it with warm lighting and light wood tones so the texture reads cozy instead of messy.
Choose a macramé panel with a sewn-in rod pocket or a top header that fits a tension rod or ceiling-mounted hardware. Hang it at least to the floor, and if it’s short, add a lower weighted fringe piece or choose a version with built-in weights. Install the rod so the curtain width is 1.5x your opening, then center it and adjust tension until the bottom edge sits flat. Cost is usually $40-120 for the curtain depending on size and knot density, with tension rod hardware around $15-40.
Use two tie-back cords in the same material so you can pull it open cleanly without tangling the strands.
Skip macramé if you need sound blocking; it’s for visual separation and texture.
4. Velvet divider in jewel tones with blackout lining

Velvet gives you instant “this is a room” energy because it holds shape and looks plush in shadows. Choose a jewel tone like deep teal, wine, or espresso-brown and pair it with a blackout lining for real separation. The velvet pile catches light in a way that makes the divider look expensive, even on a budget if you pick simple hardware. This is great for separating a sleeping area or creating a dressing nook in a studio. It also looks stunning against light walls because the fabric absorbs glare and makes the folds look intentional.
Buy velvet curtains with a lining or add a blackout liner panel behind the velvet using curtain rings or a second rod. Mount a tension rod or ceiling track above the dividing line so the top stays taut. Plan for 2x the opening width if you want dramatic pooling; for a tighter look, use 1.5x and keep the curtain hem 1-2 inches above the floor. Hem weights help velvet hang straight, especially if the fabric is heavy.
Pro tipChoose a matte velvet, not a shiny “crushed” look, if you want clean folds rather than a wrinkled surface.
Watch outDon’t hang velvet too low; if it drags or touches the floor unevenly, it reads sloppy fast.
5. Grommet curtains on a rod with rope tie-backs
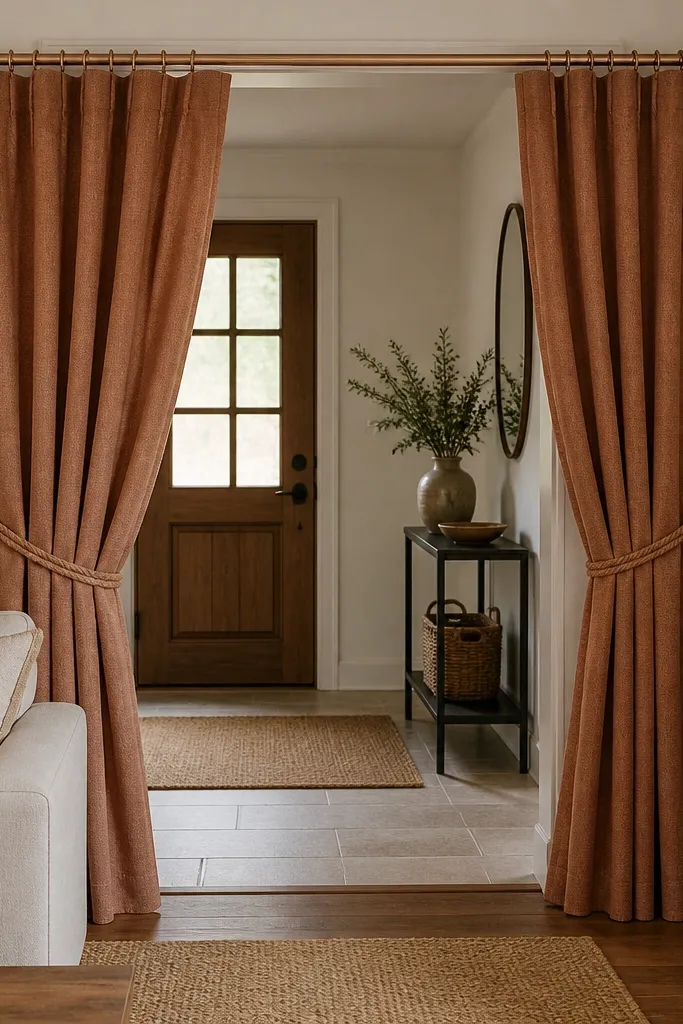
Grommet curtains are a practical way to get a smooth opening and closing motion. The metal rings slide cleanly on a rod, so the divider moves like a real partition instead of a stationary backdrop. Pair a warm neutral curtain like clay, oat, or mushroom with rope tie-backs for a tailored, styled look. Tie-backs keep the curtain from billowing into the room, which protects the separation line. This works well in small living rooms where you want the divider hidden during the day and pulled closed at night.
Install a sturdy rod with brackets into solid wall studs or use a heavy-duty tension rod if your walls can’t take drilling. Hang grommet curtains so the rings sit 1-2 inches below the rod line for a clean header. Use two rope tie-backs attached to the wall at the height you want the curtain to collect, then pull each side evenly to keep the fold symmetrical. Buy panels that total 1.5x your opening width so the curtain forms full vertical folds when closed.
Pro tipMatch the rope color to a material in the room like jute rug fibers or a wood chair finish.
Watch outAvoid thin rods that bow in the middle; a sagging rod makes the whole divider look temporary.
6. Accordion-style pleated curtain on a ceiling track
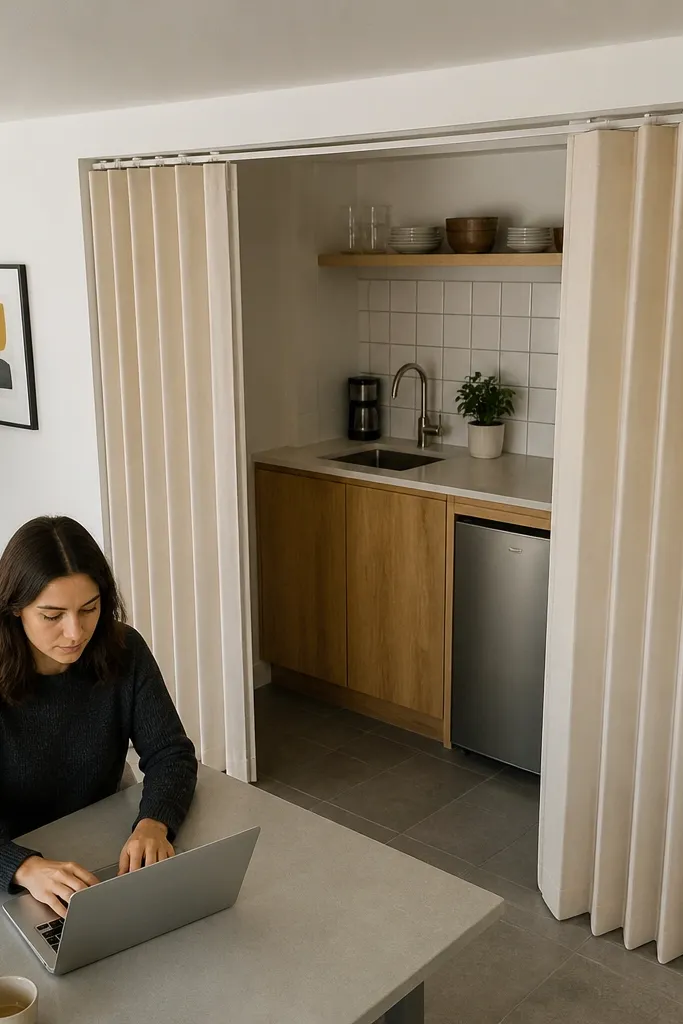
Pleats create structure. When you use pleated curtain panels on a ceiling track, the divider looks crisp even when it’s partially open. This is one of the best solutions for separating a kitchenette or mini office in a studio because you can slide the pleated panels back and forth without bunching. Choose a light cream or soft gray for a clean look, then add a slightly darker bottom band if you want the divider to look finished. The folds also help the curtain act like a barrier, even though it’s still fabric.
Use a track made for curtain panels or a pleated curtain system, and install it centered over your divider line. Hang panels so the pleat direction stays consistent, then test the slide before fully tightening hardware. Measure your divider width and buy panels wide enough to cover it with overlap — aim for 1.5x coverage if you want a solid look. If you want more privacy, pick a heavier fabric with a lining, not a lightweight cotton.
Pro tipKeep the pleats uniform by steaming the fabric lightly after installing; it makes the divider look designed.
Watch outSkip lightweight sheers on a pleated track; they’ll collapse and look flat.
7. Patterned border curtain with solid backing behind it
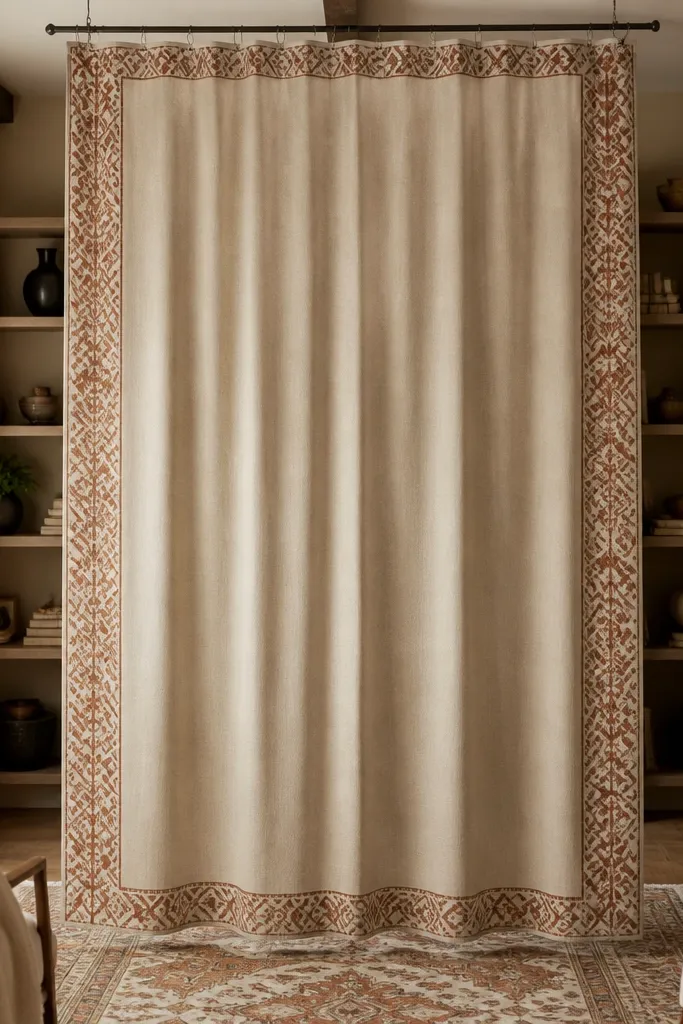
This is a smart way to make room divider curtain ideas look intentional without buying a complicated system. Use a patterned border curtain panel in front and a solid solid-color panel behind it so the divider reads finished from both sides. The patterned band creates a frame effect and makes the boundary clear, even in a narrow space like a hallway or studio corner. Choose a geometric border in black, olive, or rust, then keep the backing neutral to avoid visual overload. It’s especially good when your divider sits where people can see it at eye level.
Pick border curtains that have a clear top band so you can align the pattern horizontally. Hang the solid backing first on your rod or track, then add the patterned panel in front so the border sits centered across the divider. Use two panels that total 1.5-2x the divider width for a full look, and set the hem so it hits the floor evenly. For hardware, standard curtain rod brackets work fine if the fabric weight is moderate.
Line up the pattern so the border hits the same height on both sides; that symmetry reads expensive.
Don’t hang a patterned curtain alone if the back side is blank — it looks unfinished when you move around.
8. Bamboo shade + curtain hybrid for a layered, structured divider
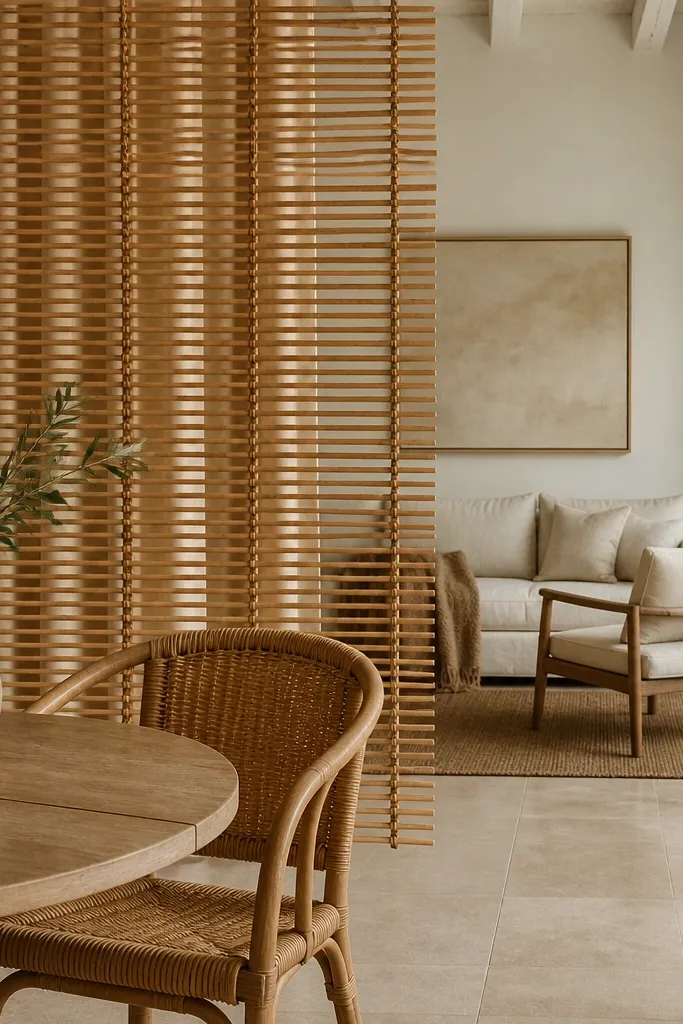
Mixing materials makes small-space dividers look designed instead of improvised. A bamboo shade adds rigid horizontal structure and blocks direct sightlines, while a soft fabric curtain adds color and softness. Keep the curtain in a solid tone like sand or warm white so the bamboo texture is the hero. This combo is great for dividing a desk from a living area because you can lift or adjust the shade for partial privacy. The rigid layer also reduces billowing, which is a common problem with fabric-only dividers.
Mount the bamboo shade on a tension rod or small brackets in front of your divider line, then hang a curtain panel behind it on a second rod. Start with the shade height so it covers the middle eye line, then let the curtain run floor-to-ceiling for the full separation effect. Use a heavier curtain fabric like twill or thick cotton so it hangs straight behind the shade. Buy curtains with a sewn header and choose a width that totals 1.5x the divider opening.
Pro tipChoose bamboo in a warm natural tone, not jet black, so the divider feels light in a small room.
Watch outAvoid super-thin fabric curtains behind the shade; they flutter and ruin the clean look.
9. Rattan panel curtain with fabric overlay for a boho-sleek boundary
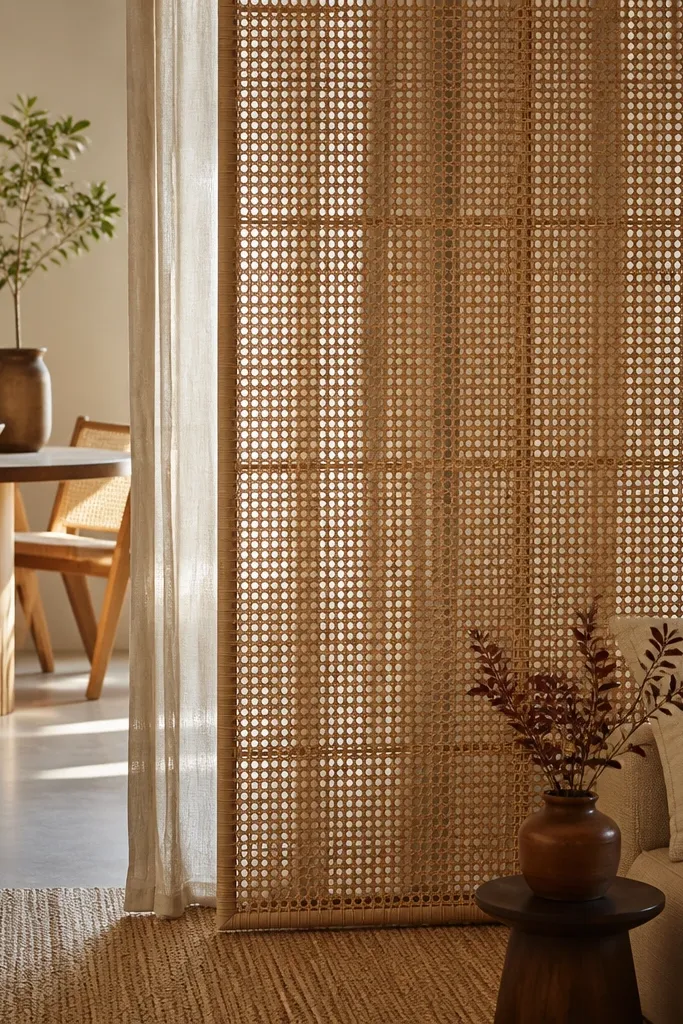
Rattan panel curtains add a crisp grid look, and the fabric overlay softens it. This works when you want separation that reads architectural without a wall. Use a light rattan shade panel in a warm honey color, then add a pale linen curtain behind it so the divider has depth from both sides. The rattan grid blocks some direct lines of sight, while the fabric keeps the space cozy. Great for separating a lounge from a dining corner in open-plan rooms.
Use rattan panels that are sized for curtains or framed panels that hang like a screen, then mount them on a tension rail or ceiling hooks. Add a linen curtain behind with a rod set slightly lower so it falls in soft folds. Aim for 1.5-2x width coverage so the rattan panels don’t leave big gaps. Finish by tying the linen at one side with a fabric sash to create a clean open/close look.
Keep the overlay linen plain and slightly textured; it makes the rattan look intentional instead of busy.
Don’t pair rattan with busy patterns on the overlay; the grid already has visual energy.
10. Floor-to-ceiling solid color block divider with contrast trim
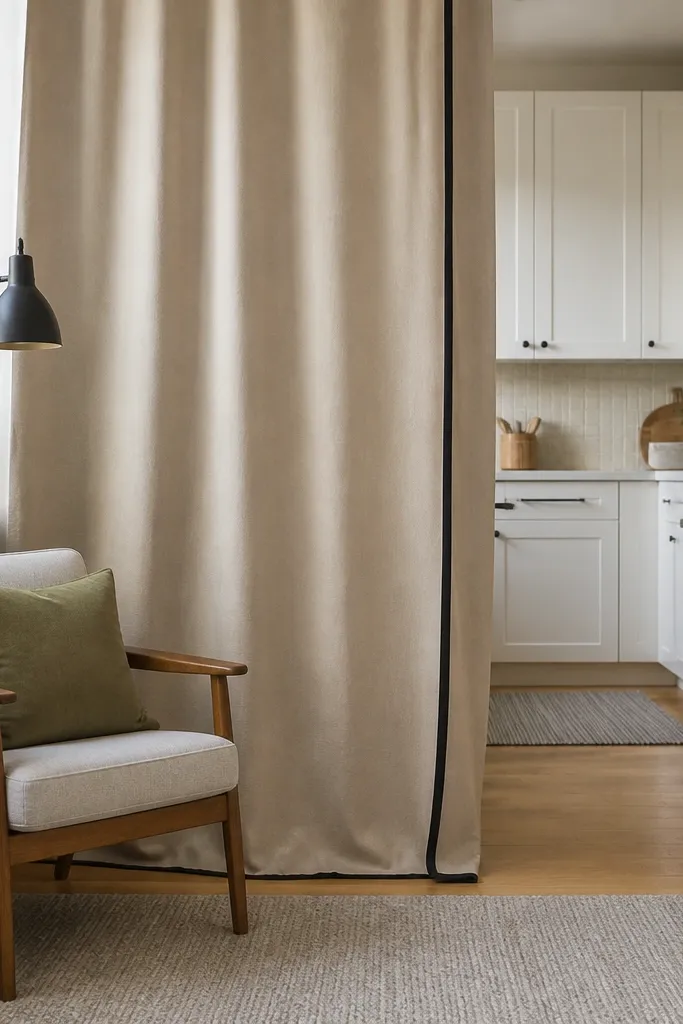
A color-block divider reads like a design feature, not a temporary fix. Pick a solid curtain in a calming base color like oatmeal, soft gray, or sage, then add a contrasting trim stripe — black piping or a narrow rust band works well. The trim gives you a crisp edge that visually “draws” the separation line. This is ideal for small apartments where you want the divider to blend with your decor but still look like it belongs. If you’re placing it in a doorway-like opening between zones, the straight vertical edge is especially satisfying.
Choose a curtain set with contrast trim already sewn, or use iron-on or sew-on trim along the vertical edges if you’re handy. Hang floor-to-ceiling so the color blocks create a full-height wall effect. Install your rod high and centered over the divider opening, then use two panels totaling 1.5-2x the opening width for full folds. Keep the hem even across both panels so the vertical line stays clean.
Pro tipMatch the base color to your wall paint undertone so the divider doesn’t look like it was added later.
Watch outAvoid trimming the divider with metallic colors unless your room already has brushed metal finishes.
11. Sheer voile with embroidered vertical lines for a tall, slimming look

If your divider sits in a narrow hallway or between rooms and you don’t want to lose light, choose sheer voile with vertical embroidery. The vertical lines make the divider look taller and more tailored, which helps the space feel longer instead of boxed in. Because it’s sheer, it’s best for visual separation — it softens sightlines and hides clutter without blocking light. Choose a white-on-cream embroidery so it reads textured rather than loud. This works well behind a couch corner or to separate a laundry zone from a living area where you mainly need a cleaner look.
Buy sheer panels with vertical embroidery so the pattern stays aligned when the curtain folds. Hang on a rod at ceiling height and use a 2x width for full drape; sheers look best with generous folds. If the fabric catches light and looks too see-through, add a second solid curtain liner on a separate rod. Steam the panels after hanging to align the embroidery and remove fold creases.
Pro tipUse a simple curtain ring or clip system so the vertical lines don’t warp at the top.
Watch outDon’t hang embroidered sheers too low; the pattern looks cut off and the divider loses its tall effect.
12. Wrap-style tie curtain with a hidden rod pocket for quick opening

Wrap-style curtains are the best choice when you need the divider to change throughout the day. One panel wraps across the divider line and ties back, leaving a clear opening when you want it. This style looks intentional because the tie creates a designed edge, not a random bunch of fabric. Choose a medium-weight cotton or linen blend in a warm neutral, then use ties in the same fabric for a clean finish. Great for separating a sleeping corner that you want to hide during the day in a studio or guest room.
Install a single rod over the divider opening. Use a wrap curtain with a rod pocket or add a hidden pocket so the top stays smooth and doesn’t sag. Tie-back hardware matters: anchor tie points at two heights on the side wall so you can keep the wrap edge straight. Buy enough fabric width to cover the divider with overlap — 1.5x coverage is a good starting point — then adjust tie position until the folds land neatly.
Pro tipAdd one weighted hem strip if the wrap panel flips or curls; it keeps the top-to-bottom line crisp.
Watch outAvoid using long scarf ties that drag; they tangle and ruin the clean wrap edge.
13. Textured boucle curtain on a tension rod for a cozy boundary
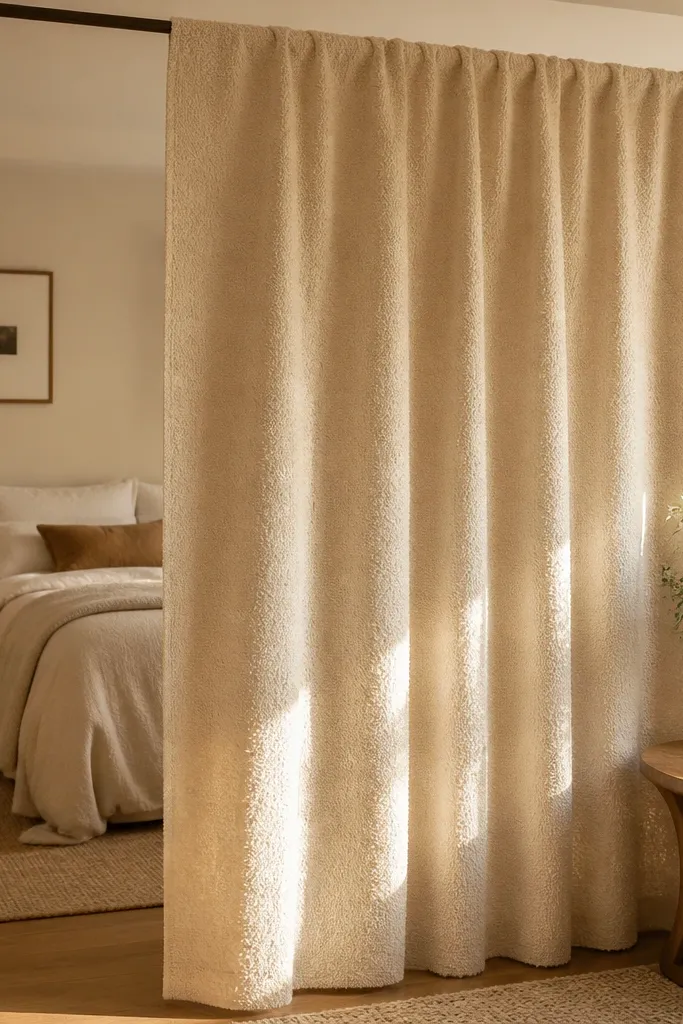
Boucle texture looks expensive and it hides imperfections in small rooms. A curtain in oat or warm cream creates a soft boundary that still feels substantial, even when it’s not blackout. The yarn texture catches light in tiny highlights, so the divider reads as a deliberate design element rather than a blank sheet. This is a great option for separating a living area from a dining table without blocking daylight. It also works well if you want a divider that hides visual mess like open shelving or a small kitchen pass-through.
Choose boucle curtains with a sewn header and enough weight that they hang straight. Use a tension rod with end brackets rated for the curtain weight, or mount brackets if your walls allow it. Hang the panels floor-to-ceiling and plan for 1.5-2x divider width so you get full folds. If the boucle sheds or catches dust, vacuum with an upholstery attachment and test gently on a small section first.
Pro tipPair boucle with matte hardware like matte black or brushed steel to keep the texture from looking shiny.
Watch outSkip super-bumpy fabrics on a flimsy rod; the rod flex shows through the folds.