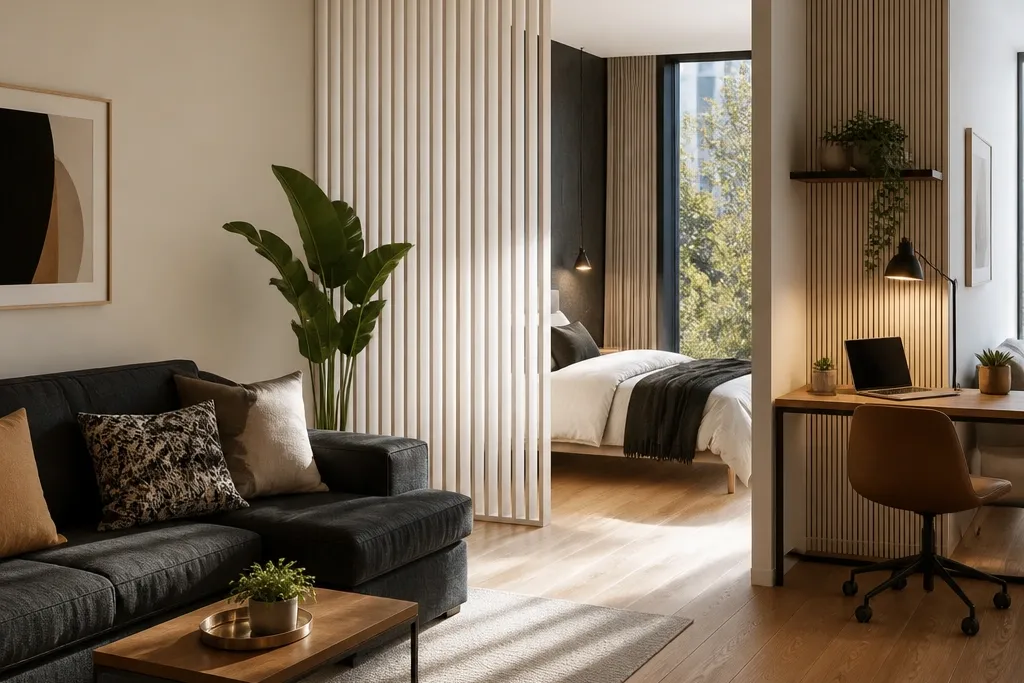
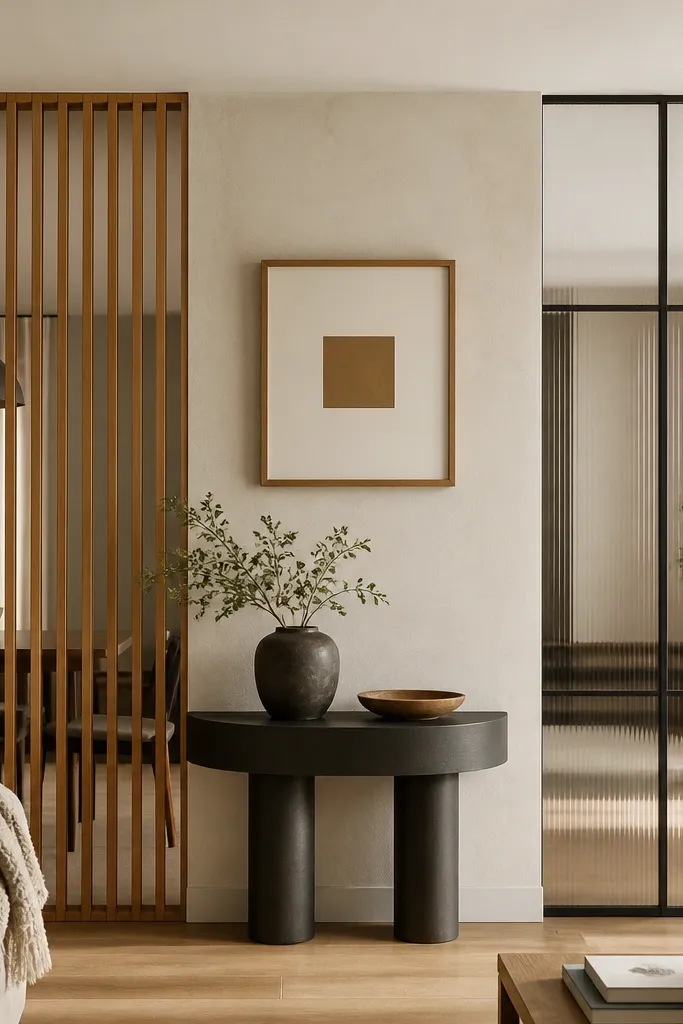
1. Slatted wood screen with a half-wall shadow gap
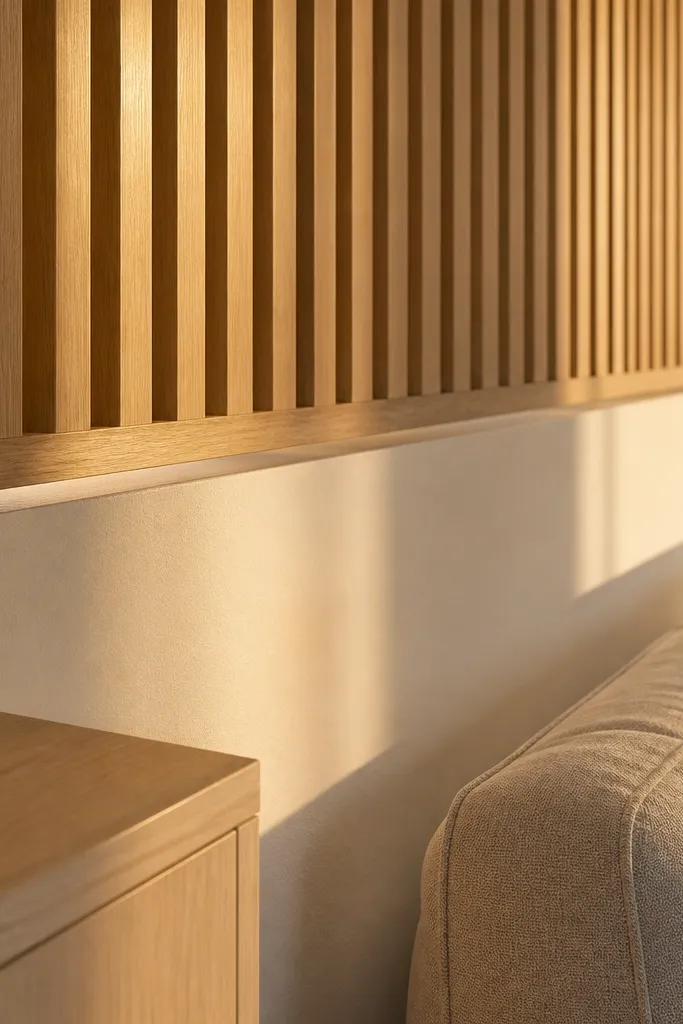
This is one of the cleanest wall divider ideas room partitions for modern interiors because the slats break light into soft lines instead of turning the space flat. Use a light wood tone like oak or ash (or paint it warm white) so the divider doesn’t darken the room. The key look is a tiny shadow gap — leave about 1 inch between the screen and the wall so it appears to float. It works especially well for separating a desk from a living area or nudging a bed back into its own zone without blocking all daylight.
Step one: measure the zone width and aim for the screen to cover about the width of the furniture you want to hide (like a bed headboard or desk). Step two: build or buy a slatted frame that’s roughly 80 inches tall and no deeper than 10-12 inches. Step three: mount the feet so the bottom sits level, then add small wall spacers to keep a 1-inch gap; finish with matte oil-based clear or a durable cabinet paint.
Pro tipKeep slat spacing consistent — around 1.5-2 inches between slats looks sharper than random gaps.
Watch outAvoid mixed wood tones in the same divider; it makes the screen look like leftover pieces.
2. Two-panel fabric divider on a ceiling track
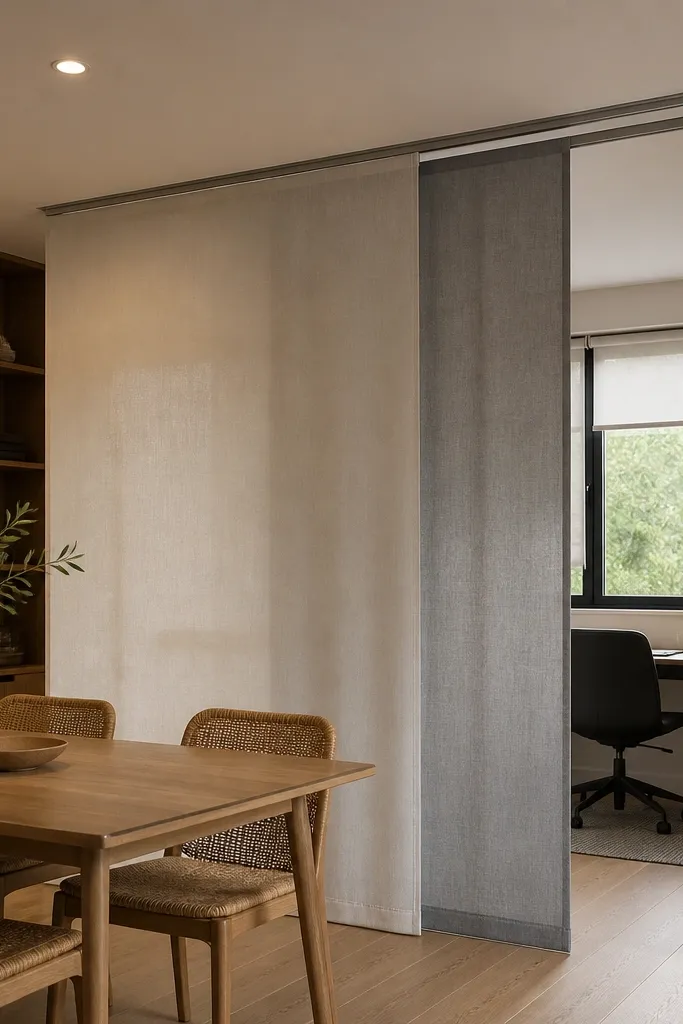
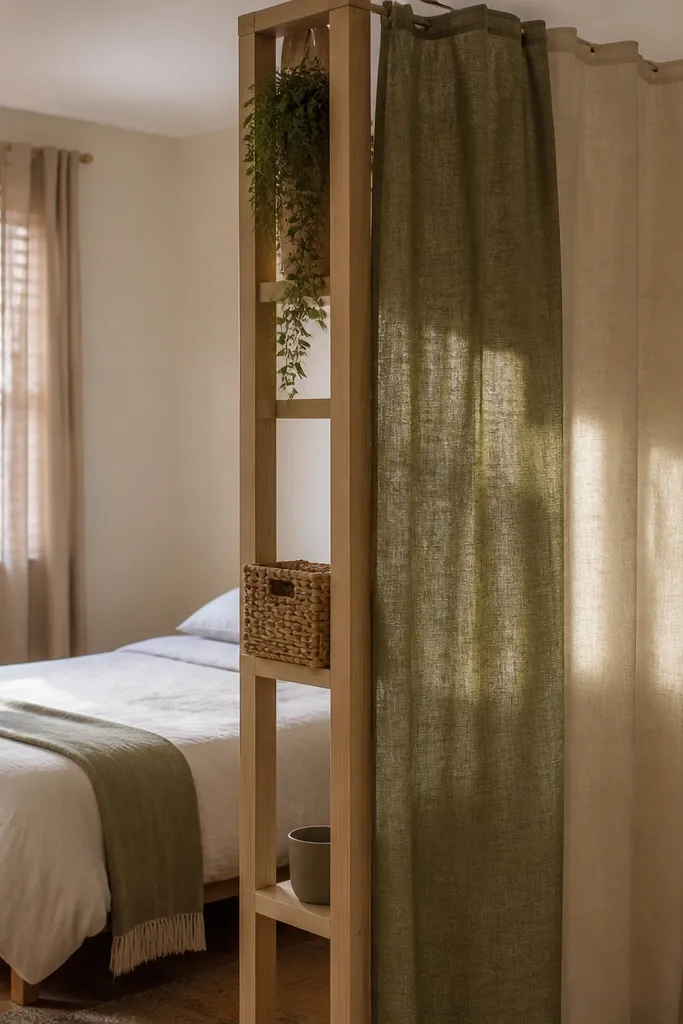
If you want privacy that you can control hour to hour, a fabric divider on a ceiling track is the most photogenic “soft partition” for small spaces. Choose a medium-weight weave in off-white, oatmeal, or dove gray so it hangs with structure instead of collapsing into wrinkles. The ceiling track makes the divider look built-in and keeps the floor clear — huge for tight hallways. This works well for turning a living room into a guest area or hiding a home office setup during the day.
Step one: install a ceiling track centered over the opening you want to define; keep the track mounted 2-4 inches below the ceiling so it reads tidy. Step two: hang two panels with a combined width that overlaps 6-10 inches when closed, and let each panel reach the floor or stop 1 inch above it. Step three: use a fabric with a tight weave (linen-look or cotton twill) and add weighted hems so the panels fall straight.
Use a matte fabric, not shiny — sheen turns the divider into a glare machine near windows.
Don’t mount the track too low; a low track makes the room feel smaller and the divider looks temporary.
3. Herringbone plywood room partition with a painted face
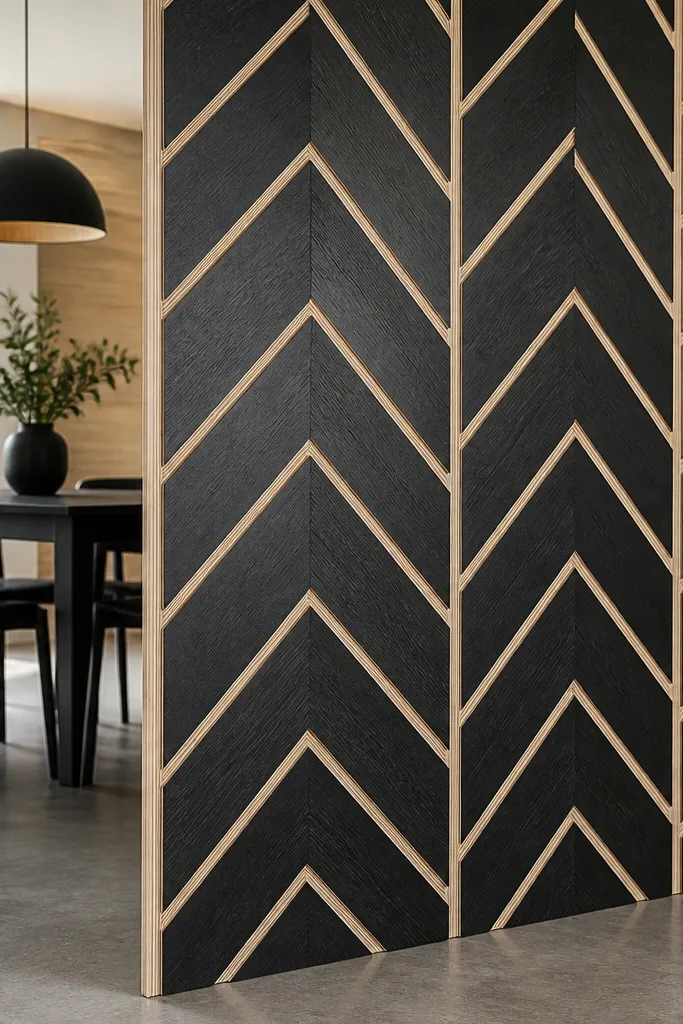
A herringbone plywood partition reads modern because the pattern creates direction and movement, not just decoration. Paint the face a deep neutral like charcoal or warm black, then leave the edges in a natural wood for contrast. This divider gives you partial sight blocking while the angled lines keep it visually light. It’s a strong choice for separating a dining nook from a living area or carving out a reading corner near a window without losing brightness.
Step one: cut plywood panels into a herringbone grid — plan for 3/4-inch plywood thickness and keep the overall width tied to your target zone (start with 48-72 inches). Step two: assemble the grid onto a backing frame so it stays rigid; sand edges smooth to avoid splinters in photos. Step three: paint one face in matte cabinet paint, add a clear topcoat for durability, and install it on a simple freestanding base or wall brackets.
Add a 1-inch bevel on the edges so the painted face catches light instead of looking flat.
Avoid glossy paint; it highlights uneven panel edges and makes the pattern look messy.
4. Metal grid room divider with a powder-coated finish
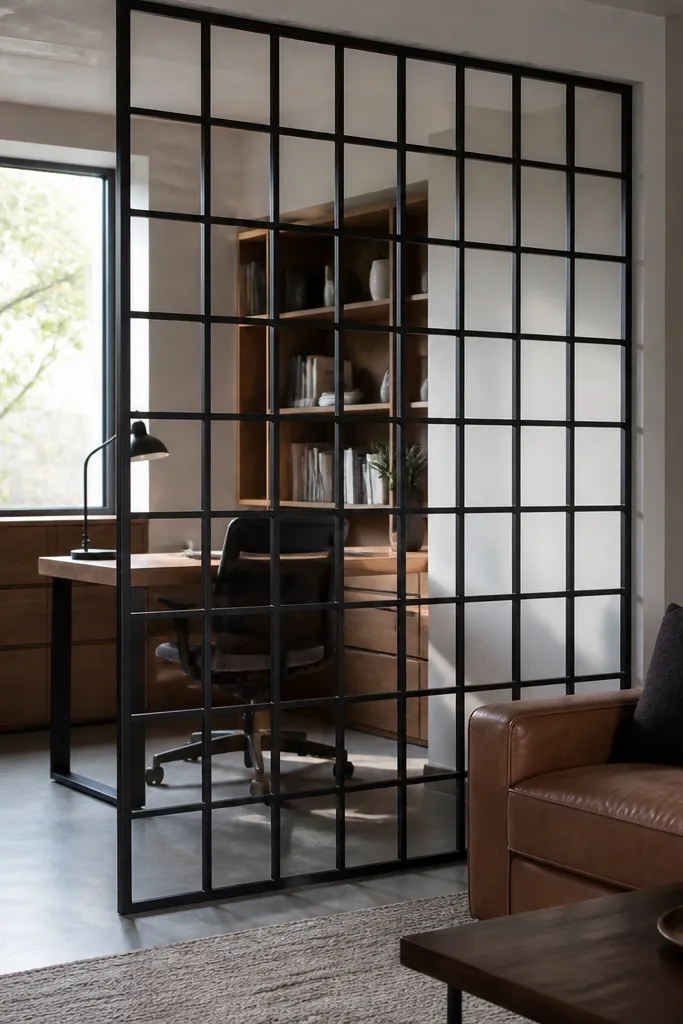
A metal grid divider is a modern wall divider idea room partitions option that looks sharp and industrial without feeling heavy. Powder-coated black or gunmetal reads clean and works with both warm woods and cool metals. The open grid keeps airflow and light moving, which matters in small rooms where you can’t afford a dark corner. Use it to separate a kitchen zone from a living zone or to define a hallway entry area.
Step one: choose a grid spacing around 1.5-2.5 inches so it’s visually tight but still see-through. Step two: make sure the frame is stable — add crossbars or a base that prevents wobble, especially if you plan to anchor it. Step three: place it 6-18 inches off the wall if you want the “floating” look; anchor with wall brackets if you have kids or pets.
Pro tipHang one or two matching wall shelves on the same divider finish — it looks designed, not improvised.
Watch outSkip chrome or uncoated metal; it shows fingerprints and cheap hardware in photos.
5. Rattan panel divider with a modern black frame
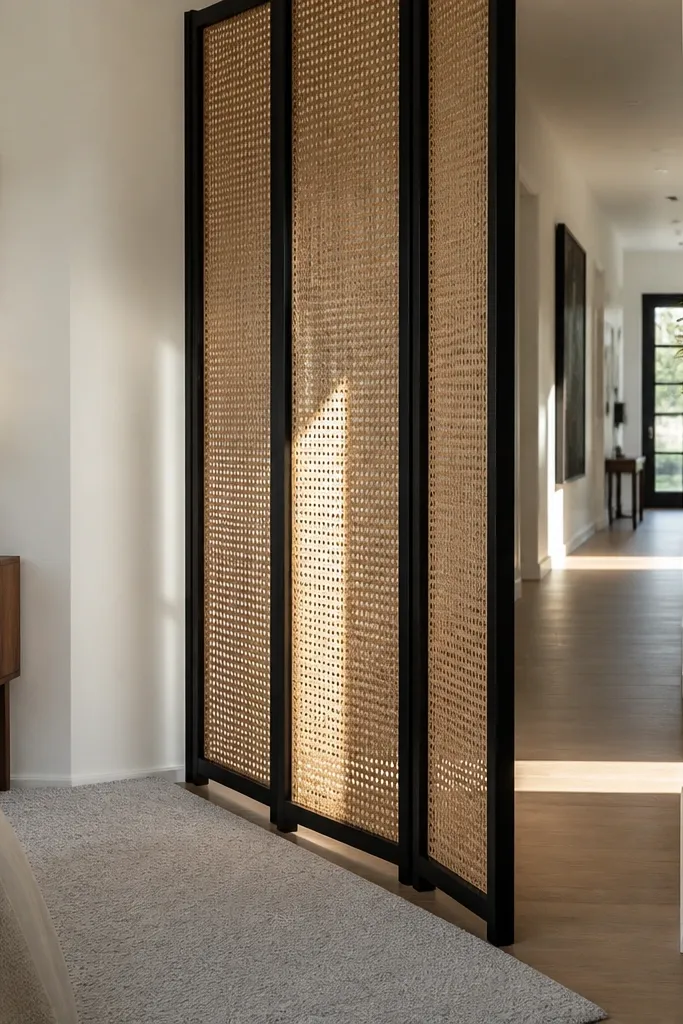
Rattan looks warm and airy, and the trick is pairing it with a modern frame. Use a black or dark walnut frame so the rattan’s texture becomes the focal point instead of looking boho-by-default. The open weave gives you partial privacy while still letting sunlight pass. This works great for splitting a bedroom from a small living area where you want softness but not full blockage.
Step one: buy rattan panel inserts sized to your target — aim for 72-84 inches tall and 36-48 inches wide per panel. Step two: frame them in flat metal or wood trims in matte black; install with tight fasteners so the rattan doesn’t sag. Step three: use a freestanding base with anti-tip brackets or anchor to the wall on one side.
Pro tipSeal rattan with a clear matte spray if you’re near a kitchen or bathroom; it reduces snagging and fraying.
Watch outAvoid overly thick rattan rolls; bulky weave makes the divider look heavy and dated.
6. Sliding barn-door style partitions on a track
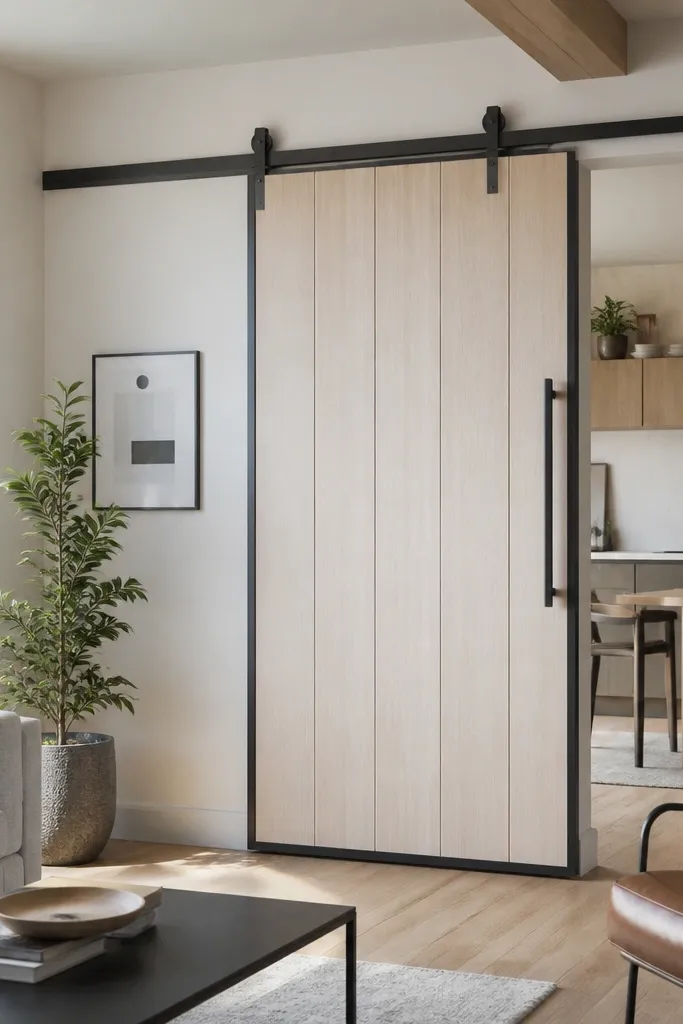
A sliding barn-door style partition is one of the best wall divider ideas room partitions for people who hate floor clutter. When it’s closed, you get real separation; when it’s open, it becomes a clean architectural line. Pick a door slab with vertical panels so it reads modern instead of rustic. Matte black hardware and a light wood door face look especially crisp in small apartments.
Step one: measure the opening you want to cover and pick a door width that overlaps the opening by 6-10 inches when closed. Step two: mount a heavy-duty ceiling track and rollers above the opening; use track length long enough that the door fully clears the space when open. Step three: add a floor guide so the door doesn’t swing; finish the door with matte paint or stain + clear coat.
Pro tipUse a flush handle or a pocket pull — protruding knobs catch on bags and look messy in tight hallways.
Watch outDon’t skip the floor guide; a swinging door makes the partition look cheap fast.
7. Stacked open shelving divider with backless top zone
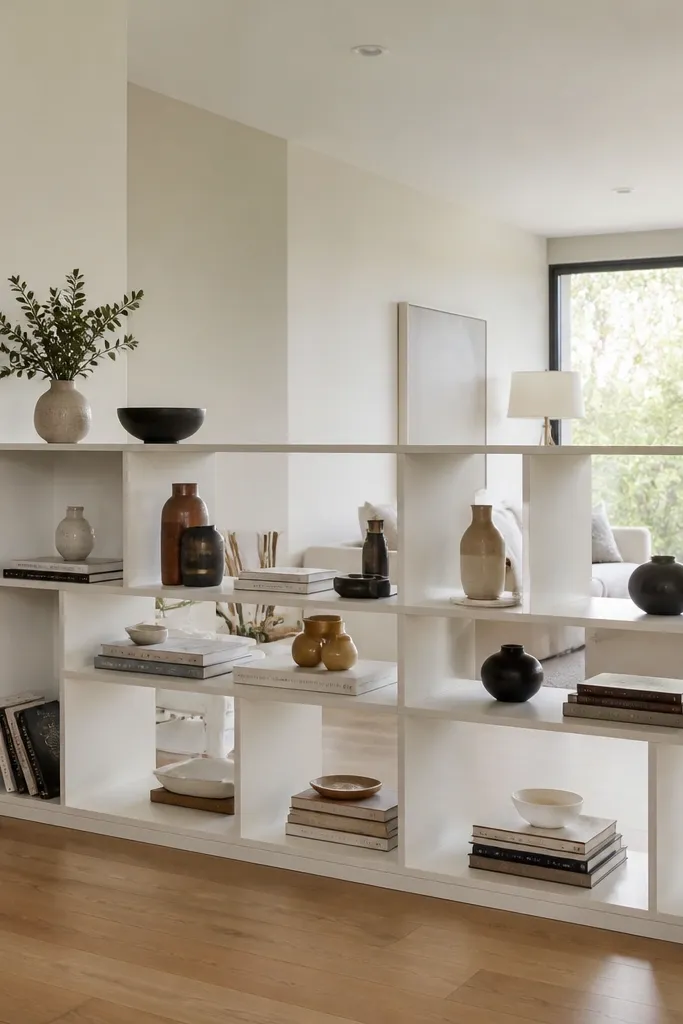
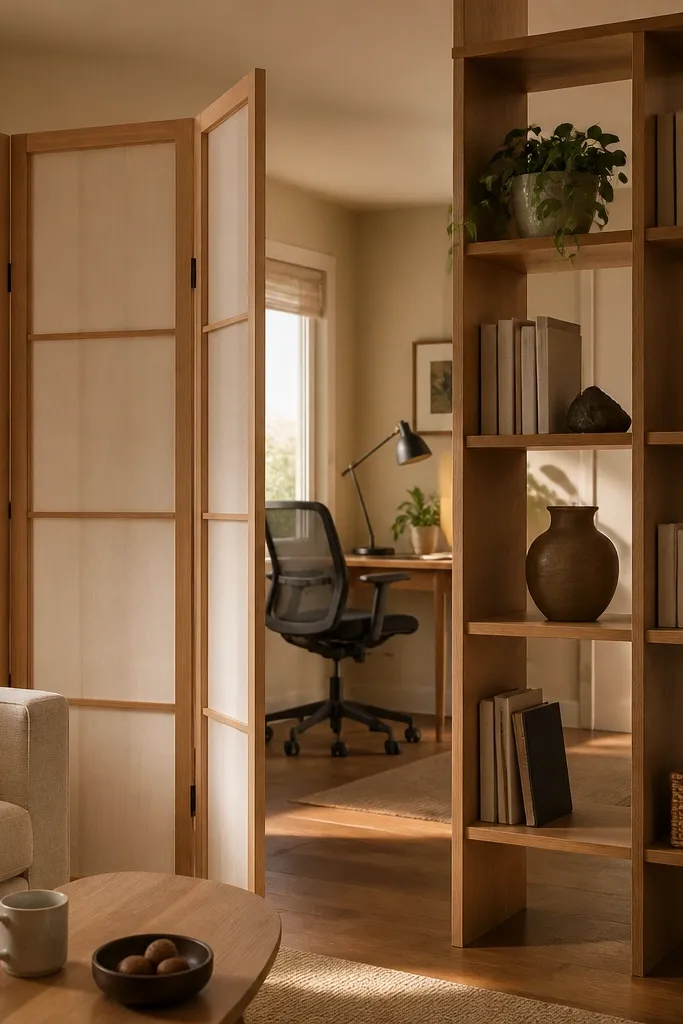
Open shelving partitions look modern because they create rhythm without fully blocking light. The best version for small spaces is a two-level design: dense shelves at the lower half for storage, then a backless or more open top zone so the room still breathes. Use a consistent finish — either white painted MDF or natural oak stain. This works well for dividing a living room from a dining nook while also giving you a place for books, ceramics, and baskets.
Step one: choose a shelving footprint that matches the furniture you’re separating; start with 48-60 inches wide and 72-84 inches tall. Step two: build or buy units where the lower section is solid-backed and the top has open sides or no back panel. Step three: anchor the shelving to the wall at stud points for safety, then style with a strict palette (two neutrals + one accent color).
Pro tipLeave 2-3 empty shelves at the top; negative space makes the whole divider look intentional.
Watch outAvoid mixing shelf depths randomly; it makes the divider look like a storage pile.
8. Perforated metal panel divider with warm LED backlight
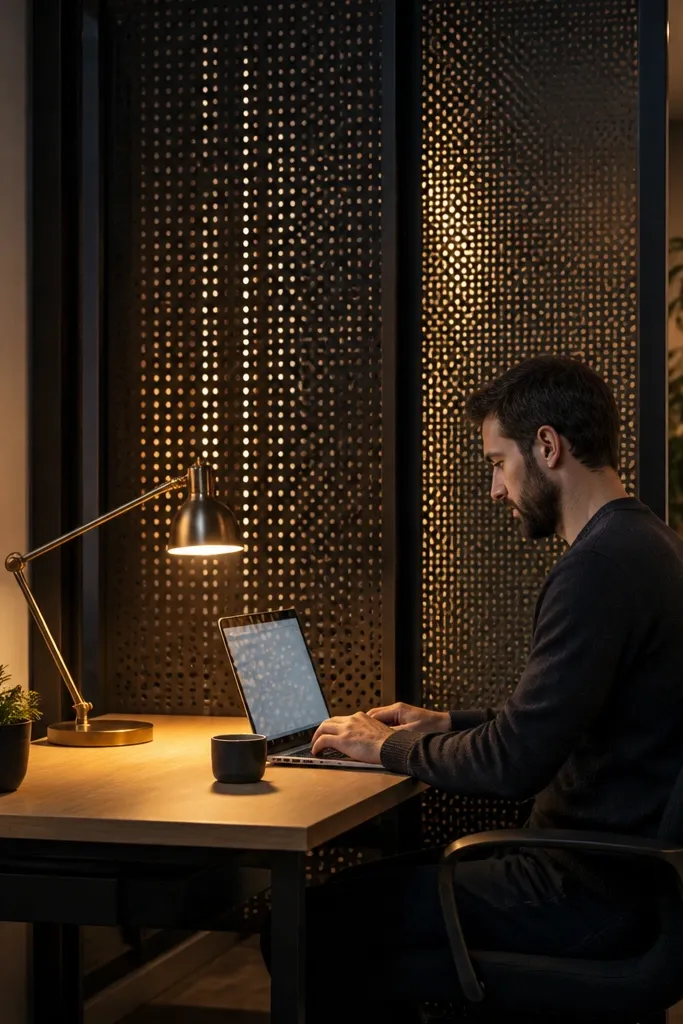
A perforated metal divider looks futuristic in a good way, but the warmth comes from lighting. Use a perforated sheet in matte black or bronze and backlight it with warm LED strips (2700K). The holes create a speckled glow that feels like texture, not like a screen. This is ideal for separating a home office corner from a living area where you want the divider to look stunning at night.
Step one: pick a perforation pattern with medium spacing so the glow reads textured; then frame the sheet in a flat border so edges look finished. Step two: install LED strips behind the panel within a shallow channel; keep the diffuser matte so it doesn’t show bright dots. Step three: mount it on wall brackets or use a freestanding frame with a base cable route; finish with a matte clear coat if needed.
Use a dimmer; the divider looks better at 30-60% brightness than full power.
Don’t use cool white LEDs; 4000K makes the metal look gray and harsh.
9. Curtain divider with tension rods and layered sheer
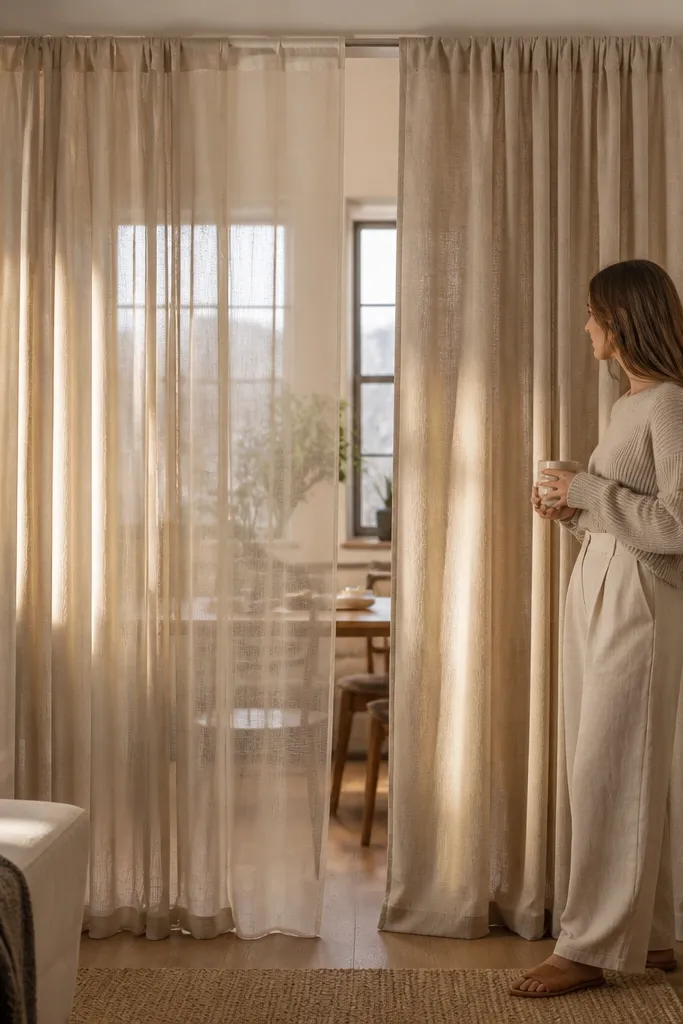
For the budget lane, curtain wall divider ideas room partitions can look surprisingly modern if you layer sheers. Hang two layers: one sheer in linen color and one heavier curtain in the same palette, both on simple tension rods or a tension rail. The result is a soft blur that still frames the space boundaries. This suits renters who can’t drill and anyone who wants a flexible divider for changing layouts.
Step one: measure the width and install tension rods with firm pressure points; choose rod ends that grip drywall edges safely. Step two: hang sheer first so it floats, then add the heavier curtain layer with clip rings for easy open-close. Step three: keep the curtains long enough to touch the floor — stop 1 inch above if you need to avoid dragging, then steam to remove creases.
Pro tipMatch curtain color to your wall paint, then add one contrasting throw or lamp shade on the “hidden” side.
Watch outAvoid thin, see-through fabric that looks like window curtains; choose sheers with body and a visible weave.
10. Acoustic felt panel divider in blocks of color
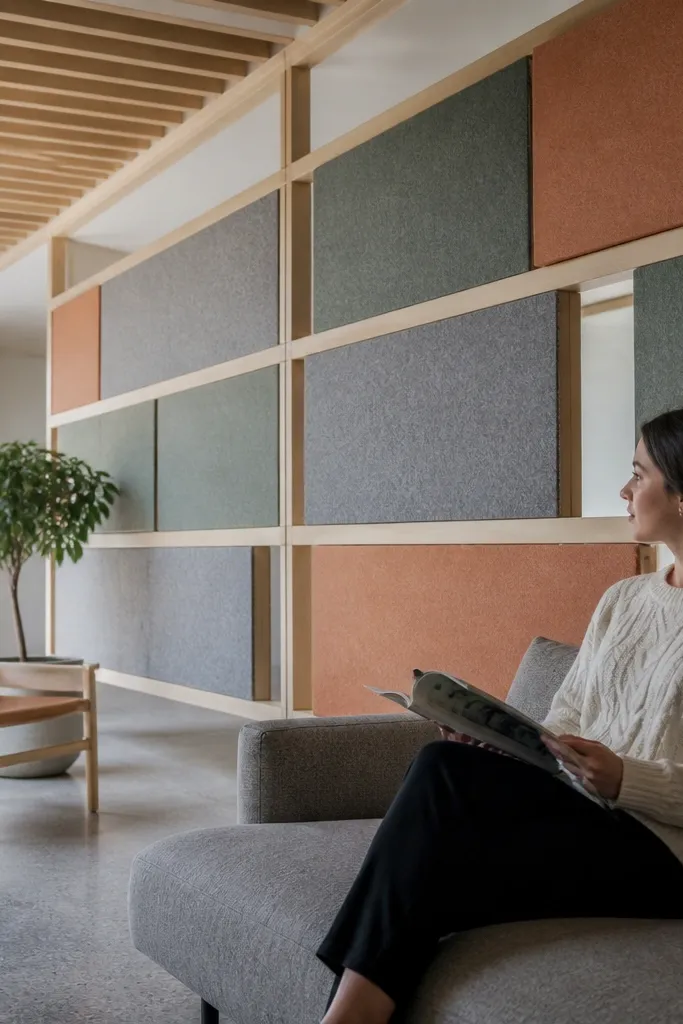
Acoustic felt panels are one of the most stylish wall divider ideas room partitions because they solve sound and look good in photos. Go for large rectangular blocks in muted tones like sage, clay, and warm gray, then keep the frame simple (black metal rails or a light wood frame). Felt absorbs high frequencies, which helps when your divider is creating a new “room” inside a room. This works well for home offices, music corners, or any living space where echoes make it feel busy.
Step one: choose felt panels sized for your layout; start with 24x48-inch blocks and plan a staggered arrangement for width coverage. Step two: mount them onto a lightweight metal rail system or build a grid frame with 1x2s; leave 1/2 inch gaps between colors for clean lines. Step three: secure the frame to wall studs or use freestanding bases with weighted feet to prevent tipping.
Pick one neutral base panel and two accent colors — three colors total looks intentional, not chaotic.
Don’t choose neon colors; felt makes them look louder than they do in daylight.
11. Bookmatched stone-look panel divider with brass trim

If you want a room partition that reads upscale without being heavy, use stone-look panels with bookmatched patterns and brass trim. The pattern gives you visual depth like a wall feature, while the trim lines keep it modern. Choose a warm stone look like travertine-beige or soft gray with subtle veining. This works for creating a statement separation between a living area and a dining area or for adding a “gallery wall” feel in a small entry.
Step one: buy or make a panel system with interchangeable stone-look sheets; target 72-84 inches tall and 30-48 inches wide per section. Step two: frame each panel with thin brass or brass-finished trim; keep the edges crisp so the pattern stays aligned. Step three: mount on a freestanding base or wall brackets; use a level and shim behind the base so the panels don’t wobble.
Pro tipAlign the veining direction vertically — it makes the divider look taller and more expensive.
Watch outAvoid random-pattern stone sheets; mismatched veining looks busy and cheap.
12. Mirrored folding screen with matte black hinges
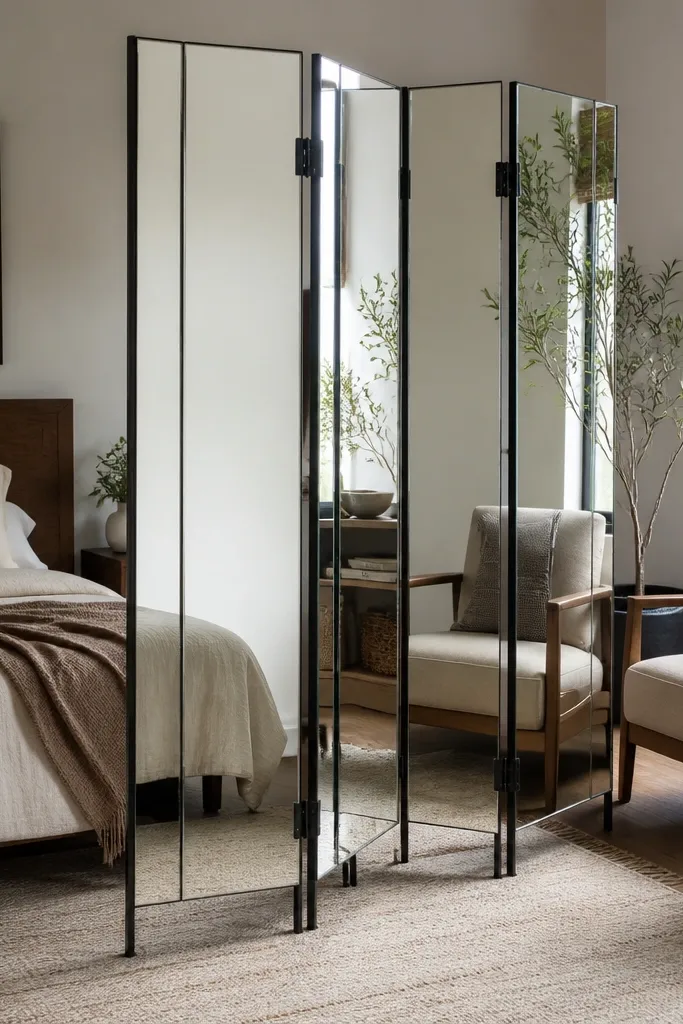
A mirrored folding screen is a classic wall divider idea room partitions option that works especially well in small spaces because it multiplies light. The modern upgrade is matte black hinges and a frameless or slim-frame mirror so it doesn’t look like an old dressing room. Use it to create a temporary zone separation for a reading nook or to hide a cluttered corner. Because it folds, it’s also practical when your layout changes.
Step one: pick a folding screen with 3-4 panels and a total height around 70-78 inches so it covers sightlines without blocking circulation. Step two: place it slightly angled (about 15 degrees) to the wall so it reflects more of the room and looks intentional. Step three: keep it away from direct glare sources; position it so reflections don’t bounce straight into your TV or desk.
Use microfiber to keep mirrors streak-free — dirty reflections make the whole divider look neglected.
Avoid heavily ornate frames; they fight the modern look and distract from your room.
13. Japanese-inspired shoji panels with translucent paper film
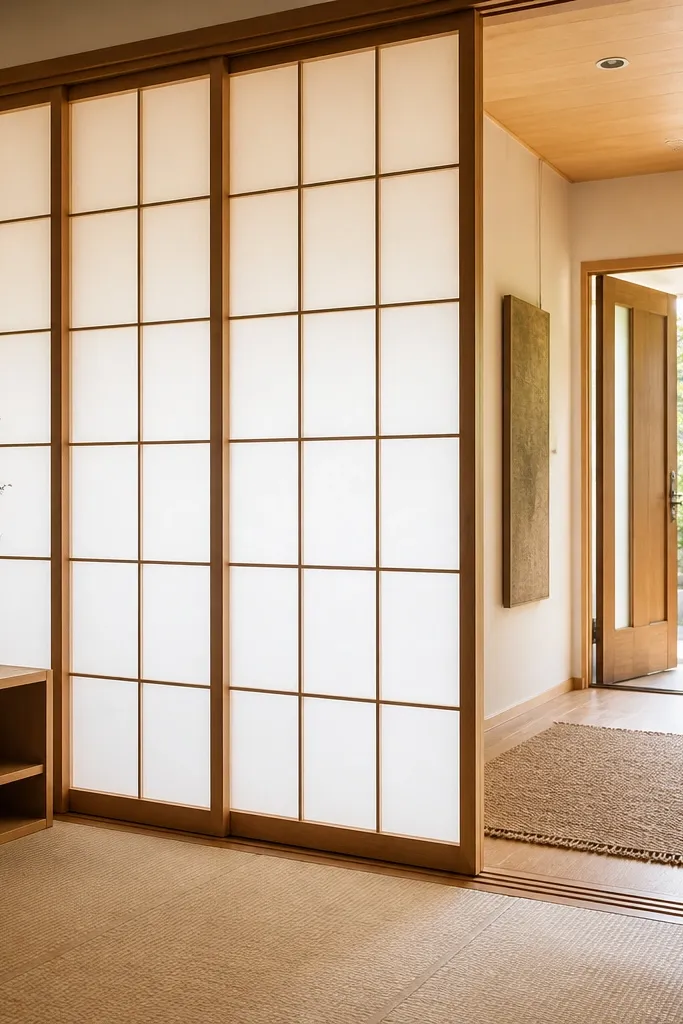
Shoji-style partitions are photogenic because the translucent surface turns harsh daylight into a soft wash. The modern version uses clean wood grid frames and translucent paper film or acrylic that looks like paper but is easier to maintain. This divider gives you privacy without making the room dark, which is exactly what most small interiors need. Place it between a bed and a living zone, or use it to soften a kitchen-to-living transition.
Step one: measure the area you want to cover and build a grid frame with evenly spaced rails; aim for 1.5-2 inches between grid lines. Step two: stretch translucent film across the frame and secure it with thin trim so it stays flat. Step three: mount the panels to a simple hinge system for folding or anchor them to wall brackets if you want fixed separation.
Use warm LED bulbs (2700K) so the translucent surface glows, not just diffuses.
Avoid thick, plastic-looking film; it shows glare and looks cheap quickly.
14. Modular acrylic partition with frosted center stripe
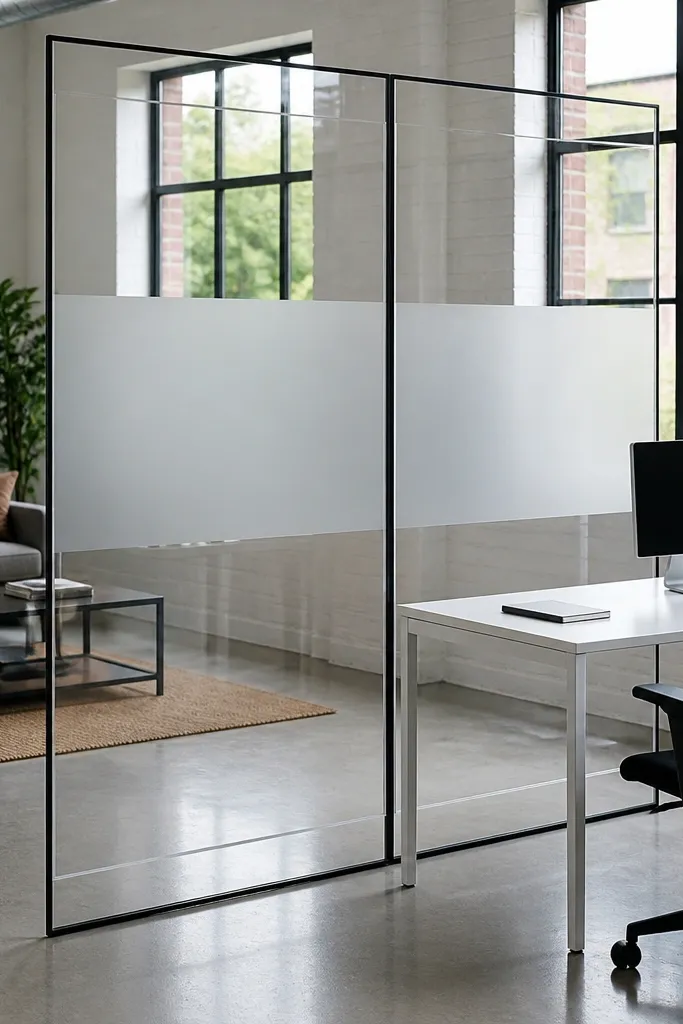
Clear acrylic partitions feel modern because they keep the room visually open while still defining zones. The trick for a good look is adding a frosted center stripe — it blocks direct eye contact without making the divider look like a solid wall. Choose clear panels with slim aluminum or black edges so it reads architectural. This is ideal for small offices, creative studios, or a dining area that needs separation from a home workspace.
Step one: plan panel sizes around your space; start with 24-36 inches wide panels and build a row that covers your target zone width. Step two: order or cut frosted vinyl stripe inserts for the center band; apply with alignment marks so it stays straight. Step three: mount using aluminum standoffs or clamp bases; keep the bottom edge clean and level and add felt pads to protect floors.
Use a slight offset between panels (a 1-2 inch stagger) so reflections don’t create a flat, mirror-like look.
Skip thick scratches and scuffed edges; they show immediately and make the whole partition look low quality.
15. Linen-wrapped panel divider with hidden storage pockets
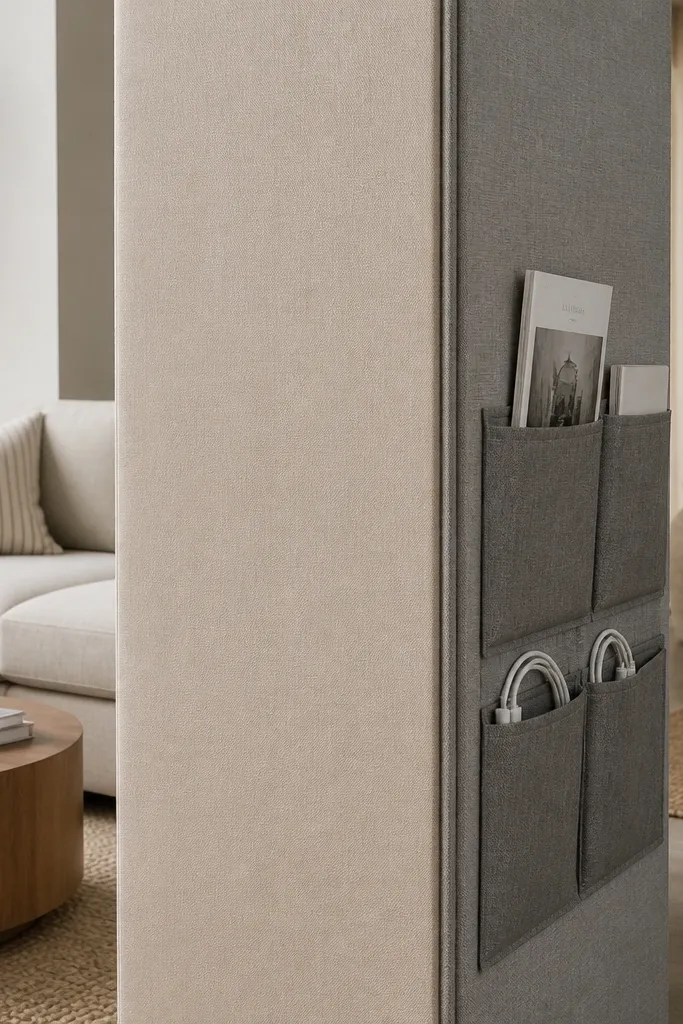
Padded linen-wrapped divider panels look soft, modern, and deliberate. The best aesthetic comes from clean edges, consistent seam lines, and a neutral fabric like oat, sand, or warm gray. Add hidden storage pockets on the back side so the divider actually helps the room — magazines, charging cords, or throw blankets. This works well for living rooms that need a “behind-the-sofa” separation or for entry corners where you want to hide everyday items.
Step one: measure the width of the area you want to hide and build a lightweight panel frame; target 72-84 inches tall and keep it under 10 inches deep. Step two: wrap the front in linen-look fabric stretched tight over foam or batting; keep seams centered and trim edges with matching tape. Step three: sew or attach storage pockets to the back, then mount with wall brackets or a stable base.
Choose fabric with a tight weave; it holds shape and looks crisp in close photos.
Avoid bulky batting thickness; it makes the divider look uneven and sloppy instead of tailored.